Articles
How To Make Chimney Sweep Broom
Modified: August 22, 2024
Learn how to make a chimney sweep broom with our step-by-step articles. Discover the essential tools and techniques for a clean and safe fireplace.
(Many of the links in this article redirect to a specific reviewed product. Your purchase of these products through affiliate links helps to generate commission for Storables.com, at no extra cost. Learn more)
Introduction
Keeping your chimney clean is essential for maintaining a safe and efficient fireplace or wood-burning stove. Hiring a chimney sweep can be expensive, but with a little bit of DIY know-how, you can make your own chimney sweep broom. In this article, we will guide you step-by-step on how to make a chimney sweep broom using simple materials.
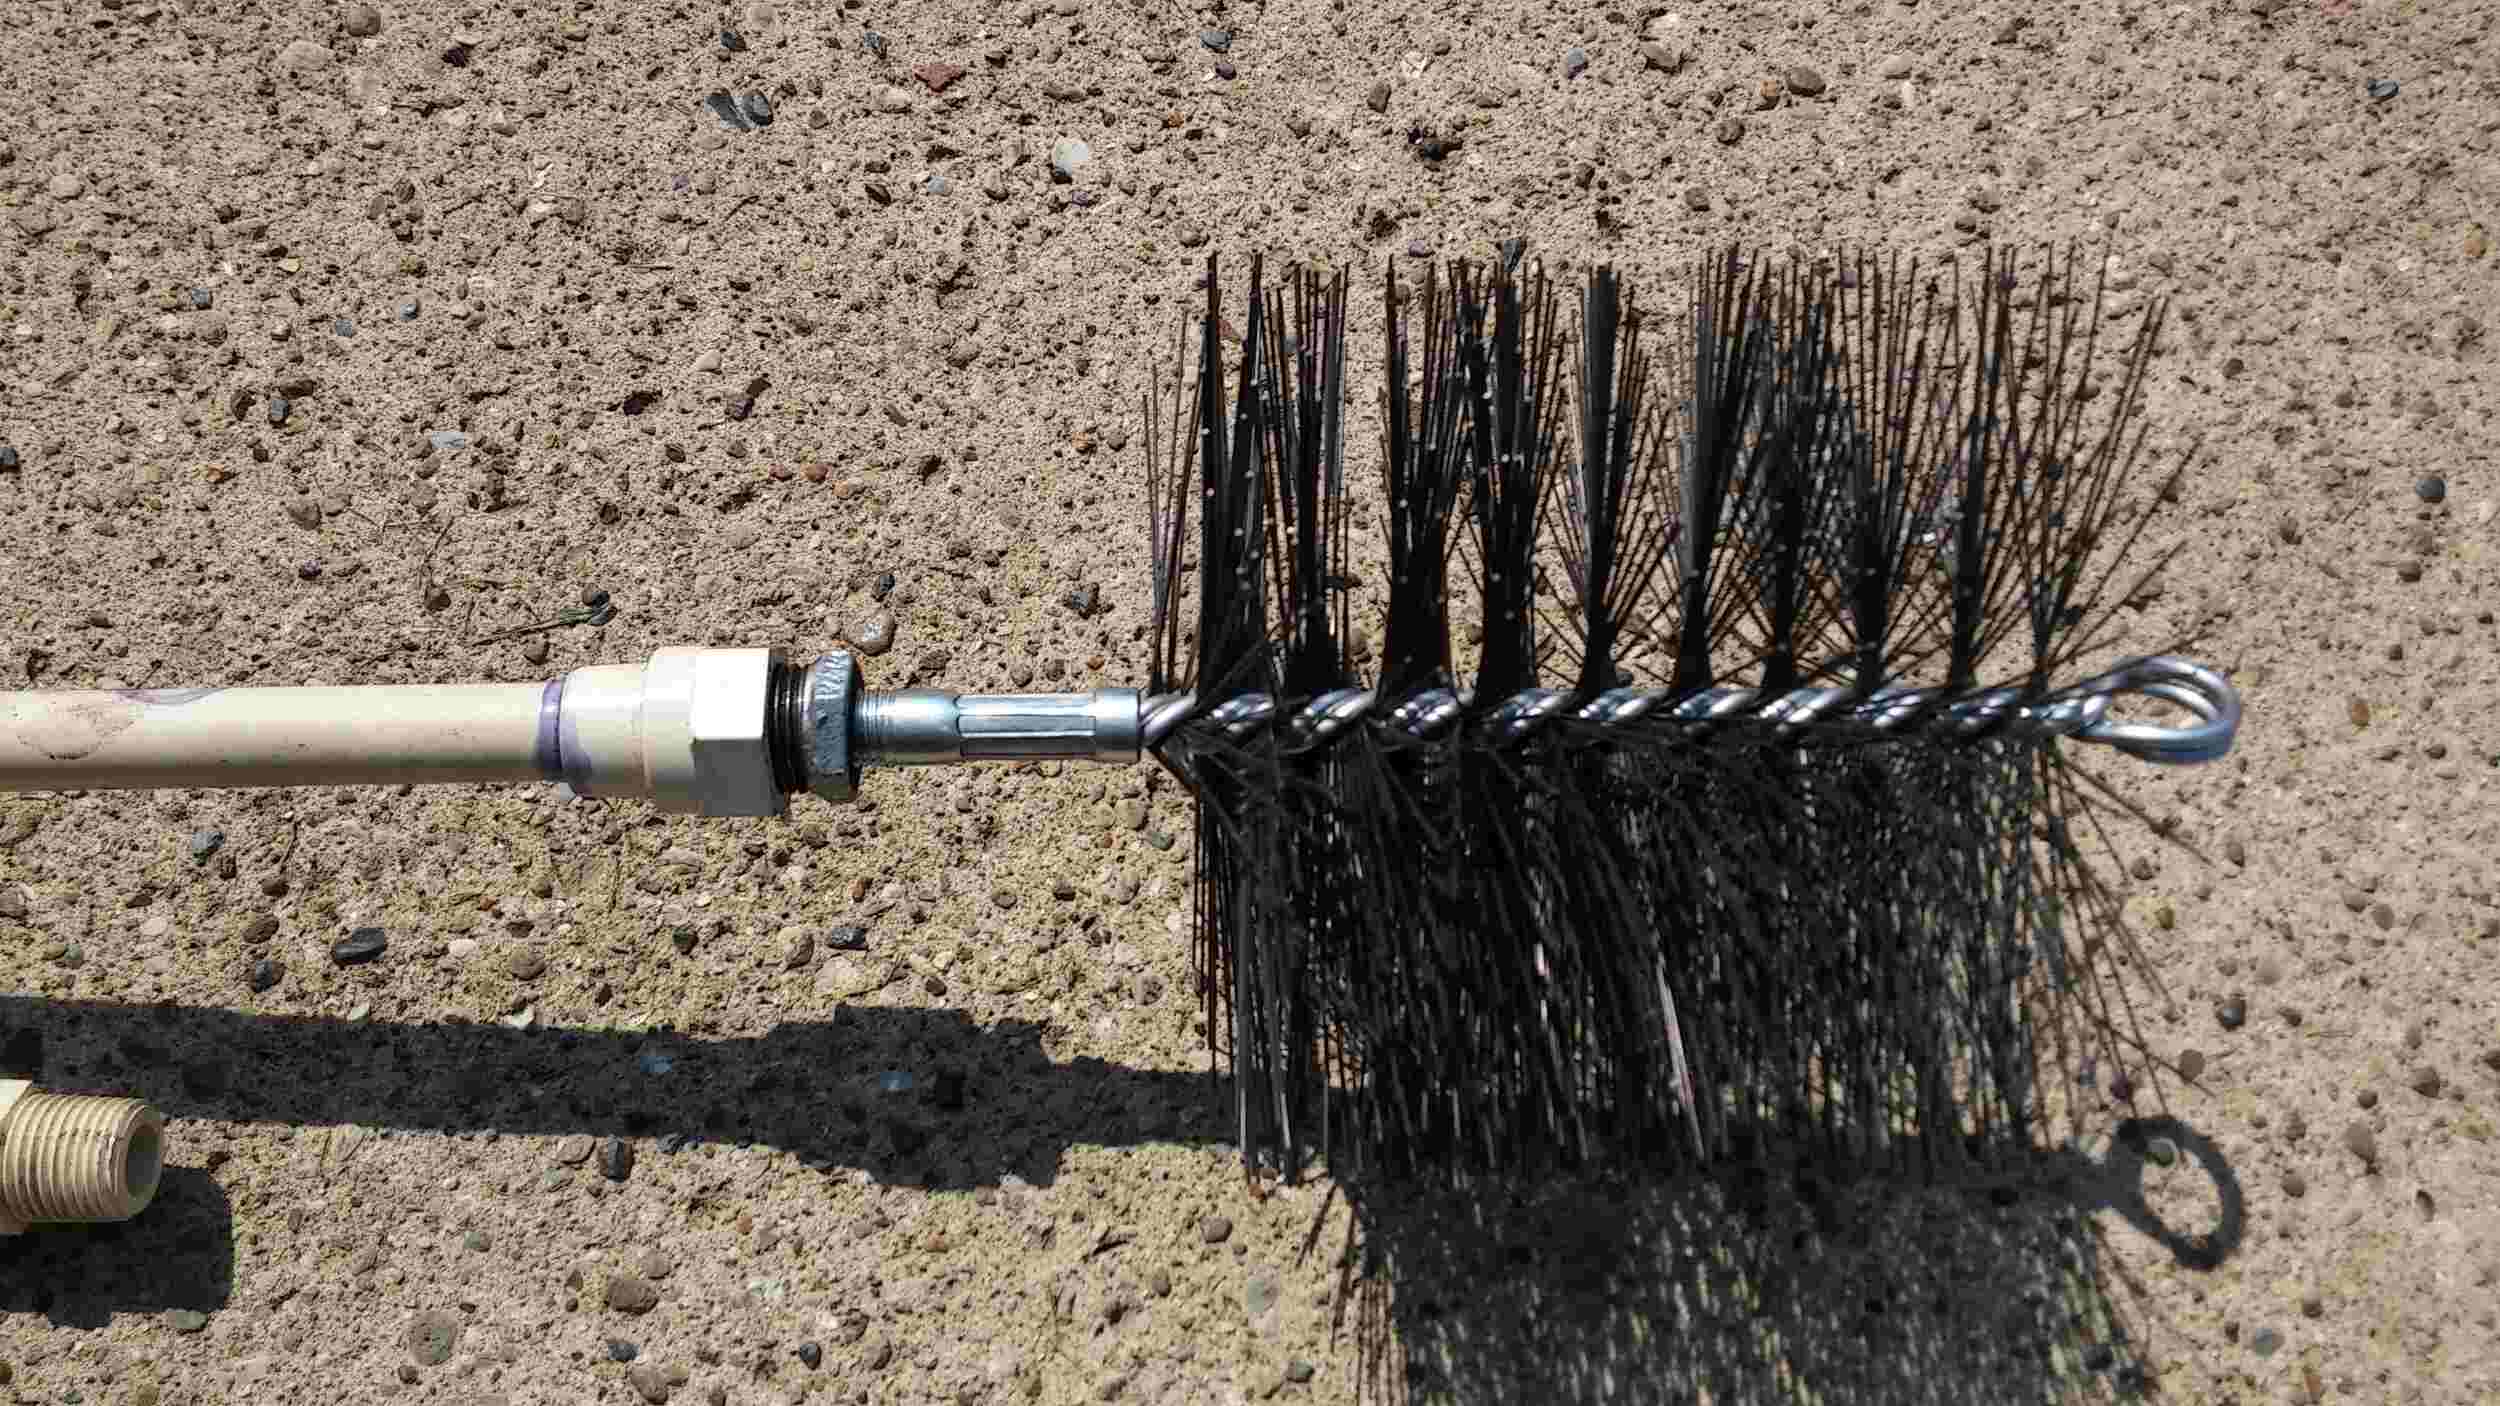
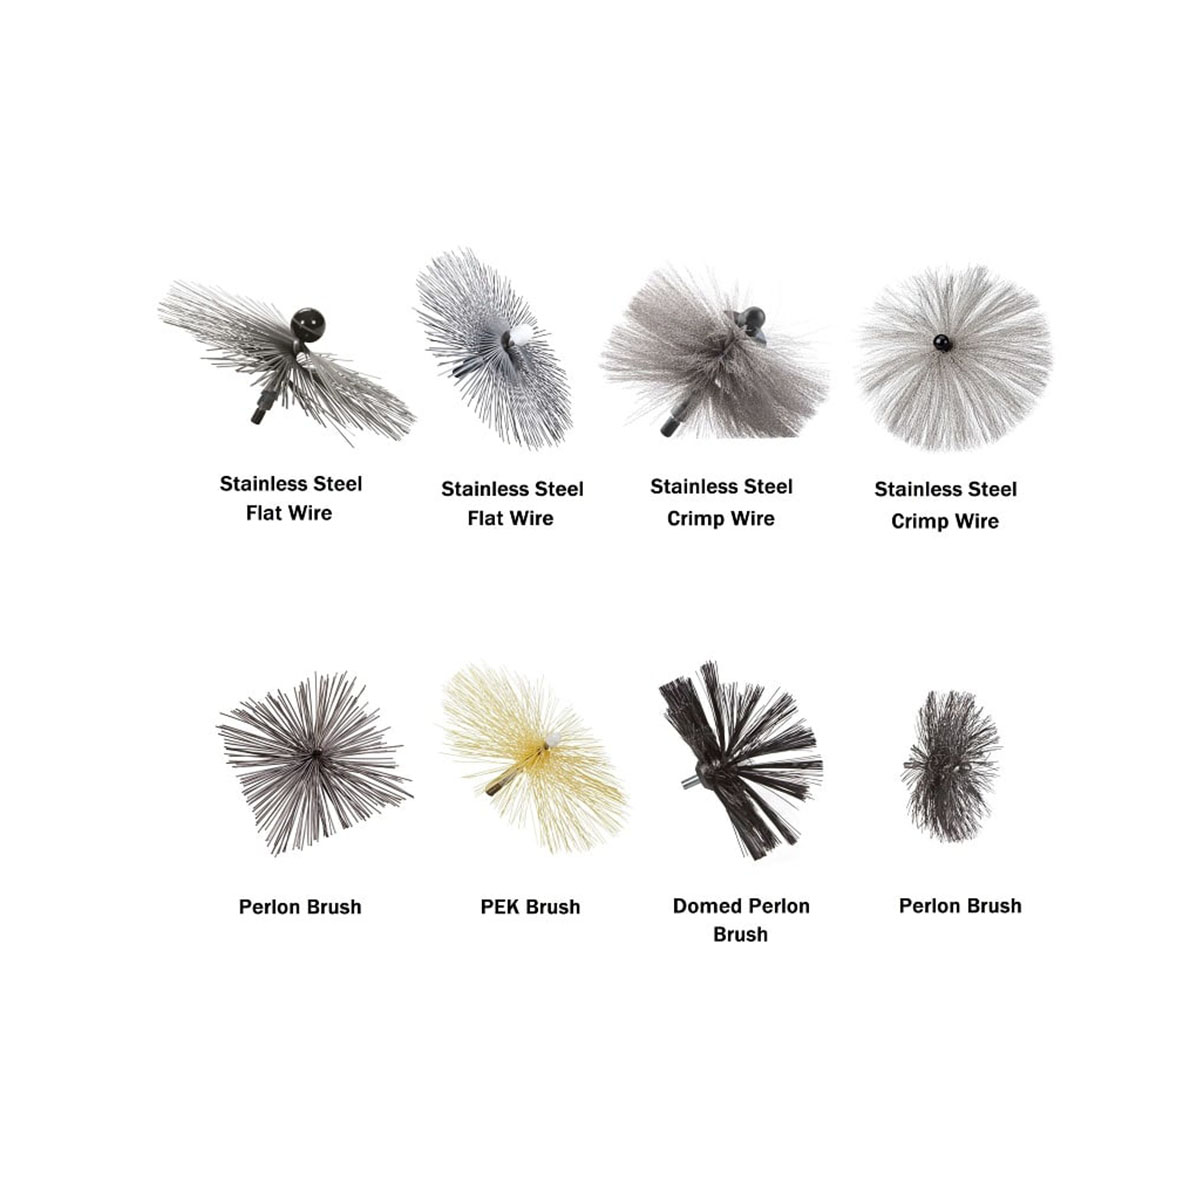
A chimney sweep broom, also known as a flue brush, is designed to remove soot, debris, and creosote buildup from the walls of a chimney. It consists of a handle and bristles that are inserted into the chimney to scrub away any buildup that could potentially lead to chimney fires or poor ventilation.
Making your own chimney sweep broom allows you to save money and customize the broom to fit the dimensions of your chimney. It is a straightforward process that requires basic tools and materials that can be easily found at your local hardware store.
Before we dive into the step-by-step instructions, let’s take a look at the materials you will need to make your chimney sweep broom.
Key Takeaways:
- Save money and customize your chimney sweep broom by following simple DIY steps using basic materials. Keep your chimney clean and safe with a custom-made tool tailored to fit your specific needs.
- Equip yourself with a cost-effective and durable chimney sweep broom to effectively remove soot, debris, and creosote buildup from your chimney. Enjoy the satisfaction of creating your own custom tool for maintaining a safe and efficient fireplace or wood-burning stove.
Read more: How Much Do Chimney Sweeps Make
Materials Needed
To make your own chimney sweep broom, you will need the following materials:
- A wooden broom handle: Choose a sturdy wooden handle that is long enough to reach the full length of your chimney.
- Bristles: Look for stiff bristles that are durable and can effectively scrub away soot and debris. You can purchase bristles specifically designed for chimney sweep brooms or repurpose bristles from an old broom.
- Drill and drill bit: You will need a drill with a drill bit that matches the diameter of your bristles.
- Screws: Select screws that are long enough to securely attach the bristles to the broom handle.
- Screwdriver or screwdriver bit: Use a screwdriver or screwdriver bit that is compatible with the screws you have chosen.
- Hanging loop or rope: Optional, but recommended for easy storage of your chimney sweep broom.
Once you have gathered these materials, you will be ready to start creating your chimney sweep broom. Now, let’s move on to the step-by-step instructions.
Step 1: Gather the Broom Handle and Bristles
The first step in making your chimney sweep broom is to gather the necessary components: the broom handle and the bristles.
Start by selecting a wooden broom handle that is long enough to reach the full length of your chimney. Look for a handle that is sturdy and durable, as it will need to withstand the pressure and friction of sweeping the chimney walls.
Next, you will need stiff bristles that are designed to effectively scrub away soot and debris from the chimney walls. You can purchase bristles specifically made for chimney sweep brooms from a hardware store or online. Alternatively, if you have an old broom with stiff bristles, you can repurpose them for this project.
Ensure that the bristles are clean and free from any dirt or debris. Trim the bristles to a desired length if necessary, keeping in mind that they should be long enough to reach the walls of your chimney.
Once you have gathered the broom handle and bristles, you are ready to move on to the next step: preparing the bristles.
Step 2: Prepare the Bristles
To ensure that your chimney sweep broom effectively removes soot and debris, it is important to properly prepare the bristles. This step will help improve the functionality and longevity of your broom.
Start by inspecting the bristles for any loose or damaged strands. Use a pair of scissors to trim off any uneven or frayed edges. This will create a neater appearance and prevent the bristles from getting tangled or snagged during use.
If the bristles are too long for your liking, you can trim them to a desired length. However, be cautious not to trim them too short, as you still want them to be long enough to reach the walls of your chimney.
Now it’s time to give the bristles a good cleaning. Fill a bucket with warm water and add a few drops of mild soap. Submerge the bristles in the soapy water and gently swish them around to remove any dirt or debris. Rinse the bristles thoroughly with clean water and allow them to air dry.
Once the bristles are dry, give them a good shake to fluff them up and remove any excess moisture. This will restore the stiffness and resilience of the bristles, making them more effective for sweeping.
By preparing the bristles properly, you are ensuring that your chimney sweep broom is ready for action. The next step is to drill holes in the broom handle to insert the bristles. Let’s move on to step three!
Step 3: Drill Holes in the Broom Handle
Now that you have prepared the bristles, it’s time to drill holes in the broom handle to insert them. This step will allow you to securely attach the bristles to the handle, ensuring that they stay in place during use.
Start by selecting a drill bit that matches the diameter of your bristles. This will ensure a snug fit and prevent the bristles from slipping or coming loose while you are sweeping.
Measure and mark the desired spacing for the holes along the length of the broom handle. The spacing will depend on the density of your bristles and your personal preference. Generally, spacing the holes about 1 to 2 inches apart should be sufficient.
When drilling the holes, make sure to keep the drill bit perpendicular to the broom handle to ensure that the holes are straight. Apply steady pressure and slowly drill through the handle at each marked point. Be cautious and take your time to avoid any splintering or damage to the handle.
Once you have drilled all the holes, use a soft cloth or sandpaper to smooth any rough edges or splinters around the holes. This will prevent any snagging or discomfort when handling the broom.
Drilling holes in the broom handle is a crucial step in the creation of your chimney sweep broom. It allows you to insert the bristles and secure them in place for effective cleaning. The next step is where you will finally insert the bristles into the holes. Let’s move on!
When making a chimney sweep broom, use natural bristles such as straw or twigs for the brush, and a sturdy wooden handle for durability. Bind the bristles tightly to the handle for a secure attachment.
Read more: How To Do Chimney Sweeping
Step 4: Insert the Bristles into the Holes
With the holes drilled in the broom handle, it’s time to insert the bristles and bring your chimney sweep broom to life. This step will secure the bristles in place, allowing for effective cleaning and maneuverability.
Start by taking one bristle at a time and inserting it into a hole on the broom handle. Push the bristle all the way through until it is securely in place. Repeat this process for each hole, ensuring that the bristles are evenly distributed along the length of the broom handle.
If you find that the bristles are too long and protruding out of the top of the holes, you can trim them to a more desired length. However, be cautious not to trim them too short, as you want the bristles to extend beyond the broom handle to effectively reach the walls of your chimney.
As you insert the bristles, you may notice that they are not all the same length. This is normal, as it allows for better coverage when sweeping the chimney walls. The different lengths create a “v” shape that helps to remove debris from different angles.
Once all the bristles are inserted, give them a gentle tug to make sure they are secure. You don’t want any bristles to come loose while you are using the broom.
With the bristles securely in place, your chimney sweep broom is starting to take shape. The next step is to ensure that the bristles are firmly secured to the broom handle. Let’s move on to step five!
Step 5: Secure the Bristles in Place
After inserting the bristles into the holes on the broom handle, it’s important to secure them in place to ensure that they stay firmly attached during use. This step will provide stability and durability to your chimney sweep broom.
Start by flipping the broom over so that the bristles are facing downward. Take a screw and align it with the first bristle hole on the underside of the broom handle. Use a screwdriver or a screwdriver bit on a drill to drive the screw into the handle, tightening it until the bristle is held securely in place.
Continue this process for each bristle hole, gently screwing in the screws to secure the remaining bristles to the broom handle. Make sure to space out the screws evenly along the handle to ensure stability.
While screwing in the screws, be careful not to overtighten them as it could damage the wood or cause the handle to split. Use enough pressure to provide a secure hold without compromising the integrity of the broom handle.
Once all the screws have been tightened, give the bristles a gentle tug to ensure that they are firmly secured to the broom handle. If any bristles feel loose, tighten the corresponding screw until they are held firmly in place.
By securely fastening the bristles to the broom handle, you can effectively and confidently use your chimney sweep broom to clean your chimney without worrying about bristle movement or detachment. The final step will be adding a hanging loop for convenient storage. Let’s move on!
Step 6: Attach a Hanging Loop
Adding a hanging loop to your chimney sweep broom allows you to conveniently store it when not in use. This final step ensures that your broom is easily accessible and kept in a proper place, ready for the next time you need to clean your chimney.
Start by selecting a sturdy rope or string that is long enough to create a loop that can be hung from a hook or peg. Choose a material that is durable and can withstand the weight of the broom.
Decide where you want the hanging loop to be attached on your broom handle. Typically, a good location is towards the top end of the handle, near the bristles. This allows for easy access and keeps the broom balanced when hanging.
Take one end of the rope or string and form a loop, making sure that it is large enough to fit over a hook or peg. Position the loop behind the broom handle, near the desired location, and bring the loose ends of the rope or string together at the front of the handle.
Tie a secure knot to hold the loop in place, ensuring that it is tight enough to withstand the weight of the broom. You can use a simple overhand knot or a more secure knot like a double half hitch. Trim any excess rope or string if necessary.
Once the hanging loop is securely attached, test it by hanging the broom on a hook or peg. Make sure that the loop holds the weight of the broom without slipping or coming loose. Adjust the position or knot if needed.
With the hanging loop in place, you can now easily store your chimney sweep broom in a neat and accessible manner. It will be ready whenever you need to clean your chimney or perform routine maintenance.
Congratulations! You have successfully completed all the steps to make your own chimney sweep broom. Now you can confidently tackle your chimney cleaning tasks with a custom-made tool that fits your needs.
Remember to always exercise caution when using your chimney sweep broom and follow proper safety guidelines. Regular maintenance and cleaning of your chimney will help ensure the longevity and safety of your fireplace or wood-burning stove.
Conclusion
Congratulations on successfully creating your very own chimney sweep broom! By following the step-by-step instructions and using simple materials, you have now equipped yourself with a cost-effective and custom-made tool for keeping your chimney clean and maintaining the safety of your home.
Making your own chimney sweep broom not only saves you money but also allows you to customize it to fit the specific dimensions of your chimney. The wooden handle provides durability and stability, while the stiff bristles effectively remove soot, debris, and creosote buildup from the chimney walls.
Remember to inspect and clean your chimney sweep broom regularly, as soot and debris can accumulate over time. Remove any clogs or buildup from the bristles to ensure optimum performance. Additionally, always exercise caution when using the broom and follow proper safety practices to prevent accidents and damage to your chimney.
With your DIY chimney sweep broom, you can now confidently maintain a clean and efficient chimney, reducing the risk of chimney fires and ensuring proper ventilation. Regular chimney maintenance is crucial for the longevity and safe operation of your fireplace or wood-burning stove.
Thank you for joining us on this DIY journey. We hope you found this article informative and enjoyed creating your own chimney sweep broom. Happy sweeping!
Frequently Asked Questions about How To Make Chimney Sweep Broom
Was this page helpful?
At Storables.com, we guarantee accurate and reliable information. Our content, validated by Expert Board Contributors, is crafted following stringent Editorial Policies. We're committed to providing you with well-researched, expert-backed insights for all your informational needs.


0 thoughts on “How To Make Chimney Sweep Broom”