Articles
What Is Back Tab Curtains
Modified: October 22, 2024
Discover everything you need to know about back tab curtains in our informative articles. Find tips, ideas, and inspiration for incorporating this stylish window treatment into your home décor.
(Many of the links in this article redirect to a specific reviewed product. Your purchase of these products through affiliate links helps to generate commission for Storables.com, at no extra cost. Learn more)
Introduction
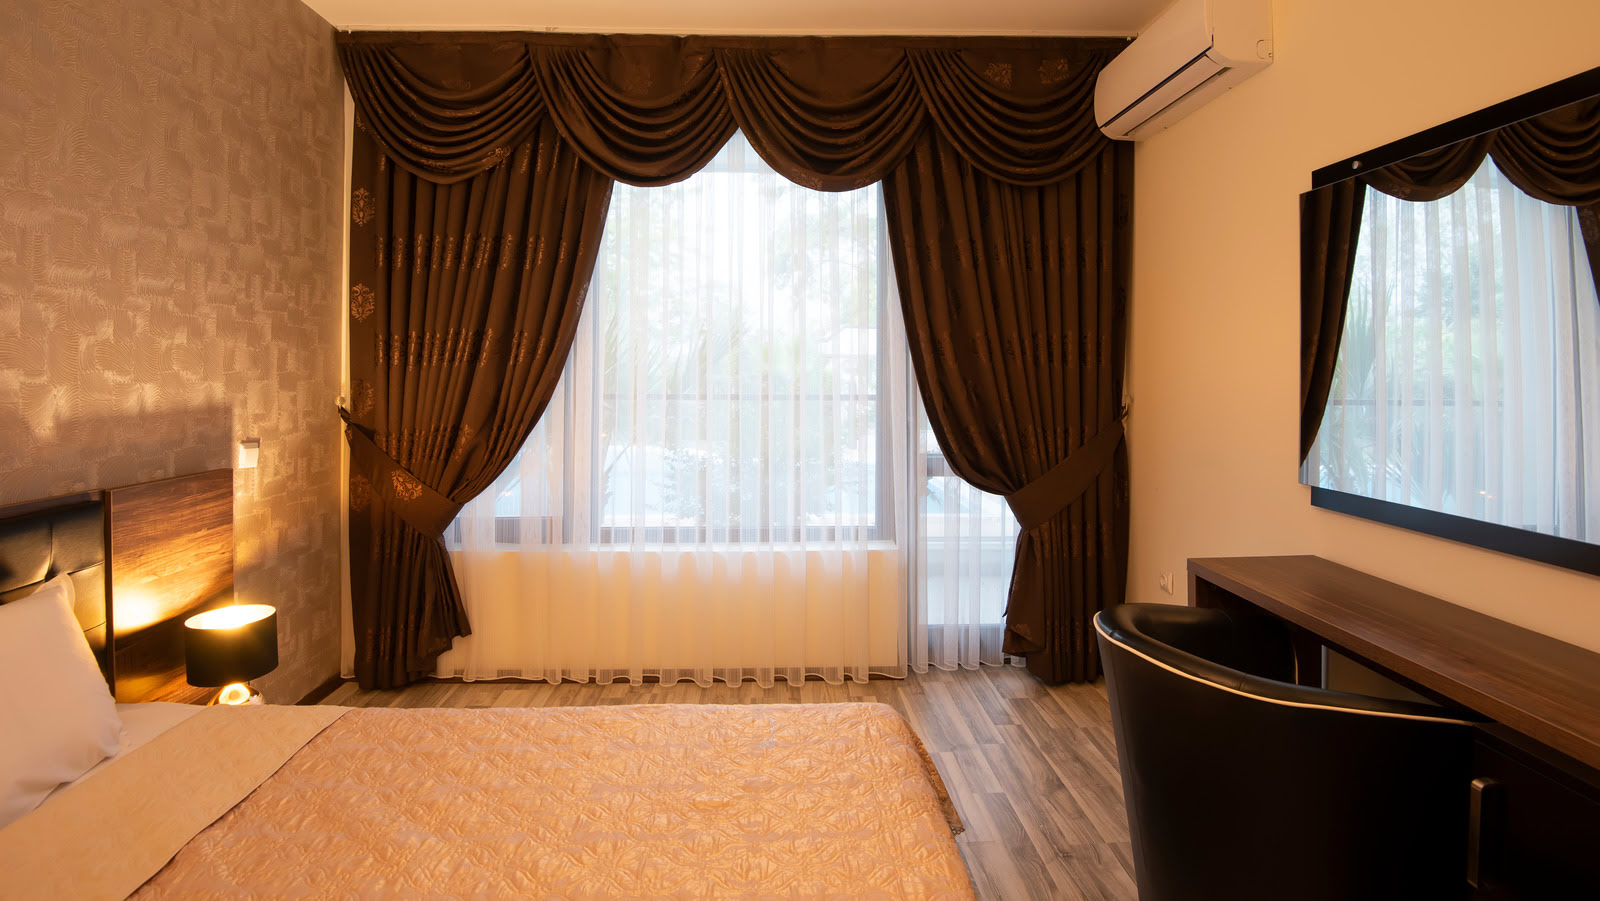
Back tab curtains are a stylish and functional window treatment that can add charm and elegance to any space. These curtains offer a unique design feature, with tabs located on the back of the curtain panel instead of the top. This design not only gives the curtains a neat and tailored look but also offers several practical advantages.
If you’re tired of traditional curtain styles or looking to enhance the aesthetic appeal of your windows, back tab curtains may be the perfect solution. In this article, we will explore what back tab curtains are, how they work, their advantages and disadvantages, different types available, and provide tips for choosing and installing them.
Whether you have a modern or traditional décor, back tab curtains can seamlessly blend with any interior design style. They are a versatile option that can be used in living rooms, bedrooms, dining areas, or any other space where you want privacy, light control, and a touch of sophistication.
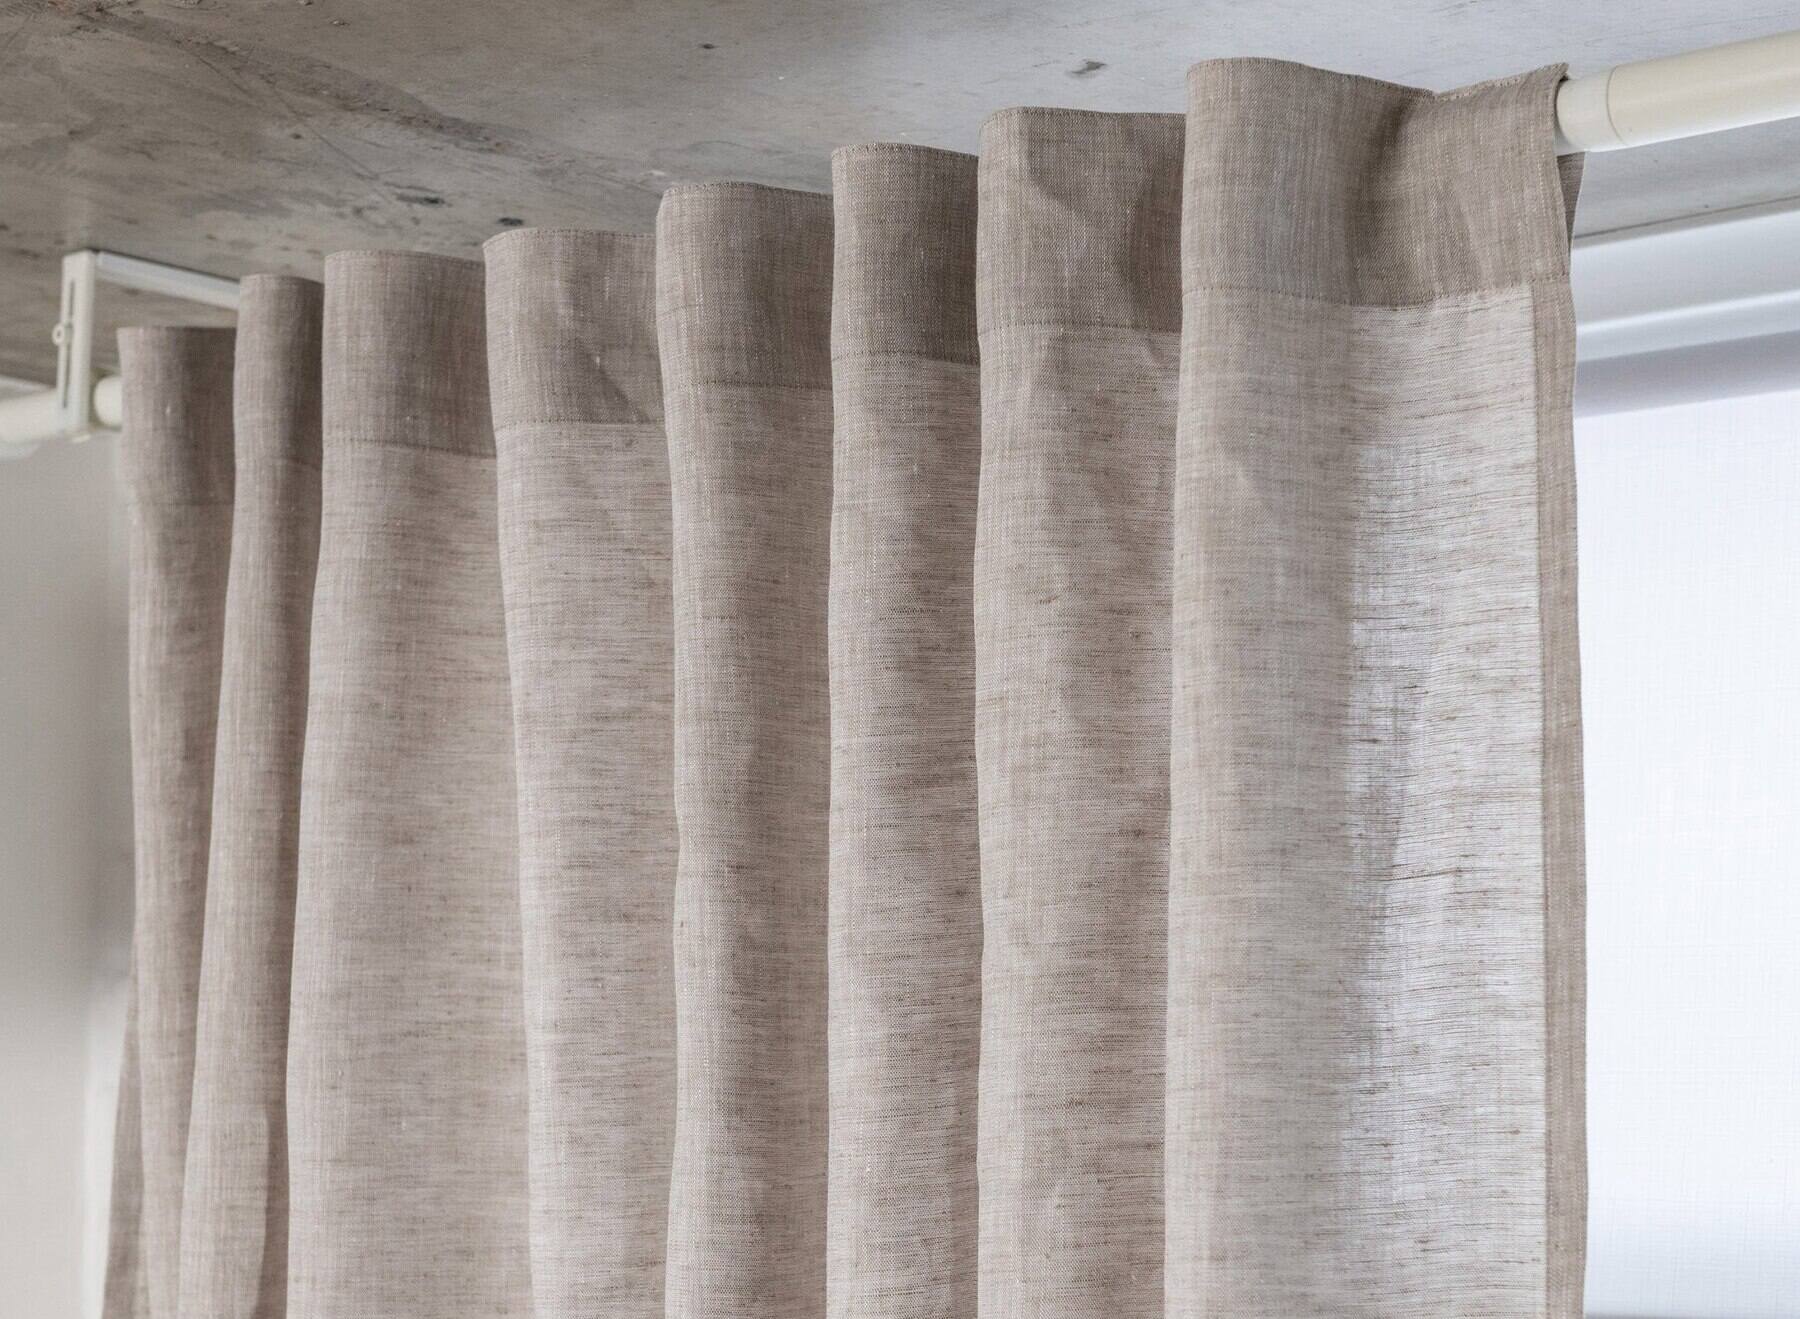
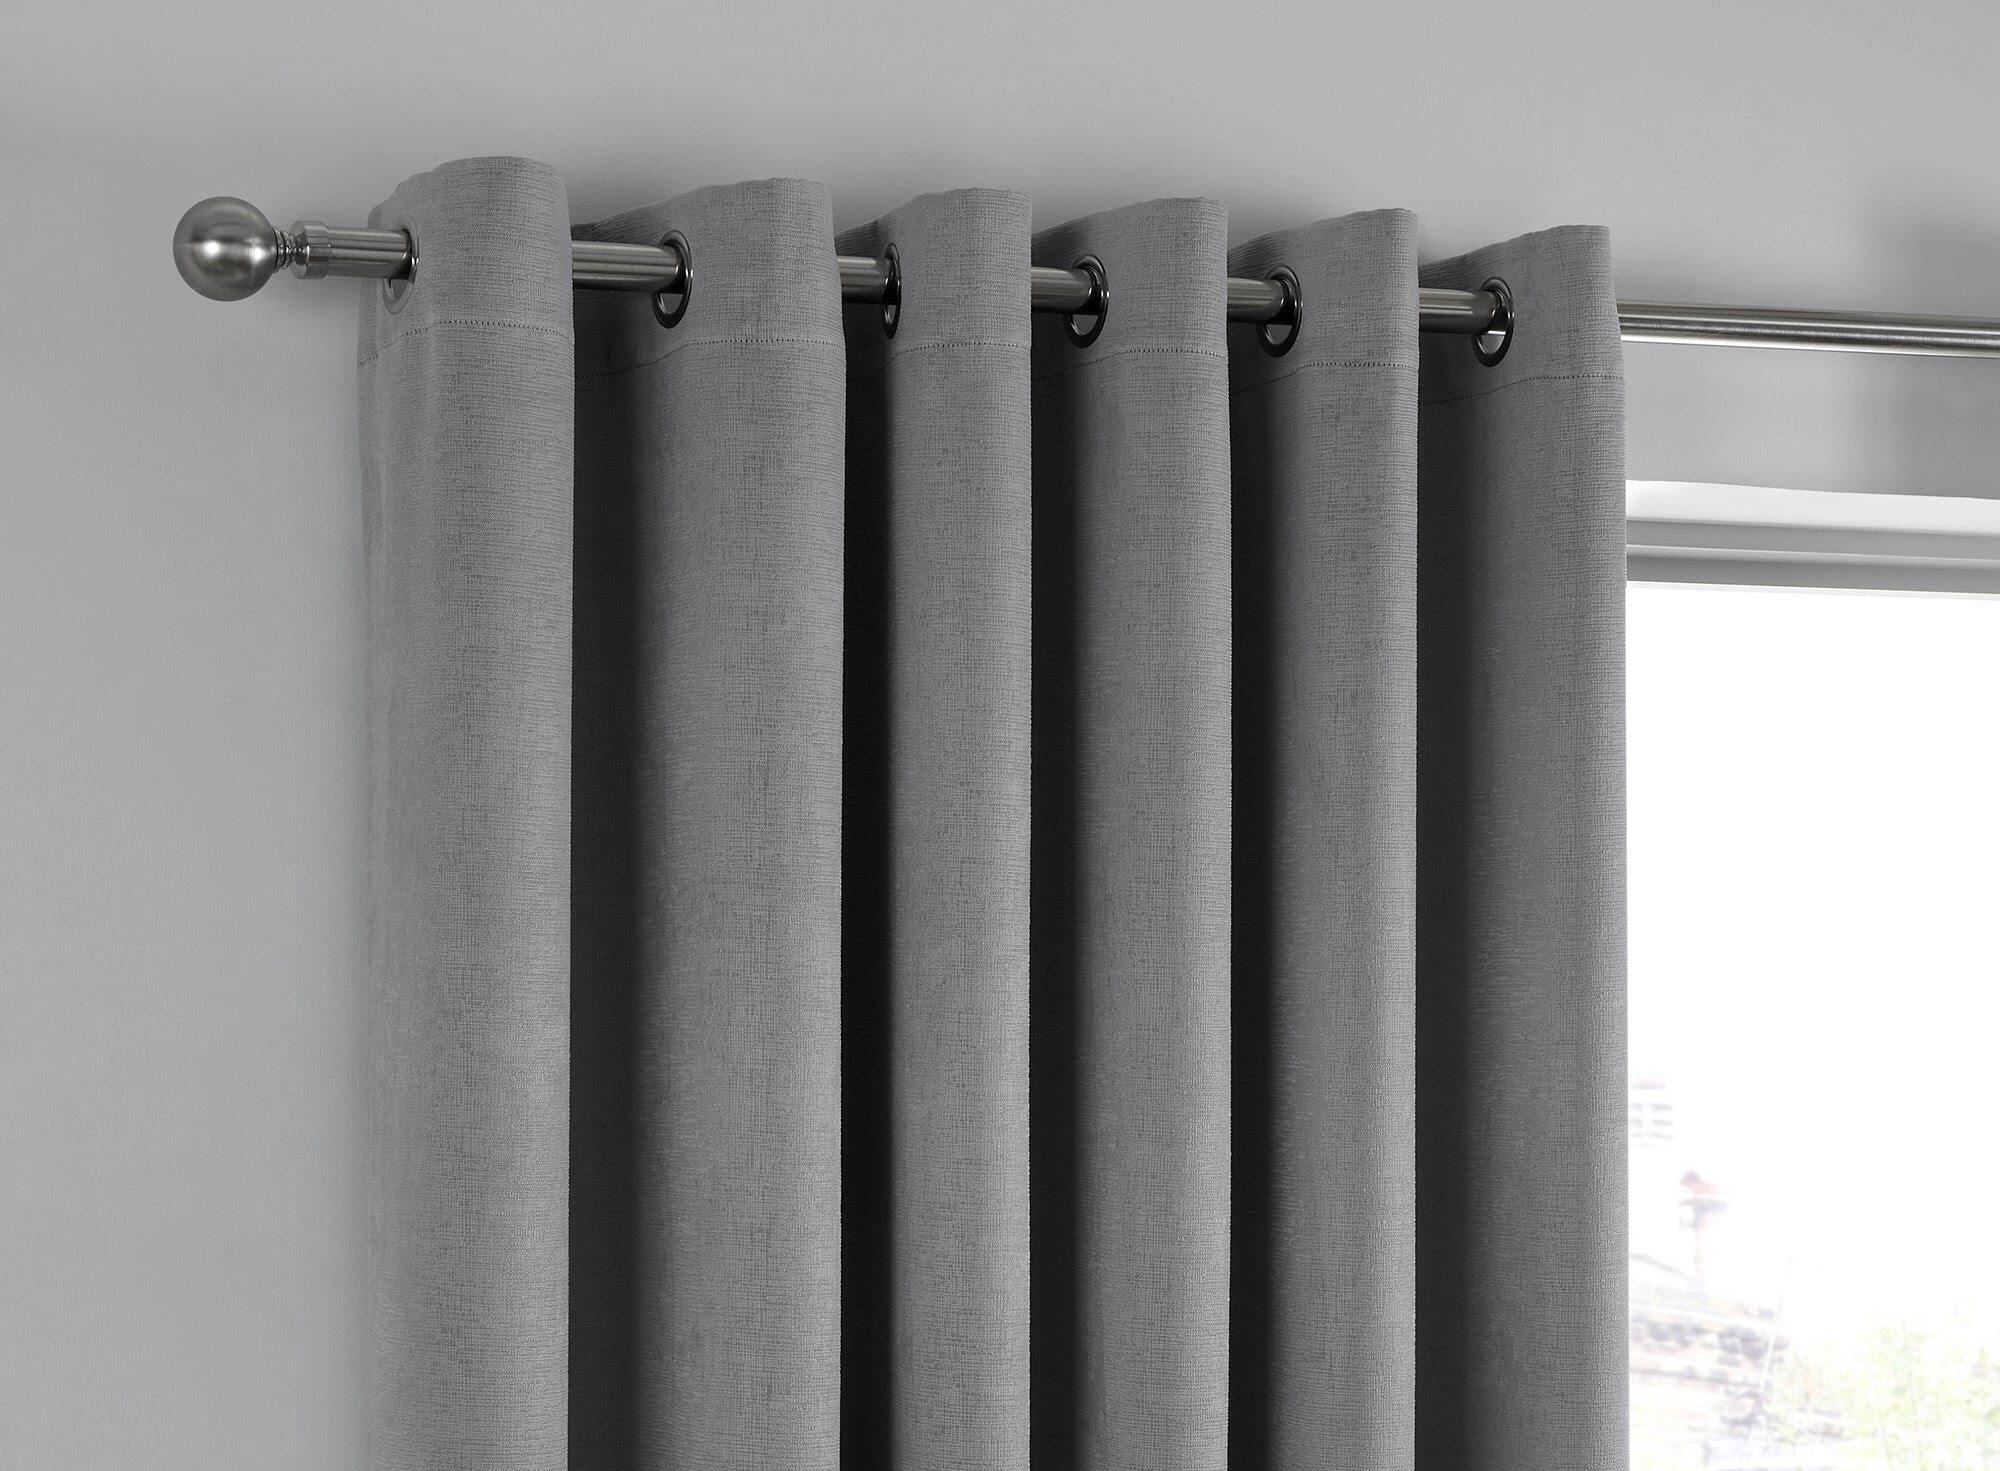
Unlike standard curtains that have visible rings or grommets at the top, back tab curtains have hidden tabs on the back of the panel. These tabs are made of fabric loops or strips that you can slide onto a curtain rod. When hung, the fabric panels create elegant soft pleats that cascade down from the rod.
One of the key advantages of back tab curtains is their ability to provide a clean and polished look. Since the tabs are hidden, they create a sleek and seamless appearance when the curtains are closed. This streamlined effect adds a touch of sophistication to your windows, elevating the overall aesthetic of the room.
Another advantage of back tab curtains is their ease of use. Unlike other curtain styles that require hooks, rings, or clips, back tab curtains are simple to hang. You can easily slide the fabric tabs onto a curtain rod, eliminating the hassle of dealing with multiple components or additional hardware.
Back tab curtains also offer versatility when it comes to light control and privacy. When closed, they provide excellent light-blocking and privacy. The soft pleats created by the hidden tabs ensure that the curtain panels overlap properly, minimizing the amount of light that can enter the room, making them ideal for bedrooms, nurseries, or media rooms.
While back tab curtains have many advantages, it’s important to consider their limitations as well. One of the main disadvantages is that they may not be the best option for heavy or thick fabrics. Since the tabs are on the back of the panel, they might not be able to support the weight of heavy materials, which could result in sagging or uneven draping.
Additionally, back tab curtains may not be suitable for wider windows or those that require frequent opening and closing. The pleats created by the tabs can overlap significantly when the curtains are pulled back, reducing the amount of window visibility and natural light entering the room. Therefore, it’s essential to consider the specific needs and dimensions of your windows before choosing back tab curtains.
Overall, back tab curtains offer a stylish and practical solution for your window treatment needs. With their sleek appearance, ease of installation, and light control capabilities, they are a great choice for any room in your home. By considering the advantages and limitations discussed in this article, you can make an informed decision and create a beautiful and functional window display with back tab curtains.
Key Takeaways:
- Back tab curtains offer a sleek and tailored look, easy installation, and excellent light control and privacy. They come in various types to suit different preferences and functional needs.
- When choosing and installing back tab curtains, consider factors such as fabric selection, color and pattern, and proper measurements. Regular maintenance will keep them looking their best over time.
Read more: What Is Tab Top Curtains
Definition of Back Tab Curtains
Back tab curtains, also known as hidden tab curtains, are a type of window treatment that feature fabric loops or strips located on the backside of the curtain panel. These tabs serve as a discreet and attractive way to hang the curtains, providing a clean and sleek appearance.
Unlike traditional curtain styles, such as rod pocket curtains or grommet curtains, back tab curtains offer a unique and stylish design element. With the tabs located on the back of the panel, they create soft pleats that drape elegantly from the curtain rod.
The tabs on back tab curtains are typically made from the same fabric as the curtain panel itself, ensuring a cohesive and coordinated look. This seamless integration of the tabs adds to the overall aesthetic appeal of the curtains and complements various interior design styles.
Back tab curtains are available in a wide range of materials, colors, patterns, and textures, allowing you to find the perfect option that matches your decor preferences and requirements. Whether you prefer light and airy sheer curtains or heavier drapes for more privacy and light control, there are back tab curtain options to suit every need.
One of the key advantages of back tab curtains is their versatility. They can be used in any room of the house, including living rooms, bedrooms, dining areas, and home offices. The clean lines and tailored appearance of back tab curtains make them suitable for both contemporary and traditional interior styles.
Another defining characteristic of back tab curtains is their ease of installation. The tabs on the back of the curtain panel allow for simple and hassle-free hanging. You can easily slide the tabs onto a curtain rod, ensuring a secure and seamless fit.
When it comes to functionality, back tab curtains offer several benefits. They provide excellent light control and privacy, especially when made from thicker or blackout fabrics. The soft pleats created by the hidden tabs ensure that the curtain panels overlap properly, minimizing the amount of light that can enter the room.
Additionally, back tab curtains can enhance the insulation properties of your windows. When closed, the fabric panels create a barrier that helps to regulate the temperature in the room by preventing heat or cold from escaping or entering through the windows.
Overall, back tab curtains are a stylish and practical choice for window treatments. Their hidden tabs, tailored appearance, and versatile design make them a popular option for homeowners who want to enhance their interior decor while enjoying the benefits of functional curtains. Whether you’re looking for added privacy, light control, or simply a sophisticated window display, back tab curtains can be the perfect solution.
How Back Tab Curtains Work
Back tab curtains work on a simple yet effective mechanism that allows for easy installation and a seamless, tailored look. The key to their functionality lies in the placement of fabric tabs along the backside of the curtain panel.
When it comes to hanging back tab curtains, there are a few steps involved. First, you will need to gather the necessary materials, including the curtain panels, a curtain rod, and any additional hardware, such as brackets or finials.
Once you have all the materials ready, follow these steps to hang your back tab curtains:
- Measure and mark the desired height of the curtain rod on the wall. Use a level to ensure accuracy.
- Install the brackets or rod holders on the marked spots, following the manufacturer’s instructions.
- Insert the curtain rod into the brackets or rod holders, ensuring it is secure and level.
- Prepare the curtain panels by ironing or steaming them to remove any wrinkles or creases.
- Flip the curtain panel over so that the backside is facing up.
- Locate the tabs along the top edge of the curtain panel. These tabs may be made of fabric loops or strips, depending on the design of the curtains.
- Start from one end of the panel and slide each tab onto the curtain rod, working your way to the other end. Ensure that the tabs are evenly spaced for a balanced and tailored look.
- Once all the tabs are on the rod, adjust the position of the curtains, ensuring they hang evenly and reach the desired length.
- Step back and admire your back tab curtains, enjoying the elegant and cohesive look they bring to your space.
The beauty of back tab curtains lies in the way they naturally create soft pleats when hung. The fabric loops or strips on the backside of the curtain panel allow the fabric to fold and drape elegantly from the curtain rod, resulting in a neat and tailored appearance.
In addition to their aesthetic appeal, back tab curtains offer functional benefits as well. When closed, they provide excellent light control and privacy. The overlapping fabric panels ensure minimal light seepage into the room, making them ideal for bedrooms, nurseries, or media rooms.
Furthermore, back tab curtains can be easily opened and closed, allowing for effortless adjustment of light and privacy levels. By simply sliding the curtain panels along the rod, you can control how much of the window is covered or exposed.
Overall, back tab curtains work by utilizing hidden fabric tabs on the back of the curtain panel to create a tailored and elegant look. Their simple installation process and functional design make them a popular choice for homeowners looking to enhance the aesthetic appeal and functionality of their windows.
Advantages of Back Tab Curtains
Back tab curtains offer a range of advantages that make them a popular choice for homeowners looking for both style and functionality in their window treatments. From their elegant and tailored appearance to their ease of installation, here are some of the key advantages of back tab curtains:
- Clean and Sleek Look: Back tab curtains have hidden tabs located on the backside of the panel, creating a seamless and polished appearance. The fabric panels cascade down from the curtain rod in soft pleats, adding an elegant touch to any space. This tailored look complements various interior design styles, from modern to traditional.
- Easy to Install: Installing back tab curtains is a straightforward process that requires minimal effort. With the fabric loops or strips on the backside of the curtain panel, you can easily slide them onto a curtain rod. This eliminates the need for hooks, rings, or clips, making the installation quick and hassle-free.
- Versatility: Back tab curtains are available in a wide range of materials, colors, patterns, and textures, allowing you to find the perfect option to suit your decor preferences. Whether you prefer sheer curtains to let in natural light or heavier drapes for privacy and light control, there is a back tab curtain option to match your needs.
- Light Control and Privacy: When closed, back tab curtains provide excellent light-blocking capabilities, making them ideal for bedrooms, nurseries, or media rooms. The soft pleats created by the hidden tabs ensure that the curtain panels overlap properly, minimizing the amount of light that can enter the room. They also offer a level of privacy by obstructing the view from outside.
- Insulation: Back tab curtains can help improve the energy efficiency of your windows by providing an additional layer of insulation. When closed, the fabric panels create a barrier that helps regulate the temperature in the room, preventing heat or cold from escaping or entering through the windows.
- Customization: Back tab curtains can be customized to fit your specific window dimensions. Whether you have standard window sizes or require longer or wider curtains, you can easily find or have back tab curtains made to perfectly fit your windows. This ensures a tailored and professional look for your windows.
With their clean appearance, ease of installation, light control capabilities, and versatility, back tab curtains offer numerous advantages for homeowners. Whether you’re looking to enhance the aesthetic appeal of your space, improve privacy and light control, or add an energy-efficient layer to your windows, back tab curtains are a stylish and functional choice.
When hanging back tab curtains, make sure to evenly space the tabs along the curtain rod to create a uniform and polished look. This will also help the curtains to hang properly and smoothly.
Disadvantages of Back Tab Curtains
While back tab curtains offer several advantages, it’s important to consider their limitations as well. Before investing in back tab curtains, it’s crucial to be aware of the potential drawbacks they may have. Here are some of the main disadvantages of back tab curtains:
- Weight Limitations: Back tab curtains may not be suitable for heavy or thick fabrics. Since the tabs are located on the back of the panel, they may not be able to support the weight of heavier materials. This can result in sagging or uneven draping of the curtains. It’s important to choose fabrics that are suitable for the weight restrictions of back tab curtains to ensure optimal appearance and functionality.
- Limited Visibility: When back tab curtains are fully open, the pleats created by the tabs can significantly overlap, reducing the amount of window visibility. This can obstruct the view and limit the amount of natural light entering the room when the curtains are pulled back. If maintaining a full view and maximizing natural light is a priority, other curtain styles, such as rod pocket or grommet curtains, may be more suitable.
- Less Frequent Opening and Closing: Back tab curtains are not the most convenient option for windows that require frequent opening and closing. The tabs can make it more difficult to slide the panels along the rod, especially if the curtains are made from thicker materials. If you often need to adjust your curtains throughout the day, considering curtain styles that offer easier operation, such as rod pocket or grommet curtains, may be more practical.
- Size Limitations: Back tab curtains might not be the best choice for wider windows. Depending on the width of the curtain panels and the spacing of the tabs, the pleats may not extend fully when the curtains are closed, resulting in a less cohesive and tailored appearance.
- Less Formal Look: Back tab curtains have a more casual and relaxed appearance compared to other curtain styles, such as pinch pleat or goblet pleat curtains. If you’re aiming for a formal or traditional look, back tab curtains may not be the most suitable option.
- Compatibility with Curtain Tracks: Back tab curtains are primarily designed to be used with curtain rods. However, if you have curtain tracks installed, the fabric tabs may not be compatible with the track system. It’s important to ensure that the curtain tabs can easily slide onto your specific curtain hardware before purchasing back tab curtains.
Considering these disadvantages can help you make an informed decision about whether back tab curtains are the right choice for your needs and preferences. While they offer many advantages, it’s important to assess the specific requirements of your space and consider alternative curtain styles if necessary.
Read more: How To Make Back Tab Curtains Slide Easily
Different Types of Back Tab Curtains
Back tab curtains come in various styles, materials, and designs, allowing you to find the perfect option that suits your aesthetic preferences and functional needs. Here are some of the different types of back tab curtains available:
- Sheer Back Tab Curtains: Sheer back tab curtains are made from lightweight and transparent fabric. They allow natural light to filter through while providing a level of privacy. Sheer back tab curtains are ideal for spaces where you want to maintain brightness and a soft, ethereal look.
- Thermal Back Tab Curtains: Thermal back tab curtains are designed with insulating properties to help regulate temperature and reduce energy loss. They are usually made from thick and tightly woven materials that provide excellent insulation and block drafts. Thermal back tab curtains are perfect for bedrooms, living rooms, and any room where insulation is a priority.
- Blackout Back Tab Curtains: Blackout back tab curtains are specifically designed to block out sunlight and create a dark environment. They are made from heavy and opaque materials that minimize the penetration of light. Blackout back tab curtains are ideal for bedrooms, nurseries, or spaces where you want to eliminate outside light completely.
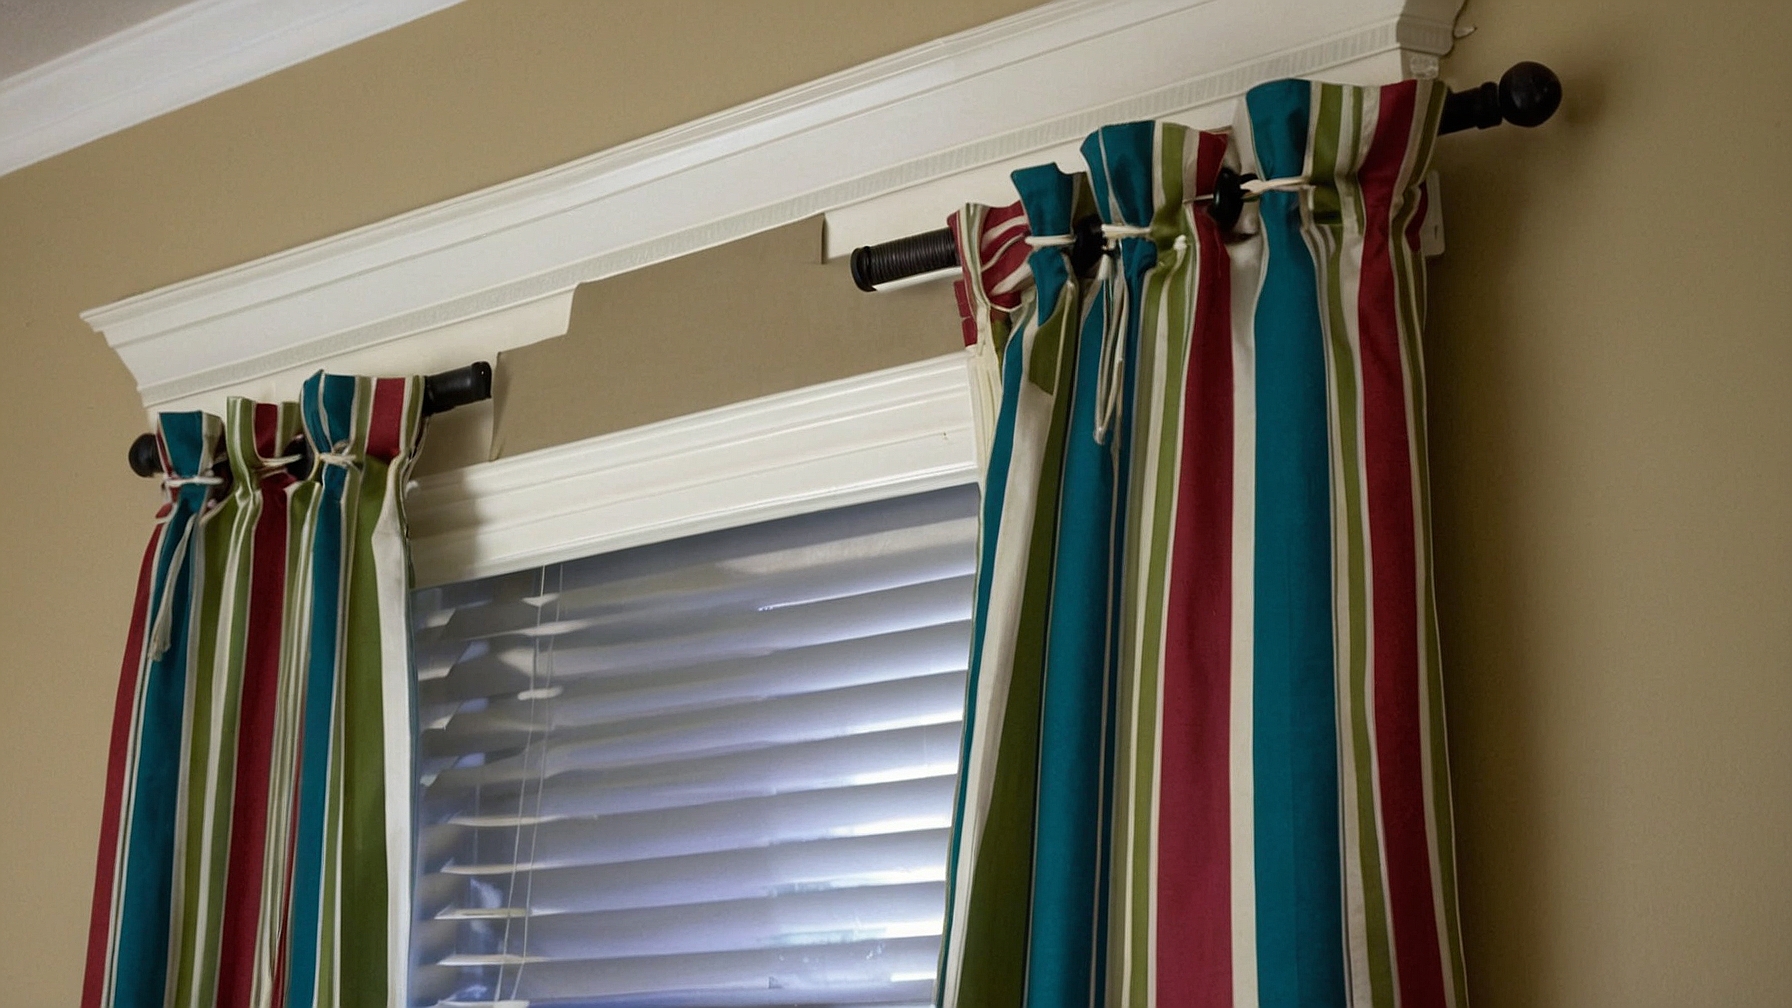
- Patterned Back Tab Curtains: Patterned back tab curtains feature various designs, such as stripes, florals, geometric shapes, or abstract motifs. These curtains add visual interest and can serve as a focal point in a room. Patterned back tab curtains are an excellent choice if you want to infuse personality and style into your space.
- Embroidered Back Tab Curtains: Embroidered back tab curtains are embellished with intricate designs and patterns created through embroidery techniques. They add a touch of elegance and sophistication to a room. Embroidered back tab curtains are often used in formal settings or rooms where a luxurious aesthetic is desired.
- Textured Back Tab Curtains: Textured back tab curtains feature visually interesting fabrics with raised patterns, weaves, or textures. This type of curtain adds depth and dimension to a space. Textured back tab curtains are a great choice if you want to incorporate tactile appeal and visual richness into your interior design.
- Lace Back Tab Curtains: Lace back tab curtains are delicate and airy, featuring intricate openwork patterns. They create a romantic and vintage-inspired look. Lace back tab curtains are often used in bedrooms, living rooms, or spaces where you want to add a touch of elegance and femininity.
When choosing the type of back tab curtains, consider the function, style, and overall aesthetic you want to achieve in your space. Each type has its own unique characteristics and advantages, so take the time to explore different options before making a decision.
Remember to consider factors such as light control, privacy, insulation, and the specific design elements that will enhance the overall look and feel of your room. By selecting the right type of back tab curtains, you can create a beautiful and functional window treatment that complements your interior design vision.
Tips for Choosing and Installing Back Tab Curtains
Choosing and installing back tab curtains require careful consideration to ensure a perfect fit and a polished look for your windows. Here are some helpful tips to guide you through the process:
- Measurements: Before purchasing back tab curtains, measure your windows carefully to determine the correct width and length needed. Consider whether you want your curtains to hang just above the window sill, reach the floor, or puddle slightly on the floor for a more elegant look.
- Fabric Selection: Choose a fabric that aligns with your desired level of privacy, light control, and aesthetic appeal. Sheer fabrics allow light to filter through and provide a soft, ethereal ambiance, while thicker materials like blackout or thermal fabrics offer increased privacy and light-blocking capabilities.
- Color and Pattern: Determine whether you want your back tab curtains to blend in with the existing color scheme or make a bold statement as an eye-catching focal point. Consider factors like wall color, furniture, and overall decor when selecting the color and pattern of your curtains.
- Hanging Hardware: Choose a curtain rod that complements the style and weight of your back tab curtains. Ensure that the rod’s length and thickness are suitable for your window dimensions and the weight of the curtains.
- Curtain Length: Decide whether you prefer your curtains to reach the floor, hover just above it, or puddle slightly. Ensure that you have accurately measured the length required to achieve the desired look.
- Installation: Follow the manufacturer’s instructions for installing the curtain rod and brackets securely. Make sure the rod is level and positioned at the desired height. Check that the brackets are properly aligned and stable to support the weight of the curtains.
- Hanging the Curtains: Flip the curtain panel so that the backside is facing up. Slide the fabric loops or strips onto the curtain rod, starting from one end and evenly spacing them along the length of the rod. Adjust the position of the curtains to ensure they hang evenly and create a balanced look.
- Arranging the Pleats: Once the curtains are hanging, arrange the pleats by gently guiding the fabric between the tabs. This step will help create a neat and tailored appearance.
- Final Adjustments: Step back and assess the overall look of the curtains. Make any necessary adjustments to ensure they are hanging straight, the length is correct, and the pleats are evenly distributed.
By following these tips, you can confidently choose and install back tab curtains that complement your decor, provide the desired level of functionality, and add visual appeal to your windows. Remember to consider factors such as measurements, fabric selection, color and pattern, hanging hardware, curtain length, and proper installation techniques to achieve the best results.
Additionally, keep in mind that back tab curtains may require occasional steaming or ironing to maintain their crisp and tailored look. Regular maintenance will ensure that your curtains remain in optimal condition and continue to enhance the overall aesthetic of your space.
Conclusion
Back tab curtains offer a winning combination of style, functionality, and ease of installation, making them a popular choice for homeowners seeking a versatile and elegant window treatment. With hidden tabs located on the backside of the panel, these curtains provide a clean and tailored look that complements various interior design styles.
One of the key advantages of back tab curtains is their sleek and seamless appearance. The hidden tabs create soft pleats that cascade down from the curtain rod, adding an element of sophistication to any space. Additionally, back tab curtains are easy to install, eliminating the need for additional hardware such as hooks or rings.
Back tab curtains offer excellent light control and privacy, particularly when made from thicker or blackout fabrics. The overlapping fabric panels minimize light seepage, making them ideal for bedrooms, nurseries, or media rooms. Furthermore, these curtains provide an additional layer of insulation, helping to regulate temperature and reduce energy loss.
When choosing back tab curtains, consider factors such as fabric selection, color and pattern, and the specific needs of your space. Sheer, thermal, blackout, patterned, embroidered, textured, and lace back tab curtains are all available options to suit different preferences and requirements.
Once you’ve chosen the perfect back tab curtains, carefully measure your windows and ensure proper installation of the curtain rod and brackets. Slide the fabric tabs onto the rod and arrange the pleats for a polished and tailored look. Regular maintenance, including steaming or ironing, will keep your back tab curtains looking their best over time.
In conclusion, back tab curtains offer a stylish and functional solution for your window treatment needs. With their sleek appearance, easy installation, light control capabilities, and a wide range of customization options, they are a versatile choice that can enhance the overall aesthetic of any room. Consider the advantages, disadvantages, and various types of back tab curtains to select the perfect option that suits your style, enhances your decor, and provides the desired practical benefits.
Ready to give your windows a fresh new look? Don't stop now! Dive into our extensive guide on curtain styles, packed with creative ideas and practical tips for dressing every room in your home. Whether you're aiming for elegance or functionality, we've got you covered. And if you're battling against unwanted light, check out our recommendations for the best light blocking curtains available. These selections promise to enhance your sleeping environment by keeping it dark and serene.
Frequently Asked Questions about What Is Back Tab Curtains
Was this page helpful?
At Storables.com, we guarantee accurate and reliable information. Our content, validated by Expert Board Contributors, is crafted following stringent Editorial Policies. We're committed to providing you with well-researched, expert-backed insights for all your informational needs.

0 thoughts on “What Is Back Tab Curtains”