Articles
How To Install A Whole House Fan
Modified: October 28, 2024
Learn how to install a whole house fan with our step-by-step guide. Our articles provide helpful tips and instructions for a successful installation.
(Many of the links in this article redirect to a specific reviewed product. Your purchase of these products through affiliate links helps to generate commission for Storables.com, at no extra cost. Learn more)
Introduction
Welcome to our comprehensive guide on how to install a whole house fan! If you’re tired of high energy bills and stuffy indoor environments, a whole house fan can be a game-changer. It not only improves air circulation but also reduces the need for air conditioning, making it an energy-efficient cooling solution for your home.
In this article, we will walk you through the step-by-step process of installing a whole house fan. From gathering the necessary tools and materials to testing the fan for proper functioning, we’ve got you covered. So, let’s get started!
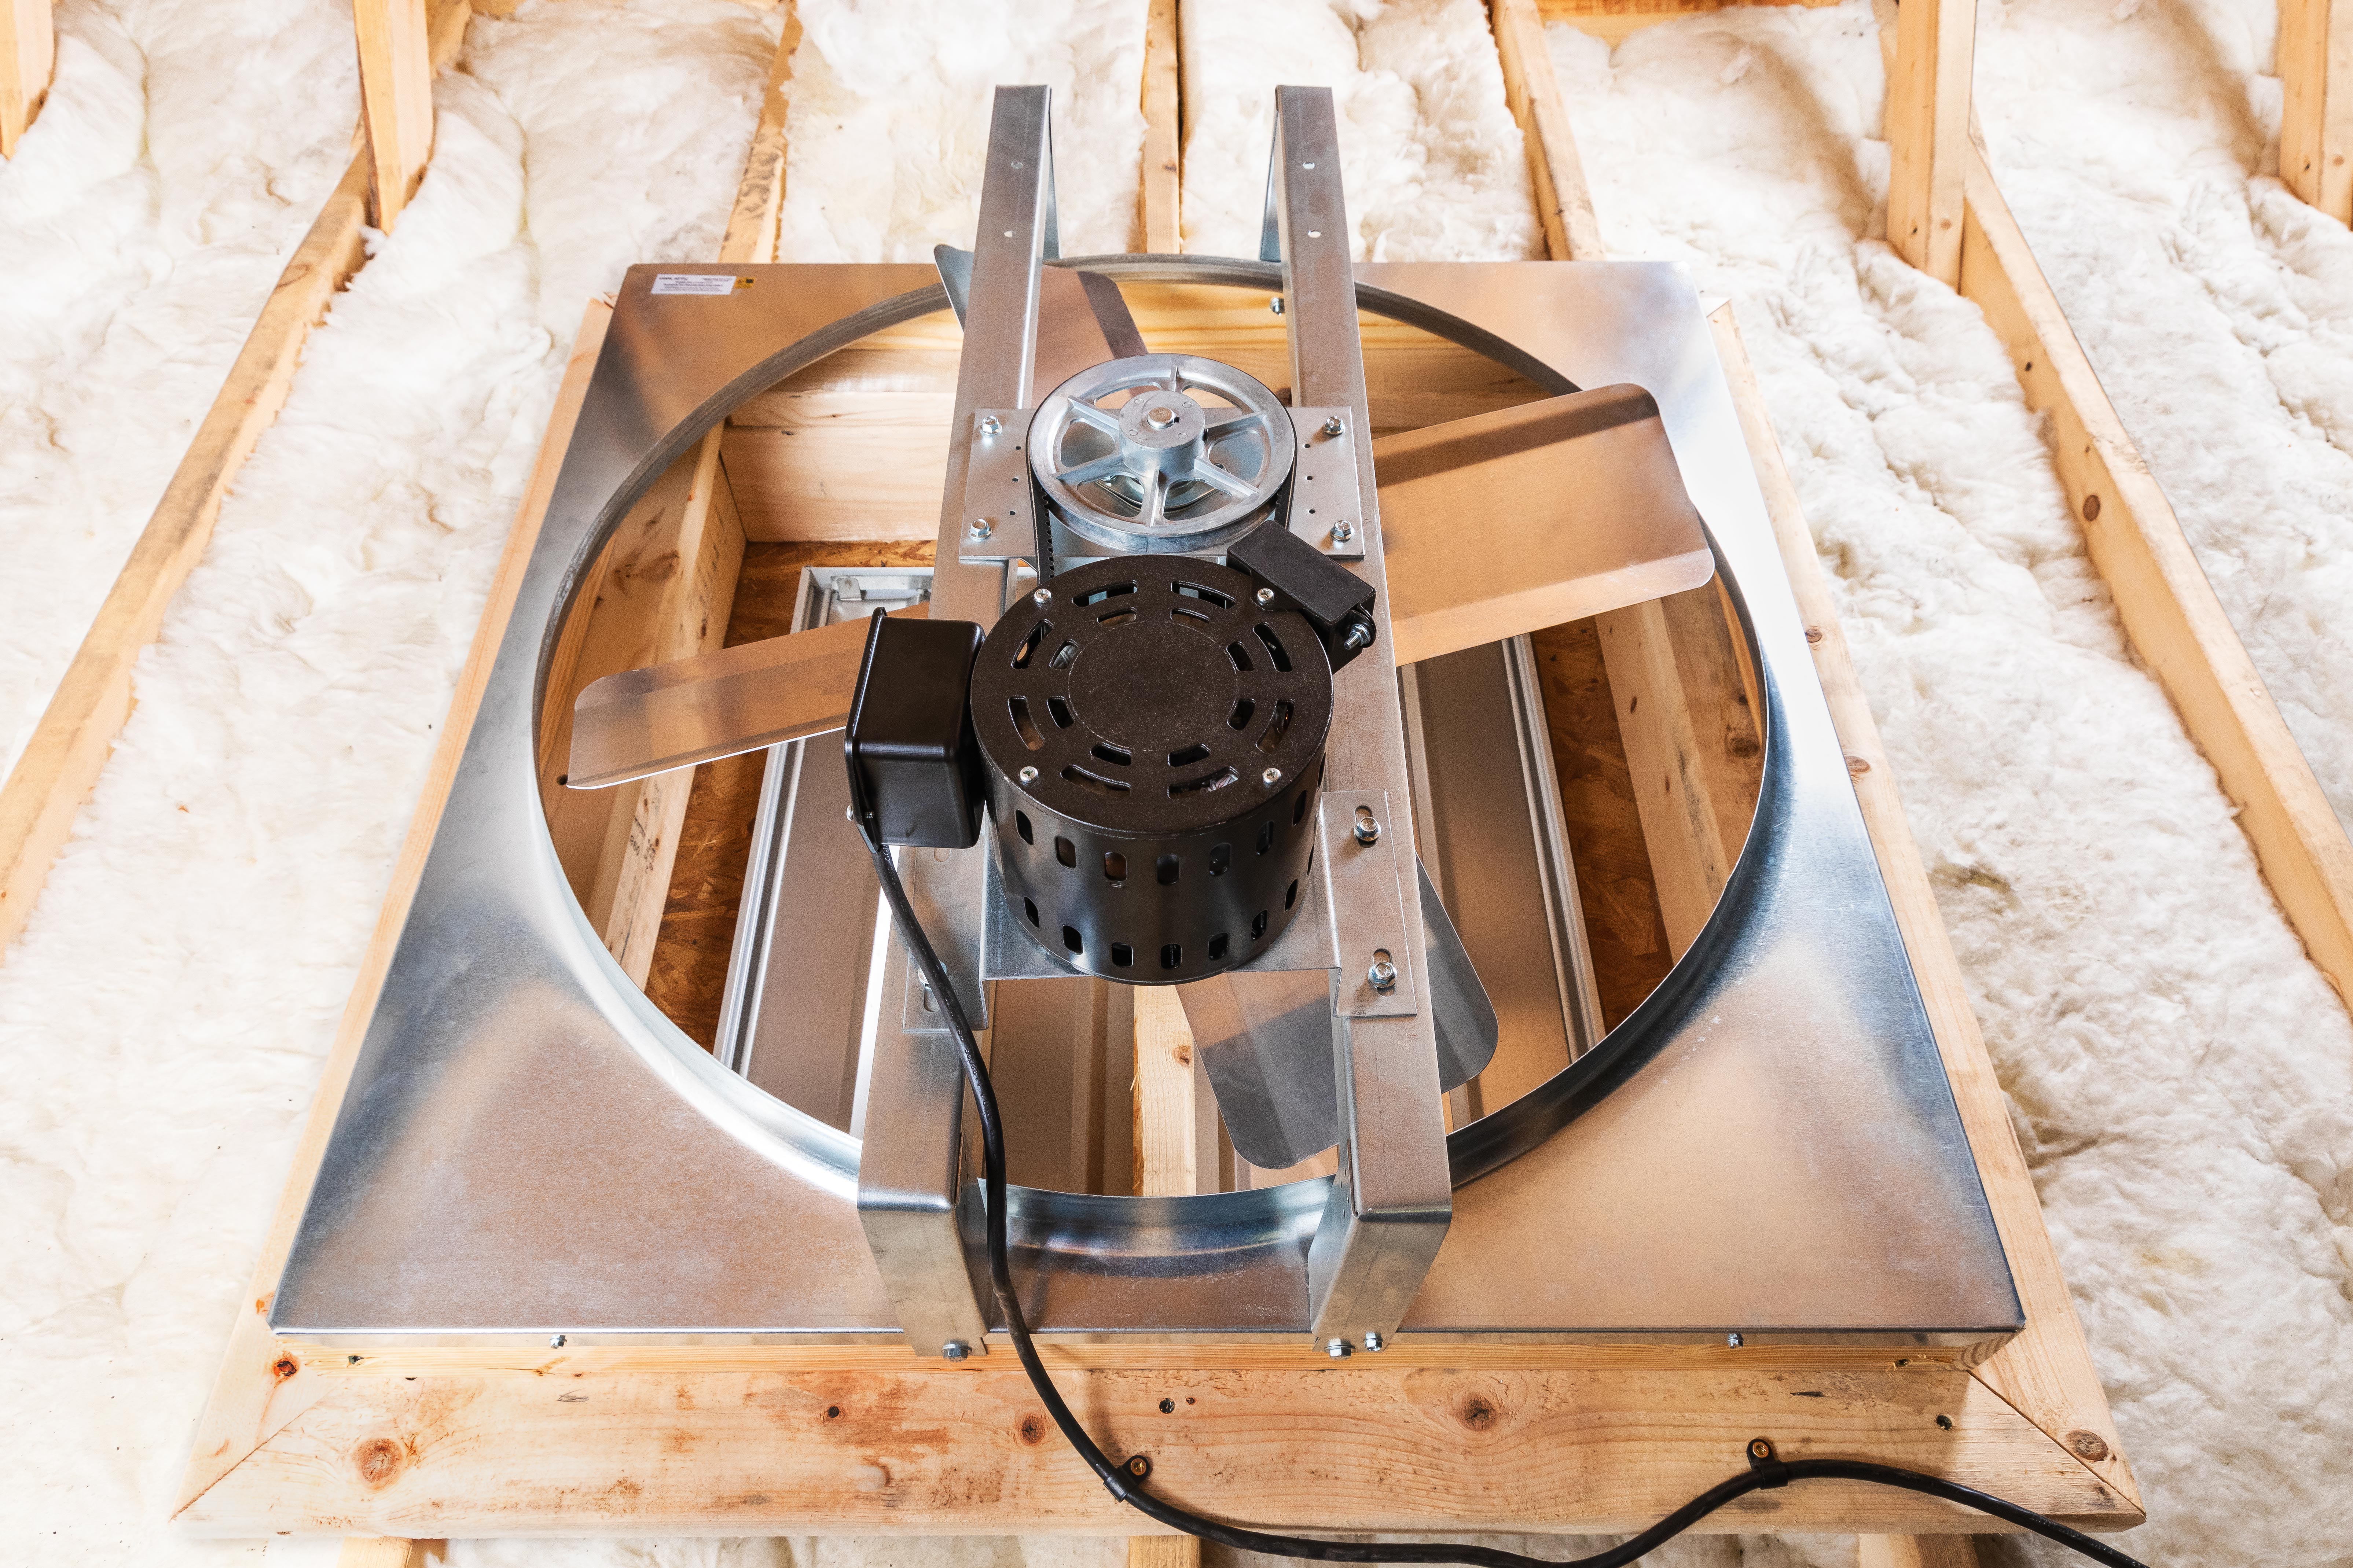
But first, let’s understand what a whole house fan is and how it works. Basically, a whole house fan is installed in the attic and draws cool air from outside, pushing out the warm air inside your home through the attic vents. It creates a powerful airflow, quickly cooling down your living space and providing excellent ventilation.
Now that you’re familiar with the concept, let’s dive into the installation process. But before starting any work, always remember to prioritize safety. Make sure to turn off the power supply and take necessary precautions to avoid any mishaps.
Key Takeaways:
- Enjoy cooler, fresher air and lower energy bills by strategically installing a whole house fan in your attic. Follow safety precautions, position the fan correctly, and test its functionality for optimal performance.
- By carefully installing and testing your whole house fan, you can create a healthier, more comfortable living environment while reducing energy consumption and cooling costs. Regular maintenance ensures long-term efficiency and benefits.
Read more: How To Install A Whole House Dehumidifier
Step 1: Gather the necessary tools and materials
Before you begin the installation process, you’ll need to gather the following tools and materials:
- Whole house fan
- Tape measure
- Pencil
- Screwdriver
- Power drill
- Saw
- Attic vent
- Duct tape
- Electrical wires
- Wire nuts
- Staple gun
- Ladder
- Protective gloves and goggles
Make sure you have all the tools and materials ready before you start the installation process, as it will help you complete the project smoothly and efficiently.
Once you have everything ready, you’re one step closer to enjoying cooler and fresher air in your home!
Step 2: Determine the suitable location for the whole house fan
The next step in installing a whole house fan is to determine the best location for it in your attic. The ideal location should be close to the center of your house and provide efficient airflow throughout all the rooms.
To find the suitable spot, follow these guidelines:
- Measure the dimensions of your whole house fan. This will help you determine how much space you need in the attic.
- Identify an area in the attic that has enough clearance for the fan’s size. Make sure there are no obstructions like beams or wiring that could interfere with its installation.
- Consider the proximity to the attic vents. The fan should be situated near the vents to ensure proper airflow and ventilation.
- If possible, choose a location that is away from bedrooms or living spaces to minimize noise disruption.
Once you’ve pinpointed the ideal location, mark it with a pencil for reference during the installation process. It’s important to take your time with this step to ensure that you choose the most efficient and effective location for your whole house fan.
By determining the suitable location, you’ll be able to optimize the airflow and cooling capabilities of your whole house fan, resulting in a more comfortable living environment.
Step 3: Measure and cut the required attic vent opening
Now that you’ve identified the suitable location for your whole house fan, it’s time to measure and cut the required opening in your attic for the vent.
Follow these steps to ensure an accurate and properly sized vent opening:
- Measure the dimensions of the attic vent that came with your whole house fan. It’s essential to have the exact measurements to avoid any unnecessary modifications.
- Locate the marked spot in the attic that you determined in the previous step as the ideal location for the fan.
- Using a tape measure, carefully measure the dimensions of the attic vent on the ceiling or the rafter where you will install it.
- Transfer those measurements to the attic and mark the area to be cut using a pencil.
- Wear protective gloves and safety goggles to ensure your safety while cutting the vent opening with a saw. Follow the marked lines and make clean, precise cuts.
- After cutting the opening for the vent, make sure to remove any excess debris or insulation to ensure proper airflow.
It’s crucial to take accurate measurements and make clean cuts, as a properly sized attic vent opening will ensure the optimal performance of your whole house fan.
With the vent opening cut, you’re one step closer to having a well-ventilated and comfortable home!
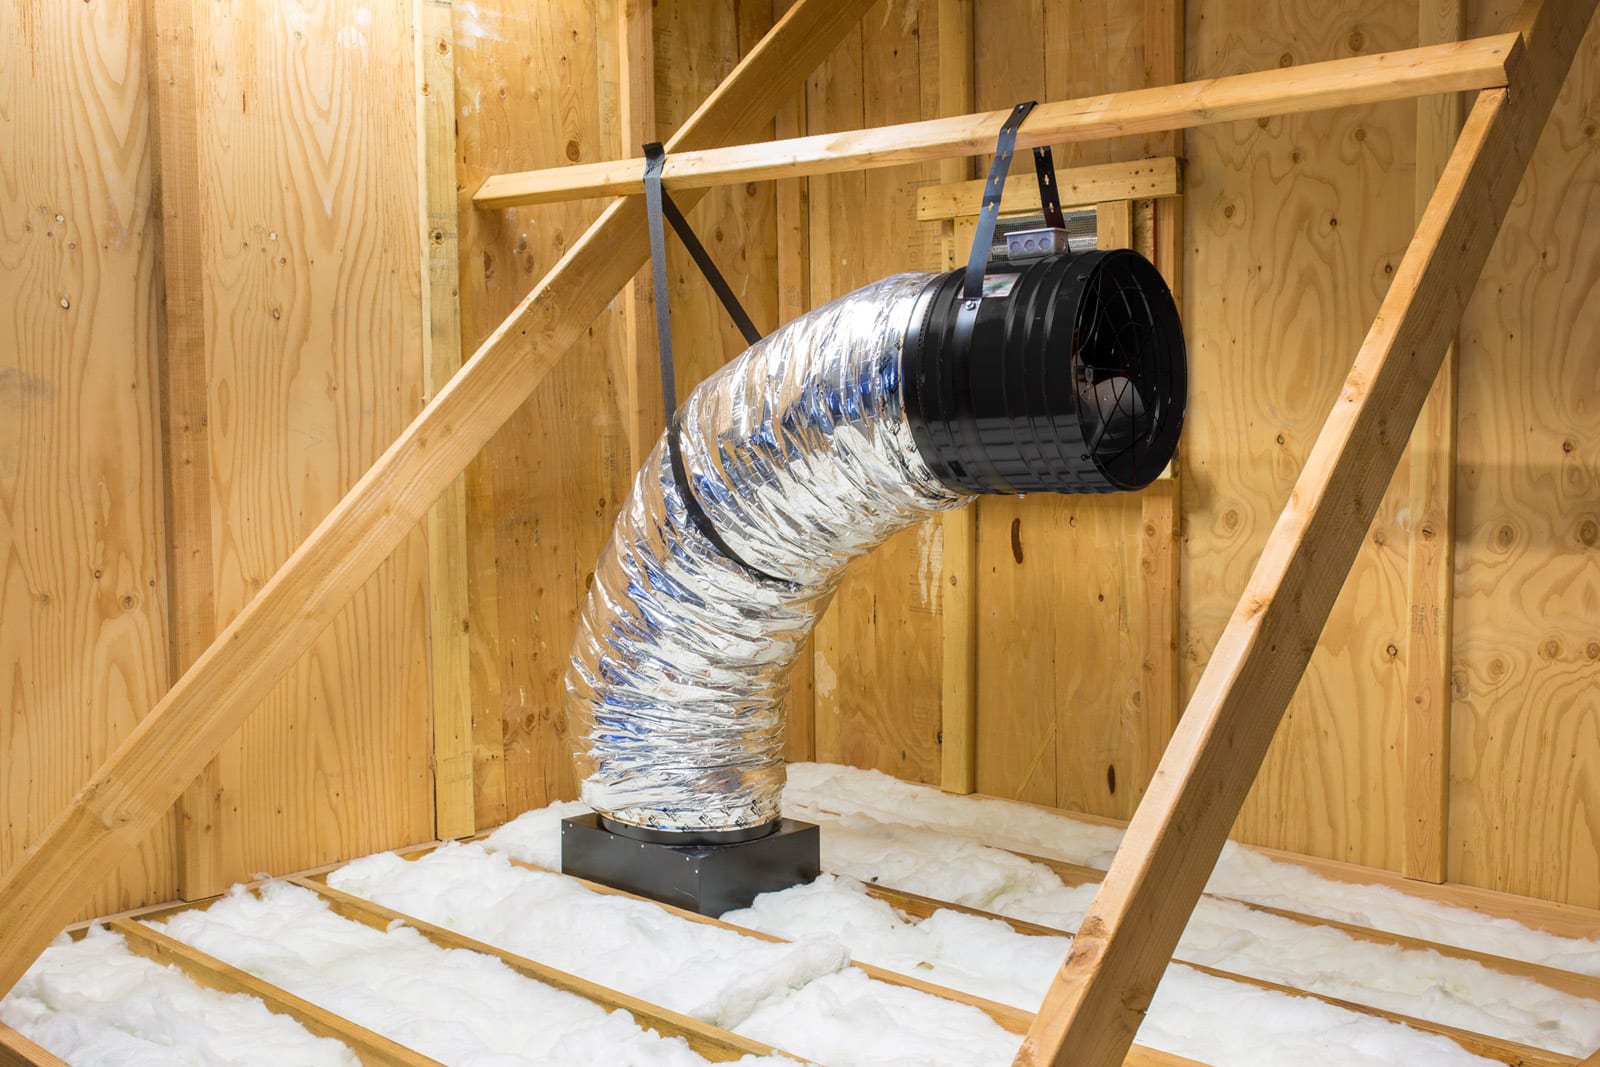
Step 4: Install the attic vent and secure it in place
With the attic vent opening cut, it’s time to install the vent and secure it in place. The vent is a crucial component of the whole house fan system as it allows proper airflow and ventilation.
Follow these steps to install and secure the attic vent:
- Take the attic vent that you previously measured and place it over the vent opening in the attic.
- Ensure that the vent aligns properly with the opening and that there are no gaps or misalignments.
- Secure the vent by using screws or nails through the provided screw holes, making sure it is firmly attached to the attic structure.
- If necessary, use duct tape or sealant to seal any gaps between the vent and the attic ceiling to prevent air leakage.
- Double-check the stability and tightness of the vent to ensure that it’s securely in place.
By properly installing and securing the attic vent, you ensure that the airflow from the whole house fan is directed efficiently and effectively throughout your home.
With the attic vent now securely installed, you’re ready to move on to the next step of the whole house fan installation process.
When installing a whole house fan, make sure to choose a location that allows for easy access to the attic for wiring and venting. This will make the installation process much smoother.
Step 5: Position the whole house fan in the attic
Now that the attic vent is securely in place, it’s time to position the whole house fan in the attic. This step involves carefully placing the fan unit in the previously determined location to maximize its effectiveness and airflow.
Follow these steps to position the whole house fan:
- Carry the whole house fan unit up to the attic. It’s essential to have someone assist you to ensure safe and secure handling.
- Align the fan unit with the attic vent opening you cut earlier. Slowly lower it into position, making sure it sits snugly against the opening.
- Ensure that the fan blades are facing downwards towards the living areas of your home. This orientation allows the fan to pull in cool air and expel warm air effectively.
- Check the positioning of the fan unit to ensure that it’s centered and balanced. This is crucial for proper operation and to avoid any unnecessary vibrations or noise.
- If necessary, adjust the positioning of the fan unit to achieve the desired balance and alignment with the attic vent opening.
By properly positioning the whole house fan in the attic, you can optimize its performance and ensure effective cooling and ventilation throughout your home.
With the fan unit in place, you’re now ready to proceed with the electrical wiring installation.
Step 6: Connect the electrical wiring to the fan
Now that the whole house fan is properly positioned in the attic, it’s time to connect the electrical wiring to ensure that it operates safely and efficiently. This step involves connecting the fan to a power source using the appropriate electrical wiring.
Follow these steps to connect the electrical wiring:
- Turn off the power supply to the area where you’ll be working. This is crucial to prevent any electrical accidents or injuries.
- Locate the electrical junction box near the fan unit. This is where the wiring connections will be made.
- Using wire cutters, remove the outer insulation on the electrical wires to expose the bare copper wire inside.
- Strip about half an inch of insulation off the ends of the wires.
- Connect the exposed copper wires from the fan unit to the corresponding wires from the electrical junction box. Secure the connections using wire nuts. The black wire connects to the black wire, the white wire connects to the white wire, and the green or copper wire connects to the grounding wire.
- After making the connections, gently tuck the wiring back into the electrical junction box.
- Secure the electrical junction box cover using screws.
- Turn the power supply back on and test the fan to ensure that it is operational.
It is essential to follow proper electrical wiring practices to ensure the safety and optimal functioning of your whole house fan.
With the electrical wiring connected, you’re now ready to move on to the next step in the installation process.
Step 7: Install the fan cover and secure it properly
With the electrical wiring in place, the next step is to install the fan cover and ensure it is securely fastened. The fan cover serves as a protective barrier, preventing any objects or debris from coming into contact with the fan blades while allowing proper airflow.
Follow these steps to install the fan cover:
- Ensure that the fan unit is switched off and disconnected from the power supply.
- Place the fan cover over the fan blades, ensuring that it aligns properly and covers the entire fan area.
- Use the provided screws or clips to secure the fan cover in place. Make sure the cover is tightly secured to ensure it doesn’t come loose during operation.
- Double-check the positioning and stability of the fan cover to ensure there are no gaps or loose parts.
- If necessary, use additional screws or fasteners to reinforce the fan cover and ensure enhanced security.
Proper installation and secure attachment of the fan cover are essential for safety and efficient operation of your whole house fan.
By following these steps, you can ensure that the fan cover is securely in place and ready to promote optimal airflow and ventilation throughout your home.
Now that the fan cover is installed, you’re ready to move on to the final step of the installation process.
Step 8: Test the whole house fan for proper functioning
After completing the installation of your whole house fan, it’s essential to test its proper functioning before relying on it for cooling and ventilation. Testing the fan ensures that all the components are working correctly and that there are no issues that need to be addressed.
Follow these steps to test the whole house fan:
- Ensure that the fan cover is securely in place and all connections are properly secured.
- Turn on the power supply to the fan unit.
- Switch on the fan from its control panel or wall switch.
- Observe the fan blades to ensure that they are rotating without any obstructions or unusual noises.
- Feel the airflow in different rooms of your home to determine if it is sufficient and circulating properly.
- Monitor the temperature and comfort level in your home to assess the effectiveness of the whole house fan.
- If you notice any issues, such as unusual noise or inadequate airflow, turn off the fan and investigate the problem further. It could be an indication of a faulty component or an installation error that needs to be addressed.
- If everything is functioning properly, congratulate yourself on successfully installing and testing your whole house fan!
Regularly testing your whole house fan will ensure that it remains in good working condition and provides effective cooling and ventilation when needed.
By following these steps and conducting the necessary tests, you can have peace of mind knowing that your whole house fan is working optimally and improving the air quality and comfort of your home.
Read more: How To Install A Whole House Humidifier
Conclusion
Congratulations on successfully installing your whole house fan! By following the steps outlined in this guide, you have taken a significant step towards improving the airflow, cooling, and ventilation in your home. A properly installed whole house fan can help reduce energy consumption, lower cooling costs, and provide a more comfortable living environment.
Throughout the installation process, we covered everything from gathering the necessary tools and materials to testing the fan for proper functioning. Ensuring safety and accuracy at every step is crucial, so be sure to follow all precautions and guidelines provided.
Remember to position the fan in the attic strategically, install the attic vent correctly, connect the electrical wiring properly, and secure the fan cover tightly. Testing the fan at the end is vital to ensure its optimal performance before relying on it for cooling and ventilation.
With your whole house fan up and running, you can look forward to enjoying fresh, cool air circulating throughout your home, promoting a healthier and more comfortable living environment.
Regular maintenance and cleaning of your whole house fan will help maintain its efficiency and longevity. We recommend inspecting the fan and its components periodically to ensure they are functioning optimally.
Thank you for choosing our comprehensive guide on how to install a whole house fan. We hope it has provided you with the necessary knowledge and confidence to tackle this project effectively. Stay cool and enjoy the benefits of your newly installed whole house fan!
Frequently Asked Questions about How To Install A Whole House Fan
Was this page helpful?
At Storables.com, we guarantee accurate and reliable information. Our content, validated by Expert Board Contributors, is crafted following stringent Editorial Policies. We're committed to providing you with well-researched, expert-backed insights for all your informational needs.


0 thoughts on “How To Install A Whole House Fan”