Articles
How To Install A Whole House Dehumidifier
Modified: August 17, 2024
Learn how to install a whole house dehumidifier with these informative articles. Find step-by-step guides and expert tips to keep your home comfortable and humidity-free.
(Many of the links in this article redirect to a specific reviewed product. Your purchase of these products through affiliate links helps to generate commission for Storables.com, at no extra cost. Learn more)
Introduction
Excess humidity in your home can lead to a variety of problems, including the growth of mold and mildew, musty odors, and even damage to your property. To combat these issues, many homeowners opt to install a whole house dehumidifier. A whole house dehumidifier is a comprehensive solution that regulates the moisture levels throughout your entire home, providing a more comfortable and healthier living environment.
In this article, we will guide you through the step-by-step process of installing a whole house dehumidifier. Whether you’re experiencing high humidity levels in your basement, crawl space, or throughout your entire home, this guide will help you understand the key considerations and tasks involved in installing a dehumidifier.
Before diving into the installation process, it’s important to note that while installing a whole house dehumidifier can be a DIY project for some, it may require the expertise of a professional HVAC technician. If you’re not comfortable working with electrical wiring or HVAC systems, it’s always recommended to seek professional help to ensure a safe and efficient installation.
Now let’s get started with the first step – assessing your home’s humidity levels.
Key Takeaways:
- Properly assessing your home’s humidity levels and choosing the right whole house dehumidifier based on capacity, energy efficiency, additional features, noise level, and warranty are crucial steps for a successful installation.
- Ensuring safety by gathering the necessary tools, shutting off the power supply, and following manufacturer’s instructions for installation, electrical wiring, testing, and maintenance is essential for a functional and efficient whole house dehumidifier.
Read also: 10 Best Whole House Dehumidifier for 2025
Step 1: Assessing Your Home’s Humidity Levels
The first step in installing a whole house dehumidifier is assessing the current humidity levels in your home. This will help you determine the appropriate size and capacity of the dehumidifier needed to effectively control the moisture levels.
There are a few different ways to measure humidity in your home. One common method is to use a hygrometer, which is a device specifically designed to measure relative humidity. You can find hygrometers at most hardware stores or online. Place the hygrometer in different areas of your home, such as the basement, bedrooms, or living room, to get an accurate reading of the humidity levels.
Another method is to look for common signs of high humidity, such as condensation on windows, musty odors, or the presence of mold and mildew. These indicators can give you a general idea of the humidity levels in certain areas of your home.
Once you have gathered sufficient information about the humidity levels in your home, you can use the following general guidelines to assess the severity:
- 30-50% humidity: Considered an ideal range for indoor comfort and health.
- 50-60% humidity: Slightly elevated humidity levels that may result in some discomfort, such as feeling clammy or sticky.
- Above 60% humidity: High humidity levels that can lead to mold growth, musty odors, and potential health issues.
If your home’s humidity levels consistently fall within the elevated or high range, a whole house dehumidifier may be necessary to control and maintain optimal humidity levels.
Once you have determined that a whole house dehumidifier is needed, you can move on to the next step – choosing the right dehumidifier for your home.
Step 2: Choosing the Right Whole House Dehumidifier
Choosing the right whole house dehumidifier is crucial for ensuring efficient and effective moisture control in your home. There are a few key factors to consider when selecting the appropriate dehumidifier:
1. Capacity: The capacity of a dehumidifier is measured in pints per day, indicating the amount of moisture it can remove from the air. Consider the size of your home and the severity of the humidity issue to determine the suitable capacity. A larger home or a highly humid area may require a higher capacity dehumidifier.
2. Energy Efficiency: Look for dehumidifiers with Energy Star certification, as these models are designed to be energy-efficient and can help you save on utility bills in the long run.
3. Additional Features: Consider any additional features that may enhance your dehumidifier’s performance and convenience. This may include built-in humidity sensors, programmable settings, digital displays, and automatic shut-off when the desired humidity level is reached.
4. Noise Level: Take into account the noise level of the dehumidifier, especially if you plan to install it in a living space. Look for models with lower decibel ratings, ensuring quiet operation.
5. Warranty: Check the warranty offered by the manufacturer to protect your investment and ensure support in case of any issues.
Research different brands and models, read customer reviews, and compare specifications to make an informed decision. It’s also advisable to consult with a professional HVAC technician or seek recommendations from experts in the field.
Once you have chosen the appropriate whole house dehumidifier, you can move on to the next step – gathering the necessary tools and equipment for installation.
Step 3: Gathering the Necessary Tools and Equipment
Before you begin the installation process of your whole house dehumidifier, it’s important to gather all the necessary tools and equipment. Having the right tools on hand will ensure a smooth and efficient installation. Here are the essential tools and equipment you will need:
1. Power Drill: A power drill with appropriate drill bits will be needed for mounting brackets or making holes for wiring.
2. Screwdriver: Both Phillips and flat-head screwdrivers may be needed for various components of the dehumidifier installation.
3. Measuring Tape: A measuring tape will help you accurately determine the dimensions and placement of the dehumidifier unit.
4. Level: A level is essential for ensuring the dehumidifier unit is installed straight and level on the mounting brackets.
5. Wire Cutters/Strippers: You will need wire cutters/strippers to cut and strip wires for proper electrical connections.
6. Electrical Tape: Electrical tape is used to insulate and secure electrical connections.
7. Fasteners: Depending on the specific installation requirements, you may need screws, bolts, or other fasteners to secure the dehumidifier unit and mounting brackets.
8. Electrical Wiring: Ensure you have the appropriate electrical wiring, connectors, and junction boxes needed for the electrical connections. It’s important to consult local electrical codes and regulations or seek professional help for any electrical work.
9. Sealant: Depending on the installation location, you may need sealant to seal any gaps or openings to prevent air leakage.
10. Protective Gear: It’s always important to prioritize safety during any installation project. Wear safety goggles, gloves, and appropriate clothing to protect yourself from potential hazards.
Before starting the installation process, double-check that you have all the necessary tools and equipment readily available. This will save you time and ensure a smooth installation process.
Now that you have gathered the necessary tools and equipment, you’re ready to move on to the next step – shutting off the power supply before beginning the installation.
Step 4: Shutting Off the Power Supply
Before you begin the installation of your whole house dehumidifier, it’s essential to shut off the power supply to ensure your safety. Working with live electrical wires can be hazardous, so taking proper precautions is crucial. Follow these steps to shut off the power supply:
1. Locate the Circuit Breaker Panel: The circuit breaker panel is usually located in the basement, garage, or utility room. It contains the switches or fuses that control the electrical circuits in your home.
2. Identify the Correct Circuit: Locate the circuit that supplies power to the area where the dehumidifier will be installed. This may require checking the electrical blueprints of your home or systematically turning off each switch until you find the correct one.
3. Switch Off the Circuit Breaker: Once you have identified the correct circuit, switch off the corresponding breaker by flipping it to the “off” position. If you have fuses, simply remove the fuse for that circuit.
4. Double-Check the Power: To ensure that the power is completely shut off, test the area where the dehumidifier will be installed with a non-contact voltage tester. This device will alert you if there is still any electrical current present.
5. Secure the Power Panel: Once you have confirmed that the power supply is turned off, secure the circuit breaker panel by covering it with an electrical panel cover or by locking it, if applicable. This will prevent anyone from accidentally turning on the power while you are working.
Remember that safety should always be your top priority when working with electrical systems. If you are unsure about any aspect of shutting off the power or don’t feel confident in your abilities, it is recommended to seek the assistance of a qualified electrician.
Now that you have shut off the power supply, you can proceed to the next step – locating the ideal installation spot for your whole house dehumidifier.
Read more: How To Install A Whole House Fan
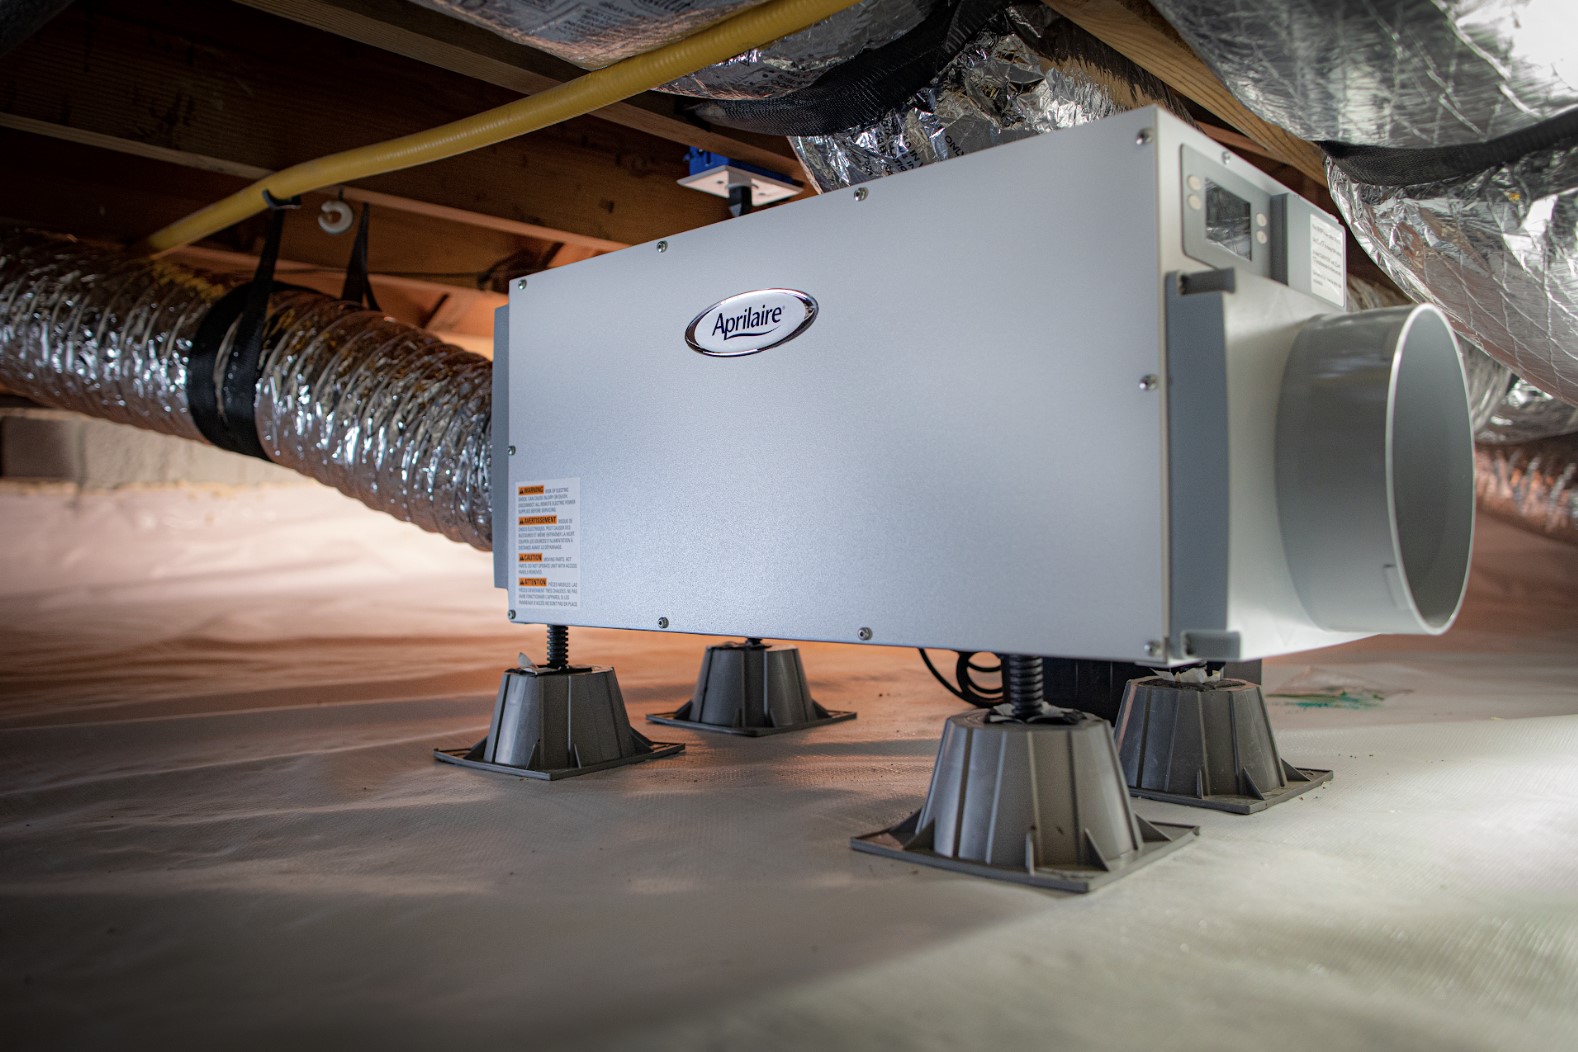
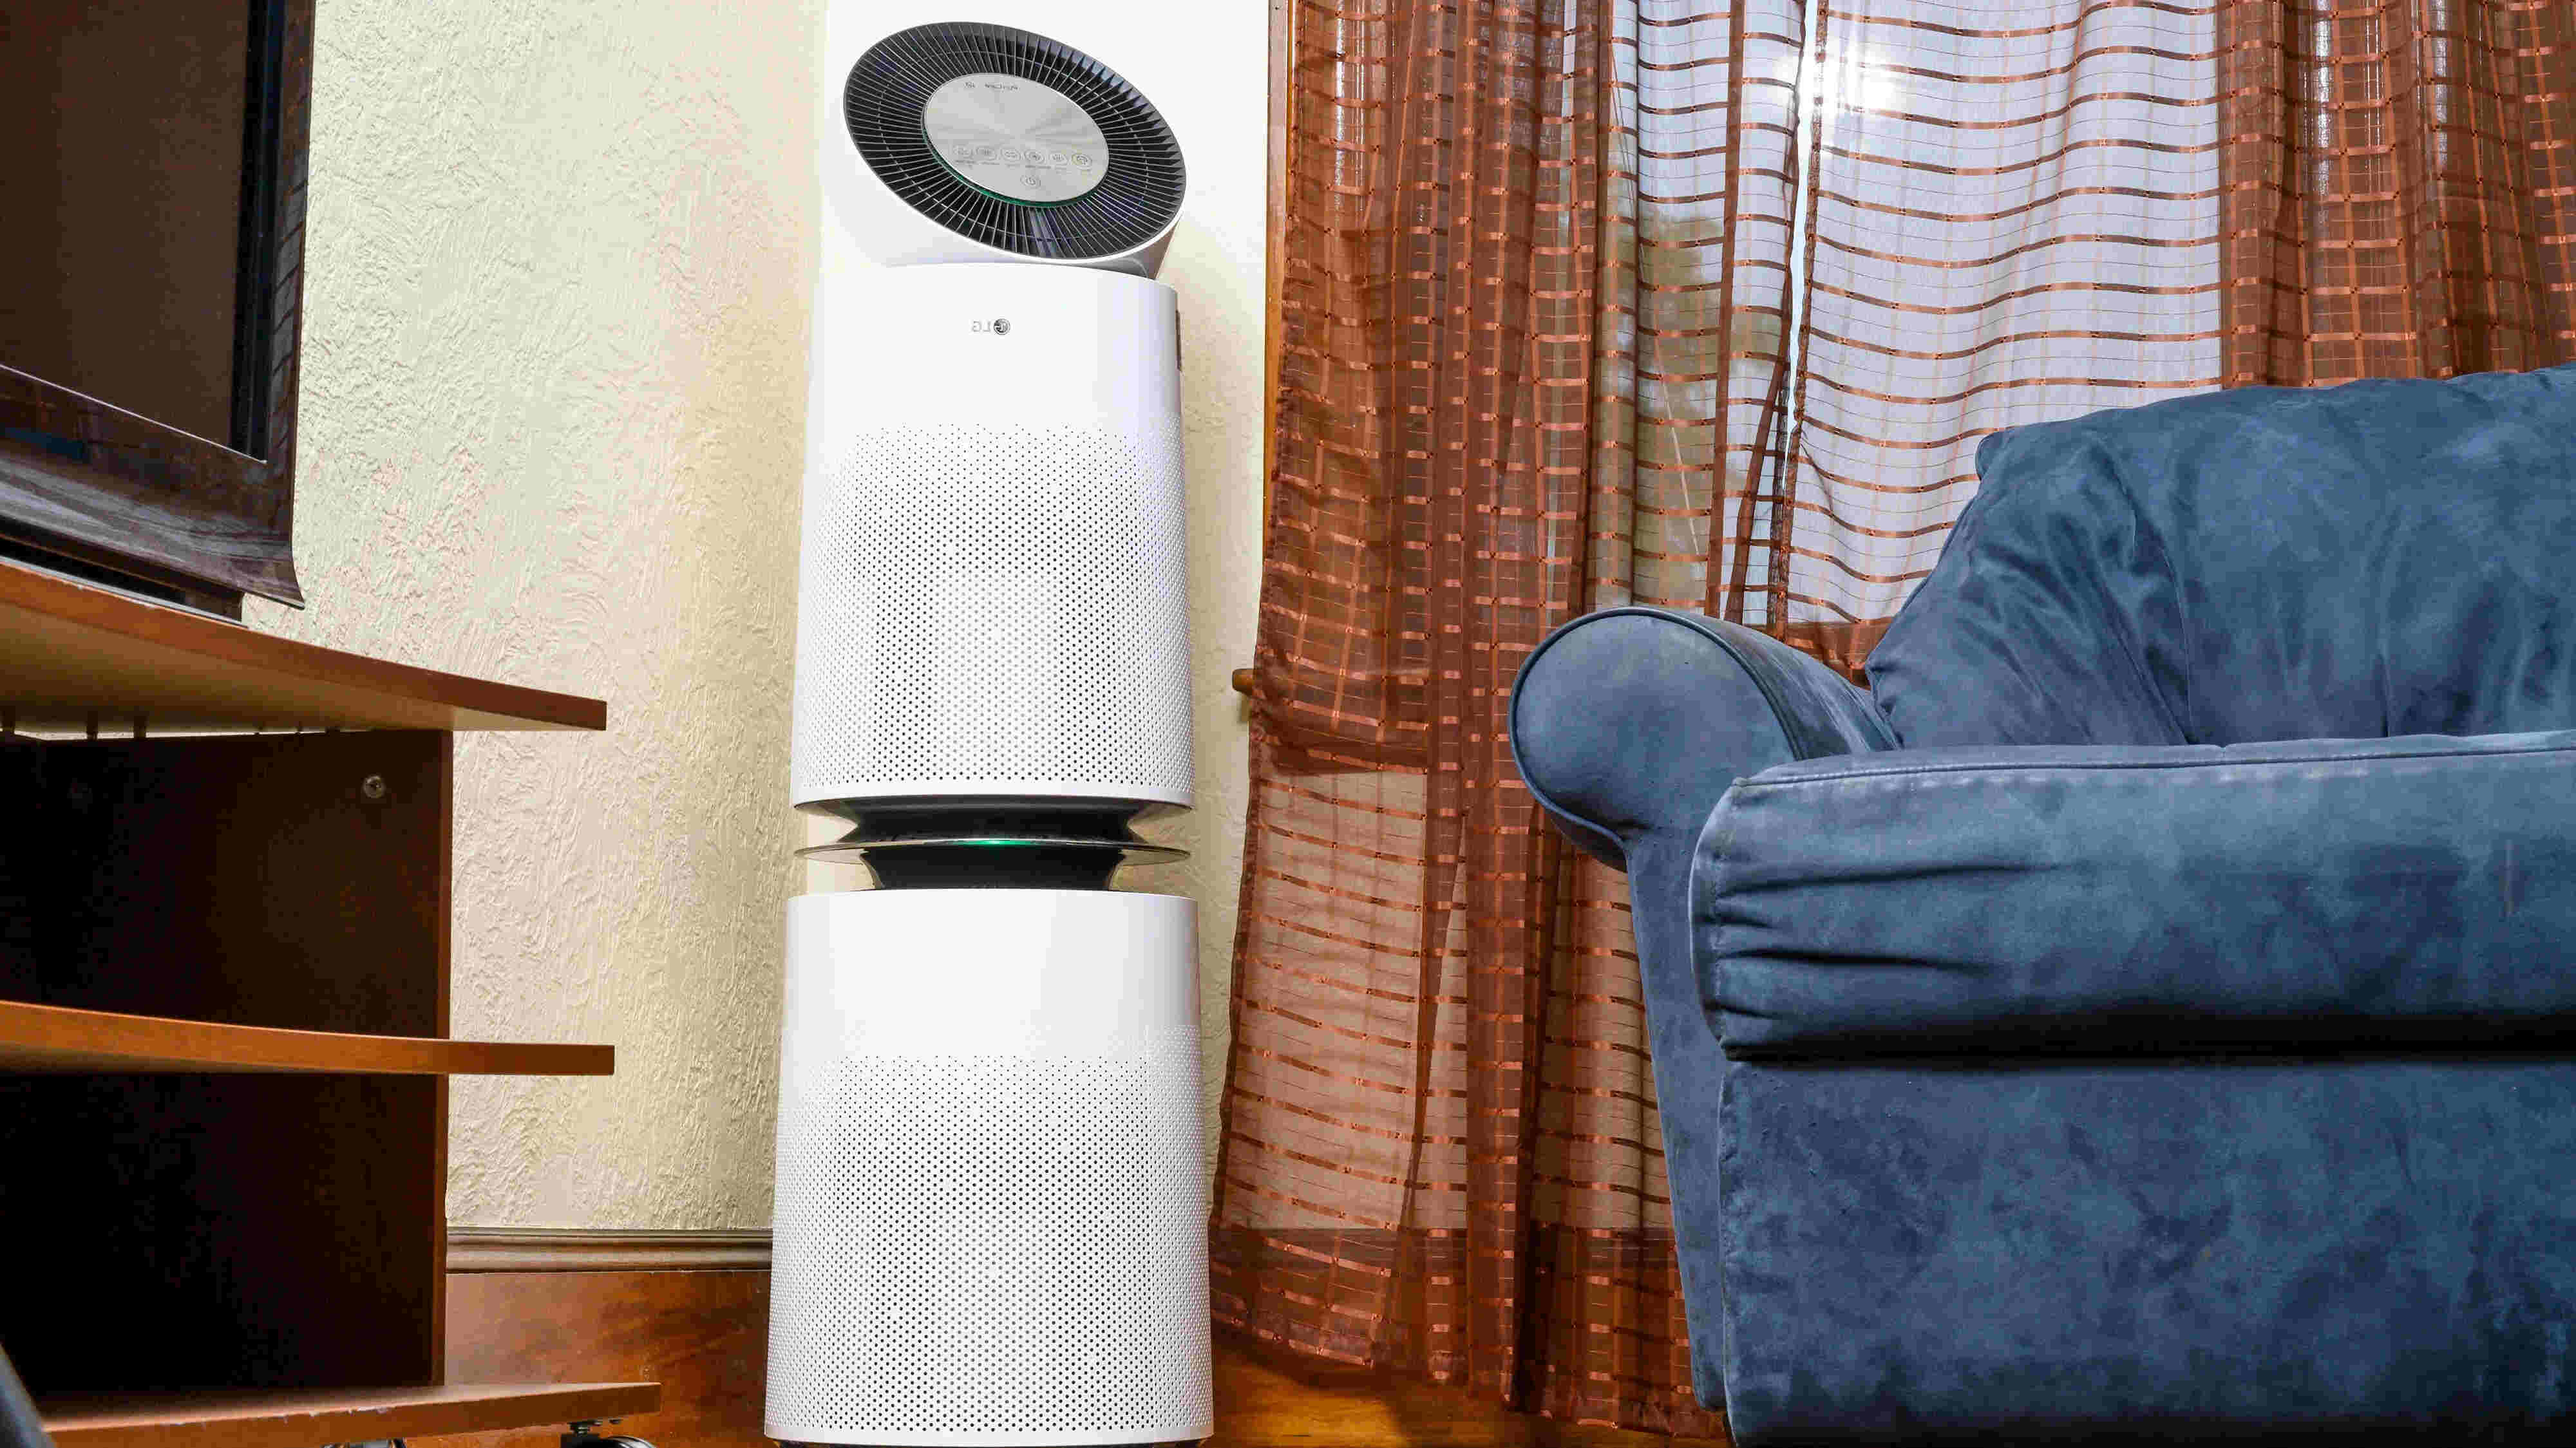
Step 5: Locating the Ideal Installation Spot
Choosing the right location to install your whole house dehumidifier is crucial for its optimal performance. The ideal spot should allow for efficient airflow, accessibility for maintenance, and minimal disruption to the aesthetics of your home. Follow these guidelines to help you find the perfect installation spot:
1. Central Location: Ideally, the dehumidifier should be installed in a central location in your home to ensure even distribution of moisture control throughout all areas. This could be in a utility room, basement, or even in a crawlspace.
2. Proximity to Moisture Source: If you’re experiencing high humidity in specific areas, such as a damp basement or crawl space, consider installing the dehumidifier closest to the source of the moisture. This will allow for better control and faster moisture removal in those areas.
3. Adequate Space: Ensure that the chosen location has sufficient space to accommodate the dehumidifier unit, including its dimensions and any necessary clearance for proper airflow and maintenance. Refer to the manufacturer’s guidelines for specific space requirements.
4. Avoid Obstructions: Keep the installation spot clear of any obstructions that may impede the airflow, such as furniture, appliances, or clutter. Obstructions can hinder the dehumidifier’s efficiency and restrict its ability to control moisture effectively.
5. Avoid Direct Sunlight: Install the dehumidifier away from direct sunlight, as excessive heat can affect its performance and energy efficiency.
6. Accessibility: Ensure that the chosen spot provides easy accessibility for routine maintenance tasks, such as cleaning or replacing filters. This will help you maintain the dehumidifier’s performance and prolong its lifespan.
7. Noise Considerations: Take into account the noise level of the dehumidifier and its proximity to living spaces. If noise is a concern, choose an installation spot away from bedrooms or areas where excessive noise may disrupt everyday activities.
By considering these guidelines, you can select an installation spot that maximizes the effectiveness of your whole house dehumidifier while maintaining the comfort and functionality of your living space.
Now that you have identified the ideal location, proceed to the next step – preparing the installation area.
When installing a whole house dehumidifier, make sure to choose a location near the HVAC system for easy installation and optimal air circulation. Also, consider hiring a professional for the installation to ensure it is done correctly.
Step 6: Preparing the Installation Area
Before you begin installing your whole house dehumidifier, it’s important to properly prepare the installation area. This will ensure a smooth and successful installation process. Follow these steps to prepare the area:
1. Clean the Area: Thoroughly clean the installation area, removing any dust, dirt, or debris that may interfere with the dehumidifier’s operation. This will also help maintain good air quality and prevent the circulation of contaminants.
2. Ensure Proper Airflow: Check for any obstructions or blockages that may impede the airflow around the dehumidifier. Clear away any furniture, boxes, or other items that may hinder the airflow and obstruct its performance.
3. Check for Moisture Issues: Inspect the area for any signs of moisture issues, such as leaks or excessive condensation. Address and resolve these issues before proceeding with the installation. It’s important to fix any existing moisture problems to ensure the dehumidifier operates effectively.
4. Consider Drainage: Determine the best method of drainage for your installation area. Most whole house dehumidifiers come with a built-in condensate pump or a gravity drain option. Ensure that the chosen drainage method is feasible and meets the manufacturer’s recommendations.
5. Mounting Surface: If you’re installing the dehumidifier on a wall or ceiling, make sure the mounting surface is sturdy and can support the weight of the unit. Use appropriate hardware and follow the manufacturer’s instructions for proper mounting.
6. Seal Air Leaks: Inspect the installation area for any gaps, cracks, or openings that may allow air leakage. Use sealant or weatherstripping to seal these openings, ensuring that the dehumidifier operates efficiently and prevents the entry of outside air.
7. Read the Manufacturer’s Instructions: Familiarize yourself with the specific installation requirements and recommendations provided by the manufacturer. Each dehumidifier may have unique instructions and guidelines that should be followed for optimal performance and safety.
By properly preparing the installation area, you set a solid foundation for a successful installation and ensure the optimal functioning of your whole house dehumidifier.
Now that the installation area is ready, proceed to the next step – installing the dehumidifier unit.
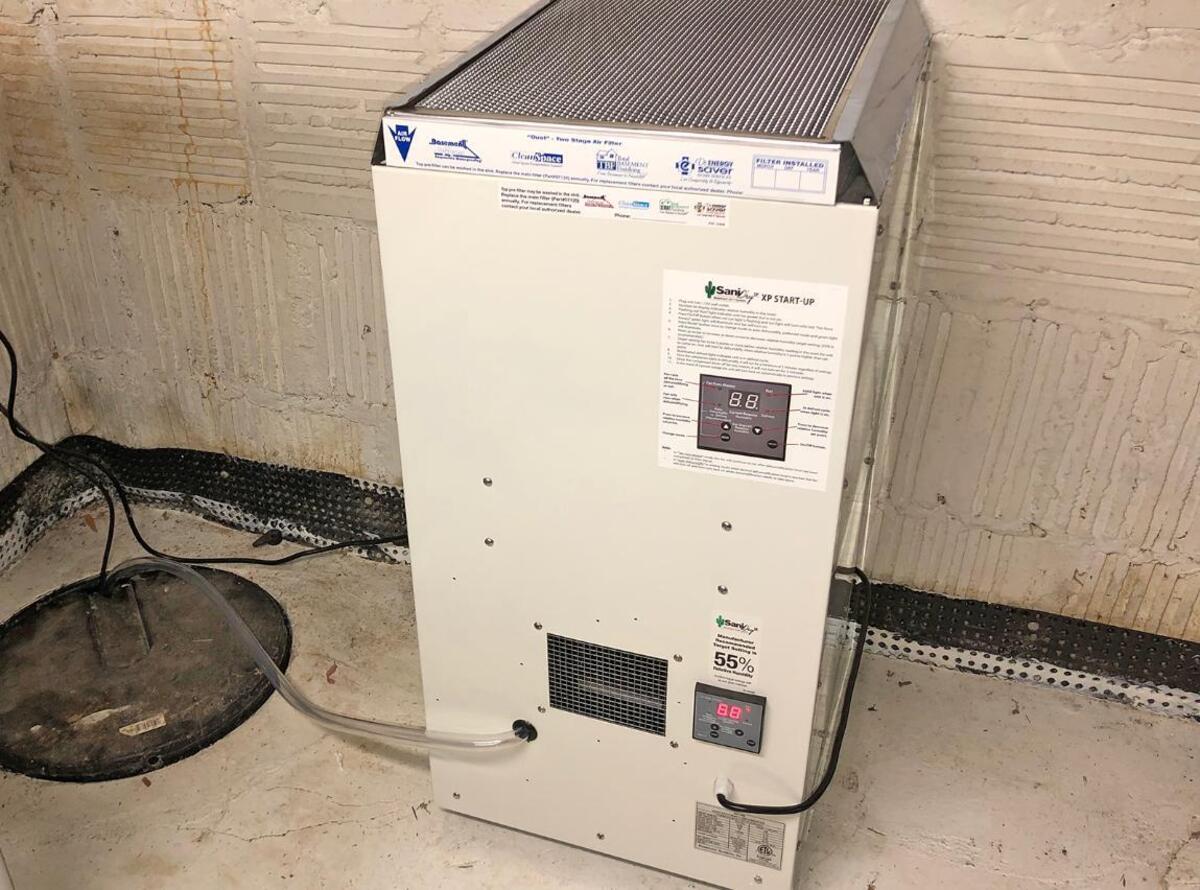
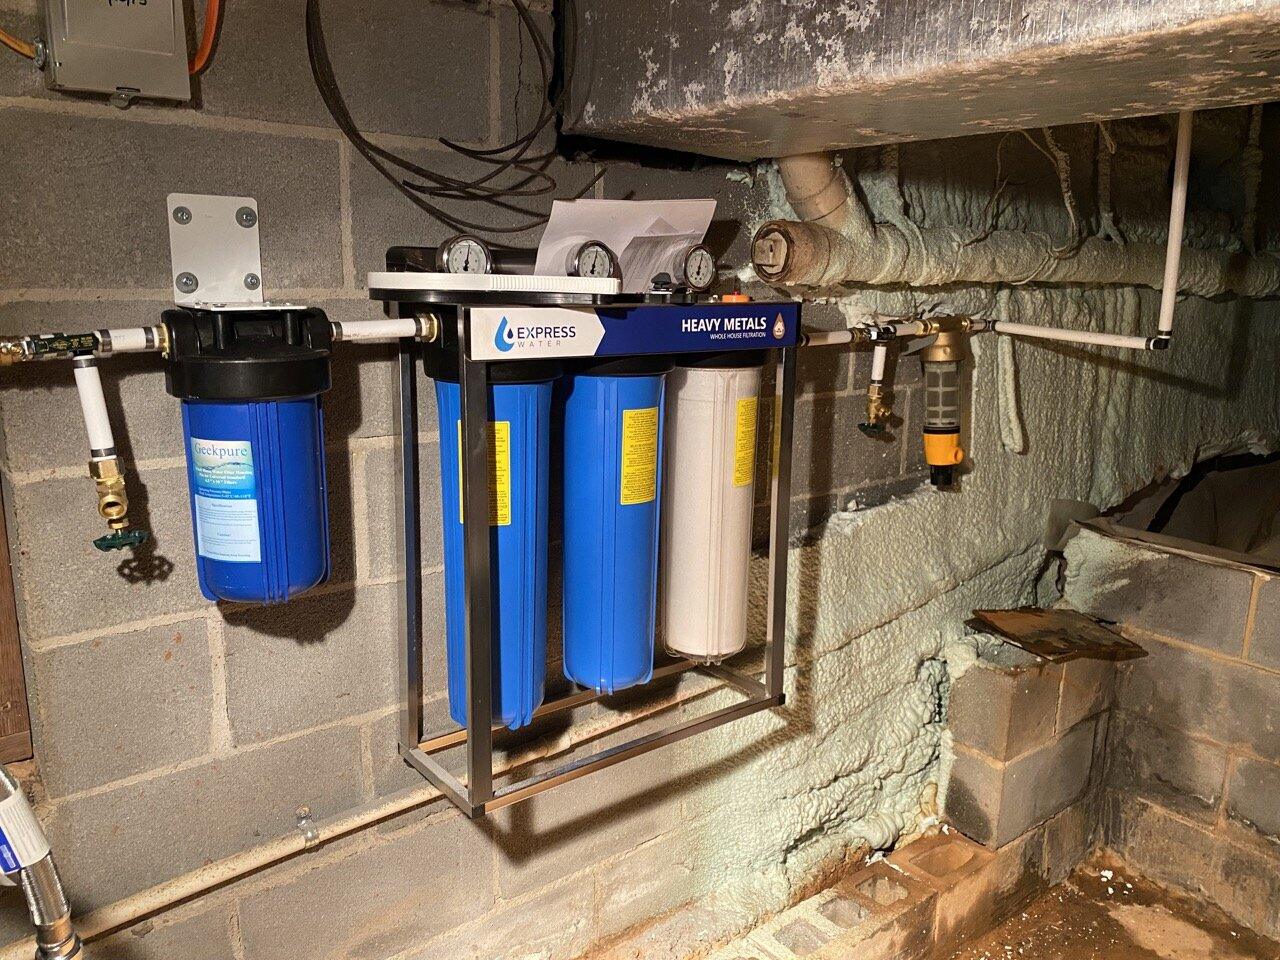
Step 7: Installing the Dehumidifier Unit
Now that you have prepared the installation area, it’s time to proceed with installing the whole house dehumidifier unit. Follow these steps to ensure a proper installation:
1. Refer to the Manufacturer’s Instructions: Carefully read the manufacturer’s instructions that came with your dehumidifier. These instructions will provide specific guidance and steps for your particular model.
2. Mounting the Unit: If your dehumidifier requires mounting, follow the manufacturer’s recommendations for installing the unit on the chosen mounting surface or location. Use appropriate hardware and ensure the unit is securely attached to prevent any accidents or damage.
3. Secure Electrical Connections: If your dehumidifier requires electrical connections, refer to the manufacturer’s instructions and local electrical codes. Follow the appropriate procedures for safely connecting the unit to the power supply. Use wire connectors and electrical tape to secure the connections and prevent any electrical hazards.
4. Attach Drainage System: If your dehumidifier has a built-in condensate pump or requires a drainage system, ensure it is properly connected or installed according to the manufacturer’s instructions. This will allow the unit to effectively remove moisture from the air and prevent water damage.
5. Seal Openings: Inspect the unit and its connections for any openings or gaps. Use sealant or appropriate sealing materials to seal any potential air leaks. This will ensure the optimal operation of the dehumidifier and prevent the introduction of outside air.
6. Double-Check Installation: Once the unit is installed, double-check all the connections, mounting, and sealing to ensure everything is secure and properly in place. Take a few moments to inspect the surrounding area for any signs of damage or potential issues.
7. Follow Safety Precautions: Always prioritize safety during the installation process. If you are unsure about any aspect of the installation or don’t feel confident in your abilities, it is recommended to seek professional assistance.
By following these steps and referring to the manufacturer’s instructions, you can successfully install your whole house dehumidifier unit. Once the unit is installed, you can move on to the next step – connecting the electrical wiring.
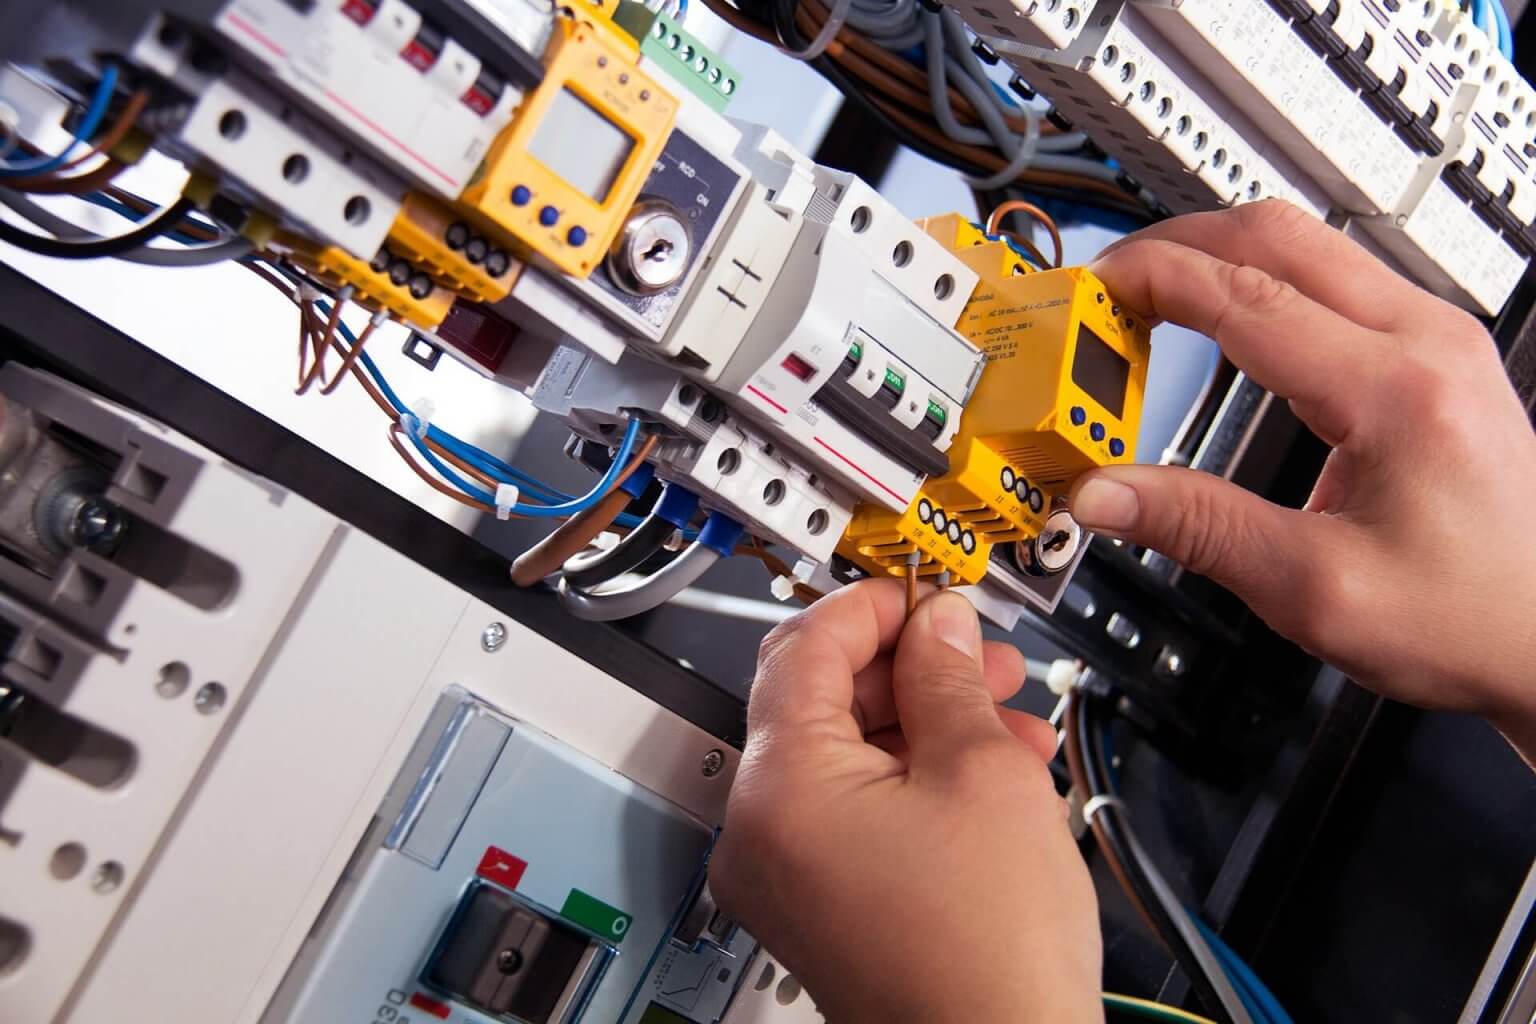
Step 8: Connecting the Electrical Wiring
Once the whole house dehumidifier unit is properly installed, the next step is to connect the electrical wiring. Follow these steps to ensure safe and proper electrical connections:
1. Refer to the Manufacturer’s Instructions: It’s crucial to read and understand the manufacturer’s instructions for connecting the electrical wiring. Each dehumidifier may have specific requirements and guidelines that need to be followed.
2. Turn Off Power: Before handling any electrical components, ensure that the power supply to the area is completely shut off. This is for your safety and to prevent any electrical accidents.
3. Remove the Electrical Cover: Locate the electrical access panel or cover on the dehumidifier unit. Use a screwdriver to remove the cover and expose the wiring terminals.
4. Prepare and Strip the Wires: If necessary, use wire cutters/strippers to properly prepare the electrical wires by removing insulation from the ends. Follow the manufacturer’s instructions for the recommended wire size and stripping length.
5. Identify the Wiring Terminals: Inside the electrical access panel, you will find wiring terminals labeled for the specific connections. These labels may be different depending on the brand and model of your dehumidifier. Consult the manufacturer’s instructions or wiring diagram for guidance.
6. Connect the Wires: Match the appropriate wires with their corresponding terminals. Typically, you will have a hot (black) wire, a neutral (white) wire, and a ground (green or bare copper) wire. Make sure to connect each wire to the correct terminal, following the specified color codes.
7. Secure the Connections: Once the wires are connected, use wire connectors or terminal screws to secure the electrical connections. Double-check that the connections are tight and properly fastened to prevent any loose or exposed wires.
8. Replace the Electrical Cover: After confirming that the electrical connections are secure, reattach the electrical access panel or cover on the dehumidifier unit. Make sure it is properly aligned and securely fastened.
9. Turn On Power and Test: Once the electrical connections are completed and the cover is in place, you can turn the power supply back on. Test the dehumidifier to ensure it powers up correctly and operates as intended.
It’s important to note that electrical work should be done in compliance with local electrical codes and regulations. If you are uncertain about any aspect of the electrical connection or lack the necessary knowledge and skills, it is advisable to consult a professional electrician for assistance.
With the electrical wiring properly connected, you can move on to the next step – testing the whole house dehumidifier.
Read more: How To Install A Whole House Humidifier
Step 9: Testing the Dehumidifier
After completing the installation and electrical connections, it’s crucial to test the whole house dehumidifier to ensure it is working correctly. Follow these steps to properly test your dehumidifier:
1. Turn on the Power: Ensure that the power supply to the dehumidifier is turned on and that the electrical connections are secure.
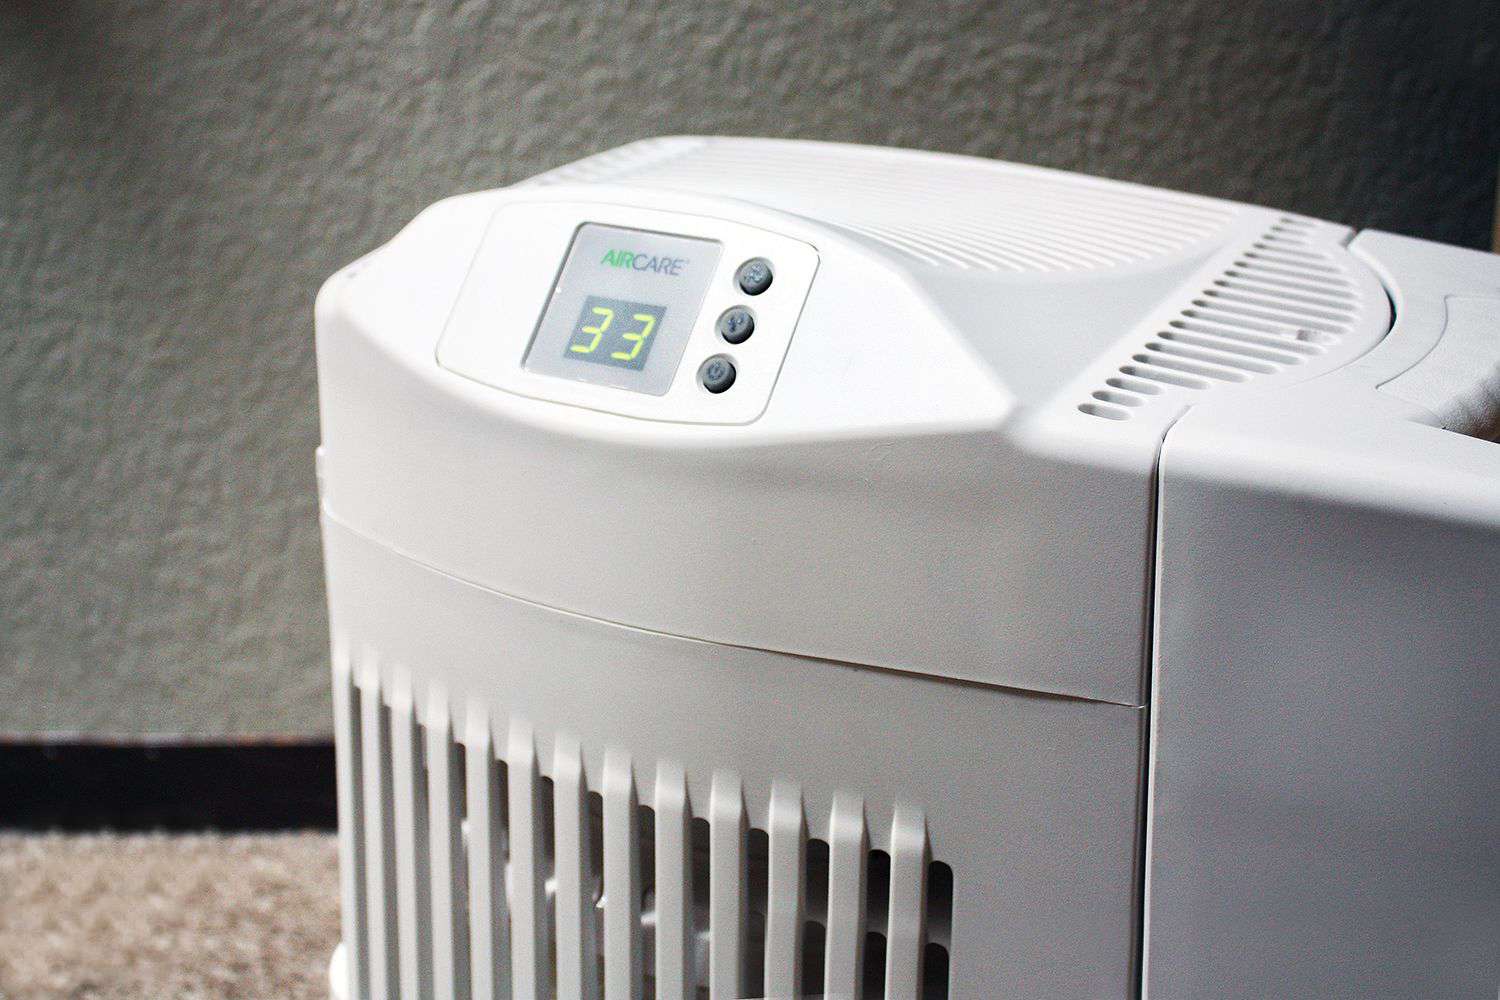
2. Set the Desired Humidity Level: Use the controls or digital display on the dehumidifier to set the desired humidity level. This will vary depending on your comfort preferences and the recommendations for optimal humidity in your home.
3. Allow the Dehumidifier to Run: Let the dehumidifier run for a sufficient period of time, typically 24 to 48 hours, to allow it to remove excess moisture from the air and bring the humidity levels down to the set target. Monitor the dehumidifier during this time to ensure it is functioning properly and effectively.
4. Check for Moisture Reduction: After the initial running period, check the dehumidifier’s collection tank or drainage outlet to see if any water has been collected. If you notice a significant reduction in moisture or if the water reservoir is filling up, it is a good indication that the dehumidifier is working effectively.
5. Monitor the Humidity Levels: Use a hygrometer or the built-in humidity sensor (if available) to monitor the humidity levels in your home. Check if the dehumidifier is maintaining the desired humidity level consistently. If there are any fluctuations or the desired humidity level is not being reached, you may need to adjust the settings or seek professional assistance.
6. Listen for Unusual Noises: Pay attention to any unusual sounds, vibrations, or noises coming from the dehumidifier during operation. Excessive noise or irregular sounds may indicate a mechanical issue or improper installation. If you notice anything concerning, consult the manufacturer’s troubleshooting guide or contact their customer support for assistance.
7. Regularly Maintain and Clean: As you test your dehumidifier, make note of any maintenance or cleaning requirements outlined in the manufacturer’s instructions. Regularly check and clean the air filters, empty the collection tank (if applicable), and perform any necessary maintenance tasks to keep the dehumidifier operating at its best.
By thoroughly testing your dehumidifier, you can ensure that it is effectively managing the humidity levels in your home, promoting a comfortable and healthy indoor environment.
Once you have confirmed that the dehumidifier is functioning correctly, you can move on to the final step – adjusting and maintaining the dehumidifier for long-term use.
Step 10: Adjusting and Maintaining the Dehumidifier
After testing your whole house dehumidifier, it’s important to make necessary adjustments and establish a regular maintenance routine to ensure its long-term performance. Follow these steps to properly adjust and maintain your dehumidifier:
1. Adjusting Humidity Levels: If you find that the humidity levels in your home are not being adequately controlled, you may need to adjust the settings on your dehumidifier. Refer to the manufacturer’s instructions on how to adjust the desired humidity level and set it to a more appropriate setting for your comfort and the prevention of moisture-related issues.
2. Monitoring Operation: Regularly check on the dehumidifier’s operation to ensure it is functioning as intended. Take note of any unusual noises, leaks, or malfunctions. This will help you identify any potential issues and address them promptly.
3. Cleaning Air Filters: The air filters in your dehumidifier accumulate dust and debris over time, which can reduce its efficiency. Follow the manufacturer’s instructions for cleaning or replacing the filters on a regular basis. This will improve the dehumidifier’s airflow and help maintain optimal performance.
4. Emptying Collection Tank: If your dehumidifier has a collection tank, make sure to regularly empty it to prevent overflow and potential water damage. Check the manufacturer’s instructions for guidance on how often to empty the tank and ensure it is done in a safe and sanitary manner.
5. Inspecting Drainage System: If your dehumidifier is connected to a drainage system, periodically check for any clogs or blockages. Ensure that the drainage pipe or tubing is clear and free from any obstructions that could prevent proper water disposal.
6. Schedule Professional Maintenance: It is recommended to schedule regular maintenance by a professional HVAC technician to ensure the dehumidifier is in optimal condition. They can inspect the unit, clean the internal components, check for any potential issues or damage, and make any necessary repairs or adjustments.
7. Follow Manufacturer’s Recommendations: Always refer to the manufacturer’s instructions and guidelines for the specific maintenance requirements of your dehumidifier. They will provide detailed information on how to care for and maintain your unit to ensure its longevity and optimal performance.
By adjusting and maintaining your dehumidifier regularly, you can prolong its lifespan and ensure it continues to effectively control the humidity levels in your home. This will provide you with a more comfortable and healthier living environment.
With these steps completed, you have successfully installed, tested, and maintained your whole house dehumidifier. Enjoy the benefits of improved indoor air quality and a more comfortable home!
Conclusion
Installing a whole house dehumidifier can greatly improve the comfort and overall quality of your home by regulating moisture levels and reducing the risk of mold, mildew, and musty odors. By following the step-by-step guide outlined in this article, you can successfully install and maintain a whole house dehumidifier to enjoy the benefits it brings.
Through the process of assessing your home’s humidity levels, choosing the right dehumidifier, gathering the necessary tools, and shutting off the power supply, you have laid the groundwork for a successful installation. Locating the ideal spot for the dehumidifier and preparing the installation area ensures optimal airflow and functionality.
The proper installation of the dehumidifier unit, including connecting the electrical wiring, is crucial for its safe and efficient operation. Testing the dehumidifier allows you to confirm its functionality and adjust settings as needed. Regular maintenance and adjustment of the unit will ensure its long-term effectiveness.
Remember, if you are unsure about any aspect of the installation process or lack the necessary expertise, it is always wise to seek professional assistance from an HVAC technician or electrician. Your safety and the proper functioning of the dehumidifier are of utmost importance.
With a whole house dehumidifier in place, you can enjoy a more comfortable home environment with balanced humidity levels, improved indoor air quality, and reduced potential for moisture-related issues. Say goodbye to musty odors and hello to a healthier living space.
We hope that this comprehensive guide has provided you with the necessary knowledge and confidence to install and maintain a whole house dehumidifier successfully. Take the necessary steps to create a more comfortable and enjoyable living environment for you and your family.
Now that you've mastered installing a whole house dehumidifier, why stop there? Keeping your home in top shape involves regular upkeep. For those keen on ensuring their living space remains in excellent condition, our detailed guide on essential home upkeep is a must-read. It covers everything from seasonal tasks to preventative measures that help avoid costly repairs. So, if you're looking to keep your living space as welcoming and well-maintained as possible, don't miss out on our comprehensive insights.
Frequently Asked Questions about How To Install A Whole House Dehumidifier
Was this page helpful?
At Storables.com, we guarantee accurate and reliable information. Our content, validated by Expert Board Contributors, is crafted following stringent Editorial Policies. We're committed to providing you with well-researched, expert-backed insights for all your informational needs.


0 thoughts on “How To Install A Whole House Dehumidifier”