Articles
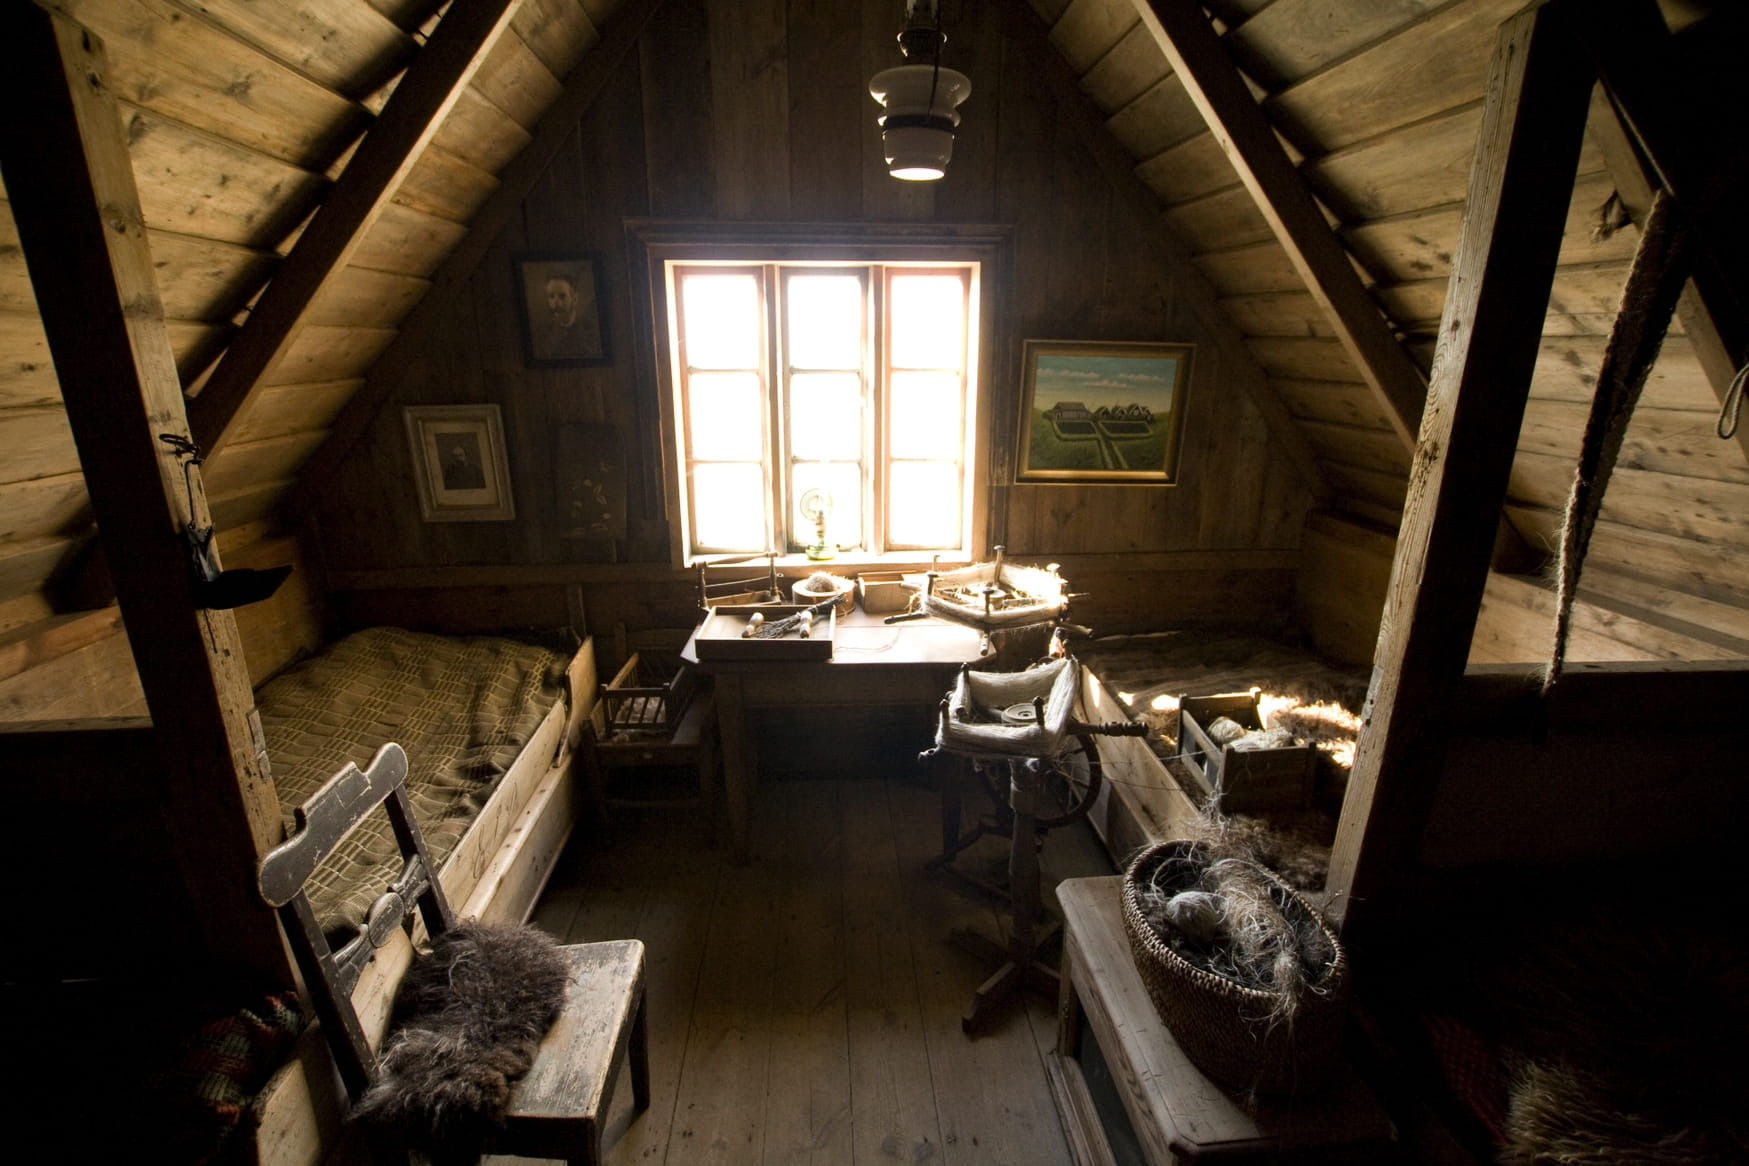
How To Keep An Attic Warm In Winter
Modified: October 23, 2024
Learn effective strategies to keep your attic warm during winter with these insightful articles. Discover valuable tips and techniques for maintaining optimal warmth and comfort in your home.
(Many of the links in this article redirect to a specific reviewed product. Your purchase of these products through affiliate links helps to generate commission for Storables.com, at no extra cost. Learn more)
Introduction
Welcome to this comprehensive guide on how to keep an attic warm during the winter months. As the colder weather approaches, it’s crucial to ensure that your attic is properly insulated and sealed to prevent heat loss and maintain a comfortable temperature throughout your home. A well-insulated attic not only helps to keep you warm but also contributes to energy efficiency and reduces heating costs.
In this article, we will discuss various methods and techniques to effectively insulate your attic, seal air leaks, and optimize heat retention. By implementing these strategies, you can create a warmer and more energy-efficient living environment, allowing you to make the most out of your attic space even during the coldest winter days.
Key Takeaways:
- Properly insulating, sealing air leaks, and utilizing radiant barriers and attic ventilation are key to keeping your attic warm in winter, enhancing comfort and energy efficiency.
- Regular maintenance, adding insulation, and weatherstripping the attic access door contribute to maintaining a warm and energy-efficient attic space, reducing heat loss and energy costs.
Read more: How To Keep A Sunroom Warm In Winter
Insulating the Attic
Insulating your attic is a crucial step in keeping it warm during the winter. It helps to create a barrier between your home and the outside elements, reducing heat transfer and preventing drafts. Here are a few key points to consider when insulating your attic:
- Type of Insulation: There are various types of insulation materials available, including fiberglass, cellulose, and spray foam. Each has its own advantages and considerations. Fiberglass insulation is cost-effective and easy to install, while cellulose insulation is eco-friendly and offers better soundproofing. Spray foam insulation provides excellent insulation properties but is generally more expensive.
- Insulation R-Value: The R-Value is a measure of the insulation’s thermal resistance. The higher the R-Value, the better the insulation’s ability to resist heat flow. The recommended R-Value for attics typically ranges between R-38 and R-60, depending on the climate zone. Consult with a professional to determine the appropriate R-Value for your specific region.
- Insulation Placement: Insulation should be placed on the attic floor, between and over the joists. It should cover all areas of the attic, including corners and eaves, to ensure consistent coverage. Avoid blocking attic vents or covering any electrical fixtures to maintain safety and proper airflow.
- Proper Installation: Insulation installation requires attention to detail. Ensure that there are no gaps or voids in the insulation, as they can allow air leakage and compromise its effectiveness. Use protective gear such as gloves, masks, and goggles during installation to minimize exposure to insulation materials.
- Hiring a Professional: If you’re unsure about the insulation installation process or lack the necessary tools and experience, it’s best to hire a professional insulation contractor. They will ensure proper installation, help you choose the right insulation material, and provide guidance on meeting local building codes and regulations.
Remember, insulating your attic is an investment that not only keeps your home warm but also improves energy efficiency and reduces heating costs. Taking the time to insulate your attic properly will provide long-term benefits and make your home more comfortable during the winter months.
Sealing Air Leaks
One of the major causes of heat loss in attics is air leaks. Unwanted air infiltration can occur through gaps, cracks, and openings in the attic, allowing warm air to escape and cold air to enter. Sealing these air leaks is essential for maintaining a warm and energy-efficient attic. Here are some key steps to effectively seal air leaks:
- Identify Air Leak Sources: Start by conducting a thorough inspection of your attic to identify areas where air may be leaking. Common sources of air leaks include gaps around pipes, vents, electrical outlets, and recessed lighting fixtures, as well as any cracks or openings in the attic walls or ceiling. Use a smoke pencil or incense stick to help visualize air movement and pinpoint leak sources.
- Caulking and Weatherstripping: Once you’ve identified the air leak sources, caulk or seal them using a suitable caulk or weatherstripping material. Use caulk to seal smaller cracks and gaps, and weatherstripping for larger gaps around windows, doors, and attic access points. Apply caulk or weatherstripping carefully, ensuring a tight seal to prevent air leakage.
- Insulate and Seal Attic Ductwork: If your attic contains HVAC ductwork, ensure that it is properly insulated and sealed. Use HVAC-specific insulation materials to cover and seal any gaps, joints, or connections in the ductwork. This prevents heated air from escaping into the attic and helps maintain consistent temperature distribution throughout your home.
- Seal Electrical Boxes and Recessed Lights: Electrical boxes and recessed lights in the attic are common sources of air leaks. Install insulating covers or gaskets around electrical boxes to create a seal. For recessed lights, use airtight IC-rated fixtures or install airtight trim kits to prevent air from escaping through the light fixtures.
- Seal Attic Access Points: The access door or hatch leading to the attic is another potential source of air leaks. Install weatherstripping around the hatch perimeter to create an airtight seal. Additionally, consider insulating the access door with an insulating blanket or foam board to minimize heat loss.
By sealing air leaks in your attic, you can significantly reduce heat loss, prevent drafts, and improve the overall energy efficiency of your home. Take the time to identify and seal these air leak sources, ensuring a comfortable and well-insulated attic space.
Installing Attic Ventilation
Proper attic ventilation is essential for maintaining a balanced and healthy attic environment. It helps to remove excess moisture, prevent the buildup of heat, and extend the lifespan of your roofing materials. Installing effective attic ventilation can significantly contribute to keeping your attic warm during the winter. Here are some key considerations when it comes to attic ventilation:
- Natural Ventilation: Natural ventilation is achieved through a combination of intake vents and exhaust vents. Intake vents, such as soffit vents or gable vents, allow fresh air to enter the attic from outside. Exhaust vents, such as ridge vents or roof vents, allow warm, moist air to escape from the attic. This creates a natural flow of air, regulating temperature and reducing humidity in the attic.
- Ventilation Area: The total ventilation area required for your attic depends on the square footage and the pitch of your roof. As a general guideline, aim for a 1:150 ratio of ventilation area to attic square footage. Consult with a professional to determine the appropriate amount of ventilation for your specific attic size.
- Proper Placement: Intake vents should be strategically placed along the lower portions of the attic, such as the soffits or eaves. This allows for the intake of cooler air from outside. Exhaust vents, on the other hand, should be positioned higher up on the roof, such as the ridge or gable, to facilitate the exit of warmer air.
- Protection from Moisture: When installing attic ventilation, it’s important to consider protection against moisture infiltration. Ensure that all vent openings are equipped with proper baffles or screens to prevent the entry of rain, snow, or pests into the attic space.
- Consider Climate Factors: Depending on your climate, you may require additional ventilation options. For example, in colder climates, supplemental attic insulation above the vents can prevent snow infiltration and reduce heat loss.
- Professional Installation: Attic ventilation installation can be a complex process, especially if retrofitting is required. It’s best to consult with a professional roofing contractor or ventilation specialist who can assess your specific attic and recommend the most suitable ventilation system.
By ensuring proper attic ventilation, you can prevent excessive heat buildup, reduce the risk of moisture damage, and maintain a comfortable and energy-efficient attic space. Paying attention to ventilation in conjunction with insulation and air sealing will help keep your attic warm and your home in optimal condition during the winter months.
Using Radiant Barriers
Radiant barriers are a great addition to your attic insulation system, especially in warmer climates or during the summer months when excessive heat gain becomes a concern. While they primarily work to reflect radiant heat, they can also contribute to keeping your attic warm during the winter. Here’s what you need to know about using radiant barriers:
- What are Radiant Barriers: Radiant barriers are thin, reflective materials typically made of aluminum foil or similar materials. They are designed to reflect the radiant heat from the sun, preventing it from penetrating into your attic. This helps to keep the attic space cooler in the summer and reduce the workload on your cooling system. In the winter, radiant barriers also reflect the heat back into the attic, improving heat retention.
- Installation: Radiant barriers are typically installed on the underside of the roof, directly above the attic insulation. They can be stapled, nailed, or taped to the rafters or roof sheathing. It’s important to leave an air gap between the radiant barrier and the insulation to maximize its effectiveness.
- Benefits of Radiant Barriers: Installing a radiant barrier in your attic can provide several benefits. In addition to reducing heat gain during the summer, it can help to prevent heat loss in the winter. This results in a warmer attic space and less strain on your heating system. Radiant barriers also contribute to energy efficiency by reducing the need for excessive cooling or heating, resulting in potential energy savings.
- Considerations and Limitations: While radiant barriers can be effective, they may not be necessary or effective in all situations. Their effectiveness greatly depends on the climate, orientation of the roof, and the amount of direct sunlight the attic receives. It’s recommended to consult with a professional to determine if a radiant barrier is suitable for your attic and climate.
- Compatibility with Other Insulation: Radiant barriers can be used in conjunction with other attic insulation materials, such as fiberglass or cellulose. They complement each other by addressing different aspects of heat transfer. Make sure to properly install and maintain the integrity of all insulation components in the attic for optimal performance.
- Professional Assistance: If you’re unsure about installing a radiant barrier or want to ensure it’s done correctly, it’s advisable to seek professional assistance. A qualified contractor or insulation specialist can assess your attic space, provide expert advice, and professionally install the radiant barrier to maximize its benefits.
Using a radiant barrier in your attic can help to optimize heat retention, reduce heat gain, and improve energy efficiency throughout the year. By considering its benefits and limitations, you can determine if a radiant barrier is the right addition to your attic insulation system.
Make sure your attic is properly insulated to keep the heat from escaping. Check for any air leaks and seal them to prevent cold drafts. Consider adding a radiant barrier to reflect heat back into the attic.
Read more: How To Keep Balcony Warm In Winter
Adding Attic Insulation
Adding additional insulation to your attic is a highly effective way to ensure your attic stays warm during the winter. It helps to prevent heat loss, maintain a consistent temperature, and reduce energy consumption. Here are some essential points to consider when adding attic insulation:
- Evaluate Existing Insulation: Start by assessing the current insulation levels in your attic. Determine the type of insulation, its condition, and its R-value. If the existing insulation is insufficient or in poor condition, it may be necessary to add more insulation.
- Choose the Right Insulation Material: There are various types of insulation materials available, including fiberglass batts, blown-in cellulose, and spray foam. Consider factors such as effectiveness, R-value, moisture resistance, and cost when selecting the insulation material that best suits your attic and budget.
- Insulation Distribution: Properly distribute the insulation throughout your attic space to achieve even coverage. Be sure to insulate the attic floor, including areas around attic access doors, recessed lighting, and HVAC ductwork. Avoid compressing insulation or blocking vents to maintain proper airflow.
- Insulation R-Value: The R-value measures the insulation’s resistance to heat flow. The higher the R-value, the better the insulation’s effectiveness. Check local building codes or consult with a professional to determine the recommended R-value for your attic insulation based on your climate zone.
- Safe and Proper Installation: When installing insulation, always follow safety guidelines and proper techniques. Use protective gear, such as gloves, a mask, and goggles, to prevent exposure to insulation materials. Carefully handle and place insulation to avoid compressing or overstuffing it, as this can reduce its thermal effectiveness.
- Consider Hiring a Professional: Adding insulation to your attic can be a challenging task, especially if it involves removing existing insulation or addressing complicated areas. Hiring a professional insulation contractor ensures proper installation, effective coverage, and compliance with building codes.
- Regular Maintenance: Regularly check your attic insulation for signs of damage, settling, or moisture-related issues. Inspect for any gaps, voids, or areas where insulation might have shifted. Address any maintenance needs promptly to maintain the insulation’s effectiveness.
By adding adequate insulation to your attic, you can significantly improve its ability to retain heat, reduce energy loss, and create a warm and cozy atmosphere inside your home. Whether you choose to do it yourself or seek professional assistance, adding attic insulation is a worthwhile investment that will benefit your home’s comfort and energy efficiency for years to come.
Weatherstripping the Attic Access Door
Properly weatherstripping the attic access door is an important step in maintaining a warm and energy-efficient attic space. The attic access door is a common area for air leakage, which can result in heat loss and drafts. Here are some essential tips to effectively weatherstrip the attic access door:
- Choose the Right Weatherstripping Material: There are several types of weatherstripping materials available, including adhesive-backed foam tape, V-strip, door sweeps, and silicone caulk. Consider factors such as durability, effectiveness, and the size of the gap to determine the most suitable weatherstripping material for your attic access door.
- Inspect the Access Door: Before applying weatherstripping, inspect the condition of the attic access door. Ensure that it closes tightly and there are no significant gaps or cracks. If necessary, repair any damage or reinforce the door to ensure a snug fit.
- Clean and Prepare the Surface: Thoroughly clean and dry the surfaces of both the attic access door and the door frame. Remove any debris, dirt, or old weatherstripping material. This will ensure proper adhesion and effectiveness of the new weatherstripping.
- Apply Weatherstripping: Measure the length of the sides and top of the attic access door. Cut the weatherstripping material to fit each side, ensuring a tight seal when the door is closed. Peel off the backing and carefully align and press the weatherstripping onto the door frame. For the bottom of the door, a door sweep or a door shoe can be applied to block drafts and seal gaps.
- Check for Proper Seal: Once the weatherstripping is applied, close the attic access door and check for proper sealing. Gently test the door to ensure there are no gaps or areas where air can pass through. Adjust the weatherstripping if necessary to achieve a tight seal.
- Maintain and Replace as Needed: Regularly check the condition of the weatherstripping on the attic access door. Over time, weatherstripping can wear out or become damaged. If you notice any signs of wear or if the door no longer seals properly, it’s important to replace the weatherstripping to maintain its effectiveness.
- Consider Insulated Attic Access Door Covers: In addition to weatherstripping, you may also want to consider using an insulated attic access door cover. These covers provide an extra layer of insulation and further reduce air leakage, improving the energy efficiency of the attic.
By properly weatherstripping the attic access door, you can minimize heat loss, prevent drafts, and improve the overall insulation of your attic. This simple yet effective step will contribute to a warmer and more energy-efficient attic space, ultimately enhancing the comfort and energy efficiency of your home.
Utilizing Insulated Attic Hatch Covers
Utilizing insulated attic hatch covers is an effective way to further enhance the insulation and energy efficiency of your attic. Attic hatch covers create a barrier between your living space and the attic, preventing heat transfer and reducing energy loss. Here’s what you need to know about utilizing insulated attic hatch covers:
- Insulation Benefits: Insulated attic hatch covers provide an additional layer of insulation to the attic access point. They help to minimize heat loss and drafts that can occur around the attic hatch, ensuring that warm air stays inside your living space and cold air stays in the attic.
- Ease of Installation: Attic hatch covers are typically lightweight and easy to install. They can be placed over the attic hatch or door to create a tight seal. Most hatch covers feature insulation materials such as foam or fiberglass, which are effective at blocking heat transfer.
- Sealing Effectiveness: Attic hatch covers are designed to fit snugly over the attic access point, creating an airtight seal. This prevents air leakage and the entry of drafts, keeping your home more comfortable and energy-efficient.
- Types of Attic Hatch Covers: There are various types of insulated attic hatch covers available, including pre-made covers, custom-made covers, and DIY options. Consider the size and design of your attic hatch when selecting the most suitable option for your home. Take accurate measurements to ensure a proper fit.
- DIY Attic Hatch Covers: If you prefer a do-it-yourself approach, you can create your own insulated attic hatch cover using materials such as rigid foam insulation board, weatherstripping, and adhesive. This allows you to customize the cover to fit your specific attic hatch dimensions.
- Accessibility: When choosing an attic hatch cover, consider the frequency of attic access. Look for covers that are easy to remove and reinstall when you need to enter the attic. Some covers feature removable panels or hinged designs to provide convenient access.
- Regular Maintenance: Inspect the attic hatch cover periodically for any signs of wear or damage. Ensure that the insulation materials are intact and that the cover is still providing a tight seal. Replace or repair any damaged covers to maintain their effectiveness in preventing heat loss.
By utilizing insulated attic hatch covers, you can enhance the insulation and energy efficiency of your attic. These covers provide an extra layer of protection against heat loss and drafts, ultimately contributing to a more comfortable and energy-efficient home. Whether you choose a pre-made cover, a custom-made option, or a DIY approach, incorporating an insulated attic hatch cover is a smart investment in optimizing the insulation of your attic space.
Maintaining Proper Attic Insulation
Maintaining proper attic insulation is crucial for ensuring its effectiveness in keeping your attic warm during the winter. Over time, insulation can settle, become damaged, or be compromised by various factors. Here are some essential tips for maintaining proper attic insulation:
- Regular Inspection: Conduct routine inspections of your attic insulation to check for any signs of damage, compression, or settling. Look for areas where insulation may have shifted or become compacted, leaving gaps or voids. Ensure that insulation is still providing sufficient coverage and insulation value.
- Address Moisture Issues: Moisture is one of the biggest threats to insulation. Inspect your attic for any signs of moisture damage, such as water stains, mold, or mildew. Identify and address the source of moisture, whether it’s a leaky roof, inadequate ventilation, or plumbing issues. Repairing and preventing moisture issues will help maintain the integrity and effectiveness of your attic insulation.
- Replace Damaged Insulation: If you find damaged or deteriorated insulation during your inspection, it’s important to replace it promptly. Wet or moldy insulation should be removed and replaced to prevent further damage and potential health hazards. Hire a professional to handle the removal and replacement process safely and efficiently.
- Insulate Around New Fixtures: If you’ve added new fixtures or made modifications in your attic, such as installing recessed lights or HVAC ducts, ensure that they are properly insulated. Insulate around these fixtures to prevent air leakage, maintain consistent insulation levels, and prevent heat loss or gain.
- Seal Gaps and Voids: Inspect the attic for any gaps or voids that may have developed over time. These gaps can occur around pipes, electrical wires, vents, and other penetrations. Use spray foam, caulk, or other suitable materials to seal these gaps and ensure a continuous and effective insulation barrier.
- Consider Adding More Insulation: Depending on your climate and the current insulation levels, you may need to add more insulation to maintain proper thermal efficiency. Over time, insulation can settle and lose its effectiveness. Consult with a professional to determine if adding more insulation is necessary and the appropriate R-value for your attic based on your local building codes.
- Expert Consultation: If you’re unsure about the condition or effectiveness of your attic insulation, it’s best to consult with an insulation professional. They can assess the insulation, identify any issues, and recommend the best course of action to maintain and improve the insulation performance in your attic.
Regular maintenance and addressing any issues promptly will help ensure that your attic insulation remains in good condition and continues to provide proper insulation throughout the winter. By maintaining proper attic insulation, you can enjoy a comfortable and energy-efficient home while minimizing heat loss and reducing energy costs.
Read more: How To Keep Floor Warm In Winter
Conclusion
Maintaining a warm attic during the winter is essential for ensuring the comfort and energy efficiency of your home. By implementing the strategies outlined in this guide, including insulating the attic, sealing air leaks, installing attic ventilation, using radiant barriers, adding attic insulation, weatherstripping the attic access door, utilizing insulated attic hatch covers, and maintaining proper attic insulation, you can create a cozy and energy-efficient attic space.
Properly insulating your attic helps to prevent heat loss and maintain a consistent temperature. Sealing air leaks keeps unwanted drafts at bay and improves energy efficiency. Installing attic ventilation helps regulate temperature and prevent moisture buildup. Radiant barriers reflect heat, reducing heat gain in the summer and heat loss in the winter. Adding attic insulation further enhances heat retention and energy efficiency.
By weatherstripping the attic access door and utilizing insulated attic hatch covers, you create a tight seal, preventing air leaks and reducing energy loss through these openings. Regularly maintaining your attic insulation ensures its effectiveness and addresses any issues that may arise over time, such as settlement or moisture damage.
Remember, keeping your attic warm not only enhances your comfort but also contributes to energy efficiency, reducing heating costs and minimizing your carbon footprint. Whether you choose to tackle these tasks yourself or seek assistance from professionals, prioritizing attic warmth will benefit both you and the environment.
Take the necessary steps to insulate, seal, ventilate, and maintain your attic, and enjoy the cozy warmth of your home all winter long. With a well-insulated and energy-efficient attic, you can create a more comfortable and sustainable living environment for yourself and your family.
Frequently Asked Questions about How To Keep An Attic Warm In Winter
Was this page helpful?
At Storables.com, we guarantee accurate and reliable information. Our content, validated by Expert Board Contributors, is crafted following stringent Editorial Policies. We're committed to providing you with well-researched, expert-backed insights for all your informational needs.


0 thoughts on “How To Keep An Attic Warm In Winter”