Home>Articles>How To Keep Water From Coming Under Garage Door
Articles
How To Keep Water From Coming Under Garage Door
Modified: October 20, 2024
Discover effective methods to prevent water from seeping under your garage door with these informative articles. Protect your belongings and maintain a dry garage environment.
(Many of the links in this article redirect to a specific reviewed product. Your purchase of these products through affiliate links helps to generate commission for Storables.com, at no extra cost. Learn more)
Introduction
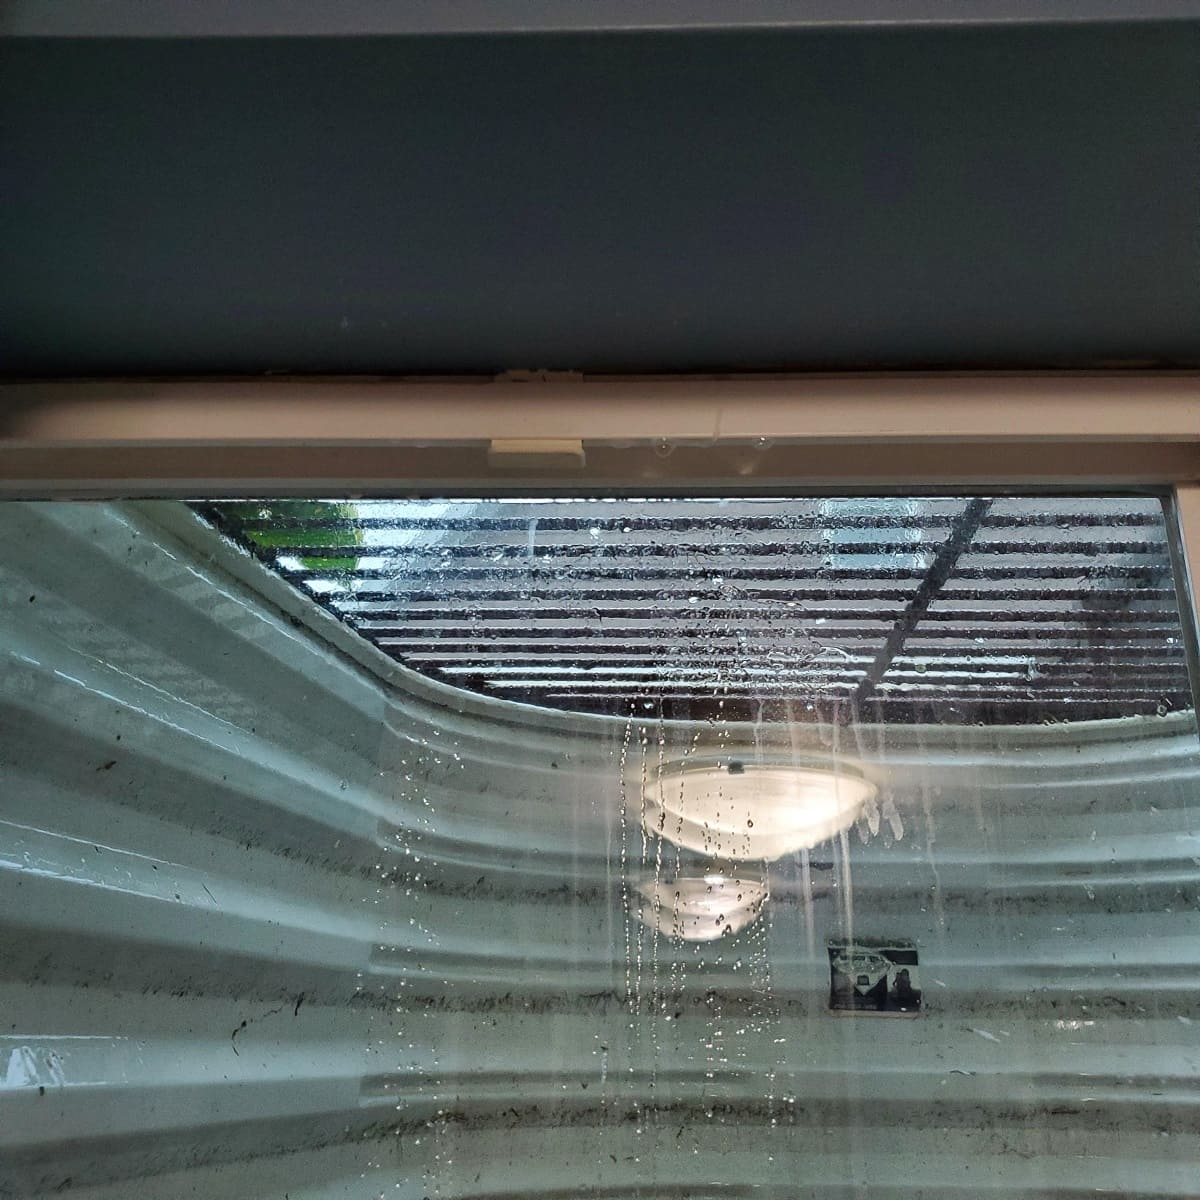
Dealing with water coming under your garage door can be a frustrating and potentially damaging issue. Not only does it create a mess inside your garage, but it can also lead to water damage to your belongings, structural damage to the garage floor, and even mold growth. However, with the right preventive measures and maintenance, you can keep water from entering your garage and protect your property from the damaging effects of water.
In this article, we will explore the various causes of water coming under the garage door, assess the potential damage it can cause, and provide you with effective solutions to tackle the issue. By understanding the underlying causes and implementing the appropriate measures, you can ensure a dry and watertight garage.
Let’s dive in and discover how to keep water from coming under your garage door!
Key Takeaways:
- Prevent water from entering your garage by sealing the door bottom, installing weatherstripping, and using a threshold seal. Regular maintenance ensures a watertight barrier and protects your belongings from damage.
- Address misalignment, worn-out weatherstripping, and garage floor cracks to keep water out. Implement effective solutions and maintain your garage door to prevent water damage and maintain a dry, protected space.
Understanding the Issue
Before we can effectively address the issue of water coming under the garage door, it’s important to understand why it happens in the first place. There are several factors that can contribute to this problem:
- Poor garage door alignment: If your garage door is not properly aligned, it can create gaps and spaces where water can easily seep through. Over time, the alignment of the door can shift due to everyday use, temperature changes, or wear and tear.
- Worn-out or damaged weatherstripping: Weatherstripping is a strip of material that is attached to the bottom of the garage door to create a seal with the ground. If the weatherstripping is old, cracked, or damaged, it can no longer effectively stop water from entering the garage.
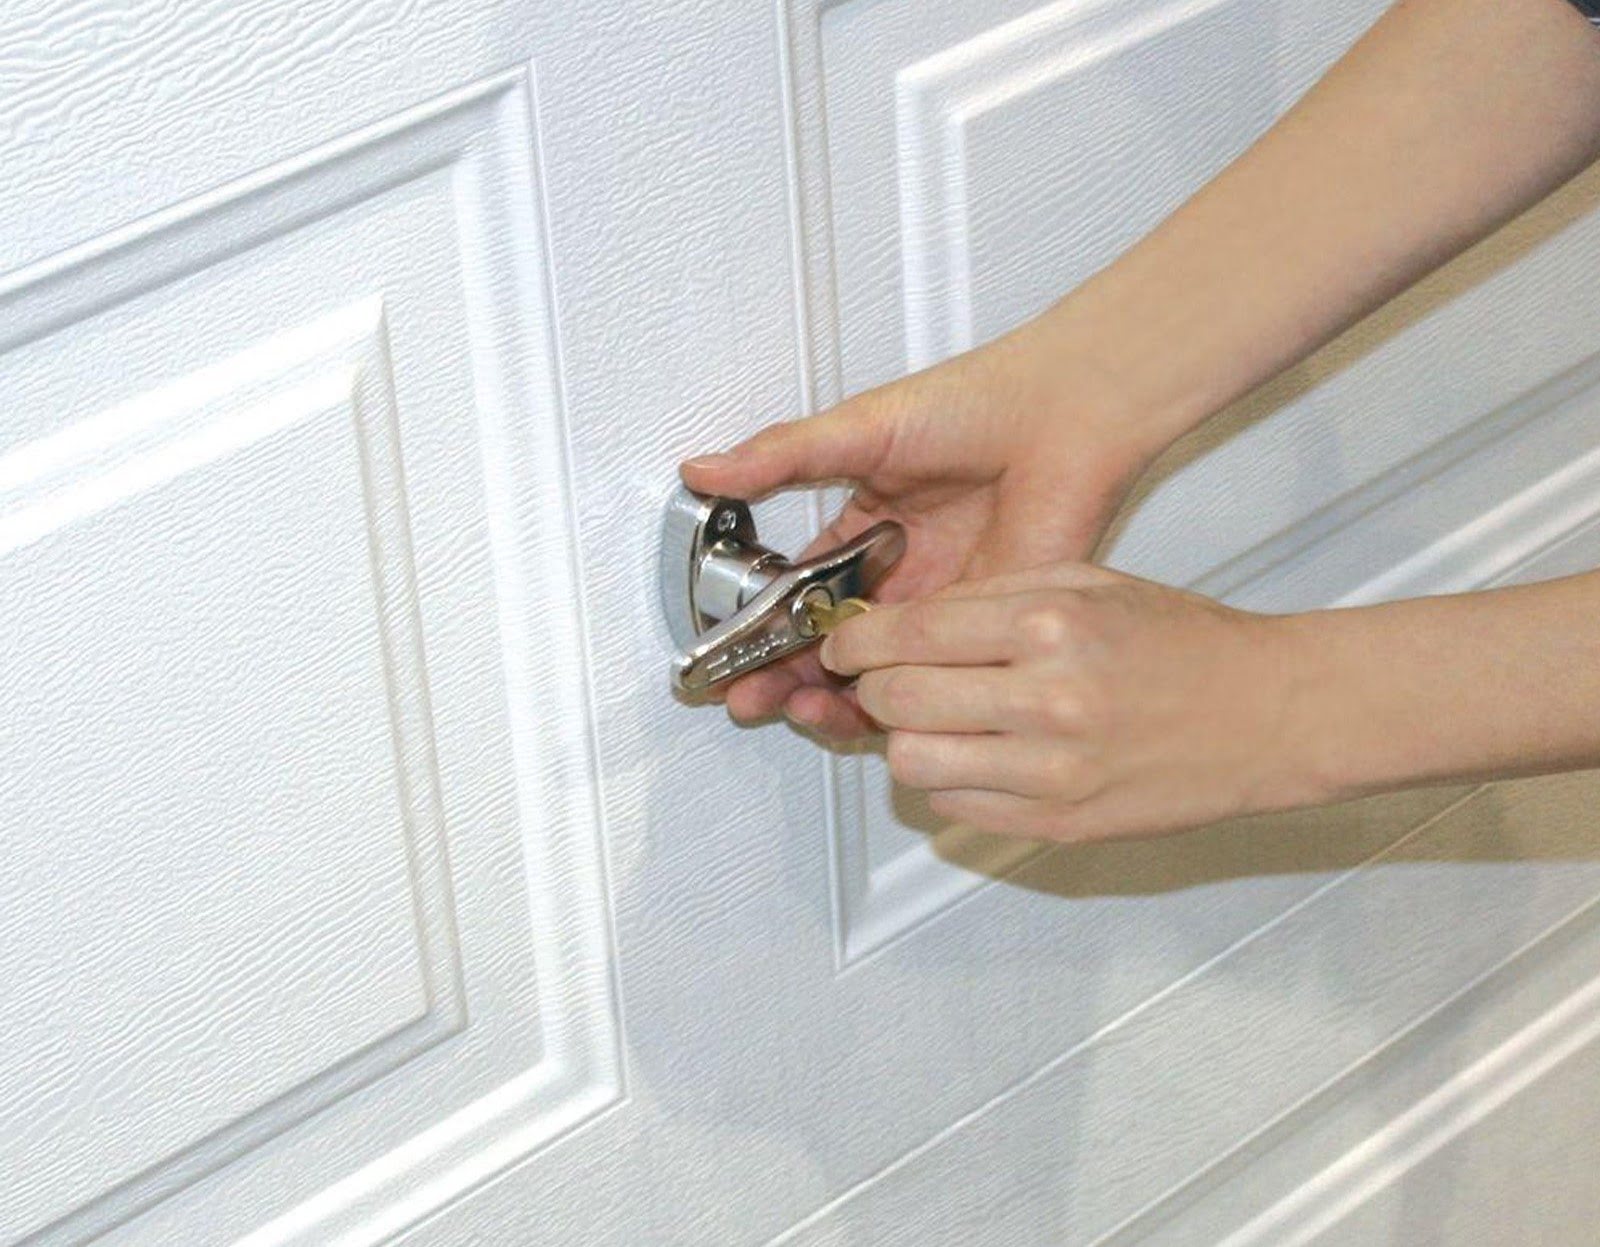
- Lack of a threshold seal: A threshold seal is a rubber strip that is installed at the bottom of the garage door, creating a barrier against water, pests, and debris. If your garage door does not have a threshold seal or if the seal is damaged, it can allow water to flow underneath.
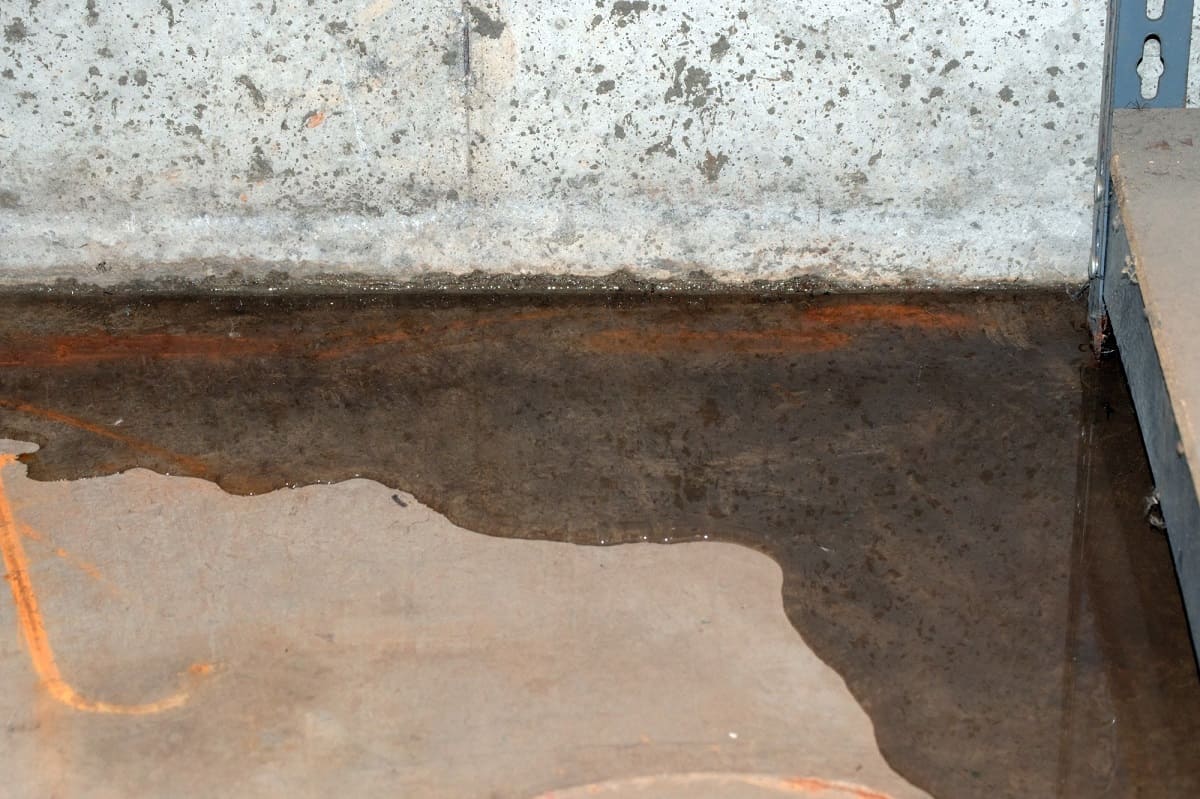
- Cracks and gaps in the garage floor: If your garage floor has cracks or gaps, water can easily find its way inside. This can be particularly problematic during heavy rainfall or when there is poor drainage around the garage.
- Poor or insufficient garage drainage: If your garage does not have proper drainage systems in place, water can accumulate and find its way under the door. This can happen if the garage is below ground level or if the surrounding landscape does not allow for proper water runoff.
By understanding these potential causes, you can better assess the specific issues contributing to water entering your garage. This knowledge will help you identify the most appropriate solutions to keep your garage dry and protected.
Identifying Possible Causes
When it comes to water coming under the garage door, there can be several causes at play. Identifying these causes is essential in order to implement the right solutions. Here are some possible causes to consider:
- Misaligned Garage Door: A misaligned or uneven garage door can create gaps and openings that allow water to seep through. Inspect the alignment of your garage door and check for any visible gaps or spaces.
- Worn-out Weatherstripping: Over time, the weatherstripping at the bottom of your garage door can become worn out, cracked, or torn. This can compromise its sealing abilities and allow water to enter. Carefully examine the condition of the weatherstripping to determine if it needs to be replaced.
- Missing or Damaged Threshold Seal: A threshold seal provides an additional barrier against water infiltration. If your garage door lacks a threshold seal or if the existing seal is damaged, it can result in water coming under the door. Inspect the threshold seal and make sure it is intact and in good condition.
- Cracks or Gaps in the Garage Floor: Examine your garage floor for any cracks or gaps that could allow water to enter. These cracks can form over time due to the natural settling of the ground or due to wear and tear. Repairing these cracks or sealing the gaps can help prevent water from seeping into the garage.
- Poor Garage Drainage: Insufficient or inadequate garage drainage can contribute to water accumulation near the garage door. If water is pooling or not draining properly, it can ultimately find its way under the door. Evaluate the drainage systems around your garage and make any necessary adjustments or improvements.
By carefully inspecting your garage and considering these possible causes, you can determine which factors are contributing to the water infiltration. This will enable you to choose the most effective solutions to address the issue and keep your garage dry.
Assessing the Damage
When water enters your garage, it can cause various types of damage depending on the extent and duration of the exposure. It’s important to assess the damage in order to understand the severity and take appropriate action. Here are some key areas to consider:
- Structural Damage: Prolonged exposure to water can weaken the structural integrity of your garage floor. This can lead to cracks, deterioration, and even sinking of the concrete. Inspect the floor for any signs of damage such as cracks, flaking, or unevenness.
- Mold and Mildew Growth: Moisture in the garage can create the ideal environment for mold and mildew to thrive. These can not only cause unpleasant odors but also pose health risks. Look for any signs of mold or mildew on walls, floors, or belongings stored in the garage.
- Damage to Belongings: Water intrusion can damage valuable possessions stored in the garage, such as wood furniture, cardboard boxes, electronics, and automotive equipment. Assess the condition of your belongings and determine if any items have been affected by water damage.
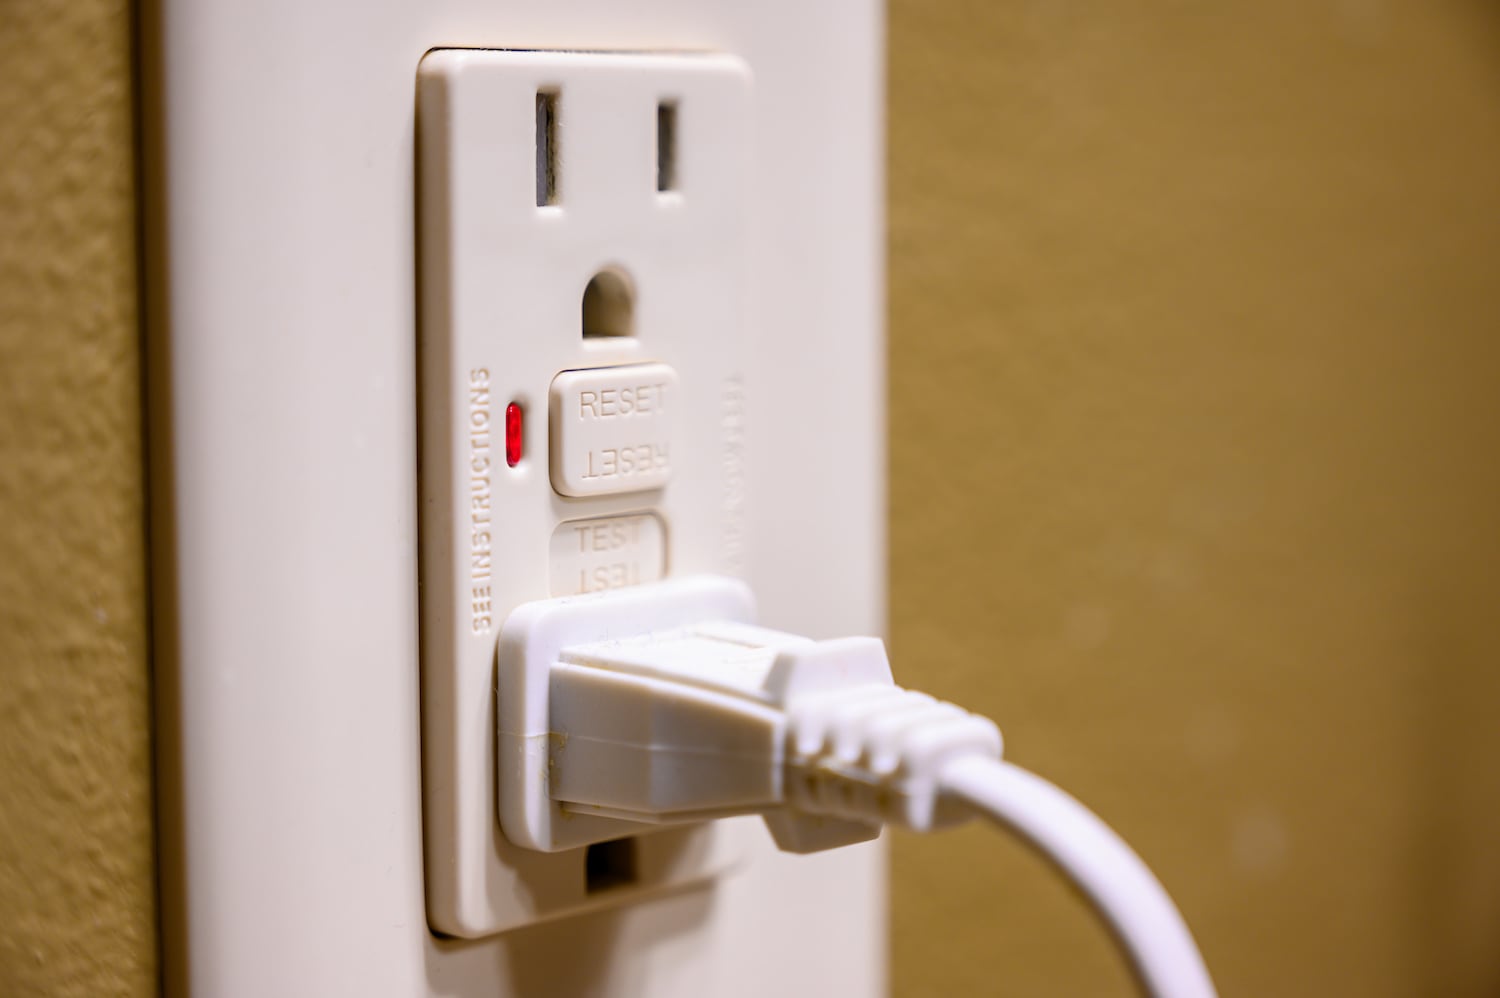
- Electrical Hazards: If water has reached electrical outlets, appliances, or wiring in the garage, it can create safety hazards. Ensure that there are no exposed wires or damaged electrical components. If you suspect any electrical damage, it’s best to consult a professional electrician.
- Pest Infestation: Standing water in the garage can attract pests such as mosquitoes, rodents, and insects. They can not only cause damage to the garage but also pose health risks. Check for any signs of pest activity in the area surrounding the water entry points.
By thoroughly assessing the damage, you can determine the severity of the situation and prioritize the necessary repairs and remediation efforts. If the damage is extensive or beyond your expertise, it’s advisable to seek professional assistance to ensure a safe and effective restoration process.
Choosing the Right Solution
Once you have identified the causes of water coming under your garage door and assessed the damage, it’s time to choose the right solution to address the issue. The appropriate solution will depend on the specific factors contributing to the water infiltration. Here are some effective solutions to consider:
- Sealing the Garage Door Bottom: One of the most common and effective solutions is to seal the bottom of the garage door. This can be done by installing a rubber seal or sweep that creates a tight seal between the door and the floor. Make sure to choose a seal that is appropriate for your specific type of garage door.
- Installing Weatherstripping: If the weatherstripping at the bottom of your garage door is worn out or damaged, it should be replaced. Measure the width of your door and purchase a new weatherstripping kit that matches the size. Follow the manufacturer’s instructions to properly install the weatherstripping and ensure a secure seal.
- Using a Threshold Seal: Installing a threshold seal at the bottom of the garage door provides an additional barrier against water infiltration. Choose a threshold seal that is suitable for your floor type and follow the installation instructions carefully. This seal will help redirect water away from the door and keep your garage dry.
- Repairing Cracks and Gaps: If your garage floor has cracks or gaps, it’s important to repair them to prevent water from entering. Use a suitable concrete filler or epoxy to fill in the cracks and seal the gaps. Smooth the repaired areas to create a seamless surface and ensure proper water drainage.
- Maintaining the Garage Door: Regular maintenance of your garage door is crucial in preventing water infiltration. Keep the tracks clean and free from debris, lubricate moving parts regularly, and test the door’s alignment. Address any issues promptly to maintain a properly functioning and watertight door.
When choosing the right solution, consider the severity of the issue, your budget, and your skill level. Some solutions may require professional assistance, especially if the damage is extensive or if you are unsure about the proper installation or repair techniques.
By implementing the appropriate solution, you can effectively prevent water from coming under your garage door and protect your garage and belongings from water damage.
Read more: Where Does The Bidet Water Come From
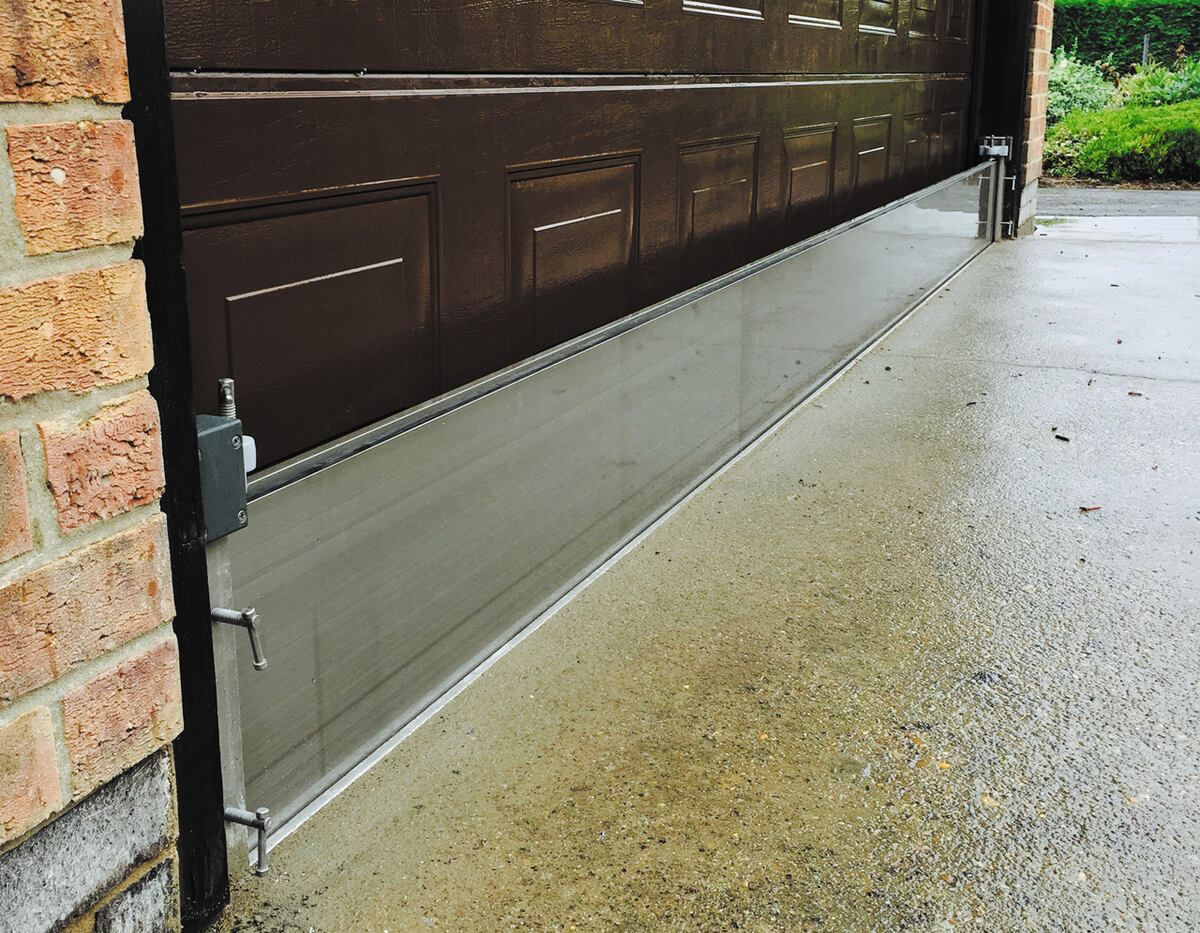
Sealing the Garage Door Bottom
Sealing the bottom of your garage door is a crucial step in preventing water from coming under the door. This process involves creating a tight seal between the door and the floor, effectively blocking any gaps or openings. Here’s how you can properly seal the garage door bottom:
- Clean the Bottom Area: Before installing a seal, ensure that the bottom area of the garage door is clean and free from debris. Use a broom or vacuum to remove any dirt, dust, or loose particles that could interfere with the sealing process.
- Choose the Right Seal: There are several types of seals available on the market, including rubber seals, PVC seals, and brush seals. Consider factors such as the climate in your area, the type of garage door, and the durability of the seal. Choose a seal that is appropriate for your specific needs.
- Measure the Door Width: Use a tape measure to determine the width of your garage door. This measurement will help you choose the correct size of seal for a proper fit. Ensure that you measure the width at several points along the bottom to account for any variations.
- Cut the Seal: If you have purchased a seal that comes in a roll or strip, cut it to the appropriate length using a utility knife or scissors. Make sure to follow the manufacturer’s instructions for cutting the seal to ensure an accurate fit.
- Attach the Seal: Position the seal along the bottom edge of the garage door, aligning it with the edge to create a tight seal. Depending on the type of seal, it may need to be fastened using adhesive, screws, or clips. Follow the manufacturer’s instructions to properly attach the seal.
- Test the Seal: Close the garage door and observe if the seal is creating a secure and watertight barrier. Inspect the seal for any gaps or areas where water could potentially seep through. Make adjustments if needed to ensure an effective seal.
Sealing the garage door bottom is a relatively simple yet effective solution to keep water from entering your garage. It helps to maintain a dry and protected space while preventing damage to your belongings and the garage structure. Regularly inspect the seal for any signs of wear and tear and replace it as needed to ensure ongoing protection.
Remember, if you are unsure about the proper installation process or if you have a more complex garage door system, it’s best to seek professional assistance to ensure a proper and secure seal.
Install a garage door threshold seal to create a barrier against water. This flexible rubber seal attaches to the bottom of the door to prevent water from seeping in.
Installing Weatherstripping
Weatherstripping is an essential component in preventing water from entering your garage through the bottom of the door. It forms a seal between the door and the floor, effectively blocking out drafts, pests, and moisture. Follow these steps to install weatherstripping for your garage door:
- Measure the Door Width: Using a tape measure, measure the width of your garage door. Measure at the bottom edge of the door to ensure an accurate measurement. Take note of the measurement as it will help you determine the length of weatherstripping needed.
- Select the Right Weatherstripping: There are different types of weatherstripping available, such as adhesive-backed foam tape, V-strip, or bulb-shaped weatherstripping. Consider the climate in your area and the condition of your garage door to choose the most suitable weatherstripping material. Also, ensure that the selected weatherstripping is designed for use on overhead garage doors.
- Clean the Door Bottom: Clean the bottom edge of the garage door to ensure it is free from dirt, dust, and debris. Use a damp cloth or mild detergent to remove any buildup that could interfere with the adhesion of the weatherstripping.
- Measure and Cut the Weatherstripping: Using the measurement taken in step 1, cut the weatherstripping to the appropriate length. Use a utility knife or scissors to make a clean and straight cut. It is better to cut the weatherstripping slightly longer than needed so you can trim it later if necessary.
- Attach the Weatherstripping: Peel off the backing from the adhesive side of the weatherstripping. Starting from one end of the door, press the weatherstripping firmly against the bottom edge of the door. Continue attaching it along the entire width of the door, ensuring it forms a tight seal.
- Test the Seal: Once the weatherstripping is attached, close the garage door and observe if it creates a proper seal with the ground. Check for any gaps or areas where water could potentially enter. Adjust the weatherstripping if necessary to eliminate any gaps and ensure an effective seal.
Installing weatherstripping is a relatively simple and cost-effective solution to prevent water from coming under your garage door. It helps to maintain a dry and insulated environment inside the garage, reducing energy loss and protecting your belongings. Regularly inspect the weatherstripping for any signs of wear or damage and replace it as needed to ensure optimal performance.
If you are unsure about the installation process or if you have a more complex garage door system, consider consulting a professional for assistance to ensure a proper and secure seal.
Using a Threshold Seal
A threshold seal is an effective barrier against water infiltration and other unwanted elements, such as pests and debris, that can enter your garage through the bottom of the door. It provides an extra layer of protection and ensures a tight seal between the door and the floor. Here’s how you can properly use a threshold seal:
- Clean the Garage Floor: Before installing the threshold seal, ensure that the garage floor is clean and free from any dirt, debris, or oil stains. Use a broom, vacuum, or suitable cleaning solution to thoroughly clean the floor surface.
- Choose the Right Threshold Seal: There are various types of threshold seals available, such as rubber, aluminum, or PVC. Consider factors such as the climate in your area, the type of garage door, and the level of traffic in your garage. Choose a threshold seal that best suits your needs and offers the desired durability and effectiveness.
- Measure and Cut the Threshold Seal: Measure the width of your garage door and mark the desired length on the threshold seal. Use a hacksaw or utility knife to cut the seal to the appropriate size. It’s important to keep your cuts straight and clean to ensure a proper fit.
- Prepare the Garage Floor: In some cases, the threshold seal may require additional preparation of the garage floor. Follow the manufacturer’s instructions to determine if any cleaning, sanding, or adhesive application is necessary before installing the threshold seal.
- Position and Install the Threshold Seal: Place the threshold seal along the bottom edge of the garage door opening, ensuring that it is aligned properly. If the seal has adhesive backing, remove the protective film and press the seal firmly onto the floor. Alternatively, follow the manufacturer’s instructions to install the seal using appropriate fasteners or adhesives.
- Test the Seal: Close the garage door and observe if the threshold seal forms a tight seal. There should be no visible gaps or areas where water could infiltrate. Adjust the position or make any necessary modifications to the seal to ensure a proper and secure fit.
A well-installed threshold seal provides a durable and long-lasting solution to prevent water from entering your garage. It can also help improve energy efficiency and reduce drafts, making your garage a more comfortable space while protecting your belongings.
If you are unsure about the installation process or if you have a more complex garage door system, it’s recommended to consult a professional for assistance to ensure a proper and secure seal.
Repairing Cracks and Gaps
If your garage floor has cracks or gaps, it’s crucial to repair them to prevent water from seeping into your garage. Cracks and gaps can develop over time due to settling, temperature changes, or wear and tear. Here’s how you can effectively repair cracks and gaps in your garage floor:
- Clean the Area: Before repairing the cracks and gaps, clean the affected area of the garage floor. Remove any loose debris, dirt, or dust using a broom or vacuum cleaner. For stubborn stains, you may need to use a suitable cleaning solution and scrub the area with a brush.
- Prepare the Crack or Gap: Use a chisel, scraper, or wire brush to remove any loose concrete or debris from the crack or gap. This will ensure better adhesion for the repair material. Make sure to clean out the crack or gap thoroughly, removing any loose particles.
- Select a Concrete Repair Material: Choose a suitable concrete repair material, such as epoxy or concrete patching compound, depending on the size and depth of the crack or gap. Follow the manufacturer’s instructions and choose a product that is designed for repairing cracks in concrete surfaces.
- Apply the Repair Material: Mix the concrete repair material according to the manufacturer’s instructions. Using a trowel or putty knife, fill the crack or gap with the repair material. Smooth the surface and level it with the surrounding floor, ensuring a seamless finish. Allow the repair material to cure as per the manufacturer’s recommendations.
- Seal the Repaired Area: To provide additional protection against water penetration, consider applying a concrete sealer over the repaired area. This will help prevent future damage and extend the life of the repair. Choose a concrete sealer that is compatible with the repair material used and apply it according to the manufacturer’s instructions.
- Maintain the Repaired Area: Regularly inspect the repaired area for any signs of cracking or damage. If you notice any deterioration, make the necessary repairs to prevent water from seeping in. Additionally, practice good garage maintenance by keeping the area clean and removing any debris or standing water that could further exacerbate the cracking or damage.
Repairing cracks and gaps in your garage floor is essential for preventing water infiltration and maintaining the structural integrity of your garage. By effectively sealing these openings, you can prevent water damage to your belongings and mitigate the risk of mold growth or further deterioration of the floor.
If the cracks or gaps are extensive or beyond your repair capabilities, it’s advisable to consult a professional to ensure a proper and lasting repair.
Read more: How To Keep Fitted Sheet From Coming Off
Maintaining the Garage Door
Regular maintenance of your garage door is vital for keeping it in optimal condition and preventing water from entering. By following a few simple maintenance tasks, you can ensure that your garage door functions properly and provides effective protection against water infiltration. Here are some maintenance tips to keep in mind:
- Keep the Tracks Clean: Regularly inspect the tracks of your garage door and clean them to remove any dirt, debris, or obstructions. Use a cloth or brush to wipe away any buildup that may hinder the smooth operation of the door. Lubricate the tracks with a silicone-based lubricant to facilitate smooth movement.
- Tighten Loose Hardware: Over time, the hardware of your garage door, such as bolts, nuts, and hinges, can become loose. Regularly inspect and tighten any loose hardware to ensure that the door is properly aligned and secured. Use a screwdriver or wrench to tighten any loose components as needed.
- Test the Balance: Periodically test the balance of your garage door to ensure that it is properly aligned. Disconnect the automatic opener and manually open the door halfway. If the door stays in place, it is properly balanced. If it slides up or down, it may require adjustment. Consult the manufacturer’s instructions or seek professional help to adjust the balance of the door.
- Inspect and Replace Weatherstripping: Check the weatherstripping at the bottom of your garage door for signs of wear, damage, or deterioration. If it is cracked, torn, or no longer provides a tight seal, it should be replaced. Remove the old weatherstripping and install new strips to maintain an effective barrier against water infiltration.
- Check and Repair Seals: Inspect the seals around the perimeter of your garage door, including the side seals and top seals. Ensure that they are intact and in good condition. If you notice any gaps or damaged areas, repair or replace the seals as necessary to maintain a watertight barrier.
- Address Issues Promptly: If you notice any issues with your garage door, such as strange noises, uneven movement, or difficulty opening and closing, address them promptly. Ignoring these issues can lead to further damage or increased risk of water penetration. Consult a professional if the problem requires expertise beyond your capabilities.
By maintaining your garage door regularly, you can extend its lifespan, improve its performance, and effectively prevent water from entering. Regular inspections and preventive measures will help you detect and address any potential issues before they escalate, saving you time and money in the long run.
Remember, if you are unsure about any maintenance tasks or encounter complex problems, it’s best to consult a professional garage door technician who can provide expert guidance and assistance.
Conclusion
Tackling the issue of water coming under your garage door is essential to maintain a dry and protected space. By understanding the causes, assessing the damage, and implementing the right solutions, you can effectively prevent water infiltration and its associated problems.
Identifying possible causes, such as misalignment, worn-out weatherstripping, or cracks in the garage floor, allows you to address the root of the issue. Through solutions like sealing the garage door bottom, installing weatherstripping, using a threshold seal, repairing cracks and gaps, and maintaining the garage door, you create a watertight barrier.
Regular maintenance is key to ensure the optimal functionality of your garage door. Keeping the tracks clean, tightening loose hardware, testing the balance, and inspecting weatherstripping and seals help maintain a secure and efficient door.
By following these preventive measures and promptly addressing any issues that arise, you can protect your garage, belongings, and structure from water damage. Additionally, maintaining a dry garage helps prevent mold growth, pest infestation, and potential electrical hazards.
Remember, if you encounter complex issues or are unsure about the appropriate solutions, it’s recommended to seek professional assistance. They can provide expert guidance and ensure that the necessary repairs and installations are done correctly.
By implementing the strategies outlined in this article, you can effectively keep water from coming under your garage door and enjoy a dry and protected garage space for years to come.
Now that you've got the know-how to keep your garage dry, why not extend that care to every corner of your home? Tackling regular upkeep tasks can save headaches and costs down the road. Dive into our next read, where we break down essential home maintenance routines. You'll learn which tasks matter most and how to efficiently keep your house in tip-top shape year-round. Don't let upkeep tasks pile up; start streamlining your home maintenance today!
Frequently Asked Questions about How To Keep Water From Coming Under Garage Door
Was this page helpful?
At Storables.com, we guarantee accurate and reliable information. Our content, validated by Expert Board Contributors, is crafted following stringent Editorial Policies. We're committed to providing you with well-researched, expert-backed insights for all your informational needs.


0 thoughts on “How To Keep Water From Coming Under Garage Door”