Articles
How To Install Wayne Dalton Garage Door
Modified: October 19, 2024
Learn how to install a Wayne Dalton garage door with our step-by-step articles. Gain expert knowledge and complete your installation with ease.
(Many of the links in this article redirect to a specific reviewed product. Your purchase of these products through affiliate links helps to generate commission for Storables.com, at no extra cost. Learn more)
Introduction
Garage doors are an essential part of any home, providing security and convenience for homeowners. And when it comes to quality and durability, Wayne Dalton garage doors are a top choice for many. With their innovative designs and advanced features, Wayne Dalton has established itself as a trusted brand in the garage door industry.
Installing a Wayne Dalton garage door may seem like a complex task, but with the right tools and knowledge, you can tackle this project and enjoy the benefits of a new garage door. In this article, we will provide a step-by-step installation guide for Wayne Dalton garage doors, ensuring a smooth and successful installation process.
Before we dive into the installation process, let’s take a closer look at Wayne Dalton garage doors. Known for their superior craftsmanship and attention to detail, Wayne Dalton offers a wide range of garage door options to suit various architectural styles and preferences. From traditional raised panel doors to contemporary glass doors, Wayne Dalton has a solution for every home.
Not only are Wayne Dalton garage doors aesthetically pleasing, but they also prioritize safety and security. Many Wayne Dalton doors are equipped with advanced safety features, such as pinch-resistant panels and tamper-resistant bottom brackets, ensuring the protection of your family and belongings.
Now that we have an overview of Wayne Dalton garage doors let’s move on to the necessary preparations before beginning the installation process. By following these steps, you’ll be well-equipped to tackle the installation with confidence and precision. So gather your tools and let’s get started!
Key Takeaways:
- Proper installation of a Wayne Dalton garage door is crucial for safety, smooth operation, and energy efficiency. Following manufacturer’s instructions and seeking professional assistance when needed ensures long-term reliability.
- Regular maintenance, testing safety features, and staying organized are essential for the longevity and functionality of your Wayne Dalton garage door. Prioritize safety, follow instructions, and seek professional assistance when necessary.
Overview of Wayne Dalton Garage Doors
Preparation
Before you begin installing your Wayne Dalton garage door, it’s crucial to gather all the necessary tools and materials. This will ensure a smooth and efficient installation process. Here are the essential items you’ll need:
1. Measuring tape: Accurate measurements are essential for a proper fit. Make sure to measure the width and height of the garage door opening, as well as the headroom and side room required for installation.
2. Level: A level is necessary to ensure that the garage door is installed straight and level, preventing any unnecessary strain on the door components.
3. Drill: A drill with both Phillips and flathead screwdriver bits will come in handy for attaching various parts of the garage door.
4. Hammer: You’ll need a hammer for driving nails, securing track brackets, and making minor adjustments during the installation process.
5. Screwdriver: A screwdriver will be needed to tighten screws, particularly when installing hinges and brackets.
6. Pliers: Pliers can be useful for tasks such as tightening cables and adjusting the tension of the springs.
7. Safety glasses and gloves: Safety should always be a priority during any construction project. Wear safety glasses to protect your eyes from any potential hazards and gloves to safeguard your hands.
In addition to these tools, you’ll also need the following materials:
1. Garage door sections: This is the main component of your Wayne Dalton garage door. The sections may come in various styles and materials, so choose the one that best matches your home’s architecture and personal taste.
2. Track and rollers: The track and rollers enable the smooth movement of the garage door. Make sure you have the appropriate track length and sufficient rollers to ensure proper operation.
3. Springs: Depending on the garage door model, you will need either torsion springs or extension springs. These springs provide the necessary counterbalance to lift and lower the garage door safely.
4. Bottom bracket: The bottom bracket attaches the bottom section of the garage door to the floor. It is essential for stability and proper alignment.
5. Hardware: Various nuts, bolts, screws, and washers will be required for attaching different components and securing the garage door in place.
Before starting the installation, it’s essential to familiarize yourself with the specific instructions provided by Wayne Dalton for your garage door model. These instructions will guide you through the installation process and ensure that you have all the specific components and hardware needed for your particular door.
Now that you have gathered all the necessary tools and materials, it’s time to take the necessary safety precautions before beginning the installation process.
Required Tools and Materials
To ensure a successful and smooth installation of your Wayne Dalton garage door, it’s important to have the necessary tools and materials on hand. Here is a comprehensive list of what you’ll need:
Tools:
1. Measuring tape: Accurate measurements are crucial for a proper fit. Make sure to measure the width and height of the garage door opening, as well as the headroom and side room required for installation.
2. Level: A level is essential for ensuring that the garage door is installed straight and level, preventing any unnecessary strain on the door components.
3. Drill: A drill with both Phillips and flathead screwdriver bits will come in handy for attaching various parts of the garage door.
4. Hammer: You’ll need a hammer for driving nails, securing track brackets, and making minor adjustments during the installation process.
5. Screwdriver: A screwdriver will be needed to tighten screws, particularly when installing hinges and brackets.
6. Pliers: Pliers can be useful for tasks such as tightening cables and adjusting the tension of the springs.
7. Safety glasses and gloves: Safety should always be a priority during any construction project. Wear safety glasses to protect your eyes from any potential hazards, and gloves to safeguard your hands.
Materials:
1. Garage door sections: This is the main component of your Wayne Dalton garage door. The sections may come in various styles and materials, so choose the one that best matches your home’s architecture and personal taste.
2. Track and rollers: The track and rollers allow for the smooth movement of the garage door. Make sure you have the appropriate track length and sufficient rollers to ensure proper operation.
3. Springs: Depending on the garage door model, you will need either torsion springs or extension springs. These springs provide the necessary counterbalance to lift and lower the garage door safely.
4. Bottom bracket: The bottom bracket attaches the bottom section of the garage door to the floor. It is essential for stability and proper alignment.
5. Hardware: Various nuts, bolts, screws, and washers will be required for attaching different components and securing the garage door in place.
6. Weatherstripping: Weatherstripping helps to seal gaps and prevent drafts, ensuring optimal energy efficiency and keeping out unwanted pests and debris.
Before starting the installation process, carefully review the instructions provided by Wayne Dalton for your specific garage door model. These instructions will guide you through the installation process and ensure that you have all the necessary components and hardware required for your particular door.
Having the right tools and materials at your disposal will not only make the installation process easier but also ensure the safety and longevity of your Wayne Dalton garage door. So, gather all the necessary tools and materials, follow the instructions diligently, and you’ll soon enjoy the benefits of a professionally installed and functional garage door.
Safety Precautions
Before you start installing your Wayne Dalton garage door, it’s essential to prioritize safety. Here are some important safety precautions to keep in mind throughout the installation process:
1. Read the instructions: Familiarize yourself with the installation instructions provided by Wayne Dalton for your specific garage door model. Pay close attention to any safety warnings or precautions mentioned.
2. Use protective gear: Wear safety glasses to protect your eyes from debris and dust. Additionally, it’s advisable to wear gloves to protect your hands from sharp edges and potential injuries.
3. Work with a partner: Garage doors can be heavy and cumbersome. It’s best to have someone assist you with the installation to ensure the proper handling and positioning of the door sections.
4. Disconnect power: Before beginning any work, disconnect power to the garage door opener to prevent any accidental activation or movement of the door.
5. Handle components with care: Garage door sections, springs, and other components can be heavy and may have sharp edges. Take caution when handling them to avoid injury.
6. Secure the door: While working on the installation, make sure the garage door is securely supported and won’t move unexpectedly. Use clamps or locking mechanisms to keep it in place.
7. Follow weight capacity guidelines: Be aware of the weight capacity and load limits specified by Wayne Dalton for your particular garage door model. Exceeding these limits can lead to a malfunctioning or unsafe door.
8. Be cautious of springs: Torsion springs and extension springs store a significant amount of tension. Exercise extreme caution when installing, adjusting, or replacing them. If you are unsure about working with springs, it’s recommended to seek professional assistance.
9. Use proper tools: Ensure you are using the right tools for the job. This includes using the correct size of drill bits, screwdrivers, and wrenches. Using improper tools can lead to damage and accidents.
10. Take breaks when needed: Installing a garage door is physically demanding. Take regular breaks to rest and avoid excessive fatigue that could compromise your safety and the quality of the installation.
By following these safety precautions, you can minimize the risk of accidents and injuries during the installation process. Always prioritize safety and use common sense. If you encounter any difficulties or doubts, it’s best to consult a professional or contact Wayne Dalton for guidance.
Now that you’re equipped with the necessary safety knowledge, let’s move on to the step-by-step installation guide for your Wayne Dalton garage door.
Read more: How Much To Install Garage Door
Step 1: Measure and Prepare the Opening
The first step in installing your Wayne Dalton garage door is to measure and prepare the opening. This ensures that the door will fit properly and function smoothly. Follow these steps:
1. Measure the width and height: Use a measuring tape to determine the width and height of the garage door opening. Measure at multiple points to account for any irregularities.
2. Check the headroom and side room requirements: Wayne Dalton provides specific headroom and side room requirements for each garage door model. Measure the space above the opening (headroom) and on the sides of the opening (side room) to ensure they meet the manufacturer’s recommendations.
3. Prepare the opening: Clear the area around the garage door opening of any obstructions or debris. Remove any existing weatherstripping or trim that may interfere with the installation.
4. Check the floor level: Use a level to check if the garage floor is level. If there are any uneven areas, you may need to make adjustments before proceeding with the installation. This will ensure proper alignment and smooth operation of the door.
5. Install the necessary hardware: Depending on your garage door model, you may need to install additional hardware, such as brackets or reinforcement plates. Follow the instructions provided by Wayne Dalton to correctly position and secure these components.
6. Insulate the opening (optional): If you desire energy efficiency or sound insulation, this is the time to install insulation materials. Follow the manufacturer’s instructions for the type of insulation you choose.
Taking accurate measurements and properly preparing the opening are crucial steps in ensuring a successful garage door installation. It’s essential to follow the manufacturer’s recommendations and specifications for the specific Wayne Dalton garage door model you are installing.
Remember to double-check your measurements and make any necessary adjustments before proceeding to the next steps. By doing so, you’ll lay the foundation for a smooth and precise installation process.
Step 2: Assemble the Garage Door Sections
After measuring and preparing the opening, the next step in installing your Wayne Dalton garage door is to assemble the garage door sections. Follow these steps:
1. Lay out the sections: Carefully unpack the garage door sections and lay them out in the order of installation. Each section should be labeled or marked for easy identification.
2. Attach the hinges: Each garage door section has hinges that allow them to fold and move smoothly. Attach the hinges to the designated locations on the sections according to the manufacturer’s instructions. Secure them firmly with the provided screws or fasteners.
3. Connect the sections: Align the sections one by one and connect them using the hinge pins. Insert the hinge pins into the pre-drilled holes on the hinges and secure them in place.
4. Check the alignment: Once the sections are connected, check their alignment to ensure they are straight and properly aligned. Adjust the sections if necessary, making sure they are level and evenly spaced.
5. Install the end stiles: The end stiles are the vertical components that provide stability to the garage door sections. Attach the end stiles to the outer edges of the end sections using screws or fasteners.
6. Reinforce the sections (if necessary): Depending on the size and weight of your garage door, reinforcement struts may be required to provide additional support. Follow the manufacturer’s instructions to install the struts securely.
7. Inspect the assembly: Once all sections are properly assembled, inspect the door for any loose screws or hinges. Tighten any loose components to ensure a sturdy and stable assembly.
Assembling the garage door sections requires attention to detail and precision. Make sure to follow the instructions provided by Wayne Dalton and take your time to ensure a proper connection between sections. A well-assembled garage door is the foundation for its smooth operation and longevity.
Once you have successfully assembled the garage door sections, you are ready to move on to the next step, which involves installing the bottom bracket and track.
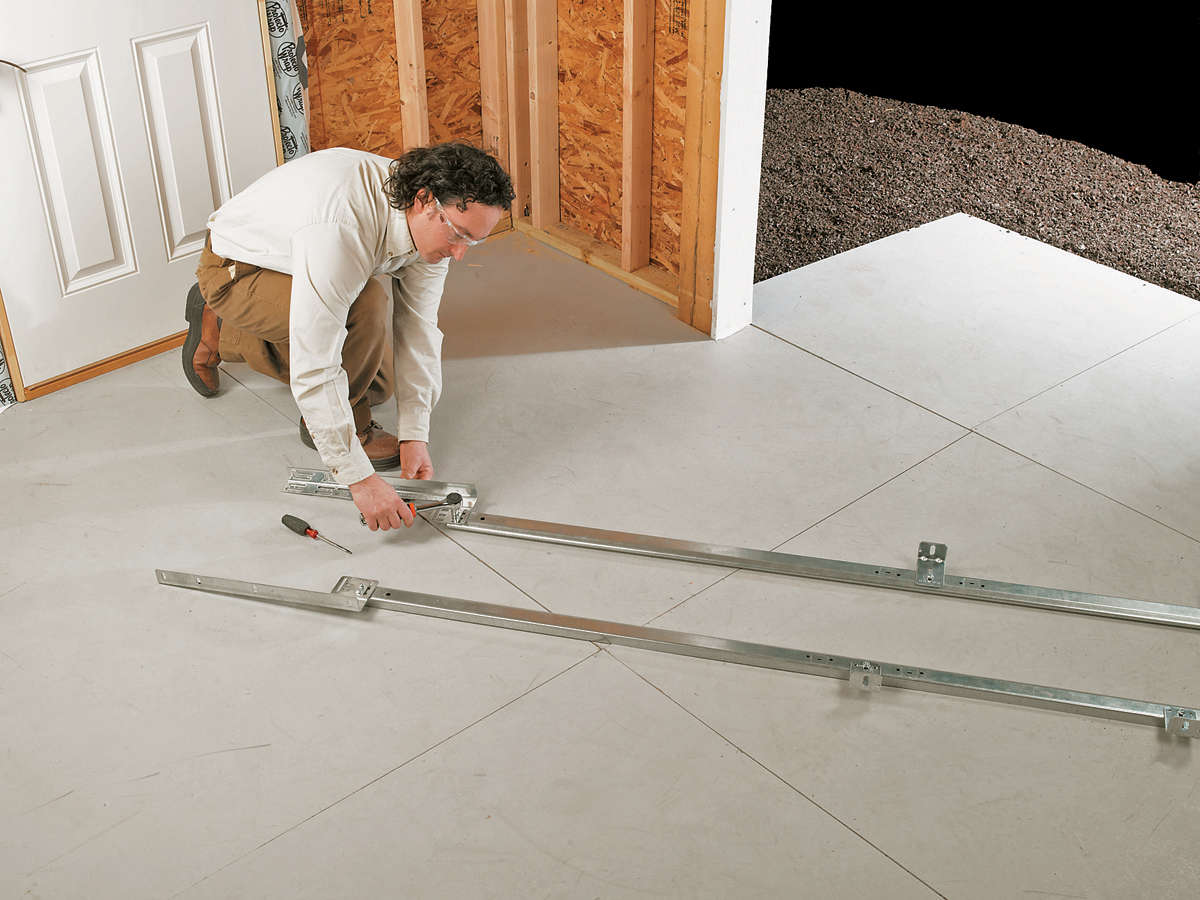
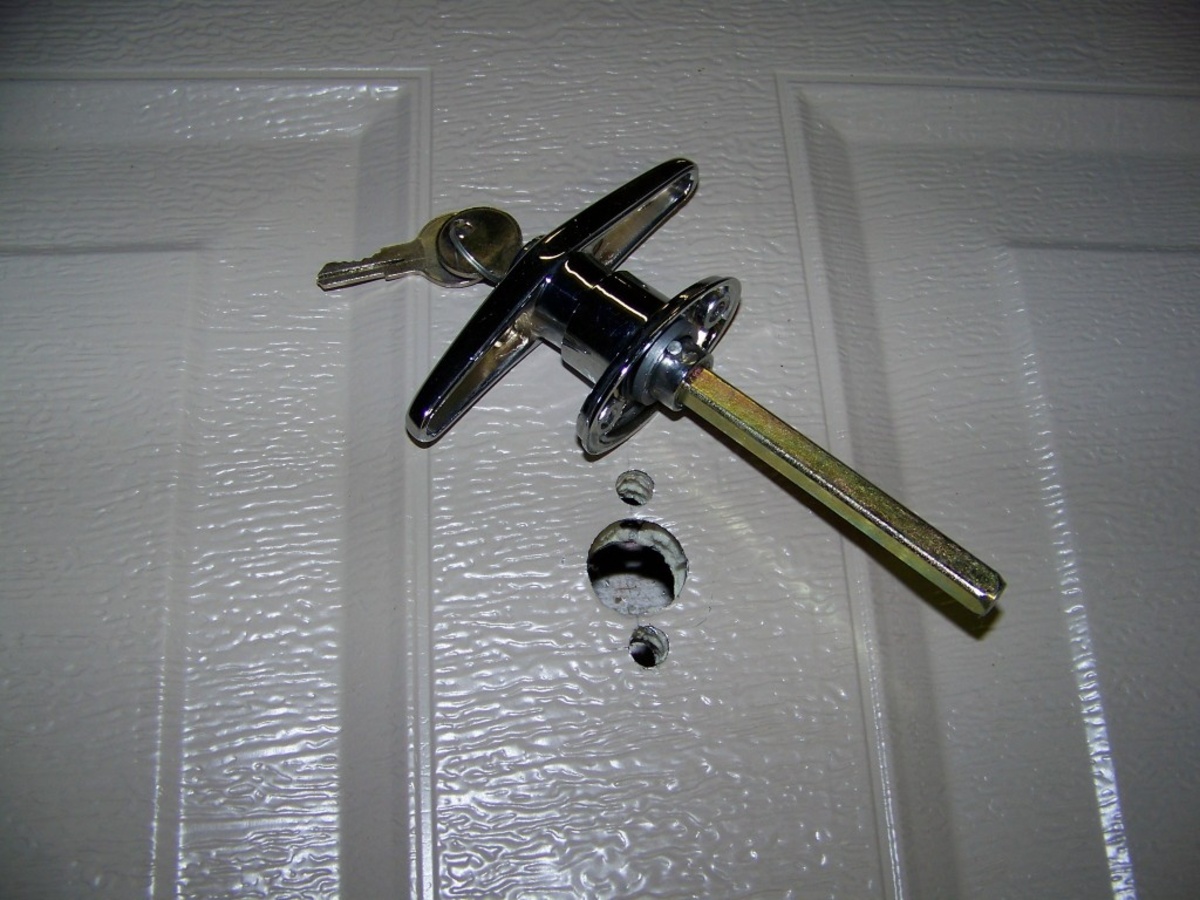
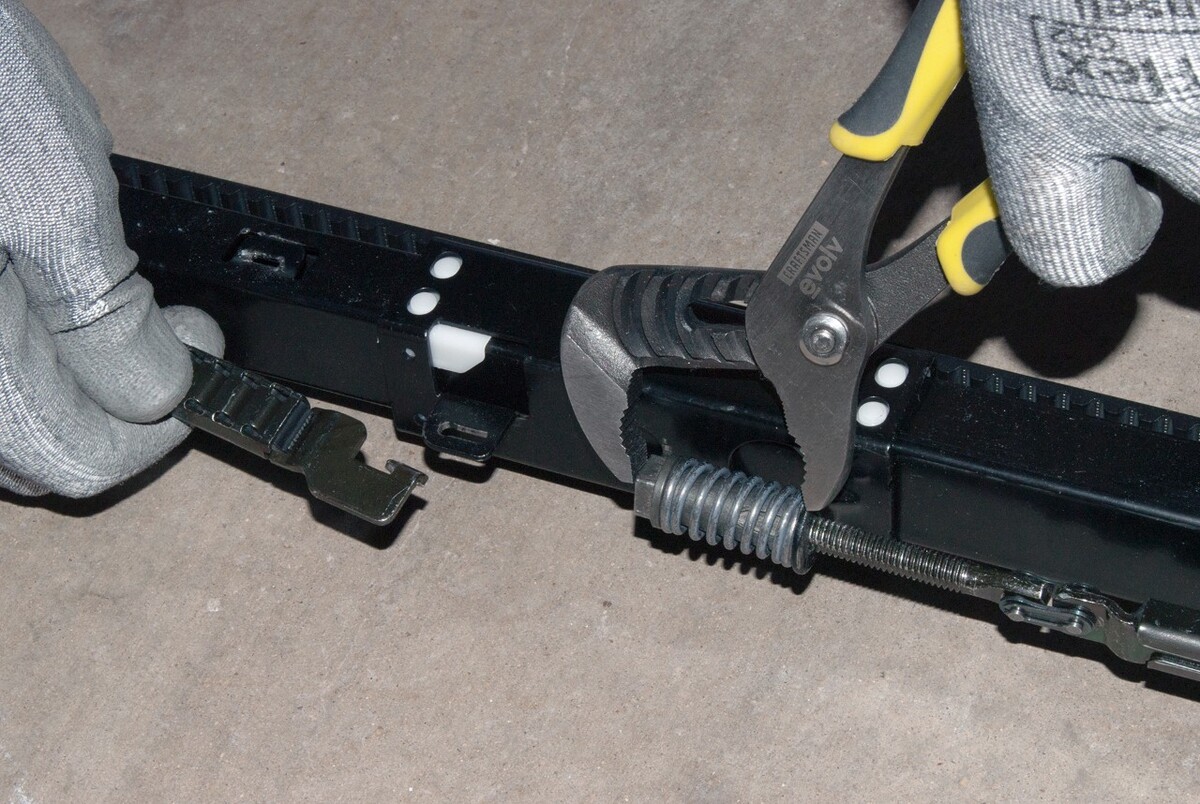
Step 3: Install the Bottom Bracket and Track
After assembling the garage door sections, the next step in installing your Wayne Dalton garage door is to install the bottom bracket and track. This is a critical step in ensuring the proper functioning and alignment of the door. Follow these steps:
1. Position the bottom bracket: Place the bottom bracket in the designated location at the bottom of the door. The bottom bracket attaches to the bottom section of the door and connects it to the track system.
2. Mark and drill pilot holes: Using a pencil or marker, mark the screw hole locations on the bottom section of the door. Then, drill pilot holes at the marked locations. Be careful not to drill through the other side of the door.
3. Attach the bottom bracket: Align the screw holes of the bottom bracket with the pilot holes on the door. Secure the bottom bracket to the door using the provided screws. Make sure the bracket is firmly attached and doesn’t wobble.
4. Install the vertical track: Position the vertical track on the inside of the garage door opening, starting from the floor and extending to the desired height. Use a level to ensure the track is straight and plumb.
5. Mark and drill pilot holes for the track brackets: Mark the locations for the track brackets on the side jambs of the garage door opening. Then, drill pilot holes at the marked locations.
6. Attach the track brackets: Attach the track brackets to the side jambs using the provided screws. Make sure the brackets are securely fastened and positioned correctly to support the vertical track.
7. Install the horizontal track: Insert the rollers on the bottom section of the door into the vertical track. Then, carefully lift and insert the rollers into the horizontal track. Slide the door back and forth to ensure smooth movement along the track.
8. Check for proper alignment: Once the bottom bracket and track are installed, visually inspect the alignment of the garage door sections. Make any necessary adjustments to ensure that the door moves smoothly and evenly.
Installing the bottom bracket and track is a crucial step in the installation process. It provides stability and proper guidance for the garage door, ensuring smooth operation. Take your time to carefully position and secure the bottom bracket and track to ensure a secure and durable installation.
After successfully installing the bottom bracket and track, you can proceed to the next step, which involves securing the vertical track and rollers.
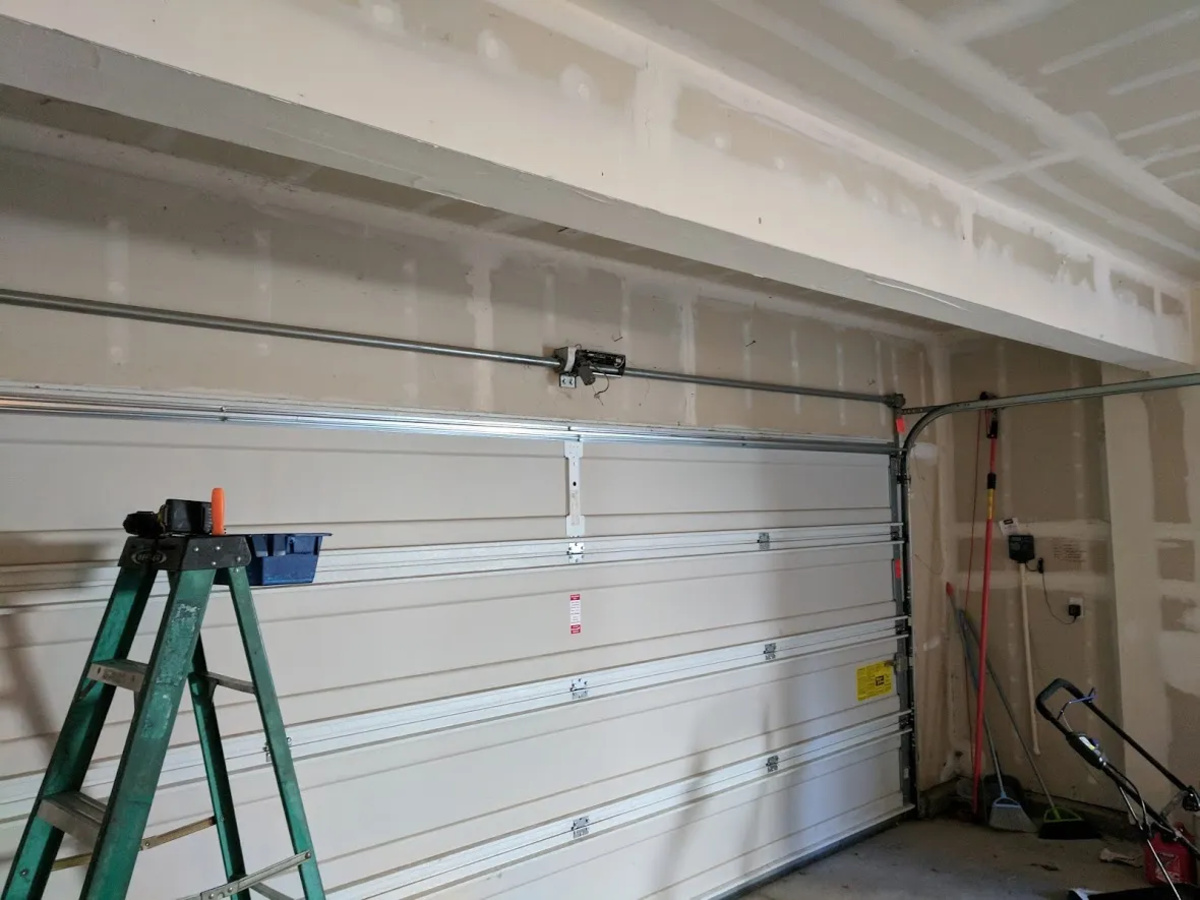
Step 4: Secure the Vertical Track and Rollers
After installing the bottom bracket and track, the next step in installing your Wayne Dalton garage door is to secure the vertical track and rollers. This step ensures proper alignment and smooth movement of the garage door. Follow these steps:
1. Position the vertical tracks: Place the vertical tracks on the inside of the garage door opening, aligning them with the track brackets installed earlier. The track should extend from the floor to the desired height, following the manufacturer’s recommendations.
2. Secure the track to the wall: Mark the location of the track mounting holes on the wall using a pencil or marker. Then, drill pilot holes at the marked locations. Make sure to use the appropriate drill bit size for the wall material.
3. Attach the track to the wall: Align the track with the pilot holes and secure it to the wall using the provided screws. Ensure that the track is straight and level, using a level to check for proper alignment.
4. Install the rollers: Place the rollers into the vertical track, starting from the bottom and working your way up. Make sure the rollers fit securely into the track and move smoothly along it.
5. Adjust the roller brackets: Each roller has a bracket that attaches it to the garage door. Adjust the brackets to ensure that the rollers are centered within the vertical track and provide smooth movement.
6. Lubricate the rollers: Apply a thin layer of garage door lubricant to the rollers to reduce friction and promote smooth operation. This will help prolong the life of the rollers and ensure quiet operation.
7. Test the movement: Carefully open and close the garage door to test the movement along the vertical track. Make sure the door moves smoothly and evenly without any obstructions or friction.
Securing the vertical track and rollers is a critical step in the installation process. Properly aligning and securing the tracks ensures the garage door’s smooth operation and prevents any unnecessary strain on the components.
Take your time to ensure that the vertical tracks are straight and securely attached to the wall. The rollers should fit snugly within the track and move freely without any binding or misalignment. Apply lubricant to the rollers as needed to maintain optimal performance.
Once you have successfully secured the vertical track and rollers, you are ready to move on to the next step, which involves installing the torsion springs or extension springs.
When installing a Wayne Dalton garage door, make sure to carefully follow the manufacturer’s instructions and use the recommended tools for a safe and proper installation.
Read more: How To Install A Clopay Garage Door
Step 5: Install the Torsion Springs or Extension Springs
The next step in installing your Wayne Dalton garage door is to install the springs. Wayne Dalton garage doors may use either torsion springs or extension springs, depending on the specific model. These springs provide the necessary counterbalance to lift and lower the garage door safely. Follow these steps to install the springs:
For Torsion Springs:
1. Gather necessary tools: Before beginning the installation, make sure you have the required tools, including winding bars, a socket wrench, and a ruler or tape measure.
2. Identify the torsion shaft: Locate the torsion shaft above the garage door opening. This shaft houses the torsion springs and allows them to store the necessary tension.
3. Determine the spring orientation: Identify the right spring and left spring based on their positioning and the direction they wind. The right spring winds in a clockwise direction, while the left spring winds counterclockwise.
4. Install the winding cones: Place one winding cone onto the torsion shaft at each end. Make sure the cone faces towards the center of the garage door. Secure the cones in place using the set screws provided.
5. Install the torsion springs: Position the right spring onto the right winding cone and the left spring onto the left winding cone. Ensure that the springs are seated properly and do not overlap or interfere with any other components.
6. Wind the springs: Using the winding bars, carefully rotate the torsion shaft in the appropriate direction to wind the springs. Follow the manufacturer’s guidelines for the recommended number of turns or the specific tension required for your door size and weight.
7. Check the balance: Once the springs are wound, utilize a ruler or tape measure to measure the distance between the bottom of the door and the floor at various points. Adjust the spring tension if needed to achieve proper balance.
For Extension Springs:
1. Gather necessary tools: Before starting the installation, ensure that you have the required tools, including safety cables, pliers, and a ladder.
2. Identify the spring location: Locate the extension spring assembly on each side of the garage door tracks. These assemblies consist of the springs, safety cables, and pulleys.
3. Install the safety cables: Attach one end of the safety cable to the bracket near the rear track hanger, and the other end to the bottom bracket on the corresponding side of the door. Ensure that the safety cable is securely fastened.
4. Thread the cables: Pass the extension spring through the safety cable. This will prevent the spring from becoming a projectile if it breaks.
5. Connect the pulleys: Attach the pulleys to the brackets on each side of the door, making sure they are aligned correctly and securely fastened.
6. Install the springs: Carefully hook the extension springs onto the designated brackets on each side of the garage door. Ensure that the springs are securely attached and properly tensioned.
7. Test the tension: Open and close the garage door to verify that the springs are properly balanced and functioning correctly. Adjust the tension if necessary until the door operates smoothly and evenly.
Proper installation of the springs is crucial for the safe and effective operation of your Wayne Dalton garage door. If you are unsure about working with springs or encounter any difficulties during the installation process, it is highly recommended to seek professional assistance.
Once you have successfully installed the springs, you can move on to the next step, which involves attaching the cable and drum assembly.
Step 6: Attach the Cable and Drum Assembly
After installing the springs, the next step in installing your Wayne Dalton garage door is to attach the cable and drum assembly. This assembly plays a crucial role in lifting and lowering the garage door smoothly and efficiently. Follow these steps to attach the cable and drum assembly:
1. Prepare the cables: Unroll the cables and inspect them for any signs of damage or fraying. If the cables are in good condition, proceed with the installation. If any damage is present, it is recommended to replace the cables before proceeding.
2. Locate the cable drum: The cable drum is typically positioned on the torsion tube, near the end brackets. Identify the correct drum and ensure it is properly aligned.
3. Insert the cable into the drum: Start by inserting one end of the cable into the slot or hole on the drum. Make sure the cable is seated securely to prevent it from slipping out during operation.
4. Wind the cable around the drum: Begin winding the cable around the drum in a tight and even manner. Use caution to prevent any overlapping or crossing of the cables. Continue winding until you reach the desired tension, taking care not to over-tighten.
5. Secure the cable: Once the cable is wound around the drum, secure it to prevent it from unwinding. This is typically done using a set screw or clamp provided with the drum assembly. Ensure the cable is securely fastened, but avoid overtightening which may cause damage.
6. Repeat the process for the other drum: If your garage door has multiple drums, repeat the above steps to attach the cable and drum assembly to each drum. Ensure consistent tension and proper alignment for all cables.
7. Test the cable tension: Gently tug on the cables to verify that they are properly tensioned. The cables should be taut, but not excessively tight. Adjust the tension if necessary by loosening or tightening the set screws or clamps.
8. Verify cable alignment: Check that the cables are properly aligned on the drums and do not rub against any other parts. Ensure that the cables are centered and parallel to the garage door tracks.
Properly attaching the cable and drum assembly is crucial for the safe and effective operation of your Wayne Dalton garage door. Take your time to follow the manufacturer’s instructions and ensure that the cables are securely fastened and properly tensioned.
Once you have successfully attached the cable and drum assembly, you can proceed to the next step, which involves installing the top fixtures and track.
Step 7: Install the Top Fixtures and Track
After attaching the cable and drum assembly, the next step in installing your Wayne Dalton garage door is to install the top fixtures and track. These components play a critical role in guiding the garage door and ensuring its smooth operation. Follow these steps to install the top fixtures and track:
1. Identify the top fixtures: Locate the top fixtures provided with your Wayne Dalton garage door. These fixtures are typically metal brackets with holes for attaching the track and supporting the door.
2. Position the top fixtures: Place the top fixtures at the top of the garage door opening, aligning them with the vertical track on each side. Ensure that the holes on the fixtures are facing towards the center of the opening.
3. Mark the screw hole locations: Use a pencil or marker to mark the locations of the screw holes on the wall above the opening. These marks will serve as a guide for drilling pilot holes.
4. Drill pilot holes: With the appropriate drill bit, carefully drill pilot holes at the marked locations. Make sure the holes are deep enough to securely fasten the fixtures but avoid drilling too deep into the wall.
5. Attach the top fixtures: Align the screw holes of the top fixtures with the pilot holes on the wall. Secure the fixtures in place using the provided screws. Ensure that the fixtures are firmly attached and level.
6. Install the horizontal track: Position the horizontal track on top of the top fixtures and align it with the vertical track. Make sure the track is level and properly aligned with the door sections.
7. Mark the track bracket locations: Use a pencil or marker to mark the locations of the track brackets on the ceiling or header above the garage door opening. These marks will be a guide for drilling pilot holes.
8. Drill pilot holes: Drill pilot holes at the marked locations, ensuring that the holes are aligned with the track brackets. Take care to choose the appropriate drill bit size for your ceiling material.
9. Attach the track brackets: Place the track brackets over the pilot holes on the ceiling or header. Secure the brackets using the provided screws, ensuring that they are securely fastened and aligned with the track.
10. Check alignment: Once the top fixtures and track are installed, visually inspect the alignment of the garage door sections and the track. Make any necessary adjustments to ensure that the door moves smoothly and evenly along the track.
Properly installing the top fixtures and track is essential for the proper operation and alignment of your Wayne Dalton garage door. Take your time to ensure that the fixtures are securely attached and the track is properly aligned with the door sections.
Once you have successfully installed the top fixtures and track, you can proceed to the next step, which involves hanging the garage door sections.
Step 8: Hang the Garage Door Sections
After installing the top fixtures and track, the next step in installing your Wayne Dalton garage door is to hang the garage door sections. This step involves attaching the sections to the track and ensuring they are properly aligned. Follow these steps to hang the garage door sections:
1. Prepare the sections: Remove any packaging or protective covering from the garage door sections. Carefully inspect each section for any damage or defects. If any issues are detected, contact Wayne Dalton for assistance.
2. Lift the first section: Start with the bottom section of the garage door. With the help of a friend or family member, lift the section and position it at the bottom of the door opening, inside the track.
3. Secure the section and rollers: Attach the hinges on the first section to the rollers in the track. Make sure the rollers are securely inserted into the track and the hinges connect properly.
4. Install the next section: Lift the second section of the door and align it with the first section. Connect the hinges between the two sections, ensuring they are securely fastened. Continue this process for each section until all sections are connected.
5. Check for alignment: As each section is installed, check for proper alignment between the sections and with the track. Adjust the hinges and rollers as necessary to ensure smooth movement and alignment.
6. Install struts (if necessary): Depending on the size and weight of your garage door, reinforcing struts may be required for added support. Follow the manufacturer’s instructions to attach the struts securely to the door sections.
7. Secure the door sections: Once all sections are properly aligned and connected, secure them in place using the provided screws or fasteners. Ensure that each section is securely fastened to the one below it and that there is no excessive movement.
8. Test the door movement: Carefully open and close the garage door to test its movement. Ensure that all sections move smoothly along the track without any binding or obstructions. Make any necessary adjustments to the hinges or rollers to achieve proper operation.
By properly hanging the garage door sections, you ensure the door operates smoothly and efficiently. Take your time to align each section properly and securely fasten them together. This step will contribute to the overall integrity and functionality of your Wayne Dalton garage door.
Once the garage door sections are successfully hung, you can proceed to the next step, which involves connecting and adjusting the spring assembly.
Read more: How To Install Insulation On Garage Door
Step 9: Connect and Adjust the Spring Assembly
After hanging the garage door sections, the next step in installing your Wayne Dalton garage door is to connect and adjust the spring assembly. The spring assembly provides the necessary counterbalance for the door, making it easier to open and close. Follow these steps to connect and adjust the spring assembly:
1. Identify the spring assembly components: The spring assembly consists of the torsion shaft, drums, and cables. Familiarize yourself with these components before proceeding.
2. Attach the cables to the drums: Start by attaching one end of each cable to the corresponding drum. Insert the cables into the designated slots or holes on the drums, making sure they are seated securely.
3. Wind the cables around the drums: Using the winding bars, carefully wind the cables around the drums. Make sure the cables wind in a tight and even manner. Take your time and follow the manufacturer’s recommendations for the number of turns required.
4. Check the cable tension: Once the cables are wound, check the tension by lifting the door slightly and releasing it. The door should stay in place when halfway open. If the door moves too quickly or does not stay in position, adjust the cable tension accordingly.
5. Adjust the spring tension: If necessary, adjust the spring tension by inserting the winding bars into the winding cone. Rotate the cone in the appropriate direction to increase or decrease the tension as needed. Take caution and follow the manufacturer’s instructions to prevent injury.
6. Test the door balance: Gently open and close the garage door multiple times to test its balance. The door should move smoothly and stay in place at any position without any undue effort. If the door feels heavy or unbalanced, adjust the spring tension as necessary.
7. Verify spring safety features: Wayne Dalton garage doors are equipped with safety features such as safety cables or containment system brackets for torsion springs. Ensure that these safety components are properly installed and functioning correctly to prevent accidents in case of spring failure.
Properly connecting and adjusting the spring assembly is essential for the safe and optimal operation of your Wayne Dalton garage door. It is crucial to follow the manufacturer’s instructions and take the necessary precautions when working with springs.
Remember, adjusting spring tension is a delicate process that requires knowledge and caution. If you are unsure about working with springs or encounter any difficulties during the adjustment, it is highly recommended to seek professional assistance.
Once you have successfully connected and adjusted the spring assembly, you can proceed to the next step, which involves installing the weatherstripping.
Step 10: Install the Weatherstripping
Installing weatherstripping is an important step in completing the installation of your Wayne Dalton garage door. Weatherstripping helps to seal gaps and prevent drafts, providing improved energy efficiency and keeping out unwanted pests and debris. Follow these steps to install the weatherstripping:
1. Choose the right weatherstripping: There are various types of weatherstripping available, including adhesive-backed foam, rubber, or vinyl strips. Select the type that is suitable for your Wayne Dalton garage door and the climate in your area.
2. Clean the door surfaces: Before applying the weatherstripping, ensure that the surface of the garage door is clean and dry. Use a mild detergent and water to remove any dirt, dust, or debris. Allow the surface to dry completely.
3. Measure and cut the weatherstripping: Measure the length of each side and the top of the garage door opening. Cut the weatherstripping to the appropriate length using scissors or a utility knife.
4. Apply the weatherstripping to the sides: Starting at the bottom, peel the backing from the adhesive side of the weatherstripping. Align it with the side of the door opening and press it firmly in place. Continue applying the weatherstripping along the entire length of each side.
5. Install the top weatherstripping: Cut the top weatherstripping to the correct length and apply it to the top of the door opening, ensuring a tight seal. Press the weatherstripping firmly against the door surface.
6. Check for proper seal: Close the garage door and inspect the weatherstripping to ensure a proper seal. Make sure there are no gaps or areas where the weatherstripping is loose or not making sufficient contact with the door.
7. Make necessary adjustments: If needed, trim any excess weatherstripping with a utility knife or scissors. Adjust the placement of the weatherstripping, if necessary, to achieve a proper seal around the entire perimeter of the door.
8. Test the seal and operation: Open and close the garage door to verify that the weatherstripping does not interfere with the door’s movement. Check for any improvement in energy efficiency and reduced drafts around the edges of the door.
By properly installing weatherstripping, you can enhance the energy efficiency of your Wayne Dalton garage door and improve the overall comfort of your garage space. It also helps to keep out dust, insects, and other unwanted elements.
Remember to periodically inspect the weatherstripping and replace it as needed to maintain its effectiveness. Weatherstripping may deteriorate over time due to exposure to weather conditions and general wear and tear.
With the weatherstripping installed, your Wayne Dalton garage door is now ready for operation. In the final step, we will discuss some important tips and recommendations to consider for proper maintenance and continued enjoyment of your garage door.
Step 11: Test the Garage Door and Make Final Adjustments
After completing the installation process, it’s essential to test the garage door and make any final adjustments to ensure proper operation. Follow these steps to test your Wayne Dalton garage door and make any necessary final adjustments:
1. Test the opening and closing: Open and close the garage door multiple times using both the wall control and the remote control (if applicable). Observe the door’s movement and listen for any unusual noises or resistance.
2. Check for proper balance: Raise the door manually to waist height and release it. The door should stay in place and not drift up or down. If the door moves or is difficult to control, it may indicate an imbalance that requires adjustment.
3. Inspect the hardware: Check all screws, fasteners, and brackets to ensure they are secure. Tighten any loose hardware using the appropriate tools.
4. Adjust the track and rollers: If the door does not glide smoothly or appears misaligned, adjust the track and rollers as needed. Loosen the screws on the track brackets, adjust the position, and tighten the screws to secure the track. Make sure the rollers glide effortlessly along the track.
5. Recheck the spring tension: Test the spring tension and verify that the door opens and closes smoothly. If needed, adjust the spring tension following the manufacturer’s recommendations. Take caution when dealing with springs and consider seeking professional assistance if unsure.
6. Lubricate moving parts: Apply a silicone-based lubricant to the rollers, hinges, and other moving parts to reduce friction and ensure smooth operation. Avoid using WD-40 or other oil-based lubricants, as they can attract debris and cause buildup.
7. Test the safety features: Verify that safety features such as the photo-eye sensors and auto-reverse mechanism are functioning correctly. Place an object in the path of the door and check if it reverses when closing.
8. Finalize any adjustments: Make any final adjustments as needed to address any issues or concerns that arise during the testing process. Ensure that the door operates smoothly, quietly, and without any binding or sticking.
Conclusion:
Installing a Wayne Dalton garage door requires careful attention to detail, following the manufacturer’s instructions, and taking necessary safety precautions. By completing the step-by-step installation guide provided in this article, you can ensure a successful installation and enjoy the benefits of a properly functioning garage door.
Remember, proper installation is key to the longevity and performance of your garage door. Regular maintenance, such as lubricating moving parts and inspecting hardware, will help prolong the life of your door and maintain its reliability.
If you encounter any challenges during the installation process or have concerns about working with certain components, it is recommended to seek professional assistance. A trained technician can provide expertise and ensure that the installation is done correctly and safely.
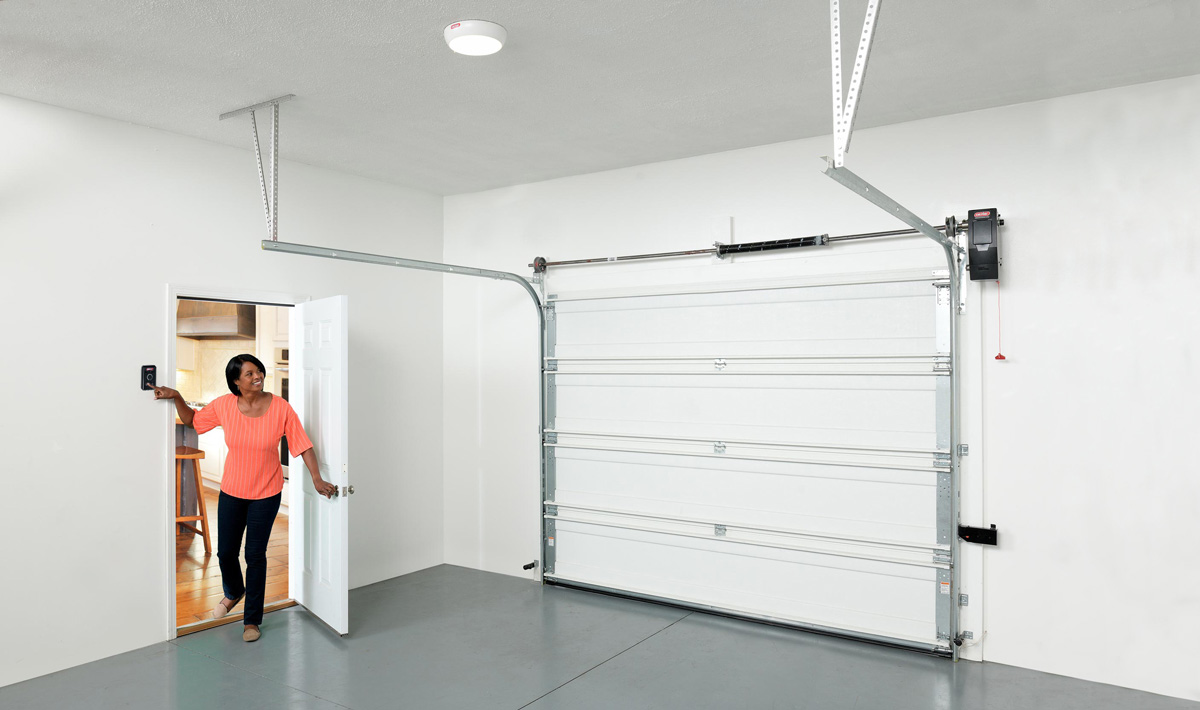
With your Wayne Dalton garage door successfully installed, enjoy the convenience, security, and aesthetic appeal it brings to your home. Regular maintenance and periodic inspections will help keep your door in optimal condition for years to come.
Importance of Proper Installation
Proper installation of your Wayne Dalton garage door is of utmost importance for various reasons. Here are some key reasons why proper installation matters:
1. Safety: A properly installed garage door ensures the safety of you and your family. Garage doors are heavy objects that can cause serious injuries if not installed correctly. The spring tension, alignment, and balance of the door must be accurately set to prevent accidents and maintain safe operation.
2. Smooth Operation: Proper installation guarantees the smooth and efficient operation of your garage door. When the door is installed correctly, all the components work together harmoniously. This ensures that the door glides smoothly along the track, opens and closes without any resistance or jerking motions, and operates quietly.
3. Energy Efficiency: A properly installed garage door helps to maintain energy efficiency in your home. Well-fitted weatherstripping and proper alignment prevent drafts and air leakage, keeping the outside elements from entering your garage. This helps to regulate the temperature inside the garage and can even contribute to energy savings.
4. Longevity of the Door: When a garage door is properly installed, it is less likely to experience premature wear and tear. Each component operates as intended, minimizing unnecessary strain or stress on the door and its parts. This can extend the lifespan of the door, reducing the need for frequent repairs or replacements.
5. Warranty Protection: Most garage doors come with warranties that provide coverage against manufacturing defects. However, these warranties often require professional installation for them to remain valid. By ensuring proper installation, you can benefit from the full protection offered by the manufacturer’s warranty.
6. Enhanced Security: A properly installed garage door provides a higher level of security for your home. When the door is installed correctly, it aligns perfectly with the surrounding structure, leaving little to no gaps for potential intruders to exploit. This helps to protect your belongings and keep your home secure.
7. Peace of Mind: Knowing that your garage door is installed correctly gives you peace of mind. You can be confident that it will function reliably and safely, reducing any potential stress or worries associated with garage door issues.
Proper installation of your Wayne Dalton garage door is not only about getting it to work, but it also ensures safety, efficiency, and the longevity of your investment. It is strongly recommended to follow the manufacturer’s instructions carefully or consult a professional garage door installer to ensure that the installation is done correctly and according to the highest standards.
By investing the time and effort into a proper installation, you can enjoy all the benefits that come with a well-functioning and reliable Wayne Dalton garage door for years to come.
Read more: How To Install Garage Door Keypad
Final Tips and Recommendations
As you wrap up the installation of your Wayne Dalton garage door, here are some final tips and recommendations to ensure a successful project and the long-term functionality of your garage door:
1. Follow the manufacturer’s instructions: It cannot be stressed enough how important it is to thoroughly read and follow the manufacturer’s instructions provided with your specific garage door model. These instructions are tailored to your door and will guide you through the proper installation process.
2. Take safety precautions: Prioritize safety throughout the installation process. Wear appropriate protective gear, such as safety glasses and gloves, and use caution when working with heavy components, spring tension, and power tools. When in doubt, consult a professional.
3. Seek professional assistance if needed: If you are unsure about any aspect of the installation process or encounter difficulties along the way, do not hesitate to seek professional assistance. Garage door professionals have the expertise and tools necessary to ensure a safe and proper installation.
4. Regularly inspect and maintain your garage door: Once the installation is complete, make it a habit to inspect and maintain your garage door regularly. Lubricate moving parts, tighten any loose hardware, and visually inspect for signs of wear or damage. Performing regular maintenance will help prolong the life of your garage door and keep it in optimal condition.
5. Test safety features periodically: Your Wayne Dalton garage door is equipped with safety features, such as photo-eye sensors and auto-reverse mechanisms. Periodically test these features to ensure they are functioning properly and providing the necessary safety measures. Refer to the manufacturer’s instructions for testing procedures.
6. Keep the garage door remote secure: To ensure the security of your home, keep the garage door remote in a secure location. If you are away for an extended period, consider disabling the remote or taking it with you to prevent unauthorized access.
7. Make necessary adjustments as required: Over time, adjustments may be needed to maintain the proper alignment and operation of your garage door. If you notice any issues, such as uneven movement, excessive noise, or strain on the door, address them promptly. Refer to the manufacturer’s instructions or consult a professional for guidance.
8. Stay organized: Throughout the installation process, keep all instruction manuals, warranty documents, and receipts in a safe place for future reference. This will come in handy for any necessary repairs, warranty claims, or reinstallation if needed.
By following these final tips and recommendations, you can ensure the longevity, functionality, and safety of your Wayne Dalton garage door. Regular maintenance and attention to detail will help you enjoy the convenience, security, and aesthetic appeal it brings to your home for many years to come.
Frequently Asked Questions about How To Install Wayne Dalton Garage Door
Was this page helpful?
At Storables.com, we guarantee accurate and reliable information. Our content, validated by Expert Board Contributors, is crafted following stringent Editorial Policies. We're committed to providing you with well-researched, expert-backed insights for all your informational needs.


0 thoughts on “How To Install Wayne Dalton Garage Door”