

Articles
How To Make A Porch Swing Bed
Modified: August 17, 2024
Learn how to make a cozy porch swing bed with our step-by-step articles. Turn your porch into a relaxing oasis and enjoy the outdoors in style.
(Many of the links in this article redirect to a specific reviewed product. Your purchase of these products through affiliate links helps to generate commission for Storables.com, at no extra cost. Learn more)
Introduction
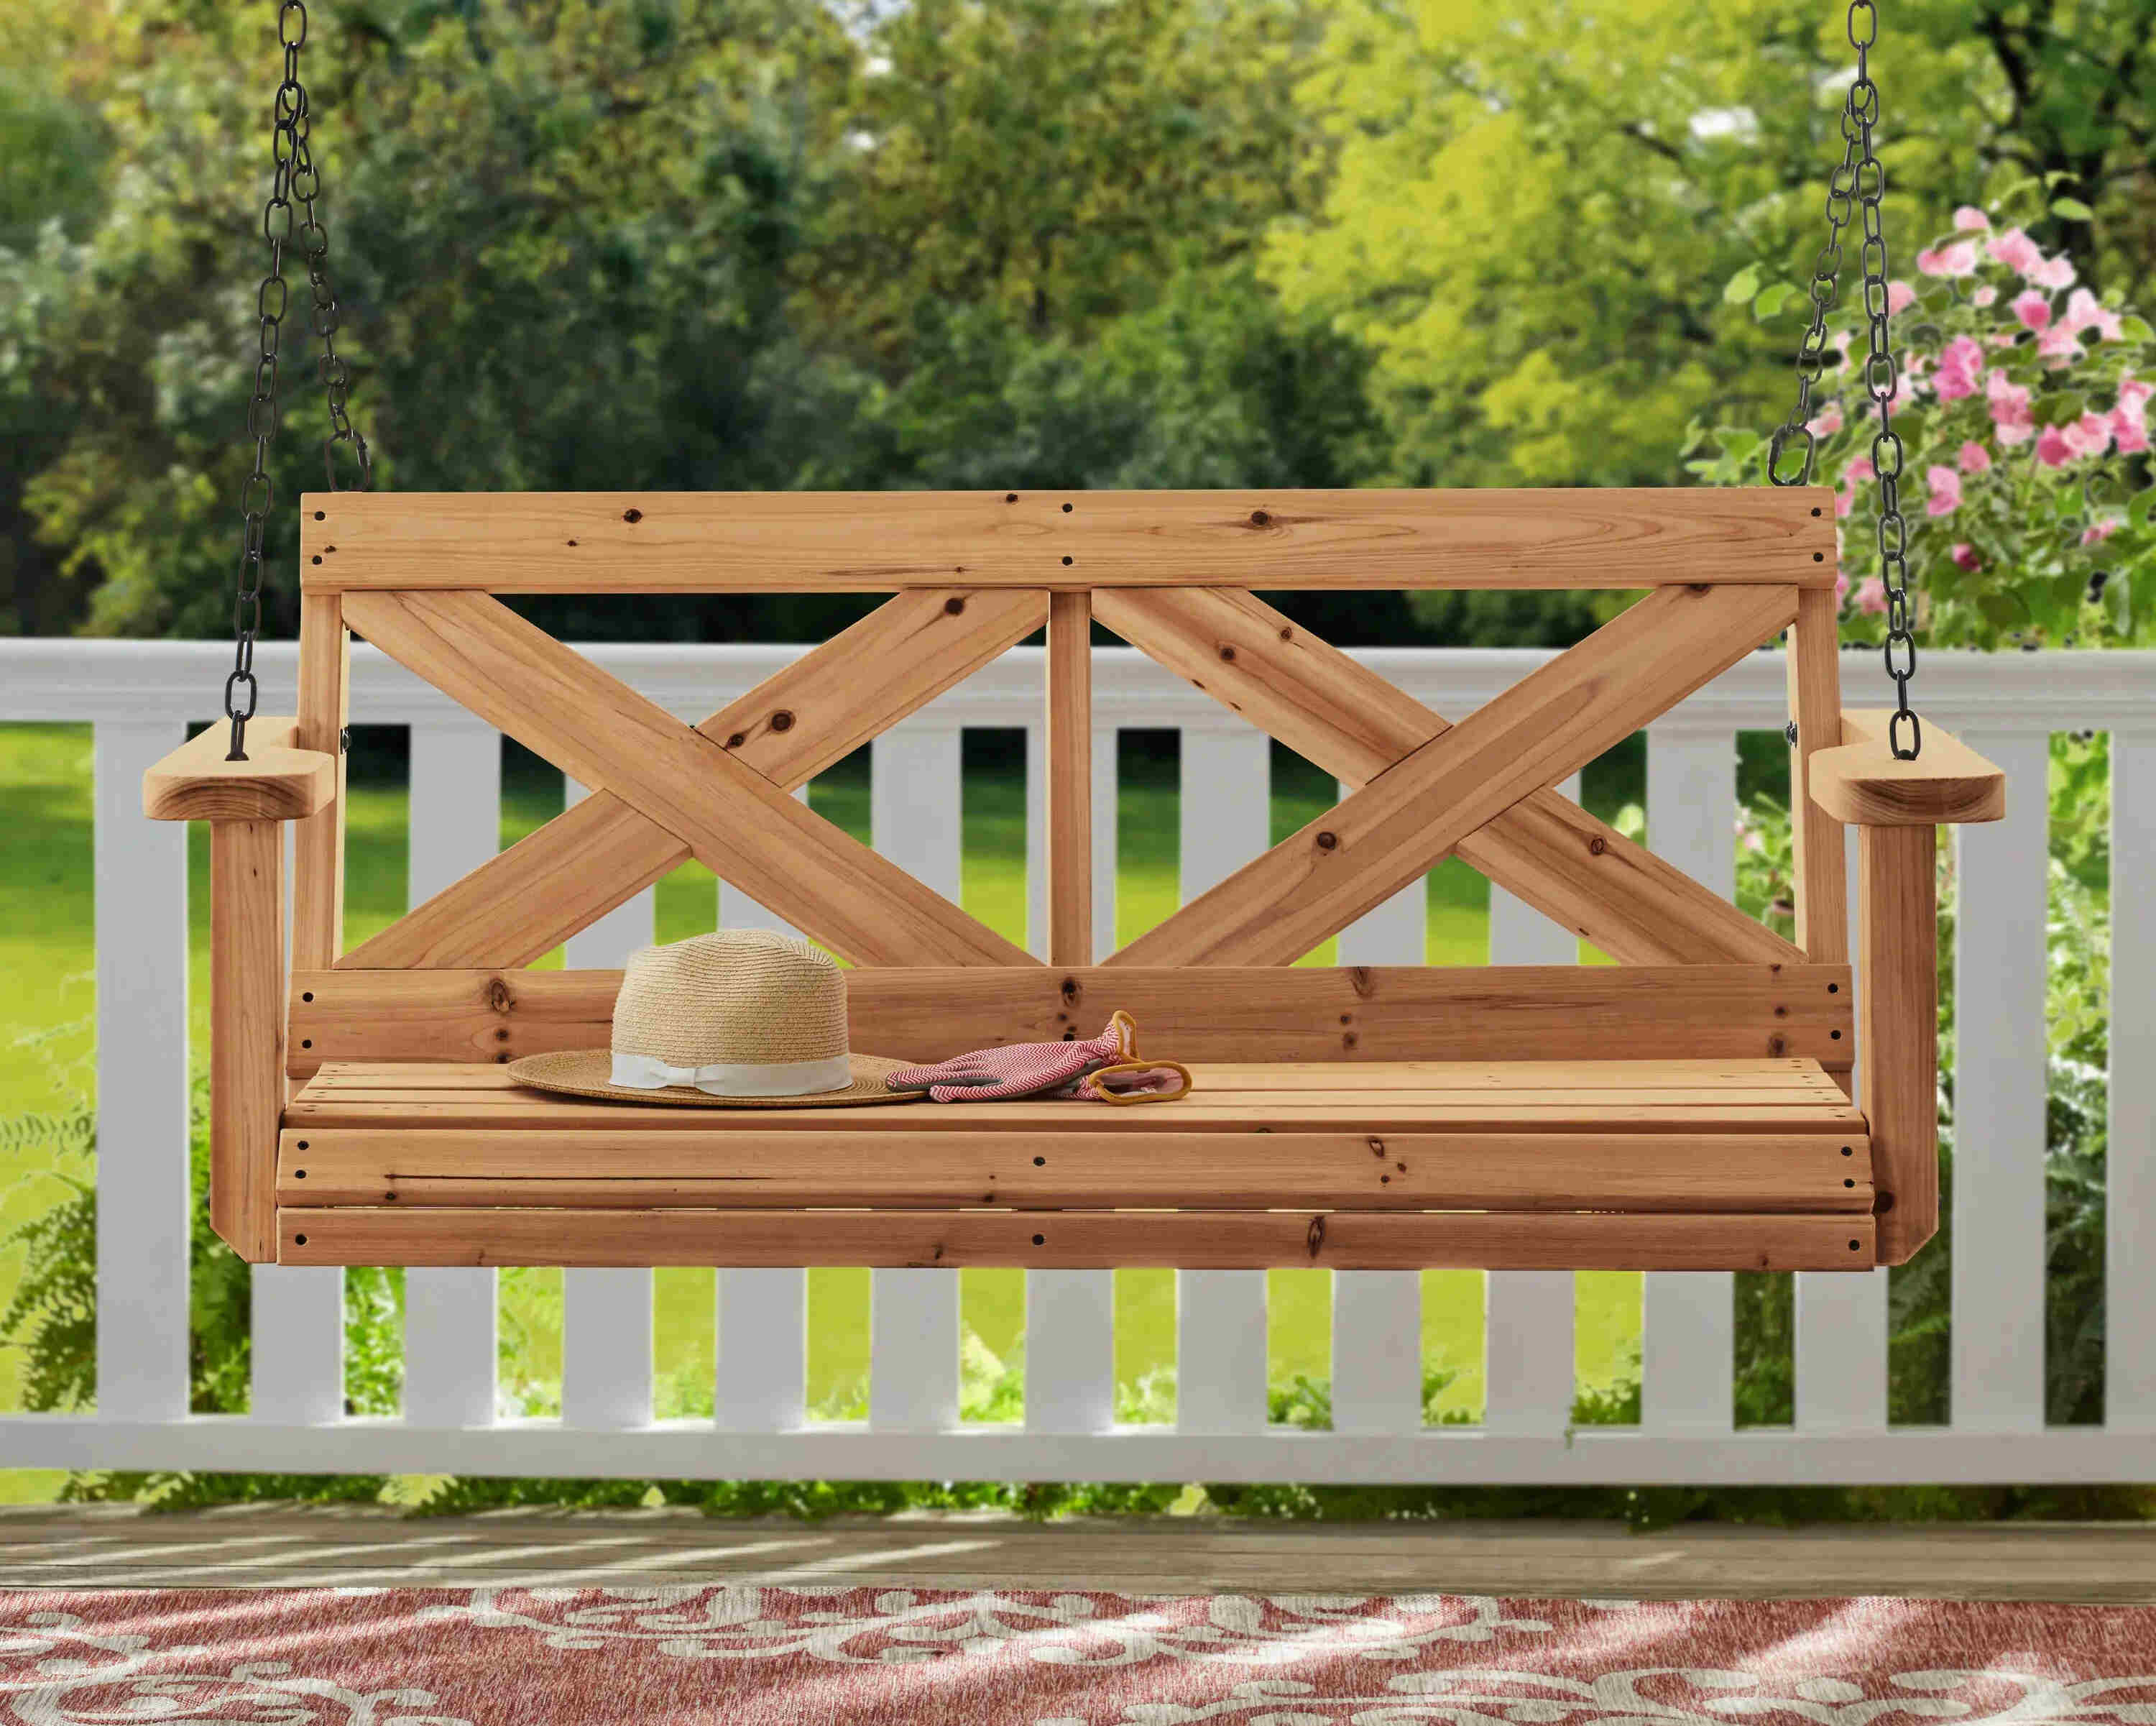
Welcome to the world of porch swing beds, where relaxation meets style. There’s nothing quite like lying on a comfortable swing bed, gently swaying back and forth while enjoying the fresh air and serenity of your porch. Whether you’re looking to take a lazy afternoon nap, read a book, or simply enjoy some peaceful alone time, a porch swing bed is the perfect addition to your outdoor space.
In this article, we’ll guide you through the step-by-step process of making your very own porch swing bed. From selecting the right location to hanging the swing, we’ll cover everything you need to know to create a beautiful and functional piece of furniture that will become the highlight of your porch.
Before we dive into the details, let’s talk about why a porch swing bed is such a popular choice among homeowners. Not only does it provide a cozy and inviting spot to relax, but it also adds a touch of charm and elegance to any outdoor setting. With a range of designs and materials to choose from, you can customize your swing bed to suit your personal taste and complement your existing porch décor.
Whether you have a spacious wrap-around porch or a small balcony, there’s a porch swing bed that will fit perfectly into your outdoor space. You can opt for a traditional wooden design for a rustic look, or choose a modern style with sleek metal frames and plush cushions for added comfort.
Now that you understand the appeal of a porch swing bed, let’s get started on creating your own. By following the steps outlined in this article and taking your time to ensure precision and quality, you’ll have a beautiful porch swing bed that will provide countless hours of relaxation and enjoyment for years to come.
Key Takeaways:
- Create a Tranquil Oasis
Craft a beautiful porch swing bed to transform your outdoor space into a serene sanctuary. Embrace relaxation, enjoy quiet moments, and share laughter with loved ones in this cozy haven. - Personalized Comfort and Style
Customize your swing bed with personalized finishes and cozy touches. Add cushions, blankets, and lighting to create a cozy ambiance. Find your perfect swinging rhythm and enjoy the simple pleasure of unwinding in style.
Read more: How To Make A Trampoline Swing Bed
Step 1: Selecting the Right Location
Before you begin building your porch swing bed, it’s crucial to choose the right location for it. Consider the following factors to ensure a pleasant and safe experience:
- Space: Measure the available space on your porch or outdoor area to determine the appropriate size for your swing bed. Make sure to leave enough room for comfortable movement around it.
- Support: Assess the structural support of the area where you plan to hang your swing bed. It should be able to bear the weight of the swing bed, along with the weight of the people who will use it.
- View: Consider the view from your chosen location. Choose a spot that offers a pleasant view and allows you to enjoy nature or your surroundings while relaxing on the swing bed.
- Weather Protection: Take into account the exposure to sun, rain, and wind. If your porch is exposed to harsh weather conditions, you may want to consider installing a canopy or choosing materials that are weather-resistant and durable.
- Privacy: Determine the level of privacy you desire. If you prefer a secluded spot, choose a location that offers some degree of privacy, such as a corner of your porch or a shaded area.
By considering these factors, you can select the perfect location for your porch swing bed, maximizing your comfort and enjoyment. Remember to also take into account any local regulations or guidelines related to hanging outdoor furniture, particularly if you live in a community with specific rules regarding porch swings or alterations to your property.
Once you have identified the ideal spot for your swing bed, you can move on to the next step: gathering the necessary materials.
Step 2: Gathering the Necessary Materials
Now that you have chosen the perfect location for your porch swing bed, it’s time to gather all the materials you will need. Here is a list of essential items to get started:
- Wood: Select high-quality, durable wood for the frame and platform of your swing bed. Cedar, teak, or pine are popular choices due to their strength and resistance to weathering.
- Chains and Hooks: You will need sturdy chains and hooks to hang your swing bed securely from the ceiling or porch beams.
- Screws and Nails: Choose corrosion-resistant screws and nails to assemble the frame and platform of the swing bed.
- Cushions and Pillows: Opt for comfortable cushions and pillows to enhance the coziness of your swing bed. Make sure they are weather-resistant and easy to clean.
- Paint or Stain: If desired, select paint or stain to add a decorative touch to your swing bed. Ensure that the paint or stain is appropriate for outdoor use and can withstand weather conditions.
- Tools: Gather a set of essential tools such as a measuring tape, saw, drill, screwdriver, and sandpaper to assist you during the construction process.
It’s important to remember that the specific materials you need will depend on the design and size of your swing bed. Consider any additional features you want to incorporate, such as cup holders or a canopy, and gather the necessary materials accordingly.
Before purchasing or gathering your materials, create a detailed shopping list to ensure you have everything you need. This will help to streamline the construction process and avoid any last-minute delays or interruptions.
Once you have gathered all the necessary materials, you can proceed to the next step: measuring and cutting the wood for your swing bed.
Step 3: Measuring and Cutting the Wood
With all the necessary materials in hand, it’s time to move on to the next crucial step in building your porch swing bed: measuring and cutting the wood. Follow these steps to ensure accurate measurements and clean cuts:
- Plan your design: Sketch out a design for your swing bed, including the dimensions and the placement of the supports and chains. This will serve as a blueprint for the cutting process.
- Measure the space: Take precise measurements of the area where the swing bed will be installed. Make sure to consider the length, width, and height limitations to ensure a proper fit.
- Mark the wood: Transfer the measurements from your design onto the wood, using a pencil or marker. Double-check the accuracy of your measurements before making any cuts.
- Cut the wood: Use a saw to carefully cut the wood according to the marked measurements. Take your time and ensure that the cuts are straight and clean.
- Sand the edges: After cutting the wood, use sandpaper to smooth out any rough edges or splinters. This will not only enhance the aesthetics of your swing bed but also prevent any potential injuries.
Remember, accuracy is key when it comes to measuring and cutting the wood for your swing bed. Double-check your measurements and take the necessary precautions to avoid any errors. It’s also a good idea to wear protective gloves and goggles while handling the saw and other tools to prioritize safety.
Once you have completed the measuring and cutting process, you are ready to move on to the next step: assembling the frame of your porch swing bed.
Step 4: Assembling the Frame
Now that you have measured and cut the wood for your porch swing bed, it’s time to move on to assembling the frame. Follow these steps to ensure a sturdy and secure frame:
- Arrange the pieces: Lay out the cut wooden pieces according to your design plan. This will help you visualize the assembly process and ensure that you have all the necessary pieces.
- Start with the sides: Begin by attaching the side pieces of the frame together. Use screws and a drill to secure the joints. Make sure to align the edges and corners properly for a seamless connection.
- Add the front and back: Once the sides are securely attached, add the front and back pieces of the frame. Again, use screws to join the pieces together, ensuring that everything is aligned correctly.
- Install the support beams: Measure and cut additional wooden pieces to serve as support beams for the frame. Attach them to the inside of the frame, providing added stability and strength.
- Reinforce the joints: To further strengthen the frame, consider adding corner brackets or braces to reinforce the joints. This will help to prevent the frame from loosening or wobbling over time.
Take your time during the assembly process and double-check every joint and connection to ensure a solid frame. It’s essential to use the right size and type of screws, as well as a drill bit that matches the screw size, to ensure a secure and durable construction.
Once the frame is assembled, it’s a good idea to test its stability and weight-bearing capacity before proceeding to the next step. Apply some pressure and gently shake the frame to ensure it can withstand the intended use.
With the frame now completed, you can move on to step 5: attaching the supports and chains to prepare for hanging the porch swing bed.
Read more: How To Build A Porch Swing
Step 5: Attaching the Supports and Chains
With the frame of your porch swing bed assembled, it’s time to move on to the next step: attaching the supports and chains. This step is crucial for ensuring the stability and proper hanging of your swing bed. Follow these steps for a secure installation:
- Locate the support points: Determine the points on your porch or outdoor area where you will attach the supports and hang the swing bed. These can be ceiling beams, sturdy porch columns, or other structural elements.
- Measure and mark: Measure the distance from the top of the swing bed frame to the desired hanging height. Mark this measurement on the support points to ensure accurate and even hanging.
- Drill pilot holes: Use a drill and an appropriate drill bit to create pilot holes in the marked spots. Ensure that the size of the pilot holes matches the size of the hooks or eye screws you will be using for hanging.
- Attach the supports: Install the supports by screwing in hooks or eye screws into the pilot holes. Make sure they are securely fastened and can bear the weight of the swing bed.
- Attach the chains: Measure the desired length of the chains for hanging the swing bed. Attach one end of each chain to the hooks or eye screws on the support points, and the other end to corresponding points on the swing bed frame.
- Check the balance: Once the chains are attached, check for proper balance and alignment of the swing bed. Adjust the length of the chains if necessary to ensure an even and comfortable hanging position.
It’s crucial to prioritize safety during this step. Make sure that the supports and chains are securely fastened and rated to support the weight of the swing bed and its occupants.
Once the supports and chains are attached, give the swing bed a gentle test swing to ensure that everything is properly balanced and secure. If any adjustments need to be made, now is the time to do so.
With the supports and chains securely in place, you’re ready to move on to the next step: preparing and attaching the swing bed platform.
When choosing the wood for your porch swing bed, opt for a durable and weather-resistant option such as cedar or teak to ensure longevity and minimal maintenance.
Step 6: Preparing and Attaching the Swing Bed Platform
Now that the supports and chains are securely installed, it’s time to prepare and attach the swing bed platform. Follow these steps to ensure a comfortable and secure platform:
- Prepare the platform: Determine the size and shape of the swing bed platform based on your design plan. Cut the wood or other material you have chosen for the platform to the appropriate size.
- Sand and finish: Use sandpaper to smooth out any rough edges or surfaces on the swing bed platform. Apply a weather-resistant finish to protect the wood from outdoor elements and enhance its appearance.
- Attach the platform: Position the swing bed platform on top of the frame, aligning it with the edges. Use screws or nails to attach the platform to the frame, ensuring a secure connection.
- Reinforce the platform: To reinforce the platform and add extra support, consider adding additional wooden slats or braces underneath the swing bed. This will help distribute the weight evenly and prevent sagging over time.
- Test for stability: Once the platform is attached, test the stability and strength of the swing bed by applying some pressure and gently rocking it back and forth. Ensure that it is secure and can support the intended weight.
When attaching the swing bed platform, it’s essential to use screws or nails that are appropriate for outdoor use and can withstand the weight and movement of the swing bed. Additionally, make sure that the platform is centered and balanced on the frame to ensure a comfortable swinging experience.
Once you have completed the preparation and attachment of the swing bed platform, you’re ready to move on to step 7: sanding and adding finishing touches to your porch swing bed.
Step 7: Sanding and Finishing Touches
After the swing bed platform is securely attached, it’s time to give your porch swing bed a polished and finished look. Follow these steps to sand the surfaces and add the finishing touches:
- Sand the surfaces: Use sandpaper or a sanding block to smooth out any rough or uneven surfaces on the swing bed frame, platform, and any additional wooden components. This will help create a comfortable and aesthetically pleasing finish.
- Round the edges: Consider rounding the corners and edges of the swing bed frame and platform to minimize the risk of injury and give a softer and more elegant appearance to your swing bed.
- Apply stain or paint: If desired, apply a coat of stain or paint to enhance the look and durability of your swing bed. Choose a color that complements your outdoor space and make sure to use a product specifically designed for outdoor use.
- Seal the wood: To protect the wood from weathering and prolong its lifespan, consider applying a sealant or outdoor wood protector. This will help prevent moisture damage and maintain the beauty of your swing bed over time.
- Add cushions and pillows: To maximize comfort, choose cushions and pillows that are designed for outdoor use and weather-resistant. Arrange them on the swing bed to create an inviting and cozy spot for relaxation.
- Add additional features: Consider adding any additional features you desire, such as cup holders, side tables, or a canopy. These extras can add functionality and enhance your overall experience with the swing bed.
Take your time during the sanding and finishing process to ensure a smooth and professional result. Pay attention to detail and make sure all surfaces are properly treated and protected to withstand the outdoor elements.
Once the sanding and finishing touches are complete, take a step back and admire your beautifully crafted porch swing bed. You’re now ready to move on to the final step: hanging the swing bed and enjoying the fruits of your labor.
Step 8: Hanging the Porch Swing Bed
With your porch swing bed fully constructed and finished, it’s time to hang it and bring your outdoor space to life. Follow these steps to ensure a safe and enjoyable hanging process:
- Choose the hanging hardware: Select the appropriate hardware for hanging your porch swing bed. This may include heavy-duty chains, strong ropes, or specialized swing hangers designed for outdoor use.
- Locate the hanging points: Identify the secure and suitable spots on your porch or outdoor area where you will attach the hanging hardware. These can be ceiling beams, pergola posts, or other sturdy structures.
- Install the hanging hardware: Use screws, bolts, or other suitable fasteners to attach the hanging hardware to the identified spots. Ensure that the hardware is installed securely, allowing for proper weight distribution.
- Measure and adjust: Measure and adjust the length of the hanging chains or ropes to achieve the desired height of your swing bed. Ensure that the swing bed hangs level and is properly balanced.
- Test for stability: Before fully enjoying your porch swing bed, test its stability and weight-bearing capacity. Apply some pressure and gently sway back and forth to ensure that it is supported securely.
- Check for clearance: Ensure that there is enough space around the swing bed for safe movement and clearance from walls, furniture, or any other obstacles.
During the hanging process, prioritize safety and ensure that the hanging hardware and attachments are in good condition and capable of supporting the weight of the swing bed and its occupants. Periodically inspect and maintain the hardware to prevent any potential accidents or hazards.
Once your porch swing bed is securely hung, take a moment to appreciate your accomplishment. You’re now ready for the final step: enjoying the comfort and relaxation that your swing bed provides.
Read more: Where To Find Porch Swings
Step 9: Enjoying Your Porch Swing Bed
Congratulations! You have successfully completed the construction and hanging of your porch swing bed. Now, it’s time to sit back, relax, and fully enjoy the comfort and tranquility it brings to your outdoor space. Here are some tips for making the most of your porch swing bed:
- Create a cozy ambiance: Arrange some outdoor lighting, such as string lights or lanterns, around your swing bed to create a cozy and inviting atmosphere. This will enhance your overall relaxation experience, especially during the evening hours.
- Add personal touches: Customize your swing bed with cushions, throw blankets, and pillows that reflect your personal style and preferences. This will not only add comfort but also make your swing bed a visually appealing focal point on your porch.
- Find the perfect swinging rhythm: Experiment with different swinging speeds and motions to find the rhythm that suits your relaxation needs. Discover the gentle sway that helps you unwind and rejuvenate.
- Enjoy quiet moments: Utilize your porch swing bed as a peaceful and quiet retreat. Use this space to read a book, meditate, or simply immerse yourself in the beauty of nature. Allow the soothing motion of the swing to ease your mind and bring tranquility.
- Invite friends and family: Share the joy and comfort of your porch swing bed with loved ones. It’s the perfect spot to gather, chat, and create lasting memories. Enjoy conversations, laughter, and quality time with those closest to you.
- Maintain and care for your swing bed: Regularly clean and inspect your swing bed for any signs of wear or damage. Protect it from harsh weather conditions by using a cover or storing it indoors when not in use. This will ensure its longevity and continued enjoyment for years to come.
Remember, the purpose of a porch swing bed is to provide a sanctuary for relaxation and rejuvenation. Take advantage of this tranquil space to unwind, connect with nature, and find solace from the busyness of everyday life.
Now, grab a good book, a refreshing drink, and settle into the comfort of your porch swing bed. Embrace the serenity it offers and embrace the moments of peace and serenity that come with it.
Conclusion
Congratulations on creating your very own porch swing bed! By following the step-by-step process outlined in this article, you have crafted a beautiful and inviting addition to your outdoor space. With careful consideration of the location, gathering the necessary materials, measuring and cutting the wood, assembling the frame, attaching the supports and chains, preparing and attaching the swing bed platform, sanding and adding finishing touches, hanging the swing bed, and finally, enjoying its comforts, you have created a haven for relaxation and tranquility.
A porch swing bed not only provides a cozy spot to unwind and enjoy the fresh air, but it also adds charm and style to any porch or outdoor setting. The careful selection of materials, attention to detail during construction, and the personalized finishes have resulted in a swing bed that suits your taste and enhances the overall aesthetics of your outdoor space.
Remember to maintain and care for your swing bed to ensure its longevity and continued enjoyment. Regular cleaning, inspections, and protection from the elements will preserve the beauty and functionality of your swing bed for years to come.
So, take some time for yourself, indulge in moments of peace and relaxation, and let the gentle sway of your porch swing bed soothe your mind and body. Share this tranquil space with loved ones, create cherished memories, and enjoy the simple pleasure of sharing stories and laughter together.
Thank you for embarking on this journey of constructing a porch swing bed with us. We hope that it brings you countless hours of comfort, relaxation, and pure joy. Embrace this serene oasis and make the most of your outdoor haven!
Frequently Asked Questions about How To Make A Porch Swing Bed
Was this page helpful?
At Storables.com, we guarantee accurate and reliable information. Our content, validated by Expert Board Contributors, is crafted following stringent Editorial Policies. We're committed to providing you with well-researched, expert-backed insights for all your informational needs.










0 thoughts on “How To Make A Porch Swing Bed”