Articles
How To Build A Porch Swing
Modified: October 20, 2024
Learn how to build a porch swing with our informative articles. Get step-by-step instructions and tips for creating the perfect outdoor retreat.
(Many of the links in this article redirect to a specific reviewed product. Your purchase of these products through affiliate links helps to generate commission for Storables.com, at no extra cost. Learn more)
Introduction
Building a porch swing is a great way to add a touch of charm and relaxation to your outdoor space. Whether you have a spacious front porch or a cozy backyard patio, a porch swing provides the perfect spot to unwind, enjoy the fresh air, and watch the world go by.
In this guide, we will walk you through the step-by-step process of building your very own porch swing. Don’t worry if you don’t consider yourself a seasoned carpenter – with a little patience and some basic tools, you can create a beautiful and functional piece of outdoor furniture.
Before we dive into the building process, let’s talk about the benefits of having a porch swing. Not only does it offer a comfortable seating option, but it also adds a decorative touch to your outdoor space. A porch swing is a versatile piece of furniture that can be enjoyed by people of all ages – from children who love to swing, to adults who want a peaceful place to relax and read a book.
Furthermore, a porch swing creates a cozy and inviting atmosphere, making it a great gathering spot for friends and family. Imagine spending a lazy Sunday afternoon swinging with your loved ones or enjoying a cup of coffee in the morning while gently swaying on your porch swing.
Additionally, building your own porch swing allows you to customize it to your specific needs and preferences. You can choose the type of wood, the design, and even add cushions or pillows for extra comfort. Plus, the sense of satisfaction and pride that comes with creating something with your own hands is immeasurable.
Now that you understand the benefits of having a porch swing and the joy that comes with building your own, let’s move on to the first step – gathering the materials you’ll need for this project.
Key Takeaways:
- Building a porch swing is a fulfilling DIY project that adds charm and relaxation to your outdoor space. From gathering materials to hanging the swing, the process allows for creativity and craftsmanship.
- Customizing the design and finish of your porch swing adds a personal touch to your outdoor decor. Enjoy the satisfaction of creating a cozy and inviting space for relaxation and enjoyment.
Read more: How Do You Build A Porch Swing
Step 1: Gather Materials
Before you begin building your porch swing, it’s important to gather all the necessary materials. Having everything on hand will ensure a smoother and more efficient building process.
Here is a list of materials you will need:
- Wood: Choose a durable and weather-resistant wood, such as cedar or teak, for the main frame of the swing. The specific dimensions will depend on the design you choose.
- Screws: Opt for corrosion-resistant screws that are appropriate for outdoor use. Make sure to choose the right length and size for your project.
- Chains or Rope: Decide whether you want to hang your porch swing using chains or rope. Chains are typically sturdier, while rope can add a rustic appeal.
- Hooks or Eye Bolts: You will need hooks or eye bolts to connect the chains or rope to the ceiling or beams of your porch.
- Cushions: If you want to add extra comfort to your swing, consider purchasing or making cushions that fit the dimensions of your seat.
- Paint or Stain: Choose a paint or stain that is suitable for outdoor applications. This will protect the wood from weather elements and give your swing a polished finish.
- Tools: Make sure you have the necessary tools for the project, such as a drill, screws driver, measuring tape, saw, and sandpaper.
Additionally, it’s a good idea to have safety equipment on hand, such as safety goggles and gloves, to protect yourself during the construction process.
Once you have gathered all the materials, take the time to inspect them and ensure everything is in good condition. Replace any damaged or warped wood, and check that all the screws and hardware are accounted for.
With the materials in hand, you are now ready to move on to the next step – choosing the design for your porch swing.
Step 2: Choose the Swing Design
Choosing the right design for your porch swing is an important step in the building process. The design you choose will determine the overall look and feel of your swing, as well as its functionality.
There are several popular designs to consider:
- Traditional Porch Swing: This classic design features a straight backrest and a seat that curves slightly for added comfort. It is a timeless choice that fits seamlessly into any outdoor setting.
- Adirondack Porch Swing: Inspired by the iconic Adirondack chair, this design features a slatted backrest and a deep, contoured seat. It offers a more relaxed and rustic aesthetic.
- Daybed Swing: If you want a swing that can double as a cozy daybed, this design is for you. It features a larger seat area and may include sides or a canopy for added privacy and comfort.
- Pergola Swing: A pergola swing combines a porch swing with a pergola structure. It provides shade and creates a unique architectural element in your outdoor space.
- Swing Bed: Similar to a daybed swing, a swing bed offers a larger seating area. It usually includes sides and a plush mattress or cushions for ultimate relaxation.
In addition to these designs, you can also find variations that incorporate features like cup holders, built-in side tables, or even a swing with multiple seats to accommodate more people.
When choosing the design, consider the style of your home and outdoor space. Opt for a design that complements your existing decor and matches the overall aesthetics of your surroundings. You can find a wide variety of porch swing plans and design ideas online, or you can create your own custom design.
Take the time to visualize how the swing will fit into your outdoor area and how it will be used. Consider factors like the available space, the number of people who will be using it, and any specific features or functionalities you desire.
Once you have chosen the design, you can proceed to the next step – measuring and marking the location for your porch swing.
Step 3: Measure and Mark the Location
Before you start building your porch swing, it’s crucial to measure and mark the location where it will be installed. Proper measurement ensures that the swing fits well and provides a comfortable seating experience.
Here are the steps to measure and mark the location:
- Choose the Spot: Select the area where you want to hang your porch swing. Consider factors like the available space, the proximity to other furniture or structures, and the desired view or surroundings.
- Measure the Area: Use a measuring tape to determine the width and depth of the available space. Take into account the swing’s dimensions and ensure there is enough clearance for comfortable swinging motion.
- Mark the Hanging Points: Identify the spots where you will install the hooks or eye bolts to hang the swing. These points should be sturdy and able to support the weight of the swing and the people sitting on it. It’s recommended to attach the swing to ceiling beams or a solid overhead structure.
- Measure the Hanging Points: Measure and mark the distance between the hanging points. This will determine the length of the chain or rope needed to hang the swing properly. The distance should allow for enough clearance from the ground and surrounding objects.
- Check for Level: Use a level to ensure that the marked hanging points are level. This will ensure that the swing doesn’t tilt or lean to one side when installed. Make any necessary adjustments to ensure a level installation.
- Consider Safety: As you measure and mark the location, keep safety in mind. Ensure that the swing will be secured properly and won’t pose any risk to people or property. Avoid hanging the swing in areas with low-hanging branches or near obstructions.
Once you have measured and marked the location, double-check the measurements to ensure accuracy. It’s always better to measure twice and cut once to avoid any mistakes or issues later on.
Now that you have the location marked, you can proceed to the next step – building the swing frame.
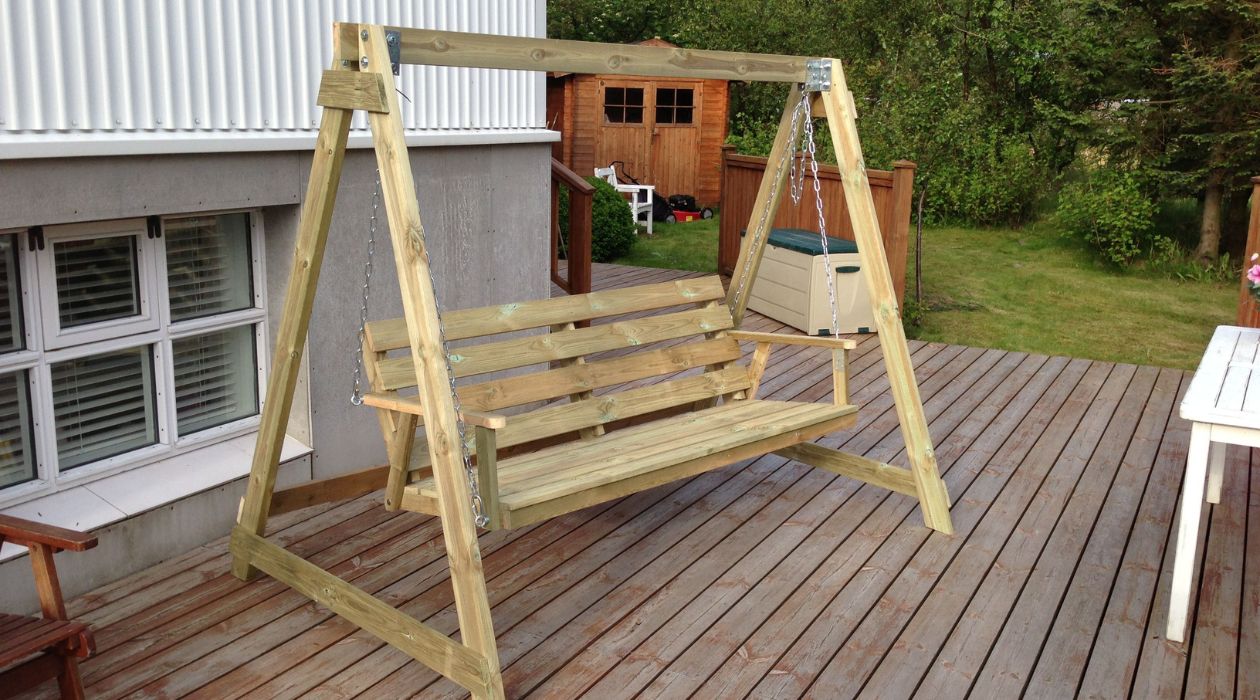
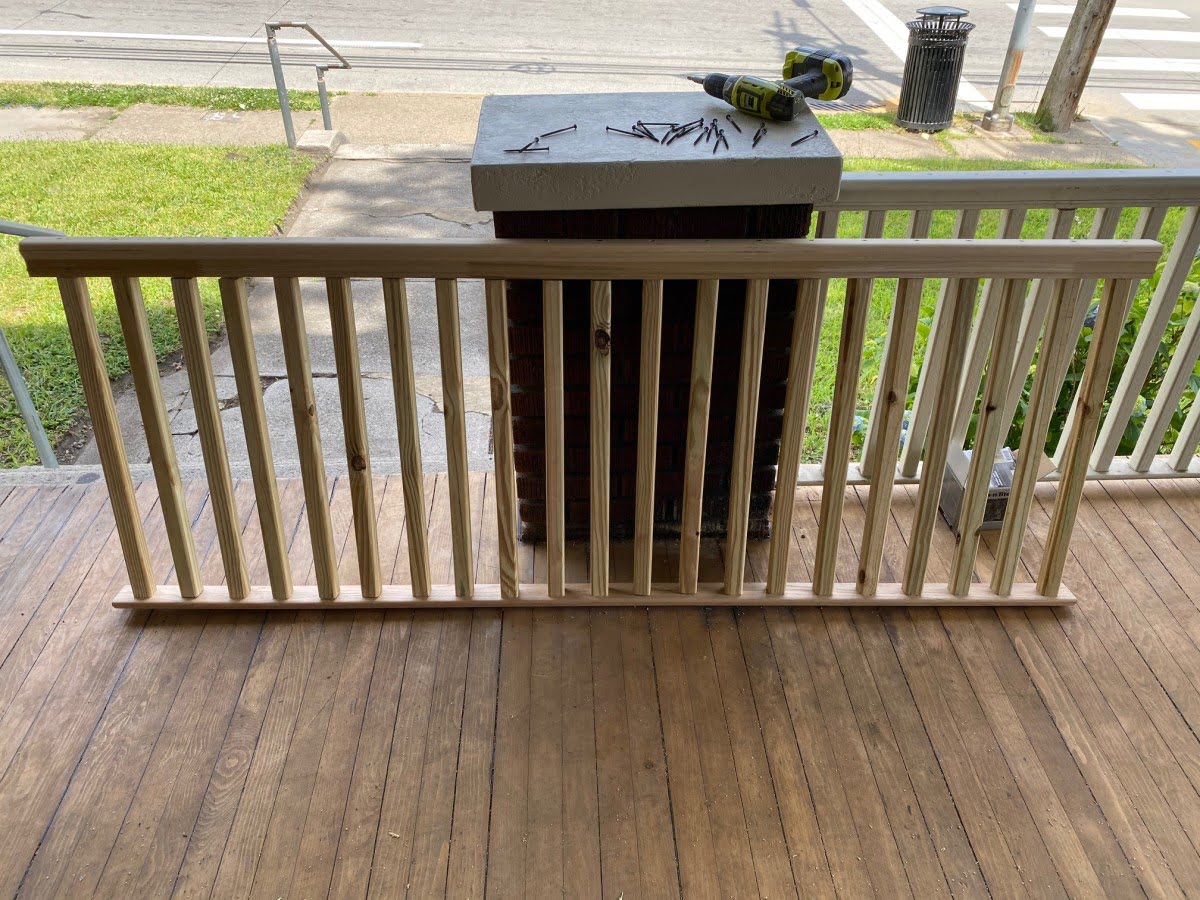
Step 4: Build the Swing Frame
Building the swing frame is a crucial step in creating a sturdy and durable porch swing. The frame provides the structure and support for the swing seat, ensuring a safe and comfortable seating experience.
Here are the steps to build the swing frame:
- Cut the Frame Pieces: Use a saw to cut the necessary pieces of wood for the frame. Refer to your chosen design or plans for the specific dimensions. Cut two long pieces for the sides of the frame and two shorter pieces for the front and back.
- Pre-drill Holes: To prevent the wood from splitting, pre-drill holes at the points where the pieces will be joined together. This will also make it easier to insert the screws later on.
- Assemble the Frame: Align the pieces according to the design and join them together using screws. Use a screwdriver or drill to secure the pieces firmly in place. Double-check for squareness and make any necessary adjustments to ensure a level and stable frame.
- Add Support Braces: Depending on the size and design of your swing, you may need to add additional support braces to reinforce the frame. These braces can be placed diagonally or horizontally between the frame pieces for added stability.
- Sand the Frame: Use sandpaper to smooth any rough edges or surfaces of the frame. This will prevent splinters and ensure a comfortable seating experience.
- Apply Finish: If desired, apply a weather-resistant finish to the frame. This will protect the wood from the elements and give it a polished look. Allow the finish to dry completely before moving on to the next step.
Building the swing frame requires precision and attention to detail. Take your time to ensure that the pieces are properly aligned and securely fastened. A strong and well-built frame will ensure the longevity and stability of your porch swing.
Once the swing frame is complete, you can proceed to the next step – attaching the swing seat.
When building a porch swing, make sure to use durable and weather-resistant materials such as cedar or teak to ensure longevity and stability.
Read more: Where To Find Porch Swings
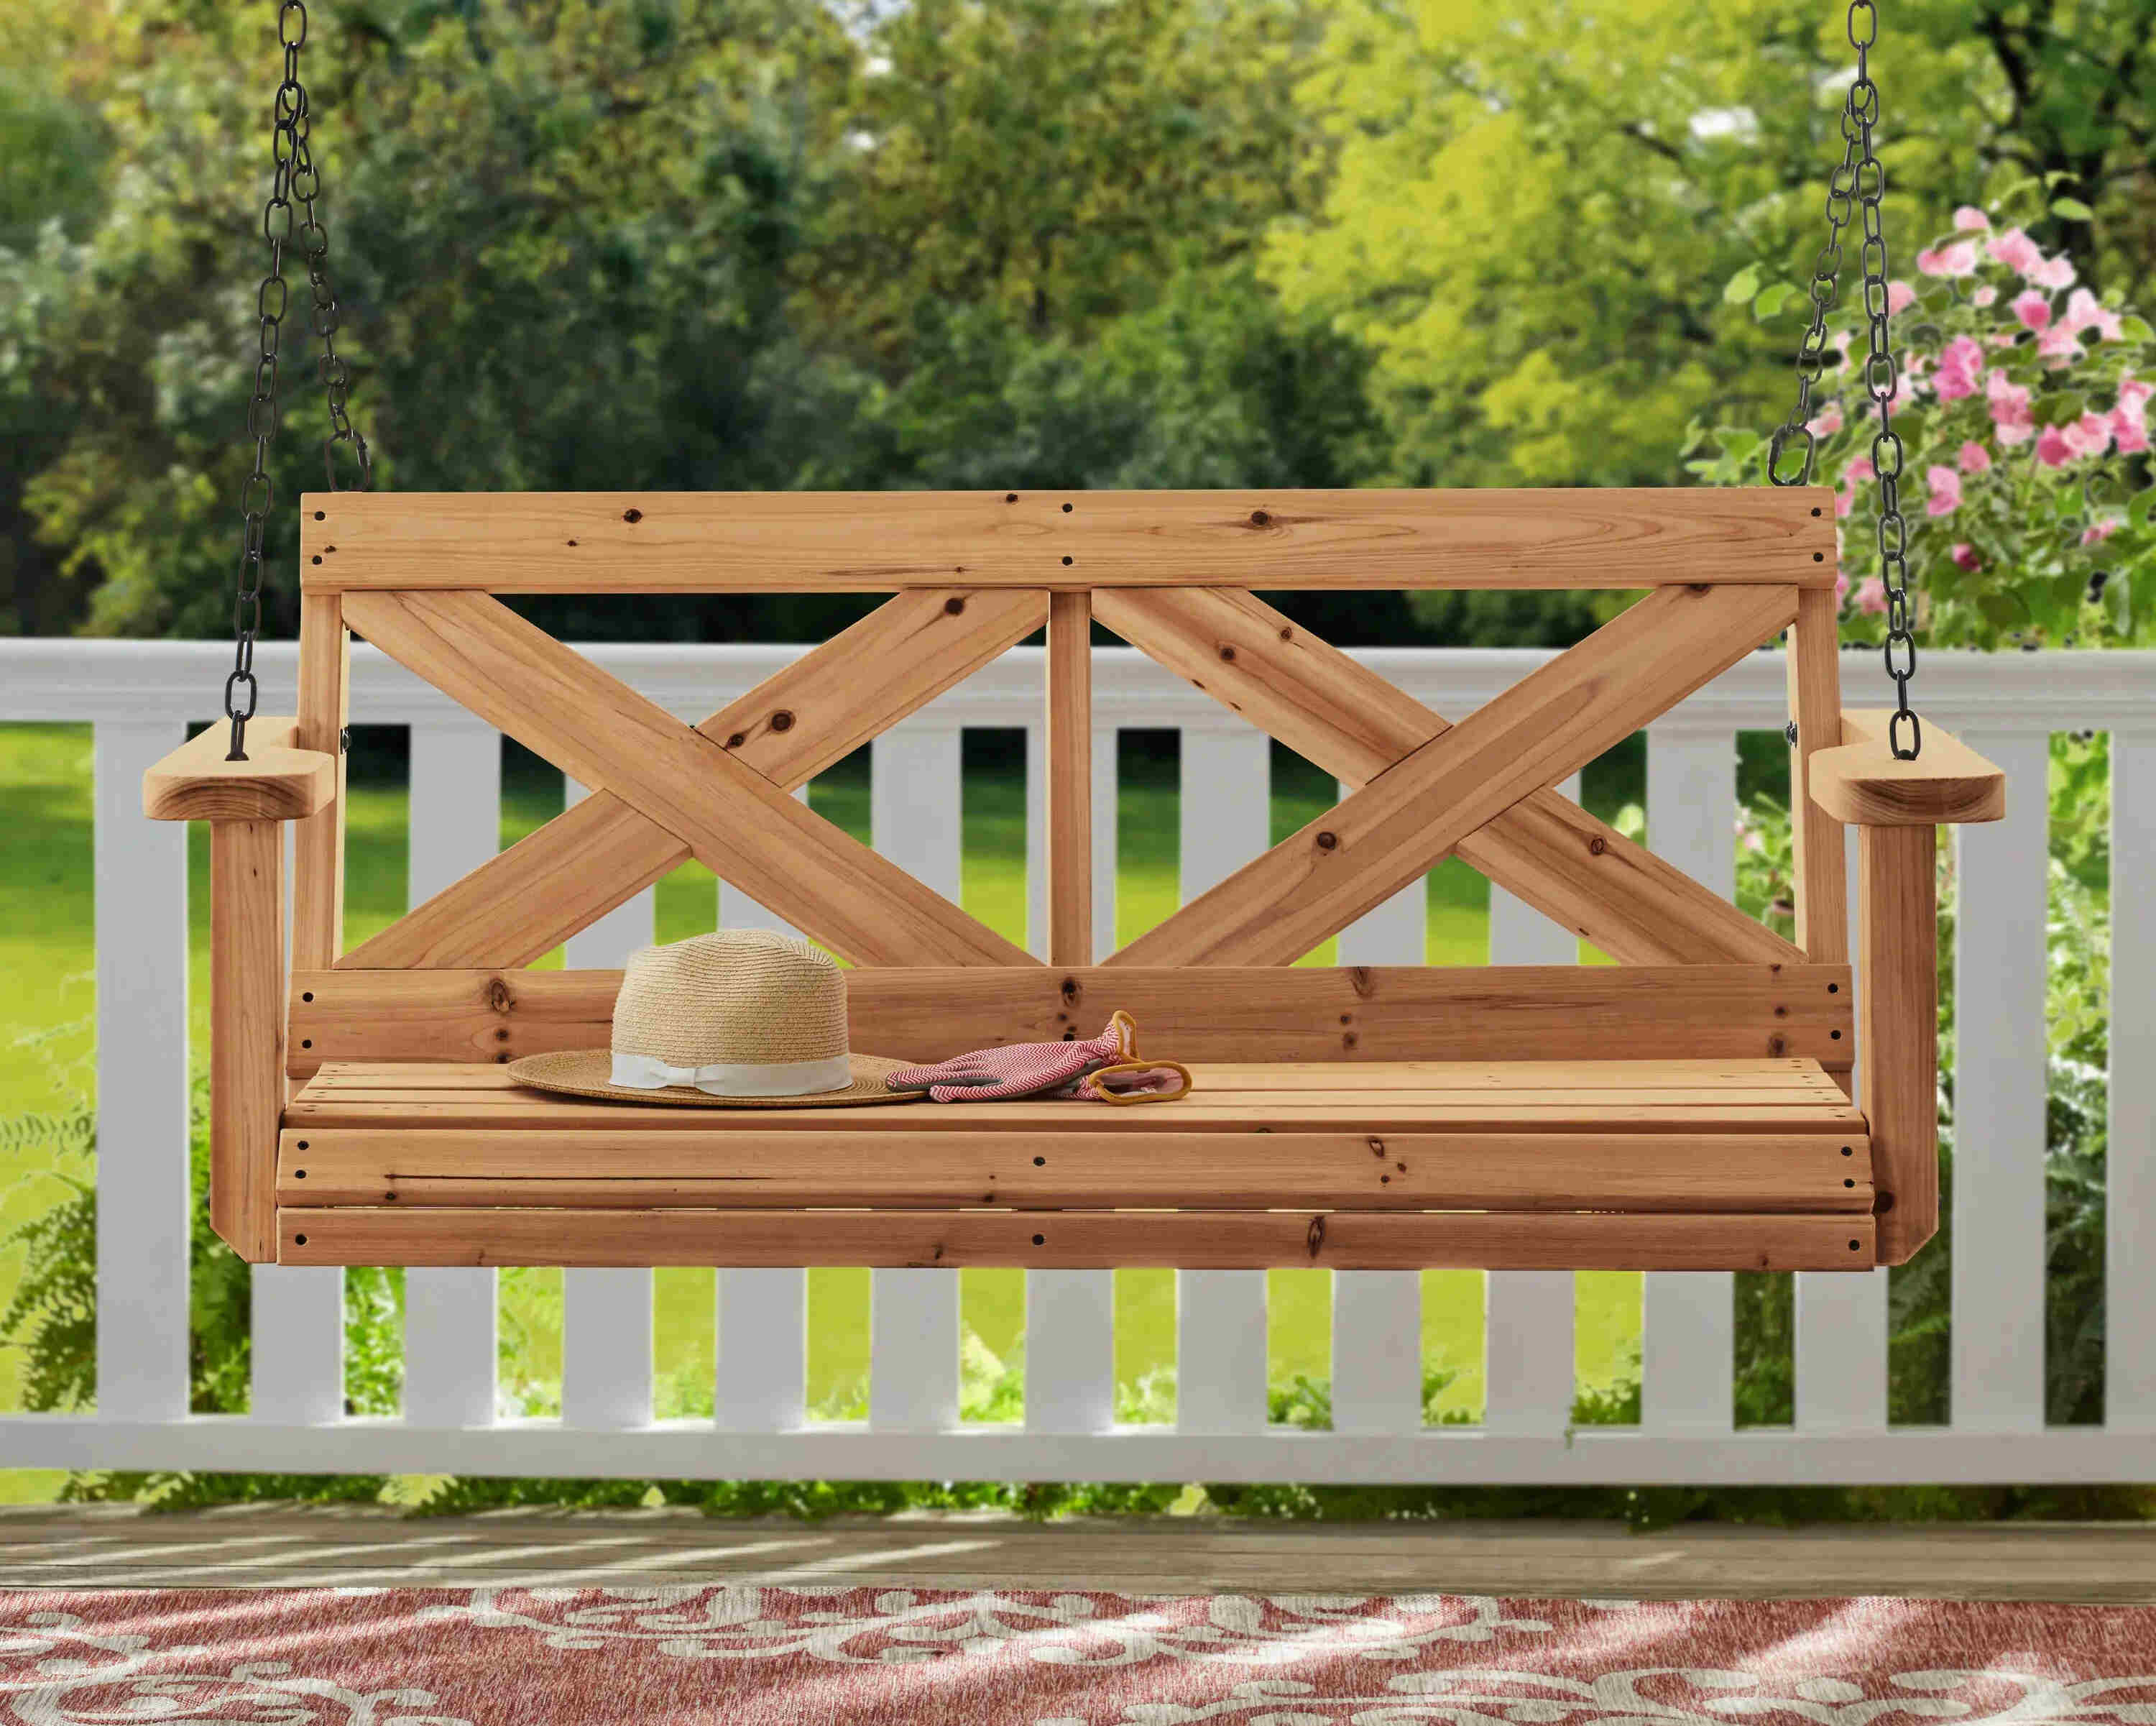
Step 5: Attach the Swing Seat
The swing seat is what provides the comfort and support for those enjoying the porch swing. Attaching the swing seat to the frame is a crucial step to ensure it is secure and stable.
Here are the steps to attach the swing seat:
- Measure and Cut the Seat Boards: Measure the dimensions of your frame and cut the seat boards to fit. It’s recommended to use sturdy and weather-resistant wood boards for the seat.
- Pre-drill Holes: Before attaching the seat boards, pre-drill evenly spaced holes along the sides of the boards. These holes will allow screws to be inserted for secure attachment.
- Align and Secure the Seat Boards: Place the seat boards onto the frame, ensuring they are evenly spaced and aligned. Use screws and a screwdriver or drill to secure the seat boards to the frame. Make sure to screw them in firmly, but be careful not to overtighten and risk damaging the wood.
- Reinforce with Braces: For added support and stability, consider adding braces underneath the seat boards. These can be cut to fit between the frame and the seat boards and attached with screws. This will help distribute weight evenly and prevent sagging.
- Sand and Finish: Sand the seat boards to smooth any rough edges or surfaces. This will ensure a comfortable seating experience. If desired, apply a weather-resistant finish to the seat boards to protect them from the elements and enhance their appearance.
Attaching the swing seat requires attention to detail to ensure proper alignment and secure attachment. Take your time to ensure that the seat boards are evenly spaced and securely fastened to the frame.
Once the swing seat is attached, you can move on to the next step – installing the hanging hardware.
Step 6: Install Hanging Hardware
To hang your porch swing securely, you will need to install the necessary hanging hardware. The type of hardware you choose will depend on your personal preference and the structure of your porch or patio.
Here are the steps to install the hanging hardware:
- Choose the Hanging Method: Determine whether you prefer to hang your swing with chains or rope. Chains offer a sturdy and secure option, while rope can add a rustic touch. Whichever method you choose, make sure it is suitable for the weight and size of your swing.
- Locate the Hanging Points: Refer to the measurements and marks from Step 3 to determine the exact placement of the hanging points. These points should be located on sturdy and supporting beams or structures.
- Install Eyebolts or Hooks: Use a drill or a screwdriver to install eyebolts or hooks into the marked hanging points. Make sure they are tightly secured and capable of supporting the weight of the swing and its occupants.
- Attach the Chains or Rope: If you’re using chains, connect them to the eyebolts or hooks using S-hooks or quick links. Make sure they are properly fastened and provide enough clearance for the swing to suspend freely. If you’re using rope, tie secure knots at each end and attach them to the eyebolts or hooks.
- Check for Level: Use a level to ensure that the swing hangs level and doesn’t tilt to one side. Adjust the chains or ropes as needed to achieve a balanced position.
- Test the Swing: Before fully committing to the hanging hardware, give the swing a few gentle pushes to ensure it is secure and stable. Make any necessary adjustments to the hanging height or position to optimize the swinging experience.
Installing the hanging hardware correctly is essential for the safety and stability of your porch swing. Double-check all connections and make sure they are securely fastened before using the swing.
With the hanging hardware in place, you are ready to move on to the next step – finishing and painting the swing.
Step 7: Finish and Paint the Swing
Finishing and painting your porch swing not only enhances its appearance but also helps protect the wood from weather elements and prolong its lifespan. This step allows you to customize the swing to match your outdoor decor and personal style.
Here are the steps to finish and paint your swing:
- Sand the Surface: Use sandpaper to smooth any rough areas or imperfections on the swing. Start with coarse-grit sandpaper and gradually move to finer-grit to achieve a smooth surface. Sanding also helps the paint or stain adhere better to the wood.
- Choose the Finish: Decide whether you prefer a natural wood finish or a painted look for your swing. If you opt for a natural finish, you can use a clear sealant or outdoor wood oil to enhance the wood’s natural beauty and protect it from the elements. If you prefer a painted look, choose a suitable outdoor paint or stain in the color of your choice.
- Apply the Finish: Use a brush or a roller to apply the chosen finish to the swing. Start with the underside of the swing, moving onto the seats, backrest, and frame. Follow the manufacturer’s instructions for proper application and drying times. Apply multiple coats if necessary for better coverage and durability.
- Add Additional Details: If desired, you can add decorative elements or accents to your swing. Consider stenciling patterns, adding designs, or applying a contrasting color to specific areas to make your swing truly unique.
- Allow for Drying Time: Allow the finish to dry completely before using the swing or adding cushions. This ensures the finish cures properly and provides optimal protection to the wood.
Finishing and painting your porch swing not only adds visual appeal but also helps protect the wood from moisture, sunlight, and other weather-related damage. Regularly inspect and touch up the finish as needed to maintain its beauty and longevity.
Once the finish has dried, you can move on to the final step – hanging the porch swing and enjoying the fruits of your labor!
Step 8: Hang the Porch Swing
Hanging your porch swing is the final step in completing your project. Properly installing and securing the swing will ensure a safe and enjoyable experience for you and your loved ones.
Here are the steps to hang your porch swing:
- Enlist Help: It’s recommended to have at least one or two people assist you in hanging the swing. This will make the process easier and safer.
- Position the Swing: Carefully position the swing under the hanging hardware, aligning it with the hooks or eyebolts.
- Attach the Chains or Rope: If using chains, attach them to the swing’s hanging hooks or eyebolts using S-hooks or quick links. If using rope, securely tie the knots to the hooks or eyebolts.
- Check Stability: Give the swing a gentle push to test its stability. Ensure that it swings freely and doesn’t sway excessively. Double-check that all connections are secure and the swing is level.
- Add Cushions or Pillows: If desired, add cushions or pillows to the swing seat for comfort and style. Make sure they are securely attached and won’t slide off during use.
- Test the Swing: Once the swing is securely hung and cushions are in place, take a moment to enjoy your handiwork. Sit on the swing and test its comfort and swinging motion.
- Regular Inspections: Periodically inspect the hanging hardware and connections to ensure they remain secure and in good condition. Check for any signs of wear or damage, and make any needed repairs or replacements.
Remember, safety is paramount when hanging your porch swing. Ensure that the swing is properly installed and can support the weight it will bear. Adhere to any weight restrictions provided by the manufacturer or design plans.
Now that you have successfully hung your porch swing, you can sit back, relax, and enjoy the serenity and comfort it provides.
Congratulations on completing your porch swing project! We hope it brings you hours of relaxation and enjoyment in your outdoor space.
Happy swinging!
Read more: How To Build A Pergola Swing
Conclusion
Building a porch swing can be a rewarding and fulfilling project that adds charm and relaxation to your outdoor space. By following the steps outlined in this guide, you have learned how to gather the necessary materials, choose a suitable design, measure and mark the location, build the swing frame, attach the swing seat, install hanging hardware, finish and paint the swing, and finally, hang it in a secure manner.
Throughout the process, you have demonstrated creativity, craftsmanship, and attention to detail. From selecting the right wood to applying the finishing touches, every step contributes to the beauty, functionality, and durability of your porch swing.
Remember to regularly inspect and maintain your porch swing to ensure its longevity and safety. Make any necessary repairs or replacements, and keep the swing clean and free from debris.
Now that your porch swing is complete, it’s time to sit back, relax, and enjoy the tranquility it offers. Whether you’re spending time alone with a good book or sharing laughter with family and friends, your porch swing will be a gathering spot that creates lasting memories.
We hope this guide has inspired you to embark on this DIY project and provided you with the knowledge and confidence to build your own porch swing. Now, go ahead and take pleasure in the satisfaction of creating a cozy and inviting space for relaxation and enjoyment.
Happy swinging!
Now that you've mastered building your own porch swing, why not dive deeper into crafting and decorating? For those who love creating with their hands, our article on why taking on DIY projects is so rewarding will show you why DIY projects are so fulfilling. If working with wood sparks your interest, don't miss our guide on the best tips for woodworking to get ahead in 2024. Lastly, to really bring your porch together, check out our insights on creative ideas on porch decor. These reads are perfect for enhancing your skills and making your space more inviting.
Frequently Asked Questions about How To Build A Porch Swing
Was this page helpful?
At Storables.com, we guarantee accurate and reliable information. Our content, validated by Expert Board Contributors, is crafted following stringent Editorial Policies. We're committed to providing you with well-researched, expert-backed insights for all your informational needs.


0 thoughts on “How To Build A Porch Swing”