
Articles
How To Hang Little Tikes Swing From Porch
Modified: May 6, 2024
Learn how to securely hang a Little Tikes swing from your porch with these helpful articles. Step-by-step instructions and tips for a safe and enjoyable swing experience.
(Many of the links in this article redirect to a specific reviewed product. Your purchase of these products through affiliate links helps to generate commission for Storables.com, at no extra cost. Learn more)
Introduction
Swinging on a Little Tikes swing is not only an enjoyable activity for kids, but it also provides them with physical exercise and fresh air. If you have a porch at home, it can be a convenient and fun place to hang a Little Tikes swing. Hanging the swing from the porch allows your children to play and swing right in the comfort of your own home, while also providing supervision and safety.
In this article, we will guide you through the process of how to hang a Little Tikes swing from your porch. Whether you’re a beginner or have some experience with DIY projects, you can follow these steps to securely install the swing and ensure a safe and enjoyable swinging experience for your little ones. So let’s get started!
Key Takeaways:
- Create a safe and enjoyable swinging experience for your children by carefully choosing the right spot, preparing the porch, assembling the swing, and testing for stability and comfort.
- Ensure a secure and stable installation of the Little Tikes swing by following step-by-step instructions, testing the swing for stability, and making necessary adjustments for optimal safety and enjoyment.
Read more: How To Hang A Porch Swing From A Tree
Materials Needed
Before you begin, make sure you have the following materials:
- Little Tikes swing set
- Drill
- Screws and hardware
- Measuring tape
- Pencil
- Level
- Step ladder
- Safety goggles
- Wrench
Having these materials ready will ensure a smooth installation process and help you hang the swing securely.
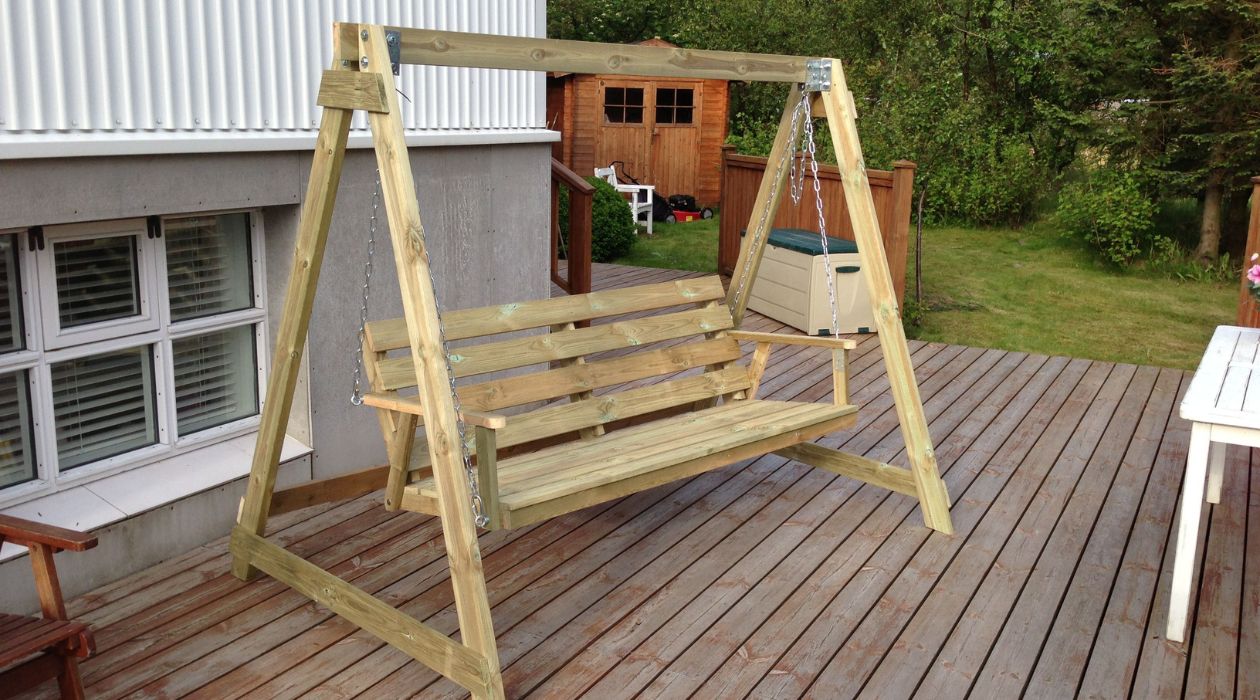
Step 1: Choose the Right Spot
The first step in hanging a Little Tikes swing from your porch is to choose the right spot. Look for a sturdy area on your porch where the swing can be safely installed. You’ll need to find a spot that has enough clearance for the swing to swing back and forth without hitting any walls or obstacles.
Take measurements to ensure that you have enough space for the swing. Measure the distance from the ceiling or overhead structure to the floor of the porch. This will help you determine the length of the chains or ropes you’ll need to hang the swing at the right height.
Consider the overall layout of your porch and how the swing will fit in. Ensure that there is enough room for the swing to swing freely without obstruction. You may need to move around furniture or other items on the porch to create the necessary space for the swing.
Another important factor to consider when choosing the right spot is the proximity to any potential hazards. Make sure there are no electrical wires or fixtures in the area where you plan to hang the swing. Also, avoid placing the swing near sharp edges or corners that could pose a risk of injury.
Once you have identified the ideal spot, mark it with a pencil or tape to ensure accuracy during the installation process. Taking the time to choose the right spot will contribute to the safety and enjoyment of the swing for your children.
Step 2: Prepare the Porch
After choosing the right spot for your Little Tikes swing, it’s time to prepare the porch for installation. Follow these steps to ensure a smooth and secure setup:
- Clear the area: Remove any furniture, plants, or other items from the chosen spot on the porch. This will create a clear and clutter-free space for installing the swing.
- Clean the surface: Sweep or clean the surface of the porch to remove any dirt, debris, or loose materials.
- Inspect the porch: Examine the porch structure to ensure it is in good condition and capable of supporting the weight of the swing and the children using it. Look for any signs of damage, rot, or instability. If you have any concerns, consult a professional or consider reinforcing the porch before proceeding with the installation.
- Locate support beams: Use a stud finder or tap with a knuckle to locate the supporting beams or joists in the porch ceiling. These beams will provide the necessary stability and strength for hanging the swing.
Identifying the supporting beams is crucial as they will be the points of attachment for the swing. Mark the locations of these beams using a pencil or tape.
By preparing the porch before installation, you ensure a secure and stable foundation for the swing. This step sets the stage for a safe and enjoyable swinging experience for your children.
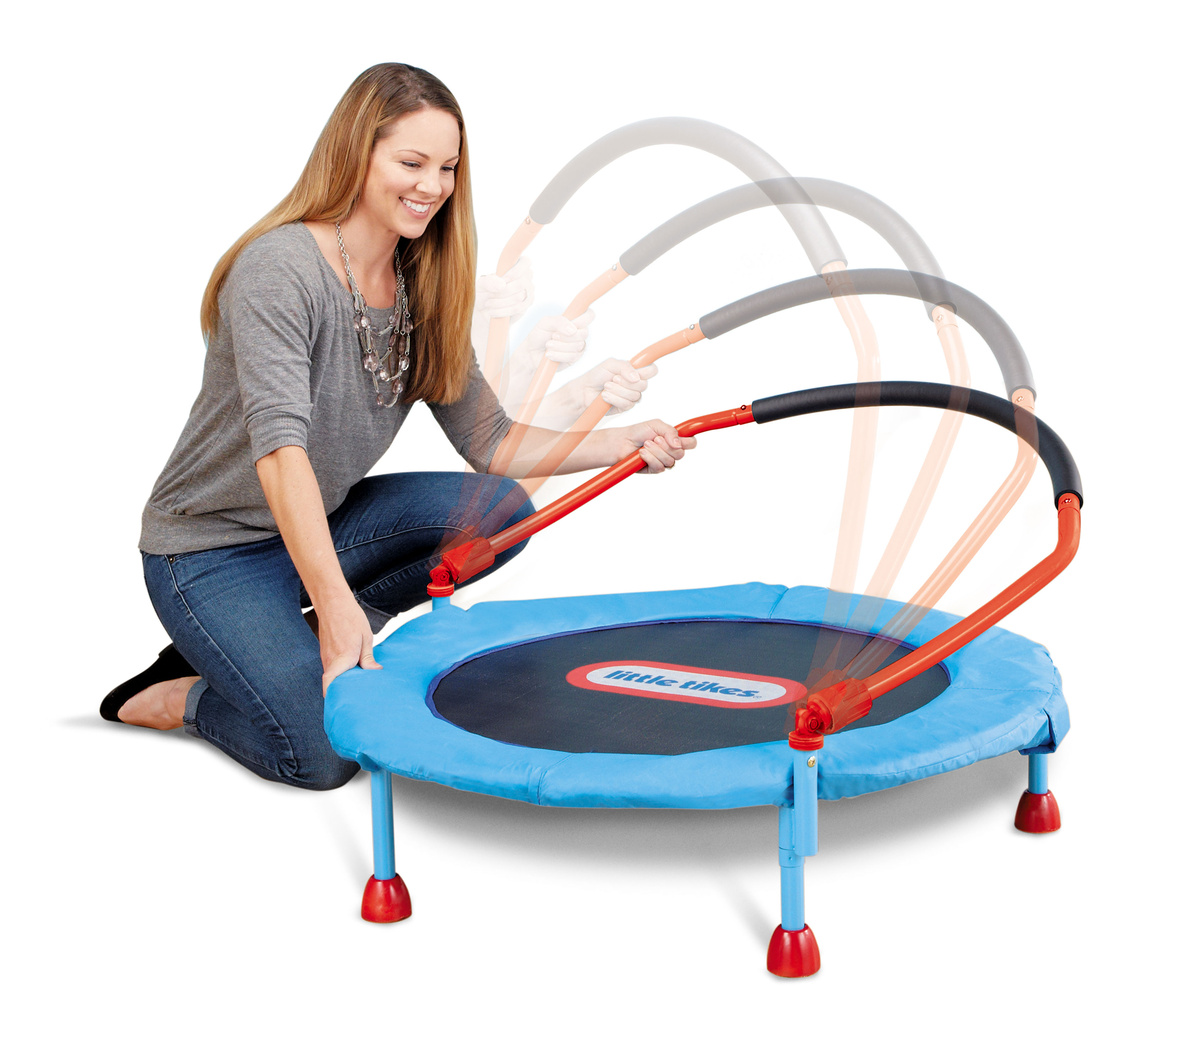
Step 3: Assemble the Swing
Once the porch is prepared, it’s time to assemble the Little Tikes swing. Follow the manufacturer’s instructions to safely and correctly put the swing together. Here are a few general steps to guide you:
- Layout the parts: Lay out all the components of the swing and ensure that you have everything you need.
- Follow the instructions: Carefully follow the step-by-step instructions provided by the manufacturer to assemble the swing. Pay attention to any specific warnings or precautions mentioned.
- Use the proper tools: Use the recommended tools and hardware provided in the package to securely fasten the swing components together.
- Double-check the assembly: Once you have completed the assembly, double-check all the connections and make sure everything is properly tightened. Ensure that the swing is stable and secure.
- Test the swing: Give the swing a few gentle tugs and make sure it feels stable. If anything feels loose or unstable, go back and check the assembly to address any issues.
Following the assembly instructions will ensure that the swing is sturdy and safe for your children to use.
Remember to always supervise your children while they are using the swing to ensure their safety. Regularly inspect the swing for any signs of wear or damage, and make any necessary repairs or adjustments as needed.
Once the swing is fully assembled and checked for safety, you’re ready to move on to the next step: installing the hooks.
When hanging a Little Tikes swing from a porch, make sure to use heavy-duty hardware such as eye bolts or swing hangers, and ensure that the porch can support the weight of the swing and the person using it. Always follow the manufacturer’s instructions for installation.
Read more: How To Hang Swing From The Ceiling
Step 4: Install the Hooks
With the Little Tikes swing assembled, it’s time to install the hooks that will attach the swing to the porch. Follow these steps to ensure a secure installation:
- Measure the distance: Measure the distance between the marked points on the porch ceiling where you will attach the swing. This will help determine the length of the chains or ropes needed to hang the swing at the desired height.
- Drill pilot holes: Use a drill and the appropriate drill bit to create pilot holes at the marked locations on the porch ceiling. Make sure the drill bit is slightly smaller than the size of the hooks to ensure a snug fit.
- Insert the hooks: Align the hooks with the pilot holes and carefully screw them into place. Use a wrench or pliers to securely tighten them, ensuring they are firmly attached to the porch ceiling. Make sure the hooks are oriented correctly to allow the swing to hang freely without any obstructions.
- Test the hooks: Give the hooks a gentle tug to ensure they are firmly anchored. If they feel loose or move, remove and reinstall them using larger or longer screws for a better grip.
It’s important to follow proper installation techniques to ensure the hooks provide a secure and stable attachment point for the swing. If you have any concerns about the stability of the porch ceiling or the attachment points, consult a professional for assistance.
Once the hooks are securely in place, you’re ready to move on to the next step: attaching the swing chains.
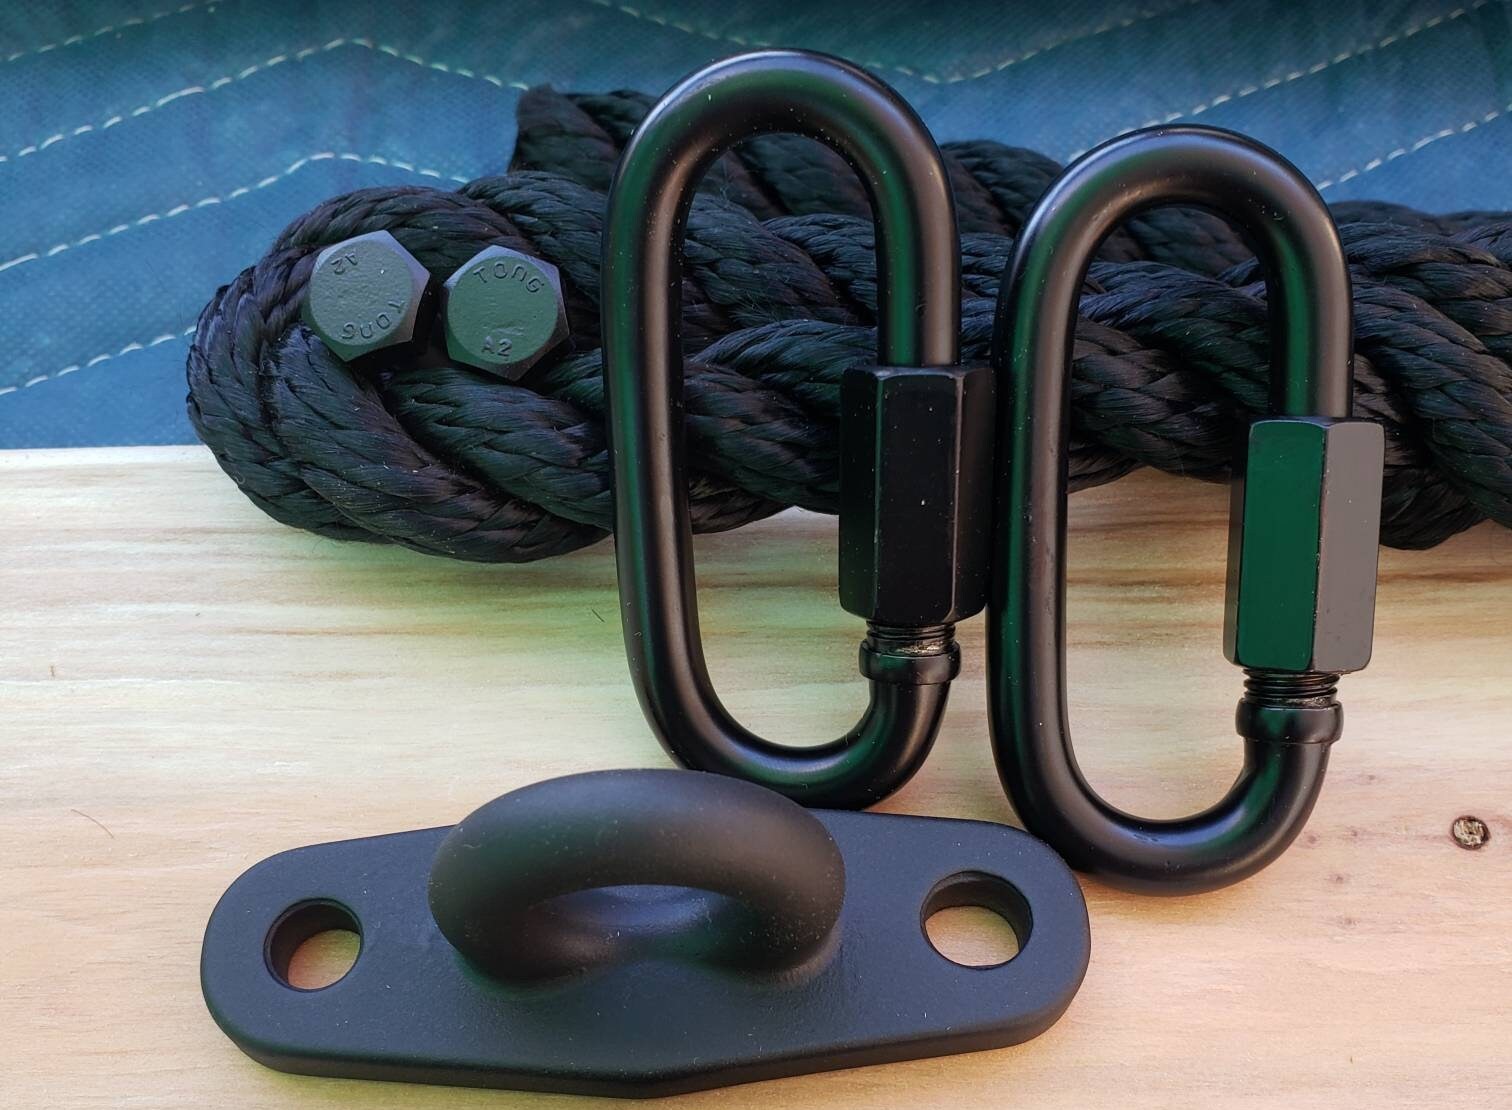
Step 5: Attach the Swing Chains
After installing the hooks, it’s time to attach the swing chains to the hooks. Follow these steps to ensure a safe and secure attachment:
- Measure the chains: Measure the length of the chains provided with the Little Tikes swing. You want to ensure that the swing hangs at a comfortable height for your children.
- Attach the chains: Connect one end of each chain to the hooks on the porch ceiling. Use the included connectors or S-hooks to securely fasten the chains to the hooks. Make sure they are tightly closed to prevent any slippage.
- Adjust the length: Adjust the length of the chains to ensure the swing is at the desired height. You may need to experiment with different chain links to find the ideal height for your children’s comfort and safety.
- Ensure even hanging: Check that both chains are even in length and that the swing is hanging level. Use a level to confirm that the swing is not tilted or leaning to one side.
- Test the swing: Give the swing a few gentle pushes to ensure it moves freely and smoothly. If the chains or connectors feel loose or unstable, tighten them further or make any necessary adjustments.
By attaching the swing chains securely and ensuring proper adjustment, you can provide a safe and enjoyable swinging experience for your children. Remember, it’s important to regularly inspect the chains for any signs of wear or damage and make any necessary repairs or replacements as needed.
Now that the swing is securely attached to the porch, we can move on to the final step: testing and making any necessary adjustments.
Step 6: Test and Adjust
Once the swing chains are securely attached, it’s time to test the swing and make any necessary adjustments for optimal safety and enjoyment. Follow these steps:
- Ensure supervision: Before allowing your children to use the swing, make sure they are under adult supervision. This will ensure their safety as they test and enjoy the swing.
- Test for stability: Give the swing a few gentle pushes to test its stability. Pay attention to any excessive swinging or movement that suggests an imbalance or loose connection. If any issues arise, stop using the swing and address the problem immediately.
- Check clearance: Verify that the swing has enough clearance from surrounding walls, furniture, or other potential obstructions. Ensure that there is enough space for a safe swinging range without any hindrance.
- Adjust chain length: While your children are sitting on the swing, observe their comfort level and adjust the chain length if necessary. Gradually raise or lower the chains to find the appropriate height for their comfort and safety.
- Level the swing: Use a level to ensure that the swing is hanging level and not tilted to one side. Adjust the chains on either side, if needed, to achieve a balanced and even hanging position.
- Regular maintenance: Regularly inspect the swing, chains, and hooks for any signs of wear, damage, or rust. Tighten any loose connections and replace any worn or damaged parts as needed.
By testing and making any necessary adjustments, you can ensure that the swinging experience on the Little Tikes swing is safe, comfortable, and enjoyable for your children.
Remember, it’s crucial to emphasize safety and supervision while your children are using the swing. Regularly check for any potential hazards or issues that may arise to maintain a safe swinging environment.
With the swing properly tested and adjusted, you can now enjoy watching your children have hours of fun and laughter on their new Little Tikes swing!
Conclusion
Congratulations! You have successfully learned how to hang a Little Tikes swing from your porch. By following these steps, you have created a safe and enjoyable space for your children to swing and play right at home.
From choosing the right spot on your porch to assembling the swing, installing the hooks, attaching the chains, and making necessary adjustments, each step in the process has contributed to ensuring the safety and stability of the swing.
Remember to always supervise your children while they are using the swing and regularly inspect it for any signs of wear or damage. Taking proper care of the swing will not only enhance its longevity but also maintain a safe swinging experience for your children.
Now, sit back, relax, and enjoy watching your little ones have a fantastic time on their new Little Tikes swing. It’s a wonderful addition to your porch that will provide them with endless fun, exercise, and memories to cherish for years to come.
Thank you for reading, and we hope you found this guide helpful in hanging a Little Tikes swing from your porch!
Now that you've mastered hanging your Little Tikes swing, why not dive into more hands-on projects? Our next guide on DIY projects provides a fun, fulfilling way to express creativity and personalize your space. Whether renovating furniture or building garden fixtures, DIY endeavors offer rewarding experiences and a sense of accomplishment. Check out our comprehensive article to get inspired and start your next project today!
Frequently Asked Questions about How To Hang Little Tikes Swing From Porch
Was this page helpful?
At Storables.com, we guarantee accurate and reliable information. Our content, validated by Expert Board Contributors, is crafted following stringent Editorial Policies. We're committed to providing you with well-researched, expert-backed insights for all your informational needs.


0 thoughts on “How To Hang Little Tikes Swing From Porch”