Articles
How To Make Porch Signs
Modified: January 23, 2024
Learn how to create stunning and customized porch signs with our informative articles. Discover tips and techniques for designing eye-catching displays to enhance your outdoor space.
(Many of the links in this article redirect to a specific reviewed product. Your purchase of these products through affiliate links helps to generate commission for Storables.com, at no extra cost. Learn more)
Introduction
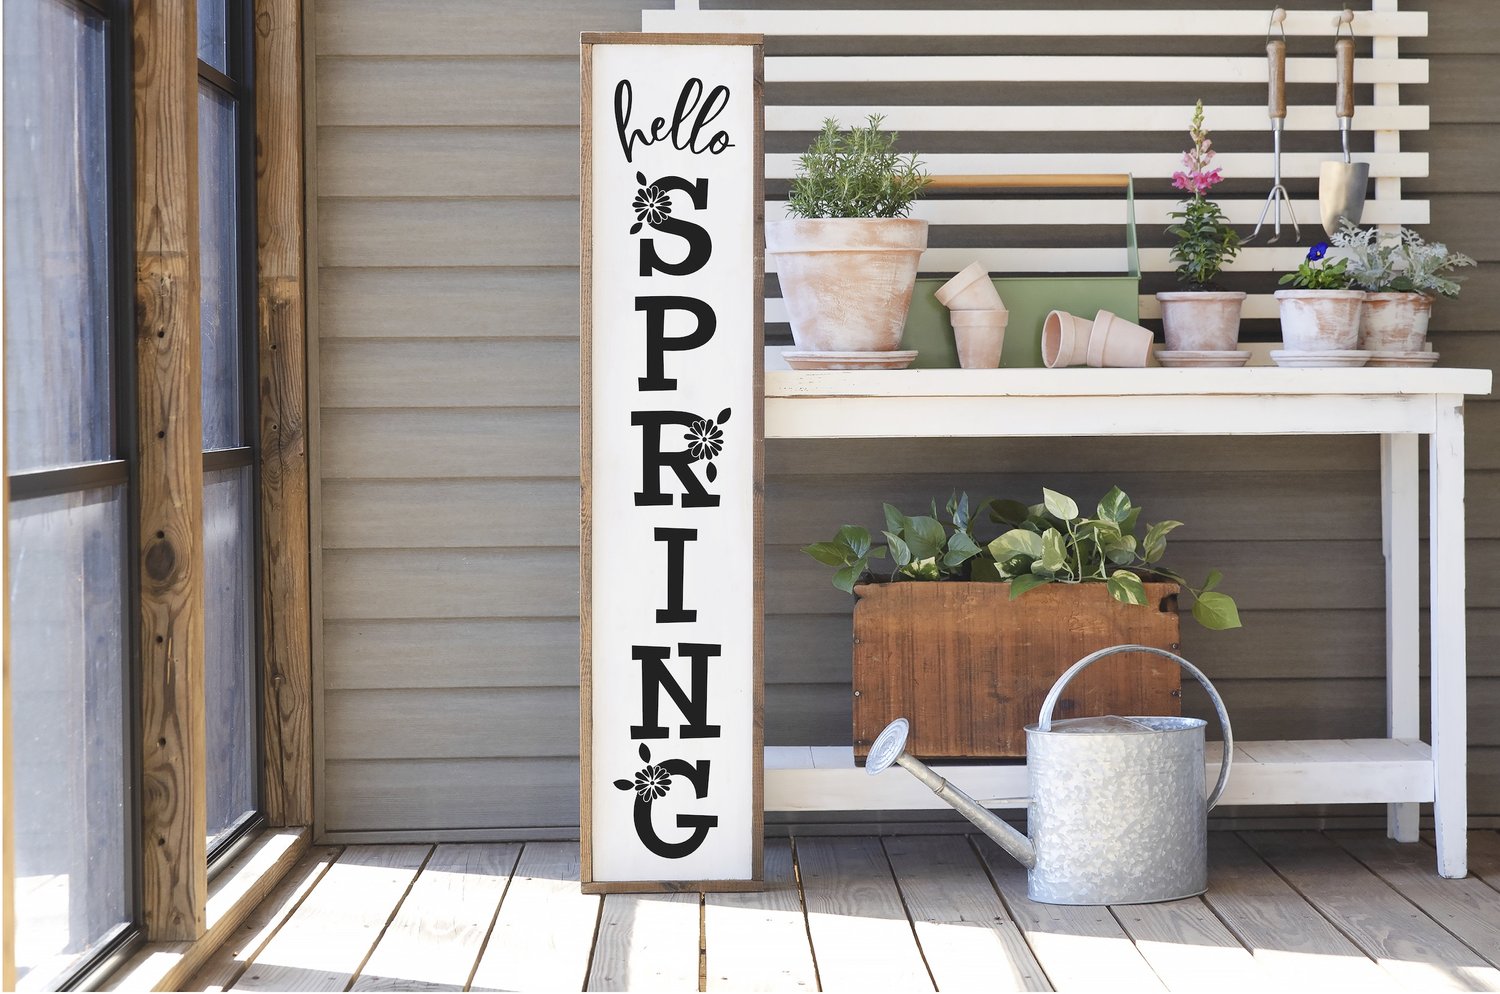
Porches are wonderful spaces to relax and enjoy the outdoors. Adding a porch sign can not only enhance the aesthetic appeal of your outdoor area, but also provide a warm and welcoming touch to your home’s entrance. Whether you want to showcase a seasonal greeting, display a meaningful quote, or simply personalize your porch, making your own porch sign can be a fun and rewarding DIY project.
In this article, we will guide you through the step-by-step process of creating your own porch signs. From choosing the right materials to hanging and displaying the final product, we will cover all the essential aspects to help you create a beautiful and eye-catching porch sign that reflects your personal style.
So, whether you are a seasoned crafter or a beginner looking to embark on your first DIY project, let’s dive in and discover how to make porch signs that will add charm and character to your outdoor space.
Key Takeaways:
- Create a personalized porch sign by choosing durable materials, planning your design, and adding finishing touches. Seal and protect your masterpiece for long-lasting beauty and proudly display your unique creation.
- Infuse your outdoor space with charm and character by making a DIY porch sign. Embrace creativity, experiment with different techniques, and enjoy the process of crafting a beautiful and welcoming addition to your porch.
Choosing the Right Materials
When it comes to making porch signs, selecting the right materials is crucial for the final outcome. Here are some considerations to keep in mind:
- Wood: Opt for a durable and weather-resistant wood such as cedar, pine, or plywood. Ensure that the wood is smooth and free of knots or imperfections that may affect the overall look of the sign.
- Size and Shape: Determine the size and shape of your porch sign based on the available space on your porch and your desired design. Common options include rectangular, square, or even custom shapes like arrows or scallops.
- Paint and Stain: Decide whether you want to paint or stain your porch sign. Each option offers a unique look and requires different types of paint or stains. Consider the overall aesthetic of your porch and choose colors that complement your existing decor.
- Hardware: Depending on how you plan to hang your porch sign, you will need appropriate hardware such as hooks, brackets, or rope. Ensure that the chosen hardware is sturdy and suitable for outdoor use.
- Additional Decorations: Think about any additional decorations you may want to incorporate into your porch sign, such as stencils, vinyl lettering, or decorative accents like bows or flowers. Gather all the necessary materials before starting the project.
It’s important to note that the materials you choose will have an impact on the longevity of your porch sign. Using high-quality and weather-resistant materials will ensure that your sign can withstand the elements and remain vibrant for years to come.
Now that you have a better understanding of the materials required, let’s move on to planning your design.
Planning Your Design
Before you start working on your porch sign, it’s essential to plan out the design to ensure a cohesive and visually appealing result. Here are some steps to help you plan your design:
- Inspiration: Look for inspiration from various sources such as home decor magazines, Pinterest boards, or online galleries. Take note of styles, color schemes, and typography that resonate with you.
- Theme: Determine the theme or message you want your porch sign to convey. Whether it’s a seasonal greeting, a motivational quote, or your family name, identify the central idea that will guide your design choices.
- Layout: Sketch out the layout of your porch sign on paper or use a digital design tool. Consider the size and shape of your sign and how the text and graphics will fit within that space. Experiment with different arrangements until you find the most visually pleasing option.
- Typography: Choose appropriate fonts that reflect the style and mood of your design. Consider the legibility of the fonts, especially if you plan to hand-paint the text. Play around with different font sizes and styles to create visual interest.
- Color Palette: Select a color palette that complements your porch and aligns with your overall design aesthetic. Keep in mind the visibility of the chosen colors and their ability to withstand fading due to sun exposure.
- Mockup: Create a mockup of your design either digitally using design software or by sketching it out on paper. This will give you a clear visualization of the final product and allow you to make any necessary modifications before starting the painting process.
By taking the time to plan your design, you can ensure that your porch sign turns out exactly the way you envision it. Planning also helps you avoid mistakes or rework during the construction phase, saving you time and frustration.
Now that you have a solid plan in place, let’s move on to the next step: preparing the wood for your porch sign.
Preparing the Wood
Before you can start painting or staining your porch sign, it’s essential to properly prepare the wood surface. This involves several steps to ensure a smooth and professional finish.
- Sanding: Begin by sanding the entire surface of the wood using sandpaper or an electric sander. This step helps to remove any rough spots, splinters, or imperfections on the wood. Sand in the direction of the grain for the best results.
- Smoothing Edges: Pay special attention to the edges of the wood, as they may be sharp or rough. Use sandpaper or a sanding block to round off the edges and create a smooth finish. This will not only make your porch sign more visually appealing but also reduce the risk of splinters.
- Cleaning: After sanding, wipe down the wood surface with a clean, damp cloth to remove any dust or debris. This ensures that the paint or stain adheres properly to the wood.
- Priming (optional): Depending on the type of wood you’re using and the desired finish, you may choose to apply a wood primer before painting or staining. Priming helps to create a smooth base and improves the durability and longevity of the final coat.
It’s important to note that the preparation process may vary slightly depending on the type of wood you’re working with. For example, if you’re using plywood, you may need to fill any visible gaps or imperfections with wood filler and sand it smooth before proceeding with the above steps.
By properly preparing the wood, you ensure a clean canvas for your porch sign. This step is crucial for achieving a professional-looking and long-lasting finish.
Now that the wood is ready, let’s move on to the next step: applying the base coat.
Applying Base Coat
Once you have prepared the wood, it’s time to apply the base coat to create a solid foundation for your porch sign. The base coat will serve as the background color for your design and help the other paint layers adhere properly.
Here’s how to apply the base coat:
- Cover your work area: Before you begin painting, protect your work area with a drop cloth or newspaper to catch any paint drips or spills.
- Choose your paint: Select a high-quality exterior paint that is suitable for outdoor use. Consider the color scheme and overall design of your porch sign when choosing the base coat color.
- Prepare your paint: Follow the instructions on the paint can for proper mixing, if necessary. Stir the paint thoroughly to ensure an even consistency.
- Apply the first coat: Using a paintbrush or foam roller, apply a thin and even layer of the base coat paint onto the wood surface. Start from one corner and work your way across the entire sign. Make sure to cover all areas, ensuring there are no gaps or streaks in the paint.
- Allow the first coat to dry: Check the drying time specified on the paint can, as it may vary depending on the brand and type of paint. Allow the first coat to dry completely before applying additional coats.
- Apply additional coats (if necessary): Depending on the desired opacity and coverage, you may need to apply one or two additional coats of the base paint. Allow each coat to dry fully before applying the next one, following the same technique as before.
Make sure to read and follow the instructions on the paint can for specific drying times and application methods, as they may vary depending on the product you’re using.
Applying a base coat creates a smooth and consistent background for your porch sign. It also provides a durable foundation for the subsequent layers of paint and decorative elements.
With the base coat applied, we can move on to the exciting part: adding text and graphics!
Adding Text and Graphics
Now that you have your base coat applied, it’s time to add text and graphics to your porch sign. This is where you can get creative and personalize your sign with meaningful quotes, family names, seasonal greetings, or any other design elements you desire. Here’s how you can do it:
- Decide on your design: Refer to your design plan and decide on the placement and layout of the text and graphics. Consider the size and style of the fonts, as well as the overall balance and visual appeal of the design.
- Choose your method: There are several ways to add text and graphics to your porch sign:
- Hand-painting: If you have steady hands and artistic skills, you can use a fine paintbrush and acrylic paint to carefully paint the text and graphics. This method allows for customization and a handcrafted look.
- Pre-made stencils: If you want a more precise and consistent look, you can use pre-made stencils to trace the letters and illustrations onto the sign. Stencils are available in various fonts and designs, making it easy to achieve professional-looking results.
- Vinyl lettering and decals: Another option is to use adhesive vinyl lettering and decals. These are available in a wide range of fonts and designs and offer the advantage of easy application and removal.
- Preparing for hand-painting: If you choose to hand-paint, use a pencil to lightly sketch the text and graphics onto the sign. This will serve as a guide for your painting process and help you ensure proper spacing and alignment.
- Applying stencils or vinyl: If using stencils or vinyl lettering, carefully place them on the sign following the predetermined layout. Press them firmly to ensure they adhere properly to the wood surface.
- Painting or filling: Depending on your chosen method, use a small paintbrush or paint pen to carefully fill in the traced letters and illustrations. Ensure even coverage and smooth lines for a professional finish.
Take your time and work with precision when adding the text and graphics to your porch sign. This step will greatly contribute to the overall impact and visual appeal of your finished product.
Once you are satisfied with the text and graphics, we can move on to the next step: adding finishing touches.
When making porch signs, be sure to use weather-resistant materials such as outdoor paint, sealed wood, or weatherproof vinyl. This will ensure your sign lasts and looks great for a long time.
Using Stencils or Freehand Painting
When it comes to adding text and graphics to your porch sign, you have the option of using stencils or embracing the freehand painting technique. Both methods offer unique benefits and allow you to personalize your sign to your liking. Let’s explore these techniques in more detail:
Using Stencils:
- Stencils provide a simple and effective way to achieve precise and professional-looking lettering and designs.
- Choose pre-made stencils with the font and design that aligns with your vision for the porch sign.
- Secure the stencil to the wood surface using painter’s tape or adhesive spray, making sure it remains in place as you work.
- Use a stencil brush or a small sponge to lightly dab or pounce the paint onto the stencil openings. Apply multiple thin layers for solid and even coverage.
- Once the paint has dried, carefully remove the stencil to reveal your crisp letters and designs.
Freehand Painting:
- Freehand painting provides the opportunity to embrace your artistic skills and add a unique, handcrafted touch to your porch sign.
- Sketch your text and designs lightly using a pencil before proceeding with painting.
- Use a fine-tipped paintbrush and acrylic paint to carefully fill in the traced lines for the text and graphics.
- Take your time and work with steady hands, ensuring smooth lines and even coverage.
- Make any necessary corrections or touch-ups as you go along, and allow the paint to dry before proceeding with additional layers or finishes.
Both stencils and freehand painting offer versatility and allow for creative expression. Choose the method that aligns with your artistic abilities, time constraints, and desired aesthetic for the porch sign.
Remember, practice makes perfect, so don’t be discouraged if it takes a few attempts to get the desired results. With patience and attention to detail, you will be able to create a beautifully painted porch sign that truly represents your style and vision.
Once the painting is complete, it’s time to add those finishing touches to elevate the overall look and protect your masterpiece. Let’s dive into the final steps to complete your porch sign.
Adding Finishing Touches
After you have added the text and graphics to your porch sign, it’s time to add those finishing touches that will elevate the overall look and ensure the longevity of your creation. Here are some essential steps to consider:
- Clean up any mistakes: Carefully inspect the porch sign for any smudges, stray paint marks, or mistakes. Use a small brush or cotton swab dipped in paint remover or water to clean up any areas that need touching up.
- Add shadows or highlights (optional): For an added dimension and depth, consider adding shadows or highlights to your text and graphics. Use a slightly darker or lighter shade of paint to create shading and make certain parts stand out.
- Embellish with additional elements: If desired, you can enhance the overall look of your porch sign by adding decorative elements such as bows, ribbons, flowers, or other embellishments that complement your design. Secure these elements using adhesive or small screws/nails, depending on the chosen material.
- Consider distressing or aging: If you prefer a vintage or weathered look, you can distress the wood or apply an aging technique using sandpaper, stain, or antiquing glaze. This can add character and give your porch sign a charming, rustic appeal.
- Inspect and make final adjustments: Step back and carefully examine your porch sign from different angles. Look for any imperfections or areas that may require further touch-ups. Once you are satisfied with the final result, allow the paint and any added elements to dry completely.
These finishing touches allow you to customize and refine your porch sign, making it truly unique and reflective of your personal style. Take your time with these steps to ensure a polished and professionally finished product.
With the finishing touches complete, it’s essential to protect your porch sign from the elements and ensure its durability. Let’s move on to the next step: sealing and protecting the sign.
Sealing and Protecting the Sign
Once you have invested time and effort into creating your beautiful porch sign, it’s crucial to protect it from the elements and ensure its longevity. Sealing and protecting the sign will not only preserve the colors and design but also make it more resistant to weathering and fading. Here’s how you can seal and protect your porch sign:
- Select a sealant: Choose a high-quality outdoor sealant that is suitable for the type of paint or stain you used. There are various options available such as polyurethane, varnish, or outdoor clear coat. Make sure the sealant is specifically designed for exterior use.
- Prepare the sign: Ensure that the paint or stain is completely dry before applying the sealant. If needed, lightly sand the surface of the sign using fine-grit sandpaper to smooth out any imperfections or rough spots.
- Apply the sealant: Using a clean brush or roller, apply a thin and even layer of sealant over the entire surface of the porch sign, including the painted areas and the exposed wood. Pay special attention to the edges and corners to ensure full coverage.
- Follow the manufacturer’s instructions: Read and follow the instructions provided by the sealant manufacturer regarding drying times and the number of coats required. Some sealants may require multiple coats for optimal protection.
- Allow the sealant to dry: After applying the first coat of sealant, allow it to dry completely. Depending on the product, this may take several hours or even overnight. Avoid touching the sign or exposing it to moisture until the sealant has fully cured.
- Apply additional coats: If recommended by the manufacturer or if you desire additional protection, apply subsequent coats of sealant following the same process and allowing each coat to dry thoroughly before applying the next.
Sealing your porch sign provides a barrier against moisture, UV rays, and other environmental factors that can cause damage or fading. It helps to preserve the colors, prevent peeling or chipping, and extends the lifespan of your sign.
Once the sealant has dried and cured, your porch sign is ready to be displayed and enjoyed! Let’s move on to the final step: hanging and displaying the sign.
Hanging and Displaying the Porch Sign
Now that your porch sign is complete and protected, it’s time to hang it up and showcase your hard work. The method of hanging will depend on the size and weight of your sign, as well as your personal preference and the available space. Here are some common options for hanging and displaying a porch sign:
- Mounting hardware: If your porch sign is relatively lightweight, you can use mounting hardware such as hooks, brackets, or D-ring hangers to securely hang it on a wall or the front of your porch. Make sure to attach the hardware to the back of the sign using appropriate screws or nails.
- Rope or twine: For a more rustic or farmhouse look, you can use thick rope or twine to hang your porch sign. Simply create loops at the top corners of the sign and secure the rope or twine with knots. Then, hang it from a hook or nail on your porch.
- Easel or stand: If you prefer a freestanding display, consider placing your porch sign on an easel or a decorative stand. This option works well for smaller or tabletop porch signs.
- Lean against a wall: For a casual and effortless display, you can lean your porch sign against a wall or a corner of your porch. This creates a relaxed and laid-back feel while still showcasing your sign.
- Incorporate seasonal decorations: Depending on the time of year and your personal style, you can enhance your porch sign display by incorporating seasonal decorations such as wreaths, floral arrangements, or lights around the sign. This adds a festive touch and creates a cohesive look.
Consider the overall style and aesthetic of your porch when choosing the hanging and display method for your porch sign. Make sure it is securely mounted or positioned to withstand wind, rain, and other outdoor elements.
Remember to regularly inspect your porch sign for any signs of wear or damage, and make any necessary touch-ups or repairs as needed. This will ensure that your porch sign continues to look its best and lasts for years to come.
Now that you have learned how to make and display a beautiful porch sign, it’s time to enjoy the final result and admire your handiwork. Congratulations on creating a unique and personalized addition to your outdoor space!
Happy crafting and happy porch decorating!
Conclusion
Creating your own porch sign is a fulfilling DIY project that allows you to infuse your personal style and creativity into your outdoor space. By following the steps outlined in this guide, you’ve learned how to choose the right materials, plan your design, prepare the wood, apply the base coat, add text and graphics, and add the finishing touches to your porch sign. Sealing and protecting your sign ensures its longevity, and thoughtful consideration of hanging and displaying options ensures it takes center stage in your porch decor.
Throughout this process, you’ve discovered the importance of selecting durable materials, planning your design, and properly preparing and sealing your porch sign. By paying attention to details and taking the time to execute each step with care, you’ve created a unique and personalized piece of artwork that adds a touch of charm and character to your porch.
Remember, this guide provides a foundation for creating porch signs, but don’t be afraid to let your creativity shine and adapt these steps to fit your personal preferences and style. Experiment with different techniques, colors, and embellishments to make your porch sign truly one-of-a-kind.
Now it’s time to proudly display your porch sign and enjoy the compliments from friends, family, and neighbors. As the seasons change, consider updating your porch sign to reflect the festive spirit, or simply switch up the design to keep your outdoor space fresh and inviting.
Embrace the joy of DIY and let your porch sign be a reflection of your creativity and personal touch. Whether you’re relaxing on your porch, welcoming guests, or simply admiring your handiwork, your porch sign will continue to add a warm and inviting touch to your outdoor oasis.
So what are you waiting for? Gather your materials, unleash your creativity, and let your porch sign become a beautiful focal point that represents your unique style and personality.
Happy porch sign making!
Frequently Asked Questions about How To Make Porch Signs
Was this page helpful?
At Storables.com, we guarantee accurate and reliable information. Our content, validated by Expert Board Contributors, is crafted following stringent Editorial Policies. We're committed to providing you with well-researched, expert-backed insights for all your informational needs.


0 thoughts on “How To Make Porch Signs”