Articles
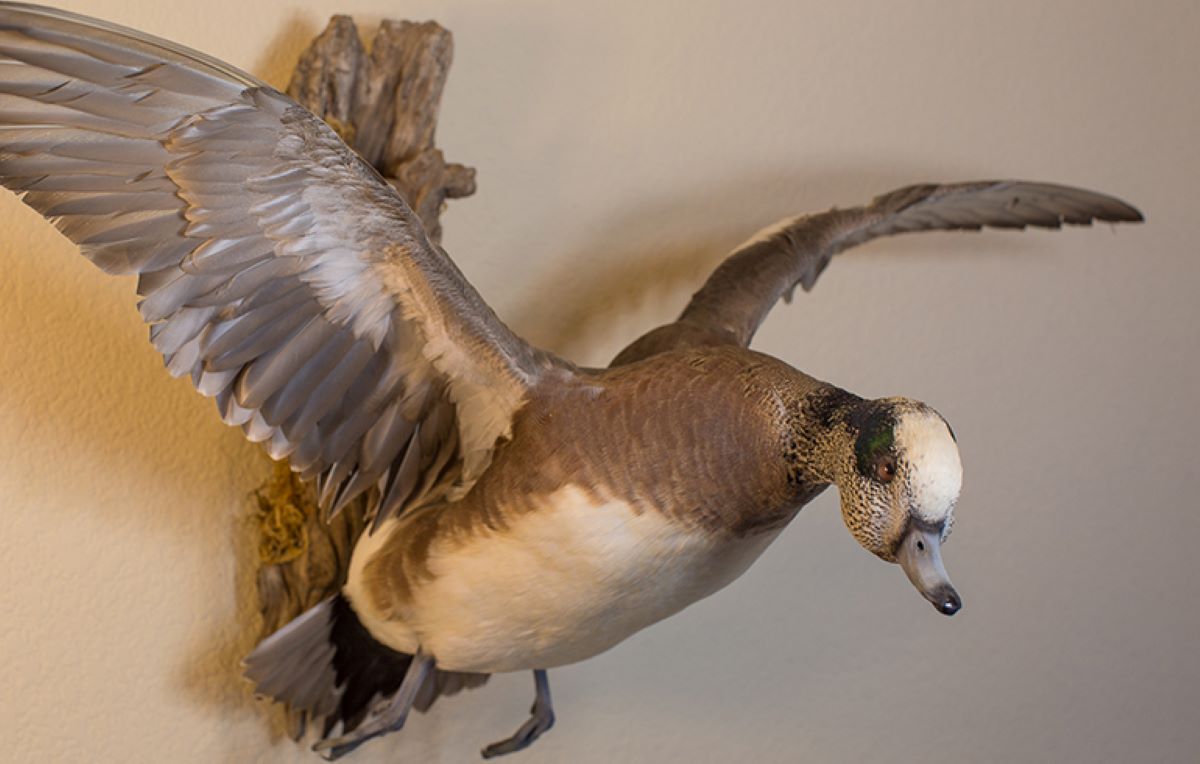
How To Store A Duck For Taxidermy
Modified: December 7, 2023
Learn the proper method to store a duck for taxidermy with our informative articles. Get step-by-step instructions and expert tips to preserve your waterfowl specimens.
(Many of the links in this article redirect to a specific reviewed product. Your purchase of these products through affiliate links helps to generate commission for Storables.com, at no extra cost. Learn more)
Introduction
Welcome to our comprehensive guide on how to store a duck for taxidermy. If you’re a hunter or wildlife enthusiast who wants to preserve the beauty of a duck and display it in your home or office, proper storage is crucial. Taxidermy is an art form that requires skill, patience, and attention to detail, and taking the necessary steps to store the duck correctly is the foundation for a successful taxidermy project.
Whether you plan to have the duck mounted by a professional taxidermist or you’re a DIY enthusiast looking to try your hand at preserving the bird yourself, this guide will walk you through the step-by-step process of storing the duck to ensure optimal preservation.
Understanding the fundamentals of storing a duck for taxidermy is essential to maintain the integrity of the bird’s feathers, structure, and overall appearance. This guide will cover the key steps involved, including preparing the duck, skinning it, fleshing it, salting it, and wrapping and storing it for preservation.
So, let’s dive in and learn how to store a duck for taxidermy like a pro!
Key Takeaways:
- Properly storing a duck for taxidermy involves thorough preparation, precise skinning, delicate fleshing, and strategic salting to preserve the bird’s beauty and structure for long-term display.
- Choosing the right wrapping materials and storing the duck in a controlled environment are crucial for maintaining its condition and ensuring a stunning display piece for years to come.
Read more: How To Store Duck Eggs
Preparing the Duck
Before you begin the process of storing a duck for taxidermy, it’s important to properly prepare the bird. Here are the essential steps to follow:
- Clean the duck: Start by removing any dirt or debris from the duck’s feathers. Use a soft brush or cloth to gently clean the bird’s exterior, being careful not to damage the feathers. Pay attention to the wings, tail, and other areas where dirt may be trapped.
- Inspect for damage: Carefully examine the duck for any signs of damage, such as tears in the skin or broken feathers. If you notice any significant damage, it’s best to consult a professional taxidermist for advice on whether the bird is suitable for preservation.
- Check for parasites: Inspect the bird for any signs of parasites, such as mites or ticks. If you find any, take the necessary steps to remove them before proceeding with the storage process.
- Take measurements: Measure the duck’s wingspan, body length, and other important dimensions. These measurements will be useful for positioning the bird correctly during the mounting or stuffing process.
By taking these preparatory steps, you ensure that the duck is clean, free from damage, and ready for the next stages of the taxidermy process. Now let’s move on to the next step: skinning the duck.
Skinning the Duck
Once you’ve prepared the duck, it’s time to move on to the process of skinning. Here’s a step-by-step guide to help you:
- Secure the duck: Begin by laying the duck on a clean, flat surface. Make sure the bird is positioned in a way that allows easy access to its front and back.
- Make the initial incision: Using a sharp knife or scalpel, make a small incision along the underside of the duck’s body, starting from the breast region and extending to the vent area.
- Continue the incision: Gently separate the skin from the body by carefully sliding the knife along the sides of the duck, following the contour of the bird’s body. Take your time to avoid damaging the skin or underlying tissues.
- Detach the skin from the wings and legs: As you continue the incision, pay extra attention to the wing and leg areas. Use your fingers or a small tool to separate the skin from the underlying muscles and joints. Be cautious not to tear the skin in the process.
- Remove the head and neck: Once you’ve detached the skin from the body, carefully cut through the neck to separate it from the head. Remove the head completely, taking care not to damage the neck area or surrounding feathers.
- Complete the skinning process: Continue to carefully remove the skin from the entirety of the duck’s body, using a combination of cutting and gentle pulling motions. Take your time to ensure that the skin is fully separated without any tears or damage.
Skilled taxidermists often use various techniques and tools to aid in the skinning process, such as taxidermy scissors and specialized knives. If you’re new to taxidermy, it may be helpful to seek guidance from a professional or consult detailed tutorials to refine your techniques.
Now that you’ve successfully skinned the duck, it’s time to move on to the next step: fleshing.
Fleshing the Duck
After skinning the duck, the next crucial step in storing it for taxidermy is fleshing. This process involves removing the excess flesh and fat from the bird’s skin to ensure proper preservation. Here’s a step-by-step guide:
- Inspect the skin: Before proceeding with fleshing, closely examine the entire skin to identify any remaining bits of flesh or fat. Use your fingers or a blunt tool to gently scrape away any remaining tissue.
- Remove the excess fat: Ducks often have a layer of fat underneath their skin. Carefully scrape away this fat using a fleshing knife or a specialized tool designed for taxidermy. Be cautious not to cut or damage the skin in the process.
- Clean the feathers: Take the time to clean the feathers by gently brushing them and removing any debris or excess fat. This will help ensure that the feathers maintain their natural appearance and texture.
Fleshing is a delicate process that requires precision and attention to detail. It’s important to be patient and take your time to avoid any unnecessary damage to the skin or feathers. If you’re new to taxidermy, it’s advisable to practice fleshing techniques on less valuable specimens before working on prized ducks.
Once you’ve successfully completed the fleshing process, the next step is salting the duck to aid in the preservation process, which we will discuss next.
After field dressing, wrap the duck in a damp cloth and place it in a plastic bag. Store it in a cool place until you can bring it to a taxidermist. Avoid freezing the duck if possible.
Salting the Duck
Salting is a crucial step in storing a duck for taxidermy as it helps to remove moisture and prevent bacterial growth. Here’s a step-by-step guide on how to salt the duck:
- Prepare the duck: Ensure that the duck’s skin has been properly fleshed and cleaned before proceeding with the salting process. This will allow for better salt absorption and preservation.
- Get the right type of salt: Use non-iodized salt or borax, which are commonly available at taxidermy supply stores. These salts help to draw out moisture from the skin.
- Apply a generous amount of salt: Sprinkle a generous amount of salt throughout the interior of the duck’s skin, making sure to cover all areas. Pay special attention to the wing and leg regions, as these areas tend to retain more moisture.
- Leave the salt on the duck: Once you’ve applied the salt, carefully fold the duck’s skin back into its original position, ensuring that the salt is in direct contact with the flesh. Leave the salt on for around 24 to 48 hours to allow sufficient moisture absorption.
- Reapply if necessary: If you notice any moisture accumulation on the surface of the duck during the salting process, gently remove the excess moisture with paper towels and reapply a fresh layer of salt.
During the salting process, it’s important to keep the duck in a cool, dry place to facilitate moisture removal. A well-ventilated area is ideal to prevent the growth of mold and mildew.
Once the salt has absorbed moisture from the skin and the duck feels firm to the touch, it’s time to move on to the next step: wrapping and storing the duck.
Read more: How To Store Duck Fat
Wrapping and Storing the Duck
After completing the salting process, it is crucial to properly wrap and store the duck to ensure its long-term preservation. This step is vital in protecting the bird from environmental factors and maintaining its overall condition. Follow these steps to wrap and store the duck:
- Choose the right wrapping material: Use acid-free tissue paper or plastic wrap specifically designed for taxidermy to wrap the duck. These materials help prevent moisture damage and maintain the integrity of the feathers.
- Position the duck: Carefully position the duck in a natural-looking pose before wrapping. Use small amounts of tissue paper or foam to support the bird’s wings, head, and tail in the desired position, if needed.
- Wrap the bird: Gently and securely wrap the duck with the chosen wrapping material. Start from the bottom and work your way up, ensuring that each part of the bird’s body is adequately protected. Avoid compressing the feathers or distorting the bird’s shape.
- Seal it in an airtight bag: To further protect the duck from pests and moisture, place the wrapped bird in an airtight bag. Vacuum-sealed bags or specially designed taxidermy bags are recommended for this purpose.
- Store in a cool, dry place: Find a suitable storage area for the wrapped and sealed duck. Ideally, this location should have controlled temperature and humidity levels. Avoid areas prone to temperature fluctuations, moisture, direct sunlight, or pests.
Regularly inspect the stored duck to ensure that there are no signs of damage, pests, or excessive moisture. If any issues are detected, take appropriate measures such as adjusting the storage conditions or consulting a professional taxidermist.
By following these steps, you can help ensure that the duck remains in optimal condition until it is ready to be mounted or used for display.
Conclusion
Properly storing a duck for taxidermy is a crucial step in preserving its beauty and creating a lasting display piece. By diligently following the steps outlined in this comprehensive guide, you can ensure optimal preservation and maintain the integrity of the duck’s feathers and structure.
Remember to begin by thoroughly preparing the duck, cleaning it and inspecting for any damage or parasites. Skinning the duck requires patience and precision to carefully remove the skin without causing damage. Fleshing involves removing excess tissue and fat from the skin, while salting helps to draw out moisture and prevent bacterial growth.
After salting, wrapping the duck using appropriate materials and storing it in suitable conditions is essential for long-term preservation. Choose acid-free tissue paper or plastic wrap to protect the skin and position the duck in a natural pose. Seal the wrapped bird in an airtight bag and store it in a cool, dry place.
Regularly monitor the stored duck for any signs of damage or moisture accumulation, and take necessary actions as needed. If you are unsure about any step or encounter difficulties, it’s always a good idea to seek guidance from a professional taxidermist.
By following these guidelines, you can successfully store a duck for taxidermy and enjoy a beautifully preserved bird for years to come. Whether you’re a hunter, nature enthusiast, or simply appreciate the art of taxidermy, the process of storing a duck properly will ensure the bird remains a stunning display piece for generations to come.
Preserve the beauty of nature with care and precision, and enjoy the artistry of taxidermy!
Frequently Asked Questions about How To Store A Duck For Taxidermy
Was this page helpful?
At Storables.com, we guarantee accurate and reliable information. Our content, validated by Expert Board Contributors, is crafted following stringent Editorial Policies. We're committed to providing you with well-researched, expert-backed insights for all your informational needs.


0 thoughts on “How To Store A Duck For Taxidermy”