Articles
How To Build Wood Duck Boxes
Modified: May 6, 2024
Learn how to build wood duck boxes in your garden and create a welcoming habitat for these beautiful birds. Increase biodiversity and enhance your garden with this DIY project!
(Many of the links in this article redirect to a specific reviewed product. Your purchase of these products through affiliate links helps to generate commission for Storables.com, at no extra cost. Learn more)
Introduction
Welcome to our guide on how to build wood duck boxes! If you are passionate about wildlife conservation and want to create a welcoming habitat for wood ducks, this article is for you. Wood duck boxes, also known as nesting boxes or duck houses, provide a safe and suitable environment for wood ducks to breed and raise their young.
Wood ducks are beautiful waterfowl species known for their stunning plumage and unique behaviors. Unfortunately, loss of natural nesting sites due to habitat destruction has impacted their population numbers. By constructing wood duck boxes, we can help these birds thrive and contribute to their conservation efforts.
Not only is building wood duck boxes a rewarding and educational activity, but it also has several benefits. Creating artificial nesting sites helps to increase wood duck populations by providing them with safe spaces to lay their eggs and rear their ducklings. It also protects their nests from predators that would otherwise threaten their survival.
In this guide, we will walk you through the process of building a wood duck box from start to finish. We will provide detailed instructions, materials, and tools needed, as well as crucial tips for selecting the right location, mounting the box securely, and properly maintaining it.
By the end of this article, you will have the knowledge and confidence to build your very own wood duck boxes, contributing to the conservation of these remarkable birds. So, let’s get started on creating a haven for wood ducks in your backyard!
Key Takeaways:
- Building wood duck boxes not only benefits the conservation of wood duck populations but also provides educational, community-engaging, and aesthetically appealing opportunities, contributing to the overall health of ecosystems.
- Properly constructing, securely mounting, and regularly maintaining wood duck boxes creates a sustainable and welcoming habitat for wood ducks, increasing their chances of successful breeding and population growth.
Read more: How To Build A Wood Shed
Benefits of Wood Duck Boxes
Building wood duck boxes and providing artificial nesting sites for these majestic waterfowl bring numerous benefits to both the birds and the environment. Let’s explore some of the key advantages of wood duck boxes:
- Conservation of Wood Duck Populations: Wood duck boxes play a crucial role in the conservation of wood ducks. By providing safe and suitable nesting sites, these boxes increase the chances of successful reproduction and bolster wood duck populations.
- Habitat Preservation: As natural wetlands continue to shrink, wood duck boxes offer an alternative nesting option for wood ducks. With the construction of nesting boxes, we can help preserve their habitat and ensure their continued presence in our ecosystems.
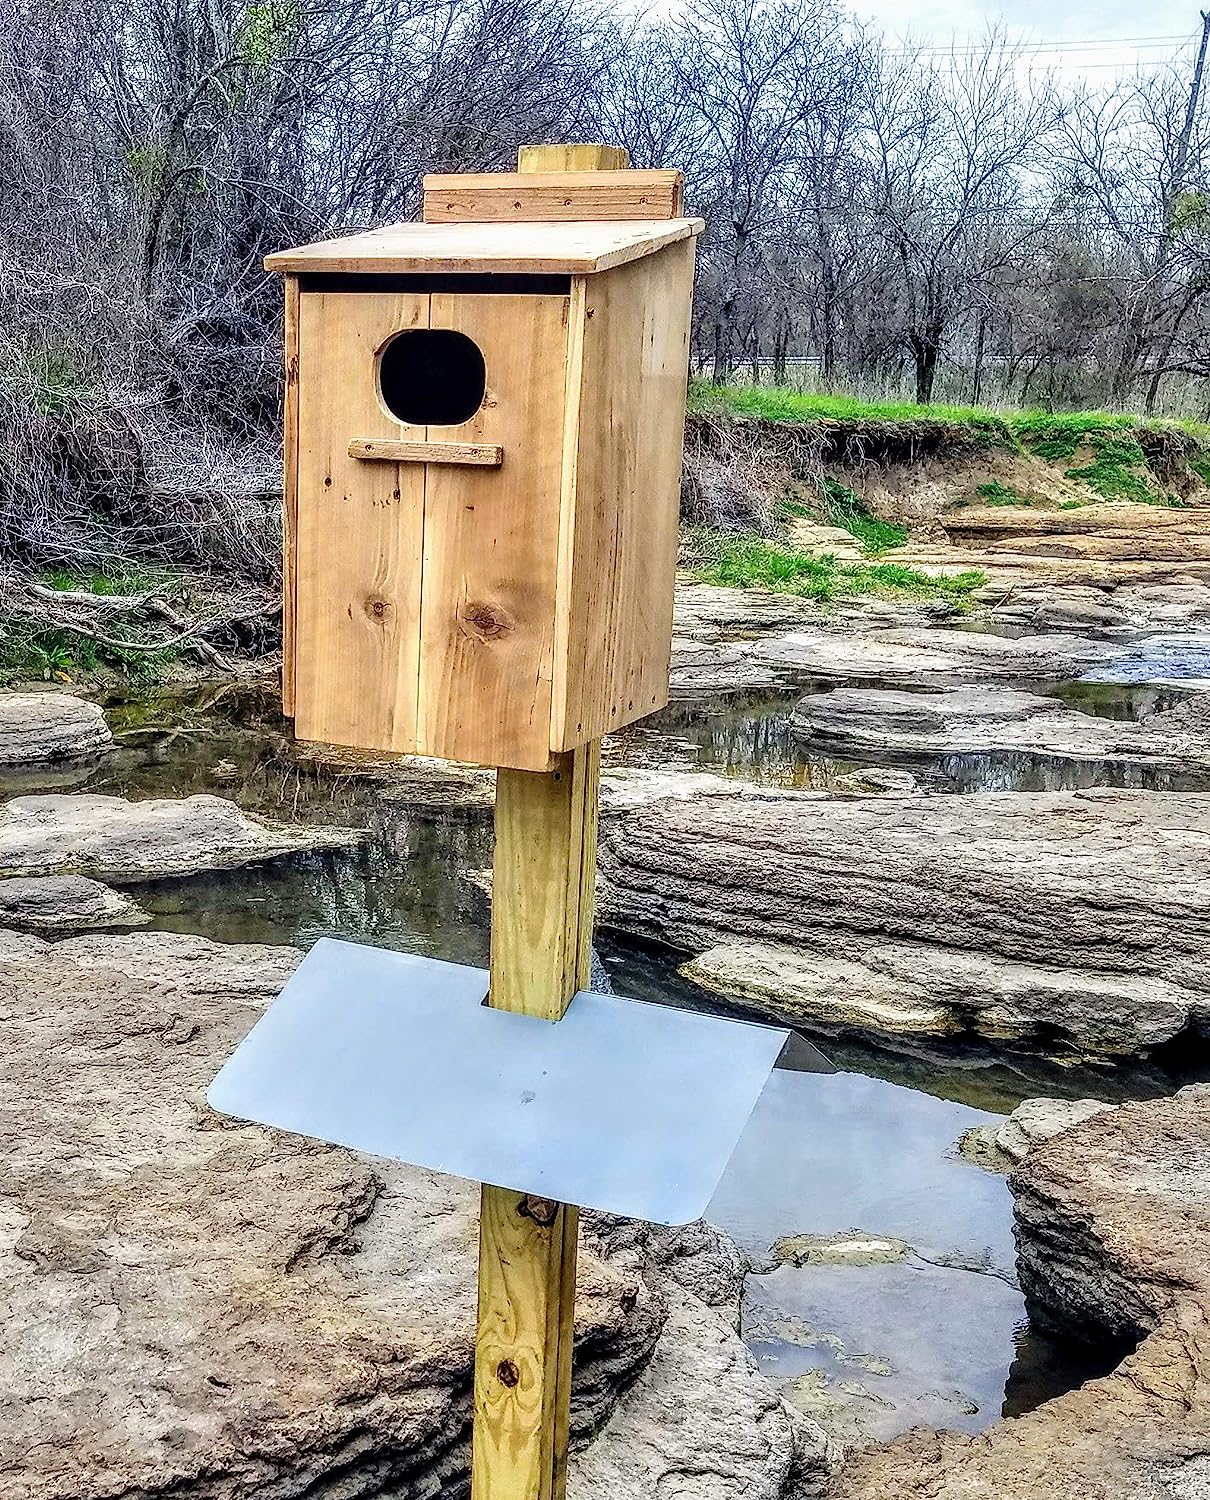
- Nest Protection: Wood duck boxes protect nests from predators such as raccoons, snakes, and owls. The elevated design and entrance hole size deter larger predators, keeping the eggs and ducklings safe during their vulnerable stages.
- Observation and Education: Installing wood duck boxes allows you to observe the fascinating behaviors of these waterfowl up close. You can witness the entire nesting process, from courtship and egg-laying to the rearing of ducklings. This hands-on experience provides a valuable educational opportunity for individuals of all ages.
- Enhanced Biodiversity: Wood ducks are keystone species that play a vital role in wetland ecosystems. By attracting and supporting wood ducks, the presence of nesting boxes contributes to the overall health and diversity of the ecosystem. These boxes also provide shelter to other cavity-nesting birds and wildlife.
- Community Engagement: Building wood duck boxes can be a community project that brings people together in a shared commitment to wildlife conservation. It fosters a sense of stewardship for the environment and encourages community members to actively participate in conservation efforts.
- Aesthetic Appeal: Wood duck boxes not only serve a practical purpose but also add beauty to a natural landscape. They can become focal points in gardens or wetland areas, enhancing the visual appeal of the surroundings.
By providing wood duck boxes, we are not only helping to conserve a remarkable species but also contributing to the overall balance and resilience of our ecosystems. Now that you understand the benefits, let’s move on to the materials and tools needed to construct your own wood duck boxes!
Materials and Tools Needed
Before you begin constructing wood duck boxes, it’s essential to gather all the necessary materials and tools. Here is a comprehensive list of what you’ll need:
Materials:
- 1″ thick rough-cut lumber (cedar or cypress are recommended)
- Waterproof exterior-grade screws
- Water-based outdoor paint or stain
- Galvanized metal or stainless steel screws for mounting
- Hardware cloth or predator guard
- Wood shavings or sawdust for nesting material
Tools:
- Measuring tape
- Pen or pencil for marking
- Saw (circular saw or table saw)
- Drill with various drill bits (including a hole saw)
- Screwdriver or screw gun
- Paintbrushes or paint sprayer (if painting the wood)
- Sandpaper or sanding block
When selecting lumber, it’s important to choose rough-cut wood that is at least 1″ thick. Cedar and cypress are ideal choices due to their durability and natural resistance to rot and decay. Avoid using pressure-treated wood, as it may contain chemicals harmful to birds.
Waterproof exterior-grade screws are essential for securing the wood pieces together. Using galvanized metal or stainless steel screws for mounting the boxes will ensure they withstand the elements over time.
Consider painting or staining the exterior of the wood duck box to provide additional protection against weathering. Water-based outdoor paint or stain is recommended to avoid potential harm to the ducks and their nesting materials.
Adding a predator guard in the form of hardware cloth, a metal plate, or an extended roof can help prevent predators from accessing the nest. Wood shavings or sawdust can be placed inside the box to create a soft and comfortable nesting material for the wood ducks.
With the necessary materials and tools in hand, you are now ready to move on to the next step: choosing the right location for your wood duck boxes. Let’s proceed to the next section to find out more!
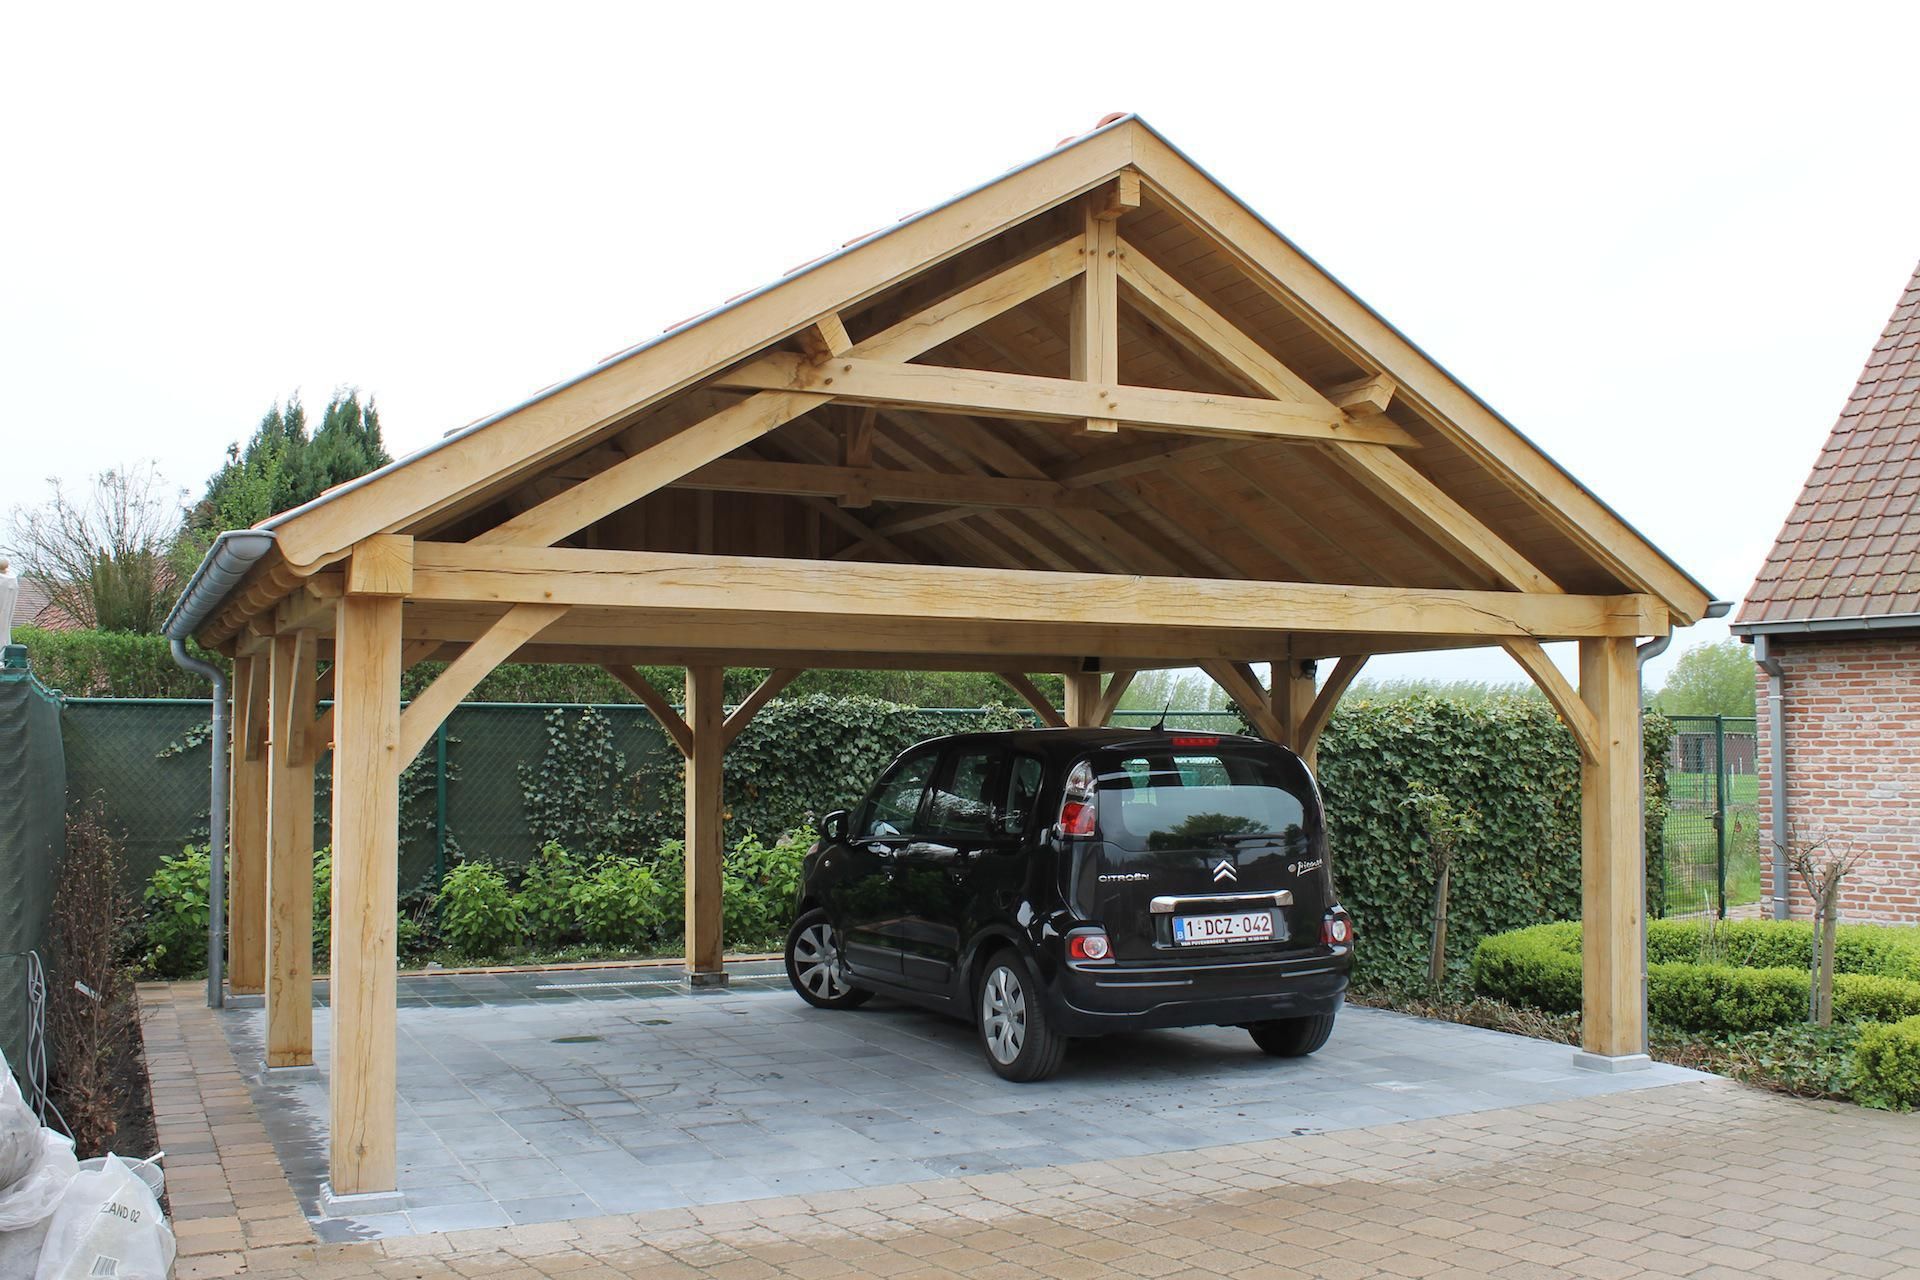
Read more: How To Build A Wood Carport
Choosing the Right Location
Choosing the proper location for your wood duck boxes is crucial for their success. Here are some factors to consider when selecting the ideal spot:
Habitat:
Wood ducks prefer to nest near wooded wetlands, swamps, ponds, or slow-moving streams with nearby mature trees. Look for an area that offers suitable food sources like aquatic plants, insects, and small invertebrates.
Distance from Water:
Place the wood duck boxes within 100 feet of a body of water to ensure easy access for the ducks. This allows them to forage for food and easily lead their ducklings to safety after they hatch.
Height and Accessibility:
Mount the wood duck boxes on wooden or metal posts 10-15 feet above the ground. This height helps protect the nests from predators but still allows for easy access during maintenance and monitoring.
Read more: How To Build A Wood Awning
Orientation:
Face the entrance of the wood duck box towards the water source to attract wood ducks. They prefer locations with a clear view of the surrounding area, so avoid dense shrubbery or obstacles blocking their approach.
Protection from Predators:
Consider installing predator guards, such as a metal cone or an extended roof, around the entrance to deter climbing predators. Make sure the predator guards are at least 2 feet in length to prevent reaching the entrance hole.
Avoiding Human Disturbance:
Choose a location away from heavy human traffic and disturbances to minimize stress on the wood ducks. Nesting boxes should be placed in a quiet and peaceful setting to provide a secure environment for nesting and raising ducklings.
Remember, every location is unique, so adapt these guidelines to suit your specific surroundings. Monitoring the activity around the wood duck boxes will allow you to make any necessary adjustments to maximize their effectiveness.
Now that you’ve chosen the perfect location, it’s time to dive into the construction process of building the wood duck box. Continue reading to learn how to bring your project to life!
Building the Wood Duck Box
Building a wood duck box requires careful attention to detail to ensure that it provides a suitable nesting habitat for wood ducks. Follow these step-by-step instructions to construct your wood duck box:
Read more: How To Build Cabinet Box
Step 1: Cut the Wood
Using the measurements below, cut the lumber into the following pieces:
- Front and Back: 19″ x 12″ (2 pieces)
- Sides: 10.5″ x 9″ (2 pieces)
- Floor: 8″ x 9″ (1 piece)
- Roof: 15″ x 12″ (1 piece)
Step 2: Create the Entrance Hole
Measure and mark a 3″ diameter entrance hole on one of the front pieces. Use a hole saw or a drill with a 3″ drill bit to create the entrance hole.
Step 3: Assemble the Box
Attach the front and back pieces to the sides using waterproof exterior screws. Place the floor piece inside the box frame and secure it with screws.
Step 4: Add the Roof
Attach the roof to the top of the box using waterproof screws. Ensure that the roof extends beyond the edges of the box to provide adequate protection against rain.
Read more: How To Build Wood Burning Fireplace
Step 5: Predator Guard
Attach a predator guard, such as hardware cloth, around the entrance hole to deter predators from reaching inside the box. Ensure the guard is securely fastened using screws.
Step 6: Ventilation and Drainage
Drill small ventilation holes near the top of the front and back pieces to provide airflow inside the box. Additionally, create drainage holes in the floor to prevent water accumulation.
Step 7: Finishing Touches
Sand any rough edges or surfaces to ensure a smooth finish. Apply a waterproof and non-toxic paint or stain to the exterior of the box, following the manufacturer’s instructions. Let the paint or stain dry completely before proceeding.
Voila! You have successfully built your wood duck box. Now it’s time to mount it in the chosen location to create a welcoming home for wood ducks. Continue to the next section to learn how to securely mount the box.
Note: It’s important to regularly clean and maintain the wood duck box to ensure its longevity and attractiveness to wood ducks. We will cover this topic in detail in the next section.
Mounting the Wood Duck Box
Mounting your wood duck box securely is essential to ensure its stability and longevity. Follow these steps to properly mount the box:
Read more: How To Build A Simple Wood Shed
Step 1: Choose the Mounting Location
Identify a suitable mounting location based on the guidelines mentioned earlier. Remember to consider the distance from water, height, accessibility, and protection from predators.
Step 2: Prepare the Mounting Post
If using a wooden post, ensure it is at least 4×4 inches and long enough to provide proper elevation (10-15 feet off the ground). Remove any branches or obstacles that may hinder the installation.
Step 3: Attach the Mounting Plate
Securely attach a galvanized metal mounting plate to the top of the wooden post. This will provide a stable platform to mount the wood duck box.
Step 4: Position the Box
Place the wood duck box onto the mounting plate. Ensure that the entrance hole faces the desired direction, typically towards the water source.
Read more: How To Build Wood Privacy Fence
Step 5: Securely Fasten the Box
Using galvanized or stainless steel screws, attach the wood duck box to the mounting plate. Make sure the screws are long enough to penetrate both the box and the plate, ensuring a secure attachment.
Step 6: Double-Check Stability
Gently shake the box and ensure it is firmly attached to the mounting plate. The box should not wobble or swing in the wind.
Step 7: Optional Predator Guard
If not already installed during the construction phase, consider adding a predator guard around the entrance hole to further protect the wood duck nest from predators. Ensure it is securely fastened and extends at least 2 feet in length.
By securely mounting the wood duck box, you provide a safe and stable nesting environment for wood ducks. Remember, monitoring the box regularly and making any necessary adjustments will contribute to its effectiveness.
In the next section, we will discuss the importance of maintaining the wood duck box and how to keep it in optimal condition for nesting wood ducks.
Maintaining the Wood Duck Box
Maintaining your wood duck box is crucial to ensure its functionality and attract wood ducks for nesting. Follow these important maintenance steps to keep the box in optimal condition:
Read more: How To Build A Wood Foundation For A Shed
Regular Inspections:
Check the wood duck box at least once every two weeks during the nesting season. Look for signs of damage, wear, or any unwanted inhabitants. Inspections allow you to address issues promptly and ensure the box remains suitable for wood ducks.
Cleaning the Box:
After each nesting season, clean out the old nesting material to prepare for the next breeding cycle. Wear gloves and remove the nesting material, replacing it with fresh wood shavings or sawdust.
Repairing Damages:
If you notice any damages such as loose screws, cracked wood, or water leaks, address them promptly. Replace damaged or rotted wood, tighten loose screws, and seal any gaps or cracks to maintain the integrity of the box.
Predator Prevention:
Regularly check the predator guard around the entrance hole to ensure it is secure and intact. Repair or replace it if needed to prevent any potential entry from predators.
Read more: How To Build A Wood Base For A Shed
Monitoring Activity:
Keep an eye on the nesting box to observe wood duck activity. Note the number of visits and potential nesting behavior. Monitoring can provide valuable insights into the success of the box and wood duck population in your area.
Record Keeping:
Maintain a record of your observations, including nesting attempts, successful hatches, and fledging. This information can contribute to research and conservation efforts and help track the effectiveness of your wood duck box.
Seasonal Maintenance:
During the offseason, inspect the wood duck box for any winter damage or deterioration. Make necessary repairs, touch up paint or stain if needed, and ensure the box is ready for the upcoming nesting season.
By implementing these maintenance practices, you can create a sustainable and welcoming habitat for wood ducks, increasing their chances of successful breeding and population growth.
Now that you understand the importance of maintaining the wood duck box, it’s time to summarize what we’ve covered in this guide.
Conclusion
Congratulations on completing our guide on how to build wood duck boxes! By constructing these nesting habitats, you have taken an important step towards promoting the conservation of wood ducks and their habitats.
We explored the benefits of wood duck boxes, including the conservation of wood duck populations, habitat preservation, nest protection, educational opportunities, enhanced biodiversity, community engagement, and aesthetic appeal. These boxes offer a practical and rewarding way to contribute to the health and sustainability of wetland ecosystems.
We discussed the materials and tools needed for building wood duck boxes, emphasizing the use of rough-cut lumber, waterproof screws, predator guards, and non-toxic finishes. By gathering the necessary supplies, you are well-prepared to embark on your construction journey.
Choosing the right location for your wood duck boxes is critical. We highlighted the importance of proximity to water, suitable habitat, height, accessibility, orientation, and protection from predators. These factors ensure that the wood duck boxes provide an ideal nesting environment for these beautiful waterfowl.
We provided step-by-step instructions for building the wood duck box, including cutting the wood, creating the entrance hole, assembling the pieces, adding the roof, and incorporating ventilation and drainage. By following these guidelines and adding your personal touch, you have crafted a habitat that wood ducks will appreciate.
Mounting the wood duck box securely is crucial for its stability and effectiveness. We covered the steps of choosing the mounting location, preparing the post, attaching the mounting plate, positioning the box, fastening it securely, and considering a predator guard. These measures ensure that the wood duck box remains a safe and attractive nesting site.
Maintaining the wood duck box is essential for its long-term functionality. We emphasized the importance of regular inspections, cleaning out the box, repairing damages, preventing predator access, monitoring activity, and keeping records. These maintenance practices contribute to the success of the wood duck box and encourage the continued presence of wood ducks.
By building, mounting, and maintaining wood duck boxes, you have become an active participant in the conservation of these majestic waterfowl. Your efforts provide them with a safe haven to breed, raise their ducklings, and contribute to the overall health of wetland ecosystems.
Thank you for joining us on this journey to learn how to build wood duck boxes. Together, we can make a positive impact on the preservation of wood ducks and create a world where wildlife thrives.
Ready to tackle more creative projects? If crafting with wood sparks your interest, our guide on the best woodworking techniques will surely keep you busy and inspired. For those who love getting hands-on, our insights on the perks of DIY projects will show why taking on such tasks can be both satisfying and practical. So, why wait? Dive into these adventures and transform ordinary spaces into something extraordinary!
Frequently Asked Questions about How To Build Wood Duck Boxes
Was this page helpful?
At Storables.com, we guarantee accurate and reliable information. Our content, validated by Expert Board Contributors, is crafted following stringent Editorial Policies. We're committed to providing you with well-researched, expert-backed insights for all your informational needs.

0 thoughts on “How To Build Wood Duck Boxes”