Articles
How To Store A Guitar Long Term
Modified: January 20, 2024
Learn the best tips and tricks for storing your guitar long term. Our articles provide expert advice on preserving the life and condition of your instrument.
(Many of the links in this article redirect to a specific reviewed product. Your purchase of these products through affiliate links helps to generate commission for Storables.com, at no extra cost. Learn more)
Introduction
Whether you’re a seasoned guitarist or just starting out, properly storing your guitar is crucial to maintaining its condition and ensuring its longevity. Storing a guitar long term requires taking certain precautions to protect it from damage caused by environmental factors such as humidity, temperature changes, dust, and accidental bumps or scratches.
In this article, we will explore the importance of proper storage, the right location to store your guitar, how to prepare it for storage, and the necessary steps to protect it from dust and humidity. By following these guidelines, you can ensure that your guitar remains in optimal condition, ready to be played whenever you desire.
Key Takeaways:
- Proper storage is crucial for preserving a guitar’s wood, finish, playability, and value. Choosing the right location, preparing the guitar, and protecting it from dust and humidity are essential steps for long-term storage.
- Regular maintenance checks, including monitoring the neck, tuning stability, action, and electronics, are vital for ensuring the optimal performance and longevity of a guitar. Seek professional assistance for any necessary repairs or adjustments.
Read more: How To Store A Guitar
Importance of Proper Storage
Proper storage is vital for preserving the playability, tone, and overall condition of your guitar. Here are a few key reasons why it’s important to store your guitar correctly:
- Preservation of wood and finish: Guitars are typically made of wood, which can be sensitive to changes in temperature and humidity. Improper storage conditions can cause the wood to warp, crack, or swell, compromising the structural integrity and aesthetics of your instrument. Additionally, exposure to sunlight or excessive heat can fade the finish and make it more susceptible to damage.
- Maintaining optimal playability: Changes in temperature and humidity can affect the neck of the guitar, causing it to warp or twist. This can result in high action (strings too far from the fretboard) or low action (strings too close to the fretboard), making it uncomfortable to play and hindering your technique. By storing your guitar properly, you can help maintain the neck’s stability and ensure consistent playability.
- Prevention of damage: Accidental bumps, falls, or exposure to household hazards can lead to dents, scratches, or even structural damage to your guitar. Proper storage minimizes the risk of such accidents and protects your instrument from potential harm.
- Longevity and value: A well-maintained guitar not only sounds better, but it also retains its value over time. By storing your guitar correctly, you are preserving its condition, which can be crucial if you ever decide to sell or trade it in the future.
Now that we understand the importance of proper storage, let’s delve into the specifics of how to store your guitar to ensure its well-being.
Choosing the Right Location
When it comes to storing your guitar, selecting the right location is key. Here are a few factors to consider:
- Temperature and humidity: The ideal storage environment for a guitar is a room with stable temperature and humidity levels. Extreme temperature fluctuations and high humidity can cause damage to the wood and overall structure of the instrument. Aim for a temperature range of around 65-75 degrees Fahrenheit (18-24 degrees Celsius) and a humidity level of 40-50%. It’s best to avoid areas prone to temperature extremes, such as attics, basements, or rooms with direct exposure to sunlight.
- Avoidance of moisture and dampness: Moisture can wreak havoc on your guitar, leading to warping, mold growth, and rust on metal parts. Avoid storing your guitar in areas prone to moisture, such as a bathroom, laundry room, or kitchen. It’s also important to keep your guitar away from areas where it could be exposed to water damage, such as near open windows, leaky pipes, or humidifiers. Using a dehumidifier or moisture-absorbing products in the storage area can help mitigate any excess moisture.
- Protection from direct sunlight: Prolonged exposure to direct sunlight can fade the finish of your guitar and cause it to age prematurely. Find a storage location away from windows or use curtains, blinds, or UV-filtering window film to prevent sunlight from reaching your instrument.
- Avoidance of high-traffic areas: Storing your guitar in a high-traffic area increases the risk of accidental bumps or knocks. Choose a location where your guitar is less likely to be bumped or jostled, such as a dedicated music room or a corner of a less frequently used room.
- Protection from pets and children: If you have pets or young children, it’s important to ensure that your guitar is stored safely out of their reach. Dogs or cats can accidentally knock over your guitar, and young children may be tempted to play with it, resulting in potential damage.
By considering these factors and selecting an appropriate location, you can provide a safe and stable environment for your guitar during long-term storage.
Preparing the Guitar
Before you store your guitar long term, it’s important to take a few preparatory steps to ensure its safety and maintain its condition. Below are some essential tasks to complete:
- Cleaning and polishing: Give your guitar a thorough cleaning before storing it. Use a soft cloth to remove any dirt, fingerprints, or debris from the body, neck, and fretboard. Avoid using harsh cleaning products that can damage the finish. Additionally, apply a high-quality guitar polish to restore shine and protect the wood.
- Detuning the strings: Loosen the tension of the strings to reduce strain on the neck and prevent warping. However, do not completely remove the strings as this can cause changes in the guitar’s setup.
- Loosening the truss rod: If you anticipate storing your guitar for an extended period, consider loosening the truss rod slightly. This helps relieve tension on the neck and minimize the risk of warping. Consult your guitar’s manufacturer guidelines or a professional technician for proper adjustment.
- Replacing old strings: If your guitar strings are old, worn, or corroded, it’s a good idea to replace them before storing. Old strings can deteriorate over time, losing their tonal quality and potentially causing damage to other parts of the guitar. By installing a fresh set of strings, you ensure that your guitar is ready to play when you retrieve it from storage.
By completing these preparatory tasks, you are setting your guitar up for optimal storage conditions and minimizing the risk of damage during the long-term storage period.
Cleaning and Polishing
Cleaning and polishing your guitar is an essential part of preparing it for long-term storage. By removing any dirt, grime, and fingerprints, and applying a protective polish, you can help preserve the finish and ensure your instrument stays in optimal condition. Here’s how to clean and polish your guitar:
- Gather the necessary supplies: You’ll need a soft, lint-free cloth, guitar cleaning solution or mild soap, and a high-quality guitar polish.
- Remove dirt and debris: Use a soft cloth to gently wipe the body, neck, and fretboard of your guitar. Pay special attention to areas with visible dirt or fingerprints. Be careful not to apply too much pressure, as this may damage the finish or scratch the surface.
- Clean the fretboard: If your guitar has a wooden fretboard, it’s important to keep it clean and conditioned. Dampen a corner of the cloth with a small amount of guitar cleaning solution or mild soap diluted with water. Gently wipe the fretboard to remove any accumulated dirt or sweat. Avoid getting the fretboard too wet, as excess moisture can cause damage. Once cleaned, use a dry portion of the cloth to remove any remaining moisture.
- Polish the body: Apply a small amount of guitar polish to another clean section of the cloth. In a circular motion, gently buff the body of the guitar. The polish will not only restore the shine but also provide a protective coating against fingerprints and other contaminants. Avoid applying polish to the fretboard or any other unfinished or exposed wood areas.
- Finish with a dry cloth: Once you’ve polished the guitar, use a clean, dry cloth to remove any excess polish and bring out the shine. Pay attention to intricate areas such as the headstock, bridge, and hardware, ensuring they are thoroughly cleaned and polished.
Remember to always follow the manufacturer’s instructions when using specific guitar cleaning products. If you’re unsure, consult with a professional guitar technician for guidance.
By regularly cleaning and polishing your guitar, you can maintain its visual appeal and protect it from dirt and contaminants, ensuring that it remains in excellent condition during storage.
Read more: How To Store Tomatoes Long Term
Detuning the Strings
Detuning the strings of your guitar is an important step in preparing it for long-term storage. By relieving the tension on the strings, you can minimize the stress on the neck and reduce the risk of warping or damage. Here’s how to properly detune your guitar:
- Start with the low E string: Begin by turning the tuning peg for the low E string (the thickest string) counterclockwise to lower the pitch. Loosen the string gradually, making sure not to release it completely.
- Repeat for the remaining strings: Move to the A string and repeat the process of turning the tuning peg counterclockwise to lower the pitch. Continue this pattern for the remaining strings: D, G, B, and high E.
- Check the tension: After detuning all the strings, give them a gentle pluck to ensure that they are all loose and the tension is relieved. The strings should feel noticeably slack and have a much lower pitch compared to their usual tuning.
- Be cautious with floating bridge systems: If your guitar has a floating bridge system, such as a Floyd Rose or Tremolo, detuning the strings uniformly may cause the bridge to tilt forward. In this case, you may need to adjust the bridge to maintain its balance. Consult your guitar’s user manual or seek guidance from a professional guitar technician for specific instructions.
- Avoid releasing all tension: While detuning the strings is important, it’s essential not to release all tension. Completely loosening the strings can result in changes to the guitar’s setup and may require additional adjustments when you retrieve it from storage.
By detuning the strings, you are minimizing the strain on the neck and ensuring that your guitar remains in optimal condition during long-term storage. Remember to check the tension periodically as strings can sometimes settle and lose tension over time.
Loosening the Truss Rod
Loosening the truss rod is an optional step when preparing your guitar for long-term storage. The truss rod helps to counterbalance the tension of the strings and maintain the neck’s stability. In certain circumstances, loosening the truss rod slightly can help alleviate any stress on the neck during extended storage periods. Here’s how to safely loosen the truss rod:
- Assess the need for adjustment: Determine if your guitar’s neck requires truss rod loosening. If the neck has a noticeable forward bow or excessive relief, tightening the truss rod may be necessary. Conversely, if the neck has a back bow or the strings are too close to the fretboard, loosening the truss rod can provide relief.
- Consult your guitar’s specifications: Refer to your guitar’s user manual or the manufacturer’s website to understand the type of truss rod adjustment your guitar employs. Some guitars have single-action truss rods that only allow for adjustment in one direction, while others have dual-action truss rods that allow for both tightening and loosening.
- Find the truss rod adjustment point: Locate the truss rod adjustment point on your guitar. This is usually located at the headstock or inside the soundhole, accessible through a small opening. It may require a hex wrench or screwdriver for adjustment.
- Loosen the truss rod: Gently turn the truss rod adjustment point counterclockwise to loosen the truss rod. Make small adjustments, a quarter turn at a time, and evaluate the neck’s response after each adjustment. It’s essential to proceed with caution and not force the adjustment to avoid damaging the neck or truss rod.
- Monitor the neck’s response: After each adjustment, check the neck’s relief by sighting down the edge of the fretboard or using a straightedge. The goal is to achieve a slight forward bow or a straight neck with a minimal amount of relief.
- Seek professional help if unsure: If you’re uncertain about making truss rod adjustments or are unsure about the specific needs of your guitar, it’s best to consult with a professional guitar technician. They can assess your guitar’s condition and make any necessary truss rod adjustments to ensure optimal playability and neck stability.
Loosening the truss rod can provide added relief to the neck during long-term storage. However, it’s important to exercise caution and make adjustments only if necessary. If you’re unsure, seeking professional assistance is always recommended to avoid any potential damage to your guitar.
Store your guitar in a climate-controlled environment to prevent warping and damage. Keep it in a case or on a stand to protect it from dust and potential accidents. Loosen the strings to reduce tension on the neck.
Replacing Old Strings
Before storing your guitar long term, it’s a good idea to replace old or worn-out strings. Over time, strings can lose their tone, become corroded, or even break. By installing a fresh set of strings, you ensure that your guitar is in optimal condition when you retrieve it from storage. Here’s how to replace your guitar’s strings:
- Select the right strings: Consider the type of music you play, your playing style, and personal preference when choosing strings. There are various options available, including different materials (such as nickel or stainless steel) and gauges (light, medium, heavy). Experimenting with different strings can help you find the perfect fit for your playing style.
- Remove the old strings: Begin by unwinding the tuning pegs to loosen the tension on the strings. Use wire cutters or string-winding tools to cut and remove the old strings. Be careful when cutting the strings to avoid any potential injuries from the sharp ends.
- Clean the guitar while the strings are off: Take advantage of the opportunity to clean your guitar while the strings are removed. Wipe the body, neck, and fretboard with a soft, lint-free cloth to remove any accumulated dirt or grime. This will also prevent dirt from transferring onto the new strings.
- Install the new strings: Starting from the low E (thickest) string, insert the string-end into the corresponding bridge or tailpiece and pull it through until there is enough slack to wind around the tuning peg. Thread the string through the appropriate peg hole and begin winding it, making sure to wrap the string neatly and tightly around the peg. Repeat this process for each remaining string, moving from the A string to the high E (thinnest) string.
- Tune the new strings: Once all the strings are installed, use a guitar tuner to tune them to the desired pitch. Start with the low E string and work your way up to the high E string. Repeat the tuning process a few times, as new strings may stretch and settle in after the initial installation.
- Stretch and settle the strings: After tuning the new strings, gently tug on each string away from the fretboard to help stretch and settle them. Retune the strings as needed until they hold their pitch consistently.
By replacing your guitar’s old strings, you ensure that it’s ready for action when you retrieve it from storage. Fresh strings not only provide better tone and playability but also minimize the risk of string breakage or deterioration during long-term storage.
Protecting the Guitar from Dust and Humidity
Dust and humidity are two common enemies that can damage your guitar over time. Properly protecting your guitar from these elements is crucial for maintaining its condition. Here’s how you can safeguard your instrument:
- Keep the guitar in a case or gig bag: Storing your guitar in a case or gig bag when not in use is the first line of defense against dust and humidity. Choose a case or bag that provides adequate padding and protection. Ensure that it is clean and free from any debris before placing your guitar inside.
- Use a humidifier: In drier climates or during winter months when the air tends to be dry, using a guitar humidifier is essential. Humidity levels lower than 40% can cause the wood to shrink and crack. Place a humidifier in the guitar case to maintain an optimal humidity level and protect the wood from drying out.
- Store the guitar away from sources of dust: Avoid storing your guitar in areas prone to dust accumulation, such as attics, garages, or workshops. Dust can settle on the guitar’s surface and find its way into small crevices, potentially damaging the finish and affecting the instrument’s performance. Choose a clean and dust-free environment for storage.
- Regularly clean the guitar: Periodically clean your guitar to remove any dust that may have accumulated. Use a soft, lint-free cloth or a guitar cleaning solution to gently wipe the body, neck, and hardware. Be cautious not to apply excessive pressure or use abrasive cleaners that can damage the finish.
- Invest in a guitar cover or display case: If you want to display your guitar while protecting it from dust, invest in a guitar cover or display case. These protective coverings can still showcase your instrument while keeping it shielded from environmental elements.
- Avoid extreme temperature and humidity changes: Rapid fluctuations in temperature and humidity can cause damage to the wood and finish of your guitar. Avoid exposing your instrument to sudden temperature or humidity changes, such as leaving it near heating or cooling vents, windows, or outside in extreme weather conditions.
- Perform regular maintenance checks: Even when properly stored, it’s important to periodically inspect your guitar for any signs of damage or issues. Check for cracks, loose parts, or changes in playability. If you notice any problems, consult a professional guitar technician for proper assessment and repairs.
By implementing these protective measures, you can ensure that your guitar remains free from dust and protected from the damaging effects of humidity, preserving its playability and overall condition over time.
Read more: How To Store Water For Long Term
Using a Guitar Case or Gig Bag
Using a guitar case or gig bag is essential for protecting your instrument during storage and transportation. Whether you’re a gigging musician or storing your guitar long term, choosing the right case or bag and knowing how to use it properly can help safeguard your guitar from damage. Here’s what you need to know:
- Selecting the right case or bag: When choosing a case or bag, consider the level of protection you need and how you plan to use it. Hard cases offer the highest level of protection and are more suitable for long-term storage and air travel. Gig bags are lightweight and convenient for short-distance transportation, rehearsals, or local gigs. Ensure that the case or bag is the appropriate size and shape for your specific guitar model.
- Padding and material quality: Look for cases or bags with ample padding to cushion your guitar against bumps and impacts. The padding should be thick enough to absorb shocks, yet gentle on the guitar’s finish. The material of the case or bag should be durable and resistant to tears and moisture.
- Properly securing the guitar: When placing your guitar in the case or bag, ensure that it fits snugly and securely. Fasten any straps or closures to keep the guitar in place and prevent it from shifting during transportation. If your case has compartments or pockets, use them to store accessories such as picks, capos, or spare strings.
- Protecting the neck and headstock: Take extra care to protect the neck and headstock of your guitar. Ensure that they are properly supported and cushioned within the case or bag. Some cases have a neck support or adjustable padding to hold the guitar securely in place and prevent any unnecessary stress on the neck.
- Climate control features: Consider cases or bags with built-in climate control features, such as humidity control or insulation. These features help regulate temperature and humidity levels, providing additional protection against environmental changes that can affect the wood of your guitar.
- Transporting with care: When transporting your guitar in a case or bag, handle it with care and avoid sudden movements or impacts. Hold the case or bag by the handles or straps, and be mindful of any obstacles or potential hazards in your path.
- Regular maintenance and inspections: Periodically inspect the case or bag for any signs of wear, such as loose stitching, broken zippers, or damaged padding. Ensure that the case or bag is kept clean and free from any debris that can scratch the guitar’s surface. If any damage is detected, repair or replace the case or bag as needed.
Using a guitar case or gig bag provides essential protection for your instrument during storage and transportation. By selecting the appropriate case or bag and using it correctly, you can maintain the integrity of your guitar and enjoy peace of mind knowing it’s safe and secure.
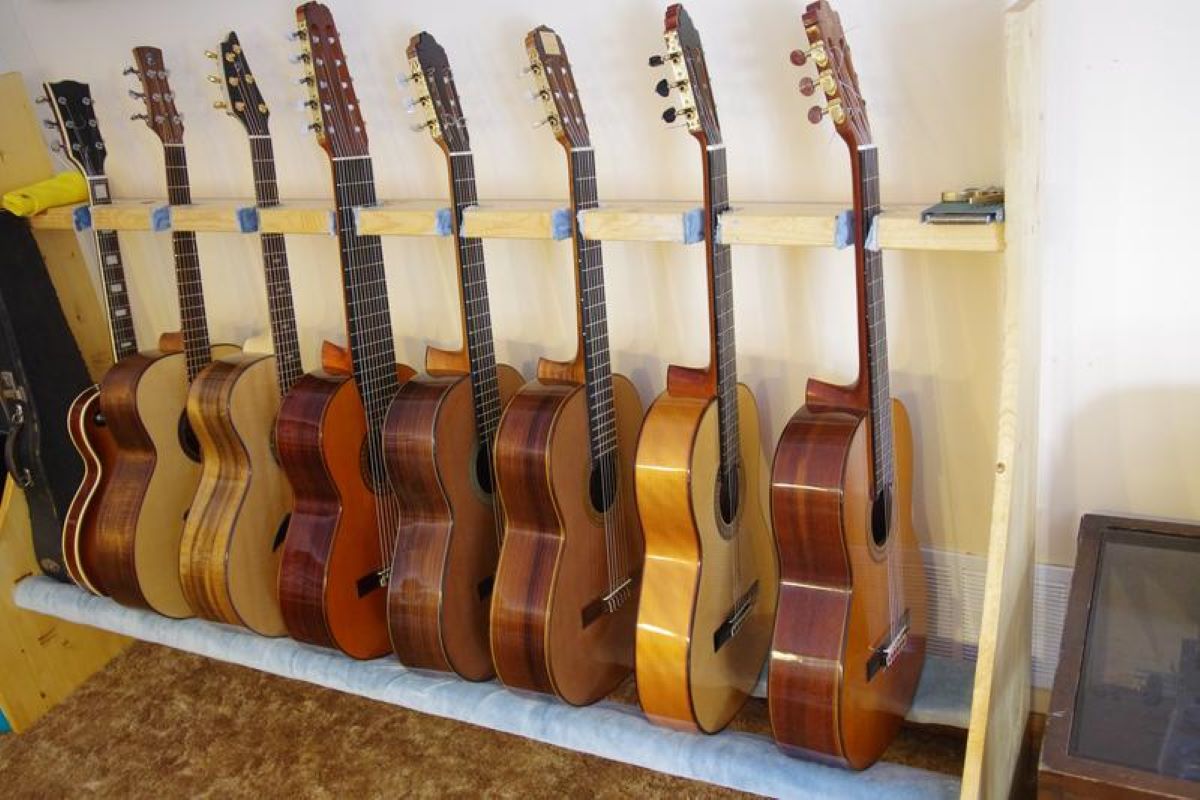
Storing the Guitar in a Stand
Storing your guitar in a stand is a convenient option that allows easy access and display while keeping it safely secured. Whether you want to have your guitar readily available for practice or showcase its beauty, using a guitar stand correctly is essential for maintaining its condition. Here’s what you need to know:
- Choose a sturdy and reliable stand: Invest in a high-quality guitar stand that provides stability and proper support for your instrument. Look for stands made from durable materials such as metal or hardwood, with secure locking mechanisms to prevent accidental falls or tip-overs.
- Position the stand correctly: Place the guitar stand on a level surface, away from high-traffic areas or potential hazards. Avoid storing your guitar near windows or areas with direct sunlight, as excessive heat and UV rays can damage the finish and wood.
- Ensure proper neck support: When placing the guitar in the stand, ensure that the neck is securely supported and resting in the designated neck cradle or yoke. The stand should provide enough padding or cushioning to protect the finish of the guitar and prevent any unnecessary strain on the neck.
- Protect against accidental falls: To minimize the risk of accidental falls, ensure that the guitar is positioned securely in the stand and that it cannot be easily knocked over. Some stands have additional safety features, such as locking straps or rubberized grips, which provide extra stability and prevent the guitar from sliding or tipping out of the stand.
- Consider humidity and temperature: While a guitar stand allows for easy access, remember to consider the surrounding climate and humidity levels. Avoid storing your guitar in an environment with extreme temperature fluctuations or high humidity. If necessary, use a humidifier or dehumidifier to maintain optimal humidity levels.
- Regular maintenance checks: Even when stored in a stand, it’s important to periodically inspect your guitar for any signs of damage or issues. Check for cracks, loose parts, or changes in playability. Additionally, remove any dust or debris from the guitar and the stand to keep them clean and free from potential scratches.
- Consider additional protection: If you plan to store your guitar in a stand for an extended period, it’s a good idea to cover it with a guitar cover or cloth to protect it from dust. This extra layer of protection can help preserve the finish and keep the guitar free from unwanted contaminants.
Storing your guitar in a stand allows for easy access and display, but it’s important to follow these guidelines to ensure the instrument remains safe and protected. By choosing a reliable stand, positioning the guitar correctly, and performing regular inspections, you can enjoy the convenience of a stand while keeping your guitar in optimal condition.
Regular Maintenance Checks
Performing regular maintenance checks on your guitar is essential to ensure its optimal performance and longevity. By inspecting your instrument at regular intervals, you can identify any issues early on and address them promptly. Here are some key areas to focus on during your regular maintenance checks:
- Check the neck and fretboard: Examine the neck of your guitar for any signs of warping, bowing, or backbow. Run your fingers along the fretboard to check for any sharp fret ends or unevenness. If you notice any issues, consult a professional guitar technician for proper adjustment and repair.
- Inspect the tuning stability: Test the tuning stability of your guitar by strumming chords or playing scales. Check if the strings tend to go out of tune quickly or if the tuning pegs are slipping. If necessary, replace old or worn-out tuning pegs, or consider upgrading to locking tuners for improved tuning stability.
- Monitor the action and intonation: The action refers to the height of the strings from the fretboard. Check if the action is comfortable to play and if there are any buzzing or choking sounds when fretting notes. Additionally, evaluate the intonation by comparing open string harmonics and fretted notes for accuracy. If adjustments are needed, consult a professional guitar technician.
- Inspect the electronics: If your guitar has electronic components, such as pickups, switches, or knobs, inspect them for proper operation. Test each pickup individually to ensure that they are functioning correctly and producing the desired sound. Clean any dirty contacts or consider a professional electronics service if needed.
- Check the hardware: Examine the hardware of your guitar, including the bridge, saddle, nut, and screws. Make sure they are securely fastened and that there are no loose or missing parts. Lubricate any moving parts, such as the tremolo or tuning pegs, with appropriate guitar lubricant to ensure smooth operation.
- Clean and polish the guitar: Regularly clean and polish your guitar to remove any dirt, oils, or fingerprints that may have accumulated. Use a soft, lint-free cloth and a high-quality guitar polish to protect the finish and keep the instrument looking its best. Avoid using abrasive cleaners or applying excessive pressure that may damage the finish.
- Monitor humidity and temperature: Keep an eye on the humidity and temperature levels in the room where your guitar is stored. Extreme temperature fluctuations and high humidity can have a detrimental effect on the wood and overall condition of the instrument. Use a hygrometer to monitor humidity levels and make adjustments as necessary, such as using a humidifier or dehumidifier.
By performing regular maintenance checks, you can ensure that your guitar remains in optimal playing condition and detect any potential issues before they escalate. Remember, if you’re unsure about any repairs or adjustments, it’s always best to seek the assistance of a professional guitar technician to ensure proper care for your instrument.
Conclusion
Properly storing your guitar long term is vital for maintaining its condition, playability, and overall value. By following the guidelines outlined in this article, you can ensure that your guitar remains in optimal shape, ready to be played whenever you desire. Here are the key takeaways:
– Importance of Proper Storage: Proper storage helps preserve the wood and finish of the guitar, maintains playability, prevents damage, and ensures the longevity and value of the instrument.
– Choosing the Right Location: Select a storage location with stable temperature and humidity levels, away from moisture, direct sunlight, and high-traffic areas.
– Preparing the Guitar: Clean and polish your guitar, detune the strings, and consider loosening the truss rod and replacing old strings before storing.
– Protecting from Dust and Humidity: Use a case or gig bag, control humidity levels with a humidifier, avoid dusty environments, and perform regular cleaning and inspections.
– Using a Guitar Stand: Use a sturdy and reliable guitar stand to store your instrument safely, ensuring proper neck support and protection against accidental falls.
– Regular Maintenance Checks: Conduct regular inspections of the neck, fretboard, tuning stability, action, intonation, electronics, hardware, and cleanliness of the guitar.
Remember that each guitar is unique, so it’s always a good idea to consult the manufacturer’s guidelines or seek advice from a professional guitar technician for specific maintenance or storage recommendations. By investing time and effort into proper storage and maintenance, you can enjoy your guitar for years to come and preserve its beauty, playability, and value.
Frequently Asked Questions about How To Store A Guitar Long Term
Was this page helpful?
At Storables.com, we guarantee accurate and reliable information. Our content, validated by Expert Board Contributors, is crafted following stringent Editorial Policies. We're committed to providing you with well-researched, expert-backed insights for all your informational needs.


0 thoughts on “How To Store A Guitar Long Term”