Articles
How To Store Butter Long Term
Modified: August 17, 2024
Learn the best methods for storing butter long term with our informative articles. Preserve its freshness and flavor for extended periods.
(Many of the links in this article redirect to a specific reviewed product. Your purchase of these products through affiliate links helps to generate commission for Storables.com, at no extra cost. Learn more)
Introduction
Butter is a versatile and essential ingredient in many culinary creations. It adds richness and flavor to dishes, making it a staple in kitchens around the world. However, occasionally you may find yourself with an excess amount of butter that you need to store for an extended period of time. Whether you’re stockpiling for emergencies, buying in bulk, or simply wanting to preserve the delicious taste of butter for longer, it’s important to know how to store butter long term.
While butter does have a limited shelf life, there are methods and techniques that can help extend its freshness, allowing you to enjoy its creamy goodness even after weeks or months. In this article, we will explore the factors affecting the shelf life of butter, the proper storage conditions for long-term storage, and the various methods you can use to store butter for an extended period of time.
Understanding the shelf life of butter is crucial in determining the storage method that suits your needs best. Butter is a perishable dairy product, and its shelf life can vary depending on factors such as the type of butter, the manufacturing process, and storage conditions.
The shelf life of commercially produced butter is typically printed on the packaging to provide guidance to consumers. Generally, it ranges from a few weeks to a few months when stored under proper conditions. However, these guidelines may not be applicable for long-term storage.
Factors such as temperature, exposure to light, moisture levels, and the presence of air can all impact the freshness and quality of butter over time. Additionally, the type of packaging used can play a significant role in preserving the taste and texture of butter during long-term storage.
Choosing the right packaging is crucial when it comes to storing butter for an extended period. The packaging should protect the butter from external elements, such as air and moisture, which can accelerate spoilage. It should also be durable and able to maintain its integrity throughout the storage period.
There are several methods you can use to store butter long term, each with its unique benefits and considerations. These methods include freezing, canning, dehydrating, and vacuum sealing. Let’s explore each method in detail to help you make an informed decision on the best approach for your butter storage needs. But before we delve into these methods, it’s important to understand the key tips for maintaining the quality of butter during long-term storage.
Key Takeaways:
- Proper storage conditions, including temperature, light exposure, and packaging, are crucial for maintaining the freshness and quality of butter during long-term storage.
- Freezing, canning, dehydrating, and vacuum sealing are effective methods for extending the shelf life of butter, providing convenient options for long-term storage.
Read more: How To Store Peanut Butter Long Term
Understanding the Shelf Life of Butter
Butter, being a dairy product, has a limited shelf life due to its high fat content. The shelf life of butter can be affected by several factors, including the type of butter, the manufacturing process, and the storage conditions.
Generally, commercially produced butter has a printed expiration date or a “best before” date on the packaging. This date is an estimate of how long the butter will retain its optimal quality and freshness when stored under proper conditions. However, it’s important to note that this date may not be applicable for long-term storage.
The shelf life of butter can also vary depending on its moisture content. Butter with higher moisture content tends to have a shorter shelf life compared to butter with lower moisture content. This is because the moisture in butter can promote the growth of bacteria and mold, leading to spoilage.
Additionally, the manufacturing process can also impact the shelf life of butter. Certain manufacturing methods, such as pasteurization and churning, can help extend the freshness of butter. These processes remove or reduce the presence of bacteria, which can contribute to spoilage.
Storage conditions play a crucial role in determining the shelf life of butter. Butter should be stored in a cool, dry place away from direct sunlight and sources of heat. Temperature fluctuations can cause the butter to melt and re-solidify, leading to changes in texture and flavor.
Exposure to air can also accelerate the oxidation process, causing the butter to become rancid. It’s important to store butter in airtight containers or wrap it tightly in foil or wax paper to minimize air exposure.
Moisture is another factor to consider when it comes to storing butter. High levels of moisture can lead to the growth of bacteria and mold, resulting in spoilage. It’s best to store butter in a moisture-free environment to ensure its longevity.
By understanding the factors that affect the shelf life of butter, you can better determine the appropriate storage methods to use for long-term storage. In the following sections, we will explore various storage methods that can help extend the shelf life of butter and keep it fresh and flavorful for an extended period of time.
Factors Affecting the Shelf Life of Butter
Several factors can impact the shelf life of butter and determine how long it remains fresh and flavorful. By understanding these factors, you can take appropriate measures to extend the shelf life of butter during long-term storage.
1. Temperature: Butter should be stored in a cool environment to slow down the rate of spoilage. High temperatures can cause the butter to soften, melt, and go rancid. Ideally, butter should be stored at a temperature between 32°F (0°C) and 50°F (10°C). Storing butter in the refrigerator is generally recommended, especially if you live in a warmer climate.
2. Light exposure: Butter is sensitive to light, especially natural and fluorescent light. Exposure to light can lead to the breakdown of the fat molecules in butter, resulting in rancidity and off-flavors. To protect butter from light, it’s best to store it in an opaque, airtight container or wrap it in foil or wax paper.
3. Air exposure: Exposure to air can also accelerate the oxidation process, causing butter to become rancid. When butter comes into contact with air, the oxygen molecules can react with the fats in the butter, leading to off-flavors and a deterioration in quality. To minimize air exposure, store butter in an airtight container or wrap it tightly in foil or wax paper.
4. Moisture: Moisture levels can affect the shelf life of butter. Excess moisture can promote the growth of bacteria and mold, leading to spoilage. It’s essential to store butter in a dry environment and avoid storing it near sources of moisture, such as sinks or refrigerators with high humidity levels.
5. Packaging: The type of packaging used for storing butter can significantly impact its shelf life. Butter should be stored in airtight containers or wrapped tightly in moisture-resistant materials to protect it from air and moisture. Avoid using plastic wrap or containers that are permeable to air and moisture as they may contribute to spoilage.
6. Quality of the butter: The quality of the butter itself can affect its shelf life. Fresh, high-quality butter tends to have a longer shelf life compared to butter that is approaching its expiration date or has been exposed to unfavorable storage conditions. It’s important to check the quality of the butter before long-term storage, discarding any butter that shows signs of spoilage or off-flavors.
By considering these factors and implementing proper storage techniques, you can significantly extend the shelf life of butter and ensure its freshness and quality during long-term storage.
Proper Storage Conditions for Long-Term Butter Storage
Proper storage conditions are essential to preserve the freshness and quality of butter during long-term storage. By ensuring the right environment for storing butter, you can extend its shelf life and enjoy its creamy goodness for an extended period of time.
Here are the key factors to consider when setting up the right storage conditions for long-term butter storage:
1. Temperature: Butter should be stored in a cool environment to slow down the rate of spoilage. The ideal temperature range for butter storage is between 32°F (0°C) and 50°F (10°C). Storing butter in the refrigerator is generally recommended, as it provides a consistent and cool temperature to keep the butter fresh. Avoid storing butter in areas where temperatures fluctuate, such as near the stove or oven.
2. Humidity: Excess moisture can lead to the growth of bacteria and mold, causing the butter to spoil. It’s important to store butter in a dry environment, away from sources of moisture such as sinks or refrigerators with high humidity levels. If you live in a particularly humid climate, consider using moisture-absorbing packets or silica gel packets in the storage container to help maintain dry conditions.
3. Light exposure: Butter is sensitive to light, especially natural and fluorescent light. Exposure to light can break down the fats in butter, leading to rancidity and off-flavors. To protect butter from light exposure, store it in an opaque container or wrap it tightly in foil or wax paper. Keep the container away from direct sunlight and bright lighting to preserve the quality of the butter.
4. Air circulation: While it’s essential to minimize air exposure, some air circulation is necessary to prevent condensation and moisture buildup. However, it’s best to store butter in an airtight container or wrap it tightly in moisture-resistant materials to prevent excessive air contact. This will help maintain the freshness and quality of the butter during long-term storage.
5. Separation from strong odors: Butter has the ability to absorb odors from its surroundings. To avoid this, store butter away from strong-smelling foods or items, such as onions, garlic, and cleaning supplies. It’s best to store butter in a separate compartment or covered container to prevent any cross-contamination of flavors.
By following these proper storage conditions, you can ensure that your butter remains fresh, flavorful, and ready to use for an extended period of time. The next step is choosing the right packaging to protect butter during long-term storage, which we will explore in the next section.
Choosing the Right Packaging for Storing Butter
Choosing the right packaging is crucial when it comes to storing butter for long-term storage. The packaging should protect the butter from external elements, such as air, moisture, light, and odors, which can accelerate spoilage and affect the quality of the butter. Here are some packaging options to consider for storing butter:
1. Airtight Containers: Storing butter in airtight containers is one of the most effective methods for long-term storage. Choose containers with a tight-fitting lid to prevent air from entering and moisture from escaping. Glass or plastic containers with a silicone gasket or a snap-lock lid are excellent options. Make sure the container is clean and dry before adding the butter.
2. Foil or Wax Paper Wrapped: Wrapping butter in foil or wax paper provides a protective barrier against air and light. Simply wrap the butter tightly, ensuring there are no openings or gaps. These materials are resistant to moisture and can help maintain the freshness and flavor of the butter. Place the wrapped butter in an airtight container or a resealable plastic bag for added protection.
3. Vacuum Sealing: Vacuum-sealed bags or containers are an excellent option for long-term butter storage. Using a vacuum sealer removes the air from the packaging, creating a seal that keeps out oxygen and moisture. This method helps preserve the quality of the butter and extends its shelf life. Ensure the butter is properly wrapped in foil or wax paper before vacuum sealing.
4. Butter Bell or Butter Crock: If you prefer a traditional approach, consider using a butter bell or butter crock. These containers have a water seal that helps maintain the freshness and spreadable consistency of butter. The butter is placed in a small compartment, while the larger part of the container is filled with water. The water seal prevents air and odors from reaching the butter, keeping it fresh for extended periods.
5. Silicone Butter Keeper: A silicone butter keeper is another option for storing butter. This container includes a lid that creates an airtight seal while keeping the butter accessible. The lid can be lifted, allowing you to spread the butter while keeping it protected. Silicone is non-porous and resistant to moisture, making it a reliable choice for long-term butter storage.
When selecting the right packaging, consider factors such as durability, moisture resistance, and the ability to maintain an airtight seal. It’s also important to label the packaging with the date of storage to keep track of the butter’s freshness. Additionally, ensure that the packaging is stored in a cool, dry place away from direct sunlight and strong odors to maintain optimal quality.
By choosing the right packaging for storing butter, you can effectively protect it from external factors and ensure its freshness and quality throughout the duration of its storage.
Read more: How To Store Barley Long Term
Methods for Storing Butter Long Term
There are several methods you can use to store butter for long-term storage, each with its unique benefits and considerations. These methods can help extend the shelf life of butter and maintain its freshness and quality over an extended period. Let’s explore some common methods for storing butter long term:
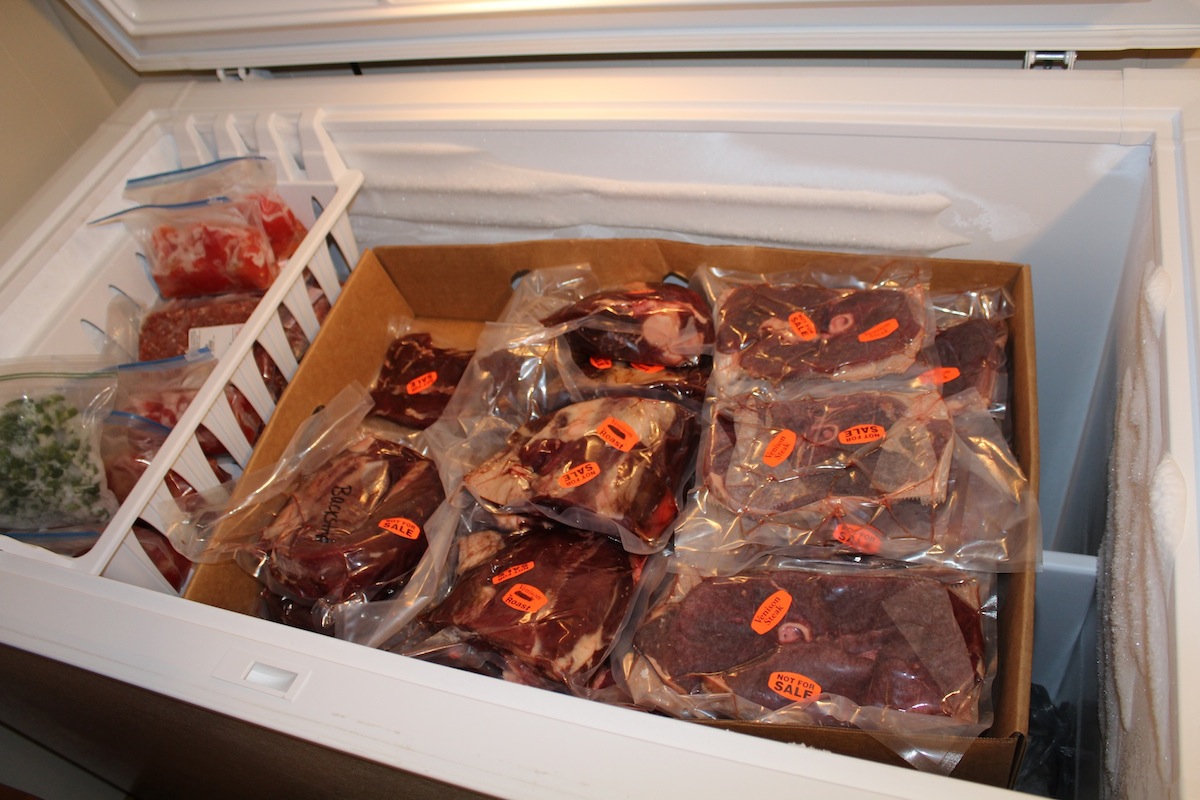
1. Freezing Butter: Freezing butter is a straightforward and effective method for long-term storage. Start by dividing the butter into smaller portions, such as tablespoons or cubes, based on your typical usage. Wrap each portion tightly in foil or freezer-safe plastic wrap to prevent freezer burn and maintain freshness. Place the wrapped portions in a resealable plastic bag or airtight container to further protect against air and moisture. Label the package with the date of freezing. Butter can be stored in the freezer for up to 6 months, and when you’re ready to use it, simply thaw it in the refrigerator before use.
2. Canning Butter: Canning butter involves heating and sealing butter in sterilized canning jars. It’s important to use proper canning techniques to ensure the safety and quality of the canned butter. Start by melting the butter in a saucepan until it is completely melted. Pour the melted butter into sterilized canning jars, leaving about 1/2 inch of headspace. Place the lids and rings on the jars and process them in a pressure canner according to specific canning instructions. Canned butter can be stored at room temperature for long periods, usually up to a year or more. Remember to store the jars in a cool, dark place away from heat sources.
3. Dehydrating Butter: Dehydrating butter involves removing the moisture from the butter, making it shelf-stable and suitable for long-term storage. Start by melting the butter and then gently simmering it to remove any remaining moisture. Once the moisture is evaporated, carefully pour the melted butter into a dehydrator tray or parchment-lined baking sheet. Spread the butter evenly and dehydrate it at a low temperature of around 100°F (38°C) until it is completely dry and brittle. Allow the dehydrated butter to cool before breaking it into small pieces or grinding it into a powder. Store the dehydrated butter in an airtight container in a cool, dry place. Dehydrated butter has a shelf life of several years when stored properly.
4. Vacuum Sealing Butter: Vacuum sealing can be done with both solid butter and melted butter. Simply wrap the butter tightly in foil or wax paper, ensuring there are no openings or gaps. Place the wrapped butter in a vacuum-sealer bag and use a vacuum sealer machine to remove the air and create an airtight seal. Alternatively, if you are sealing melted butter, pour the melted butter into a vacuum-sealer bag and seal it carefully. Vacuum-sealed butter can be stored in the refrigerator or freezer for an extended period, maintaining its freshness and quality.
It’s important to note that regardless of the method you choose, the quality of the butter before storage is crucial. Ensure that the butter is fresh, free from any signs of spoilage, and stored in appropriate packaging. Additionally, it’s recommended to rotate your stored butter and use the older batches first to ensure optimal freshness.
By employing these storing methods, you can extend the shelf life of butter and have a convenient supply on hand for all your cooking and baking needs.
Freezing Butter
Freezing butter is a simple and effective method for long-term storage, allowing you to keep butter fresh for an extended period of time. The process of freezing butter helps to preserve its flavor, texture, and quality, making it readily available whenever you need it. Here’s how to freeze butter:
1. Divide into Portions: Start by dividing the butter into smaller portions based on your typical usage. You can measure out tablespoons, cubes, or any other convenient size for your recipes. Dividing the butter into smaller portions makes it easier to thaw only what you need, reducing waste and preserving the remaining butter.
2. Wrap in Foil or Plastic Wrap: To prevent freezer burn and maintain the freshness of the butter, individually wrap each portion tightly with foil or freezer-safe plastic wrap. Ensure that the entire portion is tightly sealed and there are no openings that can expose the butter to air or moisture.
3. Place in a Resealable Bag or Container: After wrapping each portion, place them in a resealable plastic bag or airtight container. This extra layer of protection helps to shield the butter from freezer odors and prevents any potential leaks from contaminating other foods in the freezer. Label the bag or container with the date of freezing.
4. Store in the Freezer: Transfer the wrapped and sealed butter portions to the freezer. It’s best to store them in a part of the freezer where the temperature is consistent. This can be in the main freezer compartment or in a dedicated butter storage container within the freezer. Avoid storing the butter on the freezer door, as it is subjected to frequent temperature fluctuations when the door is opened and closed.
5. Thawing and Using Frozen Butter: When you’re ready to use the frozen butter, simply remove the desired portion from the freezer and thaw it in the refrigerator. Thawing butter slowly in the refrigerator helps to retain its texture and prevent any drastic temperature changes. Depending on the size of the portion, it may take several hours or overnight to thaw completely. Once thawed, the butter can be used in your recipes as you would freshly bought butter.
It’s important to note that freezing butter can affect its texture slightly. The frozen butter may become slightly crumbly or harder compared to fresh butter. However, once thawed and brought to room temperature, it will regain its spreadability and can be used as normal.
Frozen butter can be stored in the freezer for up to 6 months without a significant loss in quality. However, for the best flavor and quality, it’s recommended to use the frozen butter within 3-4 months.
Freezing butter is a convenient way to stock up on butter and have it readily available whenever you need it. By following these steps, you can ensure that your frozen butter remains fresh, flavorful, and ready to use for all your culinary creations.
Store butter long term by wrapping it tightly in wax paper or plastic wrap, then placing it in an airtight container in the coldest part of the fridge or freezer. This will help prevent it from absorbing odors and going rancid.
Canning Butter
Canning butter is a method that allows you to preserve butter for long-term storage, extending its shelf life and ensuring its availability even during times when fresh butter may not be readily accessible. Canned butter is a convenient option for emergency preparedness or when you want to stock up on butter. Here’s how to can butter:
1. Gather the Supplies: To can butter, you will need canning jars, lids, and rings. Make sure these are in good condition and sterilize them before use. You will also need unsalted butter, preferably in stick form, as it’s easier to handle and fill the jars.
2. Melt the Butter: Begin by melting the butter in a saucepan over low heat. Slowly melt the butter, stirring occasionally to prevent scorching. Be careful not to overheat the butter or let it come to a boil.
3. Prepare the Jars: While the butter is melting, sterilize the canning jars, lids, and rings by boiling them in water for a few minutes. This will ensure that they are clean and free from any bacteria or contaminants. Remove them from the water and set them aside to cool slightly.
4. Fill the Jars: Once the jars have cooled slightly, carefully pour the melted butter into each jar, leaving about 1/2 inch of headspace at the top. This headspace allows for expansion during the canning process. Use a clean, non-metallic utensil to remove any trapped air bubbles by gently stirring the butter in the jar.
5. Seal the Jars: Wipe the rims of the jars with a clean, damp cloth to remove any residue or butter that may interfere with the sealing process. Place the sterilized lids on the jars and secure them with the rings, tightening them just until they are snug. Do not overtighten.
6. Process the Jars: Depending on your elevation and the specific canning instructions, can the butter in a pressure canner according to the recommended time and pressure. This is essential for ensuring the safety and longevity of the canned butter. Follow the instructions provided with your canner for the appropriate settings.
7. Cool and Store: Once the jars have completed the canning process, carefully remove them from the canner and place them on a towel-lined countertop to cool. As the jars cool, you will hear the distinctive “ping” sound, indicating that a vacuum seal has formed. Do not disturb the jars until they are completely cool and the seals have set.
8. Label and Store: Before storing the canned butter, label the jars with the date of canning. Store the jars in a cool, dark place away from direct heat or sunlight. Canned butter can be stored at room temperature for extended periods, usually up to a year or more, although it’s recommended to use the butter within the first year for the best flavor and quality. Once opened, store the remaining butter in the refrigerator and use it within a few weeks.
Canned butter provides a convenient and long-lasting option for preserving butter. It is important to note that the texture of canned butter may differ slightly from fresh butter, but it can still be used in cooking and baking just like fresh butter.
By following these steps, you can successfully can butter and have a supply of shelf-stable butter on hand whenever you need it.
Dehydrating Butter
Dehydrating butter is an effective method to preserve butter for long-term storage. By removing the moisture from butter, it becomes shelf-stable and can be stored for extended periods without the need for refrigeration. The dehydrated butter can be reconstituted for use in cooking and baking whenever you need it. Here’s how to dehydrate butter:
1. Melt the Butter: Begin by melting the butter in a saucepan over low heat. Make sure to melt the butter slowly and avoid overheating it. Stir occasionally to ensure even melting and to prevent scorching or burning.
2. Remove Entrapped Water: After the butter is completely melted, gently simmer it over low heat for approximately 10-15 minutes. This process helps to evaporate any remaining water content in the butter, and should be done with caution to prevent the butter from browning or burning.
3. Pour and Spread: Once the simmering is complete, carefully pour the melted butter into a dehydrator tray or a parchment-lined baking sheet. Ensure that the layer of butter is spread evenly across the surface, allowing for consistent dehydration.
4. Dehydrate the Butter: Set the dehydrator to a low temperature, around 100°F (38°C), and place the tray with the butter inside. If using an oven, set the temperature to the lowest setting possible and leave the oven door slightly ajar to allow air circulation. Allow the butter to dehydrate for approximately 8-12 hours, or until it becomes completely dry and brittle.
5. Cool and Break into Pieces: Once the dehydrated butter is fully dry, remove it from the dehydrator or oven and let it cool completely. Carefully break the dehydrated butter into small pieces or grind it into a powder using a food processor or blender. This will make it easier to store and rehydrate when needed.
6. Store in an Airtight Container: Transfer the dehydrated butter to an airtight container, such as a glass jar or a resealable bag. Make sure the container is clean and dry before adding the dehydrated butter. Seal the container tightly to prevent air and moisture from entering, which could lead to spoilage. Remember to label the container with the date of dehydration.
7. Reconstituting Dehydrated Butter: When you’re ready to use the dehydrated butter, you can rehydrate it by adding it to hot liquid or by incorporating it directly into recipes. For liquid rehydration, add a tablespoon of dehydrated butter to every 2 tablespoons of hot liquid and stir until the butter has dissolved. In recipes, simply incorporate the dehydrated butter directly into your cooking or baking, allowing it to rehydrate during the cooking process.
Dehydrated butter can be stored in a cool, dry place for several months to years, depending on the storage conditions. It should be checked periodically for any signs of spoilage, such as an off smell or mold growth. Properly dehydrated and stored butter should remain shelf-stable and retain its flavor for an extended period.
Dehydrated butter is a convenient pantry staple that can be used in various culinary applications. It’s a great option for camping, backpacking, and emergency preparedness, ensuring you always have butter on hand, regardless of refrigeration availability.
Read more: How To Store Fabric Long Term
Vacuum Sealing Butter
Vacuum sealing is a popular method for preserving the freshness and extending the shelf life of many food items, including butter. By removing the air and sealing the butter tightly, you can protect it from oxidation, moisture, and other factors that can lead to spoilage. Here’s how to vacuum seal butter:
1. Wrap the Butter: Start by wrapping the butter tightly in foil or wax paper. Ensure that there are no openings or gaps where air can enter. Wrapping the butter helps to maintain its shape and prevents it from sticking to the vacuum sealer during the sealing process.
2. Prepare the Vacuum-Sealer Bag: Cut a piece of vacuum-sealer bag long enough to accommodate the wrapped butter, leaving some extra length for sealing. Make sure the bag is clean and dry before use. Open one end of the bag and place the wrapped butter inside, ensuring that it is centered and positioned away from the sealed edges.
3. Vacuum-Sealing Process: Insert the open end of the bag into the vacuum sealer, making sure it is properly aligned for sealing. Activate the vacuum sealer to remove the air from the bag. The machine will create a vacuum, sucking out the air and tightly sealing the bag once the desired vacuum level is reached. Different vacuum-sealer models may have variations in the process, so it’s important to follow the specific instructions of your machine.
4. Check the Seal: After the vacuum sealing process is complete, visually inspect the seal to ensure it is tight and secure. Run your fingers along the seal to check for any leaks or openings. If you notice any defects, repeat the sealing process with a new bag or make adjustments to ensure a proper seal.
5. Label and Store: Before storing the vacuum-sealed butter, label the bag with the date of sealing. This helps to keep track of the butter’s freshness and enables you to use the oldest packages first. Store the vacuum-sealed butter in a cool, dry place away from heat and direct sunlight. When properly sealed and stored, vacuum-sealed butter can last for several months to a year, maintaining its flavor and quality.
6. Opening and Reusing: When you need to use the vacuum-sealed butter, carefully cut open the sealed portion of the bag with scissors. Remove the amount of butter you need and reseal the remaining portion using a new vacuum-sealer bag or by trimming and resealing the existing bag. It’s important to avoid introducing moisture or contaminants into the bag when resealing to maintain the quality of the remaining butter.
Vacuum sealing butter helps to protect it from oxidation, air, and moisture, which can lead to spoilage. It is a convenient method for long-term storage, ensuring that your butter remains fresh and ready to use whenever you need it.
Remember to regularly check the vacuum-sealed packages for any signs of deterioration, such as an off smell or mold growth. Discard any butter that shows these signs, as it may indicate spoilage. By vacuum sealing butter, you can prolong its shelf life and have a steady supply of fresh butter for your cooking and baking needs.
Tips for Maintaining Butter Quality during Long-Term Storage
Properly storing butter for long-term storage is essential to maintain its quality and freshness over an extended period of time. Here are some important tips to help you preserve the flavor, texture, and overall quality of butter during long-term storage:
1. Start with Fresh Butter: Begin by ensuring that you are starting with fresh, high-quality butter for long-term storage. Check the expiration or best-before date on the package to ensure that the butter is not approaching its limit. Using fresh butter as a starting point sets the foundation for better long-term storage results.
2. Choose the Right Packaging: Selecting the appropriate packaging is crucial for maintaining butter quality. Use airtight containers, such as glass jars or freezer-safe plastic containers, to shield the butter from air, moisture, light, and odors. Tightly sealed foil or wax paper wrapping is also effective for individual portions. Avoid using containers or wrap that are permeable to air, as this can accelerate spoilage.
3. Store in a Cool Environment: Butter should be stored in a cool environment to prevent it from melting or becoming rancid. Keep the butter away from heat sources, direct sunlight, and areas with temperature fluctuations. The optimal temperature for storing butter is between 32°F (0°C) and 50°F (10°C). Storing butter in the refrigerator is generally recommended, especially in warmer climates.
4. Avoid Exposure to Light: Light exposure can cause the breakdown of fat molecules in butter, leading to rancidity and off-flavors. Store butter in opaque containers or wrap it tightly in foil or wax paper to protect it from light. Keep the containers in a dark place, away from direct sunlight and bright lighting.
5. Minimize Air Exposure: Exposure to air can accelerate the oxidation process, causing butter to become rancid and lose its freshness. To minimize air exposure, make sure all containers are tightly sealed. Consider using vacuum-sealed bags or a vacuum sealer machine to remove the air and create an airtight seal. This method is especially effective for long-term storage in the freezer.
6. Keep Away from Strong Odors: Butter has the ability to absorb odors from its surroundings, impacting its flavor. Store butter away from strong-smelling foods or items, such as onions, garlic, or cleaning supplies. Additionally, try to store butter in a separate compartment or sealed container to prevent any cross-contamination of odors.
7. Regularly Rotate and Monitor Butter: It’s important to practice proper rotation and monitoring of stored butter. Use the oldest packages first to ensure freshness and prevent waste. Regularly check the stored butter for any signs of spoilage, such as off smells, strange colors, or mold growth. Discard any butter that shows these signs, as it may indicate that the butter is no longer safe for consumption.
Remember that the shelf life of butter can vary depending on storage conditions and the specific method used. While proper storage techniques can significantly extend the longevity of butter, it’s important to check for signs of spoilage periodically and use your judgment when determining if the butter is still suitable for consumption.
By following these tips for maintaining butter quality during long-term storage, you can enjoy the creamy goodness of butter even after an extended period of time.
Shelf Life of Butter in Different Storage Methods
The shelf life of butter can vary depending on the storage method employed. Different storage methods offer varying levels of protection against factors that can accelerate spoilage, such as air, moisture, light, and temperature fluctuations. Here’s a breakdown of the shelf life of butter in different storage methods:
1. Refrigeration (Standard Storage): When stored in the refrigerator, butter typically has a shelf life of around 2 to 3 weeks from the date of purchase or the printed expiration date on the packaging. Refrigeration helps slow down the growth of bacteria and maintain the freshness and flavor of butter. It’s important to keep butter in an airtight container or wrapped tightly to prevent exposure to air, moisture, and odors within the fridge.
2. Freezing: Freezing is an excellent method for extending the shelf life of butter. When properly wrapped and stored in the freezer, butter can last for up to 6 months without a significant loss of quality. Some sources suggest that butter can even be stored in the freezer for up to a year or longer. For optimal results, wrap the butter tightly in foil or freezer-safe plastic wrap, place it in a resealable bag or airtight container, and label it with the date of freezing. Properly thaw the butter in the refrigerator before use.
3. Canning: Canned butter has an exceptionally long shelf life when stored in a cool, dark place. When canned butter is processed correctly and sealed in sterilized canning jars, it can last up to 2 to 3 years, if not longer. It’s important to follow proper canning techniques to ensure the safety and quality of the canned butter. The butter should be stored away from heat and light to prevent spoilage or degradation of flavor.
4. Dehydration: Dehydrated butter, when stored in an airtight container, can be shelf-stable for several years. The removal of moisture from butter inhibits bacterial growth and prevents spoilage. Properly dehydrated butter should be stored in a cool, dry place away from light and moisture. It’s important to check the dehydrated butter periodically for any signs of spoilage, such as off smells or mold growth.
5. Vacuum Sealing: By removing air and sealing butter tightly, vacuum sealing helps to extend its shelf life. Vacuum-sealed butter can be stored in the refrigerator or freezer, depending on the specific method used. In the refrigerator, vacuum-sealed butter can last for several months beyond the standard refrigeration shelf life. In the freezer, properly vacuum-sealed butter can last up to 1 year or longer without significant quality loss. Ensure that the vacuum-sealed packages are stored in a cool, dry place to maintain freshness.
It’s important to note that while these are general guidelines for the shelf life of butter in different storage methods, the actual shelf life can vary based on factors such as storage conditions, the quality of the butter before storage, and individual preference for taste. It’s always recommended to perform regular checks for signs of spoilage and use your judgment when determining the suitability of the butter for consumption.
By employing the appropriate storage method and following best practices, you can enjoy the rich flavor and creamy texture of butter long after its standard shelf life.
Conclusion
Storing butter for long-term use requires proper techniques and considerations to preserve its quality and taste. By understanding the factors that affect the shelf life of butter and implementing the right storage methods, you can extend its freshness and ensure its availability over an extended period of time.
Factors such as temperature, light exposure, air circulation, and moisture levels can impact the longevity of butter. It’s important to store butter in cool environments, shield it from light, minimize air exposure, and protect it from excessive moisture to prevent spoilage.
Choosing the right packaging is crucial for long-term butter storage. Airtight containers, foil or wax paper wrapping, vacuum-sealed bags, and specialized butter keepers are all effective options to maintain the freshness and quality of butter during storage.
Various methods can be employed for long-term butter storage, including freezing, canning, dehydrating, and vacuum sealing. Each method offers unique benefits and considerations, allowing you to choose the most suitable option based on your preferences and needs.
Whether you choose to freeze butter in individual portions, can butter in jars, dehydrate it into a shelf-stable form, or vacuum seal it for extended fridge or freezer storage, these methods can help you store butter for an extended period of time while preserving its taste and texture.
Remember to follow proper storage techniques and guidelines, regularly check for signs of spoilage, and use your judgment when assessing the freshness and suitability of stored butter. It’s always recommended to use older batches of stored butter first to maintain a rotation system and ensure optimal quality.
In conclusion, with the right storage conditions, packaging, and methods, you can enjoy the incredible versatility and flavor of butter for an extended period of time. Whether you’re stockpiling for emergencies, buying in bulk, or simply want to preserve the taste of butter, these storage techniques will allow you to have a convenient supply of butter whenever you need it.
Frequently Asked Questions about How To Store Butter Long Term
Was this page helpful?
At Storables.com, we guarantee accurate and reliable information. Our content, validated by Expert Board Contributors, is crafted following stringent Editorial Policies. We're committed to providing you with well-researched, expert-backed insights for all your informational needs.


0 thoughts on “How To Store Butter Long Term”