
Articles
How To Store Apple Pie
Modified: August 25, 2024
Learn how to properly store your homemade apple pie to keep it fresh and delicious for longer. Find helpful articles and tips on apple pie storage.
(Many of the links in this article redirect to a specific reviewed product. Your purchase of these products through affiliate links helps to generate commission for Storables.com, at no extra cost. Learn more)
Introduction
Apple pie is a classic dessert loved by many around the world. Its warm, sweet, and comforting flavors make it a perfect treat for any occasion. Whether you’re baking an apple pie from scratch or using a pre-made crust, knowing how to store it properly can help ensure that you can savor its deliciousness for days to come.
Storing apple pie correctly not only helps maintain its freshness but also preserves its texture and flavor. This article will guide you through the steps to store your apple pie so that it stays as delicious as the day it was baked.
Before we dive into the storage process, let’s discuss the necessary ingredients and tools you’ll need:
- A freshly baked apple pie
- Plastic wrap or aluminum foil
- Airtight container or sealable plastic bag
- Refrigerator or freezer
With these ingredients and tools at hand, you’re ready to properly store your apple pie. Read on to discover the step-by-step process!
Key Takeaways:
- Store apple pie at room temperature for 1-2 days, or refrigerate for 3-4 days. For longer storage, freeze the pie for up to 3 months. Thaw in the refrigerator before reheating or serving.
- Properly stored apple pie maintains its texture and flavor. Keep it in a cool, dry place away from direct sunlight or heat sources. Enjoy the sweet delight for days to come!
Read more: How To Store Homemade Apple Pie
Gathering Ingredients
Before you start storing your apple pie, it’s essential to gather all the necessary ingredients and tools. Having everything prepared ensures a smooth and hassle-free process. Here’s what you’ll need:
- A freshly baked apple pie: This can be a homemade pie or one purchased from a bakery. Make sure it has cooled down before moving on to the storage process.
- Plastic wrap or aluminum foil: These are essential for protecting the pie from air and moisture.
- Airtight container or sealable plastic bag: Opt for containers or bags that can completely seal the pie to maintain its freshness.
- Refrigerator or freezer: Depending on the length of storage, you’ll need either a refrigerator or freezer to keep the pie.
Gathering these ingredients and tools beforehand will save you time and ensure that your apple pie remains in top-notch condition.
Preparing the Apple Filling
One crucial step in storing apple pie is to prepare the apple filling properly. The filling adds the delightful sweetness and flavor to the pie, making it an irresistible treat. Here’s how to prepare the apple filling:
- Start by peeling and slicing the apples. You can use any variety of apples you prefer, such as Granny Smith, Honeycrisp, or Gala. Aim for evenly sized slices to ensure even cooking.
- Place the sliced apples in a large bowl and sprinkle them with some lemon juice. The lemon juice helps prevent browning and adds a tangy freshness to the filling.
- Add sugar, cinnamon, nutmeg, and a pinch of salt to the sliced apples. The amount of sugar can be adjusted based on your desired level of sweetness.
- Gently toss the apples with the sugar and spices until they are well coated. This step ensures that the flavors are evenly distributed throughout the pie.
Once you’ve prepared the apple filling, it’s time to move on to the next step—the pie crust!
Making the Pie Crust
The pie crust is an essential component of any apple pie. It provides a buttery and flaky base that complements the sweet and savory apple filling. Follow these steps to make a delicious pie crust:
- Start by combining the dry ingredients in a large mixing bowl. This typically includes flour, salt, and sugar. Mix them together until well combined.
- Add cold, diced butter to the dry ingredients. Using a pastry cutter or your hands, work the butter into the flour mixture until it resembles coarse crumbs. Small chunks of butter throughout the crust will create a flaky texture.
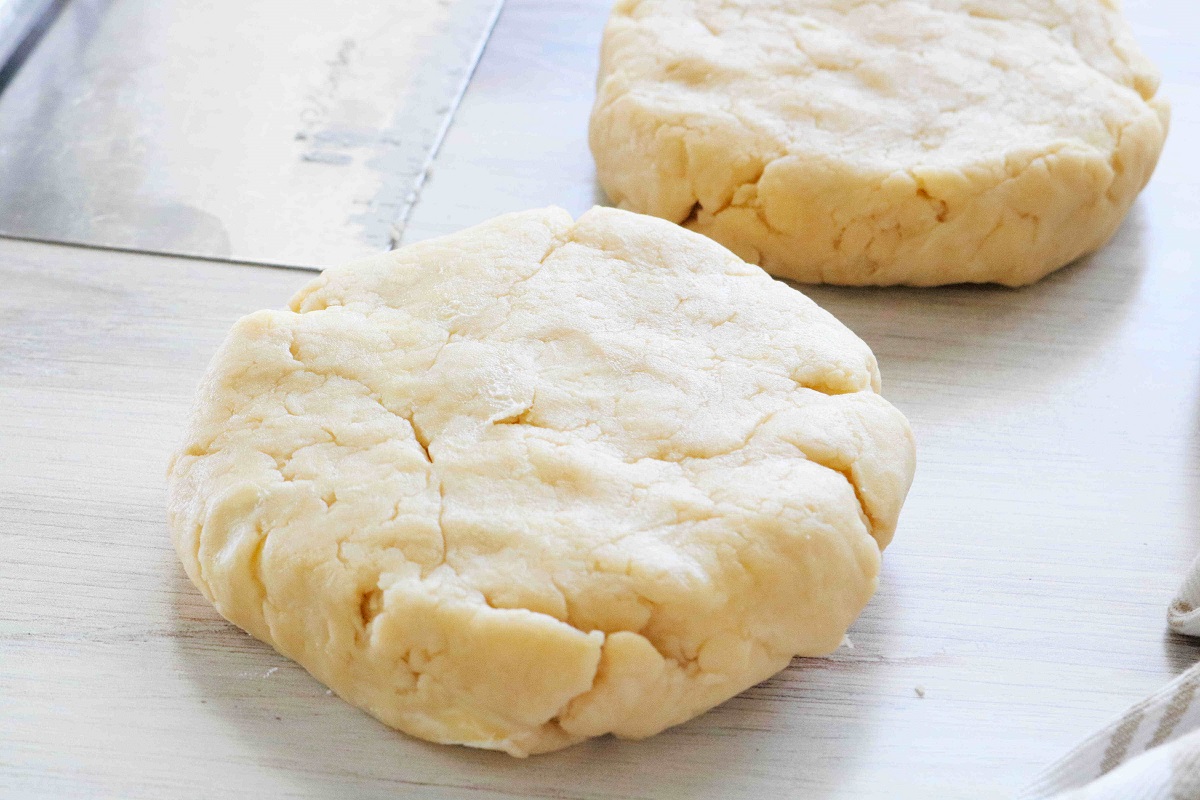
- Sprinkle cold water into the mixture, a few tablespoons at a time. Mix the dough gently with a fork or your hands until it just comes together. Be careful not to overmix, as this can result in a tough crust.
- Once the dough forms a ball, divide it in half. Flatten each half into a disk, wrap them in plastic wrap, and refrigerate for at least 30 minutes to allow the dough to chill and rest.
- When you’re ready to bake the pie, remove one of the dough disks from the refrigerator and roll it out on a lightly floured surface. Roll it to a size that will fit your pie dish, with some overhang for sealing and crimping the edges.
- Transfer the rolled-out dough to your pie dish, gently pressing it into the bottom and sides. Trim any excess dough and use it to patch up any cracks or imperfections.
With the pie crust ready, it’s time to move on to the next step—assembling the apple pie!
Store apple pie at room temperature for up to 2 days, or in the refrigerator for up to 4-5 days. Cover it loosely with foil or plastic wrap to prevent it from drying out. If storing for longer, freeze the pie for up to 4-6 months.
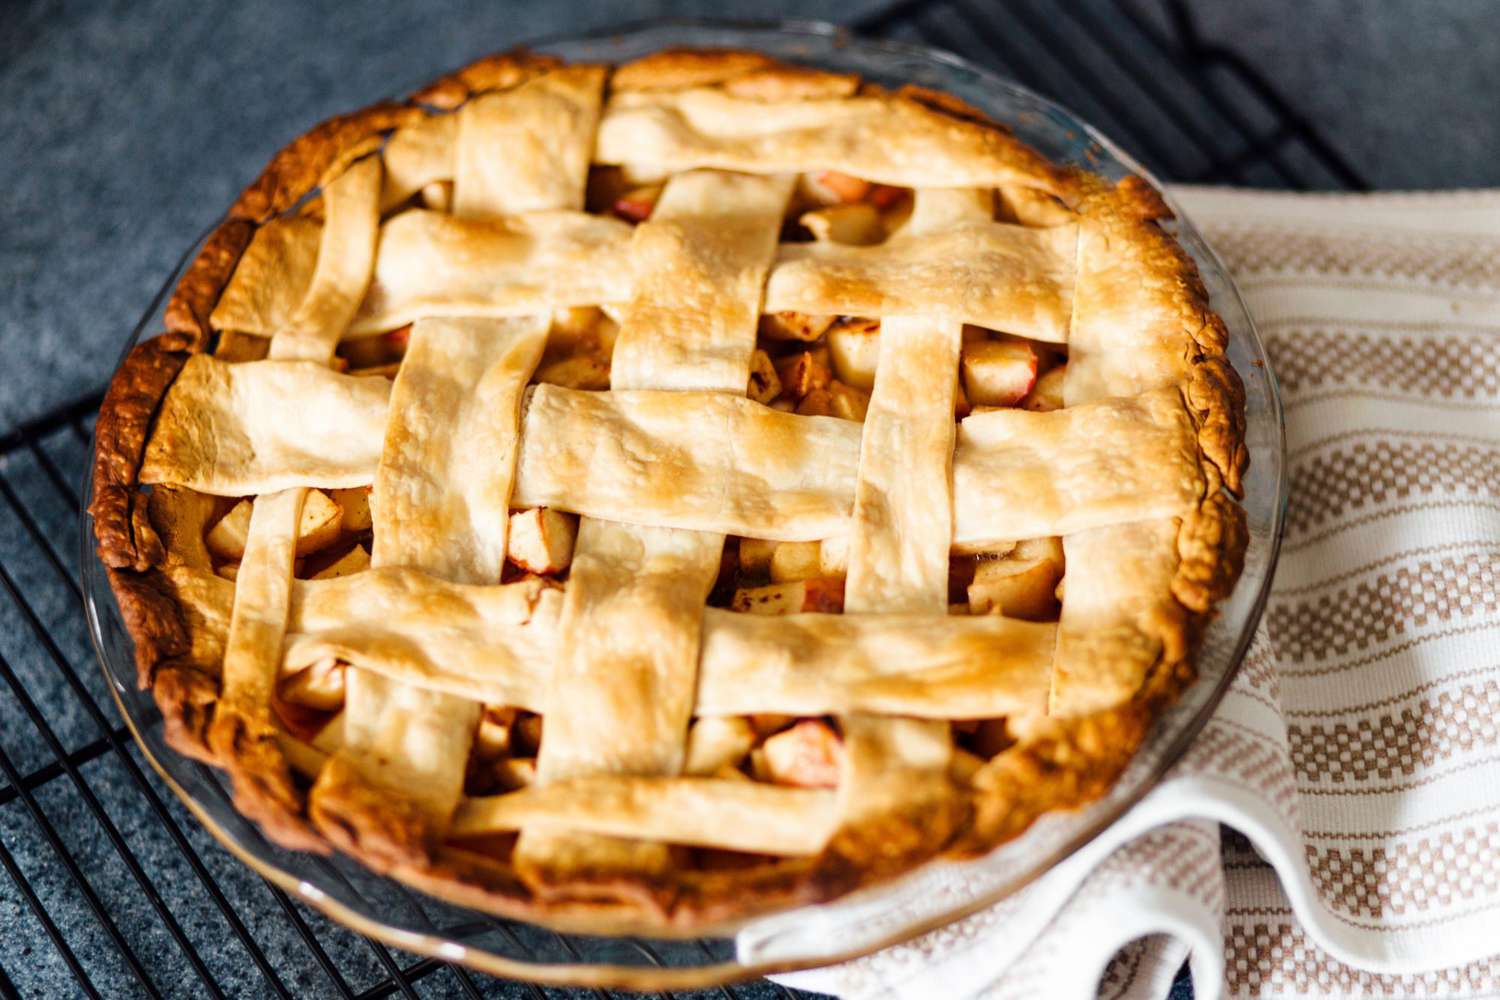
Assembling the Apple Pie
Now that you have prepared the apple filling and made the pie crust, it’s time to assemble your apple pie. Follow these steps for a perfectly layered and delicious pie:
- Start by preheating the oven to the recommended temperature, usually around 375°F (190°C).
- Take one of the dough disks you prepared earlier and place it in a 9-inch pie dish. Allow the edges of the crust to hang over the sides of the dish.
- Pour the apple filling into the pie dish, spreading it evenly over the crust. If desired, sprinkle a tablespoon or two of flour or cornstarch over the filling. This helps thicken any excess liquid from the apples.
- Roll out the second dough disk and carefully place it over the apple filling. Trim any excess dough and crimp the edges to seal the pie.
- Using a sharp knife, make a few small slits on the top crust to allow steam to escape during baking.
- Optionally, you can brush the top crust with an egg wash or milk and sprinkle some sugar for a golden and slightly sweet crust.
Now that the apple pie is assembled and ready to bake, let’s move on to the next step—baking!
Read more: How To Store Apple Pie Moonshine
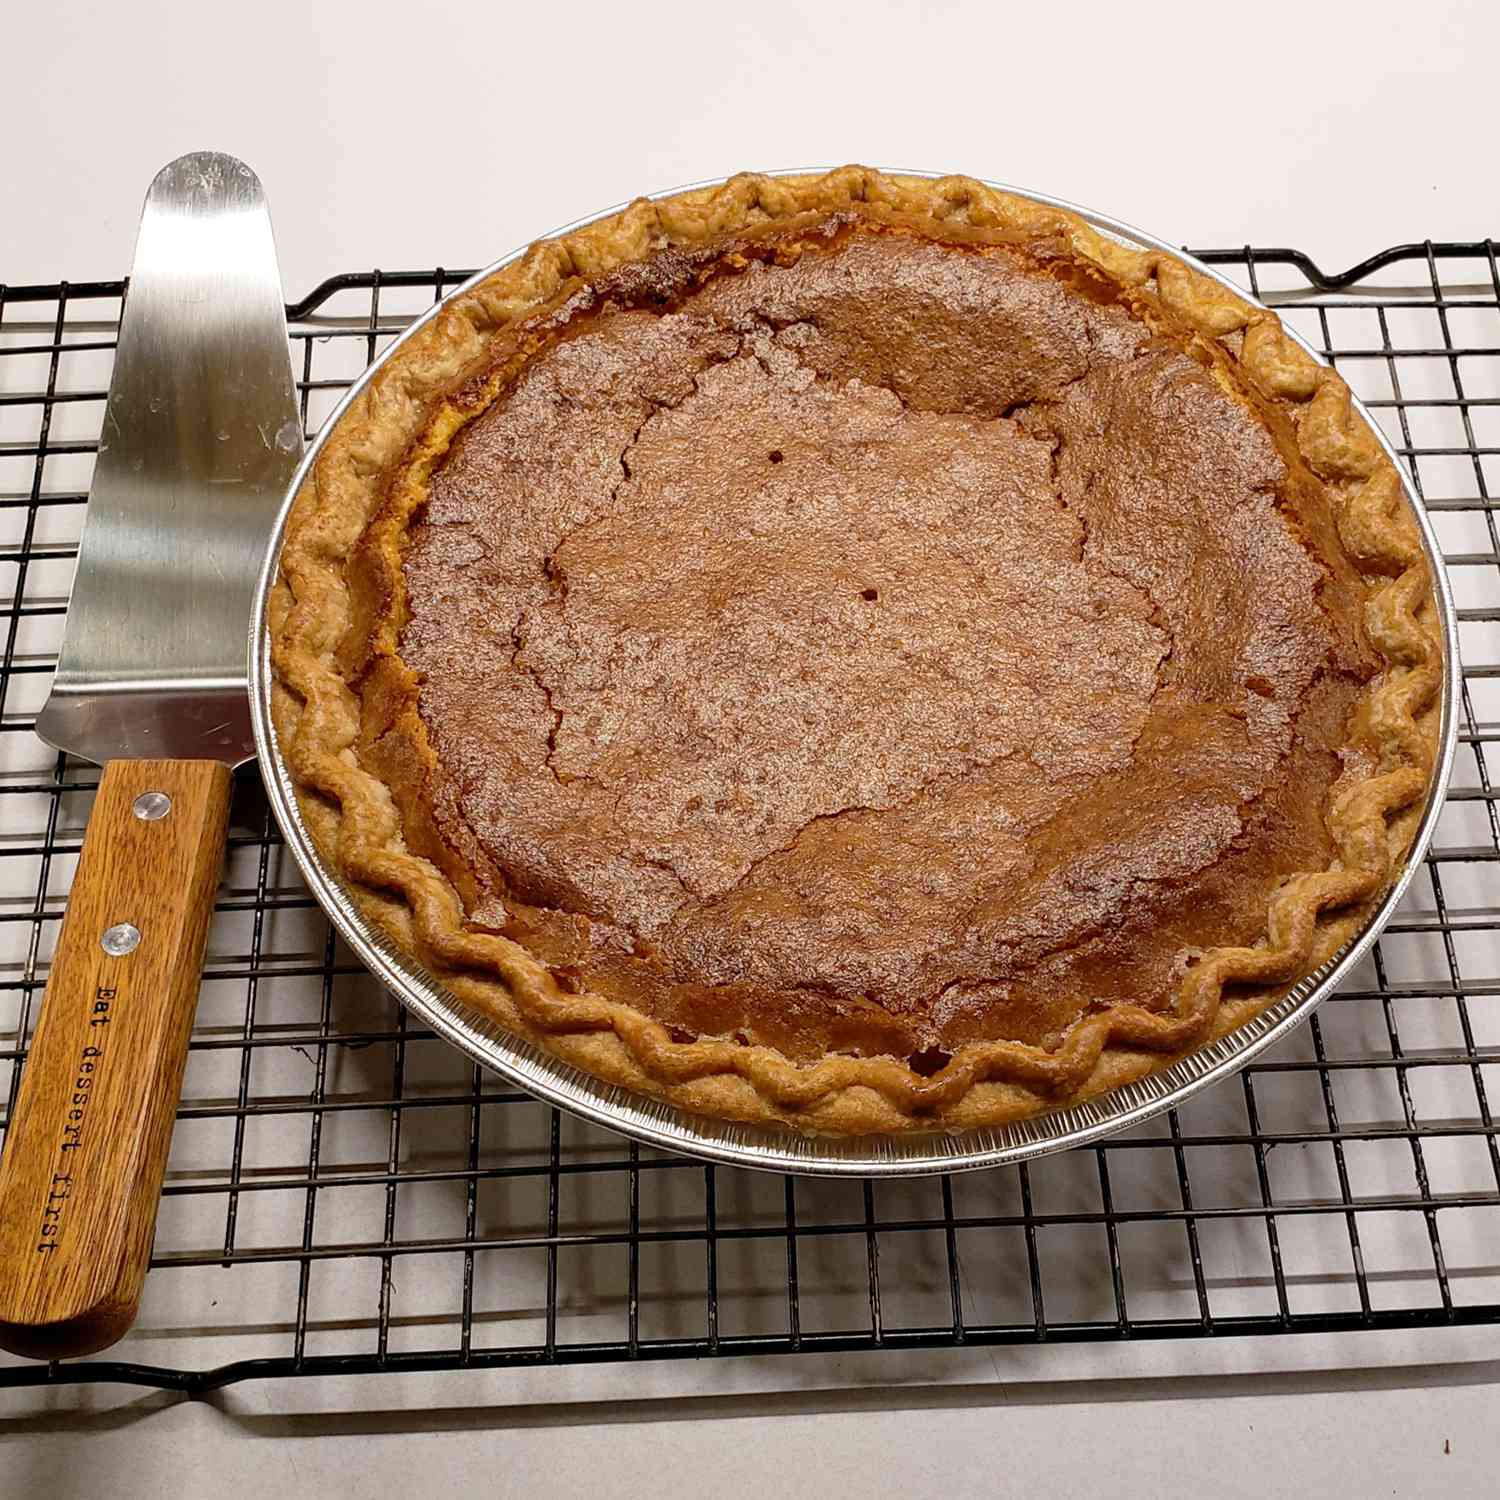
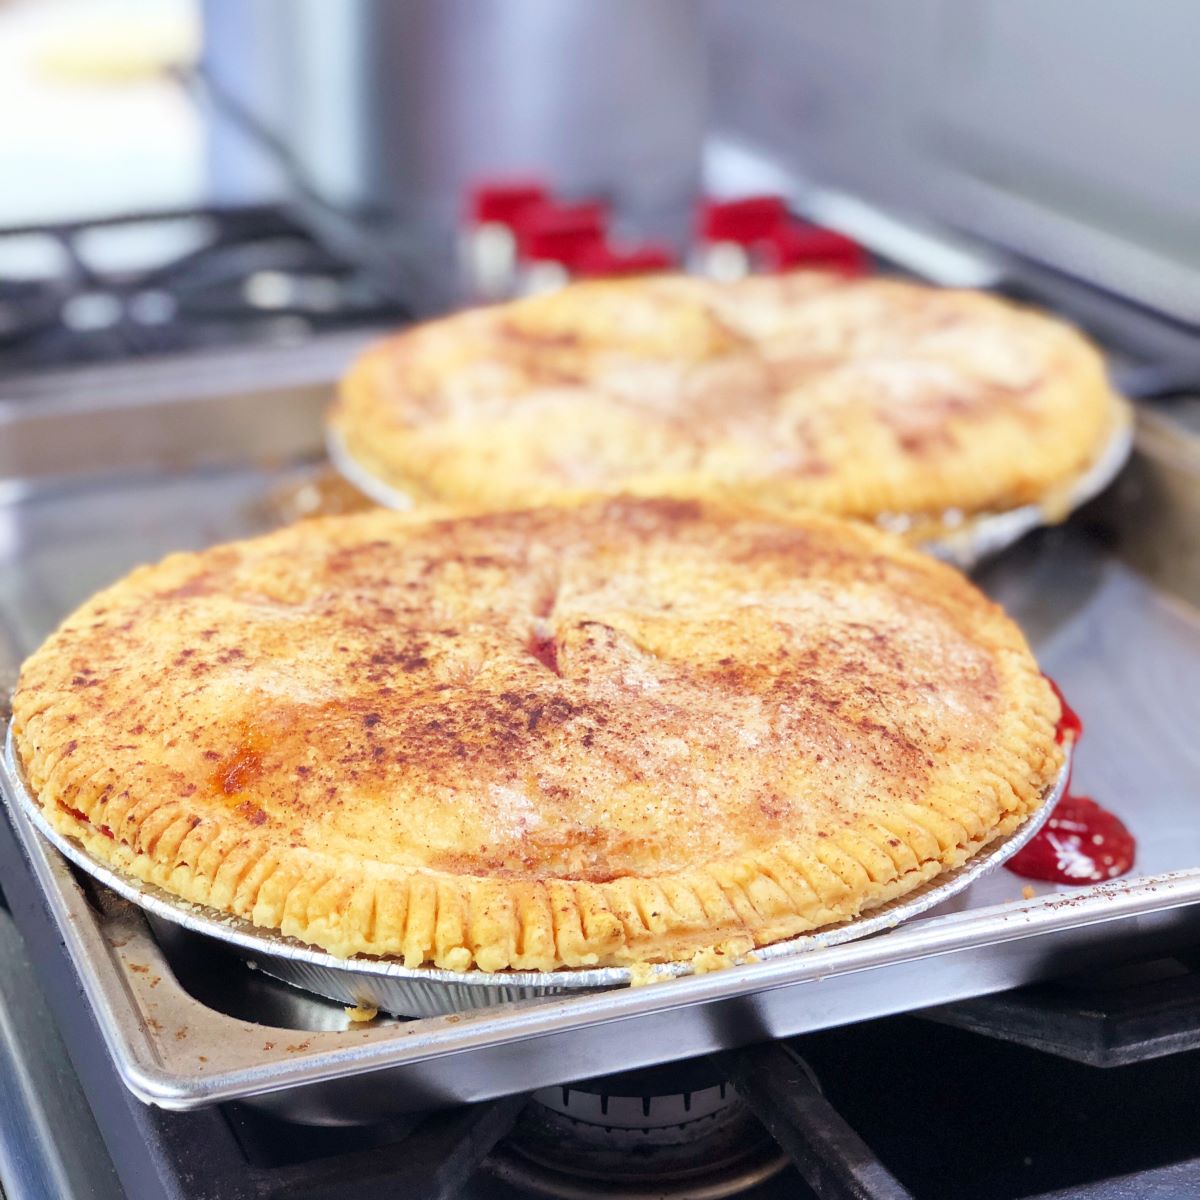
Baking the Apple Pie
After assembling the apple pie, it’s time to bake it to perfection. The baking process will bring together all the flavors and ingredients, creating a warm and delicious dessert. Here are the steps to bake your apple pie:
- Place the assembled pie on a baking sheet to catch any potential spills or drips.
- Slide the pie into the preheated oven and bake it for about 45 to 55 minutes, or until the crust turns golden brown and the filling is bubbly.
- As the pie bakes, a wonderful aroma will fill your kitchen and heighten your anticipation for the final result.
- Keep an eye on the pie as it bakes. If you notice that the crust is browning too quickly, gently place a piece of aluminum foil over the top to prevent over-browning.
- Once the pie is beautifully golden and the filling is bubbling, carefully remove it from the oven and place it on a wire rack to cool.
While it may be tempting to dig into your freshly baked apple pie right away, it’s important to allow it to cool completely before storing it. This helps the pie set and ensures that the filling stays intact.
Cooling and Storing the Apple Pie
After baking your apple pie to perfection, it’s time to cool it down and store it properly to maintain its freshness and flavor. Follow these steps to ensure your apple pie stays delicious:
- Allow the pie to cool completely on a wire rack. This will take about 2 hours. Cooling the pie helps the filling to set and prevents the crust from becoming soggy.
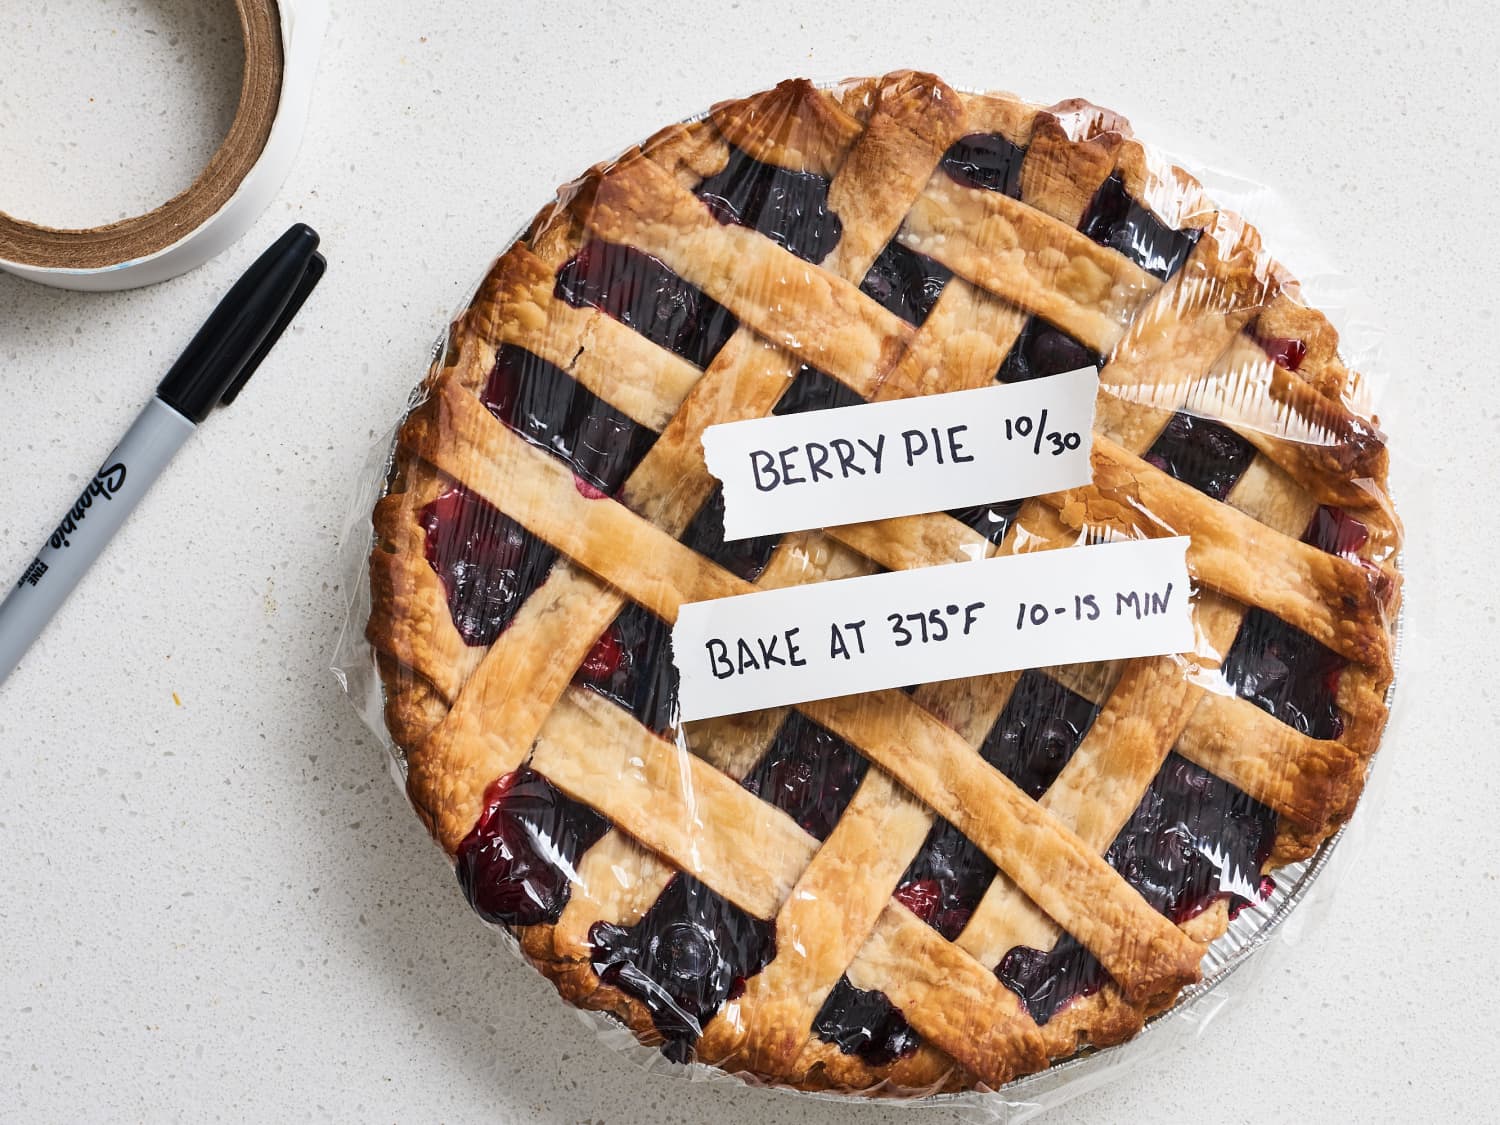
- Once the pie has cooled, it’s time to store it. If you plan to enjoy your apple pie within the next day or two, you can keep it at room temperature. Simply cover the pie loosely with plastic wrap or aluminum foil to protect it from dust and other contaminants.
- If you need to store the pie for a longer period, it’s best to refrigerate or freeze it. For refrigeration, tightly cover the pie with plastic wrap or foil and place it in the refrigerator. It will stay fresh for up to 3-4 days.
- If you opt to freeze the apple pie, wrap it tightly with several layers of plastic wrap or aluminum foil. Then, place it in a sealed, airtight container or freezer bag. Properly stored, the pie can last in the freezer for up to 3 months.
- When you’re ready to enjoy your stored apple pie, make sure you thaw it properly before serving. Transfer the pie from the freezer to the refrigerator and allow it to thaw overnight. Once thawed, you can reheat it in the oven at a low temperature or enjoy it cold.
Remember, when it comes to storing apple pie, it’s essential to keep it in a cool and dry place, away from direct sunlight or heat sources. This helps maintain its texture and flavor for the best possible taste experience.
Now that you know how to properly store your apple pie, you can enjoy the sweet delight for days to come. So bake with confidence, knowing that you have the knowledge to store your homemade apple pie like a pro!
Frequently Asked Questions about How To Store Apple Pie
Was this page helpful?
At Storables.com, we guarantee accurate and reliable information. Our content, validated by Expert Board Contributors, is crafted following stringent Editorial Policies. We're committed to providing you with well-researched, expert-backed insights for all your informational needs.


0 thoughts on “How To Store Apple Pie”