Home>Furniture & Design>Bathroom Accessories>How To Properly Use A Plunger On A Toilet
Bathroom Accessories
How To Properly Use A Plunger On A Toilet
Modified: February 18, 2024
Learn the proper technique for using a plunger on a toilet to unclog it. Find out how to effectively tackle this common bathroom issue with the right bathroom accessories.
(Many of the links in this article redirect to a specific reviewed product. Your purchase of these products through affiliate links helps to generate commission for Storables.com, at no extra cost. Learn more)
Introduction
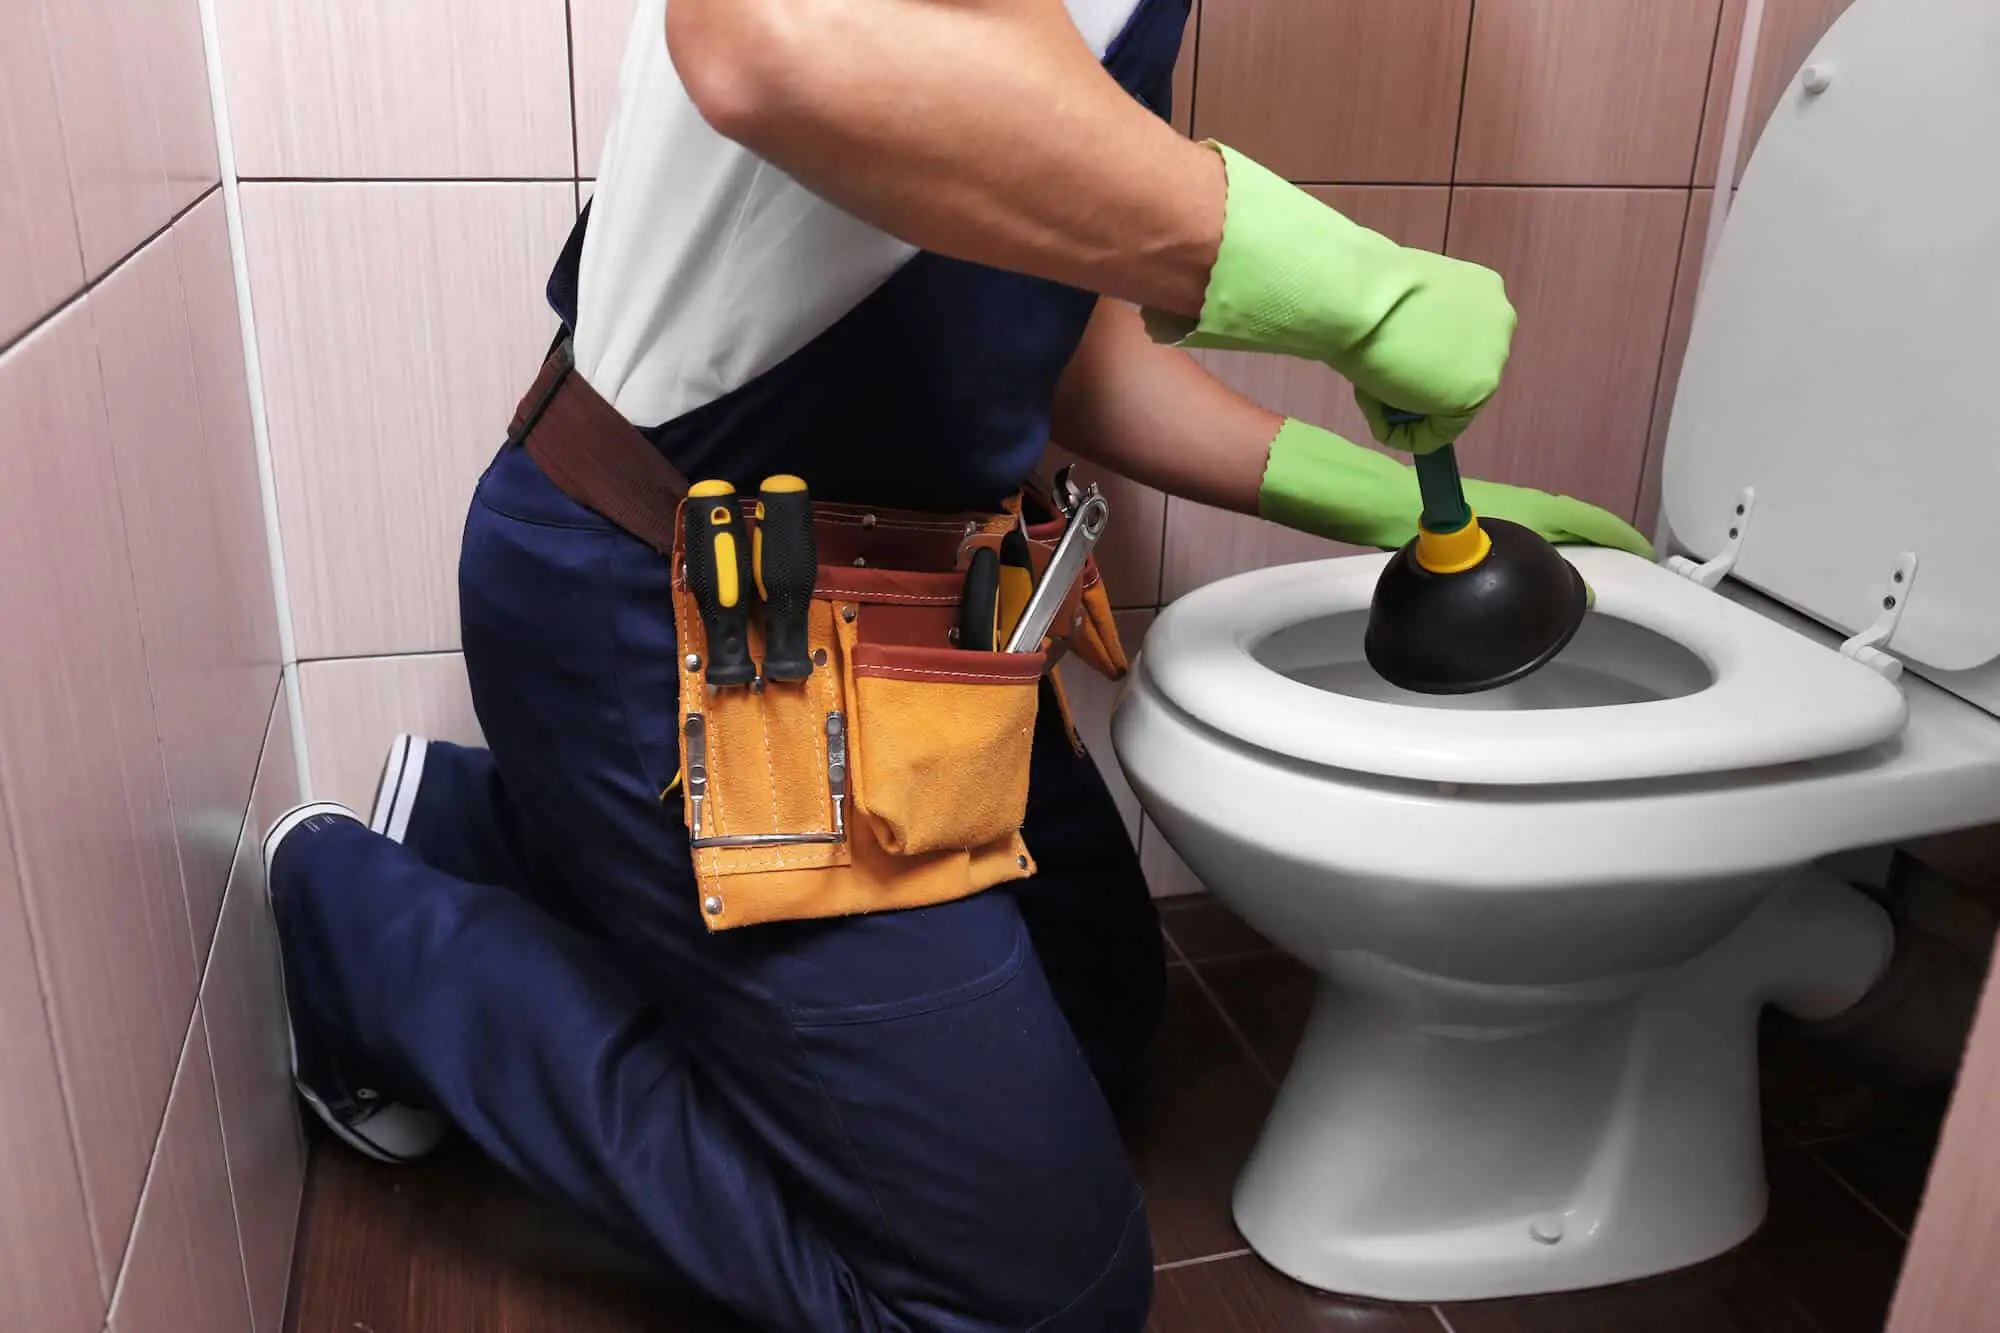
When it comes to dealing with a clogged toilet, having the right tools and knowing how to use them can save you from a messy and inconvenient situation. One of the most essential tools for addressing a clogged toilet is the plunger. This humble yet effective device is a staple in any household, and understanding how to properly use it can make the difference between a quick fix and a prolonged plumbing ordeal.
In this comprehensive guide, we will delve into the art of using a plunger on a toilet, providing step-by-step instructions and valuable insights to help you tackle this common household issue with confidence. Whether you're a seasoned homeowner or a novice DIY enthusiast, mastering the art of plunging can empower you to resolve toilet clogs swiftly and efficiently.
So, if you've ever found yourself facing a stubborn clog and wondered how to wield a plunger effectively, you're in the right place. By the end of this guide, you'll be equipped with the knowledge and skills to tackle toilet clogs like a pro, ensuring that this essential plumbing task becomes a manageable and stress-free endeavor. Let's dive into the world of plungers and discover the secrets to keeping your toilet running smoothly.
Key Takeaways:
- Master the art of using a plunger on a toilet by creating a tight seal, maintaining a rhythmic plunging motion, and being patient and persistent. Troubleshoot with hot water or seek professional help if needed.
- Prepare the toilet by assessing water level, creating a tight seal, positioning the plunger, and securing the area. Use a firm grip, rhythmic plunging motion, and observe water movement to effectively clear toilet clogs.
Read more: How To Use The Plunger In The Toilet
Understanding the Plunger
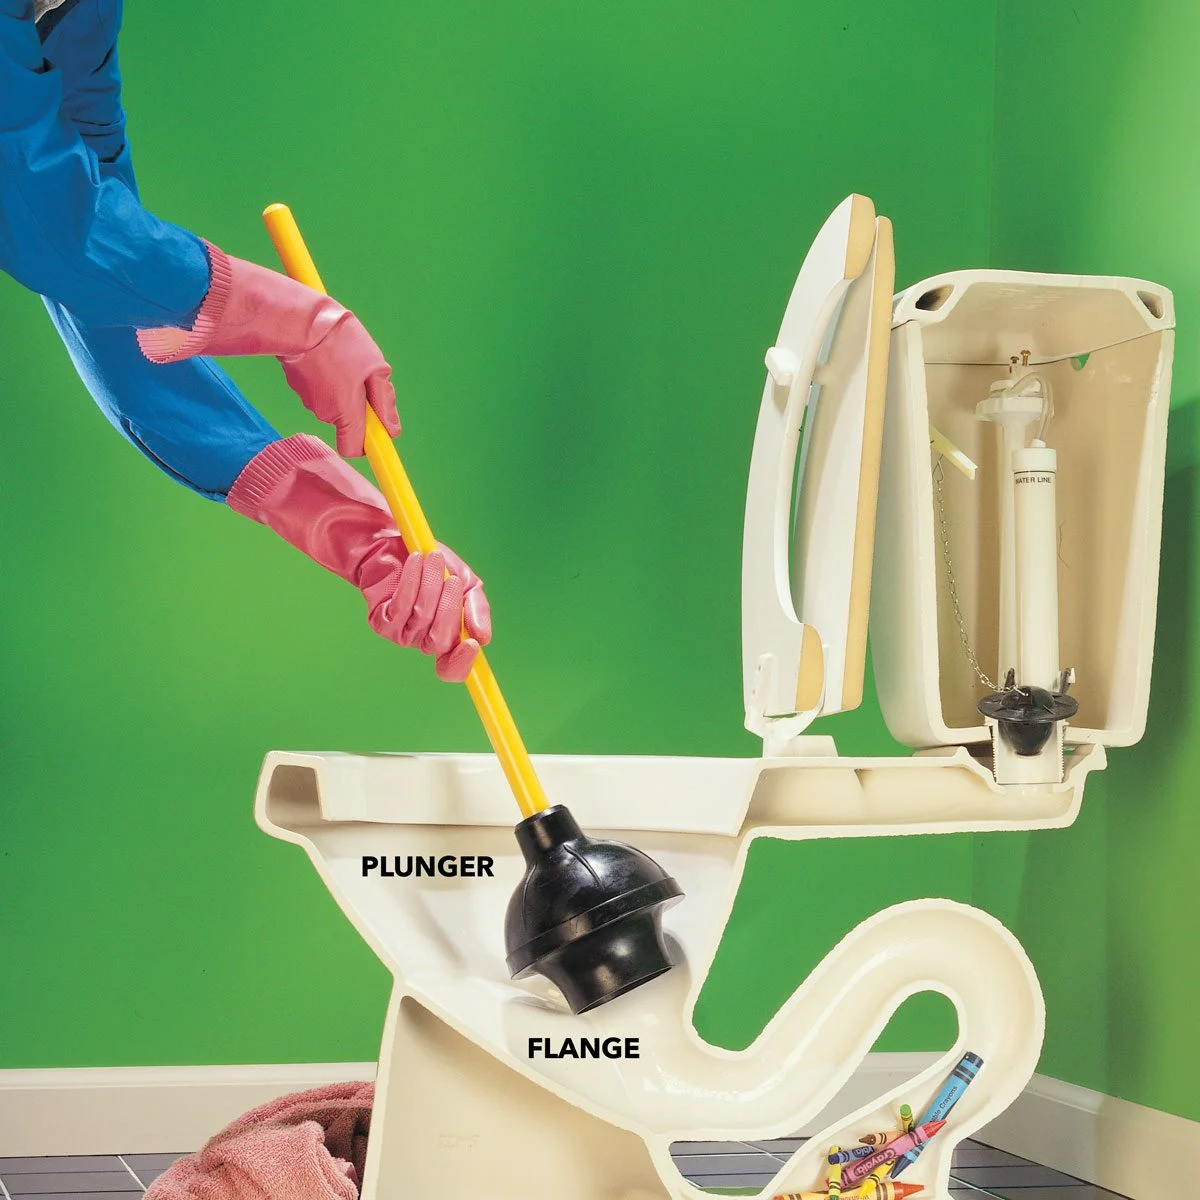
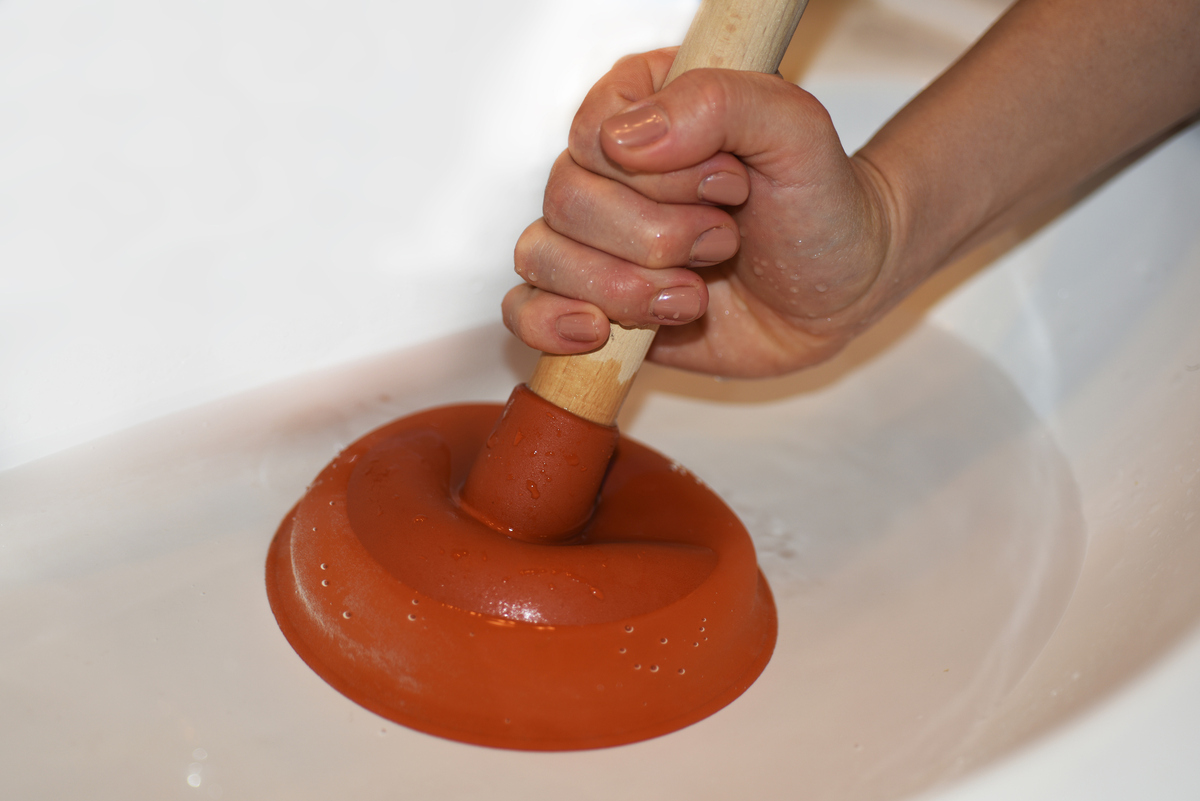
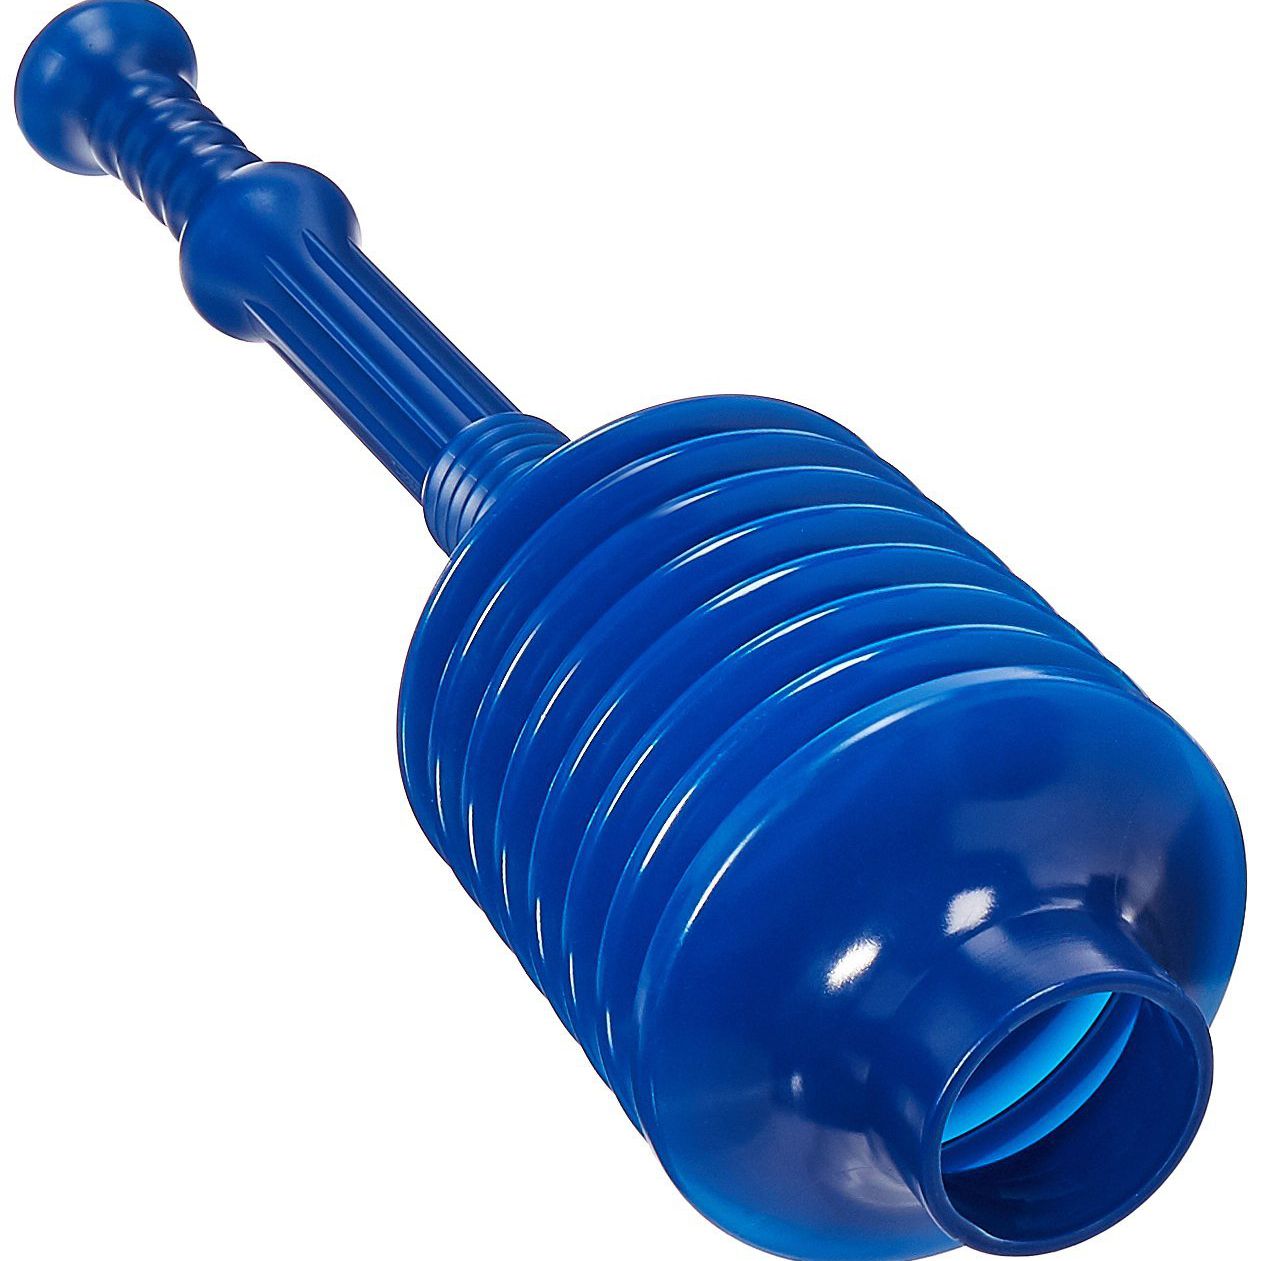
The plunger is a simple yet indispensable tool designed to address common plumbing issues, particularly toilet clogs. It consists of a rubber suction cup attached to a wooden or plastic handle, allowing for a firm grip and effective plunging action. The rubber cup, also known as the flange, is the key component responsible for creating a seal and generating the necessary suction to dislodge clogs within the toilet drain.
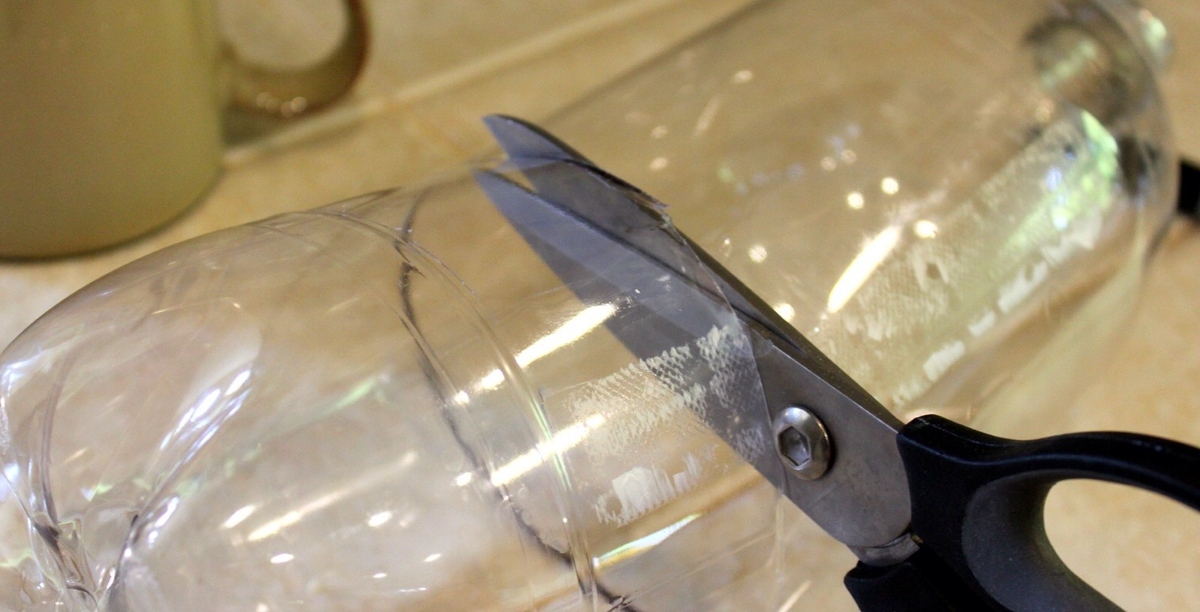
There are two main types of plungers commonly used for toilet clogs: the cup plunger and the flange plunger. The cup plunger, recognizable by its simple, dome-shaped rubber cup, is ideal for use on flat surfaces such as sinks and bathtubs. On the other hand, the flange plunger, distinguished by its extended flange or collar around the rubber cup, is specifically designed for toilets. The flange helps create a better seal within the curved toilet drain, making it more effective for dislodging stubborn clogs.
Understanding the anatomy of a plunger is crucial for using it effectively. The rubber cup's flexibility allows it to conform to the shape of the toilet drain, creating a tight seal that is essential for generating the suction needed to dislodge the clog. The handle provides the necessary leverage to apply downward pressure and initiate the plunging motion, while the airtight seal formed by the cup prevents air and water from escaping, thereby directing the force directly into the drain.
When selecting a plunger, it's important to choose one with a sturdy handle and a well-maintained rubber cup to ensure optimal performance. Additionally, understanding the differences between cup and flange plungers can help you choose the right tool for the job, maximizing your chances of successfully clearing the clog.
By familiarizing yourself with the design and functionality of the plunger, you can gain a deeper appreciation for its effectiveness in addressing toilet clogs. Armed with this knowledge, you'll be better equipped to proceed with confidence as we explore the practical steps for preparing and using the plunger to tackle stubborn toilet clogs.
Preparing the Toilet
Before diving into the plunging process, it's crucial to prepare the toilet to ensure optimal conditions for effectively dislodging the clog. Proper preparation can significantly enhance the success of the plunging endeavor and minimize potential messes. Here's a step-by-step guide to preparing the toilet for the plunging process:
-
Assess the Water Level: Begin by assessing the water level in the toilet bowl. If the bowl is filled to the brim or overflowing, it's essential to remove some of the water to prevent splashing during the plunging process. You can achieve this by carefully pouring some of the water into a bucket or using a cup to bail it out. However, it's important to leave enough water in the bowl to ensure the plunger's rubber cup remains submerged during the plunging action.
-
Create a Seal: To maximize the effectiveness of the plunger, it's crucial to ensure a tight seal between the rubber cup and the toilet drain. Inspect the flange or collar of the plunger to ensure it is clean and free of any debris that could compromise the seal. If using a cup plunger, ensure that the rubber cup is clean and free from any obstructions. Wiping the rim of the toilet bowl with a damp cloth can also help create a better seal.
-
Position the Plunger: Carefully position the plunger over the toilet drain, ensuring that the rubber cup or flange is centered over the opening. The plunger should be held at a slight angle to allow any trapped air to escape as you begin the plunging motion. This initial positioning is crucial for creating an airtight seal and maximizing the suction effect during the plunging process.
-
Secure the Area: Before commencing with the plunging action, it's advisable to secure the surrounding area to prevent any potential mess. Remove any nearby objects or items that could obstruct your movements or get splashed during the process. Placing towels or old rags around the base of the toilet can help contain any water splashes and minimize cleanup afterward.
By meticulously preparing the toilet for the plunging process, you can set the stage for a successful and efficient endeavor. These preparatory steps lay the foundation for creating the necessary conditions to effectively dislodge the clog, ensuring that your plunging efforts yield the desired results. With the toilet adequately prepared, you're now ready to proceed with using the plunger to tackle the stubborn clog and restore the proper functioning of your toilet.
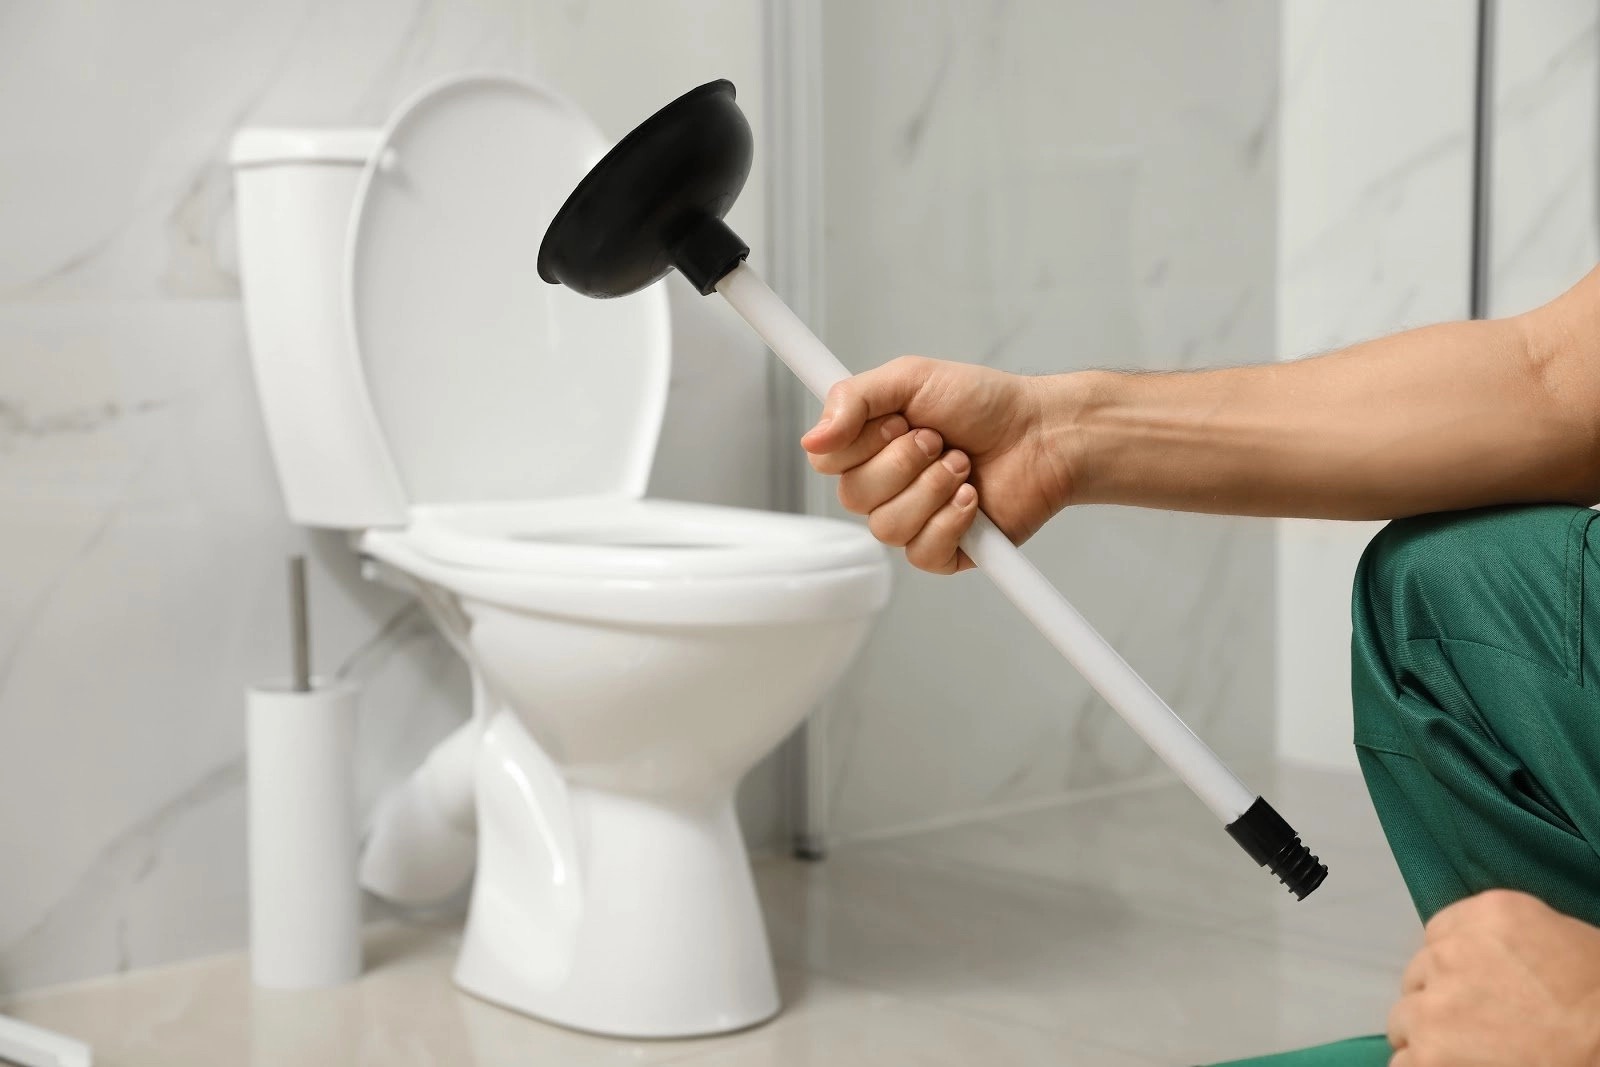
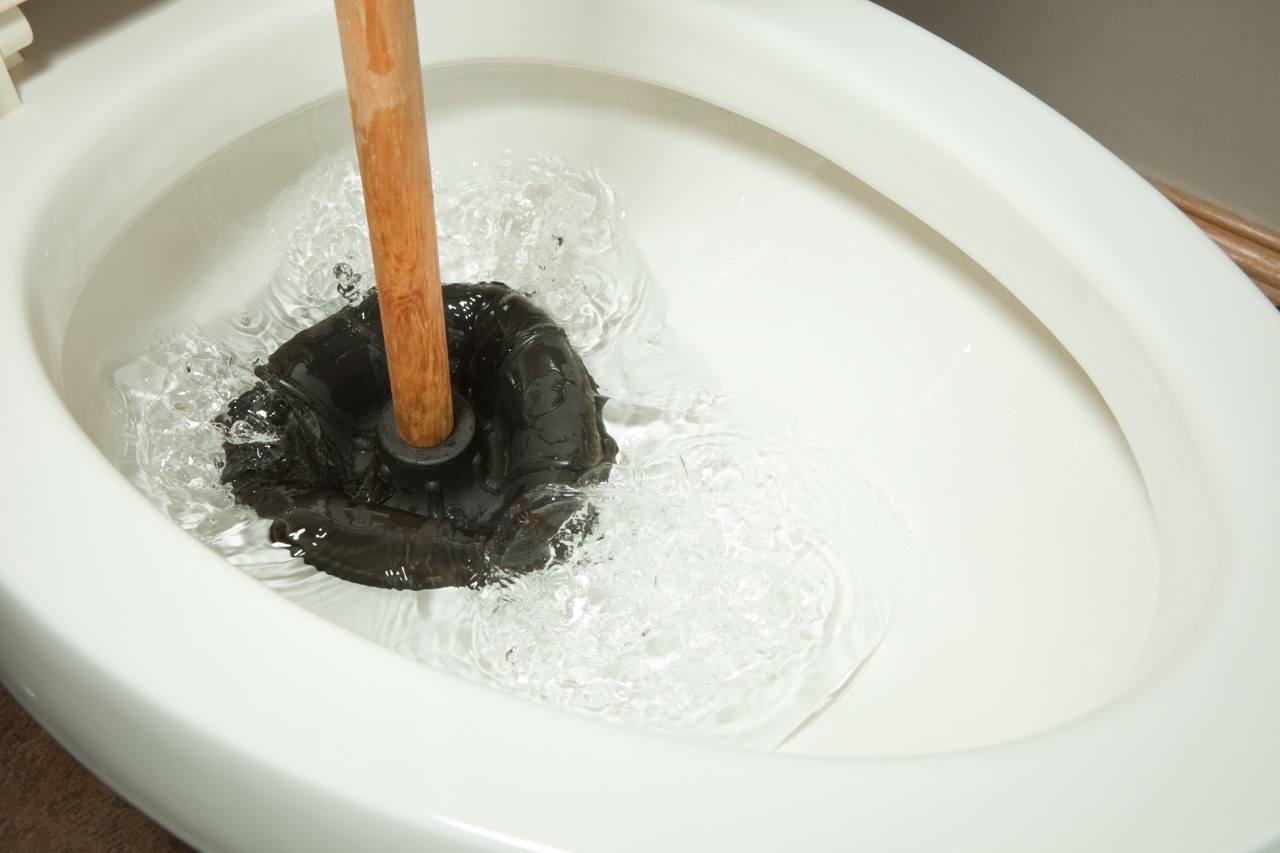
Make sure the plunger completely covers the drain. Push down and pull up with force, creating a strong suction. Repeat until the clog is cleared.
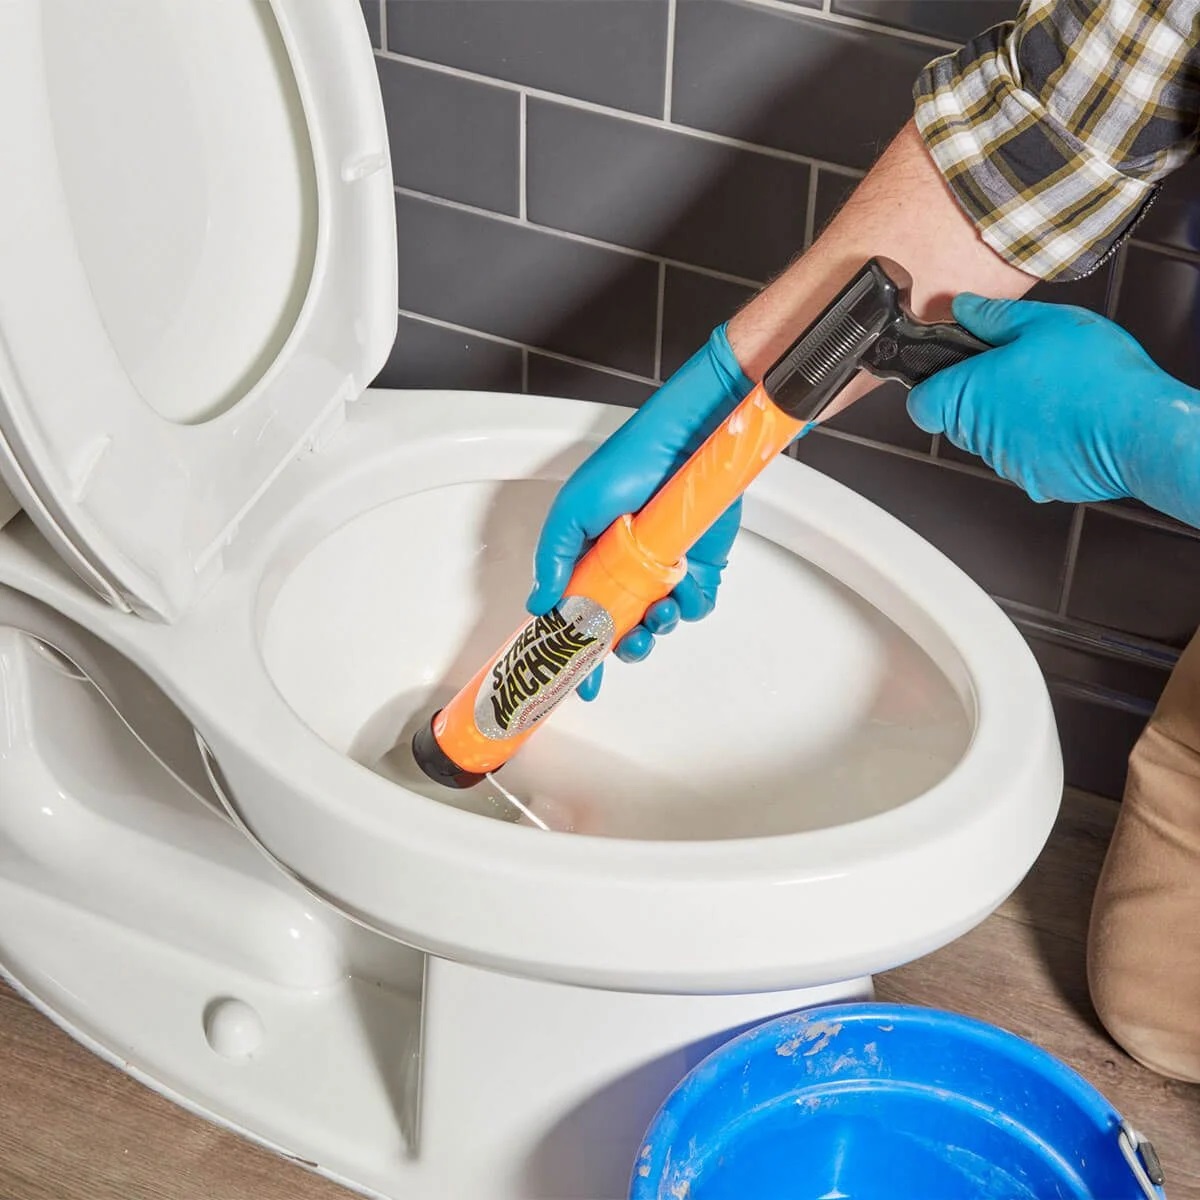
Using the Plunger
With the toilet adequately prepared and the necessary conditions in place, it's time to put the plunger to work and tackle the stubborn clog. The process of using a plunger on a toilet involves a series of deliberate and controlled movements aimed at dislodging the obstruction and restoring proper drainage. Here's a detailed guide on how to effectively use the plunger to address a toilet clog:
-
Establish a Firm Grip: Begin by gripping the handle of the plunger firmly with both hands, ensuring a secure and stable hold. The handle should be positioned comfortably within your grasp, allowing for controlled and steady movements during the plunging process.
-
Initiate the Plunging Motion: With the plunger positioned over the toilet drain, initiate the plunging motion by applying downward pressure on the handle. It's important to exert a consistent and controlled force, aiming to create a tight seal between the rubber cup or flange and the drain opening. The initial plunging action helps expel any trapped air and establishes the necessary suction for dislodging the clog.
-
Maintain a Rhythmic Motion: Once the initial seal is established, continue the plunging motion with a rhythmic and deliberate action. The goal is to generate a steady suction force that can effectively dislodge the obstruction within the toilet drain. Avoid using excessive force, as a controlled and rhythmic motion is more effective in creating the necessary pressure to clear the clog.
-
Observe the Water Movement: As you continue plunging, observe the movement of the water in the toilet bowl. If the plunging action is effective, you may notice the water level fluctuating or hear the sound of the clog being dislodged. This visual and auditory feedback can indicate progress and guide your plunging efforts.
-
Repeat the Process if Necessary: If the initial plunging attempts do not yield the desired results, repeat the process several times, maintaining a consistent and controlled motion. It's important to be patient and persistent, as some stubborn clogs may require multiple plunging attempts to fully clear the obstruction.
-
Test the Drainage: Once you feel confident that the clog has been dislodged, carefully flush the toilet to test the drainage. If the water drains smoothly and the toilet bowl empties without any signs of a backup, it indicates that the clog has been successfully cleared.
By following these steps and maintaining a patient and methodical approach, you can effectively use the plunger to address a toilet clog. The key lies in establishing a tight seal, maintaining a controlled plunging motion, and being attentive to visual and auditory cues that signal progress. With the clog cleared and the toilet functioning properly, you can proceed with confidence, knowing that you've mastered the art of using a plunger to tackle stubborn toilet clogs.
Troubleshooting
In some instances, despite your best efforts, the plunging process may not immediately resolve the toilet clog. When faced with persistent clogs or challenges during the plunging process, it's essential to employ troubleshooting techniques to address the issue effectively. Here are some troubleshooting tips to consider when encountering difficulties while using a plunger on a toilet:
-
Adjust the Seal: If you're experiencing difficulty in creating a tight seal between the plunger and the toilet drain, it's important to reassess the positioning of the plunger. Ensure that the rubber cup or flange is centered over the drain opening and that the surrounding area is free from any obstructions. Additionally, applying a thin layer of petroleum jelly around the rim of the rubber cup can help improve the seal and enhance suction.
-
Check for Obstructions: In some cases, the clog may be caused by an obstruction that is not easily dislodged through standard plunging. If you suspect the presence of a solid object or a particularly stubborn clog, consider using a toilet auger or plumbing snake to reach and remove the obstruction. These specialized tools can navigate the curves of the toilet drain and effectively address blockages that are beyond the reach of a plunger.
-
Apply Additional Pressure: When dealing with a particularly stubborn clog, applying additional pressure during the plunging process may be necessary. However, it's important to do so cautiously to avoid causing damage to the toilet or its components. Gradually increasing the force applied during the plunging motion, while ensuring that the seal remains intact, can help dislodge persistent clogs.
-
Combine Plunging with Hot Water: For clogs caused by organic matter or greasy substances, combining the plunging process with the use of hot water can be effective. Carefully pouring hot (but not boiling) water into the toilet bowl and allowing it to sit for a few minutes can help soften the clog, making it more responsive to the plunging action. This combination of heat and plunging force can enhance the effectiveness of the unclogging process.
-
Seek Professional Assistance: In cases where repeated plunging attempts and troubleshooting techniques fail to clear the clog, it may be necessary to seek professional plumbing assistance. A licensed plumber can employ specialized tools and techniques to address complex clogs and underlying plumbing issues, ensuring a thorough and lasting resolution to the problem.
By employing these troubleshooting strategies, you can effectively address challenges encountered during the plunging process and increase the likelihood of successfully clearing stubborn toilet clogs. It's important to approach troubleshooting with patience and a methodical mindset, ensuring that each step is carried out with care and attention to detail. With these troubleshooting techniques at your disposal, you can confidently navigate and overcome any obstacles encountered while using a plunger to address toilet clogs.
Read more: How To Store A Toilet Plunger
Conclusion
In conclusion, mastering the art of using a plunger on a toilet is a valuable skill that empowers homeowners to address common plumbing issues with confidence and efficiency. By understanding the anatomy and functionality of the plunger, preparing the toilet effectively, and employing the proper plunging techniques, individuals can effectively tackle stubborn clogs and restore the proper functioning of their toilets.
The process of using a plunger on a toilet involves a combination of deliberate movements, attentiveness to visual and auditory cues, and a patient, methodical approach. By establishing a tight seal, maintaining a controlled plunging motion, and being persistent in the face of challenges, individuals can increase their chances of successfully clearing toilet clogs.
Furthermore, the troubleshooting tips provided offer valuable insights for addressing persistent clogs and overcoming obstacles encountered during the plunging process. Whether adjusting the seal, checking for obstructions, applying additional pressure, or combining plunging with hot water, these techniques can enhance the effectiveness of the unclogging process and increase the likelihood of a successful outcome.
It's important to approach the task of using a plunger with patience, attentiveness, and a willingness to adapt to the specific characteristics of the clog. Additionally, knowing when to seek professional plumbing assistance is crucial, especially when faced with complex clogs or underlying plumbing issues that require specialized tools and expertise.
By mastering the art of using a plunger on a toilet, individuals can transform a potentially daunting plumbing task into a manageable and empowering endeavor. Armed with the knowledge and skills acquired from this comprehensive guide, homeowners can confidently address toilet clogs, maintain the proper functioning of their plumbing fixtures, and ensure a smooth and stress-free household experience.
In essence, the humble plunger serves as a reliable ally in the ongoing battle against toilet clogs, offering a practical and effective solution that can be wielded with confidence and expertise. With the insights gained from this guide, individuals can approach the task of using a plunger on a toilet with a sense of preparedness and assurance, knowing that they have the necessary tools and knowledge to overcome this common household challenge.
Frequently Asked Questions about How To Properly Use A Plunger On A Toilet
Was this page helpful?
At Storables.com, we guarantee accurate and reliable information. Our content, validated by Expert Board Contributors, is crafted following stringent Editorial Policies. We're committed to providing you with well-researched, expert-backed insights for all your informational needs.
0 thoughts on “How To Properly Use A Plunger On A Toilet”