Home>Furniture>Outdoor Furniture>How To Paint Decking Properly
Outdoor Furniture
How To Paint Decking Properly
Modified: March 7, 2024
Learn how to properly paint your outdoor furniture, including decking, with our step-by-step guide. Transform your deck with expert tips and techniques.
(Many of the links in this article redirect to a specific reviewed product. Your purchase of these products through affiliate links helps to generate commission for Storables.com, at no extra cost. Learn more)
Introduction
When it comes to enhancing the look and durability of your outdoor space, painting decking can make a significant difference. Whether you have a wooden or composite deck, a fresh coat of paint can revive its appearance, protect it from the elements, and extend its lifespan. However, in order to achieve the best results, it is essential to follow a proper painting process.
In this article, we will walk you through the step-by-step process of how to paint decking properly. From cleaning and preparation to selecting the right paint and applying it correctly, we will cover all the necessary details to help you achieve a professional-looking finish.
Before you begin, it is important to gather the necessary tools and materials. You will need deck cleaner, sandpaper, a paintbrush or roller, paint tray, painter’s tape, drop cloths, and, of course, deck paint. With these supplies on hand, you’ll be ready to get started on transforming your deck into a stunning outdoor oasis.
So, let’s dive into the process and discover how to paint decking like a pro!
Key Takeaways:
- Transform your outdoor space by painting your deck to revive its appearance, protect it from the elements, and extend its lifespan. Follow the step-by-step process for a professional-looking finish.
- Properly prepare, apply, and maintain your deck paint to achieve a vibrant and long-lasting finish. Choose the right paint, follow the process diligently, and enjoy your enhanced outdoor oasis.
Read more: How To Lay Out A Deck Properly
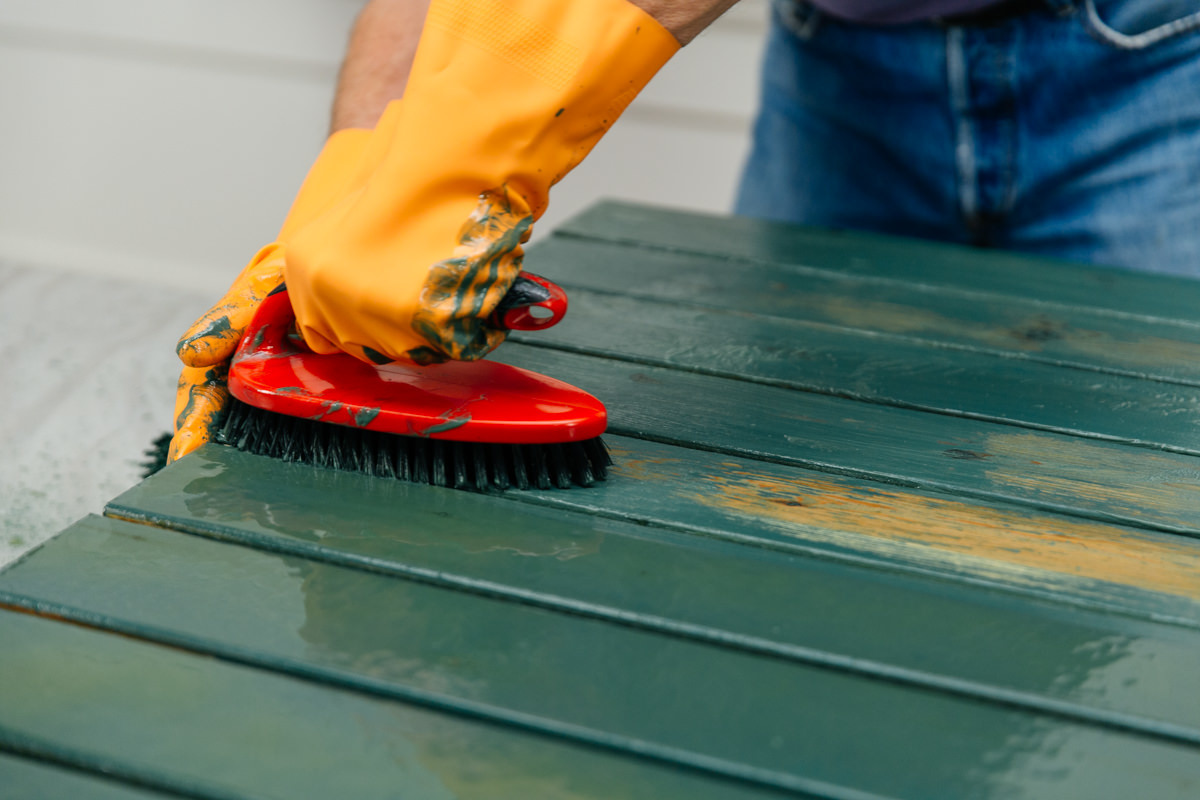
Step 1: Clean the Decking
The first and most important step in preparing your deck for painting is to thoroughly clean the surface. Over time, dirt, debris, mold, and mildew can accumulate on the deck, preventing the paint from adhering properly. Here’s how you can clean the decking effectively:
- Clear the deck: Remove all furniture, plants, and other items from your deck. Sweep away any loose debris such as leaves, twigs, and dirt.
- Pre-treat stubborn stains: If there are any tough stains or mildew spots on your deck, pre-treat them with a deck cleaner or mild detergent. Scrub the affected areas with a stiff brush to loosen the dirt.
- Apply the deck cleaner: Dilute the deck cleaner or mild detergent in a bucket of water according to the instructions on the product. Use a pump sprayer or a large sponge to apply the cleaner to the entire deck surface. Make sure to work in sections and evenly distribute the solution.
- Scrub the deck: After applying the cleaner, use a stiff brush or a deck scrubber to scrub the deck surface. Pay extra attention to areas that have heavy dirt buildup or stains. Scrub in the direction of the wood grain to avoid damaging the surface.
- Rinse the deck: Once you have thoroughly scrubbed the deck, rinse it off with clean water. You can use a garden hose or a pressure washer on a gentle setting to remove all traces of the cleaner. Make sure to rinse both the surface and the gaps between the boards.
- Allow the deck to dry: After rinsing, allow the deck to dry completely for at least 24-48 hours. Ensure that there is no moisture remaining on the surface before proceeding to the next step. This step is crucial as painting on a damp deck can lead to peeling and poor adhesion.
Cleaning your deck thoroughly not only removes dirt and stains but also sets a clean and smooth surface for paint application. Taking the time to clean it properly will ensure better paint adhesion and a longer-lasting finish.
Step 2: Sand the Surface
Once your deck is clean and dry, the next step is to sand the surface. Sanding helps to smooth out any rough areas, remove splinters, and create a better surface for the paint to adhere to. Here’s how to properly sand your decking:
- Inspect the deck: Take a close look at your deck surface and identify any rough or uneven spots. Pay attention to areas that may have started to weather or have loose wood fibers.
- Choose the right sandpaper: Depending on the condition of your deck, you may need to use different grits of sandpaper. For general sanding, start with medium-grit sandpaper (around 80-120 grit) and then switch to finer grits (120-220) for a smoother finish.
- Sand the deck surface: Use a handheld sanding block or a power sander to sand the surface of your deck. Sand in the direction of the wood grain, applying even pressure to ensure a consistent finish. Be sure to sand all the exposed surfaces, including the top of the deck boards and any railings or spindles.
- Smooth out rough spots: Pay extra attention to areas with rough spots or splintered wood. Sand these areas more aggressively to create a smoother surface. Take your time and be thorough in your sanding process.
- Remove sawdust: As you sand, sawdust will accumulate on the deck. Use a broom, brush, or vacuum to remove the sawdust regularly. Clearing away the sawdust will allow you to see the progress and ensure a clean surface for painting.
- Wipe down the deck: Once you are finished sanding, use a damp cloth or sponge to wipe down the entire deck surface. This will remove any remaining sawdust and prepare the deck for the next steps.
Sanding the deck not only improves the surface texture but also helps the paint to adhere more effectively. It creates a smooth and even surface for the paint application, ensuring a professional finish. Remember to wear protective eyewear and a mask while sanding to protect yourself from dust particles.
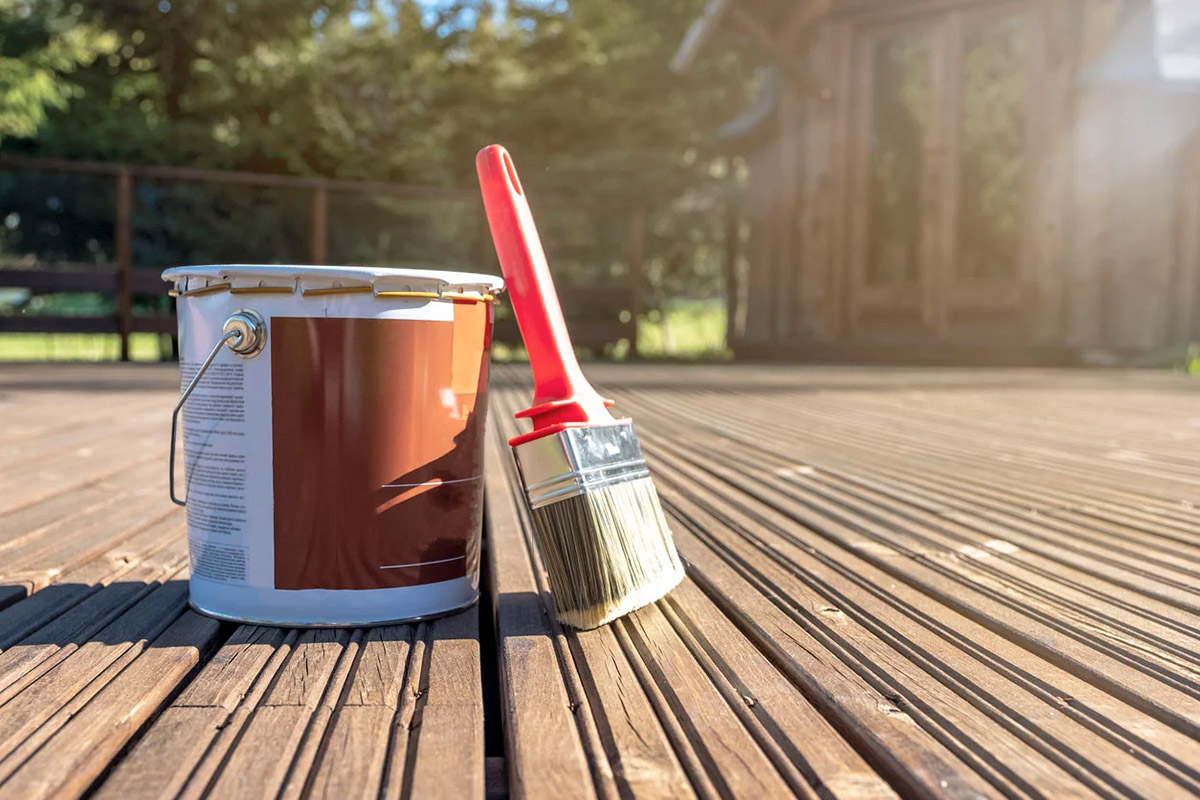
Step 3: Choose the Right Paint
Selecting the right paint for your decking is crucial to achieve a long-lasting and beautiful finish. When choosing a paint, consider the following factors:
- Type of paint: Opt for a high-quality exterior paint specifically designed for use on decks. These paints are formulated to withstand outdoor conditions, resist fading, and provide enhanced durability.
- Finish: Decide on the desired finish for your deck. You can choose between a solid color or a transparent stain. Solid color paints provide excellent coverage and hide imperfections, while transparent stains showcase the natural beauty of the wood grain.
- Color: Consider the color of your deck and its surroundings. Choose a paint color that complements your outdoor space and matches your aesthetic preferences.
- Paint additives: Some deck paints come with additives such as anti-slip properties or UV protection. Depending on your needs, these additives can provide extra safety and longevity to your painted deck.
- Application method: Check the recommended application method for the paint you choose. Some paints are suitable for brush application, while others can be rolled or sprayed on. Consider your comfort level and the size of your deck when choosing the application method.
When it comes to the paint type, oil-based paints generally offer better durability and protection, while water-based paints are easier to clean up and have lower levels of odor. Consider the pros and cons of each type and choose the one that best suits your needs.
It is always a good idea to consult with a paint specialist or the manufacturer’s guidelines to ensure you choose the right paint for your specific decking material and climate conditions. Taking the time to select the right paint will ensure a successful and long-lasting paint job on your deck.
Step 4: Prepare the Paint
Now that you have chosen the right paint for your decking, it’s time to prepare it for application. Properly preparing the paint ensures a smooth and consistent finish. Follow these steps to prepare the paint:
- Read the instructions: Before you begin, read the manufacturer’s instructions on the paint can. Pay attention to any specific preparation requirements or recommended mixing instructions.
- Stir the paint: Open the paint can and use a stir stick or a paint mixer attachment on a drill to thoroughly mix the paint. This will help blend any settled pigments and ensure a consistent color throughout.
- Check the paint consistency: Take a small amount of paint on a brush or roller and test its consistency. The paint should be smooth and easy to apply, not too thick or too runny. If needed, add a small amount of water or thinner according to the manufacturer’s instructions to achieve the desired consistency.
- Strain the paint: If you notice any lumps or debris in the paint, strain it through a mesh strainer or cheesecloth into a clean container. This will help remove any impurities and ensure a smooth application.
- Transfer the paint: If necessary, transfer a portion of the paint into a paint tray for easier access during application. Make sure the tray is clean and free from any dust or debris.
- Cover the paint can: After preparing the paint, securely cover the paint can to prevent drying or contamination. Be sure to seal it tightly to maintain the paint’s freshness.
Properly preparing the paint ensures optimal performance and helps you achieve a professional finish on your deck. Take the time to follow these steps and ensure that the paint is ready for application before moving on to the next step.
Before painting your decking, make sure to clean and sand the surface to remove any dirt or old paint. Use a high-quality outdoor paint and apply it in thin, even coats for best results.
Read more: How To Paint A Deck And Porch
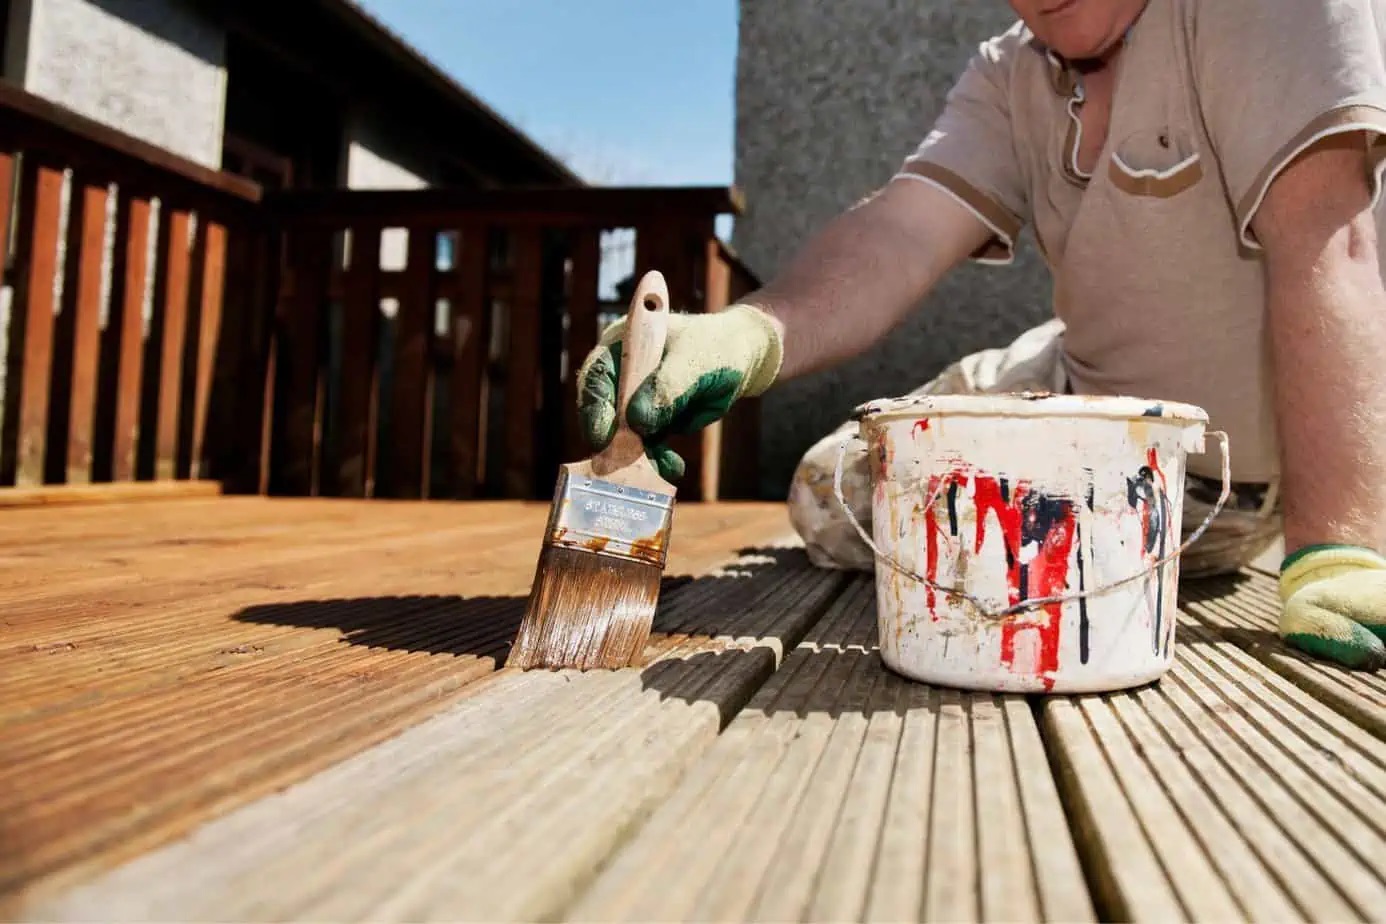
Step 5: Apply the First Coat
Now that you have prepared the paint, it’s time to start applying the first coat to your deck. Follow these steps to ensure a smooth and even application:
- Protect the surrounding areas: Use painter’s tape to mask off any areas you want to protect from paint, such as adjacent walls, posts, or railings. Lay down drop cloths to protect the ground or any nearby landscaping.
- Start from the furthest point: Begin applying the paint from the furthest point of the deck, working your way towards an exit point. This way, you won’t paint yourself into a corner or step on freshly painted areas.
- Apply the paint to the boards: Dip a brush or roller into the paint and apply a thin and even coat to the decking boards. Work in small sections and apply the paint in the direction of the wood grain for a smoother finish.
- Pay attention to gaps and edges: Use a smaller brush or a trim roller to reach into the gaps between the boards and along the edges of the deck. Ensuring even coverage in these areas will prevent any unprotected spots that may lead to moisture penetration and damage.
- Work systematically: Work in systematic rows or sections, overlapping each stroke slightly to ensure consistent coverage. This technique helps to avoid missed spots and creates a seamless finish.
- Check for drips and runs: As you paint, keep an eye out for any drips or runs. Smooth them out immediately with a brush or roller to prevent streaks or buildup of excess paint.
- Work in suitable weather conditions: Choose a day with mild temperatures and low humidity to ensure better paint drying. Avoid painting in direct sunlight or on windy days to prevent the paint from drying too quickly or debris from sticking to the wet surface.
Remember to take breaks, stretch, and stay hydrated during the painting process. Applying the first coat may take some time, but the effort will be worth it for a beautiful and long-lasting finish.
Step 6: Allow Sufficient Drying Time
After applying the first coat of paint to your decking, it’s crucial to allow sufficient drying time before applying the second coat or allowing foot traffic. Proper drying ensures that the paint adheres well and prevents any smudging or damage. Follow these guidelines to ensure the paint has enough time to dry:
- Refer to the manufacturer’s instructions: Consult the paint can or product label for the recommended drying time. Different types of paint and weather conditions may affect drying times, so it’s important to follow the guidelines specified by the manufacturer.
- Avoid foot traffic: While the paint is drying, it’s essential to keep foot traffic off the deck. Walking on the wet paint can cause smudging or leave unsightly footprints. Place a sign or temporary barrier to notify others that the deck is off-limits.
- Allow for proper ventilation: Ensure that there is proper airflow around the painted deck to facilitate drying. Open windows, doors, or use fans to keep the air circulating. Adequate ventilation helps the paint to cure faster and prevents any sticky or tacky areas.
- Monitor humidity levels: High humidity can prolong drying times and affect the paint’s performance. Avoid painting on days with excessive humidity or rain. If necessary, use a dehumidifier or wait for a drier day before proceeding.
- Check for dryness: To determine if the first coat is dry, lightly touch a small inconspicuous area of the deck with your finger. If it feels dry and doesn’t leave any residue on your finger, it’s likely ready for the second coat. However, avoid applying pressure or testing larger areas too soon, as it may still be drying beneath the surface.
It’s important to exercise patience and allow the paint ample time to dry before moving on to the next steps. Rushing this step can result in an uneven finish or damage to the freshly applied paint. So sit back, relax, and let the paint dry thoroughly for the best results.
Step 7: Apply the Second Coat
Once the first coat has dried completely, it’s time to apply the second coat of paint to your deck. The second coat enhances durability, provides better coverage, and ensures a more polished final look. Follow these steps for a successful second coat application:
- Inspect the first coat: Before applying the second coat, inspect the first coat for any missed spots, uneven coverage, or imperfections. Use a brush or roller to touch up these areas and ensure a consistent base.
- Prepare the paint: Stir the paint for the second coat in the same way as you did for the first coat. Check the consistency and strain it if necessary to remove any impurities.
- Follow the same application method: Use the same application method you used for the first coat, whether that is a brush or roller. Apply the paint evenly, working in small sections and following the direction of the wood grain.
- Overlap the strokes: Just like before, overlap each stroke slightly to ensure consistent coverage and avoid any missed spots. Take your time and work methodically to achieve a seamless finish.
- Pay attention to edges and gaps: Once again, pay special attention to edges and gaps between the boards. Ensure that these areas receive adequate paint coverage to protect against moisture and ensure a uniform appearance.
- Allow time to dry: After applying the second coat, allow ample time for it to dry fully. Follow the same guidelines as described in Step 6 to ensure proper drying. Avoid foot traffic and keep the deck well-ventilated during this drying period.
Applying the second coat will provide additional protection and ensure a more vibrant and uniform finish on your deck. Be thorough in your application and take your time to achieve the desired results.
Step 8: Final Touches and Cleanup
With the second coat applied, it’s time to add the final touches to your freshly painted deck and complete the painting process. Follow these steps to add those final details and ensure a clean and polished finish:
- Inspect the deck: Take a close look at your newly painted deck and check for any touch-ups or areas that need additional paint coverage. Use a brush or roller to address these spots and ensure a seamless appearance.
- Remove painter’s tape and drop cloths: Carefully remove the painter’s tape from any masked-off areas. Take your time to avoid peeling off any freshly painted surfaces. Likewise, fold and put away the drop cloths, being cautious not to spread any paint residue around.
- Clean up your tools: Rinse your brushes, rollers, and any other painting tools you used with water or the appropriate solvent as recommended by the paint manufacturer. Clean them thoroughly to ensure their longevity and usability for future projects.
- Dispose of paint waste responsibly: If you have any leftover paint or empty paint cans, follow proper disposal guidelines according to your local regulations. Avoid pouring paint down drains or throwing cans in the regular trash.
- Enjoy your newly painted deck: Once all the cleanup is complete, take a step back and admire your freshly painted deck. It’s now time to enjoy your outdoor space and relax in its enhanced beauty and protection.
Completing the final touches and cleanup will leave you with a clean and polished deck that is ready to be enjoyed for years to come. Taking care of these details ensures a professional-looking finish and helps maintain the integrity of your deck paint.
Read more: How To Paint Trex Decking
Conclusion
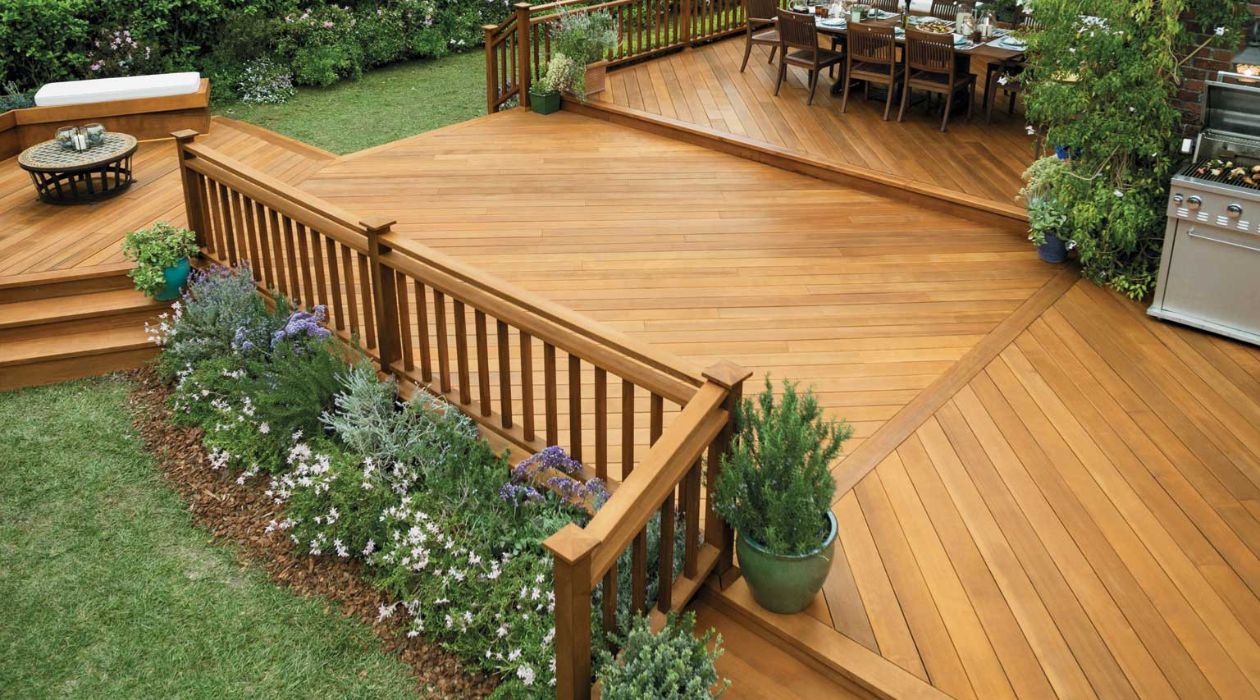
Painting your decking can transform your outdoor space, giving it a fresh and vibrant look while offering protection against the elements. By following the proper steps, you can ensure a successful paint job that will enhance the beauty and longevity of your deck. Here is a recap of the steps involved in painting your decking:
- Clean the decking thoroughly, removing dirt, stains, and debris.
- Sand the surface to create a smooth and even base for the paint.
- Choose the right paint for your decking material and climate conditions.
- Prepare the paint by stirring, checking the consistency, and straining if necessary.
- Apply the first coat of paint, paying attention to even coverage and following the wood grain.
- Allow sufficient drying time before proceeding to the next steps.
- Apply the second coat of paint to enhance durability and achieve a polished finish.
- Add final touches, such as touching up any missed spots and cleaning up your tools and work area.
Remember, throughout the process, it is essential to take your time, follow the manufacturer’s instructions, and work systematically. Proper preparation, application, and drying are key to achieving a professional-looking paint job that will stand up to the test of time.
Once your deck is freshly painted, sit back and enjoy the beauty of your outdoor space. Whether you’re hosting a gathering, relaxing with a book, or simply appreciating the view, your newly painted deck will provide a welcoming and aesthetically pleasing environment.
Lastly, don’t forget to maintain your painted deck by regular cleaning and touch-ups as needed. This will help preserve its appearance and protect it against wear and tear. With proper care, your painted deck will continue to be a source of enjoyment and pride for years to come.
Frequently Asked Questions about How To Paint Decking Properly
Was this page helpful?
At Storables.com, we guarantee accurate and reliable information. Our content, validated by Expert Board Contributors, is crafted following stringent Editorial Policies. We're committed to providing you with well-researched, expert-backed insights for all your informational needs.


0 thoughts on “How To Paint Decking Properly”