Articles
How To Store Cast Iron Pan
Modified: January 9, 2024
Learn the best techniques for storing cast iron pans in this comprehensive how-to article. Discover the proper methods for preserving the quality and longevity of your cookware.
(Many of the links in this article redirect to a specific reviewed product. Your purchase of these products through affiliate links helps to generate commission for Storables.com, at no extra cost. Learn more)
Introduction
Cast iron pans are beloved by many home cooks for their versatility and durability. These heavy-duty cooking vessels can last a lifetime if properly cared for and stored. When it comes to storing your cast iron pan, there are several factors to consider to ensure its longevity and prevent any damage. In this article, we will explore the best practices for storing your cast iron pan to keep it in optimal condition for years to come.
Proper storage of your cast iron pan not only helps to prevent scratches and rust but also makes it easily accessible for your next cooking adventure. Whether you have a single cast iron pan or a collection of different sizes, there are various storage options available that will suit your needs.
In the following sections, we will discuss the importance of cleaning and seasoning your cast iron pan before storing it, as well as different storage locations and methods to consider. So, let’s dive in and explore the best ways to store your cast iron pan!
Key Takeaways:
- Proper cleaning, seasoning, and choosing the right storage location are crucial for maintaining the longevity and optimal cooking performance of your beloved cast iron pan.
- Whether you hang, stack, store in the oven, drawer, or cabinet, proper care and maintenance will ensure your cast iron pan remains a reliable and cherished cooking tool for years to come.
Read more: How To Store A Cast Iron Pan
Proper Cleaning and Seasoning
Before you store your cast iron pan, it’s essential to ensure that it is properly cleaned and seasoned. Cleaning and seasoning remove any food residue, prevent rust, and maintain the pan’s non-stick surface.
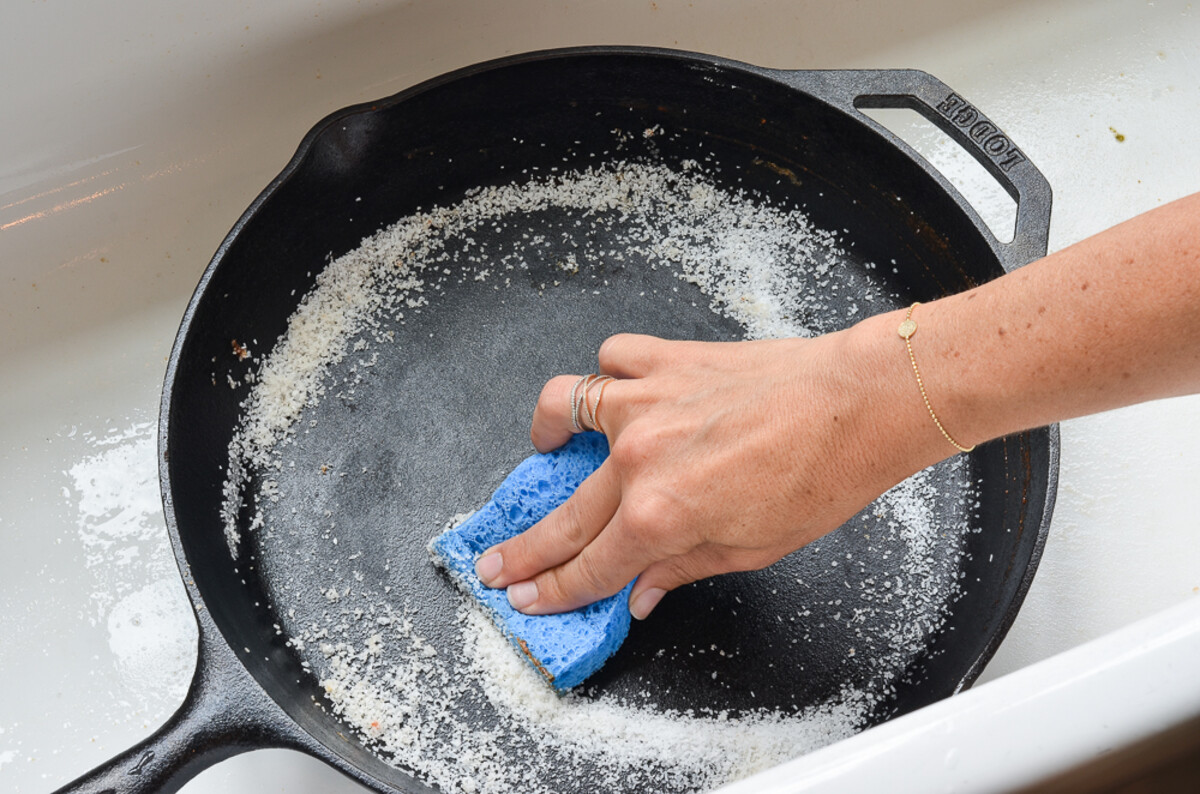
To clean your cast iron pan, start by using a stiff brush or sponge to remove any food particles. Avoid using soap or abrasive cleaners, as they can strip away the seasoning that provides the pan’s non-stick properties. Instead, opt for warm water and a gentle scrubbing motion.
For stubborn residue, you can use coarse salt as a natural abrasive. Sprinkle some salt on the pan and use a cloth or paper towel to scrub the surface. Once the pan is clean, rinse it with warm water and wipe it dry with a clean cloth.
After cleaning, it’s crucial to season your cast iron pan to maintain its non-stick surface and prevent rust. Seasoning involves applying a thin layer of oil or fat to the surface of the pan and heating it to create a polymerized layer.
To season your cast iron pan, start by preheating your oven to 400°F (200°C). Apply a small amount of oil or fat to the entire surface of the pan, including the handles. Use a paper towel or cloth to spread the oil evenly. Make sure to use an oil with a high smoke point, such as vegetable oil or flaxseed oil.
Place the oiled pan upside down on the top rack of your oven, with a baking sheet or aluminum foil on the lower rack to catch any drips. Bake the pan for about an hour, then turn off the oven and let the pan cool inside the oven. Once cooled, your cast iron pan is ready for storage.
Regularly cleaning and seasoning your cast iron pan not only helps to preserve its quality but also improves its cooking performance over time. With proper care, your cast iron pan can develop a natural non-stick surface that gets better with each use.
Choosing the Right Storage Location
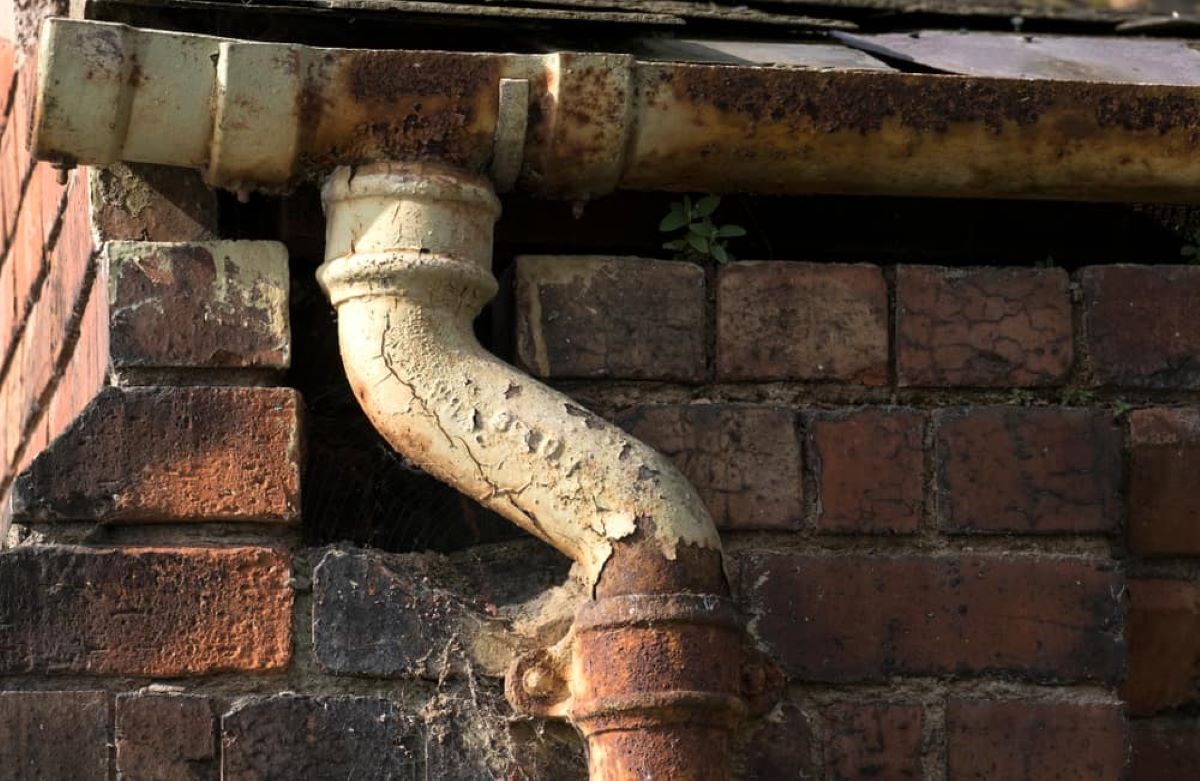
The first step in storing your cast iron pan is finding the right storage location. It’s important to choose a spot that is dry, well-ventilated, and away from excessive moisture or temperature fluctuations.
Avoid storing your cast iron pan in areas like basements or damp cabinets that are prone to humidity. Moisture can cause rust and damage the seasoning of your pan. Instead, opt for a dry area in your kitchen where the pan can be easily accessible.
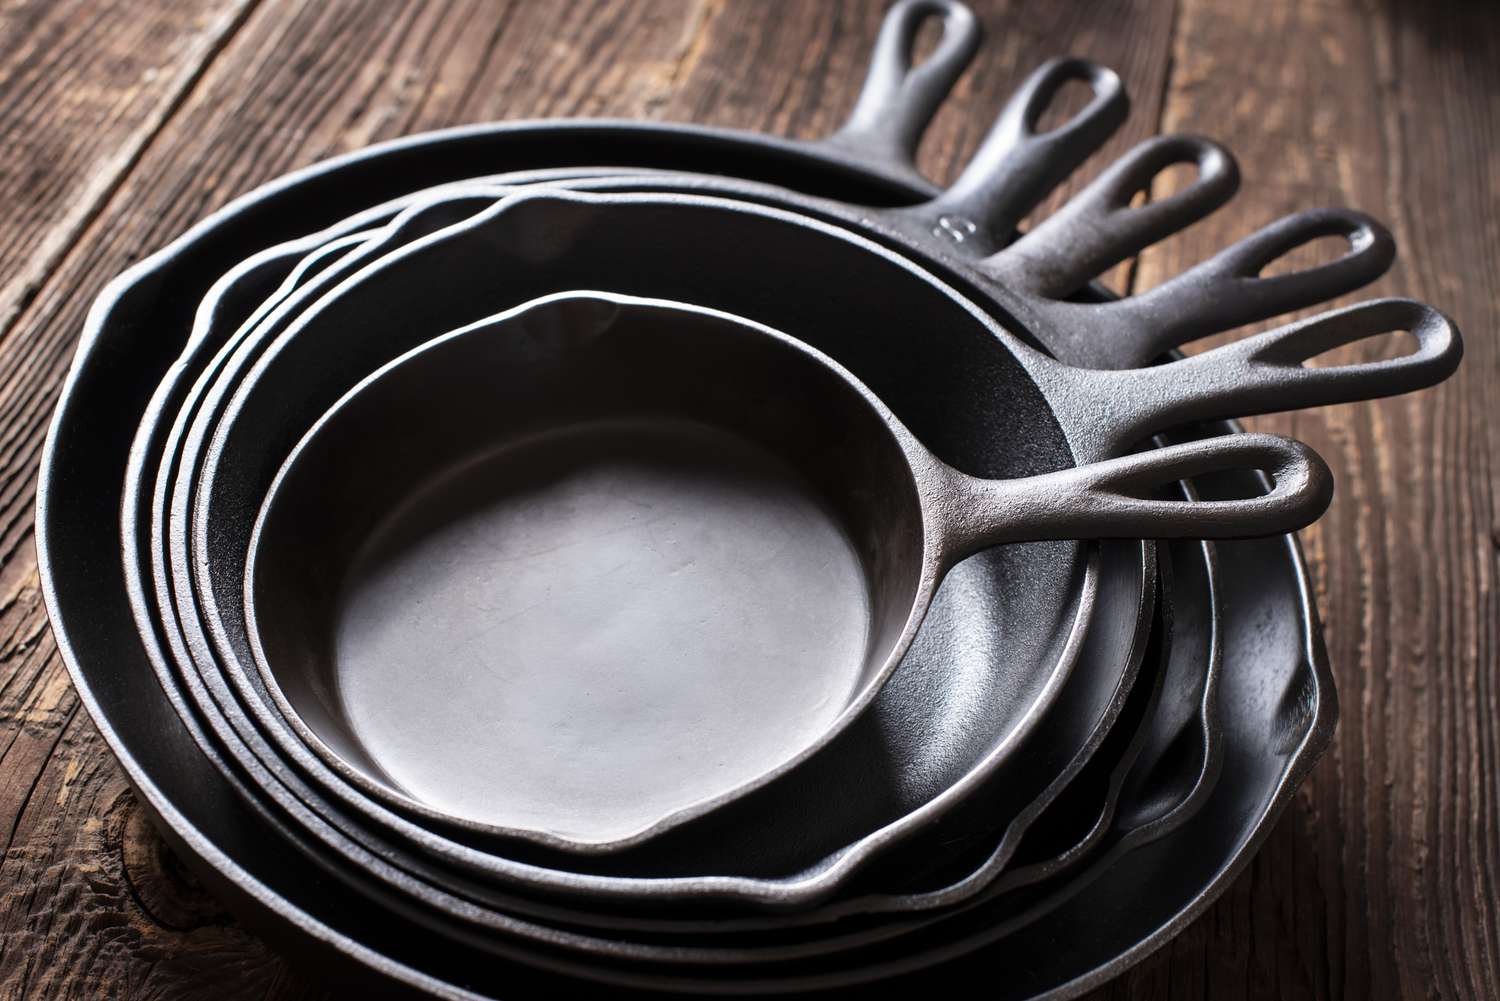
Another important consideration is the available space. Cast iron pans can be bulky and heavy, so it’s crucial to find a storage location that provides enough room to accommodate the size of your pan. You don’t want to cram it into a tight space where it might get scratched or damaged.
When determining a suitable storage location, consider the frequency of use. If you use your cast iron pan frequently, it’s best to store it within easy reach. This could be hanging it on a wall or storing it in a cabinet or drawer near your cooking area.
Alternatively, if you use your cast iron pan less often or have limited storage space, you may need to consider alternative storage solutions, such as utilizing vertical space or investing in a specific rack. These options allow you to safely store your pan while maximizing your kitchen’s storage capabilities.
By choosing the right storage location, you can ensure that your cast iron pan is both protected and easily accessible when you need it. With the proper storage spot, you can maintain the quality and longevity of your cast iron pan for years to come.
Hanging Options
Hanging your cast iron pan is not only a convenient storage solution but also a great way to display your cookware and add a rustic touch to your kitchen decor. There are several hanging options to consider, depending on the layout and design of your kitchen.
One popular method is to hang your cast iron pan from a pot rack or ceiling-mounted hooks. This allows you to keep your pans within easy reach while freeing up cabinet or drawer space. You can find pot racks in various styles and sizes to suit your kitchen’s aesthetic.
If you have a blank wall or backsplash, you can install a wall-mounted rack with hooks specifically designed for hanging cast iron pans. These racks are sturdy and can hold multiple pans, providing a convenient and organized storage solution.
An alternative hanging option is to use a towel bar or a sturdy rod mounted on the wall. Simply hang your cast iron pan using a S-hook or a specialized cast iron pan hanger, allowing you to store your pan with ease while adding a rustic charm to your kitchen.
When hanging your cast iron pan, it’s important to ensure secure attachment and proper weight distribution. Make sure the hooks or rods are strong enough to support the weight of your pan. Additionally, consider spacing the pans evenly to prevent them from bumping into each other and potentially causing damage.
Hanging your cast iron pan not only provides a practical storage solution but also showcases your cookware in an aesthetically pleasing way. It allows for easy access while adding a touch of charm to your kitchen decor.
Remember to always handle your cast iron pan with care when hanging and removing it to prevent any accidental drops or damage to the pan or your kitchen surfaces.
Stacking Alternatives
If hanging your cast iron pan is not feasible or you prefer a different storage method, there are alternative options for stacking your pans. Proper stacking ensures that your pans are protected and easily accessible whenever you need them.
One option for stacking is to use silicone or felt separators. These thin, flexible mats or disks can be placed between layers of cast iron pans to provide cushioning and prevent scratches. The separators also help to absorb any moisture and prevent rust from forming between the pans.
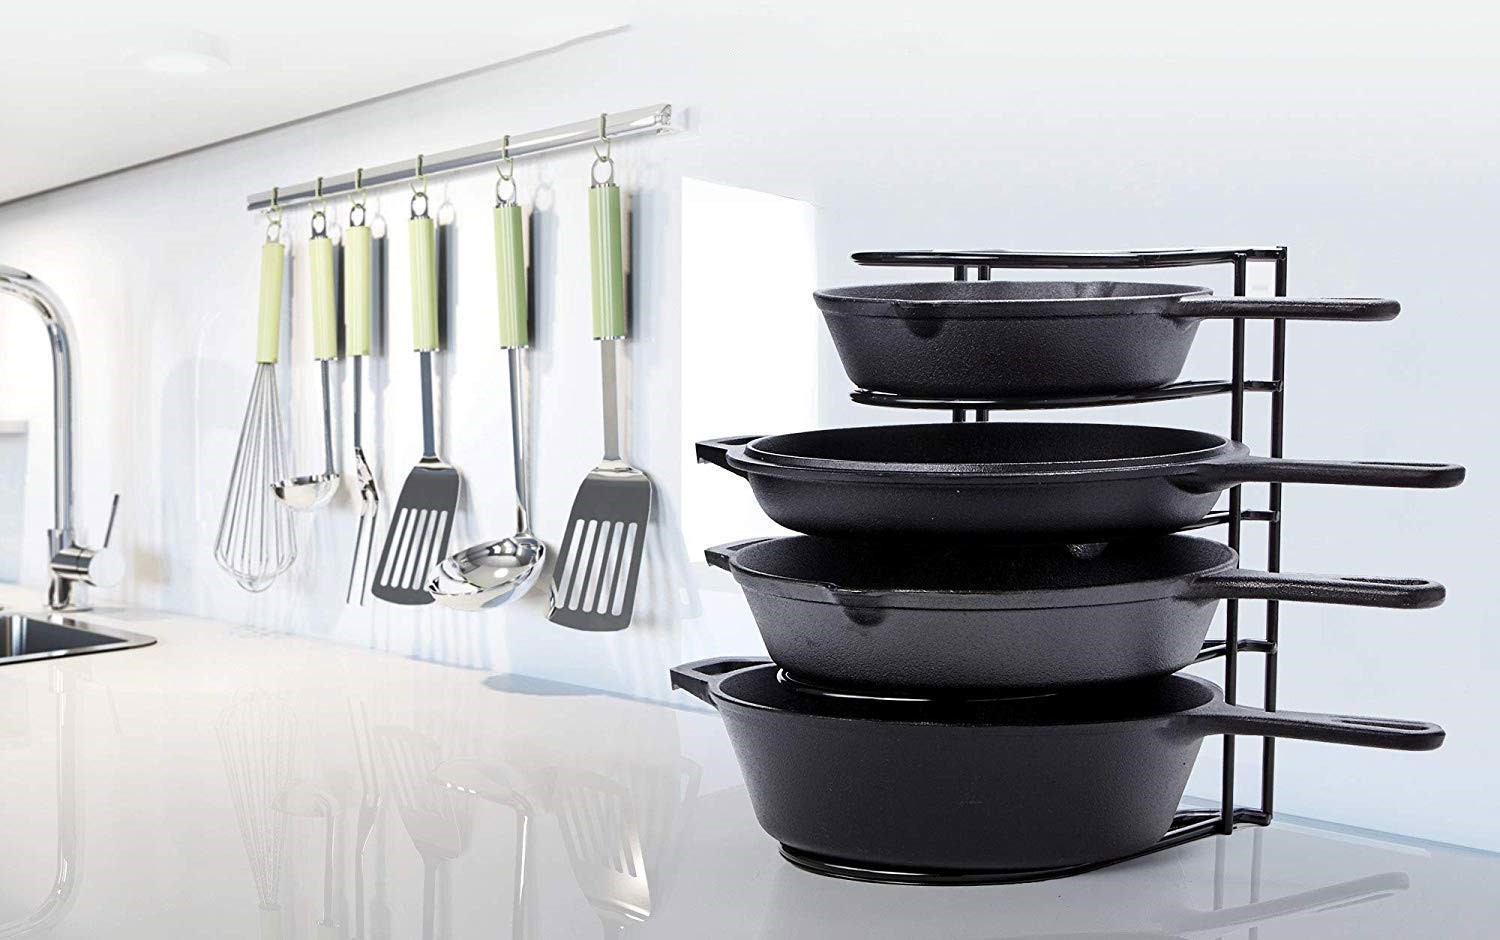
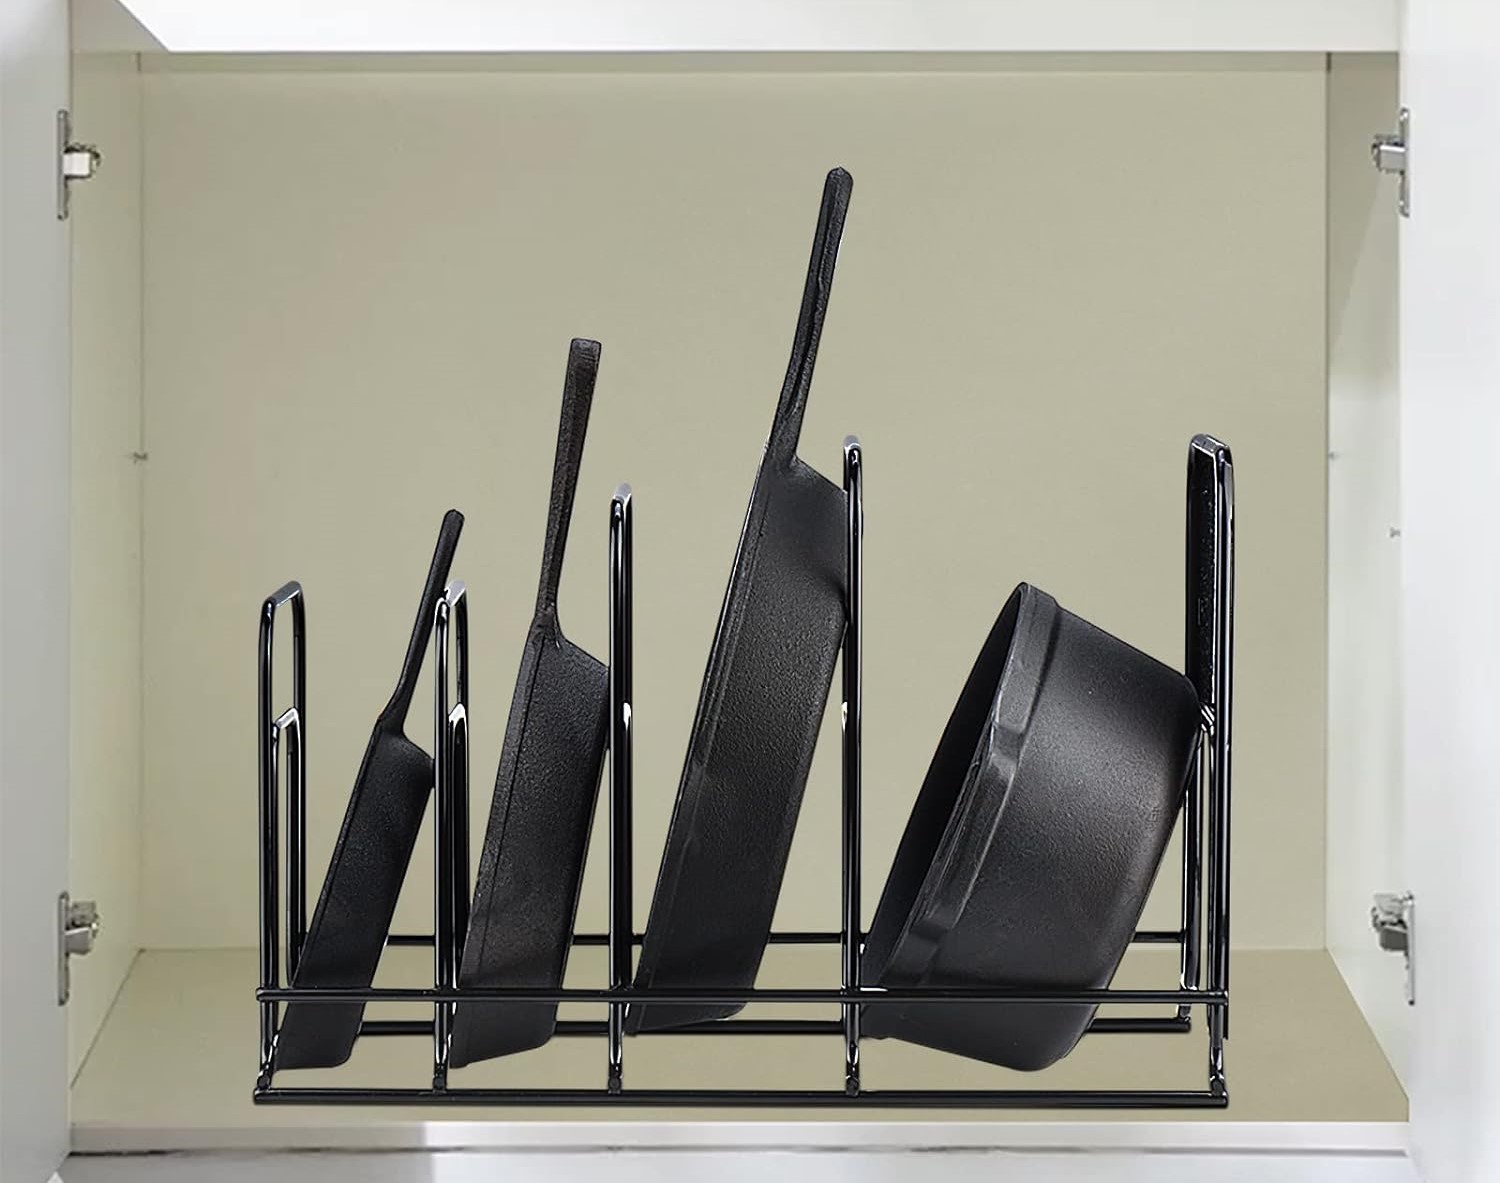
Another stacking alternative is to use stackable cast iron pan organizers. These organizers consist of separate sections or shelves that can hold multiple pans in a stacked arrangement. The organizers often come with non-slip surfaces or padding to protect the pans from scratching each other.
If you have limited storage space and need to maximize every inch, consider using a cast iron pan lid rack. These racks are designed to hold multiple lids vertically, but they can also be used to store pans. Simply stack your cast iron pans with the lids acting as dividers between each layer.
When stacking your cast iron pans, it’s important to handle them with care to prevent any accidents or damage. Place the pans gently in a stacked formation, ensuring that they are aligned properly to maintain stability. Avoid stacking too many pans, as this can increase the risk of scratches or the pans toppling over.
Additionally, it’s a good idea to periodically check and rotate the stack of pans to prevent any moisture buildup or rust from forming in between the layers. This will help ensure the longevity and quality of your cast iron pans.
By using stacking alternatives like silicone or felt separators, stackable organizers, or a lid rack, you can safely stack your cast iron pans without worrying about damage or accessibility. This allows you to save valuable cabinet space while keeping your pans organized and within reach.
Read more: How To Store Cast Iron Pans Long Term
Using Felt Pads or Cloth Separators
If you prefer to stack your cast iron pans but want to provide additional protection and cushioning between each layer, using felt pads or cloth separators is a great option. These materials act as a barrier, preventing direct metal-to-metal contact and minimizing the risk of scratches.
Felt pads are a popular choice for creating a soft surface between pans. These self-adhesive pads can be easily attached to the bottom of each pan, acting as a protective buffer. The felt absorbs any impact and prevents the pans from rubbing against each other, reducing the chances of scratches or damage to the seasoning.
When using felt pads, make sure to clean and dry the bottom surface of your cast iron pans before attaching them. This will ensure a strong bond and prevent any moisture from getting trapped between the felt and the pan, which could lead to rust.
An alternative to felt pads is using cloth separators. These can be made from old dish towels, cotton fabric, or even cut-up t-shirts. Cut pieces of cloth to the size of the bottom of your pans, and place them between each layer when stacking. The cloth provides a gentle padding and helps to absorb any moisture, preventing rust formation.
Using felt pads or cloth separators not only protects your cast iron pans from scratches but also allows for more secure and stable stacking. The extra cushioning provided by these materials ensures that your pans stay in place and reduces the risk of any accidental shifting or toppling.
It’s important to note that felt pads or cloth separators are not a substitute for proper cleaning, seasoning, and general care of your cast iron pans. Regularly inspect and clean the pads or cloth separators to remove any debris or grease buildup.
By utilizing felt pads or cloth separators, you can stack your cast iron pans with peace of mind, knowing that they are protected from direct contact and potential damage. This storage method provides both organization and an added layer of cushioning for your valuable cookware.
After cleaning and drying your cast iron pan, store it in a dry place with a light coating of oil to prevent rust. You can also place a paper towel in the pan to absorb any moisture.
Creating a Cast Iron Pan Rack
If you’re looking for a custom storage solution for your cast iron pans, creating a DIY rack can be a fun and practical option. Building your own cast iron pan rack allows you to customize the design and size to fit your kitchen space and specific storage needs.
Here are the steps to create a simple cast iron pan rack:
- Measure and choose a suitable location: Assess your available wall space or the inside of a cabinet door where you plan to install the rack. Consider the dimensions of your pans and the number of pans you want to store.
- Gather the materials: Depending on your preference and the design you envision, you’ll need a piece of wood, metal hooks or dowels, screws, a drill, a level, and a measuring tape.
- Prepare the wood: Cut the wood to your desired length and sand it down to a smooth finish. You can stain or paint the wood to match your kitchen decor or leave it natural for a rustic look.
- Attach the hooks or dowels: Measure and mark the spacing for the hooks or dowels on the wood. Pre-drill holes where you’ll attach the hooks or dowels, ensuring they are evenly spaced and level with each other.
- Secure the hooks or dowels: Screw in the hooks or insert the dowels into the pre-drilled holes, making sure they are tightly secured. Test their stability by gently pulling on them.
- Mount the rack: Determine the position for mounting the rack on the wall or the inside of the cabinet door. Use a level to ensure the rack is straight and mark the screw locations. Pre-drill holes and attach the rack to the wall using screws.
- Hang your cast iron pans: Once the rack is securely mounted, hang your cast iron pans on the hooks or dowels. Make sure to distribute the weight evenly to maintain balance and prevent the rack from tilting.
By creating a DIY cast iron pan rack, you can organize your pans while adding a personalized and functional element to your kitchen. It not only keeps your pans easily accessible but also showcases them as a charming display.
Remember to regularly inspect the rack’s stability and check for any signs of wear or damage. Make any necessary adjustments or repairs to ensure the safety of your cast iron pans and the longevity of your homemade rack.
Storing in the Oven
If you have limited cabinet or counter space in your kitchen, storing your cast iron pan in the oven can be a convenient and space-saving option. The oven provides a dry and protected environment for your pan, keeping it easily accessible for your cooking needs.
Here are some key steps to properly store your cast iron pan in the oven:
- Ensure the pan is clean and dry: Before storing your cast iron pan in the oven, make sure it is thoroughly cleaned and dried. Any residual moisture can lead to rust formation.
- Choose an appropriate oven rack: Select a rack in your oven that allows enough space for the size of your cast iron pan. It’s best to choose a rack that is not exposed to direct heat from the oven elements.
- Protect the handle: If your cast iron pan has a removable handle cover or a silicone grip, make sure to place it on the handle before storing it in the oven. This will prevent accidental burns when you use the oven for baking or cooking.
- Position the pan in the oven: Place your clean and dry cast iron pan in the chosen oven rack. Make sure it is stable and secure to prevent it from accidentally sliding or falling.
- Be mindful of temperature changes: Remember that the oven can get hot when cooking or baking. If you need to store your pan in the oven while using it for other purposes, make sure to remove the cast iron pan to avoid exposing it to high temperatures.
- Use caution when removing the pan: When you need to take the cast iron pan out of the oven for cooking or baking, use oven mitts or pot holders to safely handle the hot pan.
Storing your cast iron pan in the oven not only keeps it protected and easily accessible, but it can also help to dry out any residual moisture and prevent rust formation. Just remember to exercise caution when using the oven for other cooking purposes and to remove the pan before heating the oven.
It’s important to regularly check your cast iron pan for any signs of rust, moisture, or damage when storing it in the oven. Proper and diligent care will ensure the longevity and performance of your beloved cast iron pan.
Storing in a Drawer
If you have extra drawer space in your kitchen, storing your cast iron pan in a drawer can be a convenient and efficient storage option. Not only does it keep your pan easily accessible, but it also helps protect it from potential damage and scratches that can occur when stacked or hung.
Here are some steps to properly store your cast iron pan in a drawer:
- Ensure the pan is clean and dry: Before storing your cast iron pan in a drawer, ensure it is thoroughly cleaned and dried. Any remaining food particles or moisture can lead to rust formation.
- Prepare the drawer: Choose a deep and spacious drawer that can accommodate the size of your cast iron pan. Clear out any clutter or objects from the drawer to create ample space.
- Use a protective layer: Place a soft cloth or a silicone mat at the bottom of the drawer to provide a protective layer. This helps prevent any scratching or damage to the pan’s surface.
- Position the pan in the drawer: Carefully place your clean and dry cast iron pan in the prepared drawer. Ensure it is positioned in a way that won’t shift or slide around, potentially causing damage.
- Create dividers: If you have multiple cast iron pans that you want to store in the same drawer, consider using dividers to keep them separated and prevent any direct contact. These can be purchased dividers or even DIY options made from cardboard or foam.
- Label the drawer: To easily locate your cast iron pan, consider labeling or marking the drawer. This allows for quick and convenient access when you’re ready to cook.
Storing your cast iron pan in a drawer not only keeps it protected but also frees up cabinet or countertop space in your kitchen. However, it’s essential to regularly inspect the pan for any signs of rust, moisture, or damage, particularly if the drawer is located near a sink or exposed to moisture.
It’s also advisable to periodically remove the pan from the drawer, clean it, and allow it to breathe to prevent any moisture buildup. Proper care and maintenance will ensure that your cast iron pan stays in optimal condition for many years.
With proper storage in a drawer, your cast iron pan will be easily accessible and ready for your next cooking adventure.
Storing in a Cabinet
Storing your cast iron pan in a cabinet is a common and practical method that keeps it protected while providing easy access when you’re ready to cook. Proper storage in a cabinet ensures that your pan is kept safe from potential damage and maintains its quality over time.
Here are some steps to properly store your cast iron pan in a cabinet:
- Ensure the pan is clean and dry: Before storing your cast iron pan in a cabinet, make sure it is thoroughly cleaned and dried. Any residual moisture can lead to rust formation.
- Choose a suitable cabinet: Select a cabinet that is dry, well-ventilated, and away from any direct sources of moisture or heat. Avoid placing your cast iron pan in a cabinet above the stove, as it might be exposed to steam or grease.
- Protect the pan from scratching: Place a soft cloth or a silicone mat in the cabinet to provide a protective layer and prevent any scratching or damage to the pan’s surface. This cushioning layer helps maintain the quality of your pan.
- Position the pan in the cabinet: Carefully place your clean and dry cast iron pan in the cabinet. Ensure it is positioned in a way that won’t shift or slide around, potentially causing damage. If you have multiple cast iron pans, you might consider placing a cloth or silicone mat between them to prevent direct contact.
- Consider using a lid or cover: If you have a cast iron pan with a matching lid, place the lid on top of the pan in the cabinet. This not only helps to protect the pan but also saves space by keeping the lid and pan together.
- Organize and declutter the cabinet: To ensure easy access to your cast iron pan, keep the cabinet organized and decluttered. Remove any unnecessary items to create enough space for the pan and avoid any potential accidents when retrieving it.
- Regularly inspect and maintain: Periodically check your cast iron pan for any signs of rust, moisture, or damage. Clean and re-season your pan as needed to maintain its optimal condition.
By storing your cast iron pan in a cabinet, you can keep it protected, easily accessible, and out of sight. It’s important to maintain a dry and well-ventilated cabinet, and regularly check on your pan to ensure its longevity and performance.
With proper care and storage, your cast iron pan will continue to be a reliable and versatile cooking tool that lasts for many years to come.
Traveling with Your Cast Iron Pan
If you’re an avid camper, outdoor enthusiast, or simply want to take your cooking skills on the road, traveling with your cast iron pan can be a great way to enjoy home-cooked meals wherever you go. However, it’s important to take proper precautions to ensure the safety and protection of your pan during transit.
Here are some tips for traveling with your cast iron pan:
- Ensure the pan is clean and dry: Before packing your cast iron pan for travel, make sure it is thoroughly cleaned and dried. Any residual moisture can lead to rust formation, especially when the pan is exposed to varying temperatures and conditions during transit.
- Protect the pan from scratching: To prevent the pan’s surface from getting scratched or damaged during travel, place a soft cloth or paper towel between the pan and any other items packed alongside it. This provides a protective barrier and prevents direct metal-to-metal contact.
- Secure the pan: Use a sturdy bag or container to store your cast iron pan during travel. Make sure the bag or container is large enough to accommodate the pan without squeezing it tightly, as this can cause potential damage. Consider using a padded carrying case specifically designed for cast iron cookware.
- Avoid stacking heavy items on top: When packing your vehicle or backpack, avoid placing heavy items on top of your cast iron pan. The weight can cause the pan to get crushed or deformed, compromising its shape and functionality.
- Consider using a pan protector: If you’re concerned about any potential jostling or movement during travel, consider using a pan protector. These padded inserts fit between the pan and the bag or container, offering additional cushioning and stability.
- Pack seasoning and cleaning supplies: To maintain the quality of your cast iron pan during your travels, remember to pack any necessary seasoning and cleaning supplies. This includes a small container of oil, salt for cleaning, and a cleaning brush or sponge.
- Store in a well-ventilated area: If you’re traveling for an extended period or storing your pan in a vehicle, make sure to store it in a well-ventilated area. This helps to prevent any moisture buildup and potential rust formation.
- Inspect and re-season if necessary: Once you’ve reached your destination, inspect your cast iron pan for any signs of damage or rust. Clean and re-season the pan if needed before using it for cooking.
By following these tips, you can safely travel with your cast iron pan and enjoy delicious meals no matter where your adventures take you. Taking care of your cast iron pan during travel ensures that it will continue to be a reliable and cherished cooking tool for years to come.
Conclusion
Proper storage of your cast iron pan is essential for maintaining its longevity, preventing damage, and ensuring its optimal cooking performance. Whether you choose to hang, stack, store in the oven, cabinet, or travel with your cast iron pan, there are various options to suit your needs and available space.
Before storing your cast iron pan, remember to clean it thoroughly and season it to maintain its non-stick surface and prevent rust. Choosing the right storage location is crucial, ensuring a dry, well-ventilated area away from moisture and temperature fluctuations.
Options such as hanging your cast iron pan on a rack or utilizing stackable organizers provide convenient accessibility while adding a decorative touch to your kitchen. Using felt pads or cloth separators offers an additional layer of protection when stacking pans, reducing the risk of scratches.
If you have limited space, storing your cast iron pan in the oven, drawer, or cabinet can free up valuable countertop or cabinet space while keeping your pan easily accessible. Just remember to ensure proper ventilation, protect the pan from moisture or scratches, and regularly inspect and maintain its condition.
For those who love to cook on the go, traveling with your cast iron pan allows you to enjoy home-cooked meals anywhere. Take precautions by packing your pan securely, avoiding impacts or stacking heavy items on top, and storing it in a well-ventilated area to prevent moisture buildup.
By following these storage guidelines and taking proper care of your cast iron pan, you can ensure its durability, non-stick properties, and overall performance. A well-maintained cast iron pan will continue to be a reliable and versatile cooking companion in your kitchen for years to come.
So whether you’re a seasoned cast iron pan enthusiast or new to the world of these timeless kitchen treasures, proper storage is key to maintaining their beauty, functionality, and the delicious meals they help you create.
Frequently Asked Questions about How To Store Cast Iron Pan
Was this page helpful?
At Storables.com, we guarantee accurate and reliable information. Our content, validated by Expert Board Contributors, is crafted following stringent Editorial Policies. We're committed to providing you with well-researched, expert-backed insights for all your informational needs.


0 thoughts on “How To Store Cast Iron Pan”