
Articles
How To Store Craft Paint
Modified: October 20, 2024
Learn the best techniques for organizing, storing, and preserving your craft paint collection with these helpful articles. Streamline your creative process today!
(Many of the links in this article redirect to a specific reviewed product. Your purchase of these products through affiliate links helps to generate commission for Storables.com, at no extra cost. Learn more)
Introduction
When it comes to crafting, having a well-organized and efficient storage system for your materials is essential. This is especially true for craft paint, as keeping it in optimal condition ensures that your projects will turn out beautifully every time. But with so many different types and colors of craft paint available, it can be overwhelming to figure out the best way to store it all.
In this article, we will guide you through the process of storing craft paint effectively, from choosing the right storage solution to organizing and labeling your paint bottles. We will also provide tips for creating a suitable storage area and ensuring the longevity of your paint. With these guidelines, you’ll be able to keep your craft paint neatly arranged and easily accessible, so you can focus on unleashing your creativity.
So, let’s dive in and discover the best practices for storing craft paint!
Key Takeaways:
- Organize craft paint by type or color to enhance accessibility and streamline your creative process. Labeling and sealing paint containers ensures longevity and easy identification of colors for your projects.
- Choose suitable storage solutions and maintain proper environmental conditions to preserve the quality and usability of your craft paint collection. Implement long-term storage tips to extend the shelf life of your paints.
Read more: How To Store Framed Paintings
Choosing the Right Storage Solution
Before you begin organizing and storing your craft paint, it’s important to select the right storage solution that suits your needs. There are various options available, each with its own advantages and considerations. Here are a few popular and effective storage solutions for craft paint:
- Plastic Storage Containers: Plastic containers with multiple compartments are a popular choice for storing craft paint. These containers are available in different sizes and can be easily stacked or stored on shelves. They allow you to separate paint colors or types and provide easy visibility of your collection.
- Drawer Units: Drawer units with shallow drawers offer an efficient way to store craft paint. These units are ideal for smaller paint bottles or tubes and can be placed on a desk or shelf for easy access. The drawers are also great for categorizing your paint by color or type.
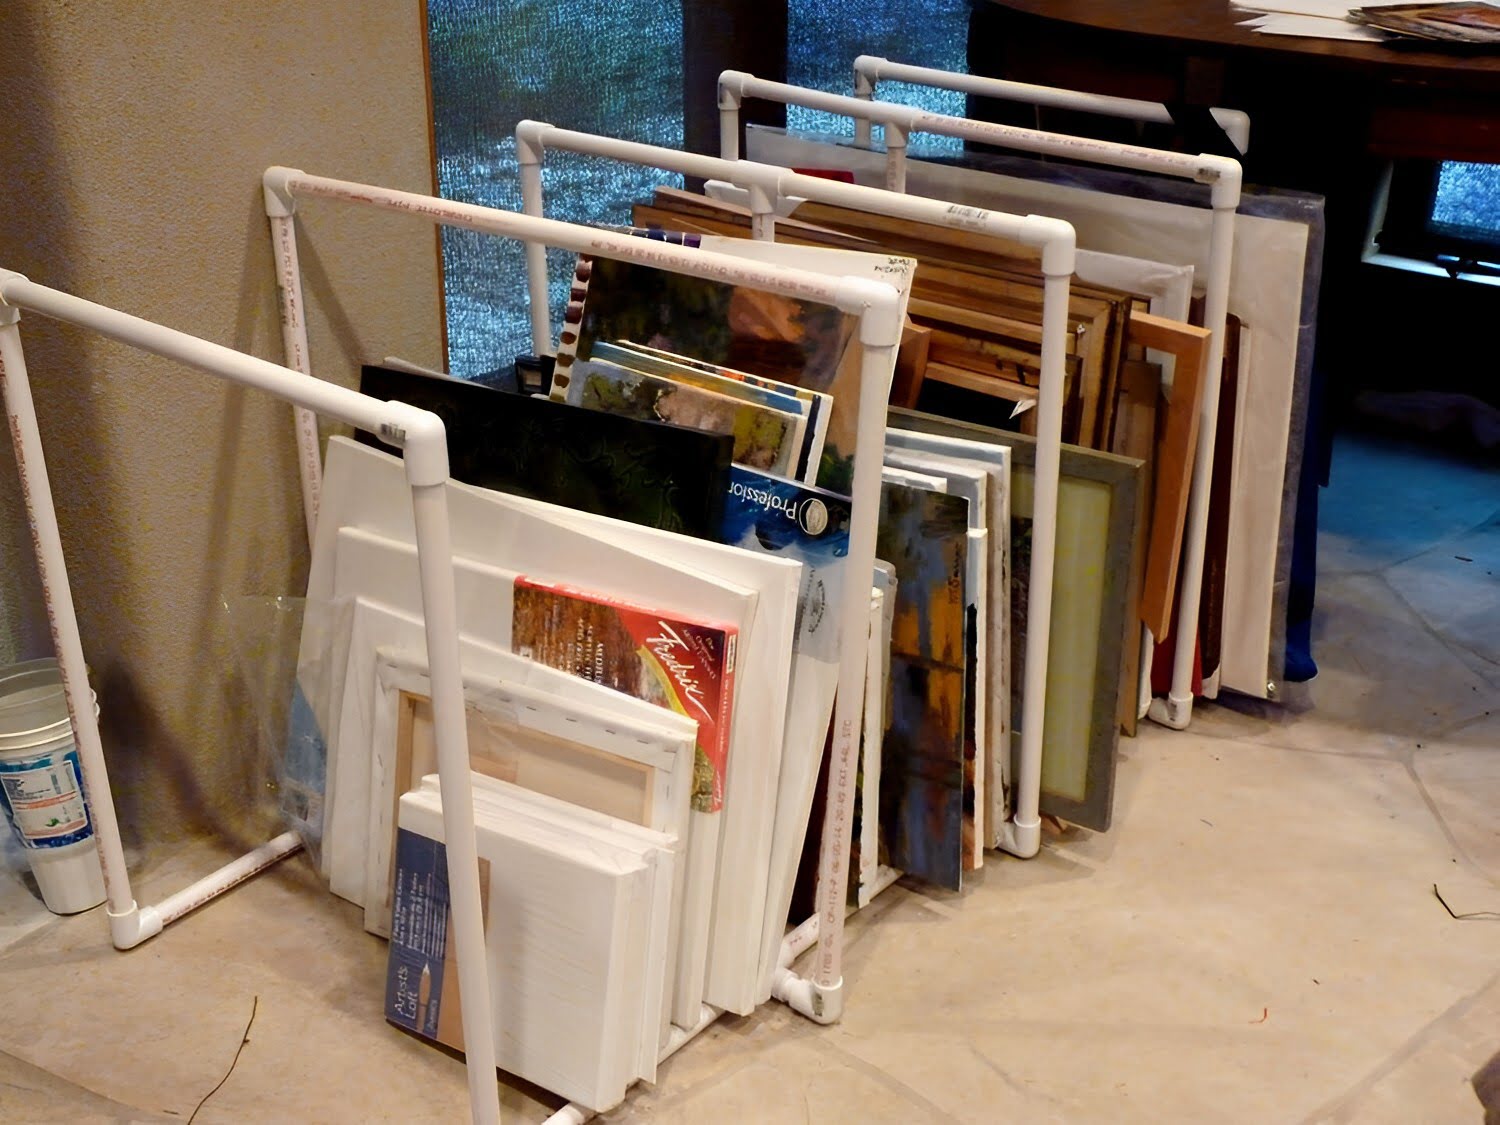
- Wall-Mounted Racks: If you have limited space, consider utilizing wall-mounted racks designed specifically for storing craft paint. These racks can be easily installed on a wall, allowing you to organize your paint bottles vertically and save valuable workspace.
- Mobile Carts or Trolleys: Mobile carts or trolleys with shelves or drawers offer flexibility in storing and accessing your craft paint. These carts can be moved around your workspace, providing convenience and the option to store other craft supplies alongside your paint.
When choosing a storage solution, consider factors such as the size of your craft paint collection, the available space in your crafting area, and the ease of access and visibility. It’s also important to ensure that the storage solution provides adequate protection against light, dust, and moisture to maintain the quality of your paint.
Additionally, consider your personal preferences and workflow. Some crafters prefer having their paint displayed and easily accessible, while others prefer a more organized and tucked-away storage system. Select a solution that aligns with your storage needs and enhances your creative process.
Now that you have chosen the right storage solution, let’s move on to preparing the storage area to ensure your craft paint remains in optimal condition.
Preparing the Storage Area
Before you start organizing your craft paint, it’s important to make sure that your storage area is clean, dry, and suitable for long-term paint storage. Follow these steps to prepare your storage area:
- Clean the Area: Begin by clearing out any clutter or debris from the storage area. Wipe down shelves, drawers, or any other surfaces that will be used to store your craft paint. A clean and dust-free environment will help maintain the quality of your paint.
- Control the Environment: Ideally, your storage area for craft paint should be in a temperature-controlled space. Extreme temperatures and humidity can negatively impact the consistency and quality of the paint. Aim to keep the storage area at a moderate temperature, avoiding areas that experience excessive heat or cold.
- Protect from Light: Exposure to direct sunlight or intense artificial light can cause paint colors to fade over time. Ensure that your storage area is away from windows or other sources of direct light. If necessary, consider using opaque containers or covering the storage area with a light-blocking cloth.
- Consider Ventilation: Good air circulation is important to prevent moisture buildup and the development of mold or mildew. If your storage area is in a closed space, ensure there is some ventilation to allow for air movement. However, avoid storing craft paint in areas that are prone to dampness or high humidity.
By preparing the storage area properly, you are creating an environment that will help preserve the quality of your craft paint for a longer period of time. Once the storage area is ready, you can proceed to organize your craft paint based on type or color.
Now, let’s explore the best practices for organizing your craft paint collection.
Organizing Craft Paint by Type or Color
One of the keys to efficient and easily accessible craft paint storage is organizing your collection in a way that makes sense to you. One popular method is organizing by type or color. Here’s how you can implement this organizational system:
- Organizing by Type: If you use different types of craft paint, such as acrylic, watercolor, or spray paint, consider grouping them together. This will make it easier to find the type of paint you need for a particular project. Separate them into designated sections within your storage solution or use different containers for each type.
- Organizing by Color: Another common approach is organizing craft paint by color. This is particularly helpful if you often work with specific color palettes or enjoy creating art with a specific color scheme. Arrange your paint bottles or tubes by color, either within individual compartments or in separate sections of your storage solution.
When organizing by color, you may choose to arrange them in a gradient pattern, from light to dark, or group similar colors together. Some crafters even take it a step further by using color swatches or paint chips as labels for each section, making it visually appealing and easier to find the desired color quickly.
Ultimately, the choice of organizing method depends on your personal preferences and creative process. You can even combine both methods by organizing first by type and then within each type, arrange the colors together. Experiment with different organization strategies until you find the one that works best for you.
Once your craft paint is organized, it’s important to label the paint bottles or containers to quickly identify the colors and types. This will save you time and prevent any mix-ups in the future.
Now, let’s move on to the next step: labeling the paint bottles or containers.
Labeling the Paint Bottles or Containers
Labeling your craft paint bottles or containers is a crucial step in maintaining an organized and easily accessible storage system. Not only does it save you time when searching for specific colors, but it also helps prevent any confusion or mix-ups. Here are some tips for effectively labeling your paint bottles or containers:
- Use Clear and Readable Labels: Choose labels that are easy to read and transparent, allowing you to see the paint color through the label. This ensures that you can quickly identify the desired color without having to remove or open the container.
- Include Essential Information: When creating the labels, make sure to include essential information such as the color name, brand, and type of paint. This information will help you easily locate the specific paint you need for your projects.
- Categorize Labels: Consider categorizing your labels based on different groups or color families. For example, you can have separate labels for primary colors, metallics, or pastels. This further enhances the organization of your craft paint collection.
- Color Swatches: In addition to label text, consider including color swatches on the labels. This visual reference will allow you to quickly identify the exact shade of the paint without having to open the container.
- Label Placement: Be consistent in where you place the labels on the paint bottles or containers. You can choose to place them on the cap, side, or bottom, depending on your storage solution and personal preference.
There are several ways to create labels for your craft paint. You can use pre-made labels or printable labels, or you can even create your own custom labels using adhesive paper or sticker sheets. Get creative with your labeling, and don’t forget to update labels if you rearrange or add new colors to your collection.
By labeling your paint bottles or containers, you can easily locate specific colors, maintain an organized storage system, and streamline your crafting process. With your craft paint organized and labeled, it’s time to look at ways to ensure the longevity of your paint.
Now, let’s discuss the proper ways to seal and close paint bottles or containers for storage.
Read more: How To Store A Painting
Properly Sealing and Closing Paint Bottles or Containers
Properly sealing and closing your craft paint bottles or containers is essential for maintaining the quality and longevity of your paint. Ensuring that they are tightly sealed will prevent air from entering and causing the paint to dry out or thicken. Follow these tips to properly seal and close your paint containers:
- Check for Leaks: Before storing your craft paint, check each bottle or container for any leaks or cracks. Discard any damaged containers as they may compromise the quality of the paint and potentially create a mess in your storage area.
- Secure Bottle Caps: Make sure to tightly secure the caps or lids of your paint bottles. This will create a tight seal and prevent air from entering. Check that each bottle is properly closed before storing it.
- Use Plastic Wrap: For containers without secure caps or bottles with more volatile paints, you can use plastic wrap as an extra layer of protection. Place the plastic wrap over the opening of the container before closing it with the cap or lid. This will provide an additional barrier against air exposure.
- Use Rubber Bands: If you find that your paint bottle caps or containers are not sealing tightly enough, you can use rubber bands to create a tighter seal. Wrap a rubber band around the bottle neck or container lid to provide extra security.
- Store Upside Down: For paint bottles with flip-top or squeeze lids, consider storing them upside down. This helps create a tighter seal and prevents air from entering the container, keeping the paint fresh and ready to use.
Properly sealing and closing your paint bottles or containers will not only preserve the quality of the paint but also prevent any accidental spillage or leakage. By taking these steps, you can ensure that your craft paint remains in optimal condition for future projects.
Now that we have covered sealing and closing the paint containers, let’s explore the best practices for storing craft paint in a suitable location.
Continue to ‘Storing Paint in a Cool, Dry Location’.
Storing Paint in a Cool, Dry Location
Choosing the right location for storing your craft paint is crucial to maintain its quality and ensure its longevity. It’s important to store your paint in a cool and dry area to prevent any damage or deterioration. Here are some key considerations when selecting a storage location:
- Avoid Temperature Extremes: Extreme temperatures can have a negative impact on your paint. High temperatures can cause the paint to dry out or separate, while cold temperatures can affect its consistency. Avoid storing your paint in areas that are prone to temperature fluctuations or excessively hot or cold environments.
- Control Humidity: Excessive humidity can lead to mold and mildew growth, which can ruin your paint. It’s important to store your craft paint in a location with low humidity levels. Avoid basements, attics, or areas near sources of water, such as bathrooms or kitchens. A dehumidifier can also be helpful in controlling moisture levels if necessary.
- Keep Away from Heat Sources: Store your paint away from heat sources such as radiators, heaters, or direct sunlight. Heat can accelerate the drying process, alter the consistency of the paint, or even cause the containers to expand and leak.
- Consider Shelving or Storage Units: Utilize shelves or storage units to keep your paint organized and off the ground. This will help protect your paint from potential water damage in case of leaks or flooding and prevent it from being exposed to extreme temperatures or humidity levels.
- Store in a Dedicated Cabinet or Closet: If possible, designate a specific cabinet or closet for your craft paint. This can provide added protection and control over the storage environment. Ensure that the cabinet or closet is well-ventilated and free from any moisture or temperature fluctuations.
By storing your craft paint in a cool and dry location, you can preserve its quality and ensure that it remains usable for a longer period of time. Proper storage conditions play a crucial role in maintaining the consistency, color, and overall performance of your paint.
In the next section, we will discuss ways to avoid direct sunlight and extreme temperatures, which can have a detrimental effect on your craft paint.
Continue to ‘Avoiding Direct Sunlight and Extreme Temperatures’.
Store craft paint in a cool, dry place away from direct sunlight and extreme temperatures. Keep the lids tightly closed to prevent drying out and store them upright to avoid leakage.
Avoiding Direct Sunlight and Extreme Temperatures
Protecting your craft paint from direct sunlight and extreme temperatures is essential to preserve its quality and prolong its shelf life. Both sunlight and extreme temperatures can have detrimental effects on the consistency and color of the paint. Here are some tips to help you avoid these potential hazards:
- Avoid Sunlight Exposure: Direct sunlight can cause the pigments in your paint to fade or change over time. To prevent this, store your craft paint in an area away from windows or any other sources of direct sunlight. If possible, consider using opaque containers or storage units to provide an additional layer of protection against sunlight.
- Protect from UV Radiation: UV radiation can also have a negative impact on your paint. If storing your paint in clear containers, make sure they are UV-resistant or consider using tinted containers to block out UV rays and protect the paint pigments from deterioration.
- Avoid Extreme Heat: High temperatures can cause your craft paint to dry out, thicken, or even separate. Avoid storing your paint in areas that are exposed to excessive heat, such as near heaters or in hot attics. Instead, opt for a cool and well-ventilated storage location.
- Prevent Freezing: Extreme cold temperatures can also affect the consistency and performance of your paint. If you live in an area with freezing temperatures, ensure that your paint is stored in a location that remains above freezing point. If necessary, consider using insulated containers or moving your paint to a more temperature-regulated area during the colder months.
By taking precautions to avoid direct sunlight and extreme temperatures, you can maintain the integrity of your craft paint and ensure that it remains in optimal condition for your projects. Proper storage conditions play a vital role in preserving the color vibrancy and consistency of your paint.
Now that you are aware of the best practices for avoiding sunlight and extreme temperatures, let’s explore different storage options such as shelving or storage units for your craft paint.
Continue to ‘Using Shelving or Storage Units for Craft Paint’.
Using Shelving or Storage Units for Craft Paint
Shelving or storage units are excellent options for organizing and storing your craft paint collection. They can help maximize space, provide easy access to your paint, and keep everything neatly organized. Here are some tips for using shelving or storage units effectively:
- Choose the Right Shelving or Storage Unit: Select shelving or storage units that are sturdy, durable, and suitable for your specific storage needs. Consider the size and weight of your craft paint collection and choose a unit that can accommodate your paint bottles or containers comfortably.
- Adjustable Shelves: Look for shelving units with adjustable shelves. This will allow you to adapt the spacing between shelves based on the height of your paint bottles or containers. It provides flexibility and ensures efficient use of the available space.
- Categorize by Type or Color: Organize your craft paint on the shelves by grouping them based on type or color. This will make it easier to find specific paints when working on projects. You can use separate shelves or designate specific sections for different paint categories.
- Utilize Storage Containers or Bins: Consider using storage containers or bins to further organize your craft paint within the shelving unit. Use clear containers to easily see and access your paint, or label the containers for quick identification. This will help prevent paint bottles from falling over and create a visually pleasing and organized display.
- Optimize Vertical Space: Make the most of the vertical space by adding additional shelves or utilizing stackable storage units. This will allow you to store more paint while keeping the area neat and orderly.
- Consider Wall-Mounted Racks: If you have limited floor space, wall-mounted racks can be an excellent solution. These racks can be easily installed on the wall, providing vertical storage for your craft paint bottles. They not only save space but also create a decorative and visually appealing display.
Using shelving or storage units for your craft paint not only helps keep your paint collection organized but also provides a dedicated space for your materials, making it easier to find the paint you need for your projects. With an efficient storage setup, you can focus more on unleashing your creativity.
In the next sections, we will discuss specific storage methods for craft paint tubes or jars, as well as storing craft paint brushes and tools. Let’s dive in!
Continue to ‘Storing Craft Paint Tubes or Jars’.
Read more: How To Store Gouache Paint
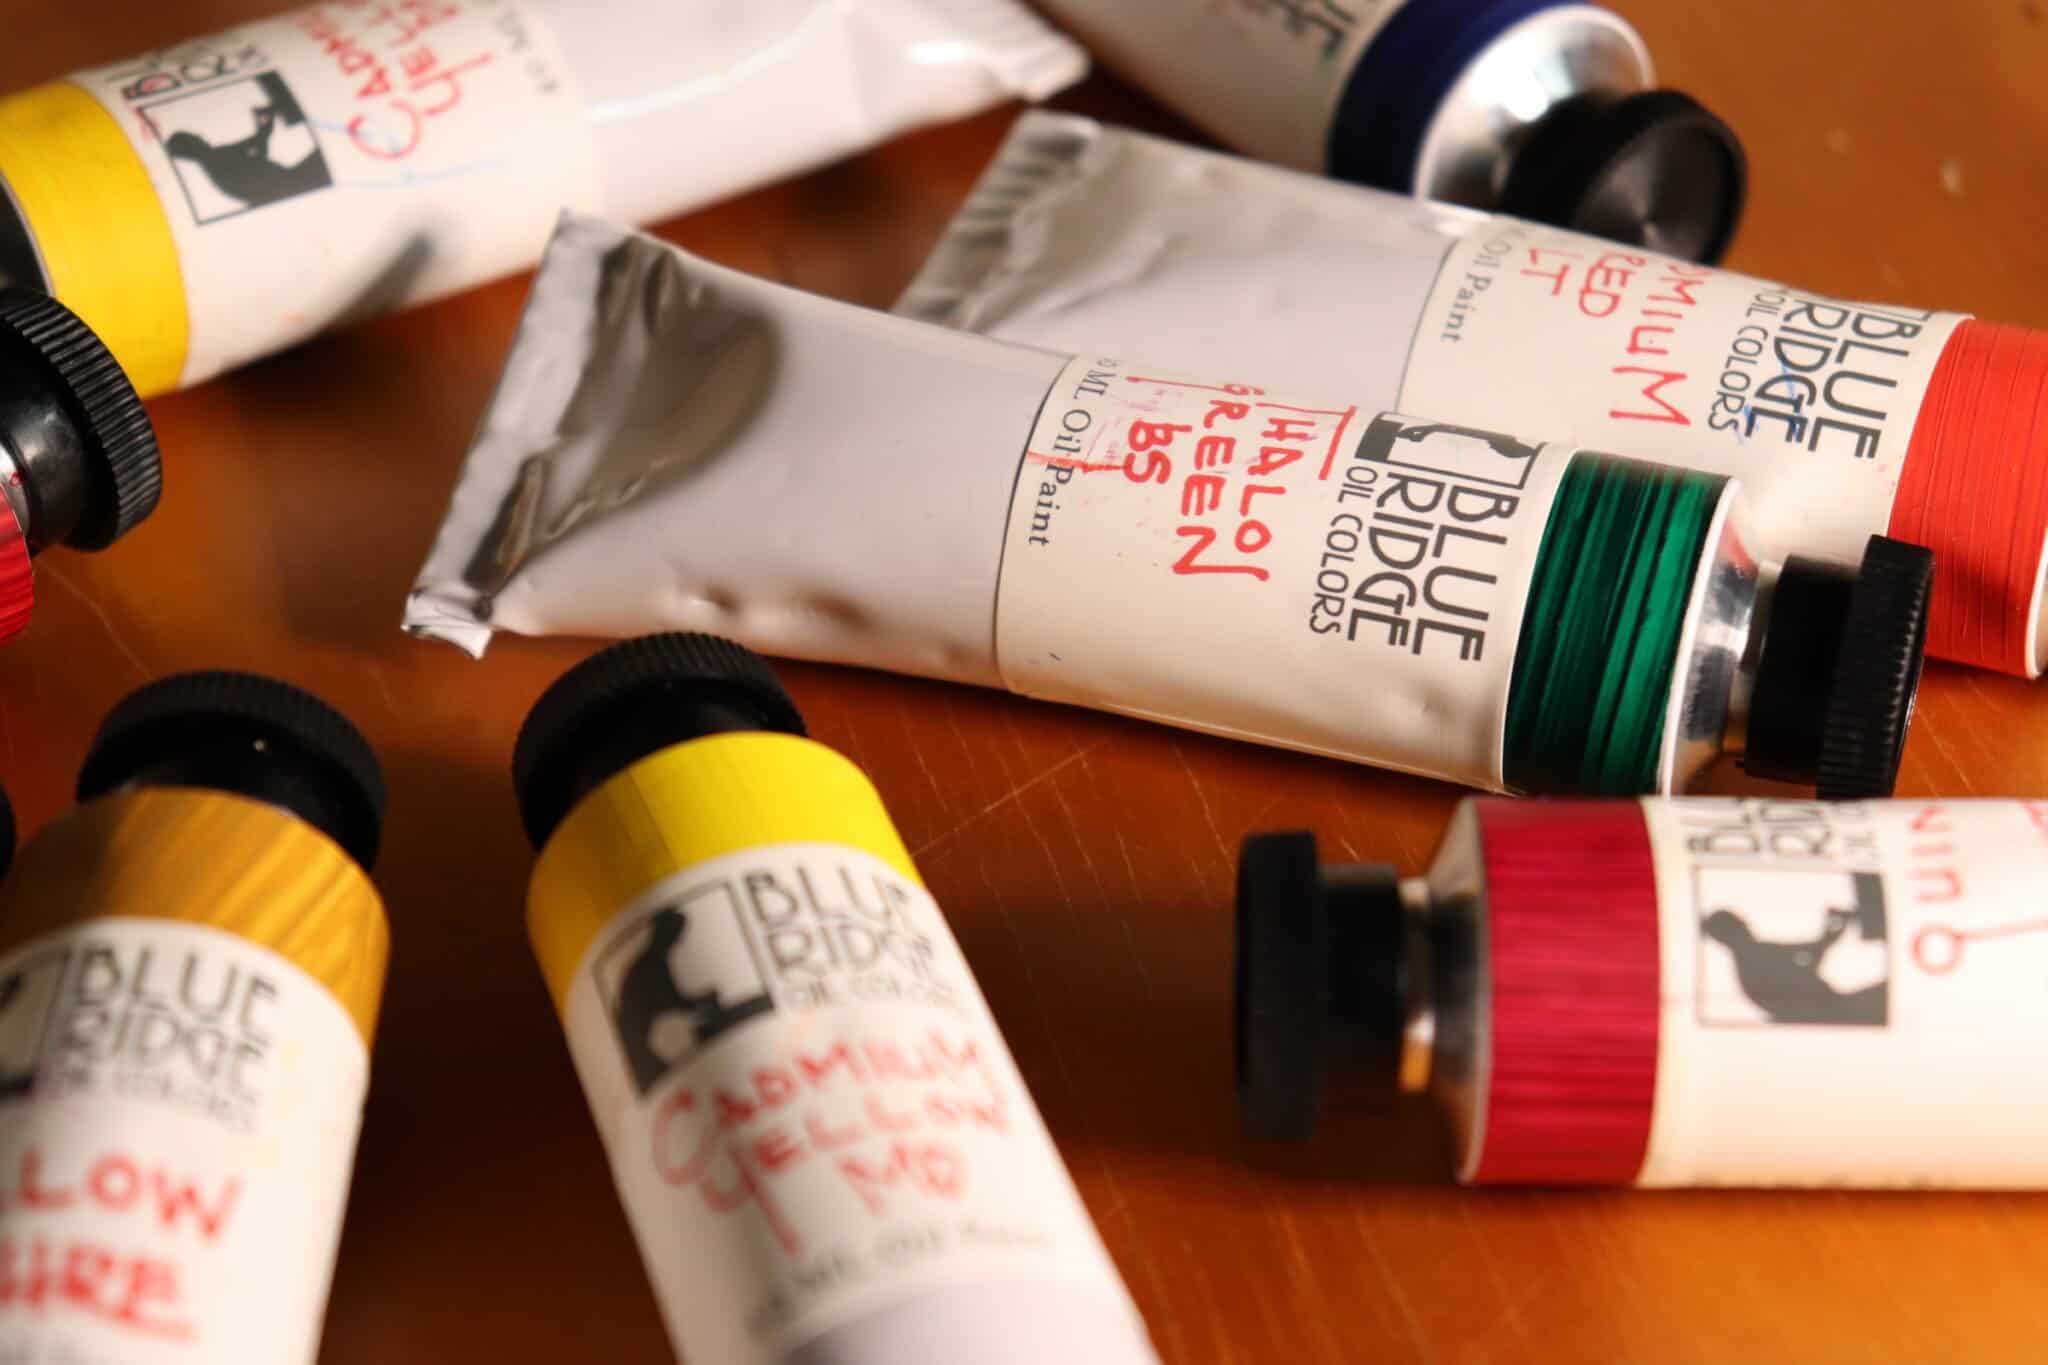
Storing Craft Paint Tubes or Jars
When it comes to storing craft paint tubes or jars, it’s important to keep them organized and easily accessible. Proper storage not only helps prolong the shelf life of the paint but also ensures that you can quickly find the colors you need for your projects. Here are some tips for storing craft paint tubes or jars:
- Stand or Rack Storage: Consider using a standing or rack storage system specifically designed for paint tubes. These storage options have individual slots or compartments that can hold the tubes upright, making it easy to see and access each color. This also helps prevent the tubes from rolling around or becoming disorganized.
- Drawer Storage: Utilize shallow drawers to store your craft paint tubes or jars. This allows you to lay them flat, making it easy to flip through and locate the desired color. Consider using dividers or organizers within the drawers to keep the tubes separated by brand or color family.
- Label the Tubes: To quickly identify the colors of your craft paint tubes, consider labeling them. You can use small adhesive labels or color-coded stickers to indicate the color and shade of each tube. This saves time and allows for easy color selection, especially when you have a large collection.
- Group by Type or Brand: If you use different types or brands of paint tubes, consider grouping them together. This makes it easier to find the type or brand of paint you need for a specific project. Separate them into different sections or use separate storage containers or drawers for each type or brand.
- Store in a Cool Location: Craft paint tubes or jars are best stored in a cool and dry location to prevent the paint from becoming too runny or thick. Avoid exposing them to extreme temperatures or direct sunlight, as these can impact the consistency and quality of the paint.
By following these storage tips, you can keep your craft paint tubes or jars organized, protected, and readily available for all your artistic endeavors. With a well-organized system in place, you can focus on your creativity and seamlessly incorporate various colors and textures into your projects.
Next, let’s discuss how to store your craft paint brushes and tools to keep them in good condition and extend their lifespan.
Continue to ‘Storing Craft Paint Brushes and Tools’.
Storing Craft Paint Brushes and Tools
Proper storage of your craft paint brushes and tools is essential to ensure their longevity and maintain their quality. Storing them correctly not only protects the bristles and tips but also allows for easy access when you’re ready to create. Here are some tips for storing your craft paint brushes and tools:
- Clean Brushes Before Storage: Before storing your paint brushes, make sure to clean them properly. Rinse them with warm water and a mild soap or brush cleaner to remove any paint residue. Gently reshape the bristles with your fingers and let them air dry completely before storing.
- Organize Brushes by Type and Size: Sort your paint brushes by type and size to make it easier to find the brush you need for each project. You can store them in separate compartments or use designated brush holders with labeled sections for each brush type and size.
- Protect the Brush Tips: It’s important to protect the bristles of your paint brushes to maintain their shape and prevent damage. Store them upright or lay them flat, making sure the bristles are not squished or bent. Avoid stacking brushes on top of each other, as this can cause the bristles to deform.
- Brush Roll or Case: Invest in a brush roll or case for added protection when storing and transporting your paint brushes. These are designed to hold brushes securely and prevent them from getting damaged or tangled. Some brush rolls even come with separate pockets or slots for each brush, allowing for easy organization and retrieval.
- Separate Storage for Tools: Keep your craft paint tools organized and separate from your brushes. Consider using a small toolbox, drawer, or caddy with compartments to store tools such as palette knives, blending tools, or sponges. This ensures that your tools are easily accessible and prevents them from mixing with your brushes.
- Label or Color Code: If you have a large collection of brushes or multiple sets, labeling or color coding them can help you quickly identify the type, size, or purpose of each brush. You can use small adhesive labels or colored bands to differentiate between different brush sets or specific brush types.
By implementing these storage tips, you can ensure that your craft paint brushes and tools stay in excellent condition and are always within reach when you’re ready to create your next masterpiece. Proper storage not only protects your brushes and tools but also saves you time and frustration when searching for the right tool for your project.
Now you have learned how to store your craft paint brushes and tools effectively. In the next section, we will provide some tips for long-term paint storage to help you maintain the quality of your paint over time.
Continue to ‘Tips for Long-Term Paint Storage’.
Tips for Long-Term Paint Storage
Proper long-term storage of your craft paint is essential for maintaining its quality and usability over time. Whether you have a large collection or want to preserve special paints for future projects, here are some tips to ensure your paint remains in optimal condition for long-term storage:
- Inspect and Sort: Regularly inspect your paint collection and sort through the bottles or containers to check for any signs of aging or deterioration. Discard any paints that have dried out, have an off smell, or appear separated or clumpy.
- Seal and Secure: Make sure all paint containers are properly sealed and closed to prevent air exposure. Consider using plastic wrap or rubber bands for additional protection if needed.
- Store in a Dark and Temperature-Stable Area: Choose a storage location away from direct sunlight or sources of intense light. Also, aim for a temperature-stable area with moderate humidity levels to prevent any adverse effects on the paint.
- Rotate Stock: When storing multiple containers of the same color or type of paint, use the oldest ones first. This helps ensure that your paint collection remains fresh and avoids the risk of having expired or unusable paint.
- Keep Small Quantities: If you have small amounts of paint left in larger containers, transfer them to smaller, airtight containers. This minimizes air exposure and helps prevent the paint from drying out or thickening.
- Maintain Inventory: Keep a record or inventory of your paint collection to easily track the colors, quantities, and expiration dates. This helps you stay organized and ensures you use the paint before it expires.
- Minimize Movement: Avoid excessive movement or shaking of your paint containers, as this can introduce air bubbles and affect the consistency of the paint. Store them in a stable position to prevent unwanted agitation.
- Avoid Contamination: To protect your paint from any potential contamination, avoid using brushes or tools that have been previously used with other mediums or non-compatible paints. Clean your brushes thoroughly before using them with your stored paint.
By following these tips, you can extend the shelf life and maintain the quality of your craft paint for long-term storage. Taking the necessary precautions ensures that your paint remains vibrant and usable when you’re ready to embark on your creative projects.
Now that we have covered tips for long-term paint storage, let’s recap what we have discussed and conclude our article on storing craft paint effectively.
Conclusion
Having a well-organized and efficient storage system for your craft paint is essential for any crafter. By implementing the tips and techniques discussed in this article, you can ensure that your paint collection remains in optimal condition and easily accessible for all your creative projects.
We started by emphasizing the importance of choosing the right storage solution based on your needs, such as plastic storage containers, drawer units, wall-mounted racks, or mobile carts. Preparing the storage area by ensuring cleanliness, controlling the environment, and protecting from light and humidity is also crucial.
Organizing your craft paint by type or color improves accessibility and helps you find the specific paint you need quickly. Labeling the paint bottles or containers with clear and readable labels, including essential information like color name and type, further enhances organization and efficiency.
Properly sealing and closing your paint bottles or containers prevents air exposure and maintains the quality of the paint. Storing your craft paint in a cool, dry location away from direct sunlight and extreme temperatures is vital to preserve its consistency and color.
Using shelving or storage units keeps your paint organized, while storing craft paint tubes or jars in standing rack storage or shallow drawers protects them from damage and ensures easy color selection. Similarly, storing craft paint brushes and tools in dedicated holders or brush rolls maintains their shape and accessibility.
Long-term storage requires regular inspection, proper sealing, storage in a dark and temperature-stable area, and rotating stock. Keeping small quantities, maintaining an inventory, minimizing movement, and avoiding contamination are additional steps to preserve your paint over time.
In conclusion, with the right storage solution, proper organization, labeling, sealing, and suitable storage conditions, you can maintain the quality and usability of your craft paint collection for a long time. By following these guidelines, you can focus on your creativity and have easy access to a palette of vibrant colors for all your crafting endeavors.
So, unleash your creativity and enjoy the beauty of a well-organized and efficiently stored craft paint collection!
Frequently Asked Questions about How To Store Craft Paint
Was this page helpful?
At Storables.com, we guarantee accurate and reliable information. Our content, validated by Expert Board Contributors, is crafted following stringent Editorial Policies. We're committed to providing you with well-researched, expert-backed insights for all your informational needs.


0 thoughts on “How To Store Craft Paint”