Articles
How To Store Endive
Modified: October 19, 2024
Learn the best methods for storing endive in this helpful articles. Keep your endive fresh and flavorful for longer with proper storage techniques.
(Many of the links in this article redirect to a specific reviewed product. Your purchase of these products through affiliate links helps to generate commission for Storables.com, at no extra cost. Learn more)
Introduction
Endive is a versatile and nutritious vegetable that can be enjoyed in a variety of recipes. Whether you grow your own endive or purchase it from a local market, knowing how to properly store it is essential for maintaining its freshness and flavor. In this article, we will explore different methods for storing endive, from refrigeration to freezing and even preserving it in oil or pickle form.
By following these storage techniques, you can extend the shelf life of your endive and ensure that it remains crisp and delicious for longer periods of time. Whether you plan to use it in salads, soups, stews, or sautés, properly stored endive will retain its vibrant color, crunchy texture, and pleasant bitterness.
So, let’s dive in and discover the best ways to store endive to keep it fresh and ready for your culinary creations!
Key Takeaways:
- Keep endive fresh by storing it in the refrigerator, root cellar, or freezer. Experiment with pickling or storing in oil for unique flavors and extended shelf life.
- Properly prepare and monitor endive to maintain its crispness and flavor. Whether refrigerating, freezing, or pickling, enjoy endive in various culinary creations.
Read more: How To Store Store-Bought Bread
Selecting Fresh Endive
When it comes to storing endive, it’s crucial to start with fresh and high-quality produce. Here are some tips to help you select the best endive for storage:
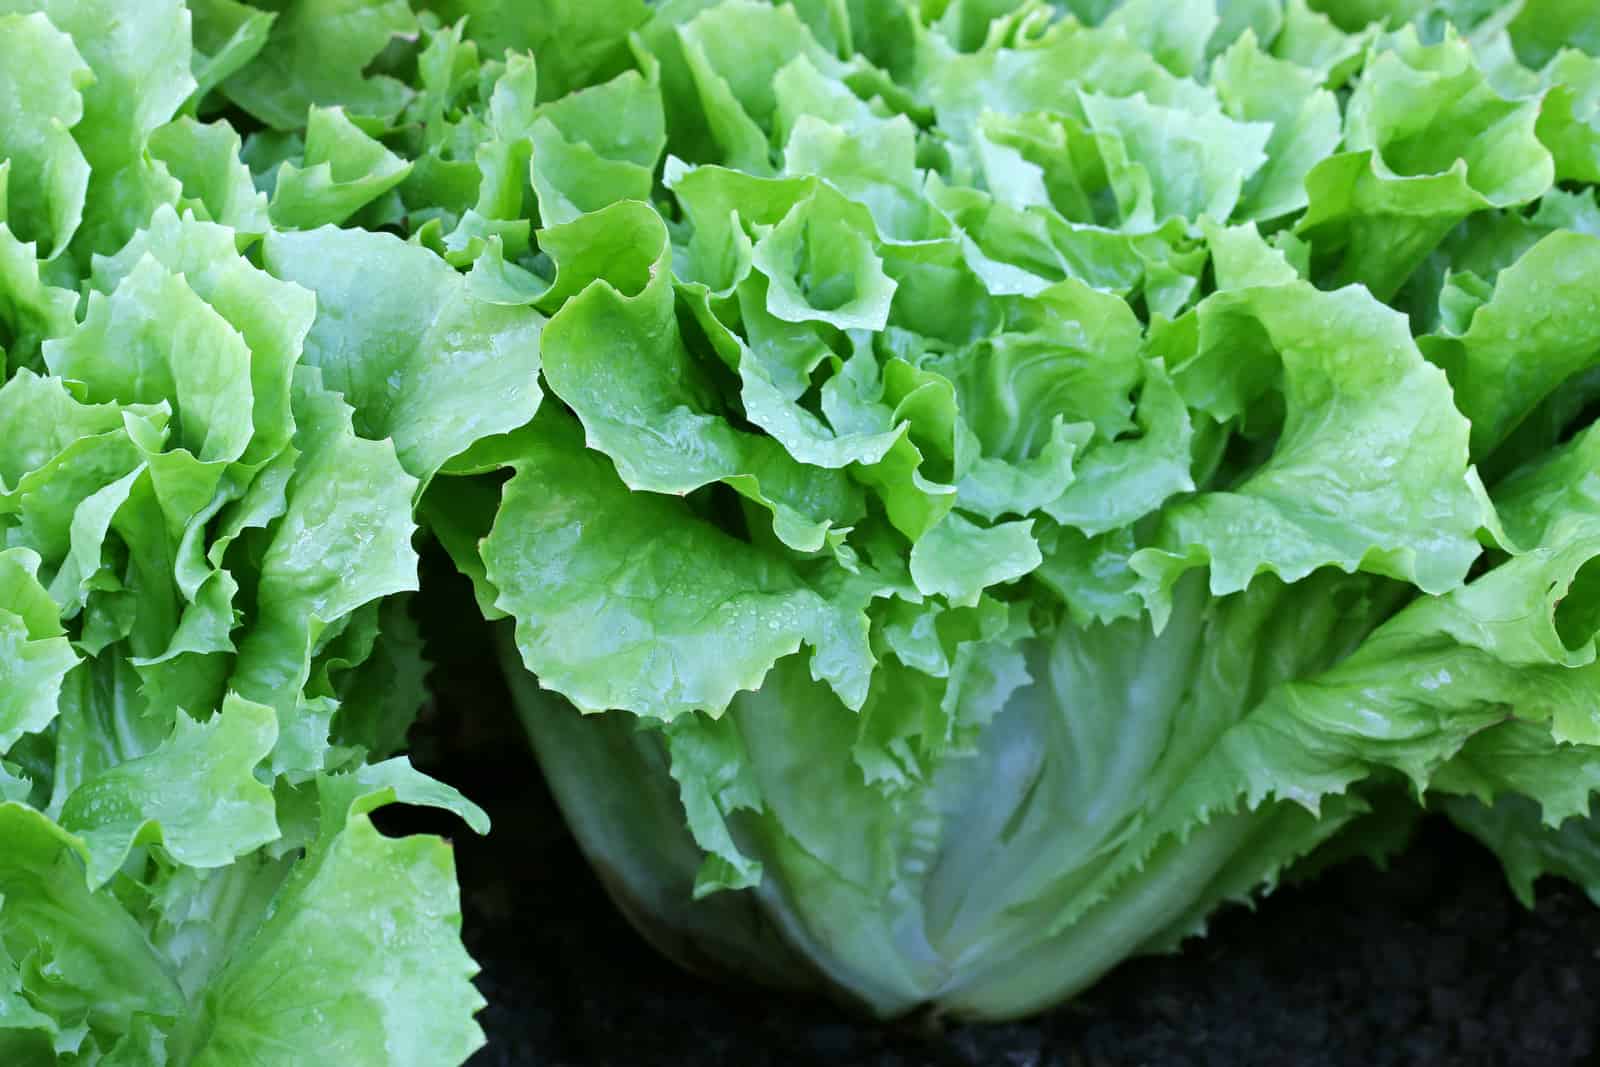
- Appearance: Look for endive heads that are firm and compact. The leaves should be crisp, vibrant, and free from any wilting, browning, or discoloration.
- Color: The outer leaves of endive should be pale to medium green, with streaks of yellow or white. Avoid endive with dark, yellowing, or brownish leaves, as they may indicate decay or spoilage.
- Size: Opt for medium-sized endive heads, as they tend to have a better texture and flavor compared to larger ones. Avoid endive heads that are excessively small or excessively large.
- Weight: Choose endive heads that feel heavy for their size. This indicates that they are fresh and packed with moisture.
- Aroma: Give the endive a quick sniff. It should have a mild, earthy scent. If you detect any unpleasant or sour odors, it may be a sign of decay.
It’s also worth noting that endive can be purchased in different forms, such as loose leaves or whole heads. Whole heads are generally recommended for storage purposes, as they stay fresh longer. However, if you prefer the convenience of loose leaves, make sure to consume them within a few days for the best quality.
By selecting fresh endive, you set the foundation for successful storage. Now, let’s move on to the next step: preparing endive for storage.
Preparing Endive for Storage
Before storing endive, it’s essential to properly prepare it to maximize its shelf life. Follow these steps to ensure that your endive stays fresh and crisp:
- Trimming: Start by removing any damaged or wilted leaves from the endive heads. Trim off the root end, leaving about an inch of stem intact.
- Cleaning: Rinse the endive heads under cool running water to remove any dirt or debris. Gently pat them dry with a clean towel or use a salad spinner to remove excess moisture.
- Separating Leaves: If you prefer to store endive leaves rather than whole heads, carefully separate the individual leaves. Place them in a colander and rinse them briefly. Allow them to dry completely before proceeding with storage.
- Blanching (Optional): If you plan to freeze your endive, blanching can help preserve its quality. Bring a pot of water to a boil, then immerse the endive heads (or leaves) in boiling water for 1 to 2 minutes. Transfer them immediately to an ice bath to stop the cooking process. Drain and pat dry before freezing.
Once your endive is trimmed, cleaned, and separated (if desired), it’s time to consider the best storage method based on your needs and available resources. Let’s explore the various options for storing endive.
Storing Endive in the Refrigerator
The refrigerator is one of the most common and convenient storage options for endive. Follow these steps to keep your endive fresh and crisp in the fridge:
- Wrap in Paper Towels: Take a clean, dry paper towel and wrap it around the base of each endive head. This helps absorb excess moisture and prevents the leaves from becoming soggy.
- Seal in a Plastic Bag: Place the wrapped endive heads in a plastic bag or airtight container. Seal the bag or container tightly to create a controlled environment with minimal exposure to moisture and air.
- Store in the Crisper Drawer: The crisper drawer in your refrigerator provides a slightly higher humidity level, which is ideal for endive. Place the bag or container of endive in the crisper drawer, away from other fruits and vegetables that produce ethylene gas, as it can accelerate the ripening process of endive.
- Temperature: Set your refrigerator to maintain a temperature of around 34 to 36 degrees Fahrenheit (1 to 2 degrees Celsius) to ensure optimal freshness and to prevent freezing.
- Check and Rotate: Periodically check on your stored endive to ensure that it remains crisp and free from any signs of spoilage. Rotate the heads if necessary to prevent any areas from becoming flattened or bruised.
- Storage Duration: When stored properly, endive can last in the refrigerator for up to 1 to 2 weeks.
Remember to only wash or separate the leaves when you are ready to use them. This minimizes moisture exposure, preserving the quality of the endive for a longer period of time. Now that you know how to store endive in the fridge, let’s explore alternative storage methods.
Storing Endive in a Root Cellar or Pantry
If you have access to a root cellar or a cool, dark pantry, storing endive in these locations can be a great option. Here’s how to do it:
- Preparation: Prepare the endive for storage by trimming, cleaning, and drying it as mentioned earlier.
- Loose Leaves or Whole Heads: Decide whether you want to store the whole endive heads or separate the leaves. Whole heads generally have a longer shelf life, but storing loose leaves can be more convenient. If storing loose leaves, place them in a breathable container, such as a mesh bag or a loosely covered bowl.
- Storage Container: Choose a storage container suitable for your chosen method. For whole endive heads, you can use a wooden crate, a cardboard box, or a paper bag. For loose leaves, breathable containers are preferable to avoid moisture buildup.
- Temperature and Humidity: Root cellars or pantries should ideally have a temperature between 32 to 40 degrees Fahrenheit (0 to 4 degrees Celsius) with a humidity level of around 60-70%. This cool and slightly humid environment helps maintain the crispness of endive.
- Avoid Exposure to Light: Keep the endive away from direct sunlight or any sources of light, as exposure to light can promote the growth of chlorophyll and cause bitterness in the leaves.
- Regularly Check and Discard: Monitor the stored endive regularly and remove any spoiled or wilted leaves or heads. This prevents the spread of decay and maintains the quality of the remaining endive.
- Storage Duration: When stored properly in a root cellar or pantry, endive can last for about 2 to 4 weeks.
Storing endive in a root cellar or pantry can provide an excellent alternative to refrigeration, especially if you have an abundance of endive or prefer a low-energy, natural storage method.
Now, let’s explore another option for storing endive: freezing.
Store endive in the crisper drawer of the refrigerator, wrapped in a damp paper towel and placed in a plastic bag. This will help keep it fresh and crisp for up to 2 weeks.
Read more: How To Store Basil From Grocery Store
Freezing Endive
Freezing is a great option if you want to store endive for an extended period of time. However, it’s important to note that freezing can change the texture of endive, making it less suitable for raw consumption but still ideal for cooked dishes. Here’s how you can freeze endive:
- Blanching: Start by blanching the endive to preserve its color, flavor, and texture. Bring a pot of water to a boil and immerse the endive heads (or separated leaves) in the boiling water for 1 to 2 minutes. This blanching process helps to kill any enzymes that can cause deterioration during freezing.
- Ice Bath: Transfer the blanched endive immediately into an ice bath to cool rapidly and halt the cooking process.
- Drain and Dry: Once cooled, drain the endive thoroughly and pat it dry with a clean towel or paper towels. Removing excess moisture is crucial to prevent freezer burn and maintain quality.
- Packaging: You have a few options for packaging the endive: individually or in portions. For individual portions, place the endive in a freezer-safe bag or container, making sure to remove as much air as possible before sealing. Alternatively, you can tightly pack the endive in a vacuum-sealed bag to minimize freezer burn.
- Label and Date: Don’t forget to label each package with the contents and date for easy identification later on.
- Freeze: Place the packaged endive in the freezer and keep it at a constant temperature of 0 degrees Fahrenheit (-18 degrees Celsius) or below.
- Storage Duration: When properly frozen, endive can be stored for up to 10 to 12 months. However, for best quality, it’s recommended to use it within 6 to 8 months.
While frozen endive may not be suitable for salads or raw consumption due to its altered texture, it can still be used in cooked dishes such as soups, stews, stir-fries, or sautés. Freezing allows you to enjoy endive throughout the year, even when it’s out of season.
Now, let’s explore another interesting method of storing endive: in oil.
Storing Endive in Oil
Storing endive in oil is a unique preservation method that infuses the vegetable with flavor and helps extend its shelf life. Here’s how you can store endive in oil:
- Preparation: Prepare the endive by trimming, cleaning, and drying it thoroughly.
- Slice or Separate Leaves: Depending on your preference, you can either slice the endive into thin strips or separate the leaves. This will allow the oil to penetrate the endive more effectively.
- Layering: In a clean and sterilized jar, begin by adding a layer of endive slices or leaves to the bottom of the jar. Sprinkle a pinch of salt and any desired herbs or spices over the layer.
- Repeat: Continue layering the endive, alternated with salt and herbs or spices, until the jar is nearly full. Leave about an inch of headspace at the top.
- Fill with Oil: Pour a high-quality oil, such as olive oil or sunflower oil, over the endive, completely covering it. Make sure there are no air bubbles trapped within the jar.
- Seal the Jar: Secure the jar with an airtight lid or cork, ensuring a tight seal to prevent air exposure.
- Storage: Store the jar in a cool, dark place, such as a pantry or cellar, away from direct sunlight or heat sources. The oil will help preserve the endive and prevent spoilage.
- Maturation Time: Allow the endive to marinate in the oil for at least 2 to 3 weeks before consuming. During this time, the flavors will meld together, resulting in a rich and flavorful endive.
- Usage: Once matured, the endive stored in oil can be used in various culinary applications. It adds a unique touch to salads, sandwiches, antipasti platters, pasta dishes, and more.
- Storage Duration: When stored properly, endive in oil can last for several months, or even up to a year, depending on the storage conditions.
Storing endive in oil not only preserves its freshness but also creates a delicious and versatile ingredient that can enhance the flavor of many dishes. Just remember to check for any signs of spoilage, such as mold or off odors, and discard if you notice any issues.
Now that you know how to store endive in oil, let’s explore another preservation method: canning.
Preserving Endive by Canning
Canning is a fantastic method for preserving endive, ensuring its long-term shelf life and enabling you to enjoy it throughout the year. Follow these steps to preserve endive by canning:
- Harvesting: Harvest fresh, firm endive heads from your garden or select high-quality endive from a reputable source.
- Preparation: Wash the endive heads thoroughly under running water and remove any damaged or wilted leaves. Trim the roots and cut the endive into desired sizes, such as quarters or halves.
- Blanching: Blanch the endive in boiling water for 2 to 3 minutes. This helps maintain its color and texture during the canning process.
- Ice Bath: Transfer the blanched endive immediately into an ice bath to cool and preserve its freshness.
- Jars and Lids: Prepare canning jars and lids by washing them in hot, soapy water. Rinse thoroughly and inspect for any cracks or damages. Sterilize the jars and lids by boiling them in a water bath or using a steam canner.
- Packing the Jars: Pack the cooled endive tightly into the sterilized jars, leaving about 1 inch of headspace at the top.
- Brine or Liquid: Prepare a brine solution or liquid by mixing water, vinegar, and salt according to a tested canning recipe. Pour the brine or liquid over the endive, ensuring that it fully covers the vegetables.
- Removing Air Bubbles: Use a non-metallic tool, like a plastic spatula or bubble remover, to remove any air bubbles trapped within the jars.
- Sealing: Wipe the jar rims clean, place the lids on top, and screw the bands to secure. Follow proper canning methods to achieve a safe and airtight seal.
- Processing: Process the jars in a water bath canner or pressure canner according to the recommended time and pressure for your specific canning recipe.
- Cooling and Storage: After processing, allow the jars to cool completely before checking the seals. Store the properly sealed jars in a cool, dark place for long-term storage.
- Usage: When ready to use, simply open a jar of canned endive, drain the excess liquid, and incorporate the preserved endive into your favorite recipes, such as salads, quiches, or stir-fries.
Canning is a time-tested method that allows you to enjoy the taste of freshly harvested endive even during the offseason. Just remember to follow proper canning techniques and use reliable, tested recipes to ensure the safety and quality of your preserved endive.
Now that you know how to preserve endive by canning, let’s explore one more storage method: pickling!
Storing Endive in Pickle Form
One delightful way to store endive is by pickling it. Pickling endive not only prolongs its shelf life but also imparts a tangy and flavorful twist to the vegetable. Here’s how you can store endive in pickle form:
- Preparation: Start by preparing the endive heads. Trim off the root end and any damaged or wilted leaves. Rinse the endive thoroughly under running water to remove any dirt or debris.
- Slicing: Slice the endive heads into thin strips or into your desired shape and size. This will allow the pickling liquid to penetrate the endive more effectively.
- Brine: In a saucepan, combine vinegar, water, salt, and any desired pickling spices or flavorings. Bring the brine to a simmer, stirring until the salt is dissolved.
- Hot Pack: Add the sliced endive to the simmering brine and cook for a couple of minutes, just until the endive slightly wilts. This helps the endive absorb the flavors of the pickling liquid.
- Jarring: Pack the hot endive strips into sterilized canning jars, leaving about ½ inch of headspace at the top.
- Brine and Processing: Pour the hot brine over the endive in the jars, covering the vegetables completely. Ensure that there are no air bubbles in the jars. Follow proper canning methods for sealing and processing the jars, either through water bath canning or pressure canning.
- Cooling and Maturing: Allow the jars to cool completely before storing them in a cool, dark place. The endive pickles will need time to mature and develop their flavors. Aim to let them sit for at least a few weeks, but they can be enjoyed even sooner if desired.
- Usage: Use your homemade endive pickles in salads, sandwiches, as a topping for burgers or tacos, or as a flavorful addition to a charcuterie board. The tangy and crunchy nature of the endive pickles will be a delightful addition to any dish!
- Storage Duration: Properly canned endive pickles can last for several months, but their flavors may peak after a few weeks to a couple of months.
Pickling endive not only provides a means of storage but also introduces a burst of flavor to this versatile vegetable. The tanginess and crunch of the endive pickles can elevate various dishes and add a unique twist to your culinary creations.
Now that you know how to store endive in pickle form, let’s wrap up our exploration of different storage methods.
Read more: How To Store Arrows
Conclusion
Properly storing endive is crucial to preserving its freshness, flavor, and nutritional value. Whether you choose to store it in the refrigerator, a root cellar, or pickle it for a tangy delight, each method offers its unique benefits. Here’s a quick recap of the storage methods we explored:
- Refrigeration: Storing endive in the refrigerator allows you to maintain its crispness and freshness for up to 1 to 2 weeks. Wrap the endive in paper towels, seal it in a plastic bag, and store it in the crisper drawer.
- Root Cellar or Pantry: If you have access to a cool, dark storage space, storing endive in a root cellar or pantry can extend its shelf life to 2 to 4 weeks. Use breathable containers and maintain a cool temperature and moderate humidity.
- Freezing: Freezing endive allows for long-term storage, although the texture changes, making it more suitable for cooking than raw consumption. Blanch the endive, pack it in freezer-safe containers, and store it at 0 degrees Fahrenheit (-18 degrees Celsius) or below for up to 10 to 12 months.
- Storing in Oil: Storing endive in oil not only prolongs its shelf life but also infuses it with delightful flavors. Layer the endive in a jar, fill it with oil, and store it in a cool, dark place for several months to a year.
- Canning: Canning endive preserves its freshness and allows you to enjoy it even when out of season. Blanch the endive, pack it into sterilized jars, cover it with brine or liquid, and process the jars according to proper canning methods.
- Pickling: Pickling endive adds a tangy twist to this versatile vegetable. Slice the endive, prepare a brine, pack it into jars, and follow proper canning methods. Allow the endive pickles to mature for a few weeks before enjoying their flavorful crunch.
Remember, regardless of the storage method you choose, select fresh endive, prepare it properly, and monitor it regularly for any signs of spoilage. By following these guidelines, you can extend the shelf life of your endive and continue to enjoy its unique taste and versatility in various culinary creations.
So, whether you are growing your own endive or purchasing it from the market, now you have the knowledge and tools to store it effectively. Experiment with different storage methods and find the one that suits your preferences and culinary needs best. With proper storage, you can savor the goodness of endive for an extended period, ensuring that it remains a staple in your kitchen.
Happy storing and enjoy your delicious endive creations!
Frequently Asked Questions about How To Store Endive
Was this page helpful?
At Storables.com, we guarantee accurate and reliable information. Our content, validated by Expert Board Contributors, is crafted following stringent Editorial Policies. We're committed to providing you with well-researched, expert-backed insights for all your informational needs.


0 thoughts on “How To Store Endive”