Articles
How To Store Grain Spawn
Modified: January 6, 2024
Learn how to store grain spawn effectively with our informative articles. Preserve the longevity and quality of your grain spawn for successful mushroom cultivation.
(Many of the links in this article redirect to a specific reviewed product. Your purchase of these products through affiliate links helps to generate commission for Storables.com, at no extra cost. Learn more)
Introduction
In the world of mushroom cultivation, grain spawn plays a crucial role. It is the mycelium-infused grain that serves as the foundation for growing various types of mushrooms. The quality of the grain spawn directly affects the success of your mushroom cultivation endeavors. However, it is important to not only focus on the quality of the grain spawn itself but also on how it is stored. Proper storage of grain spawn is vital to maintain its viability and prevent contamination.
Storing grain spawn correctly is essential for several reasons. Firstly, it prolongs the lifespan of the spawn, allowing it to be used for multiple cultivation cycles. Secondly, it helps to maintain the quality and potency of the mycelium, ensuring optimal mushroom production. Lastly, proper storage prevents contamination by unwanted bacteria, mold, or pests that could negatively impact your mushroom crop.
In this article, we will guide you through the process of storing grain spawn effectively. By following these steps, you can ensure the longevity and quality of your grain spawn, allowing for successful mushroom cultivation.
Key Takeaways:
- Proper storage of grain spawn is essential for successful mushroom cultivation. Follow the steps outlined to ensure longevity, viability, and quality, setting the stage for abundant and high-quality mushroom production.
- Regular inspection, monitoring, and protection from pests and contaminants are crucial for maintaining the integrity of grain spawn. By practicing good hygiene and proactive measures, you can safeguard the viability and success of your mushroom cultivation endeavors.
Read more: How To Store Mushroom Spawn
What is Grain Spawn?
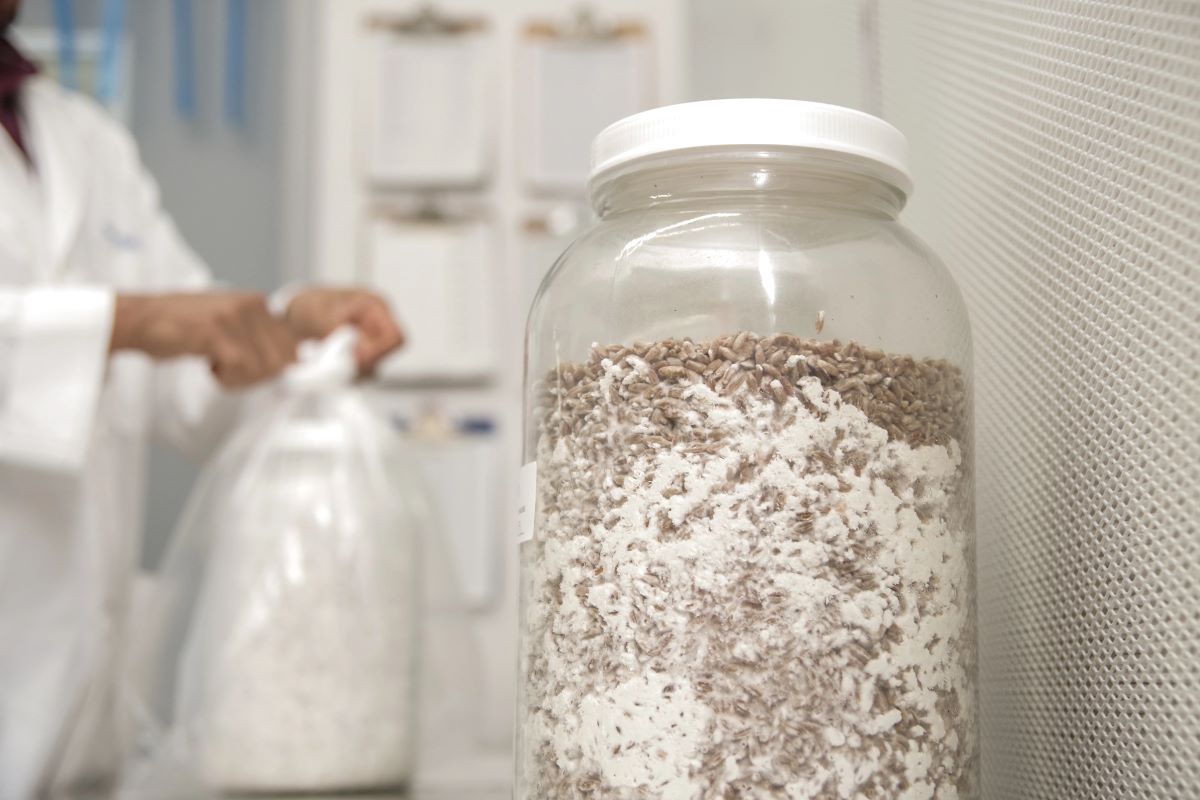
Grain spawn is a substrate used to inoculate mushroom cultivation substrates. It consists of grains, such as rye, wheat, or millet, that have been infused with mushroom mycelium. The mycelium is the vegetative part of the fungus, responsible for absorbing nutrients and spreading throughout the substrate.
Grain spawn acts as a carrier for the mycelium, providing a nutrient-rich environment for its growth. It is commonly used in various methods of mushroom cultivation, including indoor setups, outdoor beds, and commercial mushroom farms. The grains serve as a food source for the mycelium, allowing it to colonize and spread through the substrate.
Using grain spawn offers several advantages in mushroom cultivation. Firstly, it provides a controlled and consistent medium for mycelium growth. The grains are sterilized before inoculation, reducing the risk of contamination and allowing for a clean and healthy mushroom crop.
Grain spawn also allows for easy distribution and inoculation of mushroom substrates. The grains can be mixed with other materials, such as compost, wood chips, or sawdust, to create a nutrient-rich substrate. The mycelium will then colonize the substrate, breaking down organic matter and preparing it for fruiting.
Furthermore, grain spawn has a longer shelf life compared to other forms of spawn, such as agar or liquid cultures. It can be stored for extended periods, providing flexibility in mushroom cultivation schedules.
Overall, grain spawn is an essential component of successful mushroom cultivation. It provides a convenient and reliable way to introduce and propagate mushroom mycelium in various substrates. By understanding its importance and learning how to store it properly, you can ensure the best possible results in your mushroom cultivation endeavors.
Importance of Proper Storage
Proper storage of grain spawn is vital for maintaining its viability and ensuring successful mushroom cultivation. Here are some key reasons why proper storage is important:
Preserving Viability: Grain spawn contains live mycelium, which is the foundation of mushroom growth. It is essential to store the grain spawn in a way that maintains the viability of the mycelium. Improper storage conditions can cause the mycelium to become less active or even die off, rendering the grain spawn useless for future cultivation.
Protecting Quality: The quality of the mycelium directly impacts the quality of the mushrooms produced. Proper storage helps to preserve the quality of the mycelium, ensuring that it remains healthy, vigorous, and capable of producing abundant and high-quality mushrooms.
Preventing Contamination: Grain spawn is susceptible to contamination by unwanted bacteria, mold, or pests. Contamination can disrupt the growth of the mycelium and hinder mushroom production. Proper storage practices help to minimize the risk of contamination, ensuring a clean and uncontaminated grain spawn for cultivation.
Maximizing Longevity: Grain spawn can have a finite shelf life, but proper storage can help extend its usability. By providing optimal storage conditions, you can maximize the lifespan of the grain spawn, allowing it to be used for multiple cultivation cycles. This not only saves you money by reducing the need to purchase new spawn but also ensures a consistent and reliable supply for your mushroom cultivation endeavors.
Flexibility in Cultivation Schedule: Having properly stored grain spawn gives you the flexibility to start new cultivation cycles whenever you are ready. You can store the grain spawn until you are prepared to begin the next round of mushroom cultivation, allowing you to plan and schedule your growing operations more efficiently.
Taking the time and effort to store your grain spawn properly is a crucial step in ensuring successful mushroom cultivation. By preserving viability, protecting quality, preventing contamination, maximizing longevity, and allowing for flexibility in cultivation schedules, you set yourself up for a rewarding and fruitful mushroom growing experience.
Step 1: Clean and Prepare the Storage Area
Before storing your grain spawn, it is important to clean and prepare the storage area to ensure a hygienic and optimal environment. Here are the key steps to follow:
1. Clear the Space: Start by clearing the storage area of any debris, dust, or other contaminants. Remove any items that may harbor pests or bacteria. This will create a clean and clutter-free space for storing your grain spawn.
2. Sanitize the Surfaces: Thoroughly clean and sanitize the surfaces of the storage area. Use a mild disinfectant or a mixture of water and bleach to wipe down shelves, walls, and any other surfaces that will come into contact with the grain spawn containers. This will help eliminate any lingering bacteria or mold that could potentially contaminate the grain spawn.
3. Ensure Proper Ventilation: Good airflow and ventilation are crucial for maintaining the quality of the grain spawn. Make sure the storage area has adequate ventilation to prevent the buildup of humidity and potential condensation. This will help reduce the risk of mold growth and ensure the grain spawn remains dry and healthy.
4. Control Temperature and Humidity: Grain spawn is best stored in a cool and dry environment. Ideally, the storage area should maintain temperatures between 40°F (4°C) and 60°F (15°C). Additionally, the humidity levels should be kept below 70% to prevent moisture-related issues. You can use a dehumidifier or air conditioning unit to control the temperature and humidity, if necessary.
5. Organize the Storage Space: Arrange the storage area in a way that allows for easy access to the grain spawn containers. Use sturdy shelves or racks to store the containers, ensuring they are kept off the floor to avoid any potential moisture or pest issues. Keep the area well-organized, labeling the containers with the type of grain spawn and the date of inoculation to track their usage and expiration dates.
6. Implement Pest Control Measures: Take proactive measures to prevent pests from infesting the storage area. Seal any cracks or openings that pests may enter through, and consider using pest control methods such as traps or insect repellents to keep pests at bay. Regularly inspect the storage area for signs of pests and take immediate action if any are detected.
7. Maintain Cleanliness: Regularly cleaning and maintaining the storage area is essential. Regularly sweep or vacuum the floor to remove any dust or debris. Clean and sanitize surfaces periodically to prevent the buildup of contaminants. This will help ensure a clean and hygienic environment for storing your grain spawn.
By following these steps to clean and prepare the storage area, you create an optimal environment for storing your grain spawn. A clean and well-maintained storage area reduces the risk of contamination and ensures the longevity and quality of your grain spawn, setting the stage for successful mushroom cultivation.
Step 2: Choose the Right Containers
When it comes to storing grain spawn, selecting the appropriate containers is crucial for maintaining its quality and preventing contamination. Here are the key factors to consider when choosing containers for storing your grain spawn:
1. Material: Opt for containers that are made of food-grade materials such as glass, polypropylene, or high-density polyethylene (HDPE). These materials are durable, non-toxic, and resistant to moisture and temperature fluctuations, ensuring the integrity of the grain spawn.
2. Size: Consider the size of your grain spawn batches and the frequency of use. Choose containers that are large enough to accommodate the desired amount of grain spawn, but not excessively large that they take up unnecessary space. Having containers of appropriate size helps with organization and efficient use of storage space.
3. Lid Design: Look for containers with tight-fitting lids to provide a secure seal. This helps prevent moisture and contaminants from entering the containers, safeguarding the quality and viability of the grain spawn. Additionally, opt for containers with airtight seals, as this further reduces the risk of contamination.
4. Transparency: Consider opting for transparent or translucent containers. This allows you to easily monitor the condition of the grain spawn without having to open the containers. You can visually check for any signs of contamination, such as mold growth or discoloration, and take necessary action promptly.
5. Easy to Clean: Choose containers that are easy to clean and sanitize. Smooth surfaces without any intricate crevices or corners make cleaning and disinfection more effective. This reduces the risk of bacteria or mold buildup, ensuring a clean and uncontaminated environment for your grain spawn.
6. Stackability: If you have limited storage space, consider containers that are designed to be stackable. This allows you to maximize vertical space and organize your storage area more efficiently. Just ensure that the containers are structurally stable when stacked to avoid any accidents or damage to the grain spawn.
7. Reusability: If you aim to reuse your containers for multiple batches of grain spawn, choose containers that are durable and easy to sanitize. Check for containers that are resistant to staining, warping, or degradation, as these factors can affect the long-term functionality and cleanliness of the containers.
By carefully selecting the right containers, you can ensure the proper storage of your grain spawn. The containers should provide a safe and secure environment, keeping the grain spawn free from contamination and maintaining its quality and viability for successful mushroom cultivation.
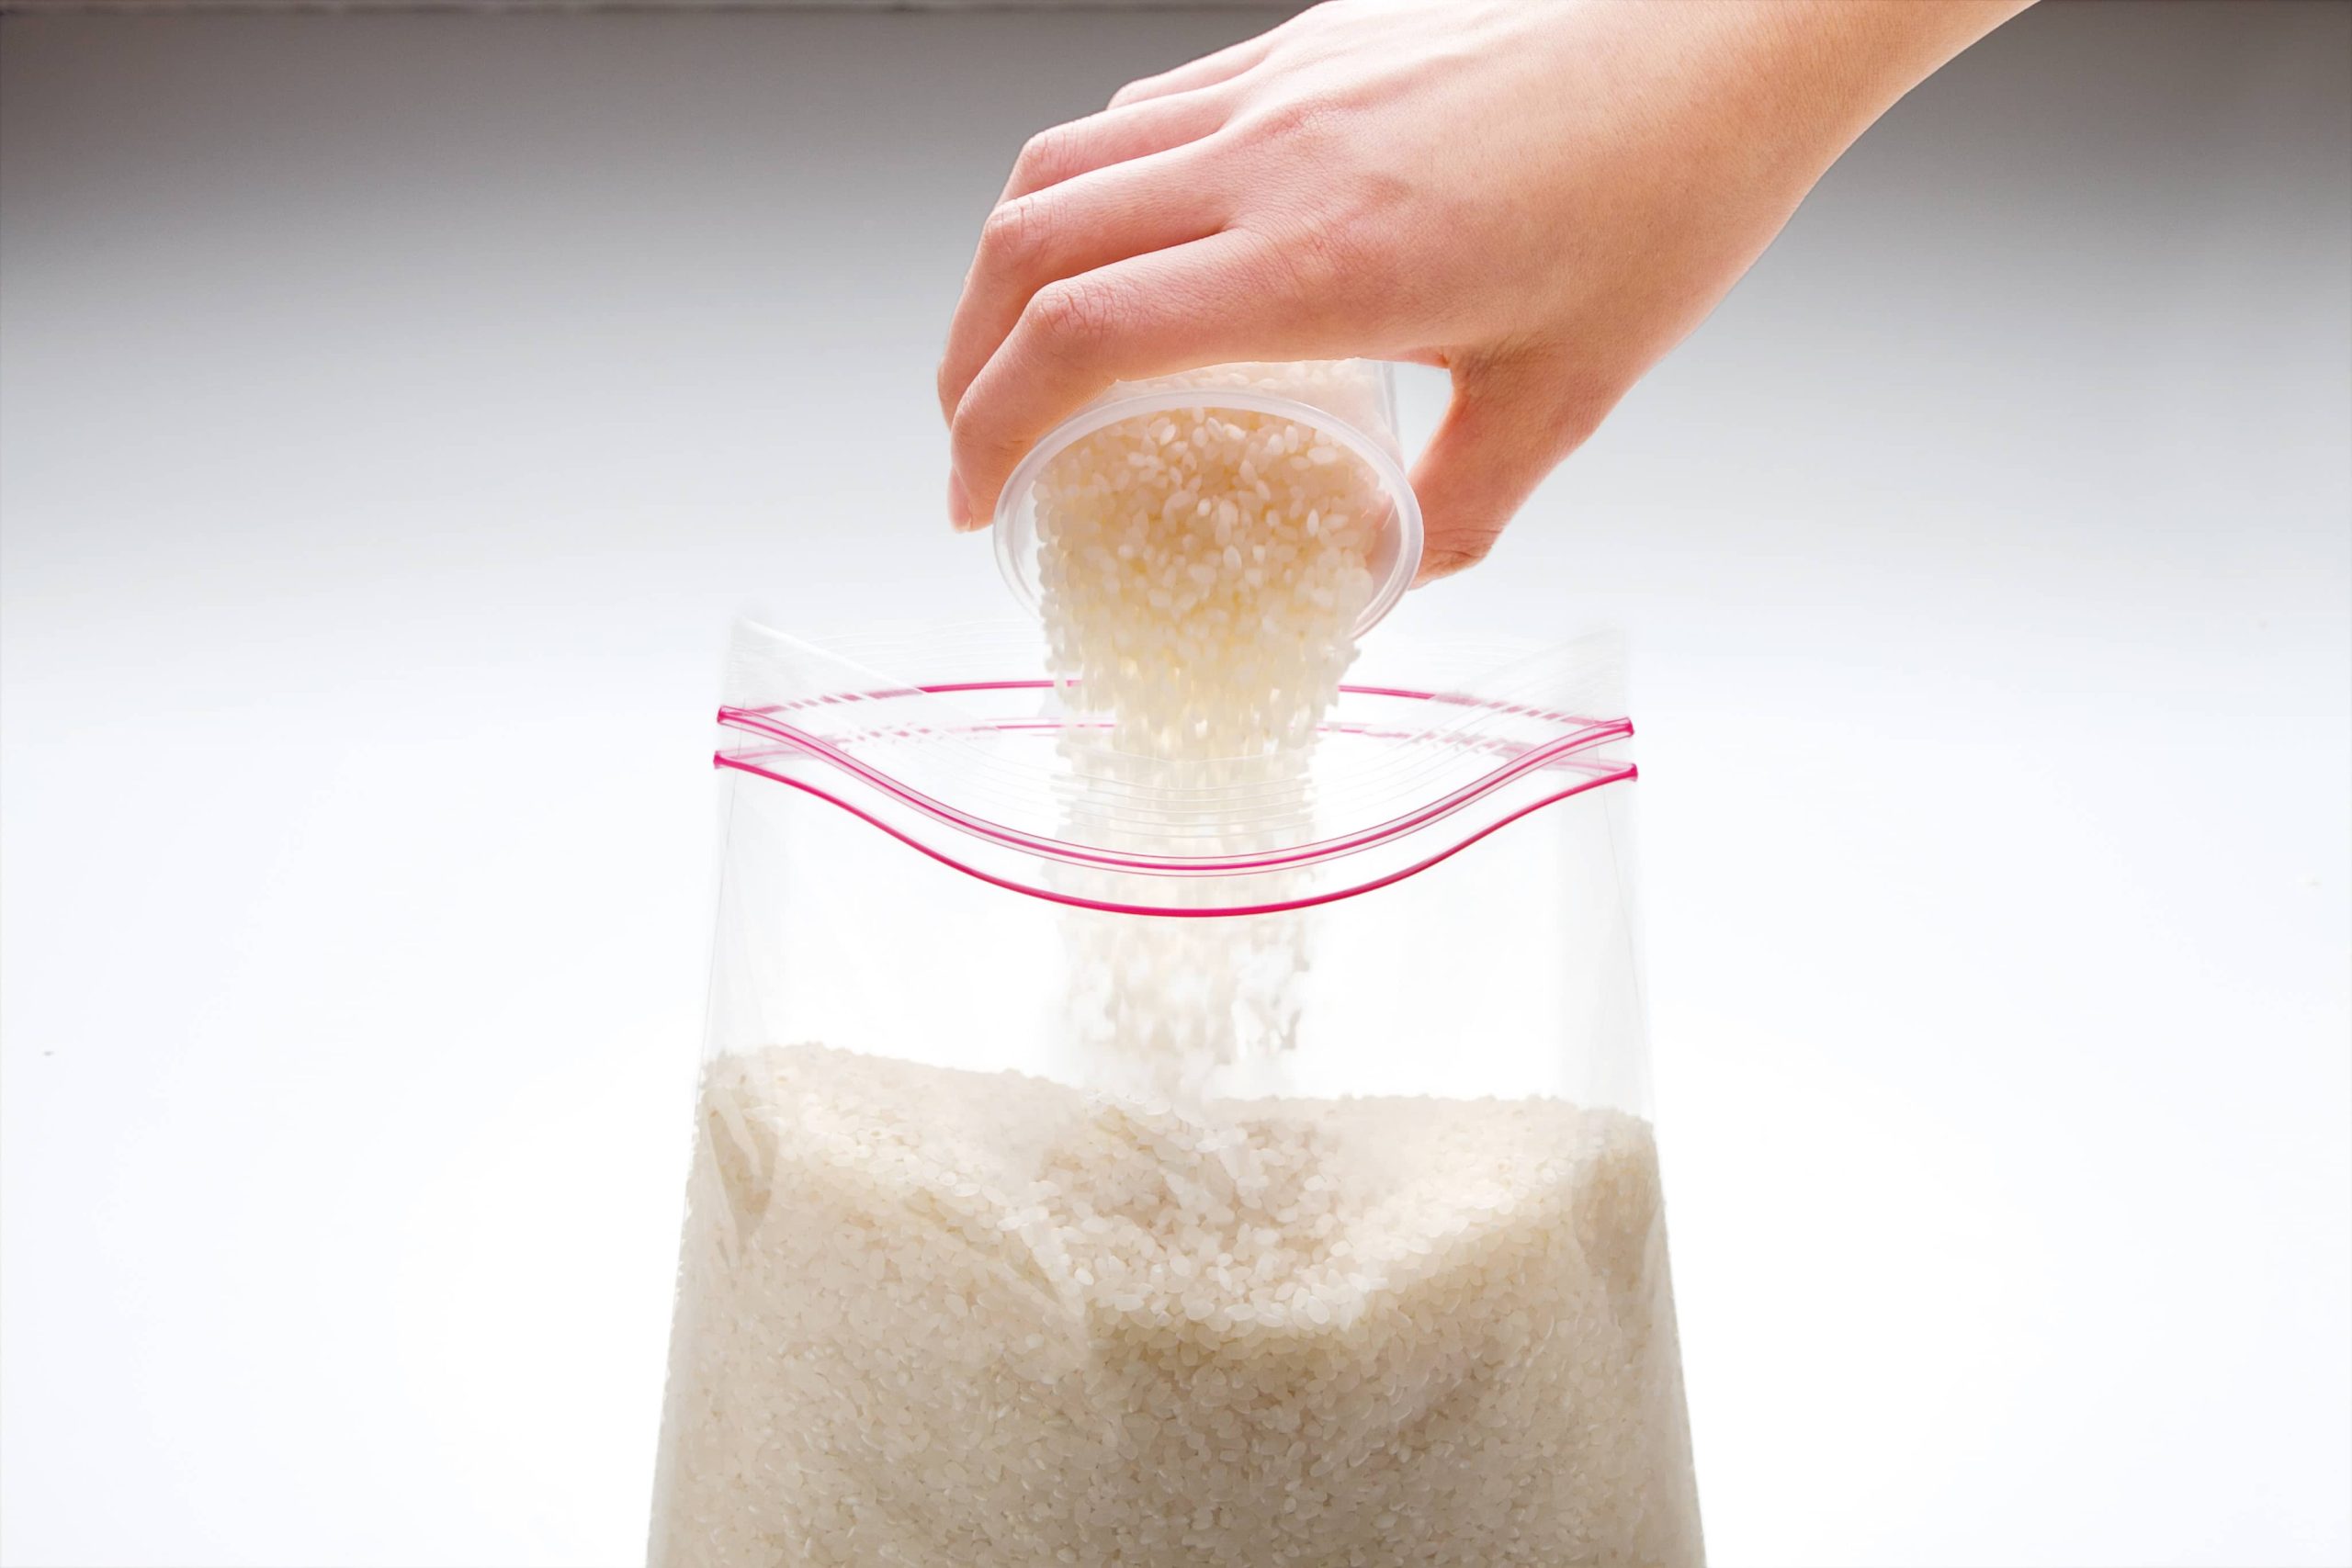
Store grain spawn in a cool, dry place to prevent contamination and maintain viability. Use airtight containers to keep out moisture and pests. Check regularly for any signs of mold or spoilage.
Read more: How To Store Inoculated Spawn Bags
Step 3: Ensure Proper Ventilation
Proper ventilation is crucial when storing grain spawn to maintain its quality and prevent the buildup of excess moisture. Adequate airflow helps to reduce the risk of contamination and ensures the grain spawn remains dry and healthy. Here are the key points to consider for ensuring proper ventilation:
1. Air Circulation: Choose a storage area with good natural air circulation. Airflow helps to prevent stagnant, humid conditions that can promote the growth of mold or other contaminants. If the storage area does not have sufficient natural airflow, you can use fans or ventilation systems to improve air circulation.
2. Avoid Condensation: Excess moisture can lead to the formation of condensation, providing a conducive environment for mold or bacterial growth. To minimize condensation, avoid storing grain spawn in areas with high humidity or fluctuations in temperature. Use dehumidifiers or absorbent materials, like silica gel packets, to help control humidity levels within the storage area.
3. Proper Spacing: Ensure that there is enough space between the containers of grain spawn to allow air to freely circulate around them. Avoid overcrowding the storage area, as it can restrict airflow and increase the likelihood of moisture buildup. Leave sufficient gaps between the containers to promote proper ventilation.
4. Elevated Placement: To further facilitate ventilation, consider elevating the containers of grain spawn off the floor. This prevents any potential moisture from seeping into the containers and encourages airflow from all sides. Use pallets or shelving units to raise the containers and allow for better ventilation and drainage.
5. Regularly Open Containers: Periodically open the containers of grain spawn to allow fresh air to circulate. This helps prevent a stagnant environment within the containers. However, ensure that you do not expose the grain spawn to drafts or direct airflow that can dry out the grain or disrupt the mycelium growth.
6. Moisture Monitoring: Regularly monitor the humidity levels within the storage area using hygrometers or humidity monitoring devices. This allows you to identify and address any potential issues with excess moisture. If humidity levels are consistently high, you may need to implement additional measures such as increasing ventilation or using dehumidifiers.
7. Cleanliness Maintenance: Keep the storage area clean and free of dust, debris, and other potential contaminants. Regularly clean and sanitize the storage area to prevent the buildup of mold or bacteria that can affect the grain spawn. Ensure that any ventilation systems or fans are cleaned and maintained properly to avoid spreading contaminants.
Proper ventilation is essential to maintain the quality and viability of your grain spawn during storage. By ensuring adequate airflow, minimizing condensation, leaving space between containers, and regularly monitoring humidity levels, you can create an environment that promotes healthy grain spawn and minimizes the risk of contamination.
Step 4: Control Temperature and Humidity
Controlling the temperature and humidity levels is crucial for preserving the quality of grain spawn during storage. Proper temperature and humidity maintenance contribute to the longevity of the mycelium and prevent the growth of contaminants. Follow these steps to control temperature and humidity effectively:
1. Optimal Temperature: Grain spawn should be stored at a cool and consistent temperature. The ideal storage temperature ranges between 40°F (4°C) and 60°F (15°C). Avoid storing grain spawn in areas that experience extreme temperature fluctuations, as they can disrupt mycelial growth and potentially compromise the viability of the spawn.
2. Avoid Heat Sources: Keep grain spawn away from direct sunlight and heat sources such as radiators or hot appliances. Excessive heat can accelerate moisture loss and increase the risk of dehydration, adversely affecting the moisture content of the grain spawn. It is important to maintain a stable and moderate temperature level to ensure the longevity of the mycelium.
3. Humidity Regulation: Grain spawn should be stored in an environment with controlled humidity. Aim for humidity levels below 70% to prevent excessive moisture, which can lead to the growth of mold or other contaminants. Use a hygrometer to monitor humidity levels periodically and make necessary adjustments using dehumidifiers or humidifiers.
4. Moisture Control: Moisture control is vital to avoid the risk of excess moisture or dehydration. The grain spawn should be stored in containers that provide a tight seal to prevent moisture infiltration. Additionally, consider using moisture-absorbing materials such as silica gel packets, which can help maintain the desired moisture balance within the storage containers.
5. Insulation: Ensure that the storage area is properly insulated to maintain a stable temperature and prevent temperature fluctuations due to external factors. Good insulation helps to preserve the temperature and humidity levels necessary for the longevity of the grain spawn.
6. Temperature and Humidity Monitoring: Regularly monitor the temperature and humidity levels within the storage area using thermometers and hygrometers. This allows you to identify any deviations from the optimal range and take prompt action to rectify them. Keeping a record of the temperature and humidity readings can also help you track the conditions over time and make necessary adjustments.
7. Climate Control Systems: If necessary, consider using climate control systems such as air conditioning units or climate-controlled storage spaces. These systems provide precise temperature and humidity control, creating an ideal environment for storing grain spawn.
Proper control of temperature and humidity is essential for maintaining the viability and quality of grain spawn during storage. By maintaining optimal temperature ranges, regulating humidity levels, utilizing moisture control methods, and monitoring the conditions regularly, you can ensure the longevity and vitality of your grain spawn, leading to successful mushroom cultivation.
Step 5: Protect from Pests and Contaminants
Protecting grain spawn from pests and contaminants is crucial to maintain its viability and prevent any negative impact on mushroom cultivation. Here are the key steps to protect the grain spawn from pests and contaminants:
1. Clean Storage Area: Ensure that the storage area is clean and free from debris, dust, and other potential contaminants. Regularly clean and sanitize the storage containers and surrounding areas to prevent the buildup of mold, bacteria, or pests.
2. Pest-Proof Containers: Choose containers that are resistant to pests, such as those with tight-fitting lids and secure seals. This helps to prevent pests, such as insects or rodents, from accessing the grain spawn. Avoid using containers made of materials that pests can easily chew through or penetrate.
3. Seal Openings: Seal any openings or cracks in the storage area to prevent pests from entering. Inspect the storage area for any potential entry points and use caulk, weather-stripping, or other suitable materials to seal them off. This reduces the chances of pests infiltrating the grain spawn containers.
4. Elevate Storage: Keep grain spawn containers off the ground to minimize the risk of pests gaining access. Place the containers on raised platforms or shelves to create a barrier between the containers and potential pests on the floor. This also helps with airflow and cleanliness.
5. Regular Inspection: Regularly inspect the grain spawn containers for signs of pest infestation or contamination. Look for any holes, bite marks, or insect activity on the containers or the surrounding area. If pests are detected, take immediate action to eliminate them and prevent further damage.
6. Pest Control Measures: Implement pest control measures to prevent and address any pest issues. This can include setting up traps or using natural pest deterrents around the storage area. Insecticides or pest control professionals may be necessary if infestations become severe. However, ensure that any pest control methods used are safe for the grain spawn and do not compromise its quality.
7. Proper Handling and Hygiene: Practice good handling and hygiene when working with grain spawn to minimize the risk of contamination. Wash hands thoroughly before interacting with the grain spawn, and use clean tools and equipment. Avoid cross-contamination by keeping grain spawn containers separate from other materials or substances that may introduce contaminants.
By taking proactive measures to protect grain spawn from pests and contaminants, you safeguard its viability and maintain the integrity of your mushroom cultivation. Regular inspection, proper storage, and implementing pest control measures will ensure that your grain spawn remains free from unwanted interference, allowing for a successful and healthy mushroom crop.
Step 6: Regularly Inspect and Monitor the Grain Spawn
Regular inspection and monitoring of grain spawn are essential to detect any potential issues early on and ensure its continued viability and quality. By regularly checking the grain spawn, you can address any concerns promptly and take necessary actions. Here are the key steps to regularly inspect and monitor the grain spawn:
1. Visual Inspection: Regularly examine the grain spawn containers visually for any signs of contamination, such as mold growth, discoloration, or unusual odors. Check for any pests or pest activity in the storage area or on the containers. If you notice any abnormalities, it is important to investigate further and take appropriate measures.
2. Smell Check: Pay attention to any unusual or foul odors emanating from the grain spawn containers. A strong and unpleasant odor could indicate contamination or the growth of unwanted microorganisms. If you detect any strange smells, it is advisable to thoroughly inspect the grain spawn for any visible signs of contamination.
3. Monitoring Moisture: Regularly monitor the moisture content of the grain spawn to ensure it remains within the optimal range. Check for any signs of excessive moisture or dryness, as either condition can negatively affect the viability of the mycelium. Use moisture meters or perform a simple touch test to gauge the moisture content of the grain spawn.
4. Recordkeeping: Maintain records of important information, including the date of inoculation, the type of grain spawn, and any observations made during inspections. This helps in tracking and identifying trends or patterns that may affect the quality or longevity of the grain spawn. Recordkeeping provides valuable insights for troubleshooting and fine-tuning storage conditions.
5. Mycelium Growth Assessment: Regularly check the growth and expansion of the mycelium within the grain spawn containers. Healthy mycelium should appear white and have an even coverage throughout the container. Any unusual colors, uneven growth, or browning may be a sign of contamination or degradation. Promptly address any issues to prevent further spread of contamination.
6. Adapt to Changes: Be aware of any changes in the storage environment or external factors that may impact the grain spawn. Changes in temperature, humidity, or overall storage conditions can affect the viability and quality of the grain spawn. Adjust storage conditions accordingly to maintain favorable conditions for the mycelium.
7. Maintain Cleanliness: Keep the storage area clean and well-maintained to minimize the risk of contamination. Regularly clean the storage containers, shelves, and the surrounding area. Practicing good hygiene when handling the grain spawn, such as using sanitized tools or wearing gloves, also reduces the chance of introducing contaminants.
Regular inspection and monitoring act as a proactive approach to identify any potential issues with the grain spawn before they escalate. By promptly addressing problems, maintaining optimal conditions, and keeping detailed records, you can ensure the continued viability and success of your grain spawn and mushroom cultivation endeavors.
Read more: How To Store Store-Bought Bread
Conclusion
Proper storage of grain spawn is crucial for the success of your mushroom cultivation endeavors. By following the steps outlined in this guide, you can ensure the longevity, viability, and quality of your grain spawn, setting the stage for successful mushroom production.
From cleaning and preparing the storage area to choosing the right containers, ensuring proper ventilation, and controlling temperature and humidity, each step plays a vital role in maintaining optimal conditions for the grain spawn. Regular inspection and monitoring allow you to detect any potential issues early on and take necessary actions to prevent contamination or degradation of the spawn.
Protecting grain spawn from pests and other contaminants is of utmost importance. By practicing good hygiene and implementing pest control measures, you can safeguard the integrity of the grain spawn and prevent unwanted interference in its growth and development.
Remember to maintain cleanliness, record important information, and adapt to any changes in the storage environment. By doing so, you create an environment that promotes healthy and productive grain spawn, leading to successful mushroom cultivation.
Proper storage of grain spawn is an investment in the future of your mushroom cultivation. By following the steps outlined in this guide and paying attention to detail, you are setting yourself up for success in producing high-quality, abundant mushrooms.
Take the time to properly store your grain spawn, and you will reap the rewards of a thriving mushroom crop, filled with rich flavors and nutritional benefits. Happy mushroom growing!
Frequently Asked Questions about How To Store Grain Spawn
Was this page helpful?
At Storables.com, we guarantee accurate and reliable information. Our content, validated by Expert Board Contributors, is crafted following stringent Editorial Policies. We're committed to providing you with well-researched, expert-backed insights for all your informational needs.


0 thoughts on “How To Store Grain Spawn”