Articles
How To Store Herbs
Modified: August 17, 2024
Learn the best methods for storing herbs in this informative article. Discover how to keep your herbs fresh and flavorful for longer.
(Many of the links in this article redirect to a specific reviewed product. Your purchase of these products through affiliate links helps to generate commission for Storables.com, at no extra cost. Learn more)
Introduction
The vibrant colors, aromatic scents, and savory flavors that herbs bring to our dishes make them a staple in any kitchen. Whether you grow your own or purchase them from the grocery store, proper herb storage is essential to maintain their freshness and maximize their lifespan. Knowing how to store herbs correctly can not only extend their shelf life but also preserve their flavors and nutritional value.
When it comes to herb storage, there are several factors to consider, such as temperature, humidity, and exposure to light. Additionally, different types of herbs have varying storage requirements, which we will explore in detail. By following the right techniques and avoiding common mistakes, you can enjoy the benefits of fresh herbs for a longer period.
In this article, we will delve into the importance of proper herb storage and discuss various methods you can use to keep your herbs fresh. From storing freshly harvested herbs to preserving dried herbs, freezing, and even creating herb-infused oils and vinegars, we will cover it all. So, let’s dive in and uncover the secrets to storing herbs effectively!
Key Takeaways:
- Proper herb storage is crucial for preserving freshness, flavors, and nutrients. Consider factors like temperature, humidity, and light exposure to maximize herb lifespan and enhance culinary experiences.
- Get creative with herb storage! From herb-infused oils to freezing and reviving dried herbs, explore various methods to preserve flavors and elevate your culinary creations.
Read more: How To Store Herbs And Spices
Importance of Proper Herb Storage
Proper herb storage is crucial for preserving the quality, flavor, and aroma of your herbs. Here are a few reasons why it is essential:
- Prolongs Shelf Life: Herbs are delicate and can quickly lose their freshness if not stored correctly. By following proper storage techniques, you can extend the shelf life of your herbs, allowing you to enjoy their flavors and benefits for a longer period.
- Maintains Flavor and Aroma: Fresh herbs are known for their distinct and intense flavors and aromas. However, exposure to air, moisture, and light can cause them to lose their potency. By storing your herbs properly, you can preserve their flavor and aroma, ensuring that they enhance your culinary creations.
- Preserves Nutritional Value: Herbs are packed with essential vitamins, minerals, and antioxidants. Improper storage can lead to the loss of these valuable nutrients. By storing herbs correctly, you can maintain their nutritional value and reap the health benefits they offer.
- Saves Money: Buying herbs can be costly, especially if you frequently cook with them. Proper storage helps prevent waste by preventing spoilage, allowing you to make the most of your herb purchases and save money in the long run.
- Enhances Culinary Experience: Freshly harvested or well-preserved herbs can elevate the taste and presentation of any dish. By storing your herbs properly, you ensure that they remain in peak condition, adding depth and complexity to your culinary creations.
- Supports Sustainable Practices: Growing and using herbs from your own garden or local sources promotes sustainability and reduces reliance on store-bought, packaged herbs. Proper storage allows you to maximize the use of your harvested or purchased herbs, minimizing waste and supporting a more sustainable lifestyle.
By understanding the importance of proper herb storage, you can make the most of your herbs and experience their full potential in your cooking. In the next sections, we will explore the factors that affect herb storage and the common mistakes to avoid. Let’s ensure that every herb you use brings freshness and flavor to your culinary adventures!
Factors Affecting Herb Storage
Several factors can impact the freshness and longevity of your herbs during storage. Understanding these factors will help you create the ideal conditions for preserving your herbs. Here are the key factors to consider:
- Temperature: Herbs are best stored at cool temperatures, ideally between 32°F (0°C) and 40°F (4°C). Higher temperatures can cause herbs to wilt, lose flavor, and spoil more quickly. Avoid storing herbs near heat sources or in warm areas of your kitchen.
- Humidity: Herbs benefit from moderate humidity levels. Excessive moisture can cause herbs to become damp, leading to mold or rot, while low humidity can cause herbs to dry out too quickly. Aim for a humidity level around 50–60% for optimal storage conditions.
- Light Exposure: Herbs should be protected from direct sunlight and excessive light exposure. Light can degrade the flavors, colors, and nutritional content of herbs. Store herbs in opaque containers or keep them in a dark, cool pantry to prevent light damage.
- Air Circulation: Proper air circulation is essential to prevent moisture buildup and reduce the risk of spoilage. Avoid tightly sealing herb containers, as it can create a humid environment. Instead, use breathable containers or loosely wrap herbs in paper towels to promote air circulation while keeping them protected.
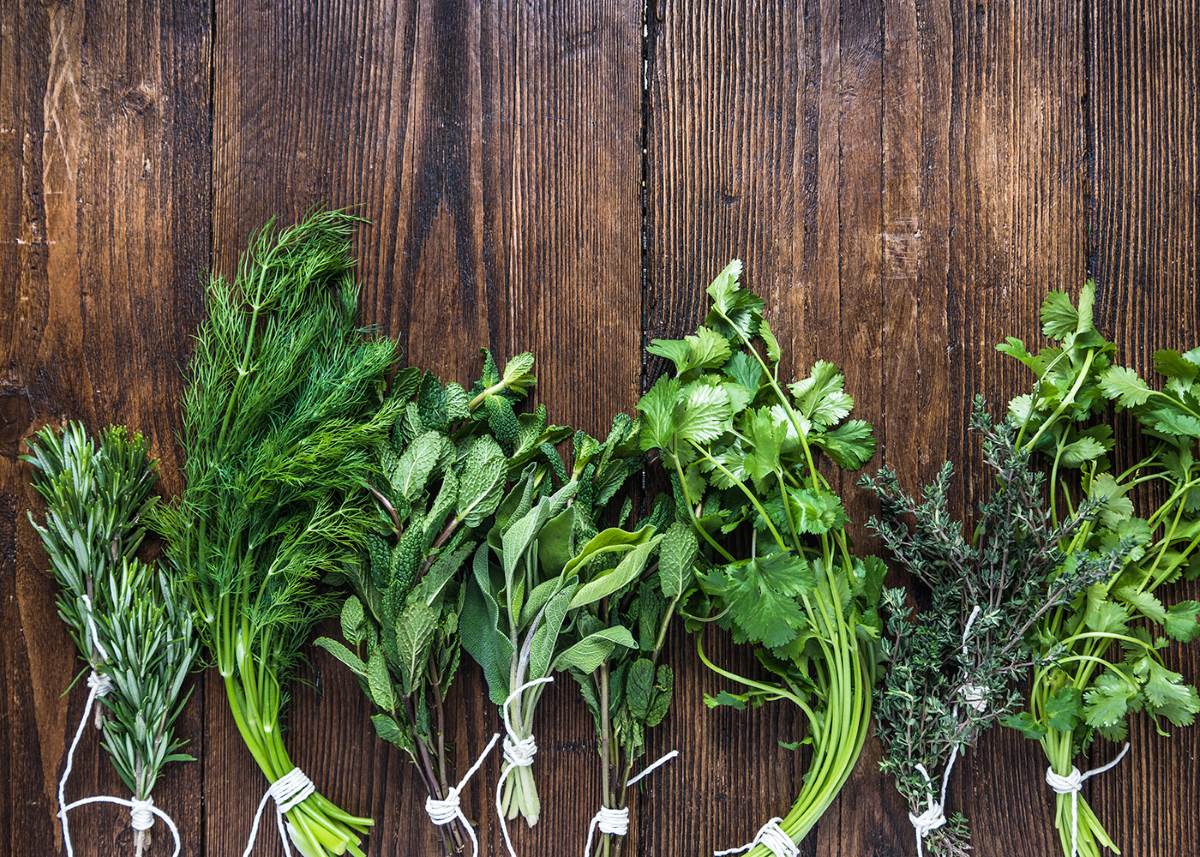
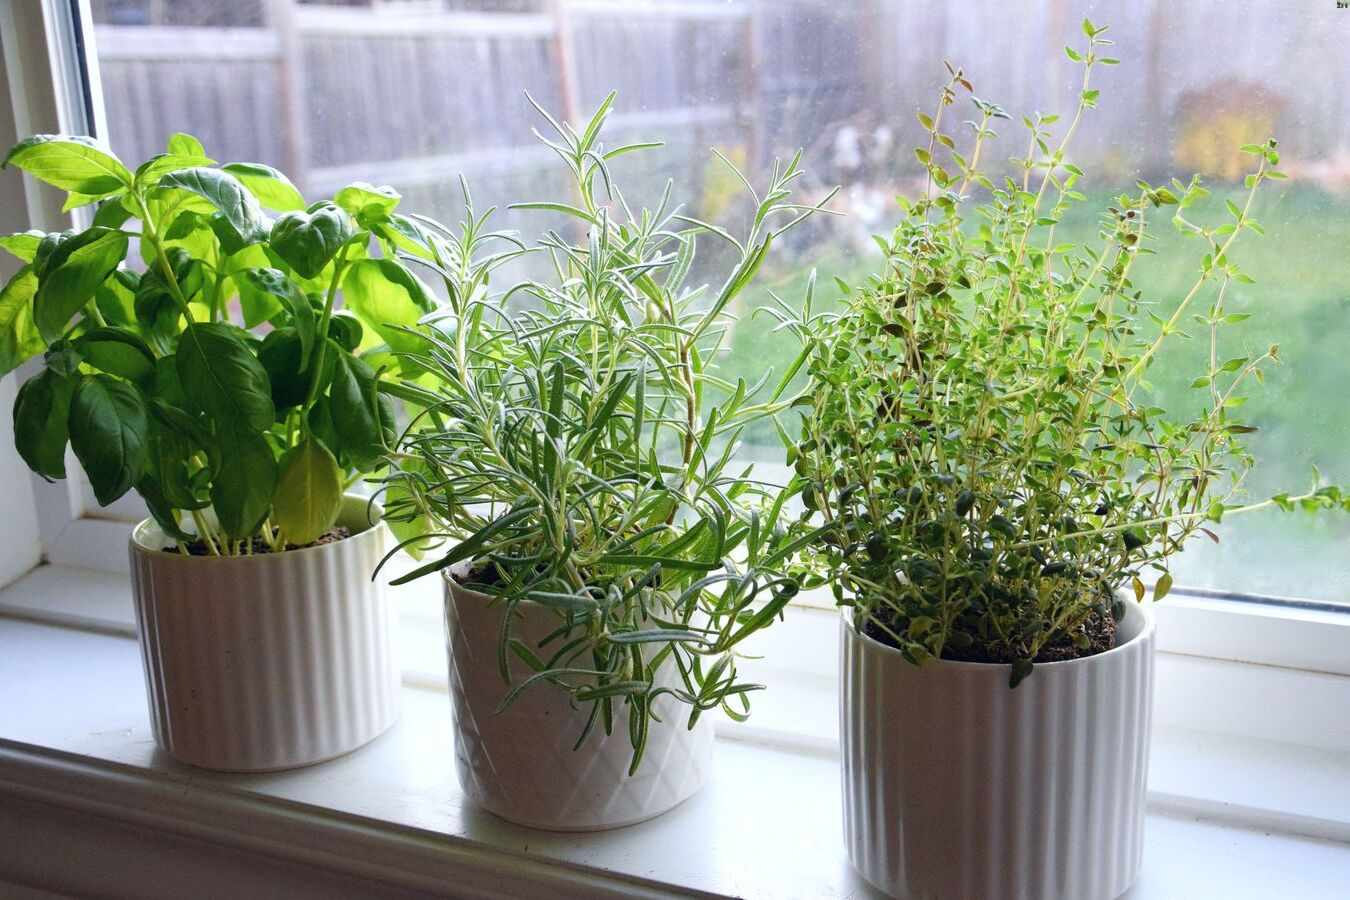
- Herb Type: Different herbs have varying storage requirements. Leafy herbs like basil, cilantro, and parsley prefer slightly higher humidity levels and can be stored with their stems submerged in water, similar to cut flowers. Sturdier herbs like rosemary, thyme, and sage can tolerate drier conditions and are best stored wrapped in a damp paper towel inside a sealable plastic bag or container.
- Herb Condition: The condition of your herbs at the time of storage can also affect their shelf life. It is important to store herbs that are free from any signs of decay or damage. Discard any wilted, yellowed, or moldy leaves before storing your herbs to prevent contamination and maintain freshness.
By considering these factors and implementing the right storage methods, you can ensure that your herbs stay fresh and flavorful for an extended period. In the next section, we will discuss some common mistakes to avoid when it comes to herb storage. Let’s uncover the pitfalls and learn how to store herbs effectively!
Common Mistakes to Avoid
When it comes to herb storage, there are a few common mistakes that can lead to the deterioration of your herbs. By avoiding these mistakes, you can ensure optimal freshness and quality. Here are some common errors to steer clear of:
- Not washing herbs before storage: It’s essential to wash your herbs before storing them to remove any dirt, pesticides, or contaminants. However, ensure that the herbs are thoroughly dry before storing them, as moisture can promote spoilage.
- Storing herbs in the refrigerator door: While the refrigerator is a common storage spot, the door compartment is subject to temperature fluctuations due to frequent opening and closing. Instead, store your herbs in the main compartment where temperatures are more stable.
- Using plastic bags without ventilation: While sealed plastic bags may seem like a convenient option, they can trap moisture and promote the growth of mold or mildew. Opt for breathable containers or loosely wrap the herbs in paper towels before placing them in a plastic bag.
- Storing different herb types together: Different herbs have different storage requirements. Storing them together can lead to cross-contamination and deterioration. Separate your herbs based on their specific storage needs to maintain their freshness and quality.
- Freezing herbs without blanching: Freezing herbs without blanching them first can result in loss of flavor, color, and texture. Blanching involves briefly immersing herbs in boiling water followed by an ice bath to preserve their characteristics. Be sure to blanch your herbs before freezing them for the best results.
- Not properly labeling herbs: Listing the names and dates on your herb containers or freezer bags can help you keep track of their freshness and prevent confusion. Use labels or marker pens to clearly identify the type of herbs and the date of storage.
- Ignoring herbs past their prime: Herbs have a limited lifespan, even with proper storage. Using herbs that are well beyond their prime can result in diminished flavors and textures. It’s important to periodically check your herbs and discard any that have significantly deteriorated.
By avoiding these common mistakes and adopting proper storage practices, you can preserve the freshness, flavors, and nutritional value of your herbs. Now that we know what to avoid, let’s move on to the methods of preparing herbs for storage in the next section.
Preparing Herbs for Storage
Properly preparing your herbs before storage is an essential step in ensuring their longevity and quality. Here are some key steps to follow when preparing your herbs for storage:
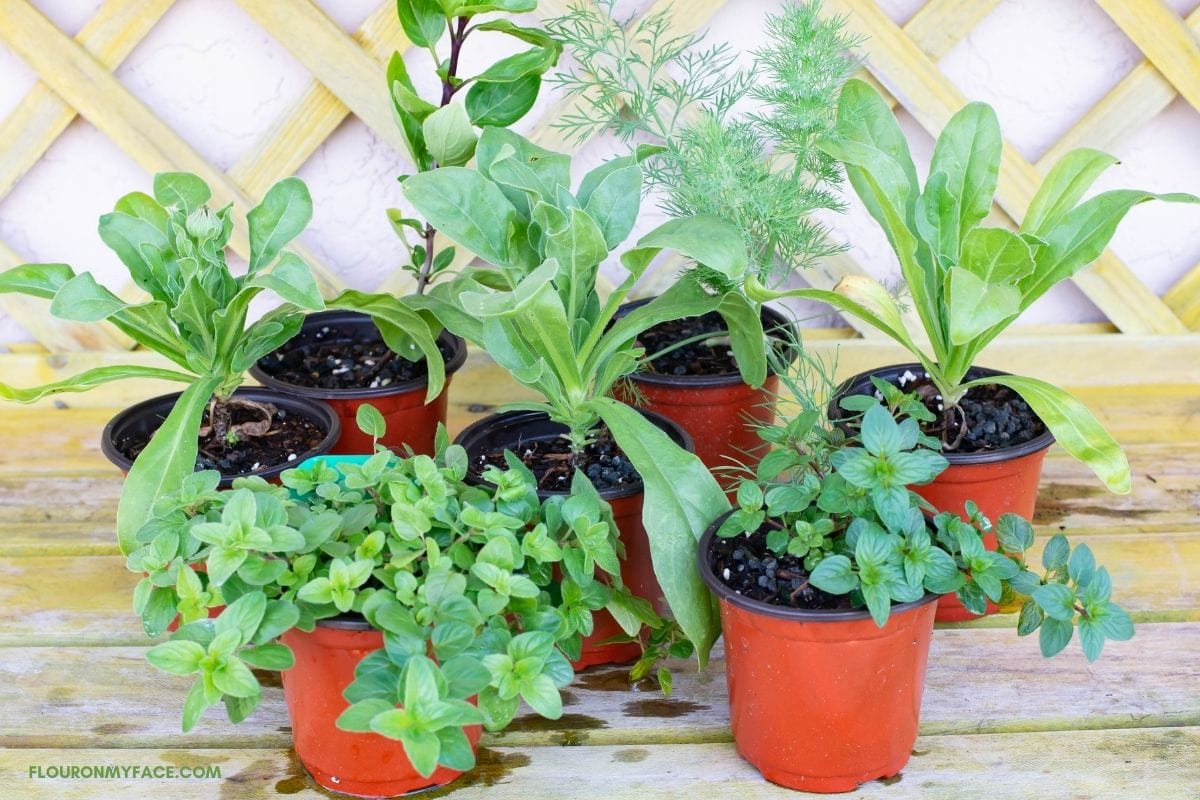
- Harvest at the right time: For herbs that you grow in your garden, it’s important to harvest them at the right time for optimal flavor and potency. Herbs are generally at their best just before they start to flower. Harvest them in the morning when the oils are most concentrated. For store-bought herbs, make sure to check the expiration date and use them before they lose their freshness.
- Wash and dry herbs: Before storing your herbs, it’s crucial to wash them to remove any dirt, excess oils, or pesticides. Gently rinse the herbs under cold water and pat them dry with a clean kitchen towel or use a salad spinner. Ensure they are completely dry to prevent moisture buildup during storage.
- Remove any damaged or wilted leaves: Inspect the herbs and remove any damaged, yellowed, or wilted leaves. These leaves can spoil quickly and impact the freshness of the rest of the herbs. Only keep the healthy and vibrant leaves for storage.
- Trim the stems: Depending on the type of herb, you may need to trim the stems. For leafy herbs like basil and parsley, remove any tough or woody stems. For hardier herbs like rosemary and thyme, trim any excess stems to ensure even storage and prevent overcrowding.
- Select the appropriate storage method: Different herbs have different storage requirements. Consider the type of herb and choose the appropriate storage method based on its characteristics. Options include storing fresh herbs in water, drying them, freezing, using herb-infused oils or vinegars, creating herb bouquets, storing herb seeds, and reviving dried herbs.
By following these steps, you can ensure that your herbs are properly prepared for storage, maintaining their freshness and maximizing their shelf life. In the following sections, we will explore various methods of herb storage in detail. Let’s uncover the different techniques to keep your herbs fresh and flavorful!
Read more: How To Store Fresh Herbs In Fridge
Different Methods of Herb Storage
There are several methods you can use to store your herbs, depending on their type and your preferences. Let’s explore the different methods of herb storage:
- Storing Fresh Herbs in Water: This method is suitable for leafy herbs like basil, mint, and cilantro. Trim the stems and place the herbs in a jar or glass of water, similar to a bouquet of flowers. Cover the herbs loosely with a plastic bag and store them in the refrigerator. Change the water every few days to maintain freshness.
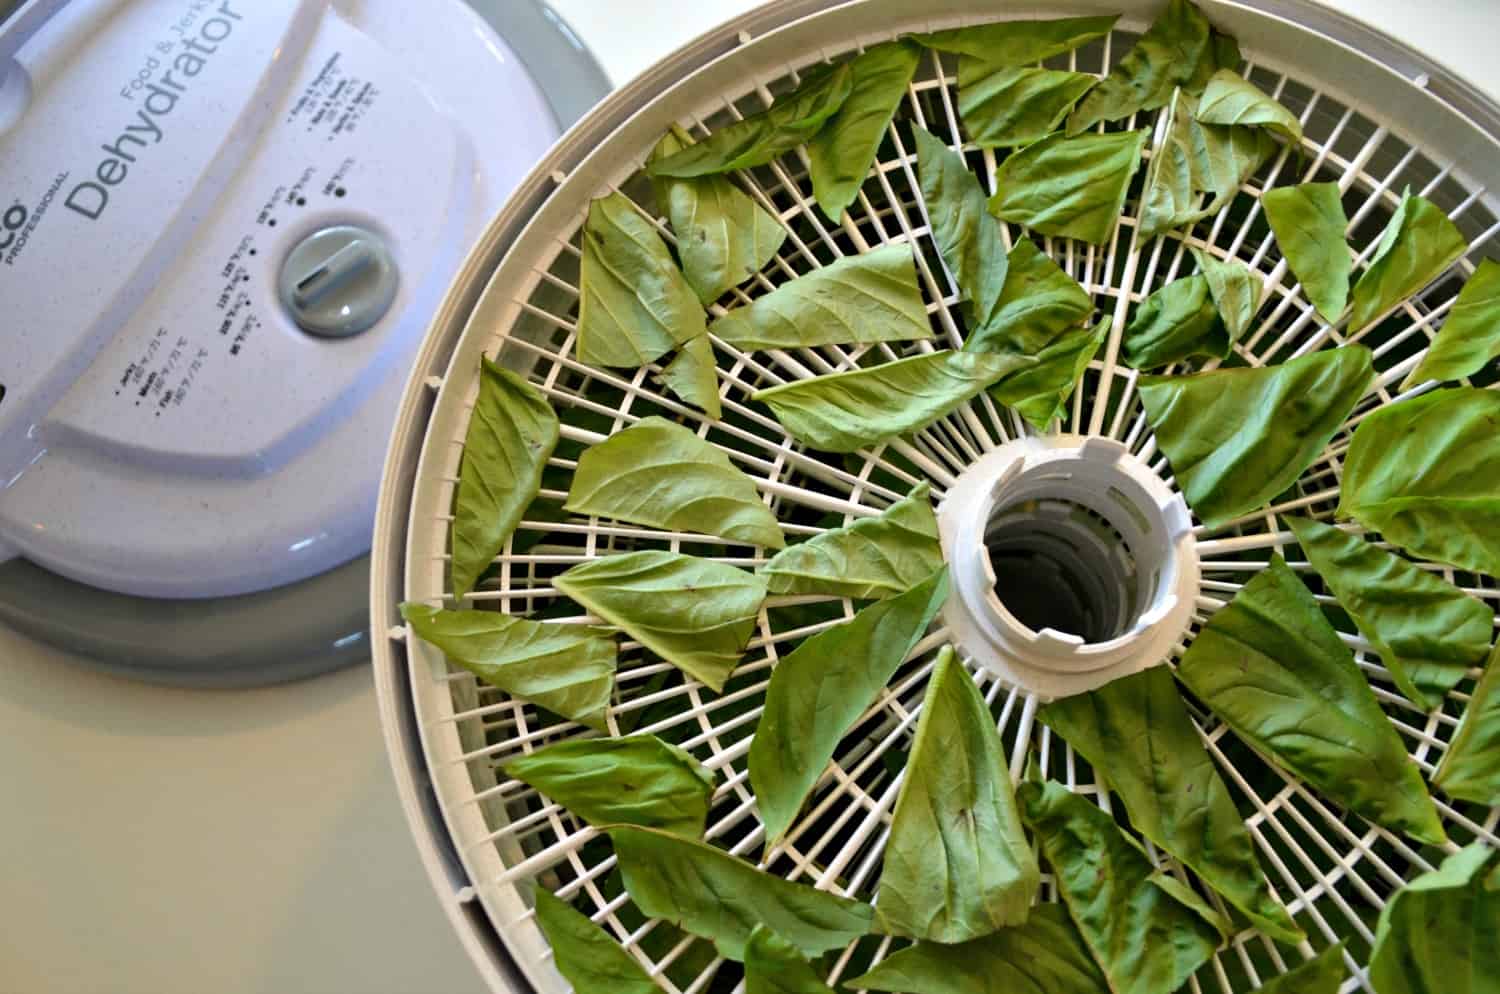
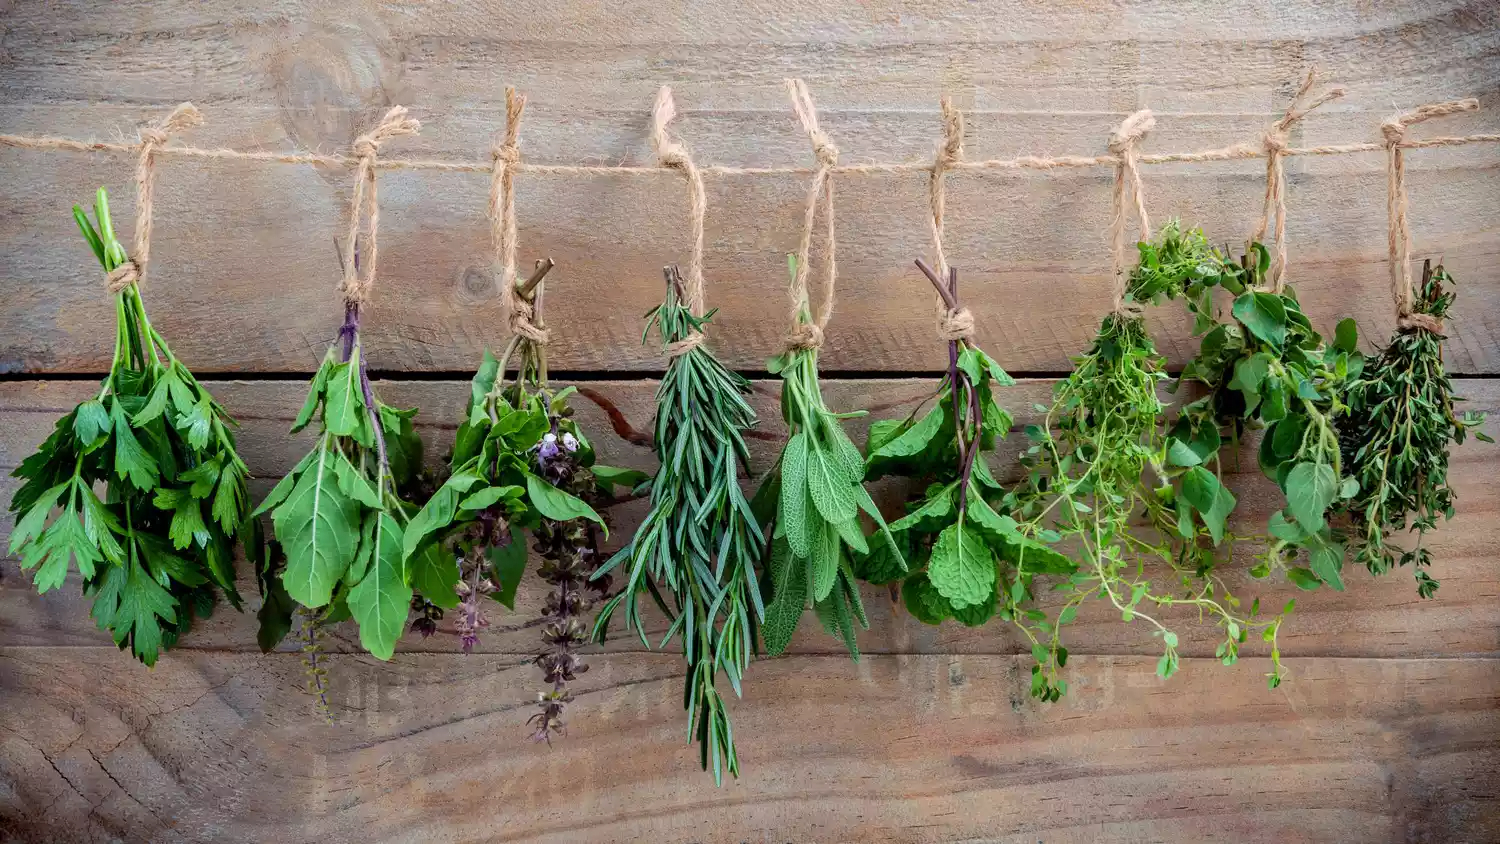
- Drying Herbs: Drying herbs is a common method for preserving their flavors. Bundle a small bunch of herbs together and hang them upside down in a cool, dry place with good air circulation. Once completely dry, remove the leaves from the stems and store them in an airtight container. Alternatively, you can dry herbs using a food dehydrator or an oven set to a low temperature.
- Freezing Herbs: Freezing herbs is a convenient method that helps maintain their flavors and textures. Wash and thoroughly dry the herbs, then finely chop or leave them whole. Place the herbs in ice cube trays and cover them with water, broth, or olive oil. Once frozen, transfer the herb cubes to a freezer bag or container for long-term storage. You can also freeze herbs in freezer-safe bags or vacuum-sealed bags.
- Herb-infused Oils: Herb-infused oils add a delightful flavor to dishes. Fill a clean jar with fresh herbs of your choice and cover them with a high-quality oil like olive or sunflower oil. Seal the jar and let it sit for a few weeks to infuse the flavors. Store the jar in a cool, dark place to maintain the quality of the oil.
- Herb Vinegars: Infusing herbs into vinegar is another way to preserve their flavors and create flavorful dressings or marinades. Fill a sterilized jar with fresh herbs and pour in vinegar of your choice, such as white wine vinegar or apple cider vinegar. Seal the jar and let it sit for a few weeks, shaking it occasionally. Store the jar in a cool, dark place to preserve the flavors.
- Creating Herb Bouquets: Some herbs, like thyme, rosemary, and bay leaves, can be tied together to create herb bouquets. Tie a bunch of herbs together with kitchen twine and hang it upside down in a cool, dry place. Once completely dry, remove the leaves from the stems and store them in an airtight container.
- Storing Herb Seeds: If you have access to fresh herb seeds or want to save seeds from your garden, proper storage is crucial. Ensure the seeds are fully dry before storing them in airtight containers or envelopes in a cool, dry place. Label the containers with the herb name and date for easy identification.
- Reviving Dried Herbs: If your dried herbs have lost some of their potency, you can revive them to enhance their flavors. Crush or grind the dried herbs to release their aromas before using them in your dishes.
By utilizing these different methods of herb storage, you can preserve the freshness, flavors, and aromas of your herbs for an extended period. In the following sections, we will delve deeper into specific storage methods and provide detailed instructions. Let’s continue our journey to discover the secrets of storing herbs effectively!
Storing Fresh Herbs
Fresh herbs are a delightful addition to any dish, and storing them properly will help preserve their freshness and flavors. Here are some tips for storing fresh herbs:
- Trim the stems: Before storing fresh herbs, trim the bottom of the stems with a sharp knife or scissors. Removing any excess leaves or woody stems will prevent overcrowding and allow the herbs to take up water more efficiently.
- Water storage method: Leafy herbs like basil, mint, and cilantro can be stored similar to a bouquet of flowers. Fill a jar or glass with about an inch of water and place the herbs in it, making sure the stems are submerged. Loosely cover the herbs with a plastic bag and secure it with a rubber band. Store the jar in the refrigerator.
- Moisture control: To prevent the herbs from becoming damp or developing mold, make sure the leaves are not in direct contact with the water. You can also wrap the lower ends of the stems with a damp paper towel before placing them in the water.
- Change the water: It’s important to change the water every two to three days to keep it fresh and prevent any bacterial growth. Before changing the water, trim the stems slightly to ensure they can uptake fresh water effectively.
- Prolonging freshness: To extend the lifespan of fresh herbs, you can also cover them gently with a plastic bag or place a plastic bag loosely over the jar, creating a mini-greenhouse effect. This helps retain the moisture around the herbs and prevents wilting.
- Labeling and identification: It’s a good idea to label your fresh herb containers with the name and date of storage. This will help you keep track of their freshness and avoid confusion when using them in your recipes.
- Herbs that do not require water: Some herbs, like rosemary, thyme, and sage, should not be stored with their stems in water, as it can cause them to become too moist. For these herbs, remove any damaged leaves, wrap them loosely in a damp paper towel, and place them in a sealable plastic bag or container. Store them in the refrigerator.
By following these guidelines, you can keep your fresh herbs vibrant and flavorful for a longer period, ensuring that they enhance your culinary creations. In the next section, we will explore the storage of dried herbs. Let’s uncover the best practices for preserving dried herbs!
Storing Dried Herbs
Dried herbs are a convenient way to have the flavors of your favorite herbs readily available in your kitchen. Proper storage of dried herbs will help maintain their quality and potency. Here’s how to store dried herbs:
- Ensure complete dryness: Before storing dried herbs, ensure that they are completely dry. Any trace of moisture can lead to mold or spoilage. To dry herbs, hang them upside down in a well-ventilated area away from direct sunlight until they are brittle and crumble easily.
- Choose airtight containers: Transfer your dried herbs to airtight containers, such as glass jars or containers with tight-fitting lids. The containers should be clean, dry, and free from any residual moisture to prevent the herbs from absorbing moisture from the environment.
- Label and date: Label each container with the name of the herb and the date of storage. This will help you keep track of the freshness of your dried herbs and ensure you use them before their flavors diminish.
- Store in a cool, dark place: Dried herbs retain their flavors best when stored in a cool, dark place. Exposure to light and heat can degrade the quality and potency of the herbs. Store them in a pantry, cabinet, or drawer away from direct sunlight and heat sources in your kitchen.
- Avoid frequent opening: Try to minimize the frequency of opening the containers to reduce air exposure, which can lead to flavor loss. It’s best to scoop out the desired amount of herbs using a clean dry spoon or measuring spoon rather than reaching your hand into the container.
- Consider portioning: If you buy herbs in bulk or dry your own herbs, consider portioning them into smaller containers. This allows you to open and use only a smaller quantity, keeping the rest of the herbs sealed and protected from air and moisture.
- Discard old herbs: Over time, dried herbs lose their potency and flavor. It’s recommended to regularly check the stored herbs for any signs of discoloration, loss of aroma, or stale flavors. If they have significantly deteriorated, it’s best to discard them and replenish your supply with fresh dried herbs.
By following these storage tips, you can ensure that your dried herbs stay fresh and flavorful for longer periods, enhancing the taste of your culinary creations. In the next section, we will explore the frozen storage method for herbs. Let’s uncover the secrets of freezing herbs!
Store fresh herbs by wrapping them in a slightly damp paper towel and placing them in a resealable plastic bag in the refrigerator. This will help keep them fresh for longer.
Using Freezing as a Storage Method
Freezing herbs is a fantastic method for preserving their freshness, flavors, and nutritional value. Freezing helps maintain the vibrant colors and aroma of herbs while extending their shelf life. Here’s how you can use freezing as a storage method for herbs:
- Wash and dry the herbs: Start by washing the herbs gently under cold water to remove any dirt or debris. Pat them dry with a clean kitchen towel or use a salad spinner to remove excess moisture.
- Choose the freezing method: There are different freezing methods you can choose from based on your preferences and intended use:
- Whole Leaves: Lay the washed and dried herbs on a baking sheet in a single layer. Place the sheet in the freezer for a few hours until the leaves are frozen. Transfer the frozen leaves to a freezer-safe bag or container, removing as much air as possible before sealing.
- Chopped or Minced: Chop or mince the herbs into small pieces as desired. Spoon the chopped herbs into ice cube trays, filling each compartment about three-quarters full. Cover the tray with plastic wrap or a freezer-safe lid and place it in the freezer. Once the herbs are frozen, transfer the herb cubes to a freezer bag or container for long-term storage.
- Herb-infused Oil: Another method is to chop the herbs and place them in an ice cube tray. Fill each compartment with olive oil or another type of cooking oil. Freeze the tray until the herb-infused oil cubes are solid, then transfer them to a freezer-safe bag or container.
- Label and date: Remember to label the freezer bags or containers with the name of the herb and the date of freezing. This helps you identify the herbs easily and keep track of their freshness.
- Store in the freezer: Place the sealed freezer bags or containers in the freezer and ensure they are kept in a flat position to prevent crushing or spilling. The herbs can be stored in the freezer for several months.
- Thawing and using frozen herbs: When you are ready to use the frozen herbs, simply remove the desired quantity from the freezer and thaw them in the refrigerator or at room temperature. Frozen herbs are particularly great for use in cooked dishes like soups, stews, and sauces.
By using the freezing method, you can preserve your herbs’ flavors and aromas while having them readily available for your culinary creations. In the next sections, we will explore other creative methods of herb storage, including making herb-infused oils and preserving herbs in vinegar. Let’s continue our journey of discovering exciting ways to store herbs!
Read more: How To Store Dried Herbs Long Term
Making Herb-infused Oils
Herb-infused oils are a wonderful way to add an extra layer of flavor to your dishes. They can be used in marinades, dressings, sauces, or simply drizzled over your favorite dishes. Making your own herb-infused oils is simple and allows you to customize the flavors to suit your taste. Here’s how you can make herb-infused oils:
- Select your herbs: Choose fresh herbs with robust flavors such as rosemary, thyme, basil, oregano, or sage. Experiment with different combinations or use a single herb for a more pronounced flavor.
- Prepare the herbs: Wash the herbs gently to remove any dirt or debris. Pat them dry with a clean kitchen towel to remove excess moisture. If the herb leaves are large, you can also roughly chop them to release more of their flavors.
- Choose your oil: Select a high-quality oil that complements the flavors of your chosen herbs. Olive oil is a popular choice, but you can also use other oils like grapeseed oil, sunflower oil, or avocado oil.
- Combine the herbs and oil: In a clean, dry jar or bottle, place the herbs and cover them with the oil. Ensure the herbs are fully submerged in the oil. You can gently crush the herbs with a spoon or use a clean chopstick to release their oils and enhance their flavors.
- Infusion process: Seal the jar or bottle tightly and place it in a cool, dark place, such as a pantry or cupboard. Let the herbs infuse in the oil for at least a week, although longer infusion times will result in a more intense flavor. Shake the jar or bottle occasionally during the infusing process to help distribute the flavors.
- Strain the oil: Once the desired flavor has developed, strain the oil to remove the herb particles. Use a fine-mesh sieve or cheesecloth to separate the oil from the herbs. Press the herbs gently to extract any remaining oil. Discard the herbs or use them as a garnish if you prefer.
- Bottle and store: Transfer the herb-infused oil into clean, sterilized bottles or jars. Label the containers with the name of the herb and the date. Store the bottles in a cool, dark place to preserve the flavors. Depending on the herbs used and the storage conditions, the infused oils can last for several months to a year.
- Usage: Use your homemade herb-infused oils in a variety of dishes, such as salad dressings, pasta sauces, roasted vegetables, or marinades. They can also be used as a flavorful drizzle over bread, pizzas, or grilled meats.
Making herb-infused oils is a simple and enjoyable process that allows you to create unique flavor profiles for your culinary creations. In the next section, we will explore the method of preserving herbs in vinegar. Let’s continue our exploration of creative herb storage methods!
Storing Herbs in Vinegar
Preserving herbs in vinegar is a delightful way to capture and retain their flavors while infusing the vinegar with their aromatic essences. The herb-infused vinegar not only adds a burst of flavor to your recipes but also makes a wonderful homemade gift. Here’s how you can store herbs in vinegar:
- Choose your herbs: Select fresh herbs with strong flavors such as basil, tarragon, thyme, rosemary, or dill. You can use a single herb or create unique blends by combining different herbs.
- Wash and dry the herbs: Gently wash the herbs to remove any dirt or debris, and pat them dry with a clean kitchen towel to remove excess moisture. Ensure the herbs are completely dry before proceeding.
- Prepare the vinegar: Choose a high-quality vinegar, such as white wine vinegar, red wine vinegar, apple cider vinegar, or rice vinegar. Heat the vinegar in a saucepan until it reaches a gentle simmer. Remove it from the heat and allow it to cool for a few minutes.
- Infusion process: Place the herbs in a clean glass jar or bottle. Pour the heated vinegar over the herbs, ensuring they are fully submerged. Use a spoon to press down the herbs gently to release their flavors. Seal the jar or bottle tightly.
- Infusion period: Place the sealed jar or bottle in a cool, dark place, such as a pantry or cupboard. Allow the herbs to infuse in the vinegar for at least a week, although longer infusion times will result in more intense flavors. Shake the jar or bottle occasionally to help distribute the flavors.
- Strain the vinegar: After the desired flavor has developed, strain the vinegar to remove the herb particles. Use a fine-mesh sieve or cheesecloth to separate the vinegar from the herbs. Press the herbs gently to extract any remaining vinegar. Discard the herbs or use them as a garnish or in other recipes if desired.
- Bottle and store: Transfer the herb-infused vinegar into clean, sterilized bottles or jars. Label the containers with the name of the herbs and the date. Store the bottles in a cool, dark place to preserve the flavors. The herb-infused vinegar can last for several months to a year, depending on the herbs used and the storage conditions.
- Usage: Use your homemade herb-infused vinegar in dressings, marinades, sauces, or as a tangy addition to a variety of dishes. It also makes a thoughtful homemade gift for family and friends who appreciate the flavors of herbs.
Storing herbs in vinegar not only extends the life of the herbs but also creates a versatile, flavorful ingredient that can elevate your culinary creations. In the next section, we will explore the method of creating herb bouquets for herb preservation. Let’s continue our journey through creative herb storage methods!
Creating Herb Bouquets for Storage
Creating herb bouquets is an elegant and visually appealing way to store and preserve herbs. This method is particularly suitable for herbs with woody stems such as thyme, rosemary, and bay leaves. Herb bouquets can be used as a decorative element in your kitchen while keeping the herbs fresh and accessible. Here’s how you can create herb bouquets for storage:
- Harvest the herbs: Gather fresh herb sprigs of the desired herb or herbs. Choose stems that are healthy and free from any signs of damage or wilting. Harvesting in the morning when the oils in the herbs are most concentrated will ensure the best flavor and aroma.
- Bundle the herbs: Gather the herb sprigs into a small bundle. Arrange the stems so they are parallel to each other. Tie the stems together tightly with kitchen twine or a rubber band. Leave a long tail of twine for hanging and securing the bouquet.
- Hang the herb bouquet: Find a cool, dry place with good air circulation where you can hang the herb bouquet upside down. This could be a pantry, a dry corner in your kitchen, or a well-ventilated room. Use the long tail of twine to hang the bouquet from a hook or a clothespin.
- Allow for drying: The herbs will air dry naturally as they hang. It typically takes one to two weeks for them to fully dry, depending on the humidity levels in your environment. The herbs are ready when they crumble easily at the touch.
- Remove the leaves: Once the herbs are completely dry, gently remove the leaves from the stems. Crush or crumble the leaves into desired sizes, discarding any tough or woody stems. You can use your fingers, a mortar and pestle, or a clean coffee grinder for this step.
- Store in airtight containers: Transfer the dried herb leaves into clean, airtight containers, such as glass jars or spice bottles. Label the containers with the name of the herb and the date of storage to keep track of freshness. Store the containers in a cool, dark place away from direct sunlight and heat.
- Usage: Use the dried herb leaves as needed in your recipes, adjusting the quantities to suit your taste. Dried herb leaves are particularly great for seasoning soups, stews, roasted meats, and sauces, adding a burst of flavor to your dishes.
Creating herb bouquets not only preserves the flavors of your herbs but also adds a beautiful and rustic touch to your kitchen. In the next section, we will explore the storage of herb seeds, allowing you to grow your own supply of fresh herbs. Let’s continue our journey of discovering creative ways to store herbs!
Storing Herb Seeds
Storing herb seeds properly is essential for ensuring their viability and germination when you’re ready to plant them. Storing herb seeds allows you to save seeds from your own garden or keep a supply of your favorite herb varieties for future use. Here’s how you can store herb seeds effectively:
- Harvesting seeds: Allow the herb plants to mature and flower. Once the flowers have dried and turned brown, the seeds are ready for harvesting. Remove the seeds by gently rubbing or shaking the flower heads into a clean container or paper bag.
- Drying the seeds: Spread the harvested seeds on a clean paper towel or a mesh drying screen. Make sure to separate the seeds and remove any plant debris. Place the seeds in a well-ventilated area away from direct sunlight and humidity. Allow the seeds to dry completely for several weeks until they are brittle and snap easily.
- Cleaning the seeds: Once the seeds are thoroughly dried, remove any remaining plant debris or chaff by gently rubbing or blowing on the seeds. Use a fine-mesh sieve or strainer to separate the seeds from any larger pieces.
- Choosing storage containers: Select small, airtight containers for storing the herb seeds. Glass jars with screw-top lids or small resealable bags work well. It’s important to ensure that the containers are clean and dry before use to prevent any moisture from affecting the seed viability.
- Labeling and organizing: Label each container with the name of the herb, the variety (if applicable), and the date of harvesting. This information will help you identify the seeds easily and keep track of their freshness. Arrange the containers in a cool, dark place away from direct sunlight and extreme temperature fluctuations.
- Optimal storage conditions: Herb seeds generally have good longevity when stored properly. Keep the seeds in a cool and dry place, such as a pantry or a refrigerator. Avoid exposure to moisture, excessive heat, or fluctuations in temperature, as these can reduce seed viability.
- Periodically checking and testing seeds: As time passes, the viability of herb seeds may decrease. Periodically check your stored seeds for any signs of deterioration, such as mold, discoloration, or damage. You can also perform a germination test by planting a small sample of the seeds to ensure their viability before sowing larger quantities in your garden.
By storing herb seeds properly, you can ensure that they remain viable and ready for future planting. This allows you to grow your own fresh herbs and maintain a continuous supply. In the next section, we will explore how to revive dried herbs and make the most out of them. Let’s keep exploring the world of herb storage!
Read more: How To Make Candles With Herbs
Reviving Dried Herbs
If you find yourself with dried herbs that have lost some of their vibrancy, don’t worry — there are ways to revive them and restore their flavors. Here’s how you can revive dried herbs:
- Crush or grind the herbs: Dried herbs can lose their potency and flavor when they become too dry. To revive them, gently crush or grind the dried herbs using a mortar and pestle or a clean coffee grinder. This helps release the essential oils and intensifies the flavors.
- Rehydrate with water or oil: Sometimes, dried herbs can benefit from a bit of rehydration. Sprinkle a small amount of water or oil, such as olive oil or vegetable oil, over the crushed or ground herbs. Let them sit for a few minutes to absorb the moisture before using them in your recipes.
- Combine with fresh herbs: To enhance the flavors of your dried herbs, consider combining them with fresh herbs. Fresh herbs have a more potent flavor profile and can help revive the dullness of dried herbs. Use a ratio of roughly 1 part dried herbs to 3 parts fresh herbs in your recipes.
- Infuse in liquids: Another way to revive dried herbs is by infusing them in liquids like broth, stocks, sauces, or dressings. Simmer the dried herbs in a liquid of your choice to allow the flavors to meld and rejuvenate. This infusion process helps rehydrate the dried herbs and infuse the liquid with their flavors.
- Adjust seasoning: When using revived dried herbs in your recipes, it’s important to taste and adjust the seasoning accordingly. The flavor of revived herbs may have intensified, so start with a smaller quantity than you would with fresh herbs. Gradually add more if needed, ensuring a well-balanced flavor in your dish.
By following these techniques, you can breathe life back into your dried herbs and elevate their flavors. While they may not regain the exact same freshness as fresh herbs, these revival methods can make a significant difference in the taste of your dishes. Use the revived herbs in your favorite recipes and enjoy their revitalized flavors!
Now that we’ve explored various methods of herb storage, from storing fresh and dried herbs to making herb-infused oils and vinegars, as well as preserving herbs in different forms, you have a range of options to keep your herbs fresh and flavorful. Get creative with your herb storage techniques, and let your dishes shine with the vibrant flavors that herbs bring. Happy herb storing and cooking!
Conclusion
Proper herb storage is essential to preserve the freshness, flavors, and nutritional value of your herbs. By understanding the importance of proper storage methods and avoiding common mistakes, you can extend the shelf life of your herbs and enhance the taste of your culinary creations.
We explored various factors that affect herb storage, including temperature, humidity, light exposure, and airflow. By considering these factors and implementing the appropriate storage techniques, such as storing fresh herbs in water or drying and freezing herbs, you can maximize the lifespan and quality of your herbs.
We also discussed how to make herb-infused oils and vinegars, creating flavorful additions that can elevate your dishes. Storing herb seeds allows you to grow your own herb supply, while herb bouquets add a decorative touch to your kitchen as the herbs dry naturally. Additionally, we explored techniques to revive dried herbs and restore their flavors.
Remember to label and date your herb storage containers to keep track of freshness and usage. Regularly check stored herbs for any signs of deterioration, and discard any that have significantly deteriorated. By following these guidelines, you can make the most out of your herb storage and minimize waste.
With the knowledge and techniques you’ve gained, you are now equipped to store herbs effectively and enjoy their flavors all year round. So, whether you’re preserving herbs from your garden or extending the life of store-bought herbs, make use of these storage methods to savor the vibrant colors, fragrant scents, and delicious tastes that herbs bring to your culinary adventures.
Embrace the world of herb storage and unleash your creativity in the kitchen. Let the freshness and flavors of herbs transform your dishes into culinary masterpieces. Happy herb storage and happy cooking!
Frequently Asked Questions about How To Store Herbs
Was this page helpful?
At Storables.com, we guarantee accurate and reliable information. Our content, validated by Expert Board Contributors, is crafted following stringent Editorial Policies. We're committed to providing you with well-researched, expert-backed insights for all your informational needs.


0 thoughts on “How To Store Herbs”