Articles
How To Make Candles With Herbs
Modified: February 25, 2024
Learn how to make candles with herbs in these informative articles. Discover step-by-step guides, expert tips, and creative ideas for crafting scented and decorative candles.
(Many of the links in this article redirect to a specific reviewed product. Your purchase of these products through affiliate links helps to generate commission for Storables.com, at no extra cost. Learn more)
Introduction
There is something magical about the soft glow and inviting scent of a flickering candle. The ambiance it creates can instantly transform your space into a tranquil haven. But have you ever considered taking your candle-making game to the next level by infusing them with the power of aromatic herbs?
Herbal candles not only add a fragrant touch to your living space but also offer various therapeutic benefits. From relaxation to stress relief, the natural properties of different herbs can enhance your well-being and create a soothing atmosphere.
In this article, we will delve into the fascinating world of making candles with herbs. We will guide you step-by-step through the process of creating your own herbal candles, allowing you to enjoy their beautiful scent and therapeutic effects.
Before we dive into the nitty-gritty of candle-making, let’s review the benefits of using herbs in candles. The combination of herbs and candles can provide a host of advantages for your mental and emotional well-being. Different herbs possess unique healing properties, and when infused into a candle, they release their aromatic compounds into the air, transforming your space into a heavenly oasis.
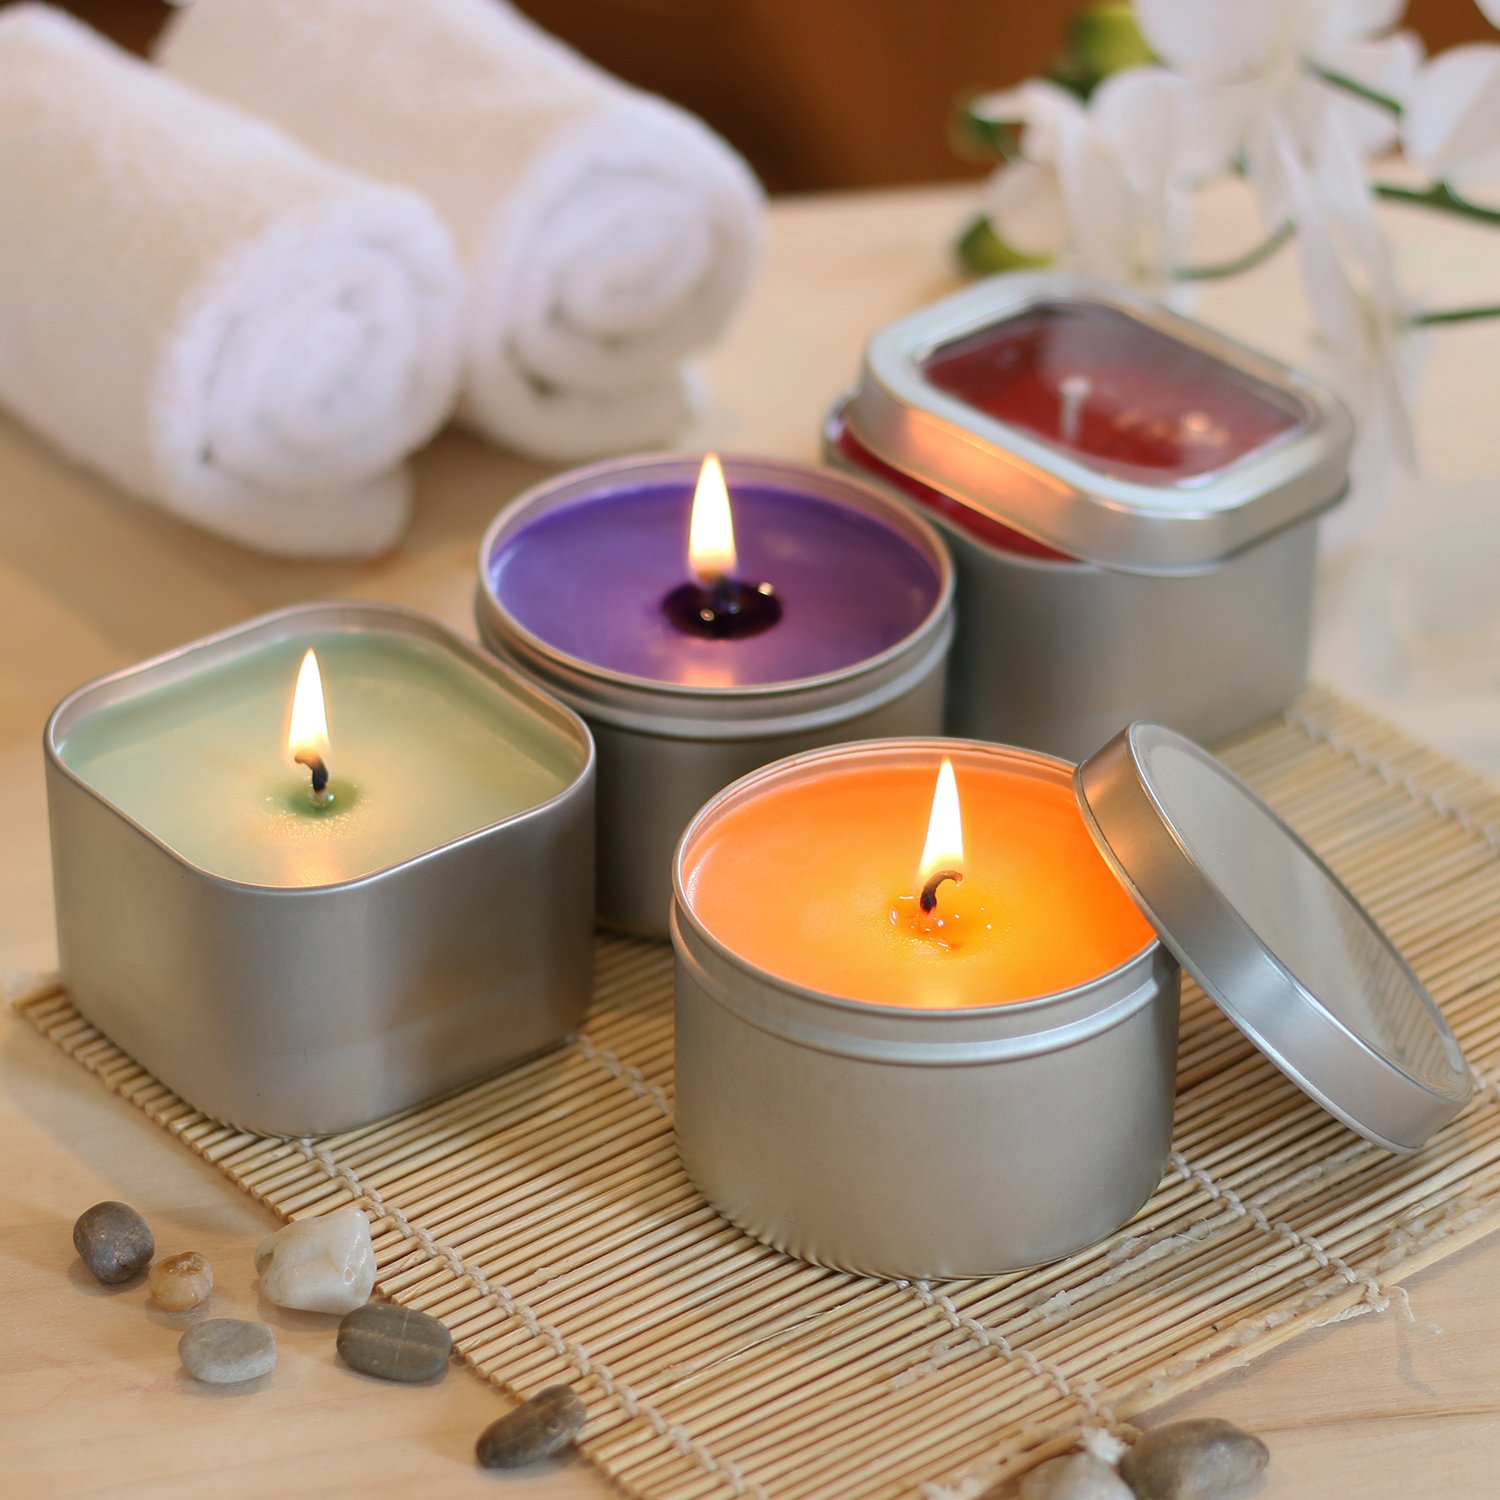
Not only do herbal candles offer aromatherapy benefits, but they can also serve as a visual treat with the vibrant colors and textures of the herbs incorporated into the wax.
Whether you’re a seasoned candle maker or new to the craft, making candles with herbs is a delightful and rewarding experience. So, let’s explore the world of herbal candle making and get ready to infuse your space with the captivating scents and therapeutic properties of nature’s bounty.
Key Takeaways:
- Infuse your space with captivating scents and therapeutic benefits by crafting your own herbal candles, creating moments of relaxation and rejuvenation in your daily life.
- Prioritize safety while enjoying the warm glow and invigorating scents of your herbal candles, enhancing your overall well-being and enriching your living space.
Read more: How To Make A Patio Herb Garden
Choosing the Right Herbs
When it comes to making candles with herbs, selecting the right herbs is crucial to ensure not only a pleasing fragrance but also the desired therapeutic benefits. Here are a few factors to consider when choosing the herbs for your candles:
- Scent: Consider the aroma you want your candle to have. Do you prefer floral, citrusy, herbal, or woody scents? Each herb has its own unique fragrance profile, so choose herbs that align with your preferences.
- Therapeutic Properties: Different herbs have different therapeutic properties, so think about the specific benefits you want your candle to provide. For example, lavender is known for its calming effects, while eucalyptus can help with respiratory issues.
- Compatibility with Wax: Certain herbs may lose their scent or discolor when exposed to high temperatures. Ensure that the herbs you choose are suitable for mixing into the candle wax.
- Your Intention: If you have a specific intention or purpose for your candle, such as love, relaxation, or energy, research herbs that align with your intention and incorporate them into your candle-making process.
Here are some popular herbs that are commonly used in candles:
- Lavender: Known for its calming properties and pleasant floral aroma, lavender is a perfect choice for relaxing and promoting restful sleep.
- Rosemary: With its refreshing and invigorating scent, rosemary is often used to enhance focus and concentration.
- Peppermint: The cooling and uplifting fragrance of peppermint can help with headaches and improve mental clarity.
- Chamomile: With its soothing and comforting scent, chamomile is ideal for promoting relaxation and reducing stress.
- Vanilla: The sweet and comforting aroma of vanilla adds a cozy and warm touch to any space.
- Cinnamon: Known for its spicy and inviting scent, cinnamon can create a cozy and welcoming atmosphere in your home.
Remember to research each herb thoroughly before using it in your candles and ensure that you are aware of any precautions or potential sensitivities.
Now that you have selected the herbs for your herbal candles, it’s time to gather the necessary materials to bring your vision to life.
Gathering Materials
Before you begin the candle-making process, it’s essential to gather all the necessary materials. Having everything on hand will ensure a smooth and seamless experience. Here’s a list of the materials you’ll need:
- Candle Wax: Choose a high-quality wax, such as soy wax or beeswax. These types of wax provide a clean and long-lasting burn.
- Herbs: Collect the herbs you have chosen for your candles. Make sure they are dried and free from any moisture to prevent mold or discoloration in your candles.
- Candle Wicks: Select wicks that are suitable for the size and diameter of your candle jars or molds. Cotton wicks are a popular choice.
- Containers or Molds: Decide on whether you want to use glass containers, tins, or silicone molds for your candles. Ensure they are clean and heat-resistant.
- Fragrance Oils or Essential Oils (optional): If you want to enhance the fragrance of your herbal candles, you can use fragrance oils or essential oils. Choose scents that complement the herbs you have selected.
- Double Boiler or Melting Pot: To melt the wax, you’ll need a double boiler or a dedicated melting pot specifically designed for candle making.
- Thermometer: A thermometer is necessary to monitor the temperature of the wax and ensure it doesn’t overheat or cool too quickly.
- Stirring Utensil: Use a heat-resistant spoon or a dedicated candle-making stirrer to mix the ingredients evenly.
- Heat Source: You’ll need a heat source, such as a stove or electric hot plate, to melt the wax.
- Protective Gear: Candle-making can involve hot wax and oils, so it’s important to protect yourself by wearing heat-resistant gloves, an apron, and safety goggles.
- Labels and Packaging: If you plan to gift or sell your candles, consider designing labels and purchasing suitable packaging materials to give them a professional and polished look.
Ensure that you have all the required materials before you begin the candle-making process. This will save you time and prevent any interruptions during the creation of your herbal candles.
Now that you have gathered your materials, it’s time to move on to the next step: preparing the candle wax.
Preparing the Candle Wax
Preparing the candle wax is a crucial step in the candle-making process. Properly melted and prepared wax will ensure that your candles burn evenly and release the fragrance of the herbs effectively. Follow these steps to prepare your candle wax:
- Cut the Wax: Begin by cutting the candle wax into small chunks or shavings. This will help it melt more efficiently and evenly.
- Measure the Wax: Determine the amount of wax you need for your candles based on the size of your containers or molds. A general rule of thumb is to use about one pound (16 ounces) of wax per 16-ounce container.
- Use a Double Boiler: Fill a large pot with water and place it on the stove. Set a smaller pot or a heat-resistant pouring pitcher into the larger pot, creating a double boiler system. This indirect heat method prevents the wax from getting too hot or burning.
- Add the Wax: Place the cut wax into the smaller pot or pouring pitcher. Turn the heat to medium-low and allow the wax to melt slowly. Stir occasionally to ensure even melting.
- Monitor the Temperature: Use a thermometer to monitor the wax temperature. Different types of wax have different melting points, so refer to the instructions provided with the wax you are using. Generally, soy wax melts around 120-140°F (49-60°C), while beeswax melts around 144-150°F (62-66°C).
- Optional: Add Fragrance Oils or Essential Oils: If you want to enhance the scent of your candles, this is the time to add fragrance oils or essential oils. Follow the recommended guidelines for the amount of oil to add based on the quantity of wax you are using.
- Stir the Wax: Once the wax has melted completely and reached the desired temperature, gently stir it to ensure that any added oils are evenly distributed. Be careful not to create bubbles or incorporate any air into the wax.
Now that your candle wax is prepared, it’s time to move on to the exciting step of adding the herbs to the wax for a delightful infusion of fragrance and therapeutic benefits.
Adding Herbs to the Wax
Adding herbs to the wax is where the magic happens in creating your herbal candles. This step infuses the candles with their delightful scents and therapeutic properties. Follow these steps to add herbs to your wax:
- Prepare the Herbs: Ensure that the herbs you have chosen are completely dry and free from any moisture. If needed, gently crush or break the herbs into smaller pieces to release their fragrance more effectively.
- Add the Herbs to the Wax: Once your wax has melted and reached the desired temperature, carefully add the prepared herbs to the wax. Stir gently to distribute the herbs evenly throughout the wax. Be mindful not to overcrowd the wax with too many herbs, as this can affect the burning process and potentially create a fire hazard.
- Let the Herbs Infuse: Allow the herbs to infuse in the wax for about 10-15 minutes. This allows the aromatic compounds in the herbs to blend with the wax and release their scent.
- Strain the Herbs (Optional): If desired, you can strain the herbs from the wax using a fine mesh strainer or cheesecloth. This step creates a smoother appearance in the finished candle and prevents any larger herb particles from interfering with the burning process.
- Decide on Herb Placement: Depending on the desired visual effect, you can choose to mix the herbs uniformly throughout the wax or create a layered effect by reserving some herbs to sprinkle on top of the poured wax.
Adding herbs to the wax is a creative process that allows you to customize the appearance and aroma of your candles. Experiment with different herb combinations and placement techniques to discover your own unique and visually appealing designs.
Now that your wax is infused with the beautiful scents and properties of the herbs, it’s time to move on to the next step: melting the wax and pouring it into molds or containers.
Read more: How To Make A Heater With Candles
Melting the Wax
Now that your wax is infused with the aromatic herbs, it’s time to melt the wax once again and prepare it for pouring into your chosen molds or containers. Follow these steps to melt the wax:
- Reheat the Wax: If the wax has cooled down significantly or solidified, reheat it using the double boiler method mentioned earlier. Make sure the water in the larger pot is simmering gently and not boiling vigorously.
- Monitor the Temperature: Use a thermometer to monitor the wax temperature. Ideally, the temperature should be between 170-185°F (76-85°C) for most types of wax. This ensures that the wax is melted enough for pouring but not too hot that it can cause damage to your containers or molds.
- Stir the Wax: Stir the wax gently to ensure that it is heated evenly throughout. This helps maintain a consistent mixture and ensures that the herbs remain well-distributed.
- Remove from Heat: Once the wax has reached the desired temperature, remove it from the heat source and set it aside. Be cautious as the wax will be hot and can cause burns.
Now that the wax is melted and at the correct temperature, it’s time to move on to the exciting step of pouring the wax into your chosen molds or containers to create your beautiful herbal candles.
Note: It’s important to be careful and exercise caution when working with hot wax. Always follow proper safety precautions, such as wearing protective gloves and clothing, and keeping children and pets away from your work area.
Pouring the Wax into Molds
With your melted wax at the right temperature and consistency, it’s time to pour it into your molds or containers to shape your herbal candles. Follow these steps to ensure a smooth pouring process:
- Prepare the Molds: If you’re using molds, make sure they are clean and dry. You can also lightly spray them with a non-stick cooking spray to ensure easy removal of the candles once they have set.
- Secure the Wicks: If you’re using wicks, anchor them in the center of each container or mold. You can use a wick holder or pencil to keep them centered and upright during the pouring process.
- Pour Slowly and Carefully: Begin pouring the melted wax into the molds or containers slowly and carefully. Start from the center and gradually work your way outward to ensure even distribution of the wax and to avoid air bubbles.
- Leave Space at the Top: Leave approximately ½ to 1 inch (1.27 to 2.54 cm) of space at the top of the molds or containers. This will prevent the hot wax from overflowing once the candles start to solidify.
- Tap or Wiggle: After pouring the wax, gently tap or wiggle the molds or containers to release any trapped air bubbles and help the wax settle evenly.
- Let the Candles Cool: Allow the candles to cool and solidify completely. This process can take several hours, depending on the size and thickness of your candles.
Remember not to move or disturb the candles while they are setting to ensure a smooth and professional appearance. It’s also important to keep the candles in a cool and undisturbed area to avoid any premature cracking or uneven cooling.
Once the candles have completely cooled and set, it’s time to move on to the next step: adding the wick and allowing the candles to fully cure.
Note: Always exercise caution when working with hot wax to prevent burns or accidents. Keep a fire extinguisher nearby and never leave melting wax unattended.
When adding herbs to your candles, make sure to crush or grind them to release their fragrance and color. This will help the herbs infuse into the wax more effectively.
Adding a Wick
Now that your poured wax has cooled and solidified, it’s time to add the wick to your herbal candles. Follow these steps to ensure proper wick placement:
- Trim the Wick: Trim the wick to a suitable length, leaving about ¼ to ½ inch (0.6 to 1.3 cm) above the surface of the candle. This will prevent excessive smoking and ensure a steady and controlled flame.
- Attach a Wick Tab: Take a wick tab, which is a small metal disc with a hole in the center, and thread the trimmed end of the wick through the hole. Push the wick tab firmly onto the bottom of the candle, ensuring that it adheres securely to the surface.
- Center the Wick: Use a wick centering tool or simply hold the wick upright with your fingers, ensuring that it is centered in the middle of the candle. This will help the candle burn evenly and prevent any tunneling or uneven melting.
- Secure the Wick in Place: To hold the wick in place while the candle cures, you can use a wick holder or simply tie the top end of the wick to a popsicle stick or pencil and rest it across the top of the container or mold.
Once the wick is securely in place, it’s time to allow the candles to fully cure and set. This process usually takes at least 24 hours, but it’s best to check the recommended curing time specified by the wax manufacturer to ensure optimal results.
After the candles have finished curing, you can move on to the final step: trimming the wick for a clean and efficient burn.
Note: Always follow proper safety guidelines when working with candle wicks and open flames. Keep flammable items away from burning candles and never leave them unattended.
Allowing the Candles to Set
Once you have added the wick to your herbal candles, it’s important to allow them to fully set and cure. This is a crucial step in the candle-making process to ensure optimal burning performance. Here’s what you need to do:
- Find the Ideal Curing Space: Place your candles in a cool, undisturbed area where they won’t be exposed to direct sunlight or fluctuations in temperature. This will help them set evenly and avoid any potential damage or deformities.
- Patience is Key: Allow your candles to cure for at least 24 hours or as per the instructions provided with the wax you used. Keep in mind that larger or thicker candles may require more time to fully set.
- Avoid Moving the Candles: Refrain from touching or moving the candles during the curing process. Even slight disturbances can cause the wax to develop cracks or uneven surfaces.
- Monitor the Candles: While the candles are setting, keep an eye on them for any signs of potential issues. Check for any changes in shape, color, or texture that may indicate problems with the curing process.
- Test Burn: It’s a good idea to conduct a test burn on one of the cured candles before lighting the others. This will ensure that the wick is properly centered and that the candle burns evenly and safely.
Properly allowing your candles to set and cure will improve their overall quality and performance. It ensures that the wax has fully solidified, the scent has blended well, and the wick is securely in place.
Once your candles have completely cured, it’s time to move on to the final step: trimming the wick for a clean and efficient burn.
Note: As always, exercise caution when handling candles, especially when they are lit. Place them on stable surfaces away from flammable materials and never leave them unattended.
Read more: How To Make Dipped Candles
Trimming the Wick
After allowing your herbal candles to set and cure, it’s important to trim the wick before lighting them. Trimming the wick helps promote a clean and efficient burn, prevents excessive sooting or smoking, and ensures optimal candle performance. Follow these steps to trim the wick:
- Check the Wick Length: Examine the wick to determine if it is too long. Ideally, it should be trimmed to around ¼ to ½ inch (0.6 to 1.3 cm) in length.
- Gently Remove Any Debris: If there is any noticeable debris or charred remains on the wick, use a pair of tweezers or a wick trimmer to carefully remove them. This will prevent any potential obstructions while burning.
- Trim the Wick: Using sharp scissors or a wick trimmer, cut the wick to the desired length. Make sure to trim it evenly and avoid cutting it too close to the wax surface.
- Discard the Wick Trim: Dispose of the trimmed wick properly by removing it from the candle or container and discarding it in a safe manner.
Trimming the wick is a simple yet vital step that ensures a clean and even burn while reducing the risk of excessive smoke, mushrooming, or flickering. It also helps extend the overall life of your candles.
Now that your wicks are nicely trimmed, you’re ready to light your herbal candles and enjoy the beautiful ambiance and therapeutic aromas they provide.
Note: Prior to lighting your candles, always keep in mind proper candle safety guidelines. Place them on stable surfaces, away from flammable objects, and never leave them unattended while lit.
Enjoying Your Herbal Candles
Now that your herbal candles are trimmed and ready to be lit, it’s time to sit back, relax, and enjoy the wonderful ambiance and soothing aromas they provide. Here are some tips for fully enjoying your herbal candles:
- Create a Relaxing Atmosphere: Light your candles in a space where you can unwind and find tranquility. Dim the lights, play soft music, and create a cozy environment that promotes relaxation.
- Choose the Right Setting: Place your herbal candles strategically in areas where you want to experience their therapeutic benefits. Whether it’s in your bedroom, living room, or bathroom, position them in spots where the scents and flickering flames can be appreciated.
- Experiment with Combinations: If you have multiple herbal candles, try burning them together to create unique scent combinations. The aromas of different herbs can blend harmoniously, creating an even more enticing atmosphere.
- Set an Intention or Focus: Take a few moments before lighting your candles to set an intention or focus for your relaxation time. Whether it’s to unwind and reduce stress or to create a positive and uplifting ambiance, infusing your candles with your intention can enhance your experience.
- Practice Mindfulness: As you bask in the ambiance of the flickering candlelight and aromatic scents, take time to fully immerse yourself in the present moment. Pay attention to the sensations, sights, and smells, allowing yourself to be fully present and mindful in the moment.
- Aromatherapy Benefits: Each herb used in your candles may have specific aromatherapy benefits. Research the properties of the herbs you chose and embrace the therapeutic effects they offer. Lavender for relaxation, peppermint for focus, or eucalyptus for respiratory relief, for example.
- Unplug and De-stress: Take this opportunity to disconnect from electronic devices and let go of daily stresses. Allow the gentle glow of your herbal candles to create a calming oasis where you can unwind and find inner peace.
Remember to always practice candle safety. Never leave burning candles unattended and keep them away from flammable materials. Always place them on stable surfaces.
By taking the time to fully enjoy and appreciate your herbal candles, you can reap the benefits of their delightful scents and therapeutic properties, creating a serene and rejuvenating atmosphere in your space.
Safety Precautions
While candle-making and enjoying the beautiful glow and aroma of herbal candles can be a delightful experience, it’s important to prioritize safety to prevent accidents and ensure a peaceful ambiance. Here are some essential safety precautions to keep in mind:
- Never Leave Burning Candles Unattended: Always extinguish your candles before leaving the room or going to sleep. Unattended candles can be a fire hazard.
- Keep Away from Flammable Materials: Place your herbal candles on heat-resistant surfaces, away from curtains, paper, and other flammable objects. Avoid proximity to drafts or breezy areas that may cause curtains or other materials to come in contact with the candle’s open flame.
- Place Candles Out of Reach: Keep your candles in a location where they can’t be reached by children or pets. Make sure they are secure and not easily knocked over.
- Trim the Wick: Ensure that the wick is always trimmed to a safe length of about ¼ to ½ inch (0.6 to 1.3 cm) before each use. This prevents excessive smoking, mushrooming, and uneven burning.
- Use Proper Candle Holders: When burning your herbal candles, place them in appropriate holders that can catch any melting wax or ensure the flame is contained. Avoid using flammable or unstable holders.
- Avoid Overcrowding: Never overcrowd your candles with too many herbs or additives. This can lead to uneven burning, excessive heat, or even a fire hazard. Follow recommended herb-to-wax ratios.
- Monitor Burning Candles: Keep an eye on your candles while they are lit and ensure that they are burning safely. Check for any signs of excessive flickering, smoking, or unusual behavior.
- Burn in a Well-Ventilated Area: Ensure that the room has proper ventilation when burning candles, especially if using fragrance oils or essential oils. This helps prevent any buildup of smoke or harmful fumes.
- Extinguish Candles Properly: Use a snuffer or carefully blow out the flame to extinguish your candles. Avoid blowing candles out forcefully, as this can cause hot wax to splatter.
- Store Candles Safely: After use, store your candles in a cool and dry place, away from direct sunlight or excessive heat. This helps maintain their quality and reduces the risk of accidental damage or melting.
By following these safety precautions, you can enjoy the ambiance, fragrances, and therapeutic benefits of your herbal candles with peace of mind, creating a cozy and safe environment in your home.
Conclusion
Crafting your own herbal candles is a rewarding and creative process that allows you to infuse your space with captivating scents and therapeutic benefits. By carefully choosing the right herbs, gathering the necessary materials, and following the step-by-step instructions, you can create beautiful candles that enhance your well-being and create a serene atmosphere.
From selecting the perfect combination of herbs to melting the wax, pouring it into molds, and allowing the candles to set, each step in the process requires attention to detail and a sprinkle of creativity. Adding the wick and trimming it ensures a clean and efficient burn while prioritizing safety precautions is essential to create a peaceful environment.
By enjoying the warm glow and invigorating scents of your herbal candles, you can create moments of relaxation, mindfulness, and rejuvenation in your daily life. Whether you use them during meditation, bath time, or simply to unwind after a long day, these candles will enhance your overall well-being and enrich your living space.
Remember to always practice proper candle safety by never leaving burning candles unattended, keeping them away from flammable objects, and trimming the wick to a suitable length. Safety should always be a priority to ensure a worry-free and enjoyable experience.
So, embark on this aromatic adventure and let your creativity and love for nature guide you in creating your own herbal candles. Immerse yourself in the captivating scents, therapeutic properties, and enchanting glow they bring to your home. Whether you gift them to loved ones or keep them for yourself, these herbal candles will be a cherished addition to any space.
Frequently Asked Questions about How To Make Candles With Herbs
Was this page helpful?
At Storables.com, we guarantee accurate and reliable information. Our content, validated by Expert Board Contributors, is crafted following stringent Editorial Policies. We're committed to providing you with well-researched, expert-backed insights for all your informational needs.