
Articles
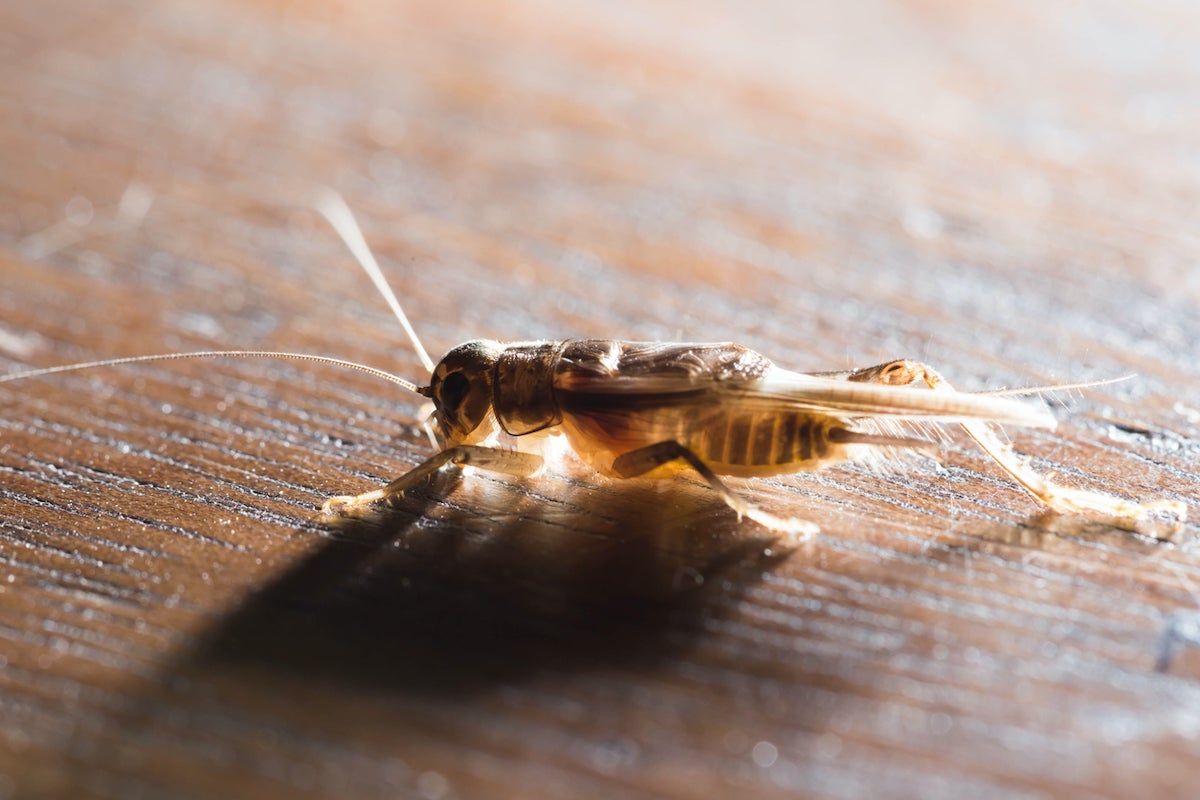
How To Store Live Crickets
Modified: October 20, 2024
Learn the best methods for storing live crickets in this comprehensive guide. Browse through our helpful articles and keep your crickets fresh and healthy.
(Many of the links in this article redirect to a specific reviewed product. Your purchase of these products through affiliate links helps to generate commission for Storables.com, at no extra cost. Learn more)
Introduction
Keeping live crickets can be a rewarding and convenient way to ensure a steady supply of feeder insects for your reptiles, amphibians, or other insect-eating pets. However, proper storage and care of live crickets are essential for their well-being and the quality of their nutrition. In this article, we will guide you on how to store live crickets effectively, so you always have healthy and active insects ready for feeding.
Whether you purchase crickets from a local pet store or breed them at home, maintaining a suitable container and creating an ideal habitat for the crickets is crucial. By following the right steps, you can ensure the longevity of your crickets and the optimal nutritional value they provide for your pets.
In this comprehensive guide, we will cover the key aspects of storing live crickets, including choosing the right container, creating the ideal habitat, providing proper ventilation, controlling temperature and humidity, offering food and water, handling and managing crickets, dealing with molting, cleaning and maintenance, and troubleshooting common issues along the way. By the end of this article, you will have all the knowledge you need to store your live crickets successfully.
So, let’s dive in and learn how to maintain a healthy and thriving environment for your live crickets!
Key Takeaways:
- Proper storage and care of live crickets is essential for ensuring a steady supply of feeder insects for your pets. Choosing the right container, creating an ideal habitat, and providing proper ventilation are key to maintaining healthy and active crickets.
- Maintaining the optimal temperature and humidity levels, providing a balanced diet, and handling and managing crickets with care are crucial for their well-being. Regular cleaning and troubleshooting common issues ensure a healthy and thriving environment for your live crickets.
Read more: What Is A Cricket On A Chimney
Choosing the Right Container
When it comes to storing live crickets, selecting the appropriate container is essential for their well-being and easy maintenance. Here are a few key points to consider when choosing the right container:
- Size: The size of the container should depend on the number of crickets you plan to store. A general rule of thumb is to have at least one gallon of space per 100 crickets. This ensures that the crickets have enough room to move around and reduces the risk of overcrowding.
- Material: Opt for a container made of plastic or glass. These materials are easy to clean and provide good visibility of the crickets inside. Avoid using metal or other materials that may contain harmful chemicals or rust.
- Lid: Make sure the container has a secure lid to prevent the crickets from escaping. The lid should have proper ventilation to allow for airflow without letting the crickets crawl out.
- Accessibility: Choose a container that allows for easy access to the crickets when it’s time to feed or handle them. Look for containers with a removable lid or a hinged door for convenient access.
Additionally, it is important to consider the container’s distance from your pet’s enclosure. Ensure that the container is not placed too close to the habitat, as the chirping sounds of the crickets can be stressful for some animals.
Once you have selected the right container, it’s time to move on to creating the ideal habitat for your live crickets.
Creating the Ideal Habitat
Creating a suitable habitat is crucial for the health and well-being of your live crickets. Here are some key factors to consider when setting up the ideal environment:
- Substrate: Start by lining the bottom of the container with a suitable substrate. A popular choice is reptile carpet or paper towels, as they are easy to clean and provide a stable surface for the crickets to walk on. Avoid using sand or soil as substrates, as they can harbor bacteria and may be ingested by the crickets.
- Hiding spots: Crickets prefer dark and secluded areas to rest and hide. Provide hiding spots by adding cardboard tubes, egg cartons, or small boxes to the container. This gives the crickets a sense of security and helps them regulate their body temperature.
- Elevated platforms: Crickets are naturally inclined to climb on elevated surfaces. Place small pieces of cork bark, branches, or plastic platforms in the container to allow the crickets to climb and explore. This not only provides enrichment but also encourages natural behavior.
- Moisture source: Crickets need a source of moisture to stay hydrated. You can provide this by placing a shallow dish filled with water or using a commercial cricket water gel product. Ensure that the water source is easily accessible but not deep enough for the crickets to drown in.
- Lighting: While crickets do not require specific lighting, providing a light source with a timer can help regulate their behavior and establish a day-night cycle. Use a low-wattage bulb or a reptile-specific light to create a gentle source of illumination.
It is important to regularly monitor the habitat and make necessary adjustments to maintain cleanliness and optimal conditions. This includes removing any uneaten food, cleaning the water source regularly, and replacing the substrate when it becomes soiled.
By creating the ideal habitat, you are providing a comfortable and stimulating environment for your live crickets to thrive in.
Providing Proper Ventilation
Proper ventilation is crucial for the well-being of your live crickets. Good airflow helps to remove excess moisture, prevent the buildup of ammonia, and maintain a fresh and odor-free environment. Here are some tips on providing proper ventilation:
- Air holes: Ensure that the container has small air holes or vents to allow for airflow. These holes should be small enough to prevent the crickets from escaping but large enough to provide adequate ventilation. Place the holes on the sides or top of the container to allow air to circulate effectively.
- Maintain humidity: While ventilation is important, it is equally important to maintain the right level of humidity. Crickets require a moderately humid environment to prevent dehydration. Monitor the humidity levels regularly and make adjustments as needed by adding or removing moisture sources such as water dishes or moistened sponge.
- Avoid direct exposure: Place the cricket container in an area where it is not directly exposed to drafts or extreme temperature fluctuations. Direct exposure to extreme heat or cold can be detrimental to the health of the crickets and may hamper their ability to breed and reproduce.
Regularly check the ventilation holes to ensure they are not blocked by debris or excess substrate. Clean any accumulated waste or residue around the holes to maintain proper airflow. Proper ventilation not only ensures the well-being of the crickets but also helps to prevent the growth of mold or bacteria in the container.
Now that you have established proper ventilation for your crickets, it’s time to focus on controlling the temperature and humidity levels to provide them with a comfortable living environment.
Controlling Temperature and Humidity
Controlling the temperature and humidity levels in the cricket habitat is essential to ensure their well-being and longevity. Here’s how you can effectively maintain the optimal conditions:
- Temperature: Crickets thrive in a temperature range of 75°F to 85°F (24°C to 29°C). Use a digital thermometer to monitor the temperature inside the container and adjust it accordingly. If the temperature falls below the desired range, you can use a heat mat or a heat lamp to provide supplemental heat. Make sure to place the heat source on one side of the container to create a temperature gradient, allowing the crickets to choose their preferred temperature.
- Humidity: Maintain a moderate humidity level of around 40% to 60% in the cricket habitat. This can be achieved by regularly misting the substrate with water or using a reptile-specific humidifier. However, be cautious not to oversaturate the habitat, as excessive moisture can lead to the development of mold and fungal growth. Monitor the humidity levels with a hygrometer and adjust as needed.
- Consistency: It is important to maintain consistent temperature and humidity levels within the cricket habitat. Sudden fluctuations can stress the crickets and negatively impact their overall health. Avoid placing the container in areas prone to temperature extremes, such as near heating vents or in direct sunlight.
Remember that different species of crickets may have slightly different temperature and humidity requirements, so it’s recommended to research the specific needs of the species you are keeping. By providing the ideal temperature and humidity levels, you ensure that your crickets remain healthy, active, and suitable for feeding your pets.
Now that you have established the optimal temperature and humidity conditions, let’s move on to the next crucial aspect – providing proper food and water for your live crickets.
Read more: What Is A Roof Cricket In Construction
Providing Food and Water
Proper nutrition is vital for the health and vitality of your live crickets. Ensuring that they have access to a balanced diet and fresh water is essential. Here’s how you can provide food and water for your crickets:
- Food: Crickets are omnivorous and have a varied diet. You can feed them a combination of commercial cricket food, fresh fruits, vegetables, and high-quality dry dog or cat food. Commercial cricket diets are designed to provide the necessary nutrients for their growth and health. You can also supplement their diet with fresh produce like carrots, apples, lettuce, and squash. It is important to offer a variety of foods to promote optimal nutrition.
- Feeding frequency: Offer fresh food to your crickets every day or every other day. Remove any uneaten or spoiled food to prevent the buildup of mold or bacteria. Proactively monitoring and maintaining a clean feeding area will ensure that your crickets are consuming fresh and nutritious food.
- Water: Provide a water source for your crickets by placing a shallow dish filled with water or using a commercial cricket water gel product. Ensure that the water source is easily accessible and doesn’t pose a drowning risk. It is important to replace the water regularly to maintain cleanliness and freshness.
- Gut-loading: Gut-loading refers to feeding the crickets nutritious food, which in turn provides essential nutrients to the animals that consume them. This is especially important if you are using the crickets as feeders for other pets. Ensure that the crickets are well-fed and have access to a variety of high-quality foods before offering them to your pets.
By providing a well-rounded diet and fresh water, you are ensuring that your crickets receive the necessary nutrients for their well-being. This, in turn, will contribute to the overall health of your insect-eating pets.
Now that you have addressed their nutritional needs, it’s important to know how to handle and manage your live crickets properly.
To store live crickets, place them in a well-ventilated container with a secure lid. Add a small amount of egg carton or paper towel for them to hide in and provide a source of moisture, such as a slice of apple or damp sponge. Keep the container in a dark, room temperature area.
Handling and Managing Crickets
Handling and managing live crickets require gentle and careful techniques to avoid injury or stress. Here are some tips on how to handle and manage your crickets effectively:
- Gentle handling: When it comes to picking up crickets, it’s important to be gentle and avoid rough handling. Use clean hands or a soft-tipped tool, like tweezers or a spoon, to gently scoop up the crickets. Avoid squeezing or gripping them tightly, as this can cause harm or even death.
- Transfer techniques: Transferring crickets to another container for feeding or cleaning requires a delicate approach. Use a clear plastic cup, a small container, or a plastic bag with small holes to collect the crickets. Slowly guide them into the new container to minimize stress and escape attempts.
- Handling precautions: Keep in mind that crickets have small legs that can be delicate. Avoid holding them by their legs, as it can result in injury. Additionally, be cautious of their ability to jump, and handle them over a designated area to prevent escape.
- Quiet environment: During handling and maintenance tasks, it’s best to minimize noise and disturbance around the crickets. Loud noises or sudden movements can stress them out, leading to negative impacts on their well-being.
Remember, regular and unnecessary handling should be minimized to reduce stress on the crickets. Provide them with a safe and comfortable habitat, and only handle them when necessary for feeding or maintenance tasks.
Now that you know how to handle and manage your crickets properly, let’s move on to understanding how to deal with molting crickets.
Dealing with Molting Crickets
Molting is a natural process that crickets go through as they grow. During this period, the crickets shed their old exoskeleton to accommodate their growing bodies. Here are some important considerations for dealing with molting crickets:
- Molting chambers: Create separate molting chambers by placing small, moistened pieces of paper towel or sponge inside the container. These chambers provide a safe and humid environment for the crickets to molt without disturbance from other crickets.
- Identifying molting crickets: Look for crickets that appear larger, duller, or less active than usual. These are likely molting crickets. Avoid disturbing or handling them during this vulnerable stage, as any disruption can be detrimental to their successful molting process.
- Provide extra moisture: During molting, crickets require additional moisture to help soften their old exoskeleton for easier shedding. Ensure that there is a humidity source available, such as a moist sponge or water dish, to provide the necessary moisture for the molting crickets.
- Monitor molting progress: Keep an eye on the molting crickets to ensure they successfully shed their exoskeleton and emerge as healthy adults. Occasionally, crickets may face difficulties during molting, getting stuck in their old exoskeleton or experiencing other issues. If you notice a cricket struggling, you can gently moisten the area around it to help facilitate the molting process. However, extreme caution should be exercised to avoid causing harm.
- Remove old exoskeletons: After a cricket successfully molts, it leaves behind its old exoskeleton. These exoskeletons can attract mold or become a food source for other crickets. It is important to remove them promptly from the container to maintain cleanliness and prevent any issues.
By creating suitable molting chambers and providing the necessary conditions, you can support your crickets during this vulnerable stage and increase their chances of successful molting.
Now that you know how to deal with molting crickets, let’s focus on how to properly clean and maintain the cricket habitat.
Cleaning and Maintenance
Regular cleaning and maintenance of the cricket habitat are essential for the health and well-being of your live crickets. Here are important steps to follow when cleaning and maintaining their environment:
- Remove waste: Regularly remove any uneaten food, dead insects, or feces from the container. Use a small scoop or tweezers to remove these items to maintain cleanliness.
- Replace substrate: The substrate in the cricket container should be replaced regularly to prevent the buildup of waste and bacteria. Depending on the number of crickets and the condition of the substrate, you may need to replace it every one to two weeks.
- Clean water dishes: If you provide water dishes for your crickets, clean them regularly to prevent the growth of bacteria. Wash the dish with a mild soap and rinse thoroughly before refilling it with fresh water.
- Inspect for mold or pests: During cleaning, inspect the container for any signs of mold, mites, or other pests. If you spot any issues, address them immediately by removing affected items and taking appropriate measures to prevent further infestation.
- Wipe down container: Occasionally, wipe down the container walls and lid with a damp cloth to remove any debris or residue. This helps to maintain a clean and hygienic environment for the crickets.
Consistency in cleaning and maintenance is crucial to prevent the buildup of waste and maintain a healthy environment for your live crickets. It also helps to reduce the chances of disease transmission and maintain the optimal health of your insect-eating pets.
Now that you understand the importance of cleaning and maintenance, let’s address some common troubleshooting issues you may encounter when storing live crickets.
Read more: How To Get Rid Of Crickets In The Basement
Troubleshooting Common Issues
While storing live crickets, you may come across some common issues that require troubleshooting. Here are a few common problems and their solutions:
- Odor: If you notice a strong or unpleasant odor coming from the cricket habitat, it may indicate poor ventilation or excessive moisture. Ensure that proper ventilation is provided, and check for any dampness or mold growth. Adjust ventilation and remove any wet or soiled substrate to address the issue.
- Escape attempts: Crickets can be quite agile and may attempt to escape from the container. Ensure that the lid is securely fastened with no gaps or openings for the crickets to squeeze through. If escape attempts persist, consider using a container with smaller ventilation holes or a different container design.
- Overcrowding: If your cricket population becomes too dense, it can lead to aggression, cannibalism, and stress. Maintain an appropriate cricket-to-container ratio to avoid overcrowding. Consider separating the crickets into multiple containers if necessary, or reducing the number of crickets you keep.
- Excessive chirping: Crickets chirp primarily to attract mates. If the noise becomes too loud or disruptive, consider moving the container to a more isolated area or using sound-dampening materials, such as foam or towels, around the container.
- Health issues: Keep a close eye on the health of your crickets. Look out for any signs of illness, such as lethargy, unusual colors, or difficulty moving. If you notice any health concerns, consult a veterinarian with experience in insect care for proper diagnosis and treatment.
By actively addressing and troubleshooting these common issues, you can ensure a healthier and more stable environment for your live crickets. Regular monitoring and proactive maintenance will help prevent potential problems from escalating.
Now that we have explored troubleshooting, let’s conclude our guide to storing live crickets.
Conclusion
Storing live crickets requires attention to detail and careful consideration of their habitat, nutrition, and overall well-being. By following the steps and guidelines outlined in this article, you can ensure that your crickets remain healthy and provide a nutritious food source for your insect-eating pets. Here’s a quick summary of the key points we covered:
Choosing the right container is essential to provide a comfortable and secure home for your crickets. Opt for a container of appropriate size, made of safe materials, with proper ventilation.
Creating an ideal habitat involves using suitable substrate, providing hiding spots and elevated platforms, and ensuring access to moisture and gentle lighting.
Proper ventilation is crucial to maintain a fresh and odor-free environment while controlling temperature and humidity levels is important for the crickets’ well-being.
Providing a balanced diet and fresh water is vital for the nutrition of your crickets. Offer a variety of nutritious foods, gut-load them for optimal nutrient transfer, and regularly clean and replace food and water sources.
Handle and manage your crickets with care, avoiding rough handling and providing a quiet and stress-free environment for them to thrive.
During molting, create separate molting chambers and provide extra moisture to support the process.
Regular cleaning and maintenance of the cricket habitat help prevent odor, escape attempts, overcrowding, and other common issues. Regularly monitor the health of your crickets to address any concerns promptly.
By troubleshooting and addressing common issues, such as odor, escape attempts, overcrowding, excessive chirping, and health problems, you can ensure a healthier and more enjoyable experience in storing live crickets.
Remember, the welfare of your crickets directly impacts the health and nutrition of your insect-eating pets. By following the guidelines outlined in this article, you can provide your crickets with a thriving and comfortable environment, ensuring a steady supply of nutritious feeder insects for your animal companions.
So, go ahead and apply these tips to store your live crickets effectively and provide the best care for both your crickets and the pets they nourish.
Frequently Asked Questions about How To Store Live Crickets
Was this page helpful?
At Storables.com, we guarantee accurate and reliable information. Our content, validated by Expert Board Contributors, is crafted following stringent Editorial Policies. We're committed to providing you with well-researched, expert-backed insights for all your informational needs.


0 thoughts on “How To Store Live Crickets”