Articles
How To Get Rid Of Crickets In The Attic
Modified: October 20, 2024
Learn effective methods to get rid of crickets in your attic with these informative articles. Safely remove these pesky pests for good!
(Many of the links in this article redirect to a specific reviewed product. Your purchase of these products through affiliate links helps to generate commission for Storables.com, at no extra cost. Learn more)
Introduction
Having crickets in your attic can be a nuisance. The chirping sound they make at night can disrupt your sleep, and their presence can also cause damage to your property. If you’re dealing with a cricket infestation in your attic, don’t worry – there are steps you can take to get rid of them.
In this article, we will guide you through a comprehensive process to eliminate crickets from your attic. We will cover everything from identifying the presence of crickets to implementing effective strategies for their removal and prevention.
Before we dive into the steps, it’s crucial to understand why crickets might be attracted to your attic. Crickets are drawn to dark and warm environments and are typically seeking shelter or a breeding ground. Attics provide an ideal habitat for them, as they are often undisturbed and have suitable conditions for their survival.
Now that we’ve set the stage, let’s move on to the first step: identifying the presence of crickets in your attic.
Key Takeaways:
- Identifying the presence of crickets in your attic is crucial. Look for signs like chirping sounds, feces, visible crickets, and damage to belongings to confirm their presence.
- Sealing off entry points, removing existing crickets, using natural deterrents, and maintaining cleanliness are effective steps to get rid of crickets in your attic. Professional help may be necessary for large or recurring infestations.
Read more: How To Get Rid Of Crickets In The Basement
Step 1: Identify the presence of crickets in the attic
The first step in getting rid of crickets in your attic is to determine if they are indeed present. Here are a few signs that can help you identify their presence:
- Chirping sounds: Crickets are known for their distinctive chirping sounds, especially the males trying to attract mates. If you hear repetitive chirping noises coming from your attic, it’s a clear indication that crickets may have made themselves at home.
- Feces and exoskeletons: Look for cricket droppings, which are tiny black pellets that resemble pepper. You may also come across discarded exoskeletons as crickets shed their outer skin during their growth process.
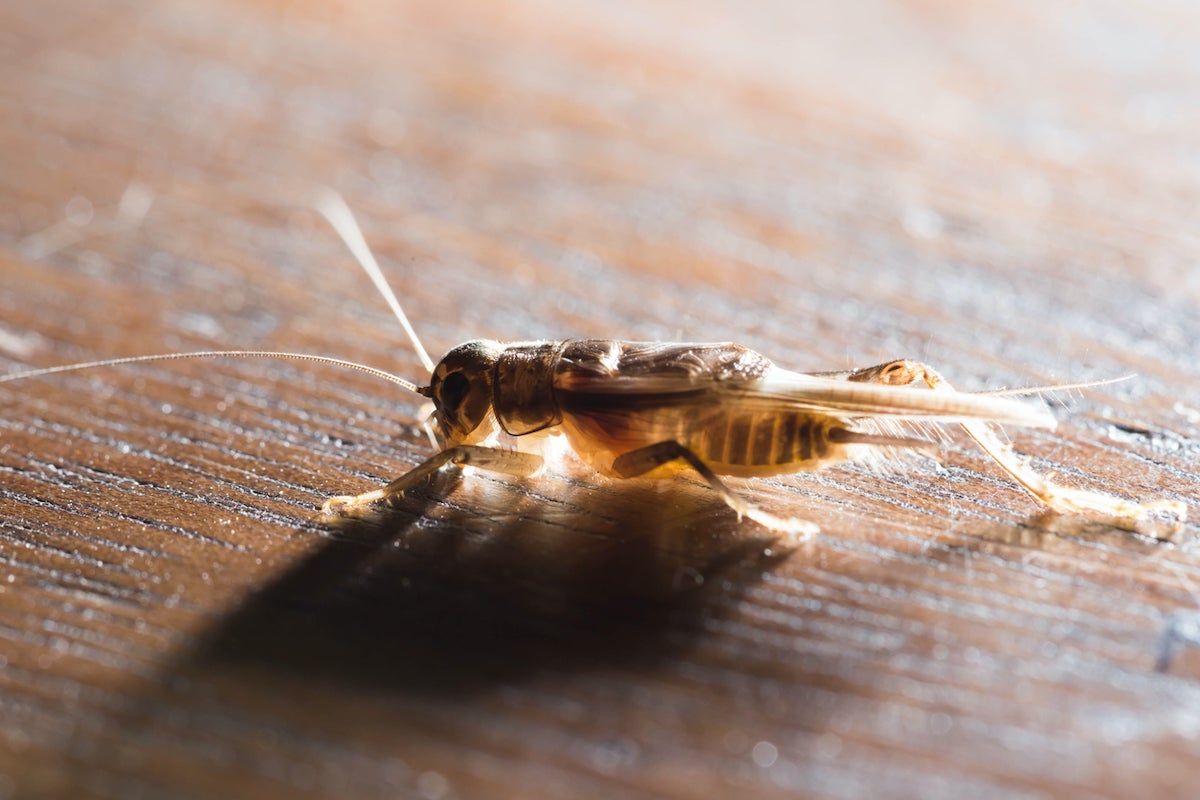
- Visible crickets: If you’re lucky, you may actually spot a cricket or two in your attic. Keep an eye out for small, brown or black insects with long antennae and long hind legs.
- Damage to belongings: Crickets are known to chew on various materials, including fabrics, papers, and even insulation. If you notice any damage to your belongings or signs of chewing in your attic, it may be a result of cricket activity.
If you observe any of these signs, it’s likely that you have crickets in your attic. It’s essential to confirm their presence before moving on to the next steps.
In the next step, we will discuss how to locate the entry points for crickets in your attic.
Step 2: Locate the entry points for crickets
To effectively get rid of crickets in your attic, it’s important to identify how they are getting in. By locating the entry points, you can take targeted measures to block their access. Follow these steps to locate the entry points:
- Inspect the attic: Begin by thoroughly inspecting your attic for any visible cracks, gaps, or openings. Pay close attention to areas where pipes, wires, or ventilation systems enter the attic as these can serve as entry points for crickets.
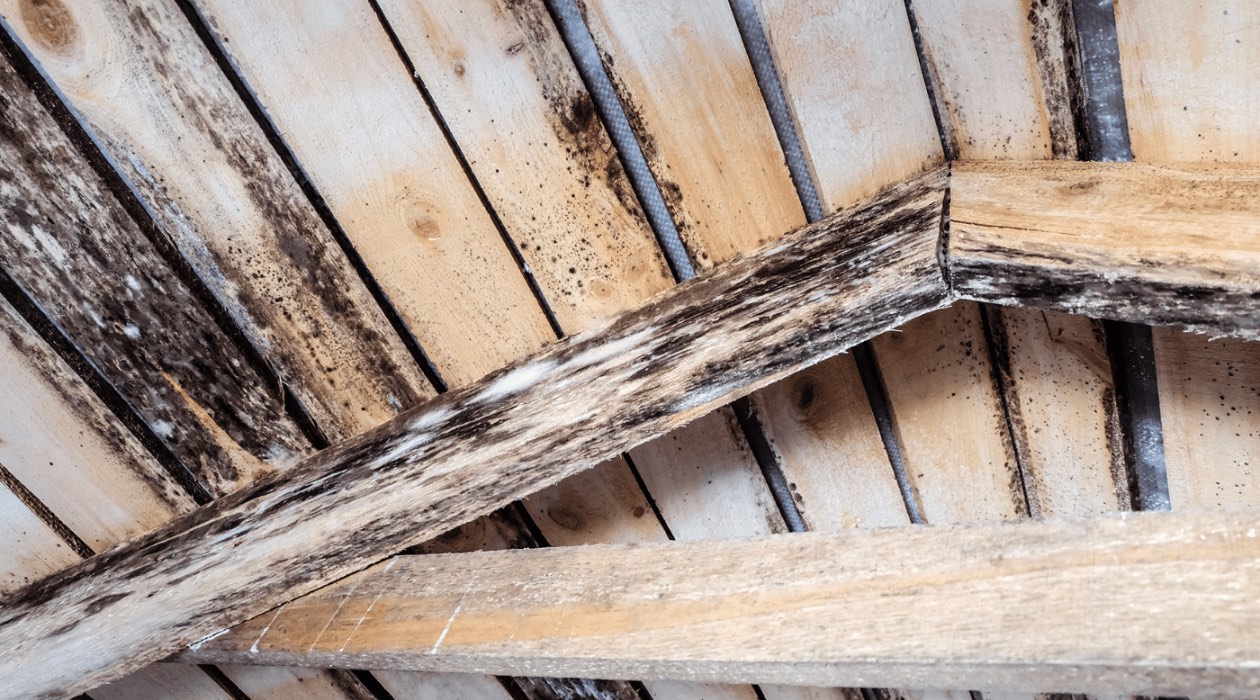
- Look for signs of damage: Check for any signs of damage, such as chewed wires, torn insulation, or damaged screens. These can indicate the areas where crickets have been entering or exiting.
- Use a flashlight: In some cases, crickets may enter through very small openings that are difficult to spot with the naked eye. Use a flashlight to carefully inspect all corners, nooks, and crannies in the attic, as well as along the walls and ceilings.
- Consider seasonal factors: Keep in mind that crickets may have different entry points depending on the time of year. During warmer months, they may enter through open windows or doors, while in colder seasons, they may seek shelter through cracks or gaps.
By conducting a thorough inspection and identifying the entry points, you will gain a better understanding of how crickets are accessing your attic. This knowledge will be crucial for the next step, which involves sealing off these openings to prevent their entry.
In step 3, we will guide you on how to effectively seal off any cracks or openings in your attic to keep crickets out.
Step 3: Seal off any cracks or openings in the attic
Now that you have identified the entry points for crickets in your attic, it’s time to take action and seal off these openings. By blocking their access, you can prevent crickets from entering and infesting your attic. Follow these steps to effectively seal off any cracks or openings:
- Gather the necessary supplies: Before you start sealing, make sure you have the right tools and materials. This may include caulk, weatherstripping, sealant, wire mesh, and a ladder, depending on the type of openings you need to address.
- Caulk or seal cracks and gaps: Use a high-quality caulk or sealant to fill in any cracks or gaps that you found during your inspection. Pay close attention to areas around windows, doors, vents, and pipes. Ensure that the sealant is applied evenly and covers the entire opening.
- Install weatherstripping: Weatherstripping is a great option for sealing gaps around windows and doors. It creates a barrier that prevents crickets from entering through these spaces. Measure and cut the weatherstripping to fit the gaps, then apply it according to the manufacturer’s instructions.
- Use wire mesh: For larger openings, such as vents or chimneys, consider using wire mesh. Cut the mesh to fit the size of the opening and secure it in place using screws or adhesive. This will allow for proper airflow while keeping crickets out.
- Pay attention to smaller openings: Crickets can enter through even the tiniest openings, so be diligent in sealing off any smaller gaps. Use caulk or sealant to fill in these tiny holes and crevices.
By thoroughly sealing off any cracks or openings in your attic, you will significantly reduce the chances of crickets gaining access. However, keep in mind that regular maintenance is essential to ensure the effectiveness of your sealing efforts.
In the next step, we will discuss how to remove any existing crickets from your attic.
Step 4: Remove any existing crickets
Now that you’ve taken preventive measures by sealing off the entry points, it’s time to focus on removing any crickets that are already present in your attic. Here are some effective methods to get rid of existing crickets:
- Manual removal: Start by manually removing any visible crickets using gloves or a handheld vacuum cleaner. Carefully capture them and dispose of them outside away from your home.
- Vacuuming: Use a vacuum cleaner with a hose attachment to suck up any crickets that are hiding in corners, cracks, or crevices. Empty the vacuum bag or container outside promptly to ensure that the crickets cannot find their way back into your home.
- Sticky traps: Place sticky traps near areas where crickets have been spotted. These traps are designed to attract and capture the crickets when they come into contact with the adhesive surface. Check the traps regularly and dispose of the captured crickets as needed.
- Natural repellents: Certain scents, such as peppermint oil or cedar chips, can act as natural deterrents for crickets. Place cotton balls infused with these oils in strategic locations around your attic to repel the crickets and discourage them from lingering.
- Professional pest control: If you have a large cricket infestation or if your efforts to remove the crickets are not yielding satisfactory results, it may be necessary to seek the assistance of a professional pest control service. They will have the expertise and tools to effectively eliminate the cricket population in your attic.
Remember, it’s important to be persistent and thorough in your efforts to remove crickets from your attic. Combining multiple methods and regularly monitoring the situation will increase your chances of successfully eliminating these pests.
In step 5, we will explore natural deterrents and repellents that can help prevent crickets from returning to your attic.
Seal up any entry points to prevent crickets from getting into the attic. Use insecticide dust in cracks and crevices, and set up sticky traps to catch any remaining crickets.
Read more: How To Get Rid Of Bats In The Attic
Step 5: Use natural deterrents or repellents
In addition to sealing off your attic and removing existing crickets, using natural deterrents or repellents can be an effective way to prevent them from returning. Here are some natural methods you can try:
- Predator urine: Many outdoor supply stores sell predator urine, such as coyote or fox urine, which can be used as a natural deterrent. Sprinkle the urine around the perimeter of your attic or in areas where crickets are likely to enter. The smell of the urine will deter crickets from approaching your home.
- Essential oils: Certain essential oils are known to repel crickets. Peppermint, citronella, and lavender are popular choices. Mix a few drops of the oil with water and spray it in and around your attic. Refresh the spray every few days to maintain its effectiveness.
- Cedar chips or balls: Crickets dislike the scent of cedar. Place cedar chips or cedar balls in your attic to create a natural barrier. You can also hang sachets filled with cedar chips in strategic locations.
- DIY vinegar spray: Mix equal parts of white vinegar and water in a spray bottle. Spray the solution in and around your attic, targeting areas where crickets have been spotted. The strong scent of vinegar can deter crickets.
- Keep the area clean: Crickets are attracted to food scraps and clutter. Make sure to keep your attic clean and free of crumbs, debris, and other potential food sources. Regularly sweep and vacuum the area to discourage them from taking up residence.
By incorporating these natural deterrents and repellents into your cricket control strategy, you can make your attic less appealing to these pests and reduce the likelihood of reinfestation.
In step 6, we will discuss the use of traps or baits as another method to catch crickets in your attic.
Step 6: Use traps or baits to catch crickets
If you’re dealing with a stubborn cricket infestation in your attic, using traps or baits can be an effective method to catch and eliminate them. Here are some options for using traps or baits:
- Glue traps: Glue traps are readily available and can be placed in areas where crickets are active. The sticky surface of the trap will capture the crickets when they come into contact with it. Check the traps regularly and dispose of the captured crickets.
- Pheromone traps: Pheromone traps are designed to attract crickets using a scent that mimics their natural pheromones. These traps have a sticky surface or a container that can be emptied. Place the traps strategically in your attic to lure and trap crickets.
- Bait stations: Bait stations work by attracting crickets to a bait that is toxic to them. These bait stations can be placed in corners or along walls where crickets are commonly found. It’s important to follow the instructions carefully to ensure the safety of pets and children.
- Homemade baits: You can also create homemade baits using common household ingredients. Mix a small amount of molasses or honey with water and place it in shallow dishes or bottle caps. The sweet scent will attract the crickets, and they will drown in the solution.
- Combine traps and repellents: To enhance the effectiveness of trapping crickets, you can also use natural repellents or deterrents mentioned in Step 5. Placing traps near areas treated with repellents can increase the chances of catching the crickets.
By using traps or baits, you can actively capture crickets and reduce their population in your attic. Regularly checking and replenishing the traps or baits will help maintain their effectiveness.
In Step 7, we will emphasize the importance of maintaining cleanliness in your attic to prevent cricket infestations.
Step 7: Maintain cleanliness in the attic
Keeping your attic clean is an essential step in preventing cricket infestations. By maintaining cleanliness, you can create an environment that is less attractive to crickets and other pests. Here are some tips on how to effectively maintain cleanliness in your attic:
- Regular cleaning: Schedule regular cleaning sessions in your attic to remove dust, dirt, and debris. Sweep or vacuum the floors and surfaces to eliminate any potential hiding places for crickets.
- Declutter the space: Remove any unnecessary items or clutter from your attic. Crickets are drawn to dark and undisturbed areas, so reducing clutter will minimize their hiding spots.
- Store items properly: If you’re using your attic for storage, make sure to store items in sealed containers rather than leaving them exposed. This will not only prevent crickets from using them as harborage, but it will also protect your belongings from damage.
- Seal food containers: If you store any food or pet supplies in your attic, ensure that they are sealed tightly in airtight containers. This will help prevent attracting crickets or other pests that are attracted to food sources.
- Maintain proper ventilation: Good airflow and ventilation in the attic can discourage crickets from taking up residence. Make sure that vents and other ventilation systems are clear and functioning properly.
- Regular inspections: Regularly inspect your attic for any signs of cricket activity or new entry points. Take immediate action if you notice any issues to prevent a full-blown infestation.
By maintaining cleanliness and practicing proper storage and organization, you can create an unfavorable environment for crickets in your attic. Regular inspections and cleaning will help you maintain control and prevent future infestations.
In the final step, we will discuss when it may be necessary to seek professional help to deal with a cricket infestation in your attic.
Step 8: Seek professional help if necessary
In some cases, a cricket infestation in your attic may be challenging to manage on your own. If you’ve tried various methods and have not had success in eliminating the crickets, it may be time to seek professional help. Here are some situations where professional assistance is recommended:
- Large infestation: If you have a severe cricket infestation in your attic, with a high population that persists despite your efforts, professional pest control services can provide effective solutions to eliminate the problem. They have the knowledge and experience to handle large infestations successfully.
- Recurring infestations: If you have dealt with repeated cricket infestations in your attic, it may indicate an underlying issue that needs to be addressed. Pest control professionals can identify the root cause of the problem and implement long-term solutions to prevent future infestations.
- Health concerns: If you or someone in your household has allergies or respiratory issues that are aggravated by the presence of crickets, it’s important to prioritize your health and seek professional help. They can take appropriate measures to eliminate the crickets without compromising your well-being.
- Technical expertise: Pest control professionals have specialized knowledge and access to professional-grade products and techniques that may be more effective in eliminating crickets. They can handle complex situations and ensure thorough treatment of your attic.
- Safety concerns: Some cricket control methods, such as using chemical insecticides, may require expertise in handling hazardous substances. Pest control professionals are trained to use these products safely and effectively, minimizing any risks to you or your property.
When selecting a pest control service, ensure they are reputable, licensed, and experienced in dealing with cricket infestations. Request a consultation to assess the situation and provide a tailored treatment plan. It’s important to communicate any concerns or specific requirements you may have.
Remember, seeking professional help can provide peace of mind and ensure that the cricket infestation in your attic is handled effectively and safely.
With Step 8 completed, you now have a comprehensive guide on how to get rid of crickets in your attic. By following these steps, you can successfully eliminate cricket infestations and prevent future problems. Remember to stay proactive and address any issues promptly to maintain a cricket-free attic.
Note: Before implementing any pest control methods, always read and follow the manufacturer’s instructions and consider the safety of people, pets, and the environment.
Thank you for reading and good luck with your cricket control endeavors!
Best Regards,
Your Name
Read more: How To Get Rid Of Termites In The Attic
Conclusion
Dealing with crickets in your attic can be a frustrating and disruptive experience. However, by following the steps outlined in this guide, you can effectively eliminate crickets and prevent future infestations.
First, it’s important to identify the presence of crickets in your attic by looking for signs such as chirping sounds, feces, or visible crickets. Once confirmed, locate and seal off any cracks or openings that may be providing entry points for the crickets.
Remove any existing crickets using methods such as manual removal, vacuuming, or traps, and consider using natural deterrents or repellents to prevent their return. Additionally, maintaining cleanliness in your attic by regular cleaning and proper storage will make it less attractive to crickets.
If your efforts are unsuccessful or if you face a significant infestation, it’s advisable to seek professional help. Pest control professionals have the expertise and tools to effectively eliminate crickets and provide long-term solutions to prevent reinfestation.
Remember to prioritize safety throughout the process. Dispose of captured crickets properly, follow instructions for any chemical treatments, and consider any health concerns or allergies in your household.
By following these steps and being proactive in your approach, you can regain control over your attic and enjoy a cricket-free space. Don’t hesitate to take action and seek professional assistance when needed.
Thank you for reading, and we hope this guide has been helpful in your journey to get rid of crickets in your attic. Wishing you all the best in your pest control endeavors!
Best Regards,
Your Name
Frequently Asked Questions about How To Get Rid Of Crickets In The Attic
Was this page helpful?
At Storables.com, we guarantee accurate and reliable information. Our content, validated by Expert Board Contributors, is crafted following stringent Editorial Policies. We're committed to providing you with well-researched, expert-backed insights for all your informational needs.


0 thoughts on “How To Get Rid Of Crickets In The Attic”