Articles
How To Store Skis For Summer
Modified: December 7, 2023
Learn how to properly store your skis during the summer months with our informative articles. Keep your gear in top condition and ready for the next season.
(Many of the links in this article redirect to a specific reviewed product. Your purchase of these products through affiliate links helps to generate commission for Storables.com, at no extra cost. Learn more)
Introduction
As the winter season comes to an end and the snow begins to melt, it’s time to think about storing your skis for the summer. Properly storing your skis is essential to maintain their performance and longevity. Without proper storage, your skis can suffer from rust, damage, and a loss of their original shape.
In this article, we will guide you through the steps to store your skis for the summer. From cleaning and drying your skis to storing them in a dry location, we will cover everything you need to know to keep your skis in top condition. So let’s dive in and learn how to store your skis properly!
Key Takeaways:
- Properly storing skis for summer involves cleaning, waxing, and protecting from moisture. Removing bindings and checking for damage are crucial steps to ensure skis remain in top condition for the next winter season.
- Applying rust inhibitor and reattaching bindings are additional measures to protect skis and ensure optimal performance. Storing skis in a dry location, using ski bags, or hanging them can help maintain their longevity and readiness for future use.
Read more: How To Store Skis At Home
Cleaning and Drying Skis
The first step in properly storing your skis is to clean and dry them thoroughly. Over time, dirt, debris, and moisture can accumulate on the ski’s surface, which can lead to rust and corrosion. Here’s how you can clean and dry your skis:
- Remove any excess snow: Start by removing any excess snow from the ski’s surface using a brush. Gently brush along the length of the ski to remove as much snow as possible.
- Wipe down the skis: Take a damp cloth or sponge and wipe down the entire ski to remove any dirt or grime. Pay special attention to the bindings and edges where debris can accumulate.
- Dry the skis: After wiping down the skis, allow them to air dry completely. Avoid using heat sources such as heaters or hair dryers, as excessive heat can warp the ski’s shape.
By cleaning and drying your skis, you are ensuring that no moisture or impurities are left on the surface, which can cause damage during storage. This simple step will help prevent rust and corrosion, keeping your skis in optimal condition for the next winter season.
Waxing Skis
Waxing your skis before storing them is a crucial step to protect the base and edges from drying out and developing rust. Waxing helps to keep the base lubricated, preventing it from drying out and becoming brittle. Here’s how to wax your skis:
- Clean the base: Start by cleaning the base of the skis using a ski-specific base cleaner. This will remove any residual dirt or wax from previous use.
- Choose the right wax: Select a wax that matches the current snow conditions or go for an all-temperature wax if you’re unsure. Apply the wax according to the manufacturer’s instructions.
- Iron the wax: Use a ski waxing iron to melt the wax onto the skis’ base. Apply the wax in a zigzag pattern along the entire length of the ski, making sure to cover the edges as well.
- Spread the wax: Use the heated iron to spread the wax evenly across the base. This will ensure an even and effective application.
- Scrape off the excess: Once the wax has cooled down, use a plastic scraper to remove the excess wax from the base. Scrape from tip to tail in long, controlled strokes.
- Brush the base: Finish the waxing process by brushing the base with a ski brush. This will help to further distribute the wax and remove any excess particles.
Waxing your skis before storing them not only helps to protect the base and edges, but it also prepares them for the next winter season. The wax acts as a protective layer, preventing moisture from seeping into the ski and causing damage.
Removing Bindings
Before storing your skis for the summer, it’s a good idea to remove the bindings. This step is not necessary for everyone, but if you plan to store your skis for an extended period or you want to perform maintenance on the bindings, removing them can be beneficial. Here’s how you can remove the bindings from your skis:
- Consult a professional: If you’re unsure about removing the bindings yourself, it’s best to consult a professional ski technician. They have the expertise and proper tools to safely remove the bindings.
- Release the brakes: Start by releasing the brakes on the bindings. This can usually be done by flipping a lever or pressing a button located near the heel piece of the binding.
- Adjust the binding settings: If your bindings have adjustable settings, take note of the current setting before removing them. This way, you can easily readjust them when you reattach the bindings later.
- Use a screwdriver: Use a screwdriver to remove the screws holding the binding to the ski. Make sure to keep the screws in a safe place, so they don’t get lost.
- Gently remove the binding: Once the screws are removed, you can gently pry the binding away from the ski using a moderate amount of force. Be careful not to damage the ski while doing so.
By removing the bindings, you can store them separately and perform any necessary maintenance or repairs. This also allows you to store the skis in a more compact manner, reducing the amount of space they occupy. However, if you prefer to leave the bindings attached, make sure they are properly adjusted, and the brakes are secured to prevent any accidental release.
Storing Skis in a Dry Location
Once your skis are clean, dry, and waxed, it’s time to find a suitable location to store them for the summer. It’s important to store your skis in a dry area to prevent moisture from causing damage. Here are some tips for storing skis in a dry location:
- Avoid damp areas: Choose a storage area that is free from moisture, such as a dry room or closet. Avoid storing your skis in a basement or garage where humidity levels can be high.
- Keep away from heat sources: Avoid storing your skis near direct sunlight, heaters, or any other heat sources. Excessive heat can warp the ski’s shape and degrade the materials.
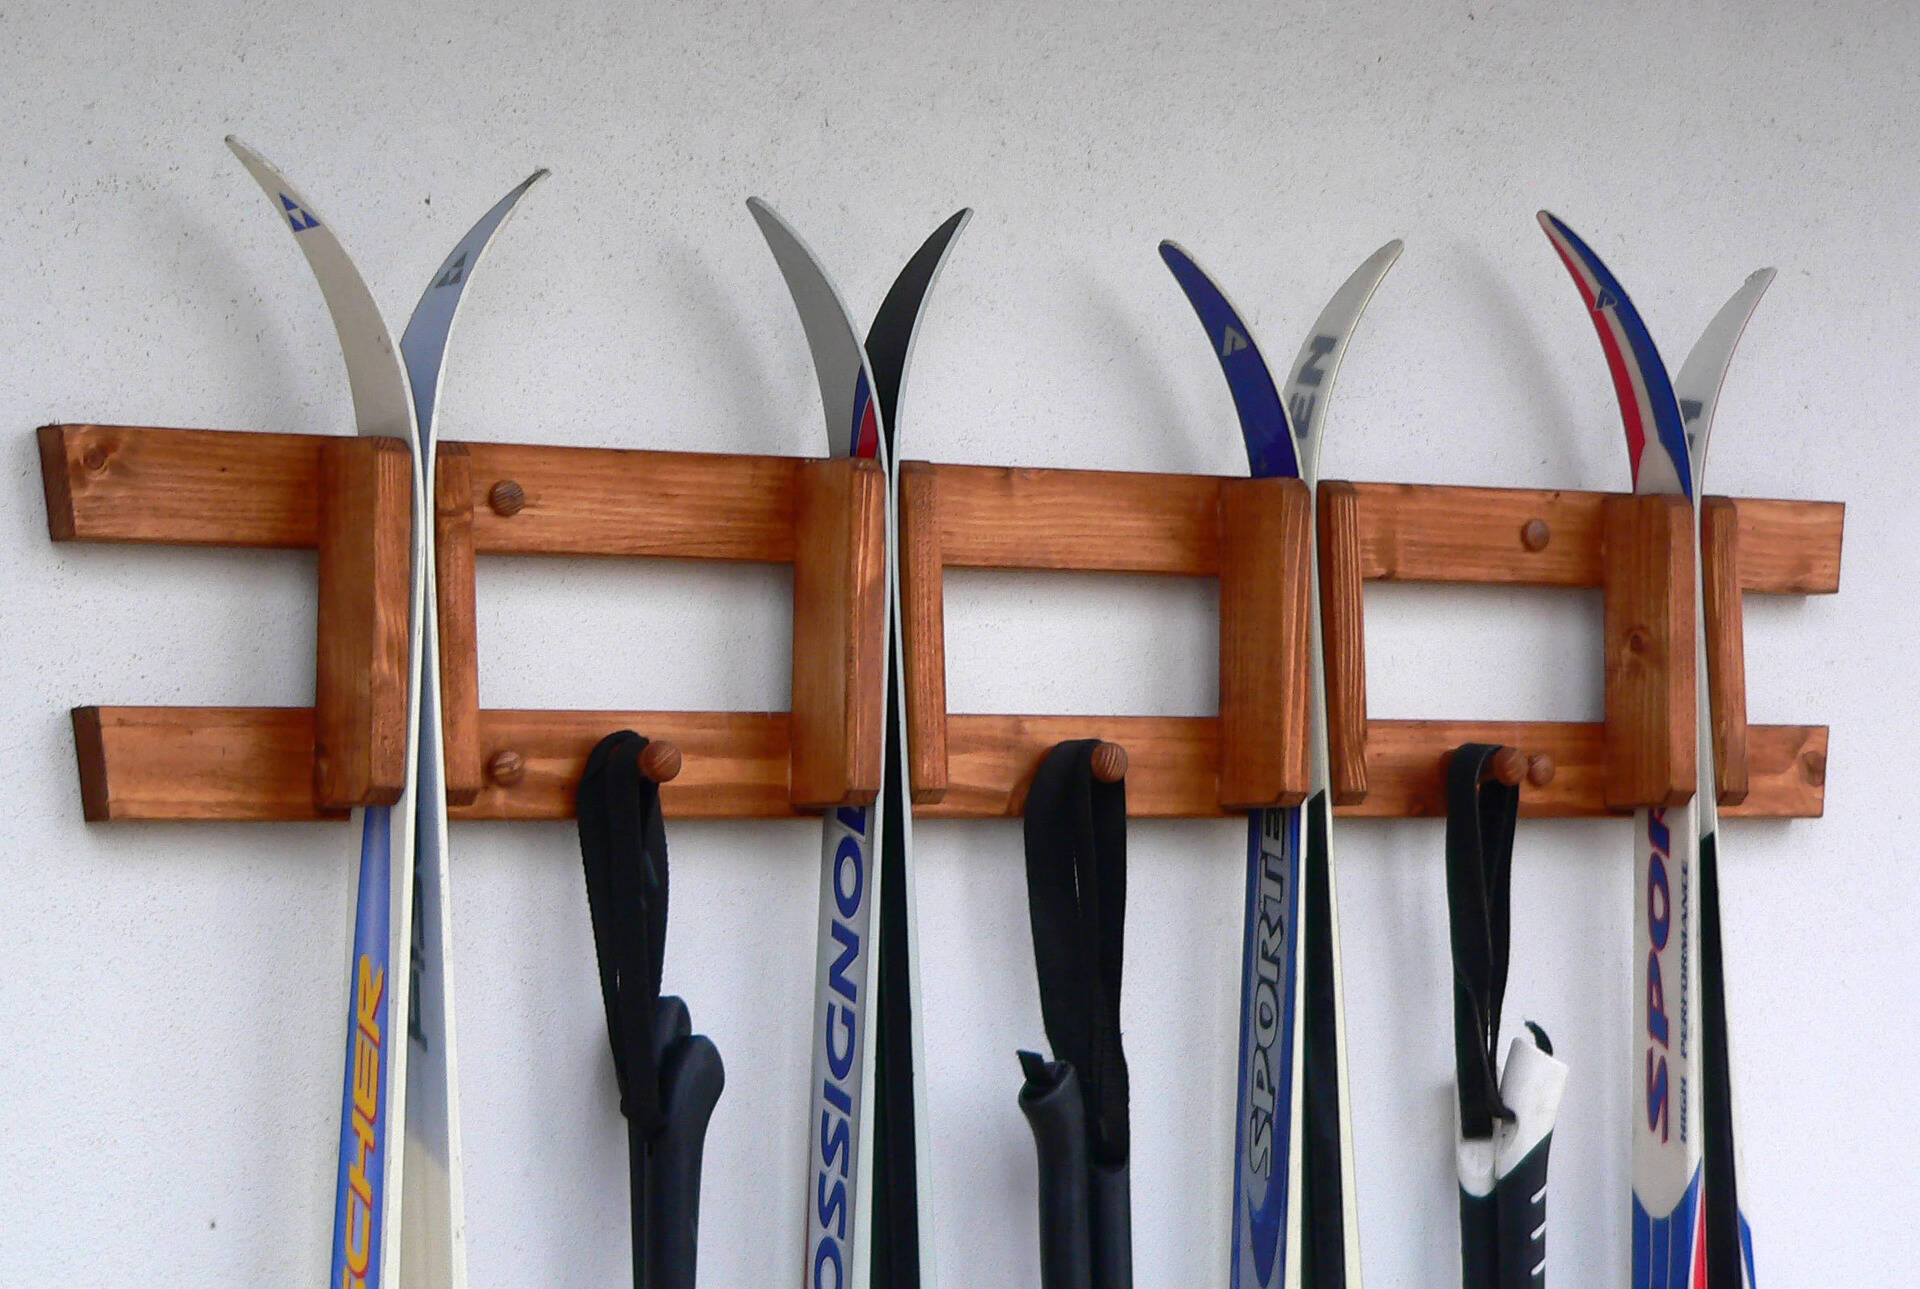
- Consider a ski rack or wall mount: Using a ski rack or wall mount is a great way to store your skis upright, which allows any accumulated moisture to evaporate. This also helps to save space and keep your ski area organized.
- Use a ski bag or sleeve: If you’re storing your skis in a larger space or in a storage area with other items, consider using a ski bag or sleeve. This provides an extra layer of protection against dust, scratches, and any potential moisture.
By storing your skis in a dry location, you’re ensuring that they remain in optimal condition throughout the summer months. Moisture can lead to rust, corrosion, or damage to your skis, so taking the necessary precautions will help to prolong their lifespan.
Read more: How To Store Skis
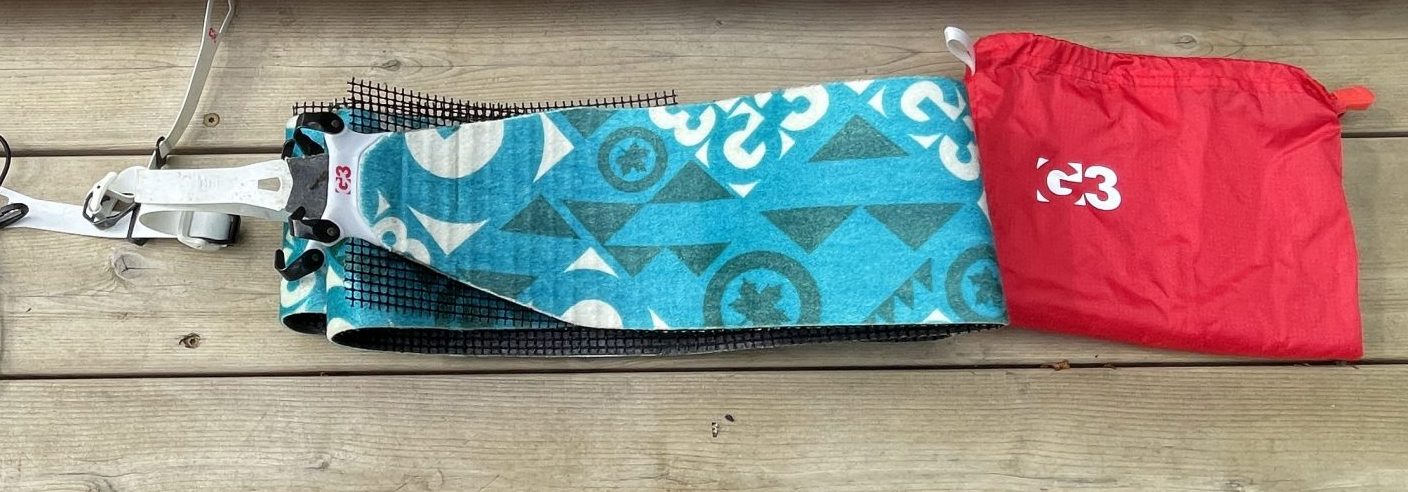
Using Ski Bags or Sleeves
When storing your skis, it’s a good idea to protect them from dust, scratches, and potential damage by using ski bags or sleeves. Here’s how you can use ski bags or sleeves to safeguard your skis:
- Select the right size: Choose a ski bag or sleeve that is appropriate for the length of your skis. It’s important to ensure that your skis fit snugly inside to prevent any movement or potential damage.
- Place your skis inside: Carefully slide your skis into the bag or sleeve, making sure to align the tips and tails properly. If you have removable bindings, position them so that they face each other to save space.
- Secure the closure: Depending on the type of bag or sleeve you have, secure the closure mechanism such as zippers, straps, or Velcro. This will keep your skis securely in place and provide an added layer of protection.
- Add padding if necessary: If you’re concerned about extra protection, you can add padding inside the bag or sleeve. Foam or bubble wrap can help to cushion your skis and prevent them from getting scratched or damaged during storage.
Using ski bags or sleeves is especially useful if you need to transport or store your skis in a larger storage space. They offer an additional layer of protection and make it easier to keep your skis organized. Just make sure to clean and dry your skis before placing them in the bag or sleeve to avoid trapping any moisture inside.
Store skis for summer by cleaning and drying them thoroughly to prevent rust. Apply a coat of wax to protect the edges and bases. Store them in a cool, dry place away from direct sunlight to maintain their condition.
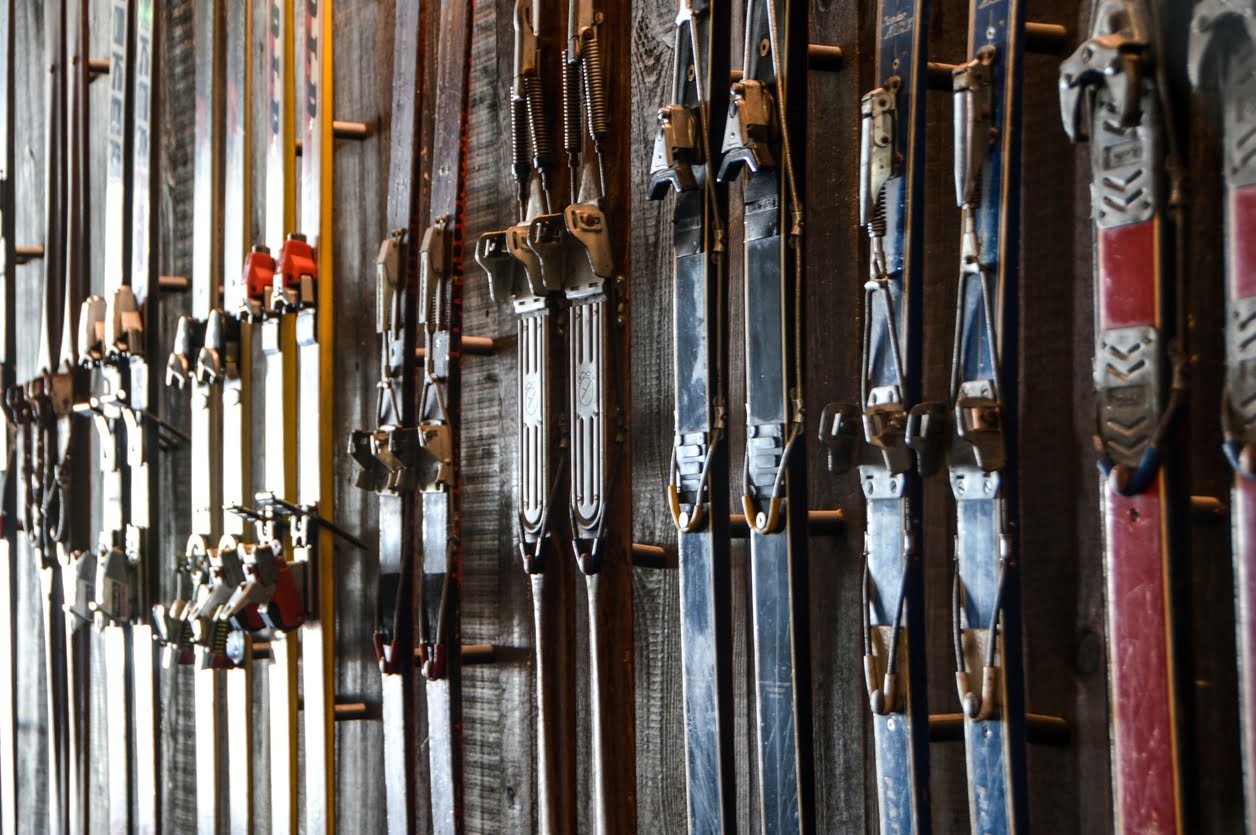
Hanging Skis
If you’re looking for a space-saving and convenient way to store your skis, hanging them can be a great option. Hanging your skis not only keeps them organized but also prevents any potential damage that may occur if they are stacked or leaning against each other. Here’s how you can hang your skis:
- Find a suitable location: Look for a sturdy wall or ceiling area where you can securely hang your skis. Make sure the location is away from direct sunlight and any heat sources.
- Install ski hooks or brackets: Purchase ski hooks or brackets that are specifically designed for hanging skis. These hooks or brackets should have padded surfaces to prevent any scratches or damage to the skis.
- Mount the hooks or brackets: Use a drill or screwdriver to mount the ski hooks or brackets on the wall or ceiling. Make sure they are level and securely attached to provide proper support for hanging your skis.
- Hang your skis: Place the skis on the hooks or brackets, ensuring that the bindings rest securely on the hooks. You can hang the skis horizontally or vertically, depending on the available space and your preference.
- Consider using ski straps: To keep your skis together and prevent them from accidentally falling off the hooks, you can use ski straps. These adjustable straps wrap around the skis and bindings, keeping them tightly together.
Hanging your skis not only saves space but also allows for proper air circulation around them, preventing any moisture buildup. Just make sure that the hanging location is secure and that the skis are properly supported to avoid any potential accidents or damage.
Applying Rust Inhibitor
To further protect your skis from rust and corrosion during the summer months, you can apply a rust inhibitor. A rust inhibitor forms a protective barrier on the metal parts of your skis, preventing moisture from causing rust to develop. Here’s how you can apply a rust inhibitor to your skis:
- Clean the metal parts: Before applying a rust inhibitor, make sure that the metal parts of your skis, such as the bindings and edges, are clean and dry. Remove any dirt or debris using a soft cloth or brush.
- Choose a suitable rust inhibitor: Select a rust inhibitor that is specifically designed for ski equipment. Look for one that is compatible with all types of metals and offers long-lasting protection.
- Apply the rust inhibitor: Following the manufacturer’s instructions, apply the rust inhibitor to the metal parts of your skis. Use a cloth or applicator to evenly coat the surfaces, ensuring complete coverage.
- Allow drying time: After applying the rust inhibitor, allow sufficient drying time as indicated on the product packaging. This will ensure that the inhibitor forms a protective barrier and effectively prevents rust.
- Periodic maintenance: During the storage period, it’s a good idea to periodically check the metal parts of your skis and reapply the rust inhibitor if necessary. This will help to maintain the protection against rust throughout the summer.
Applying a rust inhibitor is an extra precautionary step to keep your skis in top condition. It provides added protection to the metal components, prolonging their lifespan and preserving their performance for future use.
Checking Skis for Damage
Before storing your skis for the summer, it’s important to inspect them for any signs of damage. Identifying and addressing damage early on will prevent further deterioration and ensure that your skis are ready to hit the slopes when the next winter season arrives. Here’s how you can check your skis for damage:
- Look for cracks or splits: Examine the entire surface of your skis, including the topsheets and bases, for any cracks or splits. These can weaken the structure of the skis and affect their performance.
- Inspect the edges: Check the edges of your skis for any signs of damage or dullness. Look for dings, burrs, or sections where the edges may have separated from the ski’s base.
- Check the bindings: Inspect the bindings for any loose or damaged components. Ensure that the release mechanisms are functioning properly and that all screws are tight. If you notice any issues, it’s best to consult a professional ski technician for a proper assessment.
- Check the base for gouges or scratches: Look closely at the base of your skis for any deep gouges or scratches. While minor superficial scratches are normal and can be repaired easily, deeper damage may require professional repairs.
- Inspect the mounting holes: If you removed the bindings, check the mounting holes for any signs of wear or damage. Look for cracks, elongated holes, or stripped screws. If necessary, consult a professional to assess and repair any mounting hole issues.
If you discover any damage during your inspection, it’s important to address it promptly. Minor scratches or dings can often be repaired with DIY methods, while more significant damage may require professional assistance. By checking your skis for damage before storing them, you can ensure that they’re in good condition and ready to perform optimally when the next ski season arrives.
Read more: How To Store Ski Clothes
Reattaching Bindings
If you removed the bindings from your skis for storage or maintenance purposes, reattaching them correctly is crucial to ensure proper performance and safety on the slopes. Here’s a step-by-step guide on how to reattach your bindings:
- Gather the necessary tools: You will need a screwdriver and the screws that were originally used to secure the bindings.
- Align the bindings: Position the bindings correctly on the ski, aligning them with the pre-existing mounting holes. Ensure that they are centered and parallel with the ski’s edges.
- Insert the screws: Carefully insert the screws into the mounting holes, one screw at a time. Start with a few turns by hand to ensure they are aligned properly.
- Tighten the screws: Using a screwdriver, tighten the screws gradually and evenly, alternating between them. Avoid overtightening, as it can damage the ski or strip the screw threads.
- Verify proper tension: Check the tension of the bindings to ensure they are securely fastened. They should be snugly attached to the ski, but not excessively tight.
- Test the bindings: Once the bindings are reattached, conduct a simple test by gently twisting and flexing the binding mechanism. It should move smoothly and securely without any excessive play.
If you’re unsure about reattaching the bindings yourself or if you encountered any issues during the process, it’s highly recommended to consult a professional ski technician. They have the expertise and specialized tools to ensure the bindings are mounted correctly for optimal performance and safety.
Properly reattaching the bindings is essential to maintain the integrity and safety of your skis. Following these steps will ensure that your bindings are secured correctly, allowing you to confidently hit the slopes when the next ski season arrives.
Recap and Conclusion
Properly storing your skis for the summer is crucial to maintain their performance and longevity. By following a few key steps, you can ensure that your skis remain in optimal condition during the off-season. Let’s recap the essential points:
1. Clean and Dry: Start by cleaning your skis to remove any dirt or debris. Ensure they are completely dry to prevent rust and corrosion.
2. Waxing: Apply a fresh coat of wax to the base of your skis to protect them from drying out and developing rust.
3. Removing Bindings: Consider removing the bindings if you plan to store your skis for an extended period or need to perform maintenance on them.
4. Storing in a Dry Location: Find a dry area, away from heat sources, to store your skis. Consider using a ski rack, wall mount, or ski bag to protect them.
5. Using Ski Bags or Sleeves: Protect your skis from dust and scratches by storing them in ski bags or sleeves, especially if they are in a shared storage space.
6. Hanging Skis: Hanging your skis is a space-saving option that allows for proper air circulation. Use ski hooks or brackets for secure and organized storage.
7. Applying Rust Inhibitor: Apply a rust inhibitor to the metal parts of your skis to protect them from rust and corrosion during storage.
8. Checking for Damage: Inspect your skis for any cracks, splits, scratches, or damage. Address any issues before storing them.
9. Reattaching Bindings: If you removed the bindings, correctly reattach them according to the manufacturer’s instructions or consult a professional.
In conclusion, taking the time to properly store your skis for the summer will ensure they remain in top condition and ready for the next winter season. By cleaning, waxing, and protecting them from moisture and damage, you can prolong their lifespan and maintain their performance. Remember to store them in a dry location, check for damage, and address any issues promptly. With these steps, your skis will be primed and ready for your next adventure on the slopes!
Frequently Asked Questions about How To Store Skis For Summer
Was this page helpful?
At Storables.com, we guarantee accurate and reliable information. Our content, validated by Expert Board Contributors, is crafted following stringent Editorial Policies. We're committed to providing you with well-researched, expert-backed insights for all your informational needs.


0 thoughts on “How To Store Skis For Summer”