Articles
How To Store Snowblower For Summer
Modified: February 22, 2024
Learn how to properly store your snowblower during the summer months with these helpful articles.
(Many of the links in this article redirect to a specific reviewed product. Your purchase of these products through affiliate links helps to generate commission for Storables.com, at no extra cost. Learn more)
Introduction
As winter comes to an end and the snowy weather turns to warmth, it’s time to start thinking about storing your snowblower for the summer season. Properly storing your snowblower is essential to ensure its longevity and optimum performance when you need it again next winter. By following a few simple steps, you can protect your investment and make sure your snowblower is ready for action when the snow starts to fall again.
In this article, we will guide you through the process of storing your snowblower for the summer. From gathering the necessary materials to preparing the snowblower and choosing the right storage location, we will cover everything you need to know to ensure your snowblower remains in top shape during the off-season.
So, let’s get started and learn how to properly store your snowblower so that it stays in great condition and is ready to tackle the winter weather when the time comes.
Key Takeaways:
- Properly storing your snowblower for the summer involves gathering materials, preparing the machine, cleaning, draining fuel, and maintaining key components. Follow these steps to ensure your snowblower remains in top condition for the next winter season.
- Storing your snowblower in a dry, safe location, covering it for added protection, and following manufacturer recommendations are essential for maintaining its longevity and performance. By taking these steps, you can confidently store your snowblower and ensure it’s ready for action when the snow returns.
Read more: How To Store A Snowblower
Step 1: Gather Materials
Before you begin the process of storing your snowblower for the summer, it’s important to gather all the necessary materials. Having everything you need on hand will make the process much smoother and more efficient. Here are the materials you will need:
- Fuel stabilizer: This will help prevent the fuel from deteriorating and causing issues when you start up the snowblower next winter.
- Oil drain pan: You will need this to catch the old oil when you drain it from the snowblower.
- Fuel siphon: If there is any remaining fuel in the tank, a fuel siphon will make it easier to remove.
- Socket wrench: This will be used to remove the spark plug and drain the oil.
- Clean cloth or rag: You will need this to wipe down the snowblower and remove any dirt or debris.
- Gloves and safety goggles: These will protect your hands and eyes while working on the snowblower.
- Cover or tarp: To protect the snowblower from dust and debris while in storage.
Once you have gathered all the necessary materials, you are ready to move on to the next step: preparing the snowblower for storage.
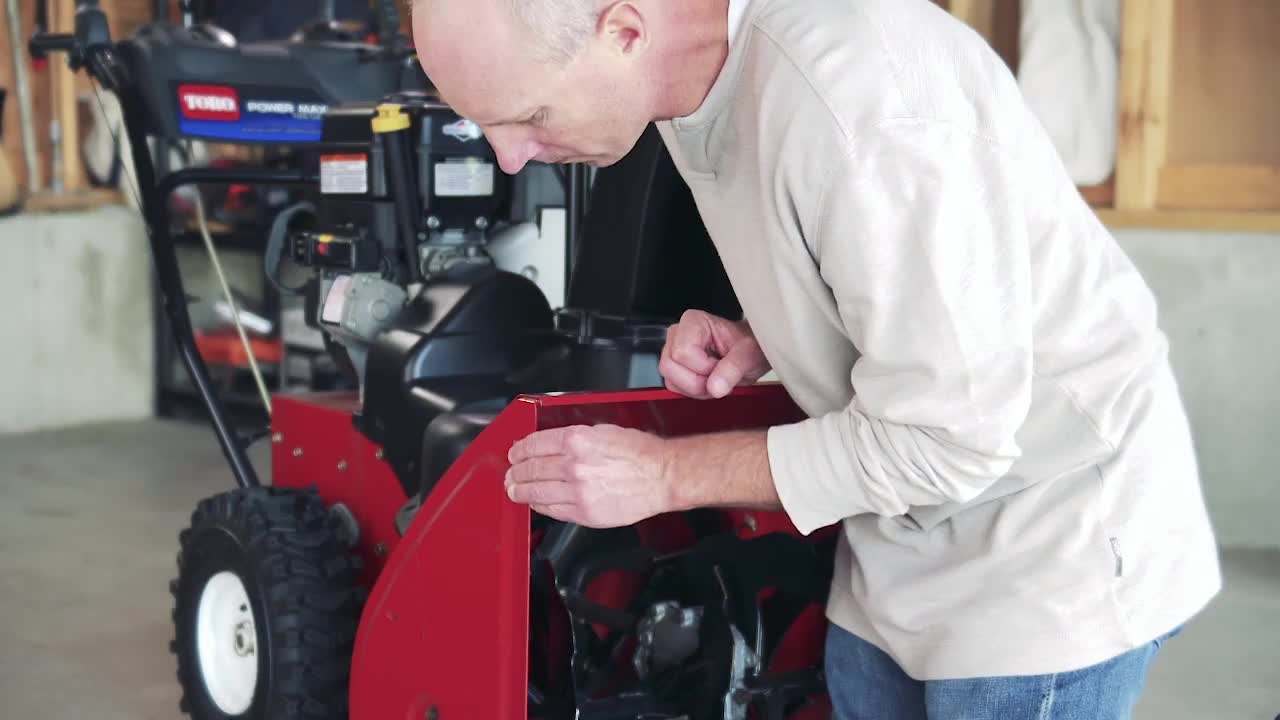
Step 2: Prepare the Snowblower
Before storing your snowblower for the summer, it’s important to take a few steps to ensure it is prepared for the off-season. Here are the key tasks to complete in this step:
- Remove any attachments: If your snowblower has any attachments or accessories such as drift cutters or tire chains, now is the time to remove them. This will make it easier to clean and store the main unit.
- Inspect for damage: Take a close look at your snowblower and check for any signs of damage or wear. Look for cracks in the housing, bent augers, or worn belts. If you notice any issues, make a note of them so you can address them before the next snow season.
- Tighten loose parts: Use a socket wrench or appropriate tool to tighten any loose bolts or nuts on the snowblower. Vibrations and usage during the winter months can cause parts to become loose, so it’s important to double-check and secure everything before storage.
- Disconnect the spark plug: For safety reasons, it’s important to disconnect the spark plug wire before working on or storing your snowblower. This will prevent accidental starts and ensure your safety while performing maintenance tasks.
By completing these tasks, you will ensure that your snowblower is in good condition and ready for storage. Now that the snowblower is prepared, let’s move on to the next step: cleaning.
Step 3: Clean the Snowblower
Before storing your snowblower for the summer, it’s crucial to thoroughly clean it to remove any dirt, debris, or leftover snow. Cleaning the snowblower will not only help maintain its appearance but also prevent rust and corrosion. Here’s how to clean your snowblower:
- Remove excess snow: Begin by clearing any remaining snow or ice from the snowblower. Use a brush or a scraper to gently remove any buildup. Be careful not to damage any components while doing this.
- Wipe down the exterior: Use a clean cloth or rag to wipe down the exterior surfaces of the snowblower. Pay attention to areas that may have accumulated dirt or salt residue. Wiping down the snowblower will help prevent corrosion and keep it looking new.
- Clean the chute and auger: The chute and auger are two critical components of the snowblower. Use a brush or a cloth to remove any debris or clogs from these parts. Ensure that they are clean and free of any obstructions.
- Inspect the belts and cables: Check the belts and cables for any signs of wear or damage. Replace or repair any worn-out parts as needed. It’s important to have these components in good condition to ensure optimal performance during the next snow season.
- Remove any dirt or debris: Take some time to inspect the nooks and crannies of the snowblower, such as the engine compartment or the control panel. Use a brush or compressed air to remove any dirt or debris that may have accumulated.
By cleaning your snowblower thoroughly, you are not only maintaining its appearance but also preventing any potential damage and ensuring its longevity. Once the snowblower is clean, it’s time to move on to the next step: draining the fuel.
Step 4: Drain the Fuel
One of the most crucial steps in properly storing your snowblower for the summer is draining the fuel. Stale fuel can cause clogs and performance issues when you try to start the snowblower again in the winter. Here’s how to drain the fuel:
- Run the snowblower: Start the snowblower and let it run until it runs out of fuel. This will help burn any remaining fuel in the engine and carburetor.
- Locate the fuel tank: Once the snowblower has run out of fuel and is turned off, locate the fuel tank. It is usually located near the engine and is easily accessible.
- Prepare a fuel-safe container: Get a fuel-safe container, such as a gas can, to collect the drained fuel.
- Disconnect the fuel line: Locate the fuel line connected to the fuel tank. Use pliers or a wrench to disconnect the fuel line from the tank. Be careful as there might still be some fuel in the line.
- Drain the fuel: Once the fuel line is disconnected, tilt the snowblower and carefully pour out the remaining fuel into the fuel-safe container. Make sure to drain all the fuel from the tank.
- Dispose of fuel properly: It’s important to dispose of the drained fuel safely and responsibly. Check local regulations for proper disposal methods or take it to a designated collection center.
By draining the fuel from your snowblower, you prevent any issues that may arise from stale fuel and ensure a smooth start when you need to use it again. After draining the fuel, you are ready to move on to the next step: replacing or cleaning the spark plug.
Read more: How To Store Snowblower
Step 5: Replace or Clean the Spark Plug
The spark plug is a vital component of your snowblower. It generates the spark needed for ignition, so it’s crucial to ensure it’s in good condition before storing your snowblower for the summer. Here’s how to replace or clean the spark plug:
- Access the spark plug: Locate the spark plug on the engine of your snowblower. It is typically located on the side of the engine and covered by a rubber boot.
- Inspect the spark plug: Remove the spark plug by carefully pulling off the rubber boot. Examine the spark plug for any signs of damage, such as cracks, carbon buildup, or worn electrodes. If the spark plug appears damaged or worn, it’s best to replace it with a new one.
- Clean the spark plug: If the spark plug looks relatively clean and is in good condition, you can opt to clean it instead of replacing it. Use a wire brush to gently remove any carbon deposits or debris from the electrode. Ensure that the electrode gap is set to the correct specifications as mentioned in your snowblower’s manual.
- Replace the spark plug: If you determined that the spark plug needs to be replaced, purchase a new spark plug that is compatible with your snowblower’s make and model. Install the new spark plug by threading it into the spark plug socket and tightening it with a socket wrench. Finally, reattach the rubber boot securely.
By replacing or cleaning the spark plug, you ensure that the ignition system of your snowblower is in optimal condition. A clean or new spark plug will provide a reliable spark for easy starting when you need to use your snowblower again. Once the spark plug is taken care of, it’s time to move on to the next step: changing the oil.
Before storing your snowblower for the summer, make sure to clean the machine thoroughly, drain the fuel, and lubricate moving parts to prevent rust and corrosion. Store in a dry, covered area to protect it from the elements.
Step 6: Change the Oil
Changing the oil in your snowblower is an important maintenance task before storing it for the summer. Fresh oil helps maintain the engine’s performance and protects it during the off-season. Here’s how to change the oil in your snowblower:
- Warm up the engine: Start the snowblower and let it run for a few minutes to warm up the engine. Warm oil flows more easily and helps ensure that any debris is suspended in the oil.
- Prepare the oil drain pan: Place the oil drain pan beneath the oil drain plug to catch the old oil.
- Locate the oil drain plug: The oil drain plug is typically located at the bottom of the engine. Consult your snowblower’s manual to locate the exact position.
- Drain the old oil: Carefully loosen the oil drain plug using a socket wrench and let the old oil drain into the oil drain pan. Ensure that all the oil has been drained completely.
- Replace the oil drain plug: Once the old oil has been drained, securely tighten the oil drain plug back into place.
- Add fresh oil: Consult your snowblower’s manual to determine the recommended type and amount of oil. Add fresh oil through the oil fill cap or dipstick opening. Use a funnel to prevent spills.
- Check the oil level: After adding the fresh oil, check the oil level using the dipstick. Ensure that it is within the recommended range.
Changing the oil in your snowblower removes any contaminants and ensures that the engine is protected during the storage period. Clean and fresh oil will help preserve the engine’s life and ensure smooth operation when you use the snowblower again in the winter. After changing the oil, it’s time to move on to the next step: lubricating moving parts.
Step 7: Lubricate Moving Parts
Lubricating the moving parts of your snowblower is essential for preventing rust and ensuring smooth operation when it’s time to use it again. Here’s how to properly lubricate the moving parts:
- Refer to the manual: Consult your snowblower’s manual to determine which parts require lubrication and the type of lubricant recommended.
- Apply lubricant: Use the recommended lubricant to coat the necessary moving parts. Common parts that require lubrication include the auger shaft, drive chain, and chute rotation mechanism.
- Rotate and exercise the parts: After applying the lubricant, manually rotate and exercise the lubricated parts a few times to ensure that the lubricant is distributed evenly.
- Check for excessive lubrication: Be careful not to over-lubricate, as excessive lubrication can attract dirt and debris, leading to potential damage. Wipe off any excess lubricant with a clean cloth.
Properly lubricating the moving parts of your snowblower prevents rust and corrosion, ensuring that the machine operates smoothly when you need it again. By following these steps, you are protecting the longevity and performance of your snowblower. After lubricating the moving parts, it’s time to move on to the next step: storing your snowblower in a dry and safe location.
Step 8: Store in a Dry and Safe Location
Choosing the right storage location for your snowblower is crucial to protect it from the elements and ensure its longevity. Here’s how to store your snowblower in a dry and safe location:
- Choose an indoor storage area: It is ideal to store your snowblower indoors, in a garage, or a shed. This helps protect it from rain, snow, and extreme temperatures.
- Clear a designated space: Clear out a designated space for your snowblower in the storage area. Make sure there are no obstructions or items that can potentially damage your snowblower.
- Elevate the snowblower: If possible, elevate the snowblower off the ground using blocks or a pallet. This helps prevent moisture from seeping into the machine and causing damage.
- Secure the snowblower: Ensure that the snowblower is stable and secure in its designated storage area. This will prevent any accidental tipping or damage during the storage period.
- Avoid direct contact with concrete: If storing the snowblower on the ground, avoid direct contact with concrete. Place a piece of cardboard or a plastic sheet under the snowblower to prevent moisture absorption.
By storing your snowblower in a dry and safe location, you are protecting it from the elements and minimizing the risk of damage during the off-season. This step is crucial for maintaining the overall condition and performance of your snowblower. After securely storing your snowblower, it’s time for the final step: covering it for added protection.
Read more: How To Store A Snowblower Outside
Step 9: Cover the Snowblower
The final step in properly storing your snowblower for the summer is to cover it for added protection. Covering your snowblower will help prevent dust, dirt, and debris from accumulating on the machine. Here’s how to cover your snowblower:
- Select a weatherproof cover: Choose a cover specifically designed for outdoor equipment or a heavy-duty tarp that is large enough to fully cover your snowblower.
- Ensure the snowblower is clean and dry: Before covering it, make sure the snowblower is clean and dry to prevent any moisture or dirt from getting trapped and causing damage.
- Place the cover over the snowblower: Carefully drape the cover over the snowblower, ensuring that it fully covers all parts of the machine.
- Secure the cover: Use bungee cords, straps, or other fasteners to secure the cover in place. This will ensure that it stays on even during windy conditions.
- Check periodically: Throughout the storage period, periodically check the cover to ensure it remains secure and in good condition. Make any necessary adjustments or repairs as needed.
By covering your snowblower, you provide an additional layer of protection against dust, dirt, moisture, and potential damage. This step is especially important if you are storing your snowblower in an outdoor area. With the snowblower securely covered, you can now rest assured that it will remain in good condition until the next winter season.
By following these nine steps, you are effectively storing your snowblower for the summer and ensuring it remains in great condition. Proper maintenance and storage will not only prolong the lifespan of your snowblower but also make it easier to start and use when the next winter arrives. So, take the time to properly store your snowblower and enjoy peace of mind knowing that it will be ready to tackle the snow when the weather changes again.
Conclusion
Storing your snowblower properly for the summer is crucial to protect your investment and ensure its optimum performance when the snow returns. By following the nine steps outlined in this article, you can confidently store your snowblower and rest assured that it will be in great condition when you need it again. Here’s a quick recap of the steps:
- Gather the necessary materials.
- Prepare the snowblower by removing attachments and inspecting for damage.
- Clean the snowblower thoroughly to remove dirt and debris.
- Drain the fuel to prevent issues from stale fuel.
- Replace or clean the spark plug for optimal ignition.
- Change the oil to keep the engine protected.
- Lubricate the moving parts to prevent rust and ensure smooth operation.
- Store the snowblower in a dry and safe location.
- Cover the snowblower for added protection against dust and debris.
By following these steps, you are taking the necessary precautions to ensure the longevity and performance of your snowblower. Proper storage will help prevent damage, maintain the machine’s integrity, and make it easier to start up when the winter season arrives again.
Remember to refer to your snowblower’s manual for specific instructions and recommendations, as different models may have unique requirements. Additionally, always prioritize safety when working on or storing your snowblower. Wear appropriate protective gear and follow all safety guidelines provided by the manufacturer.
With these guidelines in mind, you can confidently store your snowblower for the summer and enjoy the peace of mind knowing that it will be ready to tackle the snowy days ahead. Happy storing!
Frequently Asked Questions about How To Store Snowblower For Summer
Was this page helpful?
At Storables.com, we guarantee accurate and reliable information. Our content, validated by Expert Board Contributors, is crafted following stringent Editorial Policies. We're committed to providing you with well-researched, expert-backed insights for all your informational needs.


0 thoughts on “How To Store Snowblower For Summer”