
Articles
How To Store Slime
Modified: January 6, 2024
Learn the best practices for storing slime with our helpful articles. Discover tips and tricks to keep your slime fresh and ready for endless fun at any time.
(Many of the links in this article redirect to a specific reviewed product. Your purchase of these products through affiliate links helps to generate commission for Storables.com, at no extra cost. Learn more)
Introduction
Slime has become a popular sensory toy for both children and adults. Its gooey texture and endless possibilities for play make it a favorite pastime. However, as enthusiasts know, slime can quickly become a messy situation if not properly stored.
In this article, we will explore the best practices for storing slime to keep it fresh, mold-free, and readily available for playtime. Whether you have homemade slime or store-bought varieties, these tips will help you preserve your slime for longer periods, ensuring a satisfying and enjoyable slimy experience.
Choosing the right container, sealing techniques, temperature considerations, avoiding contact with other materials, storing slime for extended periods, and reviving dried out slime will be covered in detail. By following these guidelines, you can keep your slime in top-notch condition and extend its lifespan.
So, if you’re ready to take your slime storage game to the next level, let’s dive in!
Key Takeaways:
- Choose airtight containers like plastic, mason jars, or silicone to keep slime fresh and prevent leakage. Proper sealing techniques and temperature considerations are crucial for maintaining slime’s desired texture and consistency.
- Revive dried out slime by adding moisture gradually and using slime activator if needed. Proper storage practices, including choosing the right container and avoiding contact with other materials, are essential for preserving slime’s quality and ensuring endless playtime fun.
Read more: How To Store Homemade Slime
Choosing the Right Container
When it comes to storing slime, the first step is to choose the right container. The container you select should be airtight and capable of keeping the slime securely sealed. Here are a few options to consider:
- Plastic Containers: Plastic containers with tight-fitting lids are a popular choice for slime storage. Look for containers made of high-quality plastic that won’t leak or crack easily. Avoid containers with large openings or irregular shapes, as they may make it challenging to retrieve the slime.
- Mason Jars: Mason jars are another excellent option for storing slime. They are easy to find, sturdy, and come with tight-sealing lids. Plus, the clear glass allows you to see the colors and textures of your slime, adding to the visual appeal.
- Ziplock Bags: If you prefer a more flexible option, ziplock bags can be used to store slime. Ensure you choose high-quality bags that are durable and have a reliable zip closure. Consider double-bagging the slime to prevent any leakage or drying out.
- Silicone Containers: Silicone containers are becoming increasingly popular for slime storage due to their flexibility and easy cleanup. These containers are often food-grade and can be found in various shapes and sizes, allowing you to accommodate different quantities of slime.
When choosing a container, it’s also essential to consider the size. Ensure the container is spacious enough to accommodate the slime without too much excess space. This will help prevent the slime from drying out or becoming discolored.
Additionally, opt for containers with a smooth interior surface to make slime removal easier. Containers with ridges or crevices can be challenging to clean, leading to residue buildup over time.
By selecting the right container for your slime, you can keep it fresh, prevent leakage, and maintain its desired texture and consistency for longer periods.
Proper Sealing Techniques
Once you’ve chosen the perfect container for storing your slime, it’s crucial to employ proper sealing techniques to maintain its freshness and prevent any leakage. Here are some effective methods:
- Tighten the Lid: If you’re using a container with a lid, ensure that it is tightly sealed. Press down firmly on the lid and make sure there are no gaps or openings. This will prevent air from entering the container and drying out the slime.
- Use Plastic Wrap: For containers that may have a less secure seal, such as mason jars, you can use plastic wrap as an extra layer of protection. Place a piece of plastic wrap directly over the slime before sealing the jar. This will provide an additional barrier against air and keep the slime from oozing out.
- Double Bagging: If you’re using ziplock bags, consider double-bagging your slime for added security. Place the slime in one bag and seal it tightly, then place it inside a second bag and seal again. This double-bagging technique provides an extra layer of protection against leakage and can help keep the slime fresher for a longer time.
- Wrap with Cling Film: Another option to prevent drying and maintain the moisture content of your slime is to wrap it tightly with cling film before placing it in the storage container. The cling film acts as a protective barrier, keeping the slime from coming into direct contact with air.
Remember to be thorough and meticulous when sealing your slime. Take the time to ensure that all sides of the container are properly secured and there are no gaps or openings. Proper sealing will help preserve the slime’s texture, prevent any leakage, and maintain its vibrant colors.
By applying these sealing techniques, you can rest assured that your slime will be stored safely and ready to provide hours of slimy fun!
Temperature Considerations
Temperature plays a crucial role in maintaining the quality and consistency of slime. Extreme temperatures can cause the slime to change in texture or even deteriorate over time. Here are a few temperature considerations to keep in mind:
- Avoid Heat Exposure: Slime is sensitive to heat, so it’s important to keep it away from direct sunlight and high temperatures. Exposure to heat can cause the slime to melt or become sticky. Store your slime in a cool, dry place to maintain its intended texture.
- Freezing Slime: While heat is detrimental to slime, extreme cold temperatures can also have adverse effects. Freezing slime can lead to texture changes, making it hard and less pliable. Avoid storing slime in extremely cold areas, such as a freezer, to prevent any unwanted alterations.
- Room Temperature: The ideal temperature for storing slime is room temperature, typically between 68-72 degrees Fahrenheit (20-22 degrees Celsius). At this temperature range, slime retains its original consistency and stays fresh for longer periods.
- Avoid Temperature Fluctuations: Rapid temperature fluctuations can affect the quality of slime. Avoid storing slime in areas with significant temperature changes, such as near heaters or air conditioning vents. These fluctuations can cause condensation and impact the slime’s texture and integrity.
By being mindful of temperature considerations, you can ensure that your slime remains in its best condition. Remember to keep it in a location that is not prone to extreme temperatures, and store it at a steady room temperature to maintain its desired texture and playability.
Store slime in an airtight container to prevent it from drying out. Keep it in a cool, dry place away from direct sunlight to maintain its consistency.
Avoiding Contact with Other Materials
When it comes to storing slime, it’s crucial to keep it away from contact with other materials that could potentially cause damage or contamination. Here are some guidelines to help you avoid any unwanted interactions:
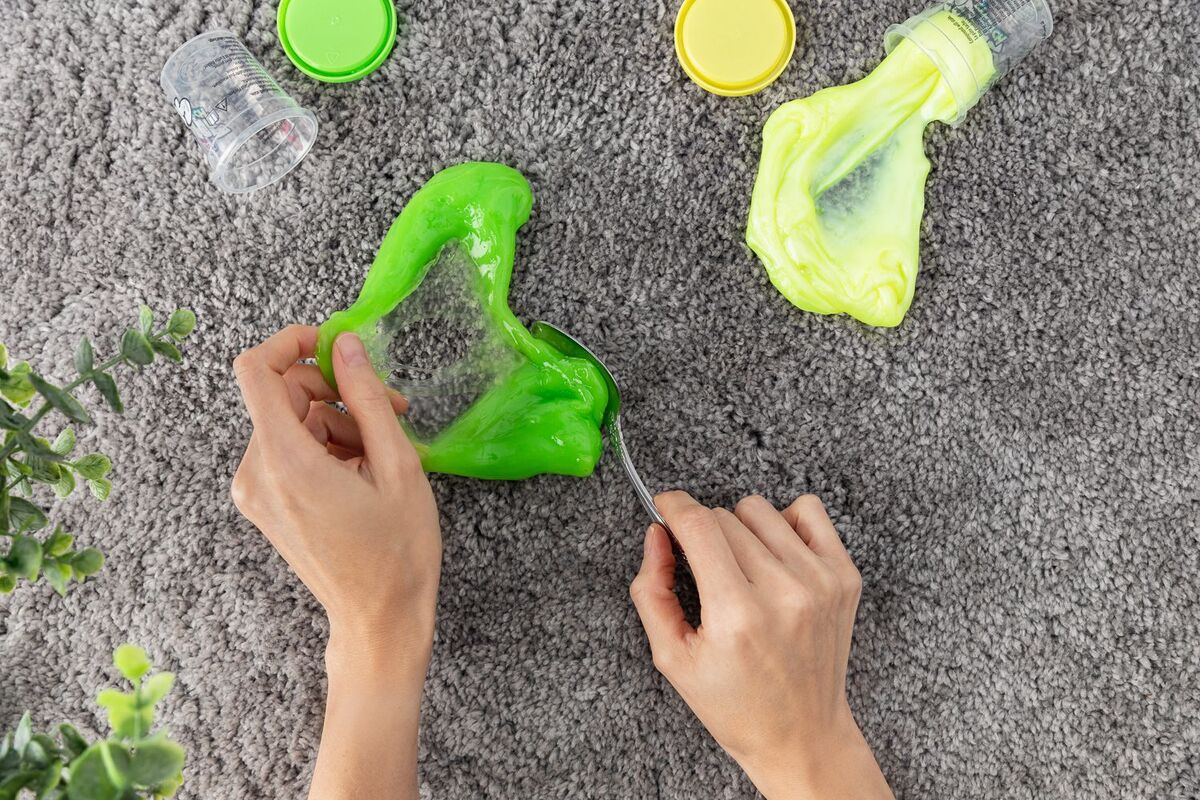
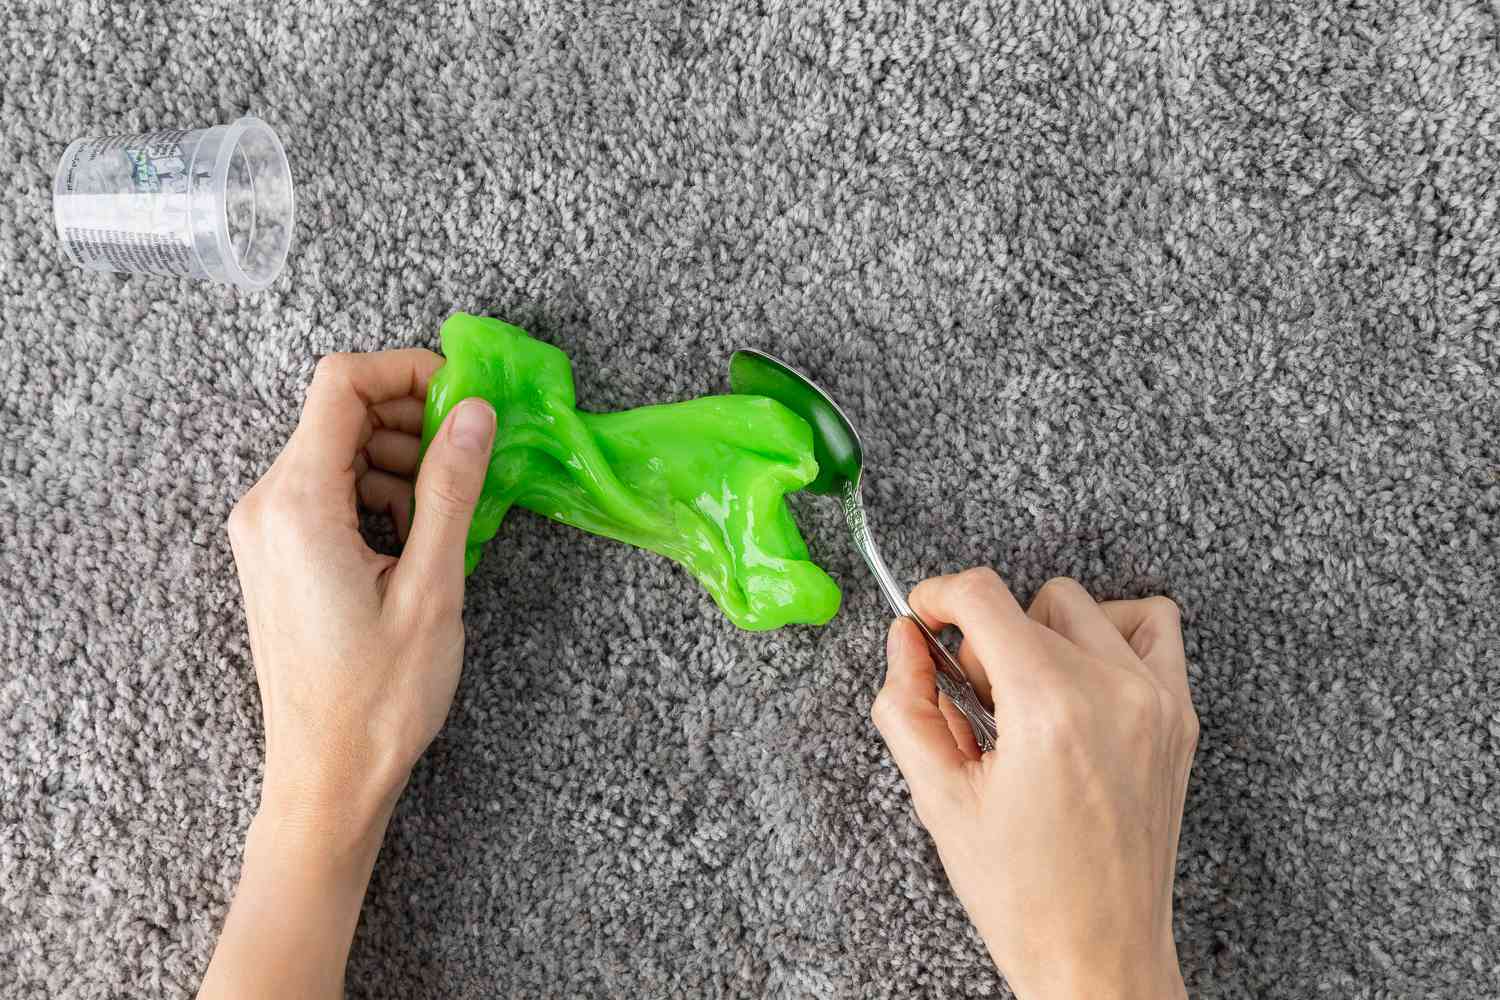
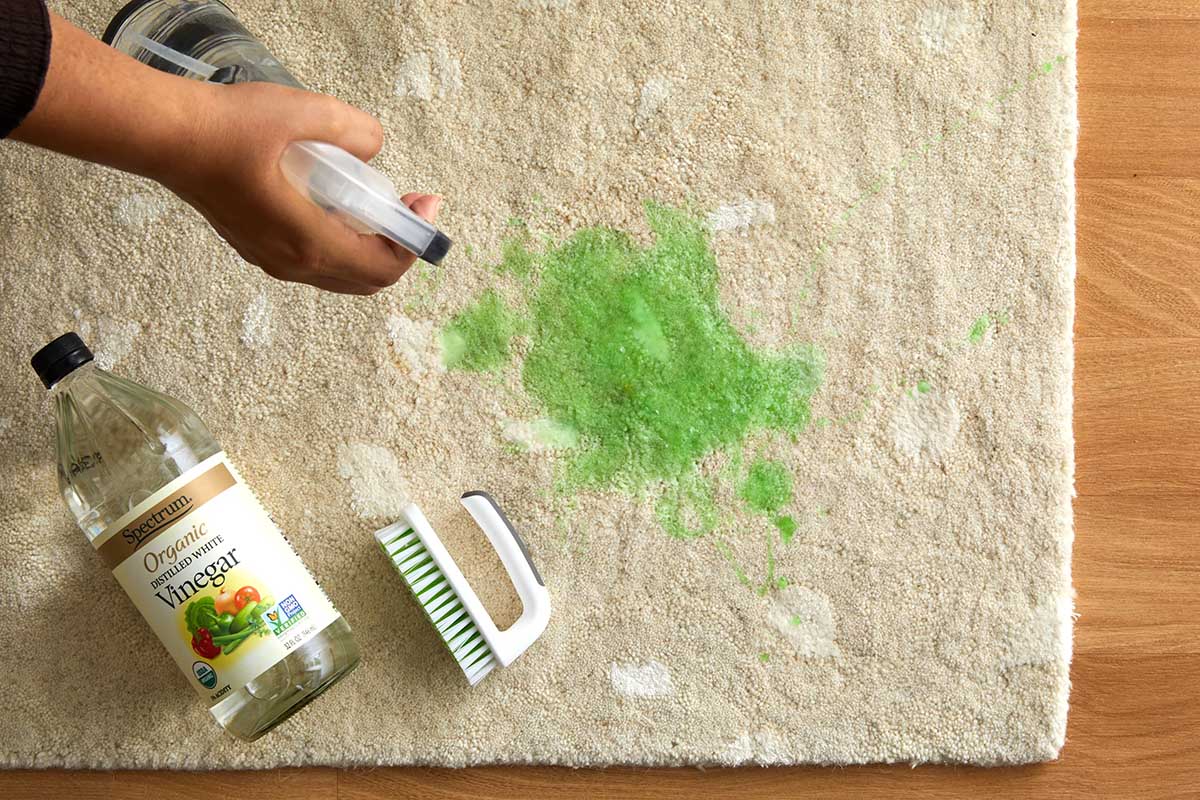
- Avoid Contact with Fabrics: Slime can leave stains on fabrics, so it’s essential to prevent contact between slime and clothing, carpets, or upholstery. Always handle slime on a clean, non-absorbent surface to avoid any messy mishaps. If a spill does occur, remove the slime promptly and clean the affected area with warm water and mild detergent.
- Separate from Food and Edible Items: It’s important to store slime separately from food or edible items to maintain hygiene and prevent accidental consumption. Ensure that there is no cross-contamination between slime containers and food containers in your storage area.
- Avoid Chemical and Sharp Objects: Keep slime away from direct contact with chemicals, cleaning agents, or sharp objects. These can damage the slime’s texture, cause discoloration, or even puncture the container, leading to leakage. Store your slime in a designated area away from any potentially harmful substances.
- Prevent Mixing of Slime Varieties: If you have different types of slime with different colors or textures, it’s best to store them separately. Storing different types of slime together can lead to unintentional mixing, altering their original qualities. Use individual containers or dividers to keep your slime varieties separate and well-organized.
By taking precautions and avoiding contact with other materials, you can ensure that your slime remains clean, safe, and free from any unwanted interactions or damage. Proper storage practices will help maintain the quality and integrity of your slime, keeping it ready for endless hours of enjoyment.
Read more: How To Make Liquid Glass Slime
Storing Slime for Extended Periods
If you’re looking to store your slime for an extended period, whether it’s due to an excess amount or you want to save it for future use, here are some tips to help keep your slime fresh and ready to play:
- Remove Air Bubbles: Before storing your slime, make sure to remove any air bubbles that may have formed. Gently knead the slime to eliminate any trapped air. This will help prevent drying out and maintain the slime’s texture.
- Use Fresh Containers: If you are storing slime for an extended period, consider transferring it into fresh containers. Over time, slime may leave residues or stick to the sides of the container, affecting its quality. Using clean, new containers will ensure a fresh start for your slime.
- Add Slime Activator: If you find that your slime tends to become sticky or lose its consistency over time, adding a small amount of slime activator can help rejuvenate it. Simply add a drop or two of activator and knead the slime until it reaches the desired texture.
- Label and Date: It’s always helpful to label your slime containers and include the date of storage. This way, you can keep track of how long each batch of slime has been stored and ensure that you use the oldest ones first.
- Store in a Cool, Dark Place: Choose a storage location that is cool, dry, and away from direct sunlight. Excessive heat or prolonged exposure to light can lead to deterioration of the slime’s quality. A pantry or a closet shelf can be suitable options.
- Regularly Check and Refresh: Periodically check your stored slime for any signs of drying out or changes in texture. If needed, you can refresh the slime by adding a small amount of water or slime activator and kneading it until it regains its original consistency.
By following these tips, you can confidently store your slime for extended periods without worrying about its quality. This way, you’ll always have a stash of fresh and ready-to-play slime whenever the mood strikes!
Reviving Dried Out Slime
It can be disheartening to discover that your slime has dried out, but fear not! With a few simple steps, you can revive your dried out slime and bring it back to its original squishy glory. Here’s how:
- Add Moisture: The first step in reviving dried out slime is to add moisture. Start by sprinkling a small amount of water onto the slime. Be cautious not to add too much water at once, as it can make the slime overly sticky. Start with a few drops and gradually increase if needed.
- Knead and Mix: Once you’ve added the water, begin kneading and mixing the slime. Incorporate the water slowly and evenly throughout the slime. You may need to spend some time working the slime to distribute the moisture properly.
- Use Slime Activator: If adding water alone doesn’t bring the slime back to its desired consistency, you can try using slime activator. Slime activator is typically a solution made from borax or saline solution. Add small amounts of the activator at a time, kneading and mixing the slime until you achieve the desired texture.
- Be Patience: Reviving dried out slime can take some time, so be patient throughout the process. It may require multiple rounds of adding water or activator and kneading to restore the slime’s original softness and stretchiness.
- Store Properly: Once you have successfully revived your slime, make sure to store it properly to prevent it from drying out again. Transfer the slime to an airtight container and follow the storage guidelines mentioned earlier in this article.
Remember, each batch of slime is unique, so the exact amount of water or activator needed for revival may vary. It’s important to take the process slowly, adding small amounts at a time and gradually adjusting until you achieve the desired consistency.
By following these steps, you can give your dried out slime a new lease on life and enjoy its squishy goodness once again!
Conclusion
Storing slime properly is essential to maintain its texture, prevent mold growth, and ensure it stays fresh for an extended period. By following the right storage techniques, you can keep your slime ready for endless playtime fun. Here’s a summary of the key points discussed in this article:
Choosing the right container is the first step in slime storage. Opt for airtight containers such as plastic containers, mason jars, or silicone containers to keep your slime securely sealed.
Properly sealing your containers using techniques like tightening the lid, using plastic wrap, double bagging, or wrapping with cling film is crucial to prevent leakage and maintain the slime’s freshness.
Temperature considerations are important to keep in mind. Avoid exposure to extreme heat or cold, and store slime at room temperature to maintain its desired consistency.
Avoiding contact with other materials such as fabrics, food, chemicals, or sharp objects will help prevent damage or contamination to your slime.
When storing slime for extended periods, removing air bubbles, using fresh containers, labeling and dating, and storing in a cool, dark place are key practices to maintain the quality of your slime.
If your slime has dried out, don’t worry! Reviving it is possible by adding moisture gradually, kneading and mixing, and using slime activator if needed.
By implementing these storage techniques and proper care, you can ensure your slime remains fresh, mold-free, and ready to provide hours of slimy enjoyment.
So, whether you’re a seasoned slime enthusiast or just starting your slime collection, remember to store your slime with care, and you’ll have a long-lasting and squishy slime experience.
Frequently Asked Questions about How To Store Slime
Was this page helpful?
At Storables.com, we guarantee accurate and reliable information. Our content, validated by Expert Board Contributors, is crafted following stringent Editorial Policies. We're committed to providing you with well-researched, expert-backed insights for all your informational needs.


0 thoughts on “How To Store Slime”