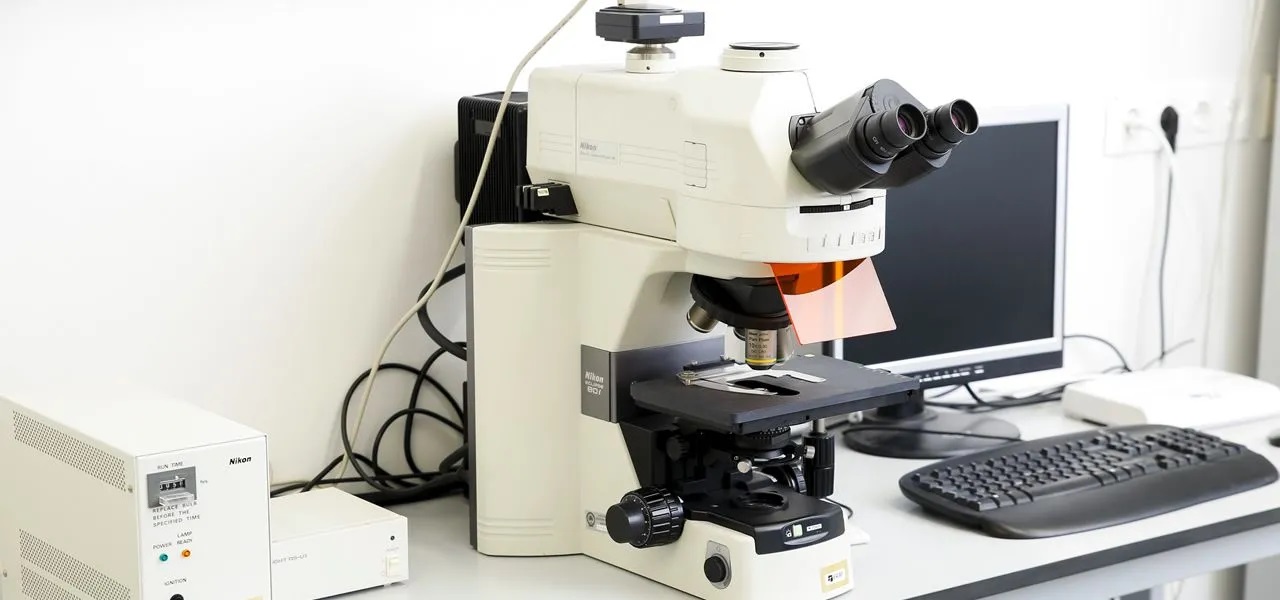

Articles
How To Store A Microscope
Modified: March 1, 2024
Learn how to properly store and maintain your microscope with our informative articles. Find expert tips and advice to ensure the longevity of your valuable instrument.
(Many of the links in this article redirect to a specific reviewed product. Your purchase of these products through affiliate links helps to generate commission for Storables.com, at no extra cost. Learn more)
Introduction
Proper storage of a microscope is crucial for maintaining its functionality and longevity. Whether you are a hobbyist or a professional user, knowing how to store a microscope correctly will ensure that it remains in excellent condition between uses. It’s essential to protect the delicate optics and delicate moving parts of the microscope from dust, moisture, and other potential sources of damage.
In this article, we will guide you through the steps required to store a microscope properly. By following these guidelines, you can ensure that your microscope is preserved in optimal condition, allowing you to continue to explore the microscopic world with clarity and precision.
So, let’s dive into the process of storing a microscope and ensure that it remains in pristine condition for years to come.
Key Takeaways:
- Properly storing a microscope involves thorough cleaning, disassembly, and protective wrapping to maintain its longevity and functionality. Choosing the right storage container and environment is crucial for preserving its delicate components.
- Labeling the storage container with detailed contents and instructions ensures easy identification and efficient organization. Periodic checks and routine maintenance are essential to uphold the optimal storage conditions and protect the microscope investment.
Read more: How To Store Microscope
Step 1: Proper Cleaning
Before storing a microscope, it is crucial to give it a thorough cleaning to remove any dirt, dust, or debris that may have accumulated. Start by using a soft brush or a bulb blower to gently remove loose particles from the exterior surfaces of the microscope.
Next, use a lens cleaning solution specifically designed for optical equipment to clean the lenses and the eyepieces. Apply the solution to a lens cleaning tissue or a microfiber cloth and gently wipe the lenses in a circular motion. Avoid applying excessive pressure as it may scratch the lens. Repeat this process for all the lenses and eyepieces.
Additionally, clean the stage, the arm, and any other accessible parts using a mild soap solution or a damp cloth. Make sure to dry all the surfaces thoroughly to prevent any moisture from causing damage during storage.
Remember, proper cleaning is essential not only for the appearance of the microscope but also to ensure the accuracy of your future observations. A clean microscope will provide clear and crisp images, improving the quality of your work.
Step 2: Removing Batteries or Power Source
Before storing a microscope, it is important to remove the batteries or disconnect the power source. This is necessary to prevent any potential damage that may occur if the batteries leak or if there is an electrical malfunction.
If your microscope is powered by batteries, carefully remove them from the battery compartment. Inspect the batteries for any signs of corrosion or leakage. If you notice any damage, dispose of the batteries safely and replace them with new ones before using the microscope again.
If your microscope is powered by an AC adapter or power cord, unplug it from the power source and disconnect it from the microscope. Make sure to coil the cord neatly and store it separately, so it does not become tangled or damaged during storage.
By removing the batteries or disconnecting the power source, you mitigate the risk of potential damage caused by leakage, electrical faults, or accidental power surges. This step ensures the safety of the microscope and prolongs its lifespan.
Step 3: Disassembling the Microscope
Disassembling the microscope is an important step for proper storage. Start by removing any detachable accessories such as eyepieces, objective lenses, and filters. Carefully unscrew or detach them according to the manufacturer’s instructions and place them in a safe and labeled container to avoid misplacement.
If your microscope has a removable stage or mechanical stage, remove them as well. Take note of any knobs, screws, or clips that may need to be loosened or unscrewed before removing these parts. Remember to handle them gently to avoid any damage.
For microscopes with adjustable parts such as the condenser or the light source, return them to their default position or as instructed by the manufacturer. This will prevent any strain on the moving components during storage.
By disassembling the microscope, you reduce the risk of accidental damage to delicate components and make it easier to store and transport the microscope. It also allows for better cleaning and maintenance of individual parts, ensuring their longevity and optimal functionality in the long run.
Step 4: Wrapping the Optics
Protecting the delicate optics of your microscope is crucial to ensure their integrity during storage. Wrapping the optics provides an additional layer of protection against dust, scratches, and other potential damage.
Start by using a clean, lint-free microfiber cloth or lens tissue to gently clean the lenses and eyepieces one last time. Make sure to remove any residual fingerprints or smudges that may have been left behind.
Next, use lens caps or protective covers specifically designed for microscope optics to cover the lenses and eyepieces. These caps provide a barrier against dust and accidental contact, minimizing the risk of scratches or damage.
If lens caps are not available, you can use clean, soft cloth or lens tissue to carefully wrap the lenses and eyepieces. Start by folding the cloth or tissue into a small square or rectangle. Gently place it over the lens or eyepiece and secure it in place with a rubber band or a gentle tape. Make sure not to apply excessive pressure that could potentially damage the lens.
Wrapping the optics safeguards them from potential harm while the microscope is in storage. This step helps maintain the clarity and quality of the lenses, ensuring optimal performance when the microscope is used again.
Step 5: Securing Moving Parts
Securing the moving parts of your microscope is essential to prevent any potential damage or misalignment while it is being stored. The moving parts, such as the focusing knobs or the stage controls, are delicate and should be properly secured to maintain their functionality.
Start by ensuring that all the knobs and controls are in their default or locked positions. This prevents any accidental movement or strain on the internal mechanisms during storage.
If your microscope has adjustable arms or extensions, collapse or lock them in place to minimize the risk of damage. Make sure the arm is securely fastened to the base of the microscope to prevent any wobbling or instability during storage.
Additionally, if your microscope has a movable stage, make sure it is centered and properly secured to avoid any shifting or misalignment. Check that the stage locks or clamps are tightened to hold the stage firmly in place.
By securing the moving parts, you reduce the risk of damage caused by accidental movements or shifts during storage. This step ensures that the internal mechanisms of the microscope remain intact and in their proper positions, ready for use when the microscope is taken out of storage.
Store your microscope in a clean, dry place away from direct sunlight and extreme temperatures. Cover it with a dust cover to protect it from dust and debris. Keep it in a sturdy case or cabinet to prevent damage.
Step 6: Choosing the Right Storage Container
Choosing the right storage container for your microscope is crucial to ensure its safety and protection during storage. The container should provide adequate space, cushioning, and protection from external elements. Here are some factors to consider when selecting a suitable storage container:
- Size: Choose a container that can comfortably accommodate the disassembled parts of your microscope. It should have enough space to prevent any crowding or pressure on the components.
- Durability: Opt for a container made of sturdy materials such as plastic or metal to withstand any potential impacts or accidents while in storage. It should be able to maintain its structural integrity over time.
- Sealing: Ensure that the storage container has a secure lid or closure mechanism to keep out dust, moisture, and pests. Airtight or water-resistant containers are ideal for maximum protection.
- Cushioning: Look for a container that provides cushioning or padding inside to protect delicate components from impacts or vibrations. You can use foam inserts, soft cloth, or even bubble wrap to create a cushioned environment for the microscope parts.
- Organization: Consider a container with compartments or dividers to keep the microscope parts organized and prevent them from getting tangled or damaged during storage.
Once you have chosen a suitable storage container, place the disassembled microscope components inside, making sure they are arranged in a logical and organized manner. Avoid overcrowding or stacking heavy objects on top of the microscope to prevent any potential damage.
By choosing the right storage container, you can provide a safe and protected environment for your microscope during its storage period. This ensures the longevity and integrity of the microscope’s components, allowing for seamless use when it is taken out of storage.
Step 7: Adding Protective Cushioning
Adding protective cushioning to the storage container is an important step in ensuring the safety of your microscope during storage. Cushioning materials provide an extra layer of protection against impacts, vibrations, and any potential damage that may occur during handling or transportation.
There are various materials that you can use to provide cushioning for your microscope components:
- Foam Inserts: Place foam inserts specifically designed for storing delicate equipment inside the storage container. These inserts provide a soft and protective layer, preventing the microscope parts from coming into direct contact with each other or the container’s walls.
- Bubble Wrap: Wrap individual microscope components with bubble wrap to provide cushioning and shock absorption. This will safeguard the components from accidental impacts or movements during storage.
- Soft Cloth or Towels: Place a layer of soft cloth or towels at the bottom of the container to create a cushioned base. This will help absorb any shocks and provide additional protection for the microscope parts.
When adding cushioning materials, make sure not to overcrowd the container, as it may put unnecessary pressure on the components. Arrange the microscope parts strategically, ensuring that each item is properly wrapped or placed in its designated area.
By adding protective cushioning, you minimize the risk of damage to the fragile microscope components during storage. This step ensures that the microscope remains safe and free from any potential harm until it is needed again for future use.
Step 8: Storing in a Dry and Cool Place
Proper storage conditions play a crucial role in maintaining the integrity and functionality of your microscope. It is important to store the microscope in a dry and cool environment to protect it from moisture, temperature fluctuations, and other potential sources of damage. Here’s what you need to consider:
Moisture: Moisture is one of the biggest enemies of a microscope as it can cause rust, mold, or damage to the delicate components. Store the microscope in a dry area with low humidity levels to minimize the risk of moisture-related issues.
Temperature: Extreme temperatures can adversely affect the performance and durability of the microscope. Avoid storing the microscope in areas prone to excessive heat or cold, as this can cause expansion and contraction of materials, leading to potential damage. Ideally, the storage area should be at a moderate temperature.
Humidity Control: To further protect against moisture, consider using desiccant packets or humidity control devices in the storage container. These will help absorb any excess moisture, maintaining an optimal environment for the microscope.
Light Exposure: Prolonged exposure to direct sunlight or artificial light can cause fading or deterioration of certain materials used in the microscope. Store the microscope in a location away from direct light to preserve its condition and extend its lifespan.
Avoiding Chemicals: Store the microscope away from any chemicals, solvents, or substances that could potentially harm the components. Chemicals can cause corrosion or damage to sensitive parts of the microscope, so it’s important to keep them separate and stored in a well-ventilated area.
By storing the microscope in a dry and cool place, you minimize the risk of damage caused by moisture, temperature fluctuations, and exposure to light or chemicals. This step ensures the stability and longevity of the microscope, allowing it to function optimally when it is used again in the future.
Read more: How To Store Basil From Store
Step 9: Labeling the Storage Container
Labeling the storage container is a crucial step that often gets overlooked but can save you time and frustration when you need to locate and retrieve your microscope. Proper labeling ensures easy identification and allows for efficient organization. Here’s how to label the storage container:
Mark the Container: Use a permanent marker or labels to clearly mark the storage container as “Microscope” or “Microscope Storage”. This simple designation will prevent confusion and help you locate the container easily when needed.
Include Additional Details: Consider adding additional important details to the label, such as the date of storage, your name or initials, and any specific instructions or warnings. This information can be helpful for future reference or if someone else needs to locate or handle the microscope.
List Contents: Create a detailed list of the contents of the storage container, including each component and accessory that is stored inside. This inventory list will not only help you keep track of what is stored but also assist in quickly identifying if anything is missing or misplaced.
Attach Instruction Manuals: If you have printed instruction manuals or guides for your microscope, consider attaching them to the inside of the storage container or keeping them in a labeled pocket or folder. This way, they will be readily available for reference when you need them in the future.
Store in a Visible Location: Finally, ensure that the labeled storage container is stored in a visible and easily accessible location. This will prevent it from getting buried or misplaced among other items and make it convenient to find and retrieve when needed.
By labeling the storage container, you create a system that facilitates efficient organization and quick identification of your microscope. This step saves you time and effort in the long run and adds an extra layer of convenience to the storage process.
Conclusion
Storing a microscope properly is an essential practice that ensures its longevity and functionality. By following the steps outlined in this guide, you can protect your microscope from damage, maintain its performance, and prolong its lifespan for years to come.
From proper cleaning to disassembling the microscope, each step in the process allows for thorough maintenance and care. Wrapping the optics, securing moving parts, choosing the right storage container, adding protective cushioning, and storing in a dry and cool place all contribute to creating an optimal environment for the microscope.
Additionally, labeling the storage container provides easy identification and organization, enabling quick retrieval of the microscope when needed. This step ensures that you can access your microscope efficiently and have all the necessary information readily available.
Remember to revisit the stored microscope periodically to check for any signs of damage, perform routine maintenance, and ensure the storage conditions remain suitable.
By following these steps and implementing proper storage practices, you can protect your microscope investment and continue to explore the fascinating world of microscopy with clarity and precision in the future.
Frequently Asked Questions about How To Store A Microscope
Was this page helpful?
At Storables.com, we guarantee accurate and reliable information. Our content, validated by Expert Board Contributors, is crafted following stringent Editorial Policies. We're committed to providing you with well-researched, expert-backed insights for all your informational needs.


0 thoughts on “How To Store A Microscope”