Articles
How To Store Solar Panels When Not In Use
Modified: August 16, 2024
Learn how to properly store solar panels when they are not in use with our informative articles. Preserve the longevity and efficiency of your solar panels with expert tips and advice.
(Many of the links in this article redirect to a specific reviewed product. Your purchase of these products through affiliate links helps to generate commission for Storables.com, at no extra cost. Learn more)
Introduction
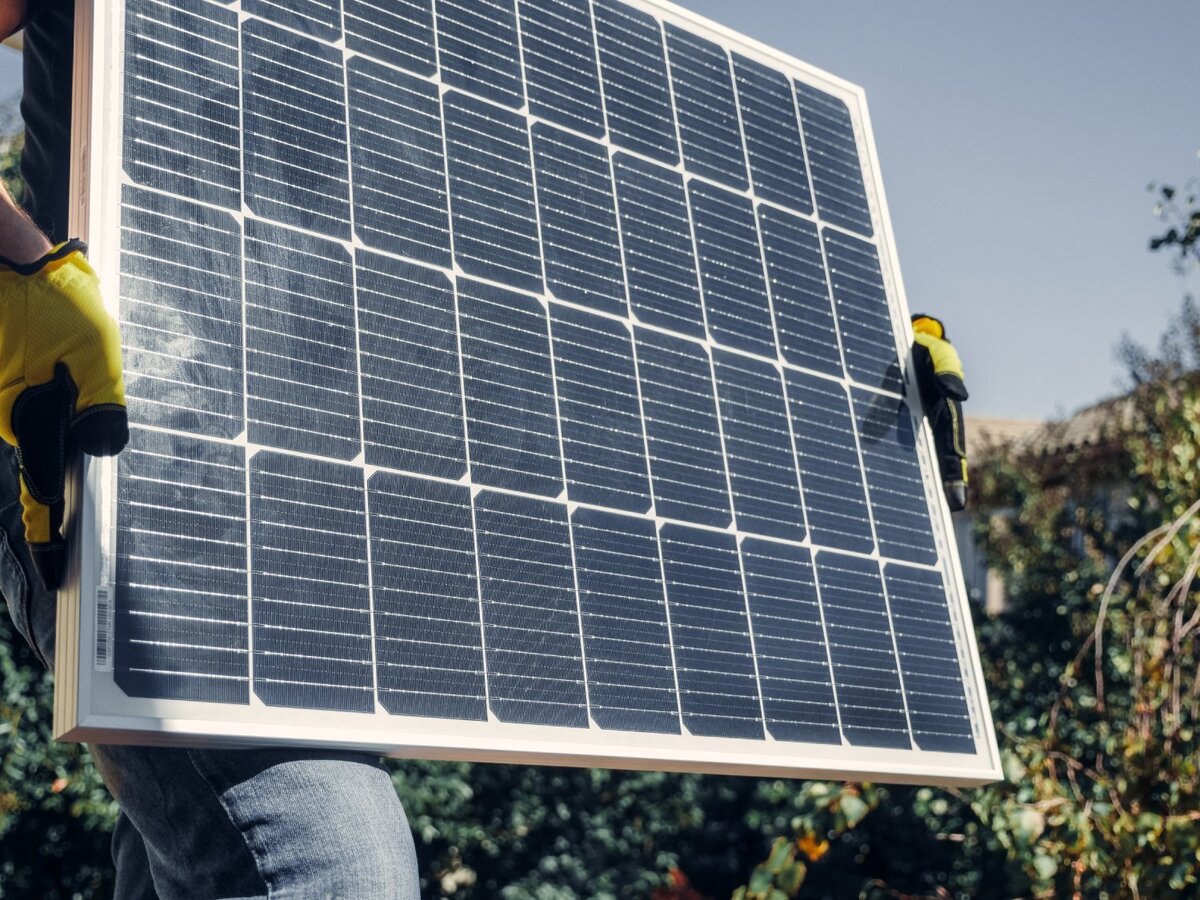
As the popularity of solar panels continues to rise, more and more people are looking to harness the power of the sun to meet their energy needs. However, there are times when solar panels may not be in use, such as during periods of low energy demand or when undergoing maintenance. During these times, proper storage becomes essential to ensure the longevity and efficiency of the solar panels.
Properly storing solar panels when not in use is crucial for their optimal performance and durability. By following the right storage practices, you can protect your investment and ensure that your solar panels continue to generate clean, renewable energy for years to come.
This article will guide you through the process of storing solar panels effectively. We will outline the importance of proper storage, discuss the factors to consider, and provide step-by-step instructions on how to safely and securely store your solar panels.
So, whether you’re a homeowner with residential solar panels or a business owner with a commercial solar installation, read on to learn how to store your solar panels when not in use and maximize their lifespan.
Key Takeaways:
- Proper storage protects solar panels from physical damage, moisture, extreme temperatures, and UV exposure, ensuring longevity and efficiency.
- Safely disconnecting panels from power sources, securely packaging, and regular inspections during storage are crucial for maintaining panel integrity and performance.
Read more: How To Store Electricity From Solar Panels
Importance of Proper Storage for Solar Panels
Proper storage is essential for solar panels when they are not in use. Here are a few key reasons why proper storage is important:
- Protection against physical damage: Solar panels are made of delicate components such as glass, silicon cells, and metal frames. By storing them properly, you can protect them from physical damage caused by harsh weather conditions, falling debris, or accidental bumps and knocks.
- Prevention of moisture damage: Exposure to moisture is one of the biggest threats to solar panels. Moisture can enter the panels and lead to corrosion of the electrical connections and damage to the solar cells. By storing them in a dry location, you can prevent moisture damage and ensure their long-term functionality.
- Protection against extreme temperatures: Solar panels are designed to withstand a range of temperatures, but prolonged exposure to extreme heat or cold can still affect their performance. By storing them in a controlled environment, you can prevent damage caused by temperature fluctuations and ensure the panels are ready for use when needed.
- Prevention of damage from UV rays: Solar panels are exposed to the sun’s UV rays when in use. However, when not in use, prolonged exposure to UV rays can lead to degradation of the materials and diminish their efficiency over time. Storing them in a shaded or covered area can help protect them from excessive UV exposure.
- Preservation of warranty: Many solar panel manufacturers provide warranties that cover defects and malfunctions. However, improper storage can void these warranties. By following the correct storage practices recommended by the manufacturer, you can ensure that your warranty remains valid and any potential issues are covered.
In summary, proper storage for solar panels is crucial for protecting them from physical damage, moisture, extreme temperatures, UV rays, and preserving their warranty. By investing a little time and effort in storing your solar panels correctly, you can extend their lifespan and enjoy the maximum benefits of your solar energy system for many years to come.
Factors to Consider When Storing Solar Panels
When it comes to storing solar panels, there are several factors to consider to ensure their safety and longevity. Here are some important factors to keep in mind:
- Cleanliness: Before storing solar panels, it is essential to clean them thoroughly. Remove any dirt, dust, or debris that may have accumulated on the surface. This not only ensures optimal performance but also prevents any potential damage that can occur if contaminants are left on the panels for an extended period.
- Disconnecting from power sources: Before storing solar panels, it is crucial to disconnect them from any power sources. This includes turning off the electrical connection at the inverter and disconnecting the panels from any batteries or grid connections. This step is essential for safety reasons and to prevent any electrical surges or damage to the panels during storage.
- Secure packaging: When storing solar panels, make sure to package them securely to protect them from any physical damage. Use appropriate packaging materials such as foam padding or bubble wrap to safeguard the panels during transportation or storage. Additionally, ensure that the packaging is water-resistant to prevent any moisture from seeping in.
- Choosing the right storage location: Selecting the appropriate storage location is crucial. Ideally, store solar panels in a clean, dry, and well-ventilated area. Avoid areas with extreme temperature fluctuations or high humidity levels. If possible, store them in a climate-controlled environment to minimize any potential damage caused by environmental factors.
- Organized storage: Proper organization is important when storing solar panels. Keep them in an upright position to avoid any unnecessary strain on the components. If storing multiple panels, stack them carefully, making sure to place a protective barrier between each panel to prevent scratches or damage.
- Regular inspection and maintenance: While in storage, it is essential to periodically inspect the panels for any signs of damage or deterioration. Check for any cracks, loose connections, or corrosion. Additionally, perform routine maintenance activities such as cleaning, tightening loose screws, and ensuring proper electrical connections.
By considering these factors and following the recommended storage practices, you can ensure the safety and longevity of your solar panels while they are not in use. Taking the time to properly store and maintain your panels will allow them to continue generating clean and renewable energy when you are ready to use them again.
Cleaning and Maintenance Before Storage
Before storing solar panels, it is crucial to thoroughly clean and perform necessary maintenance to ensure their optimal performance and prevent any potential damage. Here’s a step-by-step guide on cleaning and maintenance before storage:
- Inspect for any damage: Before starting the cleaning process, visually inspect the solar panels for any signs of damage, such as cracks or loose connections. Address any issues before proceeding with cleaning.
- Turn off power sources: Prior to cleaning, disconnect the solar panels from any power sources. Switch off the electrical connection at the inverter and disconnect them from batteries or grid connections. This will prevent any potential electrical accidents or damage during the cleaning process.
- Remove debris: Gently remove any loose dirt, leaves, or debris from the surface of the solar panels using a soft brush or a clean microfiber cloth. Take care not to apply excessive pressure that could cause scratches or damage.
- Clean with soapy water: Prepare a mild soap solution by mixing a few drops of dishwashing liquid with water. Use a soft sponge or cloth dipped in the soapy water to gently wipe the surface of the solar panels. Avoid using abrasive cleaners or scrub brushes that can scratch the panels.
- Rinse with clean water: After washing, rinse the panels thoroughly with clean water to remove any soap residue. Ensure that all soap is completely rinsed off to prevent any potential buildup that can affect the panel’s performance.
- Dry the panels: Allow the solar panels to air dry completely or use a clean, lint-free cloth to gently dry them. Make sure the panels are completely dry before storing to prevent moisture buildup during storage.
- Inspect electrical connections: While cleaning, check the electrical connections for any loose or damaged wires. Tighten any loose connections and repair or replace any damaged components as necessary.
- Document and photograph: Before storing, document and photograph the condition of the solar panels to have a record of their current state. This can help with insurance claims or warranty issues in the future if needed.
By following these steps and ensuring that your solar panels are clean and properly maintained before storage, you can prevent dirt buildup, reduce the risk of damage, and ensure their optimal performance when you are ready to use them again. Regular cleaning and maintenance will help extend the lifespan of your solar panels and maximize their energy generation efficiency.
Selecting an Appropriate Storage Location
Choosing the right storage location for your solar panels is crucial in ensuring their safety and longevity. Here are some factors to consider when selecting an appropriate storage location:
- Dry and well-ventilated area: It is essential to store solar panels in a dry environment to prevent the accumulation of moisture. Moisture can lead to corrosion, electrical damage, and decreased performance. Ensure that the storage location has proper ventilation to allow air circulation.
- Avoid temperature extremes: Extreme temperatures can negatively impact the performance and lifespan of solar panels. Avoid storing them in areas with excessive heat or cold, as this can cause thermal stress and potential damage. Look for a storage location that offers a consistent temperature range.
- Protection from UV exposure: Prolonged exposure to direct sunlight and UV rays can degrade the materials of solar panels over time. Look for a storage location that provides shade or cover to minimize UV exposure. Alternatively, you can use a UV protective cover or storage container.
- Secure and stable environment: Ensure that the storage location is stable and secure to prevent any potential damage from accidents or natural disasters. Avoid areas prone to flooding, earthquakes, or high winds. If necessary, consider using racks or stands to keep the solar panels off the ground and protected.
- Accessibility: Consider how easily you can access the stored solar panels when needed. If you plan to store them for an extended period, make sure the location allows for easy retrieval and transportation when you are ready to reinstall or use the panels.
- Away from chemicals and corrosive substances: Keep solar panels away from any chemicals or corrosive substances that may be present in the storage location. These can cause damage to the panels’ surfaces or electrical components.
- Compliance with manufacturer’s recommendations: It is important to check the manufacturer’s guidelines and recommendations for storing their specific brand of solar panels. They may provide specific instructions or storage requirements that should be followed to maintain the warranty or ensure the panels’ optimal performance.
By taking these factors into consideration, you can select an appropriate storage location that provides the optimal conditions for your solar panels. Remember, the right storage environment can have a significant impact on their performance, longevity, and overall efficiency when it’s time to reinstall and use them again.
Store solar panels in a dry, cool place away from direct sunlight. Cover them with a tarp or protective covering to prevent damage from the elements. Disconnect and store the batteries separately.
Read more: How To Mount Solar Panels To Roof
Preparing the Solar Panels for Storage
Properly preparing your solar panels for storage is essential to ensure their safety and maintain their efficiency. Here are the steps to follow when preparing solar panels for storage:
- Clean the panels: Before storing, make sure to clean the solar panels thoroughly. Remove any dirt, dust, or debris from the surface using a gentle brush or a clean, lint-free cloth. This will help prevent build-up and potential damage during the storage period.
- Inspect for damage: Take the time to carefully inspect the solar panels for any signs of damage, such as cracks, loose connections, or broken components. Address any issues or repairs needed before storing the panels.
- Disconnect the power sources: It is crucial to disconnect the solar panels from any power sources before storage. Switch off the electrical connection at the inverter and carefully disconnect them from batteries or grid connections. This step ensures safety and prevents any electrical accidents or damage during storage.
- Securely package the panels: Protect the solar panels by using proper packaging materials. Wrap each panel individually with foam padding or bubble wrap to provide cushioning and prevent scratches. Place them in a sturdy storage box or container that is water-resistant and provides additional protection during transportation or while in storage.
- Label the packaging: Clearly label the packaging with information such as “Fragile,” “Solar Panels,” and “Handle with Care.” This will help ensure that the panels are handled properly during storage and transportation.
- Store the panels in an upright position: When storing solar panels, keep them in an upright position to prevent any undue strain on the components. Stacking them horizontally can lead to damage. If you need to stack multiple panels, place a protective barrier between each panel to prevent scratches.
- Choose a suitable storage location: Select a storage location that is dry, well-ventilated, and offers protection from extreme temperatures and UV exposure. Avoid areas prone to humidity, direct sunlight, or fluctuating temperatures, as these can impact the integrity and performance of the panels.
- Document and photograph: Before storing, document and photograph the condition of the panels. This will serve as a record of their state before storage, which can be useful for insurance claims or warranty purposes in the future.
By properly preparing your solar panels for storage, you can prevent damage, preserve their performance, and ensure they are ready for reinstallation or use when the time comes. Taking the necessary precautions during preparation will help extend the lifespan of your solar panels and protect your investment.
Safely Disconnecting the Solar Panels from Power Sources
Before storing your solar panels, it is crucial to safely disconnect them from any power sources to ensure your safety and prevent any potential damage. Here are the steps to follow when disconnecting solar panels from power sources:
- Turn off the electrical connection: Start by turning off the electrical connection at the inverter. The inverter is responsible for converting the DC electricity generated by the solar panels into AC electricity for use in your home or business. Locate the inverter and switch it off following the manufacturer’s instructions.
- Disconnect from batteries: If your solar panels are connected to a battery storage system, safely disconnect them from the batteries. Depending on the system, this may involve turning off a circuit breaker or disconnecting specific wires. Follow the instructions provided by the manufacturer to ensure a safe disconnection.
- Disconnect from the grid: If your solar panels are connected to the grid, you will need to follow specific procedures to safely disconnect them. Contact your utility company or a qualified electrician to guide you through the process and ensure compliance with local regulations.
- Use appropriate safety equipment: When working with electrical connections, it is important to prioritize safety. Wear appropriate safety gear, such as rubber gloves and safety goggles, to protect yourself from any potential electrical hazards.
- Label all connections: As you disconnect the solar panels from power sources, label all the connections and wires. This will make it easier to reattach them correctly when you are ready to reinstall the panels.
- Secure loose wires: After disconnecting the solar panels, ensure that any loose wires or connections are secured. This will help prevent accidents or damage during storage or transportation.
- Take photographs: Before storing the panels, consider taking photographs of the wiring and connections. These images can serve as a reference point when reconnecting the solar panels in the future.
- Consult the manufacturer’s guidelines: Every solar panel system is unique, so it is important to consult the manufacturer’s guidelines and instructions for proper disconnection procedures. The manufacturer’s recommendations will provide specific instructions that should be followed to ensure a safe and successful disconnection.
By carefully following these steps and adhering to safety guidelines, you can safely disconnect your solar panels from power sources. Properly disconnecting the solar panels will protect you from electrical hazards and ensure that the panels are ready for storage or any necessary maintenance.
Securely Packaging and Storing the Solar Panels
Proper packaging and storage are essential to protect the integrity and performance of your solar panels during periods of non-use. Here are the steps to securely package and store your solar panels:
- Wrap each panel: To provide cushioning and protection, wrap each solar panel individually using foam padding or bubble wrap. This will prevent scratches and minimize the risk of damage during transportation and storage.
- Use protective spacers: If storing multiple solar panels, use foam or cardboard spacers between each panel to prevent them from rubbing against each other and causing damage. This will also provide additional stability and support during storage.
- Choose a sturdy storage box or container: Select a storage box or container that is sturdy and large enough to accommodate the solar panels without bending or stressing them. Ensure that the container is waterproof or water-resistant to protect the panels from moisture and humidity.
- Secure the panels: Once the solar panels are wrapped and placed in the storage container, secure them to prevent movement. Use straps or bungee cords to hold them in place and minimize any potential shifting or jostling during transportation or storage.
- Store in a cool, dry place: Find a storage location that is cool, dry, and well-ventilated. Avoid areas with extreme temperature fluctuations or high humidity, as these can negatively affect the panels’ performance and lifespan. If possible, store the panels in a climate-controlled environment.
- Keep away from harsh chemicals: Ensure that the storage area is free from harsh chemicals or corrosive substances that may damage the solar panels. Store them in an area where they won’t be exposed to any harmful fumes or substances that can deteriorate their materials.
- Label the storage container: Clearly label the storage container as “Solar Panels” and indicate the fragility of its contents. This will help ensure that the panels are handled with care during transportation and that they can be easily identified when needed.
- Regularly inspect and maintain: While in storage, periodically inspect the solar panels for any signs of damage, such as cracks or loose connections. Perform routine maintenance activities, such as cleaning or tightening any loose screws, to keep the panels in optimal condition.
By securely packaging your solar panels and storing them in a suitable environment, you can protect them from physical damage, moisture, and other environmental factors that could impact their performance. Regular inspections and maintenance during storage will help ensure they remain in good working order and are ready to be reinstalled or used when the time comes.
Regular Inspections and Maintenance during Storage Period
Regular inspections and maintenance are essential even during the storage period to ensure the long-term performance and functionality of your solar panels. Here’s what you should do to maintain your panels during storage:
- Inspect for any signs of damage: Regularly check the solar panels for any signs of damage, such as cracks, chips, or broken components. Inspect the frames, glass surfaces, and electrical connections for any defects. Address any issues immediately to avoid further damage or deterioration.
- Clean the panels: Although the panels are in storage, it is important to keep them clean. Remove any dust or debris that may have accumulated on the surface. Use a soft brush or a clean microfiber cloth to gently wipe away dirt or particles. Keeping the panels clean will minimize any loss in performance due to soiling.
- Check electrical connections: Inspect the electrical connections to ensure they are intact and not loose. Tighten any loose wires or connectors. Faulty connections can lead to inefficient performance or even safety hazards, so it is crucial to address any issues promptly.
- Monitor for signs of corrosion: Check for any signs of corrosion on the electrical terminals or connectors. Corrosion can impede the flow of electricity and compromise the panels’ performance. If you notice any corrosion, gently clean the affected areas using a corrosion inhibitor or contact a professional for assistance.
- Inspect the storage environment: Regularly assess the storage environment for any changes that may impact the panels. Look for signs of moisture or humidity, pests, or damage to the storage containers. Address any issues, such as leaks or pest infestations, immediately to prevent damage to the panels.
- Photograph and document: Continuously document the condition of the stored solar panels by taking photographs and keeping a record of any changes. This will help with insurance claims or warranty issues in the event of unforeseen damage or defects.
- Follow manufacturer’s guidelines: It is important to follow the manufacturer’s guidelines and recommendations for maintenance during the storage period. They may provide specific instructions on the frequency of inspections, cleaning techniques, or any other maintenance tasks that should be performed.
- Plan for reinstallation: As you conduct regular inspections and maintenance, also start planning for the reinstallation of the solar panels. Consider the necessary steps and preparations needed to ensure a smooth and efficient reinstallation process once you are ready to put the panels back into service.
By conducting regular inspections and maintenance during the storage period, you can identify and address any issues that may affect the performance or durability of your solar panels. This proactive approach will help ensure that your panels remain in optimal condition and are ready to resume generating clean and renewable energy when you decide to reinstall them.
Read more: How To Clean Solar Panels On A Roof
Conclusion
Proper storage is crucial for solar panels when they are not in use. By following the right practices, you can ensure the longevity and efficiency of your solar panels, protecting your investment and maximizing their lifespan. Here are the key takeaways:
First and foremost, proper storage protects solar panels from physical damage, moisture, extreme temperatures, and UV exposure. Safely disconnecting the panels from power sources is essential for safety and to prevent any electrical surges or damage during storage. Securely packaging the panels and choosing an appropriate storage location are important factors in maintaining their integrity and performance.
Before storage, make sure to clean the panels thoroughly and inspect them for any signs of damage. Disconnected panels should be wrapped individually with foam padding or bubble wrap to provide cushioning and prevent scratches. Store them in a cool, dry, and well-ventilated place to protect them from environmental factors that can impact their performance.
Regular inspections and maintenance during the storage period are crucial. Check for any damage, clean the panels, monitor electrical connections, and assess the storage environment for any changes. Following the manufacturer’s guidelines and documenting the condition of the panels will help with insurance claims, warranty issues, and ensure their optimal performance when you decide to reinstall them.
In conclusion, proper storage practices are essential for the long-term performance and efficiency of solar panels. By carefully preparing, safely disconnecting, securely packaging, and conducting regular inspections and maintenance, you can protect your solar panels and ensure they are ready for use when the time comes. Maximize the lifespan of your panels and continue to enjoy the benefits of clean and renewable energy for years to come.
Frequently Asked Questions about How To Store Solar Panels When Not In Use
Was this page helpful?
At Storables.com, we guarantee accurate and reliable information. Our content, validated by Expert Board Contributors, is crafted following stringent Editorial Policies. We're committed to providing you with well-researched, expert-backed insights for all your informational needs.


0 thoughts on “How To Store Solar Panels When Not In Use”