Articles
How To Store Power Wheels In Garage
Modified: August 28, 2024
Learn the best ways to store your power wheels in the garage with our helpful articles. Keep your ride-on toys safe and organized for easy access and longevity.
(Many of the links in this article redirect to a specific reviewed product. Your purchase of these products through affiliate links helps to generate commission for Storables.com, at no extra cost. Learn more)
Introduction
Welcome to the world of Power Wheels! These electric ride-on toys have captivated the hearts of children and sparked their imagination for decades. But when it comes to storing these awesome vehicles, it’s important to take some necessary steps to keep them safe and in good condition. Whether you’re preparing for the winter months or just need to free up some space in your garage, this article will guide you on how to store your Power Wheels effectively.
Before we dive into the details, it’s essential to make sure that you have enough space in your garage to accommodate the Power Wheels. Clearing out any clutter or unused items will not only create room for the vehicles but also help maintain a tidy and organized storage area.
Once you’ve made space, the next step is to thoroughly clean and prepare the Power Wheels for storage. Start by removing any loose dirt or debris from the surfaces using a soft brush or cloth. If there are any stubborn stains, you can use mild soap and water to gently scrub them away. Make sure to dry the vehicles completely before proceeding.
Choosing the right storage solution is crucial to ensure the longevity of your Power Wheels. Let’s explore a few options:
Key Takeaways:
- Properly storing Power Wheels involves clearing space, cleaning, choosing the right storage solution, and protecting the vehicles. Regular maintenance during storage ensures they remain in optimal condition for future use.
- By following the steps outlined in the article, you can create an organized and safe storage space for your Power Wheels, ensuring their longevity and readiness for countless hours of fun and excitement.
Read more: How To Store Wheels
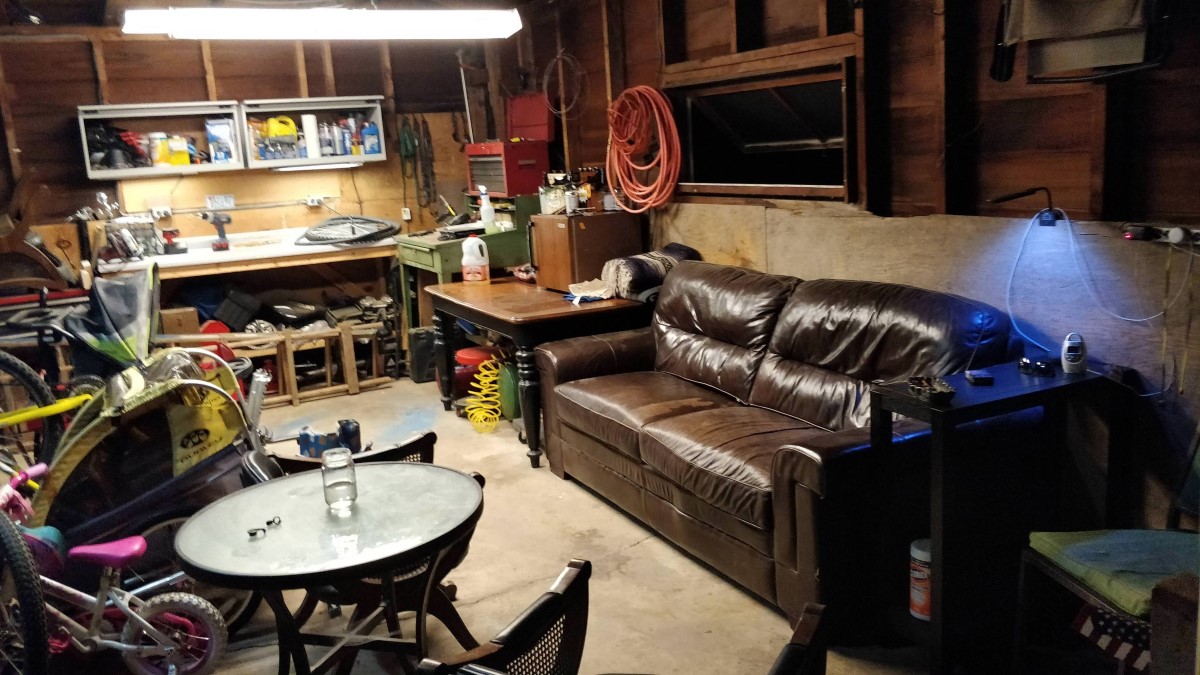
Clearing Space in the Garage
Before you can start storing your Power Wheels in the garage, you’ll need to clear out some space. This step is essential to ensure that there is enough room for the vehicles and that they can be easily accessed when needed. Here are some tips on clearing space in your garage:
- Sort and Declutter: Begin by sorting through the items in your garage and determining what you need to keep and what can be removed. Donate, sell, or discard any items that you no longer use or need. This will not only create more space but also help you stay organized in the long run.
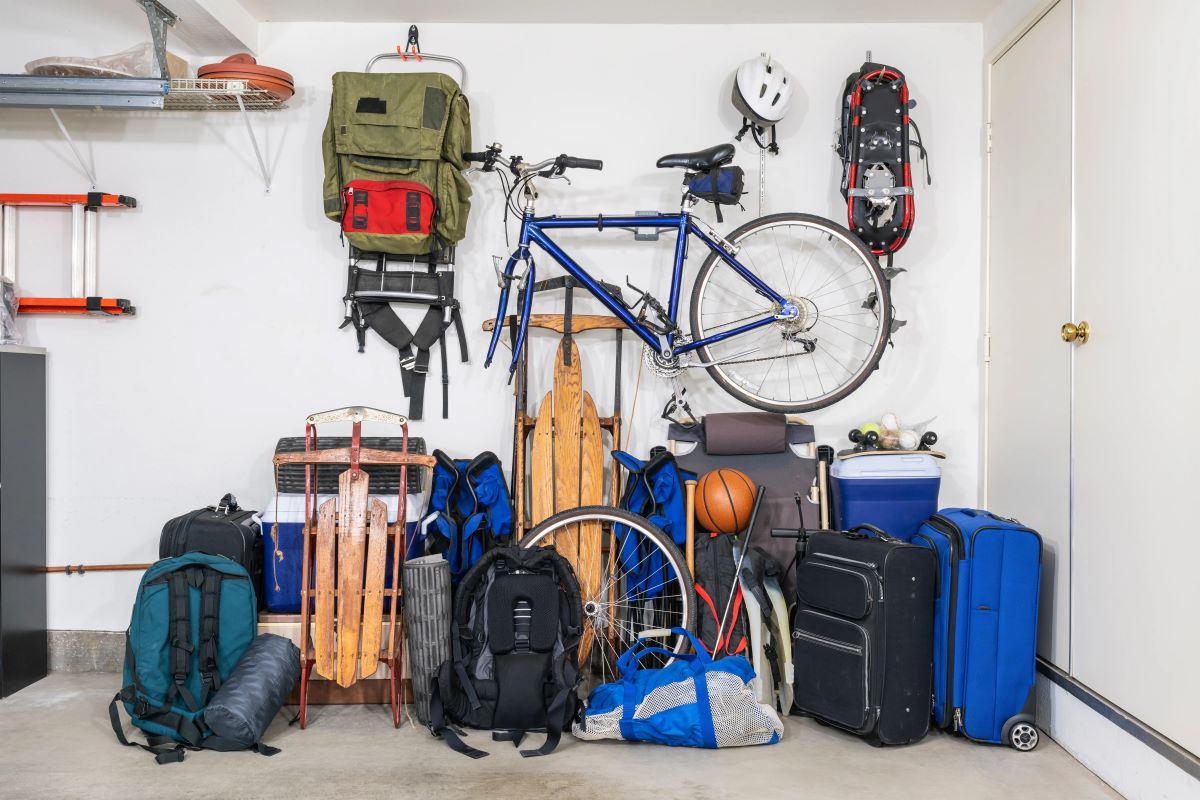
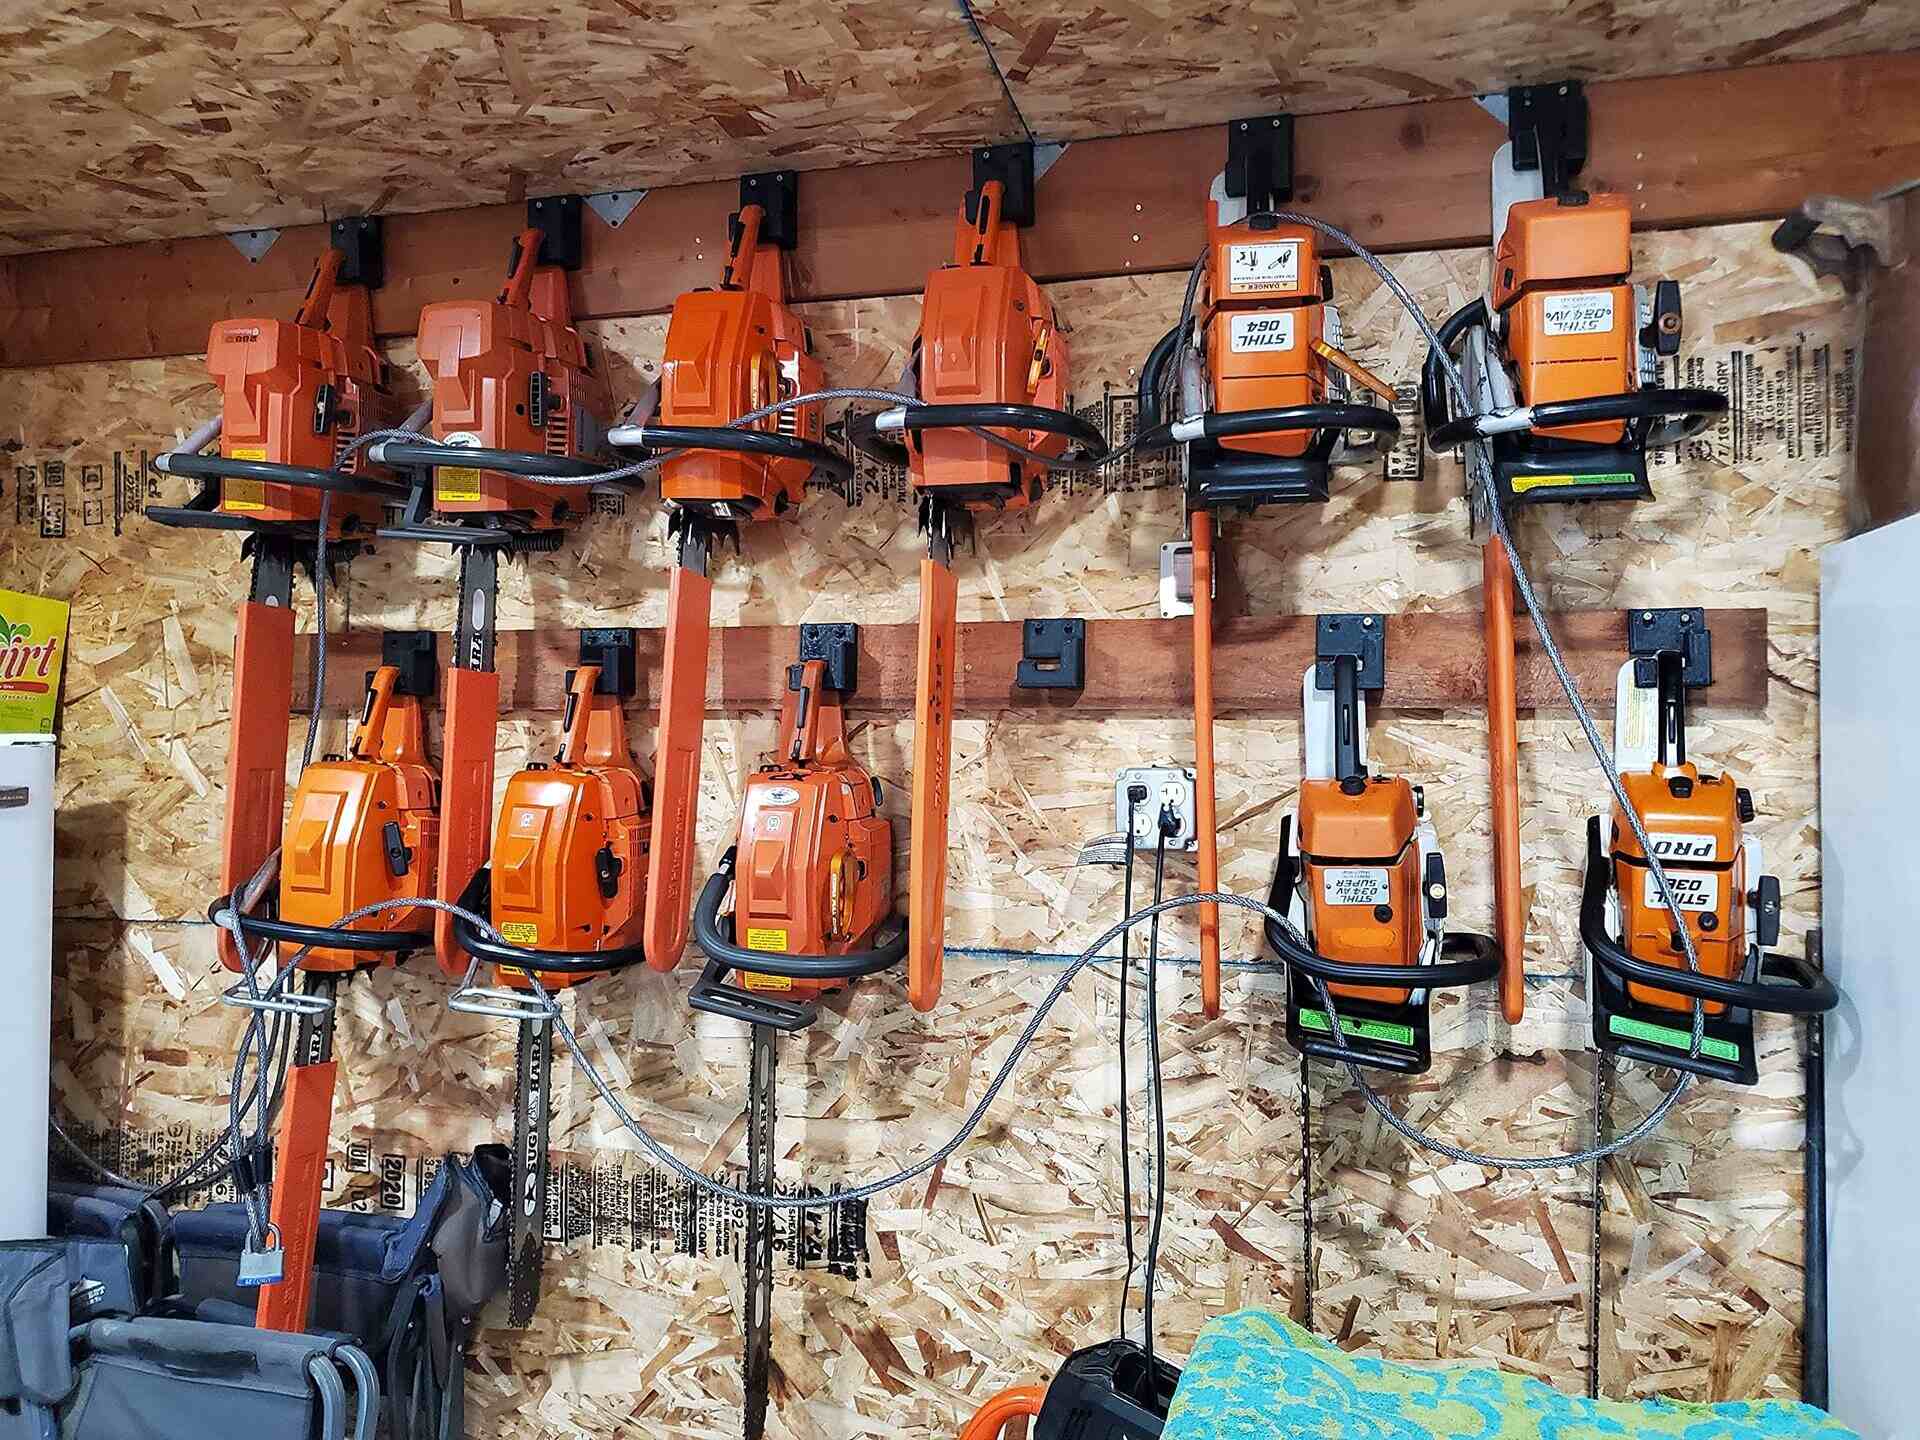
- Utilize Wall Space: Take advantage of the vertical space in your garage by installing shelves, pegboards, or hooks on the walls. This will allow you to store smaller items such as tools, accessories, and cleaning supplies, freeing up valuable floor space for your Power Wheels.
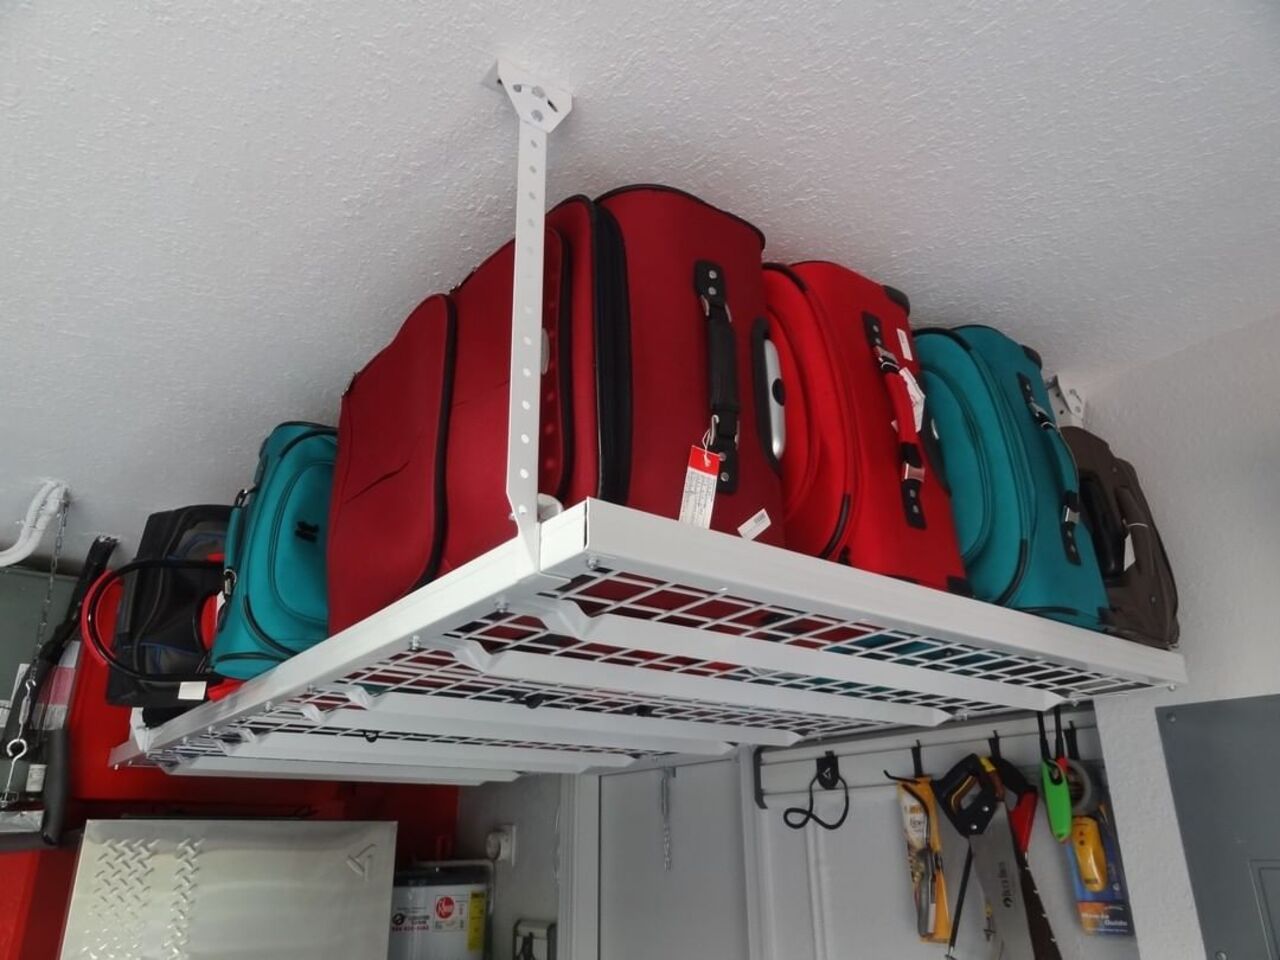
- Maximize Ceiling Space: Consider installing overhead storage racks or platforms to make use of the often-underutilized ceiling space. These racks can hold items that are not frequently accessed, such as holiday decorations or seasonal items.
- Create Zones: Create designated zones in your garage for different purposes, such as a car parking area, a workspace, and a storage area for your Power Wheels. This will help you maintain an organized and functional space.
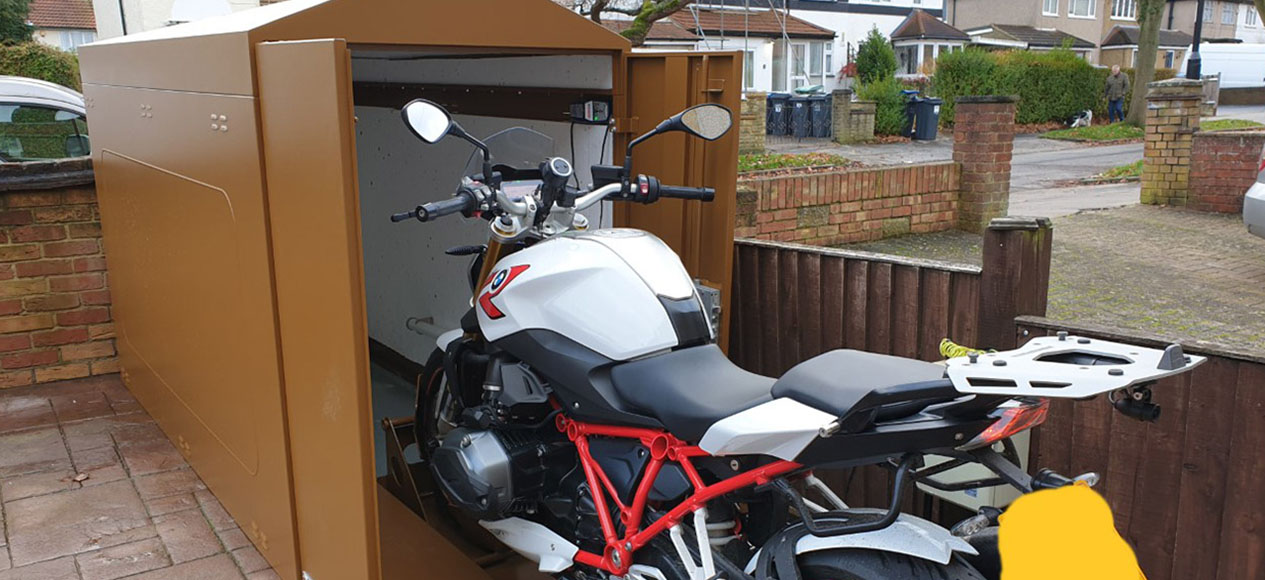
- Invest in Storage Solutions: If you have larger items or equipment that need to be stored, consider investing in storage cabinets, lockers, or containers. These will help keep your garage neat and tidy while providing a secure and protected space for your belongings.
By following these tips, you’ll be able to clear out the necessary space in your garage and create an organized environment for storing your Power Wheels. With a clutter-free and optimized garage, you’ll have peace of mind knowing that your vehicles are safely stored and ready to be enjoyed whenever you or your little ones are ready for some thrilling adventures.
Cleaning and Preparing the Power Wheels
Before storing your Power Wheels, it’s important to give them a thorough cleaning and prepare them for the period of storage. Follow these steps to ensure your vehicles remain in top condition:
- Remove Batteries: Start by disconnecting and removing the batteries from the Power Wheels. This will help prevent any potential damage or leakage during storage.
- Clean the Exterior: Use a mild soap or detergent mixed with water to clean the exterior surfaces of the Power Wheels. Gently scrub away any dirt, mud, or grime using a soft cloth or sponge. Avoid using abrasive cleaners or brushes that could damage the paint or decals.
- Clean the Interior: Carefully remove the seats and floor mats, if applicable, and clean them separately. Use a vacuum cleaner to remove any dirt or debris from the interior of the vehicles. Wipe down the surfaces with a damp cloth to remove any remaining dust.
- Lubricate Moving Parts: Apply a small amount of silicone or WD-40 to the moving parts of the Power Wheels, such as the wheels, pedals, or steering mechanism. This will help prevent rust and keep the components functioning smoothly.
- Check for Damage: Inspect the Power Wheels for any signs of damage, such as cracks, loose parts, or worn-out tires. If you notice any issues, make the necessary repairs or replacement before storing the vehicles.
- Allow for Drying: After cleaning, allow the Power Wheels to air dry completely. This will prevent the growth of mold or mildew during storage.
- Consider Disassembling: If your Power Wheels are easily disassembled, it’s a good idea to take them apart for storage. This will save space and make transportation easier if needed in the future. Just make sure to keep all the disassembled parts together and label them for easy reassembly.
By following these cleaning and preparation steps, you’ll ensure that your Power Wheels are ready to be stored for an extended period. This will help maintain their overall condition and ensure they are in optimal shape when it’s time to bring them out for more adventures.
Choosing the Right Storage Solution
When it comes to storing your Power Wheels, choosing the right storage solution is essential to protect your vehicles from damage and ensure their longevity. Here are some options to consider:
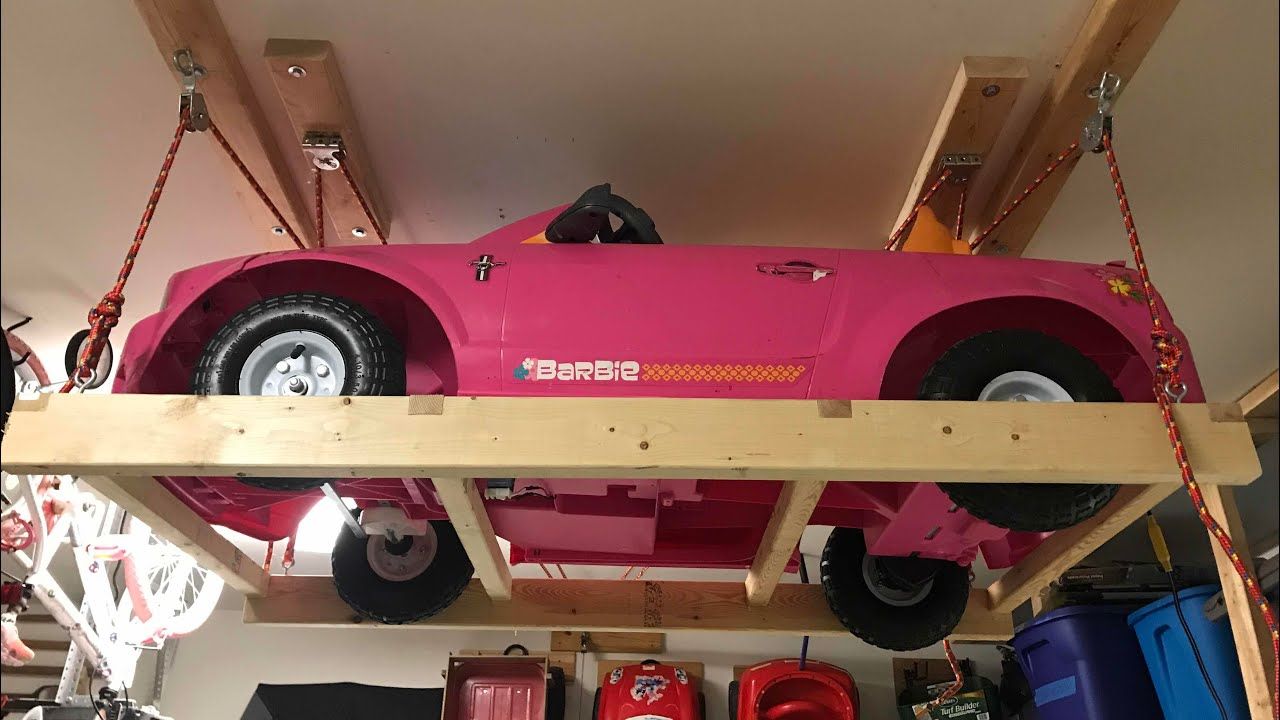
- Hanging Storage System: A hanging storage system is an excellent option if you want to maximize your garage’s vertical space. These systems typically feature hooks or straps that allow you to suspend the Power Wheels from the ceiling. Make sure to use sturdy hooks and adjustable straps to ensure proper support and stability.
- Shelves or Racks: If you have enough floor space in your garage, consider installing shelves or racks specifically designed for storing Power Wheels. These can be adjustable to accommodate vehicles of different sizes and provide a convenient and organized solution.
- Plastic Bins or Containers: Plastic bins or containers are a popular choice for storing Power Wheels. They offer protection from dust, moisture, and pests. Make sure to choose bins or containers that are large enough to comfortably accommodate the vehicles and have secure lids to prevent any damage or access by unwanted critters.
- Covered Carport: If you have an outdoor space such as a covered carport, it can be a suitable option for storing Power Wheels. Make sure the area is sheltered from the elements and protected from direct sunlight. You may consider using a tarp or cover to provide an extra layer of protection.
- Spare Room or Basement: If you have a spare room or a basement with enough space, this can be an ideal location for storing Power Wheels. Just make sure the area is clean, dry, and well-ventilated to prevent any potential moisture or mildew issues.
When choosing a storage solution, make sure to consider the size and weight of your Power Wheels, as well as the available space in your garage or storage area. It’s also important to consider factors such as accessibility, safety, and protection from weather conditions.
Regardless of the storage solution you choose, it’s advisable to cover your Power Wheels with a breathable fabric or tarp to provide an extra layer of protection. This will help keep dust and debris away from the vehicles.
Remember to position the Power Wheels in a way that minimizes any pressure or stress on the tires or other components. Properly storing your Power Wheels will not only preserve their condition but also make it easier to retrieve and enjoy them when the time comes.
Storing Power Wheels in a Hang Storage System
If you want to maximize your garage’s vertical space, storing your Power Wheels in a hang storage system is an excellent option. Here’s a step-by-step guide to help you with this storage method:
- Choose the Right Hang Storage System: Look for a hang storage system that is specifically designed for storing large items like Power Wheels. Ensure that the system is sturdy, adjustable, and capable of supporting the weight of your vehicles.
- Measure and Mark: Use a measuring tape to determine the spacing and height requirements for the hang storage system. Mark the spots on the ceiling where you will install the hooks or straps.
- Install Hooks or Straps: Install strong hooks or straps on the marked spots on the ceiling. Make sure to secure them properly to ensure the safety of your Power Wheels.
- Attach the Vehicles: Carefully attach the hooks or straps to the designated areas on the Power Wheels, ensuring that they are securely fastened and balanced.
- Adjust for Height and Space: Use the adjustable feature of your hang storage system to set the appropriate height so that the Power Wheels are off the ground and allow for sufficient space in your garage.
- Check Stability: Once the Power Wheels are hung, double-check their stability and ensure that they are balanced and not putting excessive strain on the hooks or straps.
- Accessibility: Consider the ease of access to your Power Wheels when storing them in a hang storage system. Make sure to position them in a way that allows for convenient retrieval when you’re ready to use them again.
Storing your Power Wheels in a hang storage system not only saves valuable floor space but also keeps them off the ground, protecting them from potential damage. Make sure to regularly inspect the hooks or straps and the overall integrity of the storage system to ensure it continues to securely hold your Power Wheels.
Remember, safety is paramount. If you’re unsure about installing a hang storage system yourself, it’s best to seek professional assistance to ensure proper installation and peace of mind. With your Power Wheels hanging in the garage, you’ll have plenty of free space, a neat storage solution, and easy access to your vehicles whenever adventure calls!
To store power wheels in the garage, it’s best to clean them thoroughly, remove the battery, and store it in a cool, dry place. It’s also a good idea to cover the power wheels to protect them from dust and debris.
Read more: How To Store Hot Wheels In Package
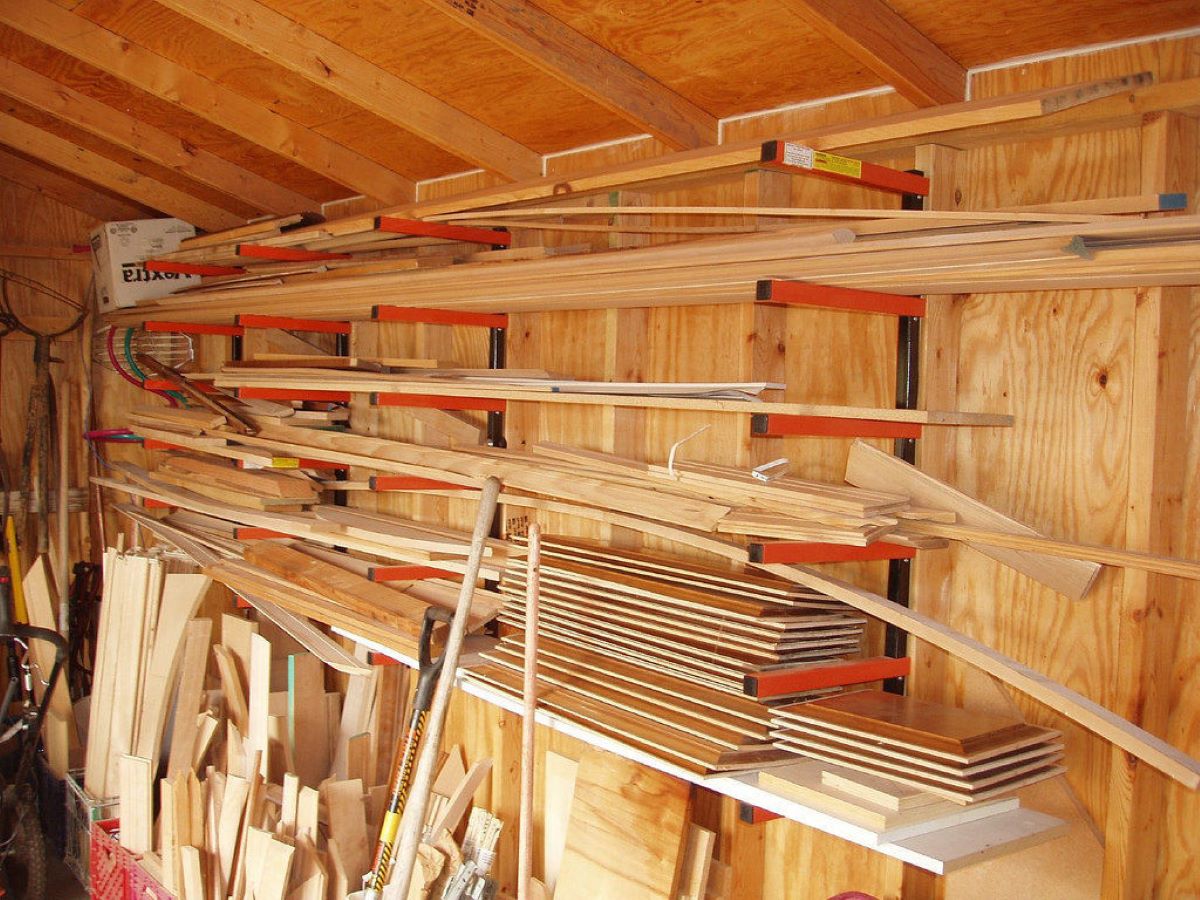
Storing Power Wheels on Shelves or Racks
If you have enough floor space in your garage, storing your Power Wheels on shelves or racks is an excellent storage solution. Here are some steps to help you with this method:
- Select Sturdy Shelves or Racks: Choose shelves or racks that are strong and durable enough to support the weight of your Power Wheels. Ensure that they are specifically designed for storing heavy items.
- Measure the Size: Measure the dimensions of your Power Wheels to determine the appropriate size of the shelves or racks. It’s important to choose ones that can comfortably accommodate the vehicles without any risk of tipping over.
- Adjust Shelf Heights: If your shelves or racks have adjustable heights, customize them according to the size of your Power Wheels. This will allow for efficient use of space and ensure the vehicles fit securely on the shelves or racks.
- Position the Power Wheels: Carefully position the Power Wheels on the shelves or racks, making sure they are balanced and stable. It’s a good idea to place larger or heavier vehicles on the lower shelves or racks for added stability.
- Secure Vehicles: Depending on the design of the shelves or racks, you may want to secure the Power Wheels using straps or ties to prevent any accidental movements or falls. This is especially important if you live in an area prone to earthquakes or have young children who may be tempted to climb on the vehicles.
- Leave Adequate Space: Allow for sufficient space between each Power Wheel to avoid any potential damage or scratching. This will also make it easier to remove the vehicles from the shelves or racks when you want to use them again.
- Organize Accessories: Take advantage of the shelves or racks to store any accessories or spare parts that accompany your Power Wheels. This will help keep everything organized and easily accessible.
By storing your Power Wheels on shelves or racks, you not only create a neat and organized storage solution but also protect your vehicles from potential damage. Regularly check the stability of the shelves or racks and ensure that they are properly secured to prevent any accidents.
Remember to consider the weight capacity of the shelves or racks when storing larger or heavier Power Wheels. If you have multiple vehicles, designing a system with different shelves or racks for each vehicle can help with organization and accessibility.
With your Power Wheels safely stored on shelves or racks, you’ll have peace of mind knowing that your vehicles are protected and ready for the next exciting adventure!
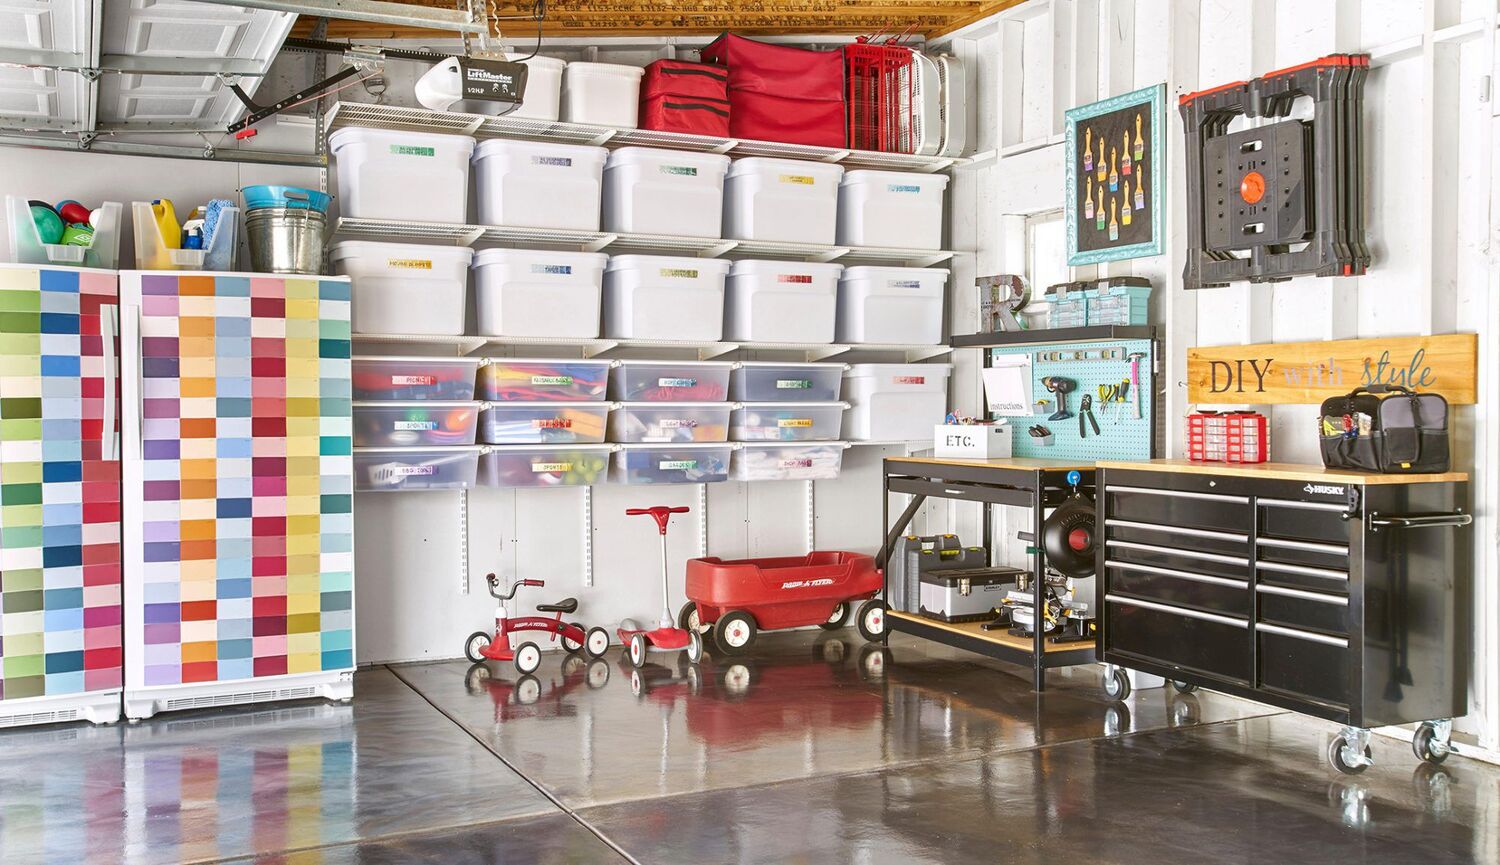
Storing Power Wheels in Plastic Bins or Containers
If you’re looking for a convenient and protective storage solution for your Power Wheels, using plastic bins or containers is a great option. Here’s a step-by-step guide to help you store your vehicles effectively:
- Select the Right Size: Choose plastic bins or containers that are large enough to comfortably accommodate your Power Wheels. Ensure there is enough space for the vehicles to fit without any excessive squeezing or pressure.
- Clean and Dry: Before placing your Power Wheels in the plastic bins or containers, ensure that they are clean and dry. Remove any loose dirt or debris from the vehicles’ surfaces.
- Wrap Fragile Parts: For Power Wheels with delicate parts or areas prone to damage, consider wrapping them in soft blankets, towels, or bubble wrap. This will provide an additional layer of protection during storage.
- Position the Power Wheels: Carefully position the Power Wheels within the plastic bins or containers, taking care to distribute the weight evenly. If you have more than one vehicle, it’s a good idea to separate them with soft materials to prevent any potential scratches or damage.
- Label the Bins: To maintain organization and easy identification, label each plastic bin or container with the name or image of the Power Wheel stored inside. This will save you time and effort when you need to locate a specific vehicle.
- Stack with Care: If you plan on stacking the plastic bins or containers, ensure that the bottom ones can support the weight of those on top. Place heavier items towards the bottom and lighter ones on top to maintain stability.
- Store in a Dry Area: Find a dry and well-ventilated area for storing your plastic bins or containers. This will help prevent any moisture buildup or potential damage to your Power Wheels.
- Keep Away from Heat Sources: Avoid storing your plastic bins or containers near heat sources, as this can cause the material to warp or melt. Choose a location that is cool and maintains a consistent temperature.
By storing your Power Wheels in plastic bins or containers, you provide them with protection against dust, moisture, and potential damage. The bins also offer an organized and easily accessible storage solution.
Remember to check on your stored Power Wheels periodically, especially if they are stored for a long duration. This will allow you to ensure their condition and address any issues promptly.
With your Power Wheels safely stored in plastic bins or containers, you can have peace of mind knowing that they are protected and ready for the next thrilling adventure!
Properly Covering and Protecting Power Wheels
When it comes to storing your Power Wheels, it’s essential to properly cover and protect them to ensure their longevity and maintain their condition. Here are some steps to help you effectively cover and protect your vehicles:
- Choose a Breathable Cover: Select a cover specifically designed for Power Wheels or similar large items. Look for a cover made from breathable material that allows air circulation to prevent moisture buildup.
- Cover the Power Wheels Completely: Ensure that the cover fully encases the Power Wheels, protecting them from dust, dirt, and potential scratches. Make sure there are no gaps or exposed areas.
- Secure the Cover: Use fastening mechanisms, such as straps or elastic cords, to secure the cover in place. This will prevent it from being blown away or displaced during storage.
- Protect from Sunlight: If you’re storing your Power Wheels in an area exposed to direct sunlight, use a cover that offers UV protection. This will help prevent fading or damage to the vehicle’s paint or plastic components.
- Ensure Water Resistance: If your storage area is prone to moisture or you live in an area with frequent rain, choose a cover that is water-resistant or waterproof. This will shield your Power Wheels from potential water damage during storage.
- Inspect and Clean the Cover: Regularly inspect the cover for any signs of damage or wear, and periodically clean it according to the manufacturer’s instructions. This will help maintain its effectiveness and prolong its lifespan.
- Store in a Dry Area: Ensure that your Power Wheels are stored in a dry area to prevent moisture buildup. If necessary, use moisture-absorbing products such as silica gel packs or desiccants in the storage space.
- Protection Against Pests: Take measures to prevent pests, such as rodents or insects, from accessing your covered Power Wheels. Seal any potential entry points and consider using pest deterrents or traps in the storage area.
Properly covering and protecting your Power Wheels not only keeps them clean and in pristine condition but also safeguards them from potential damage caused by external factors. Remember to remove the cover with care when you’re ready to use the vehicles again, ensuring they are clean and dry before uncovering them.
With your Power Wheels securely covered and protected, you can confidently store them knowing that they are shielded from elements and ready to bring joy and excitement to your next adventure!
Maintaining Power Wheels during Storage
Proper maintenance during the storage period is essential to ensure that your Power Wheels remain in optimal condition and are ready to go when you need them. Here are some tips to help you maintain your vehicles during storage:
- Regular Battery Maintenance: If you’re storing your Power Wheels for an extended period, it’s important to regularly charge the batteries to prevent them from losing their charge. Refer to the manufacturer’s instructions for recommended charging intervals.
- Keep Batteries Stored Properly: If you’ve removed the batteries from your Power Wheels, store them separately in a cool and dry place. Make sure they are fully charged before storing and periodically check their charge levels during storage.
- Avoid Temperature Extremes: Extreme heat or cold can have a negative impact on the components of your Power Wheels. Choose a storage area that maintains a moderate temperature to prevent any potential damage.
- Check Tire Pressure: Periodically inspect the tire pressure of your Power Wheels during storage. Adjust as necessary to ensure that the tires are properly inflated. This will help prevent flat spots and maintain optimal performance.
- Rotate Wheels: If your Power Wheels are stationary for an extended period, consider rotating the wheels occasionally. This will help prevent flat spots from developing on the tires and ensure that they wear evenly.
- Inspect for Pests: Regularly check your Power Wheels for any signs of pest infestation, such as droppings or chewed wires. If you notice any pest activity, take appropriate measures to address the issue promptly.
- Address Any Damage: If you discover any damage or issues during storage, such as cracks, loose parts, or worn-out components, address them as soon as possible. Repair or replace any damaged parts to ensure the Power Wheels are in proper working condition once you’re ready to use them again.
- Clean before Use: Before taking your Power Wheels out of storage and putting them to use, give them a thorough cleaning. Remove any dust or debris that may have settled on the surfaces during storage.
By following these maintenance tips, you’ll help ensure that your Power Wheels remain in good condition and are ready to deliver countless hours of fun and excitement. Regular checks, battery maintenance, and addressing any damage promptly will help extend the lifespan of your vehicles and maximize their performance.
Remember, safety should always be a priority. Inspect all components thoroughly before allowing children to use the Power Wheels, and refer to the manufacturer’s guidelines for proper usage and maintenance.
With proper maintenance during storage, your Power Wheels will be ready to hit the road whenever adventure calls!
Read more: How To Lock A Garage Door Without Power
Conclusion
Properly storing your Power Wheels is essential to ensure their longevity and keep them in optimal condition for years of enjoyment. By following the steps outlined in this article, you can create an organized and safe storage space that protects your vehicles from damage and preserves their performance.
Clearing the space in your garage and selecting the right storage solution, whether it’s a hang storage system, shelves or racks, or plastic bins or containers, will help you utilize the available space efficiently. Cleaning the Power Wheels before storage and choosing the appropriate cover or protection will safeguard them from dirt, dust, and potential damage.
Remember to also maintain your Power Wheels during storage through regular battery maintenance, proper tire pressure, and periodic checks for pests or damage. Taking the time to address any issues promptly will ensure that your vehicles are in optimal condition once you’re ready to use them again.
Whether you’re storing your Power Wheels for the winter months or clearing space in your garage, these storage and maintenance tips will help you keep your vehicles in top shape. By giving them the proper care they deserve, you’ll ensure that they continue to provide endless hours of fun, excitement, and adventure for you and your family.
So get ready to store your Power Wheels with confidence, knowing that you have the knowledge and guidance to maintain them properly. With a little effort and attention to detail, your Power Wheels will be ready to hit the road whenever you’re ready for your next thrilling ride!
Frequently Asked Questions about How To Store Power Wheels In Garage
Was this page helpful?
At Storables.com, we guarantee accurate and reliable information. Our content, validated by Expert Board Contributors, is crafted following stringent Editorial Policies. We're committed to providing you with well-researched, expert-backed insights for all your informational needs.


0 thoughts on “How To Store Power Wheels In Garage”