Articles
What Do I Need To Start Making Candles
Modified: February 25, 2024
Discover the essential articles you need to start your candle-making journey. Explore the must-have tools, materials, and techniques for creating beautiful homemade candles.
(Many of the links in this article redirect to a specific reviewed product. Your purchase of these products through affiliate links helps to generate commission for Storables.com, at no extra cost. Learn more)
Introduction
Making candles is not only a fun and creative hobby, but it can also be a lucrative business venture. Whether you’re looking to add a personal touch to your home decor or start a candle-making business, understanding the essentials is crucial for success.
In this article, we will dive into the world of candle making and explore the key supplies, techniques, and safety precautions you need to know before getting started. From choosing the right wax and wicks to selecting fragrances and dyes, we will walk you through the entire process step by step.
But before we jump right in, let’s take a moment to appreciate the beauty and versatility of candles. For centuries, candles have symbolized warmth, relaxation, and ambience. They can uplift your mood, create a cozy atmosphere, or even mark important occasions. With endless customization options, you have the power to create candles that reflect your unique style and personality.
Whether you’re an absolute beginner or have some experience in candle making, this comprehensive guide will provide you with the knowledge and tips to take your candle-making skills to the next level. So, let’s gather our supplies, ignite our creativity, and embark on a candle-making journey like no other.
Key Takeaways:
- Embark on a candle-making journey with essential supplies, quality wax, and safety precautions. Infuse warmth, ambiance, and personal touch into any space with your unique and creative candles.
- Create beautiful and professional-looking candles by choosing the right wicks, fragrances, and dyes. Prioritize safety, experiment, and refine your techniques to enjoy the rewarding experience of candle making.
Read more: What Do I Need To Make Candles At Home
Getting Started
Before delving into the world of candle making, it’s important to familiarize yourself with the basic steps and materials involved. Here are a few key points to consider when getting started:
- Research and Planning: Take the time to research different candle-making techniques, styles, and trends. This will help you determine the specific type of candles you want to create and the target audience you wish to cater to. Planning your candle-making journey will ensure a more organized and successful experience.
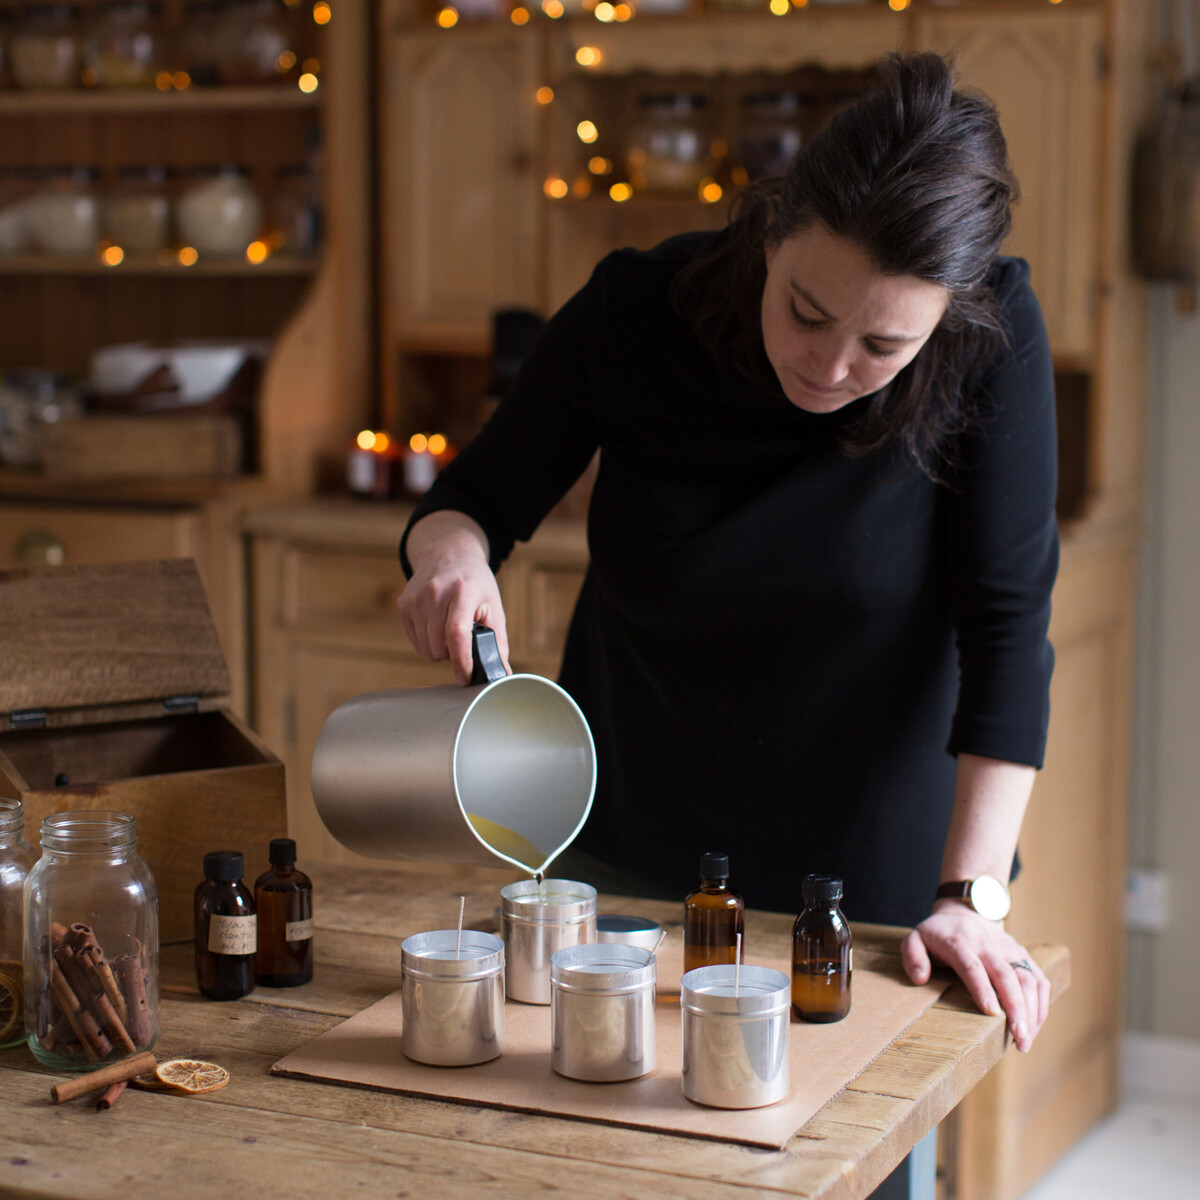
- Set Up a Workspace: Designate a clean and organized area as your candle-making workspace. Make sure it is well-ventilated and away from any flammable materials. Cover the surface with a protective layer to prevent any spills or wax drips from damaging the area.
- Gather Essential Supplies: Stock up on the necessary supplies to kickstart your candle-making endeavors. These may include wax, wicks, fragrances, dyes, molds or containers, and various tools and equipment.
- Invest in Quality Ingredients: To create high-quality candles, it’s important to invest in premium ingredients. Opt for natural and high-melt point waxes, quality wicks, and safe fragrance oils or essential oils. This will ensure that your candles burn evenly and emit a pleasing aroma.
- Begin with Simple Candle Types: As a beginner, it’s recommended to start with simple candle types such as container candles or pillar candles. These are easier to make and require fewer materials and techniques. Once you gain confidence and experience, you can explore more complex candle designs and styles.
- Join Online Communities or Workshops: Connect with fellow candle enthusiasts and experienced artisans by joining online candle-making communities or attending workshops. This will provide you with a wealth of knowledge and support, and offer opportunities to exchange ideas and learn new techniques.
By following these steps and gathering the necessary supplies, you will be well-prepared to embark on your candle-making journey. Remember, practice makes perfect, so don’t be discouraged if your first few attempts don’t turn out exactly as expected. With time and experience, you will refine your skills and create beautiful, unique candles that bring joy to yourself and others.
Essential Supplies
When it comes to candle making, having the right supplies is essential for producing beautiful and high-quality candles. Here is a list of the key supplies you’ll need to get started:
- Wax: The type of wax you choose will greatly impact the appearance and performance of your candles. There are various options available, including soy wax, beeswax, paraffin wax, and palm wax. Each type has its own advantages and disadvantages, so it’s important to research and choose the one that best suits your needs and preferences.
- Wicks: Wicks are responsible for providing a controlled and consistent burn in your candles. They come in different sizes and materials, such as cotton, paper, or metal-core. The size and material of the wick will depend on the diameter of your candle and the type of wax you are using.
- Fragrances and Dyes: Adding fragrances and dyes to your candles can enhance their appeal and create an inviting ambiance. Choose high-quality fragrance oils or essential oils that are specifically formulated for candle making. Dyes, in the form of liquid or solid color blocks, can be used to add vibrant hues to your candles.
- Candle Molds and Containers: Candle molds and containers come in a variety of shapes and sizes, allowing you to experiment with different designs and styles. Molds can be made of aluminum, silicone, or plastic, while containers can range from glass jars to tin cans. Choose molds and containers that are heat-resistant and suitable for the type of wax you are using.
- Tools and Equipment: There are several tools and equipment that will make your candle-making process easier and more efficient. These may include a double boiler or a melting pot for melting the wax, a thermometer to monitor the temperature, a stirring utensil, a pouring pitcher, a heat gun or a hairdryer for smoothing the surface, and a wick holder or a centering device to ensure the wick stays in place.
- Safety Precautions: Safety should always be a top priority when working with hot wax and open flames. Make sure to have safety equipment such as heat-resistant gloves, safety goggles, and a fire extinguisher nearby. Additionally, always work in a well-ventilated area and keep children and pets away from your candle-making workspace.
By having these essential supplies on hand, you’ll be equipped to create beautiful and professional-looking candles. As you gain experience and experiment with different techniques, you may want to expand your collection of supplies to include additional tools and decorative elements. The possibilities are endless, and with practice, you’ll be able to create unique and personalized candles that bring joy and warmth to any space.
Wax Options
When it comes to candle making, choosing the right wax is crucial for achieving the desired appearance, burn time, and scent throw of your candles. Here are some popular wax options to consider:
- Soy Wax: Soy wax is derived from soybean oil and is a popular choice among environmentally conscious candle makers. It is renewable, biodegradable, and produces a clean and slow burn. Soy candles also have excellent scent throw and can hold a high fragrance load.
- Beeswax: Beeswax is a natural wax produced by bees and is known for its unique golden color and sweet honey scent. It has a longer burn time compared to other waxes and produces a beautiful, warm glow. Beeswax is a popular choice for making decorative and pillar candles.
- Paraffin Wax: Paraffin wax is derived from petroleum and is widely used in candle making due to its affordability and versatility. It has a higher melting point, which makes it ideal for creating pillar candles and taper candles. Paraffin wax can hold a high fragrance load and produces a strong scent throw.
- Palm Wax: Palm wax is made from the oil extracted from palm trees and is known for its natural and crystalline appearance. It has a unique ability to create beautiful and intricate patterns in candles. Palm wax has good scent throw and burn time, making it a popular choice for container candles.
- Blended Waxes: Blended waxes are created by combining different types of waxes to achieve specific characteristics. For example, a soy and paraffin blend can offer the best of both worlds, having the clean burn of soy wax with the strong scent throw of paraffin wax. Blended waxes allow for customization and flexibility in candle making.
When selecting a wax, consider factors such as burn time, scent throw, appearance, and sustainability. Each wax has its unique qualities, so it’s important to experiment and find the one that best suits your preferences and the type of candles you want to create.
It’s worth noting that different waxes may require specific heating and pouring temperatures, so be sure to carefully follow the manufacturer’s instructions. Additionally, investing in a good quality wax thermometer will help you monitor and maintain the optimal temperature throughout the candle-making process.
Remember, the choice of wax plays a significant role in the overall quality and performance of your candles. So, take your time to explore different wax options, conduct test burns, and discover the perfect wax that will bring your creative vision to life.
Wick Types
Choosing the right wick is essential for ensuring a clean, efficient, and long-lasting burn in your candles. The wick type you use will depend on factors such as the diameter of your candles, the type of wax you’re using, and the desired burn time. Here are some popular wick types to consider:
- Cotton Wicks: Cotton wicks are the most commonly used wicks in candle making. They are made from natural cotton fibers and come in different sizes and thicknesses. Cotton wicks provide a consistent and controlled burn, making them suitable for various candle types.
- Paper Core Wicks: Paper core wicks are cotton wicks with a thin paper core in the center. The paper core helps the wick remain upright and rigid during the burn, making it particularly suitable for container candles. Paper core wicks are known for their clean and even burn.
- Wooden Wicks: Wooden wicks provide a unique and rustic touch to candles. They are made from sustainably sourced wood and offer a crackling sound reminiscent of a cozy fireplace. Wooden wicks are commonly used in container candles and can create a wider melt pool, resulting in better fragrance throw.
- Metal-Core Wicks: Metal-core wicks have a metal or zinc core surrounded by cotton fibers. The metal core improves the rigidity of the wick, especially for larger candles. Metal-core wicks are known for their excellent stability and consistent burn.
- Flat Braid Wicks: Flat braid wicks are made from flat woven cotton or cotton blend strands. They are popular for taper and pillar candles due to their ability to produce a steady and controlled flame. Flat braid wicks come in various widths to accommodate different candle sizes.
When selecting a wick, it’s important to consider the diameter of your candles and the type of wax you’re using. The size and thickness of the wick will impact how the wax is burned and how efficiently the candle burns. If you’re unsure about the right wick size, you can refer to wick size charts provided by candle-making suppliers or conduct test burns.
During the test burn, observe the flame height, the formation of a complete melt pool, and any signs of tunneling or smoking. Adjustments may be needed to achieve the desired burn characteristics. It’s also worth noting that wick performance can vary with different fragrances and dyes, so be sure to consider these factors as well.
By choosing the appropriate wick type and size, you’ll ensure that your candles burn evenly, cleanly, and without any issues. Proper wick selection is an important aspect of candle making that contributes to the overall success and satisfaction of your finished products.
Read more: What Printer Do I Need To Make Shirts
Fragrances and Dyes
Adding fragrances and dyes to your candles can enhance their appeal and create a truly delightful experience for both the eyes and the nose. Here’s what you need to know about fragrances and dyes in candle making:
Fragrances:
Choosing the right fragrance for your candles is a key aspect of creating a desired ambiance and mood. Here are a few considerations when selecting fragrances:
- Fragrance Oils vs. Essential Oils: Fragrance oils are specially formulated oils that are designed to provide a strong and long-lasting scent throw in candles. They come in a wide range of scents, from floral and fruity to warm and woody. Essential oils, on the other hand, are derived from natural plant sources and offer a more subtle and aromatherapeutic scent.
- Fragrance Load: The amount of fragrance oil you add to your candles, known as the fragrance load, can affect both the strength of the scent and the performance of the candle. It’s important to follow the recommended fragrance load percentage provided by the manufacturer to avoid overpowering or poor burning candles.
- Testing and Blending: It’s a good practice to conduct small test batches of candles when experimenting with different fragrances. This allows you to evaluate how the fragrance performs in the wax and observe its scent throw and longevity. You can also get creative by blending different fragrance oils to create unique scent combinations.
Dyes:
Dyes are used to add vibrant colors to your candles and make them visually appealing. Here are a few points to consider when working with dyes:
- Types of Dyes: Candle dyes are available in both liquid and solid forms. Liquid dyes are easy to work with and provide a wider range of color options, while solid dyes are convenient for precise and consistent color control.
- Testing and Concentration: Similar to fragrances, it’s important to test different dye concentrations to achieve the desired color intensity in your candles. Start with a small amount and gradually add more until you achieve the desired hue. Keep in mind that some waxes may require more dye than others to achieve the same color intensity.
- Mixing and Layering: You can get creative with your candle designs by mixing different colored dyes or creating layered effects. Experiment with different techniques, such as swirls or gradient effects, to achieve unique and eye-catching visual appeal.
Remember to always follow the manufacturer’s guidelines and instructions when working with fragrances and dyes. It’s also important to keep in mind that certain fragrances and dyes may affect the burning characteristics of your candles, so it’s recommended to conduct test burns to ensure optimal performance and safety.
The combination of carefully selected fragrances and vibrant dyes will add a personal and captivating touch to your candles, making them not only visually appealing but also a delight to the senses.
Candle Molds and Containers
Candle molds and containers are essential components in candle making as they dictate the shape, size, and overall appearance of your finished candles. Here’s what you need to know about choosing the right molds and containers:
Candle Molds:
Candle molds come in a variety of materials, shapes, and sizes. Here are a few options to consider:
- Aluminum Molds: Aluminum molds are durable and heat-resistant, making them a popular choice for creating pillar and votive candles. They provide a smooth and professional finish to the candles and allow for easy release of the finished product.
- Silicone Molds: Silicone molds are flexible and easy to use. They come in various shapes and designs, allowing you to create intricate and detailed candles. Silicone molds are ideal for making novelty candles and can be reused multiple times.
- Plastic Molds: Plastic molds are lightweight and affordable, making them a great option for beginners. They are available in different sizes and designs, including basic shapes and more intricate patterns.
When choosing candle molds, consider the type of wax you are using and the specific design or shape you want to achieve. Some molds may require additional steps, such as using a mold release agent or preheating, to ensure easy removal of the candle once it has set.
Candle Containers:
If you prefer to create container candles, you’ll need appropriate containers to hold the wax. Here are a few options to consider:
- Glass Jars: Glass jars are a popular choice for container candles. They come in various shapes and sizes, allowing you to create a sleek and elegant look. Glass jars are heat-resistant and provide excellent visibility of the candle, making them a great option for scented candles.
- Tin Cans: Tin cans are a versatile and budget-friendly option for container candles. They are available in different sizes and can be easily decorated or customized to align with your brand or personal style. Tin cans are lightweight and portable, making them great for travel candles or gifts.
- Ceramic or Concrete Containers: Ceramic or concrete containers add a unique and artistic touch to your candles. They come in various shapes and textures, offering a modern and stylish look. Ceramic or concrete containers are ideal for creating decorative and statement candles.
When choosing candle containers, consider the compatibility with your chosen wax and the style you wish to achieve. Ensure that the containers are heat-resistant and have a stable base to prevent any accidents.
Whether you opt for molds or containers, the choice of shape, size, and material will play a significant role in the overall aesthetic appeal of your candles. Take your time to explore different options and experiment with various molds or containers to create candles that are uniquely beautiful and visually appealing.
When starting to make candles, you will need wax, wicks, fragrance oils, a double boiler, a thermometer, and containers or molds. Be sure to also have a workspace with good ventilation and proper safety equipment.
Tools and Equipment
Having the right tools and equipment is essential for a smooth and efficient candle-making process. Here are some essential tools and equipment you’ll need:
- Double Boiler or Melting Pot: A double boiler or melting pot is used to melt the wax gently and evenly. It helps to prevent the wax from scorching or overheating. If you don’t have a double boiler, you can create one by placing a heat-resistant container inside a pot of boiling water.
- Thermometer: A wax thermometer is crucial for monitoring the temperature of the wax. Maintaining the right temperature is important for achieving the desired pouring consistency and preventing issues such as cracking or poor fragrance throw.
- Stirring Utensil: A heat-resistant stirring utensil, such as a stainless steel spoon or a silicone spatula, is needed to mix the wax, fragrance oils, and dyes. It’s important to use a dedicated utensil for candle making to avoid cross-contamination with food items.
- Pouring Pitcher: A pouring pitcher with a spout makes it easier to pour the melted wax into the molds or containers without spilling. Look for a pitcher with a heat-resistant handle for safe and comfortable pouring.
- Heat Gun or Hairdryer: A heat gun or hairdryer can be used to smooth the surface of your finished candles and eliminate any bubbles or imperfections. This step is especially important for achieving a polished and professional look.
- Wick Holder or Centering Device: Using a wick holder or centering device ensures that the wick stays in the center of the candle while the wax sets. This helps to achieve an even burn and prevent tunneling.
- Scale: A digital scale is useful for accurately measuring the wax, fragrance oils, and dyes. Following precise measurements is crucial for consistent results in your candle-making process.
- Heat-Resistant Gloves and Safety Goggles: When working with hot wax, it’s important to protect yourself. Heat-resistant gloves protect your hands from burns, while safety goggles shield your eyes from any potential splashes or splatters.
Additionally, it’s important to have a clean and organized workspace with a protective covering to prevent any spills or wax drips from damaging surfaces.
While these are the essential tools and equipment, you may also want to consider investing in optional items such as a label maker, packaging materials, a heat sealer for sealing packaging, and a candle-making notebook to keep track of your recipes and experiments.
Remember to regularly clean and properly maintain your tools and equipment to ensure their longevity and optimal performance. By having the right tools at your disposal, you’ll be well-equipped to create beautiful and professional-looking candles.
Safety Precautions
Safety should always be a top priority when it comes to candle making. Working with hot wax and open flames requires careful attention and adherence to safety guidelines. Here are some essential safety precautions to follow:
- Work in a Well-Ventilated Area: Ensure that your candle-making workspace is well-ventilated. This helps to minimize exposure to potentially harmful fumes emitted during the melting and pouring of wax. Open windows or use a fan to improve air circulation.
- Keep Flammable Items Away: Maintain a clear and clutter-free working area. Keep flammable materials such as paper, fabric, or chemicals away from heat sources. This reduces the risk of accidental fires.
- Use Protective Gear: Wear heat-resistant gloves and safety goggles when handling hot wax or other potentially hazardous materials. Gloves protect your hands from burns, while safety goggles shield your eyes from any splashes or splatters.
- Use Heat-Resistant Containers: When pouring melted wax into containers, ensure that they are heat-resistant and can withstand high temperatures. Glass jars or containers labeled as suitable for candle making are usually a safe choice.
- Never Leave Unattended Flames: Never leave burning candles unattended. Always extinguish candles before leaving a room or going to bed. Keep candles away from flammable materials and out of reach of children and pets.
- Use Fire Safety Measures: Have a fire extinguisher or a bucket of sand nearby in case of any accidental fires. Familiarize yourself with fire safety protocols and know how to properly use a fire extinguisher.
- Monitor Temperature: Keep a close eye on the temperature of the wax when melting and pouring. Overheating the wax can cause it to catch fire or release toxic fumes. Use a thermometer to monitor and maintain the optimal temperature range for your specific wax type.
- Follow Manufacturer’s Instructions: Always read and follow the manufacturer’s instructions regarding the safe handling and usage of the candle-making supplies and equipment you are using. This includes guidelines on melting temperatures, fragrance load limits, and recommended safety precautions.
Remember, accidents can happen, so it’s important to be prepared and prioritize safety in every step of your candle-making process. By following these safety precautions and exercising caution, you can enjoy the creative and rewarding experience of candle making while ensuring the well-being of yourself and those around you.
Step-by-Step Guide
Now that you have a good understanding of the essential supplies, it’s time to dive into the step-by-step process of making your own candles. Follow this guide to create beautiful and fragrant candles:
- Prepare Your Workspace: Set up a clean and well-ventilated workspace. Cover the surface with a protective layer and gather all the necessary supplies and tools.
- Melt the Wax: Using a double boiler or a melting pot, melt the wax over medium-low heat. Stir occasionally until the wax reaches the recommended melting temperature for your specific wax type.
- Add Fragrance and Color: Once the wax has melted completely, remove it from heat and allow it to cool slightly. Add your chosen fragrance oil or essential oil, and if desired, add liquid or solid candle dye to achieve the desired color. Stir gently to ensure even distribution.
- Prepare the Molds or Containers: If you’re using molds, ensure they are clean and dry. If using containers, pre-wick them by adhering the wick to the bottom center and securing it in place using a wick holder or a small drop of melted wax.
- Pour the Wax: Carefully pour the melted wax into the molds or containers, ensuring the wick remains centered. Leave a small amount of space at the top to allow for any shrinkage during cooling.
- Allow to Cool and Set: Let the candles cool and solidify completely. This process may take a few hours, so be patient and avoid disturbing the candles during this time.
- Trim the Wick: Once the candles have fully set, trim the wick to about ¼ inch in length. This ensures a clean and even burn when the candles are lit.
- Label and Package: If desired, label your candles with fun and informative labels. Package them in suitable containers or wrapping materials to protect them and enhance their presentation.
- Enjoy and Share: Your candles are now ready to be enjoyed or shared with others. Light them up, bask in their warm glow, and revel in the delightful scents that fill the room.
Remember, practice makes perfect. Don’t be discouraged if your first attempt doesn’t turn out exactly as planned. Keep experimenting, learning, and refining your techniques to create candles that reflect your personal style and bring joy to yourself and others.
Troubleshooting Tips
Candle making is a creative and rewarding process, but sometimes you may encounter challenges along the way. Here are some troubleshooting tips to help you overcome common issues:
- Fragrance Not Strong Enough: If you find that the scent of your candles is not as strong as desired, try increasing the fragrance load in your next batch. You can also experiment with different fragrance oils or essential oils to find ones with stronger scent throw.
- Uneven or Tunneling Burn: If your candle burns unevenly or tunnels in the center, it may be due to a wick that is too small for the diameter of the candle. Try using a larger wick size or using a wick holder or centering device to keep the wick centered while the candle burns.
- Cracked Candle: Cracks can occur if the candle cools too quickly or if there are temperature fluctuations during the setting process. To prevent cracking, allow the candle to cool slowly and avoid placing it in a drafty area. You can also try pouring the wax at a slightly higher temperature to ensure better adhesion.
- Sunken Tops: If the tops of your candles appear sunken or concave, it may be because the wax has contracted as it cools. To fix this issue, you can melt a small amount of additional wax and carefully fill in the sunken area to achieve a smooth surface.
- Sooty Flames: Sooty flames can occur if the wick is too long or if the candle is burning in a drafty area. Trim the wick to ¼ inch before lighting, and ensure that the candle is placed in a draft-free environment. This will help to create a clean and soot-free burn.
- Poor Scent Throw: If your candles are not releasing enough fragrance, make sure you are using a suitable amount of fragrance oil based on the manufacturer’s recommendations. Also, consider using a higher quality fragrance oil or essential oil that is specifically formulated for candle making.
Remember, troubleshooting is all part of the learning experience. Don’t be discouraged by setbacks, as they provide an opportunity to refine your skills and make improvements. Take note of the issues you encounter and experiment with different techniques and adjustments to achieve the desired results in your candle making.
Finishing and Packaging
Once your candles are made, it’s time to give them a finishing touch and package them in an appealing and professional manner. Here are some tips for finishing and packaging your candles:
- Trim the Wick: Before packaging your candles, ensure that the wicks are trimmed to about ¼ inch in length. This not only provides a clean and even burn but also prevents the wick from getting tangled or damaged during transit.
- Add Labels: Create or print labels to provide important information about your candles, such as the fragrance, burn time, and any safety instructions. Labeling adds a polished and professional look to your candles and helps customers make informed choices.
- Wrap with Shrink Wrap: Consider using shrink wrap to enclose your candles in a protective layer. Use a heat gun or hairdryer to shrink the wrap around the container or mold, creating a tight and secure seal. This not only keeps the candle pristine but also adds a sleek and attractive appearance.
- Decorate with Ribbon or Twine: Add a decorative touch to your packaged candles by tying a ribbon or twine around the container or mold. This simple addition can elevate the overall presentation and make your candles stand out.
- Create Gift Sets: Bundle a selection of your candles together to create gift sets. Arrange the candles in a box or a basket and add some decorative filler, such as shredded paper or fabric, for an elegant and enticing presentation.
- Consider Custom Packaging: For those looking to create a unique and branded experience, consider designing custom packaging for your candles. This can include personalized boxes, labels, and even inserts with your logo or brand information. Custom packaging adds a professional and cohesive look to your candles.
- Provide Care Instructions: Include a small card or insert with care instructions for your customers. This can include recommendations on the initial burn time, trimming the wick, and proper candle maintenance. Clear instructions ensure that customers can enjoy their candles safely and to the fullest.
Remember to choose packaging materials that are durable and sturdy, protecting your candles from damage during transportation and storage. Use materials that align with your brand aesthetic and create a positive unboxing experience for your customers.
By giving attention to the finishing details and packaging, you create a professional and attractive product that customers will be proud to display and give as gifts. The right finishing touches can make a significant difference in the overall perceived value and customer satisfaction of your candles.
Conclusion
Candle making is a captivating and rewarding craft that allows you to create beautiful, fragrant, and personalized candles. With the knowledge gained in this comprehensive guide, you are well-equipped to embark on your candle-making journey.
From understanding the essential supplies and wax options to selecting the right fragrance oils and dyes, you now have the foundation to create candles that not only delight the senses but also reflect your unique style and creativity. Remember to experiment, test, and adjust your techniques as you continue to refine your skills.
As you progress in your candle-making journey, don’t be afraid to explore different designs, scents, and packaging options. Connect with other candle enthusiasts and seek inspiration from online communities and workshops. Share your creations with friends and family, and consider turning your passion for candle making into a business venture.
Throughout your candle-making process, prioritize safety precautions to ensure a seamless and hazard-free experience. Take the necessary steps to prevent accidents and protect yourself and your surroundings. Safety should always be a top priority.
Whether you’re making candles for your own enjoyment, as gifts for loved ones, or with the intention to start a business, the art of candle making allows you to infuse warmth, ambiance, and personal touch into any space.
So, gather your supplies, let your creativity soar, and embark on a candle-making journey that brings light, fragrance, and joy into your life and the lives of others.
Frequently Asked Questions about What Do I Need To Start Making Candles
Was this page helpful?
At Storables.com, we guarantee accurate and reliable information. Our content, validated by Expert Board Contributors, is crafted following stringent Editorial Policies. We're committed to providing you with well-researched, expert-backed insights for all your informational needs.


0 thoughts on “What Do I Need To Start Making Candles”