Articles
What Do I Need To Make Candles At Home
Modified: October 20, 2024
Learn all the essential articles needed to make candles at home. Get started with this beginner's guide to candle making.
(Many of the links in this article redirect to a specific reviewed product. Your purchase of these products through affiliate links helps to generate commission for Storables.com, at no extra cost. Learn more)
Introduction
There’s something truly magical about the soft glow and soothing scent of a candle. Whether you love the ambiance it creates or the therapeutic benefits it offers, making your own candles at home can be a rewarding and fulfilling experience. Not only does it allow you to unleash your creativity, but it also gives you control over the ingredients used, ensuring a clean and eco-friendly product.
If you’re new to candle making, don’t worry! This article will guide you through the process and provide valuable insights into the essential equipment and supplies you’ll need, different wax options, wicks, fragrance choices, coloring techniques, and safety precautions to ensure a successful candle making journey.
So, roll up your sleeves and get ready to embark on this delightful adventure of creating homemade candles that will bring warmth and joy to your space.
Key Takeaways:
- Embrace the art of candle making at home by gathering quality supplies, experimenting with scents and colors, and prioritizing safety for a rewarding and creative experience.
- Create stunning homemade candles with the right wax, wicks, and fragrances, while troubleshooting common issues and infusing your personal touch for unique and delightful results.
Read more: What Do I Need To Start Making Candles
Equipment and Supplies Needed
Before diving into the world of candle making, it’s essential to gather the necessary equipment and supplies. Here’s a comprehensive list to get you started:
- Candle Wax: Choose from various options like soy wax, beeswax, or paraffin wax, based on your preference.
- Candle Wicks: Select wicks suitable for the type and size of candles you plan to make.
- Containers or Molds: Depending on your desired candle shape, consider using glass jars, tins, or specialized molds.
- Double Boiler or Melting Pot: Use this to melt the wax safely and evenly.
- Thermometer: Ensure you have a thermometer to monitor the wax temperature accurately.
- Pouring Pot: A pouring pot with a spout will make pouring the melted wax easier and more precise.
- Stirring Utensils: Have a few heat-resistant utensils, like stainless steel or silicone stirrers, to mix the wax and additives.
- Fragrance Oils or Essential Oils: Enhance the atmosphere with delightful scents by selecting your preferred fragrance or essential oils.
- Colorants: If you wish to add color to your candles, gather suitable candle dyes or colorants.
- Wick Holders or Centering Devices: When making container candles, these tools help keep the wicks centered and straight.
- Labels and Packaging: Once your candles are ready, you may want to consider labels and packaging materials for a professional touch.
- Safety Equipment: Always prioritize safety by using protective gear like gloves, goggles, and an apron.
Before starting your candle making journey, ensure you have all the necessary equipment and supplies on hand. This preparation will make the process smoother and more enjoyable.
Wax for Candle Making
Choosing the right wax is crucial for successful candle making. There are several types of wax available, each with its own unique properties. Here are the most common options:
1. Soy Wax: Soy wax is popular among candle makers due to its natural and eco-friendly nature. It is derived from soybean oil and burns cleanly, producing minimal soot. Soy candles have a longer burn time and excellent fragrance throw.
2. Beeswax: Beeswax is another natural wax that emits a subtle, sweet aroma. Known for its slow burn and natural golden color, beeswax candles have a unique charm. They produce a warm glow and purify the air as they burn.
3. Paraffin Wax: Paraffin wax is widely used in the candle industry for its affordability and versatility. It has a high melting point, which ensures a long-lasting burn time. However, paraffin is a byproduct of petroleum, so it’s not considered as eco-friendly as other options.
4. Blends: Many candle makers opt for wax blends that combine different waxes to achieve specific characteristics. For example, a soy-paraffin blend can offer the benefits of both, while additives like stearin or vybar can enhance fragrance retention and reduce air bubbles.
When choosing your wax, consider factors such as burn time, scent throw, eco-friendliness, and personal preferences. Remember to follow the manufacturer’s instructions for melting and pouring temperatures to ensure optimal results.
Regardless of the type of wax you choose, proper storage is essential to maintain its quality. Keep your wax stored in a cool, dry place, away from direct sunlight or extreme temperatures, to prevent it from melting or deteriorating.
By selecting the right wax, you’ll lay a solid foundation for creating beautiful, long-lasting candles that will fill your space with warmth and fragrance.
Types of Candle Wicks
Choosing the right candle wick is crucial for a successful burn and optimal performance of your homemade candles. Various factors, such as the type of wax, candle size, and desired burn time, influence the selection of wicks. Here are some of the most common types of candle wicks:
1. Cotton Wicks: Cotton wicks are widely used in candle making due to their affordability and availability. They are known for their clean burn and minimal soot production. Cotton wicks come in different sizes, suitable for various candle diameters, and can be found pre-waxed or unwaxed.
2. Wood Wicks: Wood wicks have gained popularity for their unique crackling sound and cozy ambiance they create. Made from a blend of natural materials, wood wicks require a bit of extra care during the initial burn to establish a proper wax pool. They are well-suited for larger diameter candles and provide an attractive visual element.
3. Core Wicks: Core wicks, also known as zinc or metal-core wicks, are commonly used for their stability and rigidity. The metal core provides additional support, preventing the wick from sagging or curling during the burn. Core wicks are ideal for container candles or those made from harder wax blends.
4. Specialty Wicks: Depending on your specific candle-making needs, you may come across specialty wicks such as braided wicks, flat wicks, or self-trimming wicks. These wicks are designed for specific candle types, such as tapered candles or votives, and offer unique features for optimal burning performance.
When selecting a wick, consider the diameter of your candle, the specific wax used, and the desired burn time. It’s essential to test different wicks to ensure proper performance, such as an even and steady burn, minimal smoke, and efficient scent release.
Additionally, trimming the wick before each burn to about ¼ inch helps maintain a controlled flame and prevents excessive soot or mushrooming. Remember, a well-chosen wick is crucial for a successful candle burning experience, so don’t overlook this important aspect of candle making.
Essential Oils and Fragrance Options
One of the most enjoyable aspects of making your own candles is choosing the perfect scent to fill your space. Essential oils and fragrance options allow you to create unique and captivating aromas. Here’s a guide to help you navigate the world of candle fragrances:
1. Essential Oils: Derived from plant materials, essential oils offer natural scents and potential therapeutic benefits. There is a wide variety to choose from, including lavender, eucalyptus, citrus, and more. Essential oils can be used individually or blended to create custom fragrance combinations. However, it’s important to note that some essential oils have a lower flash point, which may affect the performance of your candle. Always check the manufacturer’s guidelines for recommended usage and appropriate safety precautions.
2. Fragrance Oils: Fragrance oils are synthetic or semi-synthetic fragrances specifically formulated for candle making. They come in a vast array of scents, ranging from fruity and floral to woody and spicy. Fragrance oils offer consistency in scent and performance and often have a higher flash point than essential oils. Be sure to choose high-quality fragrance oils designed for candle making to ensure the best results.
3. Combining Essential Oils and Fragrance Oils: Get creative by blending essential oils and fragrance oils to create unique scent combinations. Experiment with different ratios to find the perfect balance of natural and synthetic scents. Keep in mind that certain essential oils have a stronger aroma and may require fewer drops compared to others.
When adding fragrance to your candles, be conscious of the recommended fragrance load percentage for the specific wax you are using. Adding too much fragrance can negatively impact the burn time and performance of your candles. Aim for a fragrance load within the recommended range to achieve a pleasant and well-balanced scent throw.
Remember that individual scent preferences vary, so don’t hesitate to let your creativity shine by mixing and matching fragrances to create candles that bring joy and relaxation to your space.
Read more: What Do I Need For A Home Theater System
Coloring Your Candles
Adding color to your candles can enhance their visual appeal and complement your home decor or the ambiance you want to create. There are several methods and options for coloring your homemade candles. Here’s a breakdown of the most common approaches:
1. Liquid Dyes: Liquid candle dyes are easy to work with and offer a wide range of color choices. They come in concentrated form, allowing you to control the intensity of the color. Start with just a few drops and adjust as needed until you achieve your desired shade. Remember, a little goes a long way, so start with a small amount and gradually add more if needed.
2. Dye Blocks: Dye blocks are solid blocks of candle dye that can be shaved or grated to add color to your wax. They offer versatility, allowing you to mix different colors to create custom shades. Keep in mind that dye blocks may require more stirring and mixing to achieve even color distribution throughout the wax.
3. Powdered Pigments: Powdered pigments, such as mica powders, provide a wide range of vibrant and metallic colors. They are perfect for achieving unique and eye-catching effects. These powders can be mixed directly into the melted wax or used to decorate the surface of the candle. However, be cautious when using powdered pigments, as they can be easily inhaled. Wear a mask or respirator and handle them with care.
4. Natural Colorants: If you prefer a more natural approach, there are options for coloring your candles using natural ingredients. For example, spices like cinnamon or turmeric can add warm, earthy tones, while beetroot powder can create pink or red hues. It’s important to test these natural colorants in small batches to ensure they blend well and don’t affect the performance of your candle.
Regardless of the coloring method you choose, it’s important to follow the manufacturer’s guidelines for recommended usage rates and optimal color mixing. Remember to stir the dye or colorant thoroughly into the melted wax to ensure even distribution.
Keep in mind that some fragrances and essential oils may alter the color of your candles. It’s always a good idea to test your chosen colorant in combination with your fragrance to ensure the desired color result.
Coloring your candles allows you to unleash your creativity and personalize each one according to your taste. Whether you prefer bold and vibrant or subtle and muted shades, adding color will make your homemade candles truly unique.
When making candles at home, it’s important to have the necessary supplies such as wax, wicks, fragrance oils, a double boiler, and a thermometer. Be sure to follow safety guidelines and instructions carefully for best results.
Candle Molds and Containers
When it comes to creating candles at home, selecting the right molds or containers is essential to achieving the desired shape and presentation. Here are some considerations for choosing the perfect candle molds or containers:
1. Molds:
- Pillar Molds: Pillar molds are typically used for creating freestanding pillar or column candles. They come in various shapes and sizes and can be made of metal, silicone, or plastic. Pillar molds allow for endless creativity, as you can experiment with different designs, textures, and even embed decorations.
- Votive Molds: Votive molds are smaller containers designed to create votive candles. They are often made of metal or heat-resistant glass and can be used with or without a mold release agent, depending on the material. Votive candles are versatile and make perfect additions to any setting or occasion.
- Specialty Molds: Specialty molds come in a wide range of shapes and designs, including animals, flowers, and geometric shapes. These molds allow you to create candles that are not only functional but also serve as decorative pieces. They add a touch of whimsy and uniqueness to your collection.
2. Containers:
- Glass Jars: Glass jars are a popular choice for container candles. They come in various sizes and shapes, from small jars for travel candles to larger ones for statement pieces. Glass containers offer a visually pleasing and versatile option as they allow you to showcase the wax and any added decorative elements or layers.
- Tins: Metal tins are often used for making travel candles or as an alternative to glass containers. They are portable, lightweight, and easy to work with. Tins are available in different finishes and sizes, making them a practical choice for candles that need to be easily transportable.
- Ceramic or Concrete Containers: For a more unique and stylish touch, consider using ceramic or concrete containers for your candles. These containers add a modern and industrial aesthetic to your homemade candles, making them a standout addition to your decor.
When choosing molds or containers, consider factors such as the type of candle being made, the intended use, and the overall style and theme you aim to achieve. Always ensure the molds or containers are heat-resistant and suitable for candle making.
Remember to prepare your molds or containers by spraying or brushing them with a mold release agent to help in the easy removal of the candles once they have solidified.
Whether you prefer the versatility of molds or the variety of containers, both options offer limitless possibilities to create candles that are both visually appealing and functional.
Safety Precautions
Candle making is a fun and rewarding activity, but it’s important to prioritize safety throughout the process. By following these safety precautions, you can ensure a secure and enjoyable candle making experience:
- Work in a Well-Ventilated Area: Ensure that your workspace is well-ventilated to prevent the accumulation of fumes from melted wax, fragrances, and dyes. Open windows or use a fan to promote air circulation.
- Protective Gear: Wear appropriate protective gear, such as gloves, goggles, and an apron, to shield yourself from potential splatters, spills, or burns. Safety should always come first.
- Melt Wax Safely: Use a double boiler or a dedicated melting pot to melt your wax. Avoid direct heat sources, such as stovetops or open flames, which can be dangerous and increase the risk of fire.
- Monitor Wax Temperature: Use a thermometer to monitor the wax temperature closely. Overheated wax can cause burns or ignite, while too low temperatures may result in improper candle setting or poor performance.
- Handle Hot Wax with Care: Be cautious when handling hot wax. Never pour it directly onto your skin or in close proximity to flammable materials. Use appropriate utensils and pouring pots with a spout for ease and precision.
- Fire Safety: Keep a fire extinguisher nearby and familiarize yourself with how to use it effectively. Never leave a burning candle unattended and ensure that candles are placed on stable surfaces away from flammable objects.
- Safe Fragrance Usage: When working with fragrance oils or essential oils, follow the recommended usage rates provided by the manufacturer. Some fragrances have lower flash points, which can be a fire hazard if used incorrectly.
- Cleanup: Clean up spills and drips promptly to prevent slip and fall accidents. Wipe down surfaces and dispose of waste materials properly, keeping your workspace clean and organized.
- Keep Away from Children and Pets: Candle making involves hot materials that can pose a risk to curious children or pets. Ensure that your workspace is inaccessible to them and store finished candles in a safe place.
- Read and Follow Instructions: Always refer to the instructions provided by the wax and fragrance manufacturers for specific safety guidelines and usage instructions.
By incorporating these safety precautions into your candle making routine, you can create a safer environment and enjoy the process with peace of mind. Safety is essential for both your well-being and the successful outcome of your homemade candles.
Step-by-Step Guide to Making Candles at Home
Candle making at home is an enjoyable and creative process. Follow this step-by-step guide to create beautiful candles:
- Gather and set up all the necessary equipment and supplies, including wax, wicks, containers or molds, a double boiler or melting pot, thermometer, pouring pot, stirring utensils, fragrance oils or essential oils, colorants, and safety gear.
- Prepare your workspace by covering the surface with newspapers or a heat-resistant mat. Ensure the area is well-ventilated and free from any clutter.
- Set up your double boiler or melting pot and fill the bottom with water. Place it on low to medium heat, ensuring that the water doesn’t boil or come into direct contact with the top pot.
- Add the wax to the top pot and melt it gently, stirring occasionally until it reaches the recommended melting temperature specified by the wax manufacturer. Use a thermometer to monitor the temperature accurately.
- If desired, add your chosen colorants or dyes to the melted wax and stir well to ensure even distribution.
- Once the wax has reached the desired temperature, remove it from the heat source and allow it to cool slightly. If using fragrance oils or essential oils, add them to the wax according to the recommended usage rates, stirring gently to incorporate.
- Prepare your containers or molds by placing wicks securely in the center. Use wick holders or centering devices to keep the wicks straight and centered.
- Pour the melted wax slowly and carefully into the prepared containers or molds, ensuring that the wicks remain in place. Leave a small amount of space at the top to allow for any potential shrinkage as the candles cool and set.
- Allow the candles to cool and solidify at room temperature for several hours or as recommended by the wax manufacturer. Avoid disturbing or moving the candles during this time to ensure they set properly.
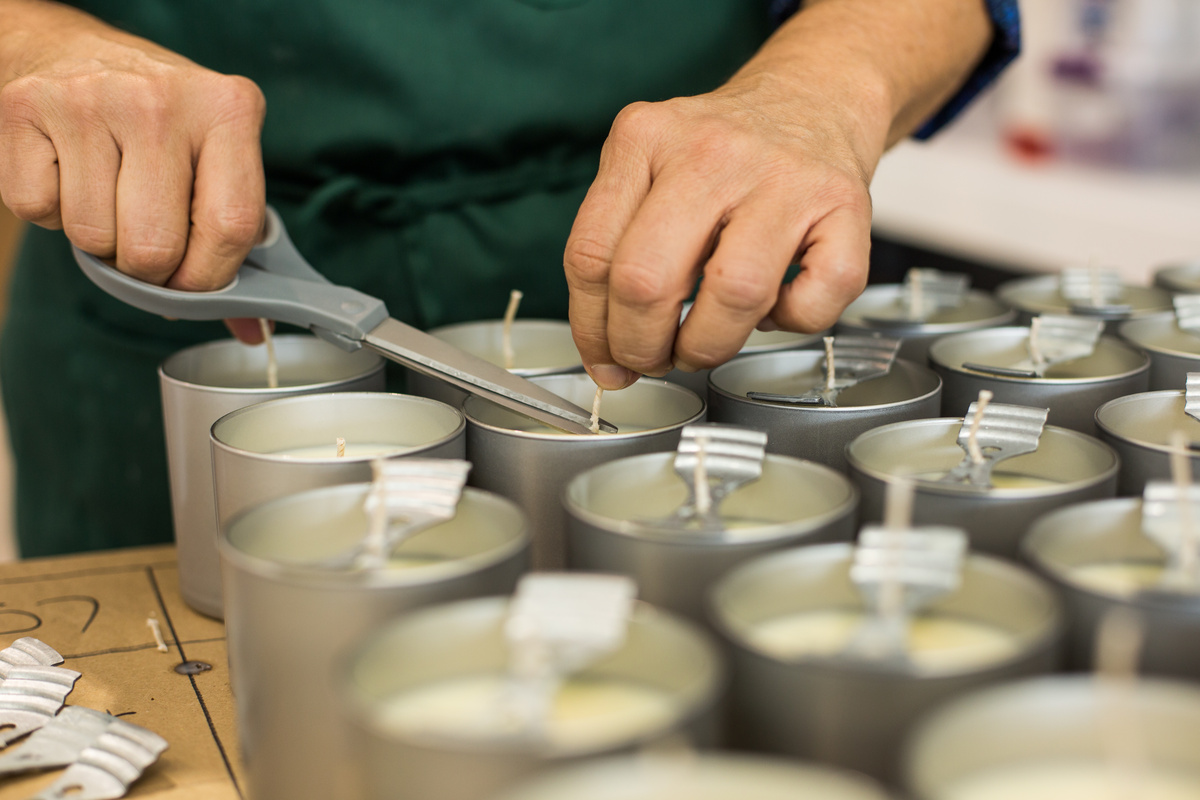
- Once the candles have completely cooled and hardened, trim the wicks to approximately ¼ inch using sharp scissors. This will promote an even and clean burn when the candles are lit.
- Optional: Add any additional decorative elements, such as labels or ribbons, to personalize your candles.
- Your homemade candles are now ready to be enjoyed! Light them up and savor the warm glow and delightful scent they bring to your space.
Remember to follow all safety precautions throughout the entire candle making process. Take your time, be patient, and have fun experimenting with different colors, fragrances, and styles. With practice, you’ll become more confident in your candle making skills and create stunning candles for yourself or to give as thoughtful gifts.
Read more: What Printer Do I Need To Make Shirts
Troubleshooting Common Candle Making Issues
While making candles at home can be a rewarding experience, it’s not uncommon to encounter some challenges along the way. Here are some common candle making issues and troubleshooting tips to help you overcome them:
1. Sinkholes: Sinkholes occur when the center of the candle collapses during the cooling process, leaving a concave indentation. To prevent sinkholes, ensure that you pour your wax at the proper temperature and allow it to cool slowly and evenly. Avoid pouring wax that is too hot or using containers that are too wide for the size of the wick.
2. Tunneling: Tunneling refers to uneven burning, where the candle creates a tunnel down the center, leaving wax along the sides. To prevent tunneling, always allow the initial burn to create a full wax pool that reaches the edges of the container. Trim the wick regularly to about ¼ inch to maintain a consistent burn.
3. Frosting: Frosting appears as a whitish, crystalline layer on the surface of the candle. It is a natural phenomenon that can occur with certain types of wax, primarily soy wax. Although frosting doesn’t affect the performance of the candle, you can minimize its appearance by ensuring a smooth and gradual cooling process, avoiding rapid temperature changes.
4. Poor Scent Throw: If you find that your candles have a weak or faint scent, it may be due to using an insufficient amount of fragrance oil. It’s important to follow the recommended usage rate provided by the manufacturer. Additionally, consider using fragrance oils with stronger scent profiles, and make sure that you’re using the appropriate type and size of wicks for your candles.
5. Uneven or Mushy Wax: Inconsistent or mushy wax can be caused by improper cooling or pouring temperatures. To ensure even solidification, allow the candles to cool at room temperature, away from drafts. If the issue persists, consider adjusting the pouring temperature and/or adding additives like stearin or vybar to improve hardness and stability.
6. Sooty Flames: Excessive soot production in your candle flames can be a result of using a wick that is too large or a wax that is not properly formulated for candle making. Ensure that you choose the appropriate wick size for your candle diameter and that you’re using high-quality candle-making wax suitable for your desired candle type.
If you encounter any of these issues or other problems while making candles, don’t get discouraged. Candle making is a learning process, and with practice, you’ll become more proficient in troubleshooting and achieving the desired results. Don’t be afraid to experiment, ask for advice from experienced candle makers, and keep refining your techniques.
Tips for Candle Making Success
Candle making can be a rewarding and enjoyable hobby. Here are some tips to help you achieve success and create beautiful candles:
- Measure and Prepare: Accurate measurements are essential for consistent results. Use a scale to weigh your wax and other ingredients precisely. Prepare all your equipment and supplies before you start to ensure a smooth workflow.
- Quality Ingredients: Invest in high-quality wax, fragrance oils, wicks, and other additives for the best results. Using premium materials will improve the burn, scent, and overall performance of your candles.
- Wick Selection: Choose the appropriate wick size and type for the diameter and type of candle you’re making. The right wick is crucial for a clean, even burn and optimal scent throw. Test different wicks to find the best fit for your specific candle formulation.
- Temperature Control: Pay attention to temperature when melting and pouring your wax. Follow the manufacturer’s guidelines for the recommended temperature range. Incorrect temperatures can affect the appearance and burning qualities of your candles.
- Scent Testing: Test different fragrance oils or essential oils in small batches to gauge their performance. Some scents may fade or change when subjected to the heat of the candle. Experiment to find the right combination of scents for the desired fragrance strength.
- Color Experimentation: Have fun experimenting with colors in small batches before committing to larger quantities. Remember that colors will appear different when the wax is melted compared to the final solidified candle. Start with small amounts of color and adjust as needed.
- Patient Curing: Allow your candles to cure or “rest” for a few days before testing or using them. This resting period allows the fragrance to fully blend with the wax, resulting in a stronger and better-balanced scent throw.
- Labeling and Packaging: Give your candles a professional touch by labeling and packaging them attractively. Include the fragrance name, burn time, and safety information on the labels. Choose packaging materials that protect the candles and reflect your personal style.
- Maintain a Clean Workspace: A clean and organized workspace contributes to a more enjoyable and efficient candle making process. Regularly clean your tools and surfaces to prevent cross-contamination and keep everything in order for future projects.
- Keep a Journal: Keep a record of your candle making process, including measurements, techniques, and any adjustments you made. This journal can serve as a reference for future batches and help you troubleshoot any issues that may arise.
Remember, practice makes perfect. Don’t be discouraged if your initial attempts don’t turn out exactly as expected. Learn from each experience, adapt your techniques, and continue to explore new candle making methods. With time and practice, you’ll develop your unique style and create beautiful candles that bring joy and warmth to your space.
Conclusion
Congratulations! You’ve discovered the wonderful world of candle making and embarked on a journey to create your own unique and beautiful candles. Through this article, we’ve explored the essential equipment and supplies, different types of wax, candle wicks, fragrance options, coloring techniques, and safety precautions to ensure a successful candle making experience.
By gathering the necessary equipment and choosing the right ingredients, such as high-quality wax, wicks, and fragrance oils, you have the foundation for creating candles that not only look stunning but also burn cleanly and emit delightful scents. With the right temperature control and attentive testing, you can troubleshoot common issues and achieve consistent results.
As you explore the art of candle making, don’t forget to infuse your creativity and personal touch into each candle you create. Experiment with different fragrances, colors, molds, and containers to develop your signature style. Keep a journal to track your progress and learn from each experience to refine your techniques.
Remember to prioritize safety throughout the candle making process. Be mindful of proper ventilation, wear protective gear, and handle hot wax with care. Follow fire safety guidelines and keep candles away from flammable materials.
Candle making is not only a fulfilling hobby, but it also allows you to create meaningful gifts for loved ones or start your own candle business. The possibilities are endless, and with practice, you’ll gain confidence in your skills and create candles that bring warmth and joy to any space.
So, set aside some time, gather your supplies, and allow your creativity to shine as you embark on the delightful journey of making candles at home. Enjoy the experience, embrace the artistry, and embrace the soothing ambiance that comes with the glow of your handmade candles.
Frequently Asked Questions about What Do I Need To Make Candles At Home
Was this page helpful?
At Storables.com, we guarantee accurate and reliable information. Our content, validated by Expert Board Contributors, is crafted following stringent Editorial Policies. We're committed to providing you with well-researched, expert-backed insights for all your informational needs.