Articles
Why Is My AC Unit Not Turning On
Modified: November 1, 2024
Discover common reasons why your AC unit may not be turning on. Read our helpful articles to troubleshoot and fix the issue.
(Many of the links in this article redirect to a specific reviewed product. Your purchase of these products through affiliate links helps to generate commission for Storables.com, at no extra cost. Learn more)
Introduction
Summer is in full swing, and the heat is becoming unbearable. You rush to turn on your trusty air conditioning unit, only to realize that it’s not turning on. Frustration sets in as you wonder why your AC unit is suddenly unresponsive. Don’t panic! This article will guide you through the common reasons why an AC unit may not turn on and provide troubleshooting steps to help you get it up and running again.
There could be various factors contributing to the problem, from minor issues like power interruptions or thermostat malfunctions to more serious problems like faulty wiring or a malfunctioning compressor. By understanding the root causes, you can save yourself from unnecessary hassle and potentially expensive repairs.
Before diving into the specific reasons why your AC unit may not be turning on, it’s essential to note that some troubleshooting steps may require technical expertise. If you’re unfamiliar or uncomfortable with handling electrical components or HVAC equipment, it’s always best to seek professional assistance. Safety should be your top priority.
Key Takeaways:
- Troubleshooting a non-working AC unit involves checking power supply, thermostat settings, air filters, and inspecting various components. Regular maintenance and professional assistance can prevent and resolve common issues.
- Safety is a priority when dealing with electrical components and complex repairs for AC units. If unsure, seek professional HVAC technician assistance to avoid risks and ensure optimal functioning.
Read more: Why Is My AC Fan Not Turning On
Common reasons for an AC unit not turning on
When your AC unit fails to turn on, it can be frustrating and inconvenient, especially during hot summer months. To help you diagnose and resolve the issue, here are some common reasons why your AC unit may not be turning on:
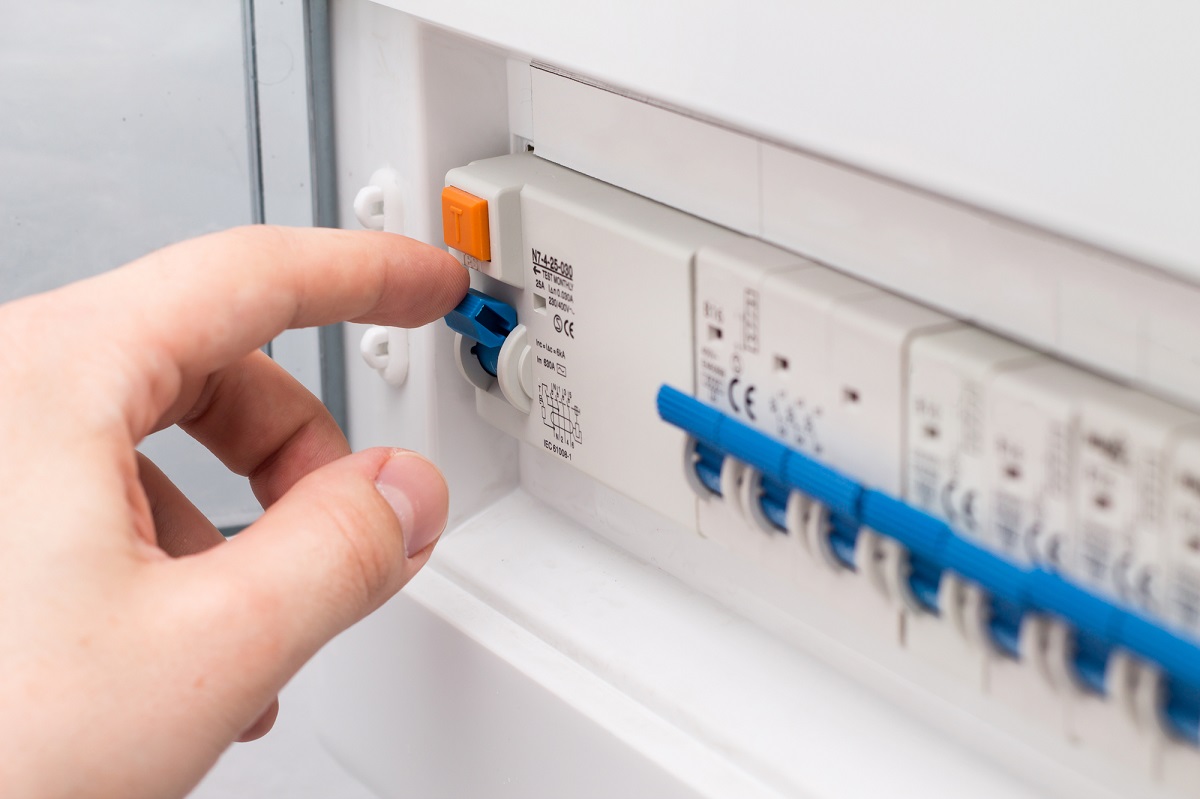
- Power issues: One of the most common reasons for an AC unit not turning on is a power problem. Check if the unit is receiving power by ensuring the circuit breaker for the air conditioner is not tripped or the fuse is not blown. Additionally, check if the power switch for the AC unit is turned on.
- Thermostat problems: Another common culprit for an unresponsive AC unit is a faulty thermostat. Ensure that the thermostat is set to a temperature lower than the current room temperature and is properly connected to the AC unit. You can also try replacing the batteries in the thermostat if it’s battery-powered.
- Faulty wiring or circuit breaker issues: Faulty or damaged wiring can prevent the AC unit from receiving the necessary electrical connection. Inspect the wiring and make sure there are no loose connections or exposed wires. Additionally, check the circuit breaker panel and reset any tripped breakers related to the AC unit.
- Condensate overflow switch triggered: AC units have a condensate overflow switch that shuts off the system when the drain line is clogged or the condensate pan is full. Check for any signs of condensate leakage or a clogged drain line. Clearing the clog and emptying the condensate pan can help resolve this issue.
- Dirty air filters: A clogged or dirty air filter can restrict airflow, causing the AC unit to overheat and shut off as a safety measure. Check the air filter and clean or replace it if necessary. Regularly cleaning or replacing air filters can prevent this issue from occurring in the future.
- Refrigerant leaks: Low refrigerant levels due to leaks can cause the AC unit to malfunction and not turn on. If you suspect a refrigerant leak, it’s best to contact a professional HVAC technician to diagnose and repair the issue.
- Malfunctioning compressor: The compressor plays a crucial role in cooling the air. If the compressor is faulty, it can prevent the AC unit from turning on. Unusual noises coming from the compressor or warm air blowing from the vents are indications of a malfunctioning compressor that requires professional attention.
- Blower motor or fan problems: A malfunctioning blower motor or fan can prevent the AC unit from starting. Check if the blower motor or fan is running smoothly and free from any obstructions. If you notice any issues, such as strange noises or a lack of airflow, it’s best to consult a professional technician.
- Defective capacitor: The capacitor provides the initial electrical charge to start the AC unit. If the capacitor is defective or worn out, it can prevent the AC unit from turning on. An HVAC technician can test and replace the capacitor if needed.
- Faulty control board: The control board serves as the brain of the AC unit, coordinating the various components. If the control board is faulty, it can disrupt the functioning of the AC unit and prevent it from starting. Professional assistance is recommended for diagnosing and repairing control board issues.
Identifying the specific reason why your AC unit is not turning on can give you a better idea of how to resolve the issue. However, if you’re unsure or uncomfortable with troubleshooting the problem yourself, it’s always best to hire a qualified HVAC technician to inspect and repair your AC unit.
Power issues
When your AC unit fails to turn on, the first and most basic issue to check is the power supply. Power issues can range from simple solutions to more complex problems. Here are a few steps to troubleshoot power-related problems:
- Circuit breaker: Start by checking the circuit breaker for the air conditioning unit. The circuit breaker acts as a safety device, tripping and cutting off power supply when there is an electrical overload. Locate the circuit breaker panel in your home and check if any breakers are in the “off” position. If you find a tripped breaker, switch it back on and try turning on the AC unit again.
- Fuse: If your AC unit is equipped with fuses instead of a circuit breaker, check if any of the fuses are blown. A blown fuse will appear black or have a broken wire within it. Replace any blown fuses with new ones of the same amperage and test the AC unit again.
- Power switch: Double-check that the power switch of the AC unit itself is turned on. It may seem obvious, but sometimes the switch can accidentally be turned off or bumped out of position.
- Power supply: Ensure that the AC unit is receiving power from the electrical outlet it is plugged into. Sometimes, the power cord may become loose or disconnected, preventing the unit from turning on. Additionally, check if other nearby appliances or devices connected to the same electrical circuit are functioning properly. If all other devices are also not working, it indicates a real power supply issue that needs attention from an electrician.
If you have gone through these steps and your AC unit still does not turn on, it’s best to consult an HVAC professional. They can further diagnose and address any underlying electrical issues that may require specialized knowledge and equipment.
Remember, working with electrical components can be dangerous, so it’s essential to prioritize your safety. If you are unsure or uncomfortable with handling electrical systems, always seek professional assistance to avoid the risk of electric shock or other accidents.
Thermostat problems
A malfunctioning thermostat can be a common cause for your AC unit not turning on. The thermostat acts as the control center for your cooling system, and if it is not functioning properly, it can prevent the AC unit from receiving the signal to start. Here are a few troubleshooting steps to address thermostat problems:
- Check the temperature setting: Ensure that the temperature setting on your thermostat is lower than the current room temperature. If the thermostat is set to a temperature equal to or higher than the current room temperature, the AC unit will not turn on. Adjust the temperature setting and see if the AC unit starts up.
- Verify the mode setting: Make sure that the thermostat is set to “cool” mode rather than “heat” or “off.” If it is set to the wrong mode, switch it to the appropriate cooling mode and try turning on the AC unit again.
- Replace the batteries: If your thermostat is battery-powered, replace the batteries. Weak or dead batteries can cause the thermostat to malfunction and display inaccurate readings or fail to send the signal to turn on the AC unit.
- Clean the thermostat: Dust and debris can accumulate on the thermostat, affecting its performance. Gently clean the thermostat with a soft, dry cloth to remove any dirt or particles that may be interfering with its operation.
- Check the connections: Ensure that the thermostat is securely connected to the AC unit. Loose or faulty wiring connections can prevent the thermostat from effectively communicating with the AC unit. If you have the knowledge and experience, you can inspect the wiring connections and tighten any loose screws or replace damaged wires. However, it’s recommended to hire a professional technician for any thermostat wiring or electrical issues.
If you have gone through these troubleshooting steps and your AC unit still does not turn on, it may be necessary to replace the thermostat. Faulty thermostats can sometimes be beyond repair and require a replacement to restore proper functionality. Consider contacting an HVAC professional to help you select and install a new thermostat suitable for your AC system.
Remember, handling electrical components and thermostat wiring may require technical expertise, so if you’re uncertain or uncomfortable with these tasks, it’s always best to seek professional assistance to avoid any damage to your thermostat or AC unit.
Faulty wiring or circuit breaker issues
Faulty wiring or circuit breaker problems can cause your AC unit to not turn on or experience intermittent power issues. Wiring issues can range from loose connections to damaged wires, while circuit breaker problems can be caused by overload or electrical faults. Here are some troubleshooting steps to address wiring or circuit breaker issues:
- Inspect the wiring: Begin by inspecting the wiring connections of your AC unit. Check for loose or disconnected wires, frayed insulation, or signs of damage. If you notice any issues, it’s essential to address them promptly. However, working with electrical wiring can be dangerous, so it’s recommended to hire a professional electrician or HVAC technician to handle any wiring repairs or replacements.
- Reset the circuit breaker: If your AC unit is not receiving power, check the circuit breaker panel for any tripped breakers. Locate the breaker corresponding to your AC unit and flip it fully to the “off” position first and then back to the “on” position. This resetting process can help restore power to the AC unit. If the breaker trips again immediately, it indicates an electrical fault or overload issue that requires professional attention.
- Consider an electrical inspection: If you frequently experience circuit breaker tripping or suspect wiring issues, it may be worthwhile to have an electrical inspection of your home. An electrician can assess the electrical system, identify any potential problems, and make necessary repairs or upgrades to ensure safe and efficient operation.
It’s important to note that working with electrical systems can be hazardous, and improper handling can cause severe injury or damage. If you are uncertain or uncomfortable with electrical troubleshooting and repairs, it’s best to entrust the task to a qualified professional who has the knowledge and expertise to handle electrical wiring and circuit breaker issues safely.
By addressing faulty wiring or circuit breaker problems, you can ensure a reliable and safe power supply to your AC unit, which will help resolve the issue of it not turning on.
Read more: Why Does My AC Keep Turning On And Off
Condensate overflow switch triggered
Many air conditioning units are equipped with a condensate overflow switch as a safety mechanism to prevent water damage. This switch is triggered when the condensate drain line is clogged or the condensate pan becomes full. When the switch is triggered, it shuts off power to the AC unit to avoid any potential water overflow. Here’s how you can troubleshoot this issue:
- Locate the condensate drain line and pan: The condensate drain line is a pipe located near the indoor unit of the AC system. The condensate pan collects the moisture that is drained from the AC. Locate these components and inspect them for any signs of water accumulation or blockage.
- Clear the condensate drain line: If you notice that the condensate drain line is clogged, use a wet/dry vacuum or a pipe cleaner to remove any debris or buildup obstructing the line. Clearing the clog will enable proper drainage and prevent the condensate overflow switch from being triggered.
- Empty the condensate pan: If the condensate pan is full, carefully empty it into a suitable container. Once emptied, ensure that the drain pipe connected to the pan is clear and not obstructed. Clean any dirt or debris from the pan to prevent future clogs.
- Inspect for leaks or excessive condensation: While troubleshooting the condensate overflow switch issue, check for any signs of water leaks or excessive condensation near the indoor unit of the AC system. If you notice any leaks or excess moisture, it’s best to contact a professional HVAC technician to inspect and repair the problem.
- Regular maintenance: To prevent future occurrences of the condensate overflow switch being triggered, it’s important to perform regular maintenance on your AC system. This includes cleaning the condensate drain line, checking and clearing the condensate pan, and scheduling routine professional maintenance to ensure optimal performance.
If you have followed these troubleshooting steps and the condensate overflow switch is still being triggered, it could indicate a more complex underlying issue. In such cases, it is recommended to seek the assistance of a qualified HVAC technician who can diagnose and address the problem effectively.
Remember, dealing with water and electrical components can be risky, so exercise caution and prioritize your safety when attempting to resolve the condensate overflow switch issue.
Dirty air filters
One of the most common reasons for an AC unit not turning on is dirty or clogged air filters. Air filters play a crucial role in maintaining good indoor air quality by trapping dust, debris, and other particles. However, over time, these filters can become dirty and obstruct the airflow, causing the AC unit to overheat and shut off. Here’s how you can troubleshoot and address dirty air filter issues:
- Locate and inspect the air filters: Start by locating the air filters in your AC system. The filters are often found near the return air duct or inside the air handler unit. Carefully remove the filters and visually inspect them for dirt, dust, or debris accumulation.
- Clean or replace the air filters: If the air filters are dirty but still in good condition, you can clean them. Gently vacuum or rinse the filters with water until they are free from dirt and debris. Allow the filters to dry thoroughly before re-inserting them into the AC unit. Alternatively, if the filters are heavily soiled or damaged, it’s recommended to replace them with new filters of the correct size and type.
- Regularly maintain the air filters: To prevent future issues with dirty air filters, it’s important to establish a regular maintenance schedule. Check the air filters at least once a month and clean or replace them as needed. This will ensure proper airflow and improve the efficiency of your AC unit.
- Consider upgrading to higher-quality filters: If you frequently experience dirty air filters or have concerns about indoor air quality, upgrading to higher-quality filters may be beneficial. HEPA (High-Efficiency Particulate Air) filters or electrostatic filters are designed to capture smaller particles and provide superior air filtration. Consult with an HVAC professional to determine the best filter options for your specific AC system.
Regularly maintaining and replacing dirty air filters not only helps your AC unit function properly but also improves indoor air quality by reducing dust, allergens, and pollutants. It’s a simple yet essential step in ensuring the efficient and reliable operation of your AC system.
Remember, turning off your AC unit before removing or replacing the air filters is crucial to prevent any debris from being pulled into the system. If you are unsure about the proper cleaning or replacement procedures, consult the manufacturer’s instructions or seek the assistance of a professional HVAC technician.
Check the thermostat settings to make sure it’s set to cool and the temperature is lower than the current room temperature. Also, check the circuit breaker to ensure the AC unit has power. If these don’t solve the issue, it may be time to call a professional.
Refrigerant leaks
Refrigerant is a vital component in your AC system, responsible for cooling the air that is circulated throughout your home. If there is a refrigerant leak, it can cause your AC unit to malfunction and not turn on. Here’s what you need to know about refrigerant leaks and how to address them:
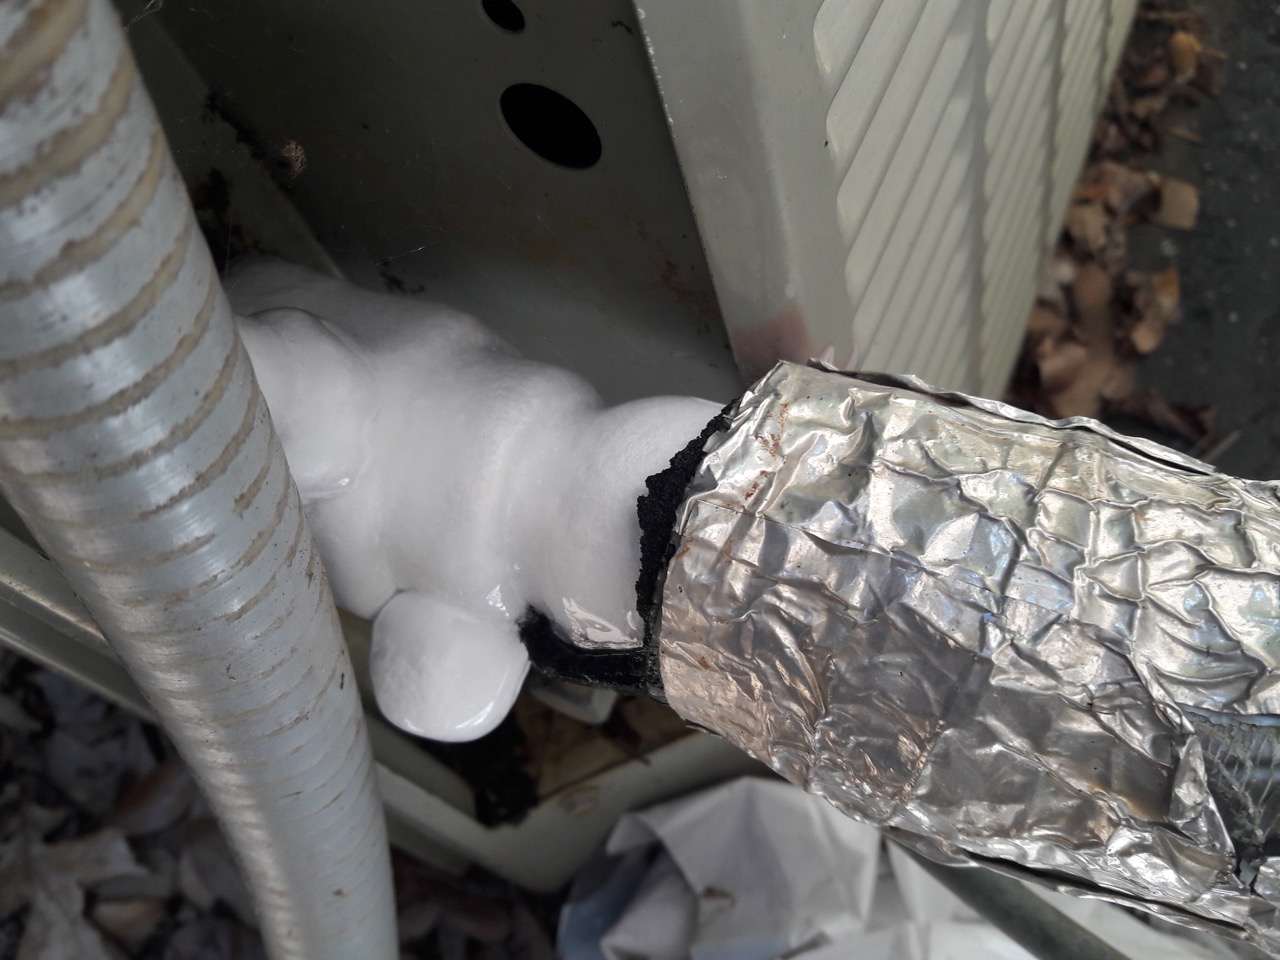
- Recognize the signs of a refrigerant leak: Some common signs of a refrigerant leak include the AC unit not cooling as effectively as before, ice formation on the refrigerant lines or evaporator coil, hissing or bubbling noises near the AC unit, or a noticeable decrease in airflow. If you notice any of these signs, there is a possibility of a refrigerant leak.
- Avoid DIY repairs: Refrigerant leaks require professional attention and should never be attempted as a DIY fix. Handling refrigerant without the proper training and equipment can be hazardous to your health and the environment. It’s best to contact a licensed HVAC technician with experience in refrigerant leak detection and repair.
- Diagnosing and repairing the leak: A qualified technician will use specialized tools to detect the refrigerant leak and determine its location. Once the leak is identified, they will repair the leak and recharge the system with the appropriate amount of refrigerant. In some cases, if the leak is severe or in a difficult-to-reach location, they may recommend replacing the affected components.
- Preventing future leaks: To minimize the chances of refrigerant leaks in the future, it’s important to schedule regular maintenance for your AC system. This includes checking for leaks, inspecting refrigerant lines and connections, and ensuring the system is properly sealed. Additionally, keeping the area around the AC unit clean and free from debris can help prevent damage to refrigerant lines.
Refrigerant leaks not only lead to an inefficient cooling system but can also cause long-term damage to your AC unit. Timely detection and repair are crucial to prevent further issues and ensure the continued performance of your AC system.
If you suspect a refrigerant leak or notice any signs of decreased cooling performance, it’s important to act promptly and contact a professional HVAC technician. They have the expertise and equipment to diagnose and repair refrigerant leaks safely and efficiently.
Malfunctioning compressor
The compressor is the heart of your air conditioning system, responsible for circulating refrigerant and facilitating the cooling process. If the compressor malfunctions, it can lead to your AC unit not turning on. Here’s what you need to know about a malfunctioning compressor and how to address the issue:
- Recognize the signs of a malfunctioning compressor: Some common signs of a faulty compressor include strange noises coming from the outdoor AC unit, warm air blowing from the vents, frequent on-off cycling of the AC unit, or a complete failure of the unit to turn on.
- Check the power supply: Before assuming the compressor is at fault, it’s important to verify that the AC unit is receiving power. Check the circuit breaker panel and ensure that the circuit breaker for the AC unit is not tripped. Additionally, make sure the power switch for the AC unit is turned on.
- Inspect for visible damage: Visually inspect the compressor for any visible signs of damage, such as leaks, corrosion, or broken components. If there is obvious damage, it’s likely a more serious issue that requires professional attention.
- Seek professional assistance: Diagnosing and repairing a malfunctioning compressor should be handled by a qualified HVAC technician. They have the knowledge and experience to properly assess the compressor and determine if it can be repaired or if it needs to be replaced.
- Consider the age and warranty: If your AC unit is relatively new and still covered under warranty, contact the manufacturer or an authorized service provider to inquire about repair or replacement options. They will guide you through the warranty process and determine the best course of action.
- Weigh the cost of repair versus replacement: In some cases, a repair may be possible, but it’s essential to consider the cost. If the repair is significantly expensive or the compressor is nearing the end of its lifespan, it may be more cost-effective to invest in a new AC unit. Your HVAC technician can provide guidance based on the specific circumstances.
A malfunctioning compressor is a significant issue that requires attention from a trained professional. Attempting to repair or replace a compressor without the proper knowledge and equipment can cause further damage and potentially void any remaining warranty on your AC unit.
If you suspect a malfunctioning compressor or notice any signs of compressor failure, it’s best to contact an HVAC technician. They will accurately diagnose the issue and recommend the most appropriate solution to get your AC unit up and running again.
Blower motor or fan problems
The blower motor and fan are crucial components of your AC system, responsible for circulating the cooled air throughout your home. If there are problems with the blower motor or fan, it can prevent your AC unit from turning on and functioning properly. Here’s what you need to know about blower motor or fan issues and how to address them:
- Listen for unusual noises: Turn on your AC unit and listen for any unusual noises coming from the indoor or outdoor unit. Grinding, squealing, or rattling noises may indicate a problem with the blower motor or fan.
- Check for airflow: If you don’t feel any air blowing from the vents when the AC unit is turned on, it could signify an issue with the blower motor or fan. Lack of airflow can be caused by a malfunctioning motor, a broken fan blade, or a blockage in the ductwork.
- Inspect the blower motor: If you are comfortable doing so, visually inspect the blower motor for any signs of damage or wear. Look for loose wires, burnt-out capacitors, or excessive dust and debris accumulation. Remember to turn off the power to the AC unit before performing any inspections or repairs.
- Check the fan blades: Inspect the fan blades for any signs of damage, such as cracks or chips. Damaged blades can cause imbalance and reduce the efficiency of the blower motor. If you notice any issues, it’s best to replace the damaged fan blades.
- Clear obstructions: If you suspect a blockage in the ductwork or near the fan, carefully remove any obstructions. This may involve removing vent covers and using a vacuum or brush to clear out debris. Avoid pushing any obstructions further into the ductwork, as it can cause more significant problems.
- Hire a professional technician: If you are unsure about inspecting or repairing the blower motor or fan, it’s best to hire a professional HVAC technician. They have the knowledge and experience to diagnose and resolve issues with these components safely and effectively.
Blower motor or fan problems can vary in severity, and attempting to repair or replace these components without the proper expertise can cause further damage. It’s essential to prioritize your safety and rely on a qualified technician for any blower motor or fan issues.
If you suspect a problem with your blower motor or fan or notice any signs of reduced airflow or unusual noises, contact an HVAC technician to assess and address the issue promptly.
Defective capacitor
A defective capacitor can cause your AC unit to not turn on or exhibit irregular behavior. The capacitor is responsible for supplying the initial electrical charge to start the compressor and fan motors. Here’s what you need to know about a defective capacitor and how to address the issue:
- Recognize the signs of a defective capacitor: Some common signs of a faulty capacitor include the AC unit not turning on, a humming sound coming from the AC unit, the compressor or fan motors not running, or the AC unit frequently tripping the circuit breaker.
- Turn off the power: Before inspecting or replacing a capacitor, it’s crucial to turn off the power to the AC unit from the electrical panel. This will prevent any potential electrical accidents or injuries.
- Locate the capacitor: The capacitor is typically located within the outdoor unit of your AC system. It is a cylindrical or oval-shaped component with wires connecting it to the compressor and fan motors.
- Inspect the capacitor: Visually inspect the capacitor for any signs of swelling, leaking, or damage. A defective capacitor may have bulging or leaking electrolyte, indicating internal failure.
- Use a multimeter: If you have access to a multimeter and are comfortable using it, you can test the capacitor for proper functionality. Follow the manufacturer’s guidelines and instructions specific to your multimeter to perform the test accurately.
- Replace the capacitor: If you have determined that the capacitor is defective either through visual inspection or testing, it’s recommended to replace it. Capacitors are inexpensive components and can be easily replaced. Ensure that you select a replacement that matches the specifications of the original capacitor in terms of capacitance and voltage rating.
- Seek professional assistance: If you don’t have the necessary tools, knowledge, or experience to inspect or replace the capacitor, it’s best to contact a professional HVAC technician. They can accurately diagnose the issue and replace the capacitor safely and efficiently.
Capacitor-related issues require caution and proper handling. If you’re uncertain about inspecting or replacing a capacitor, it’s always advisable to seek help from a qualified professional.
If you suspect a defective capacitor or notice any signs of capacitor failure in your AC unit, it’s important to address the issue promptly. Contact an HVAC technician who can diagnose, replace, or repair the capacitor, restoring the proper functioning of your AC system.
Faulty control board
The control board is the central component that regulates and coordinates the operation of various parts of your AC system. If the control board is faulty, it can cause your AC unit to not turn on or function erratically. Here’s what you need to know about a faulty control board and how to address the issue:
- Recognize the signs of a faulty control board: Some common signs of a defective control board include the AC unit not responding to thermostat commands, incorrect temperature readings on the thermostat, frequent system cycling, or a complete failure of the AC unit to turn on.
- Check the power supply: Before assuming the control board is at fault, make sure that the AC unit is receiving power. Check the circuit breaker panel to ensure that the circuit breaker for the AC unit is not tripped. Additionally, confirm that the power switch for the AC unit is turned on.
- Inspect for visible damage: Visually inspect the control board for any signs of damage, such as burnt-out components, discolored areas, or loose connections. If you notice any obvious damage, it’s likely a more serious issue that requires professional attention.
- Verify wiring connections: Ensure that all wiring connections to the control board are secure and properly fitted. Loose or faulty connections can cause communication problems and lead to a malfunctioning control board.
- Test the control board: If you have the technical knowledge and access to the necessary equipment, you can test the control board with a multimeter to determine if it is functioning correctly. Follow the manufacturer’s guidelines and instructions specific to your control board to perform the test accurately.
- Consult a professional: Diagnosing and repairing a faulty control board is best left to a qualified HVAC technician. They can accurately assess the control board and determine if it needs repair or replacement. A professional technician will have the expertise and specialized tools required for this task.
- Consider upgrading to a smart thermostat: If the control board continues to malfunction, you may want to consider upgrading to a smart thermostat. Smart thermostats offer advanced features and improved control over your AC system. They can provide a more reliable and efficient way to regulate the cooling of your home.
A faulty control board is a complex issue that requires professional expertise to diagnose and repair. Attempting to repair or replace a control board without the necessary knowledge and experience can lead to further damage and may void any existing warranties.
If you suspect a faulty control board or notice any signs of control board failure in your AC unit, contact a licensed HVAC technician. They can accurately diagnose the issue and recommend the best course of action to restore your AC unit’s proper functioning.
Troubleshooting steps for a non-working AC unit
When your AC unit refuses to turn on, it can be frustrating and uncomfortable, especially during hot summer days. However, there are several troubleshooting steps you can take to identify and potentially resolve the issue before contacting a professional. Here are some essential steps to troubleshoot a non-working AC unit:
- Check the power: Ensure that the AC unit is receiving power. Verify that the circuit breaker for the AC unit is not tripped and that the power switch on the unit itself is turned on. Additionally, make sure the electrical outlet is functioning correctly.
- Inspect the thermostat: Check the thermostat settings to ensure it is set to a temperature lower than the current room temperature. If the thermostat is battery-powered, replace the batteries. Verify that the thermostat is properly connected to the AC unit and not obstructed by any objects.
- Change the air filter: A dirty or clogged air filter can restrict airflow and cause the AC unit to shut off. Check the air filter and clean or replace it if necessary. Regularly maintaining clean air filters can prevent future issues.
- Examine the condensate drain line: A clogged condensate drain line can trigger the overflow switch and shut off the AC unit. Clear any blockages or debris in the drain line and ensure the condensate pan is not full.
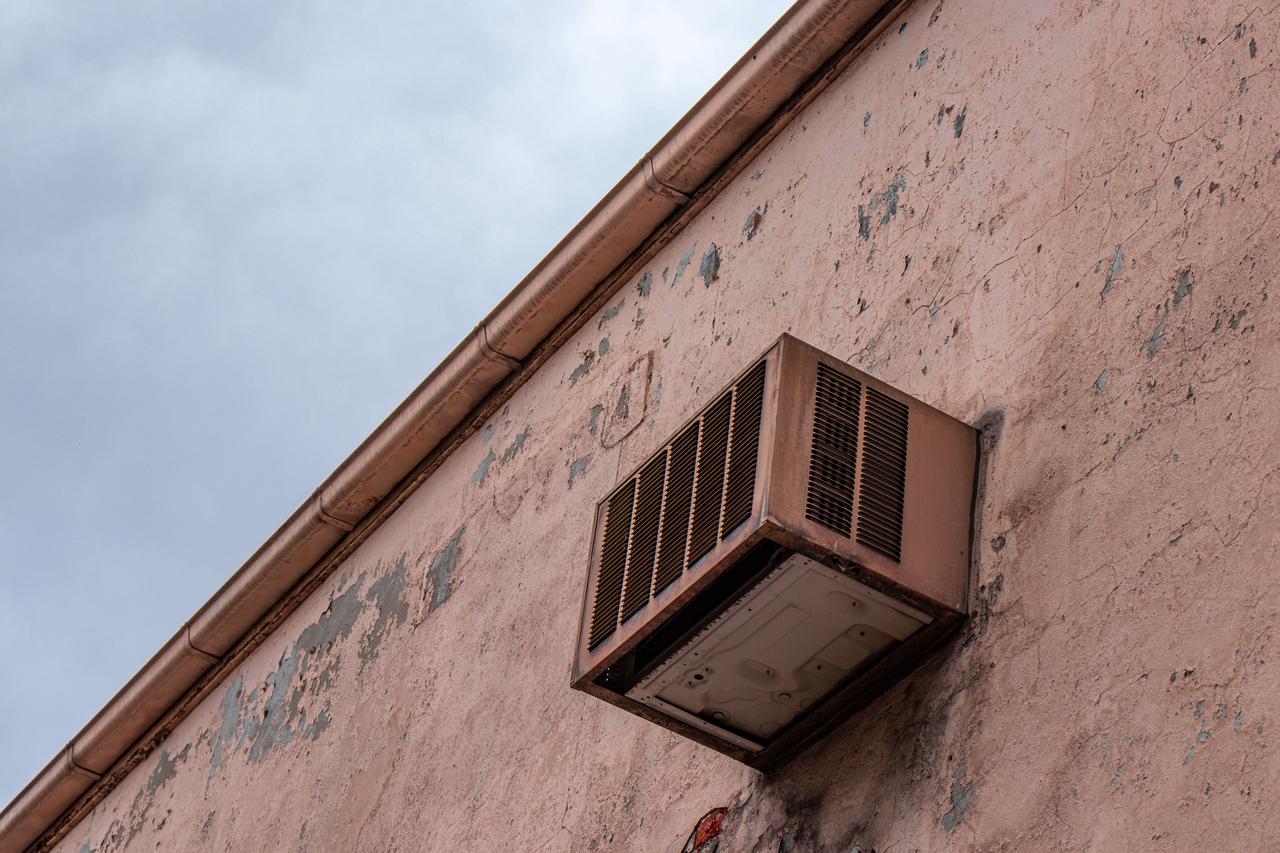
- Inspect the outdoor unit: Check the outdoor unit for any visible damage or obstructions. Clear away any debris, grass, or plants that may be obstructing the unit’s airflow. Ensure that the fan blades are not damaged or obstructed.
- Check for refrigerant leaks: Look for signs of refrigerant leaks, such as oily spots or ice formation on the refrigerant lines. If you suspect a refrigerant leak, contact a professional HVAC technician to handle the issue, as refrigerant handling requires specialized knowledge and equipment.
- Reset the unit: Occasionally, resetting the AC unit can resolve minor issues. Turn off the AC unit from the thermostat and the circuit breaker panel. Wait for a few minutes and then turn on the power again.
If you have gone through these troubleshooting steps and your AC unit still does not turn on or function correctly, it may be time to seek professional assistance. A qualified HVAC technician can accurately diagnose the problem, provide proper repairs, and ensure the optimal functioning of your AC system.
Remember, AC systems involve electrical components and can be complicated to troubleshoot. If you are unsure or uncomfortable with these steps, it’s always best to contact a professional technician to avoid any risks or further damage to your AC unit.
Read more: Why Does My Car Shake When I Turn On The AC
Conclusion
A non-working AC unit can be a source of frustration, especially during the hot summer months. However, by understanding the common reasons for an AC unit not turning on and following the appropriate troubleshooting steps, you can potentially resolve the issue and restore comfort to your home. From power issues and thermostat problems to faulty wiring, condensate overflow switch triggers, dirty air filters, refrigerant leaks, malfunctioning compressors, blower motor or fan problems, defective capacitors, and faulty control boards, there are various factors that can contribute to a non-working AC unit.
By systematically addressing each potential issue, you can identify the root cause and determine whether you can resolve it yourself or if professional assistance is required. However, it’s important to prioritize your safety and take caution when dealing with electrical components or complex repairs. If you are unsure or uncomfortable with any of the troubleshooting steps, it’s best to consult a qualified HVAC technician.
Regular maintenance, such as cleaning or replacing air filters, scheduling professional inspections, and addressing any issues promptly, can help prevent AC unit problems from occurring in the first place. Additionally, being mindful of the age and warranty of your AC unit, considering upgrades to smart thermostats, and relying on professionals for repairs or replacements are all important factors to consider when dealing with a non-working AC unit.
In conclusion, troubleshooting a non-working AC unit requires patience, attention to detail, and an understanding of the various components and potential issues. By following the troubleshooting steps outlined in this article and seeking professional assistance when needed, you can increase the chances of resolving the issue and enjoying a comfortably cooled home once again.
Frequently Asked Questions about Why Is My AC Unit Not Turning On
Was this page helpful?
At Storables.com, we guarantee accurate and reliable information. Our content, validated by Expert Board Contributors, is crafted following stringent Editorial Policies. We're committed to providing you with well-researched, expert-backed insights for all your informational needs.


0 thoughts on “Why Is My AC Unit Not Turning On”