Articles
Why Is My Portable AC Leaking Water
Modified: October 20, 2024
Discover why your portable AC is leaking water with these informative articles. Find out the common causes and how to fix it.
(Many of the links in this article redirect to a specific reviewed product. Your purchase of these products through affiliate links helps to generate commission for Storables.com, at no extra cost. Learn more)
Introduction
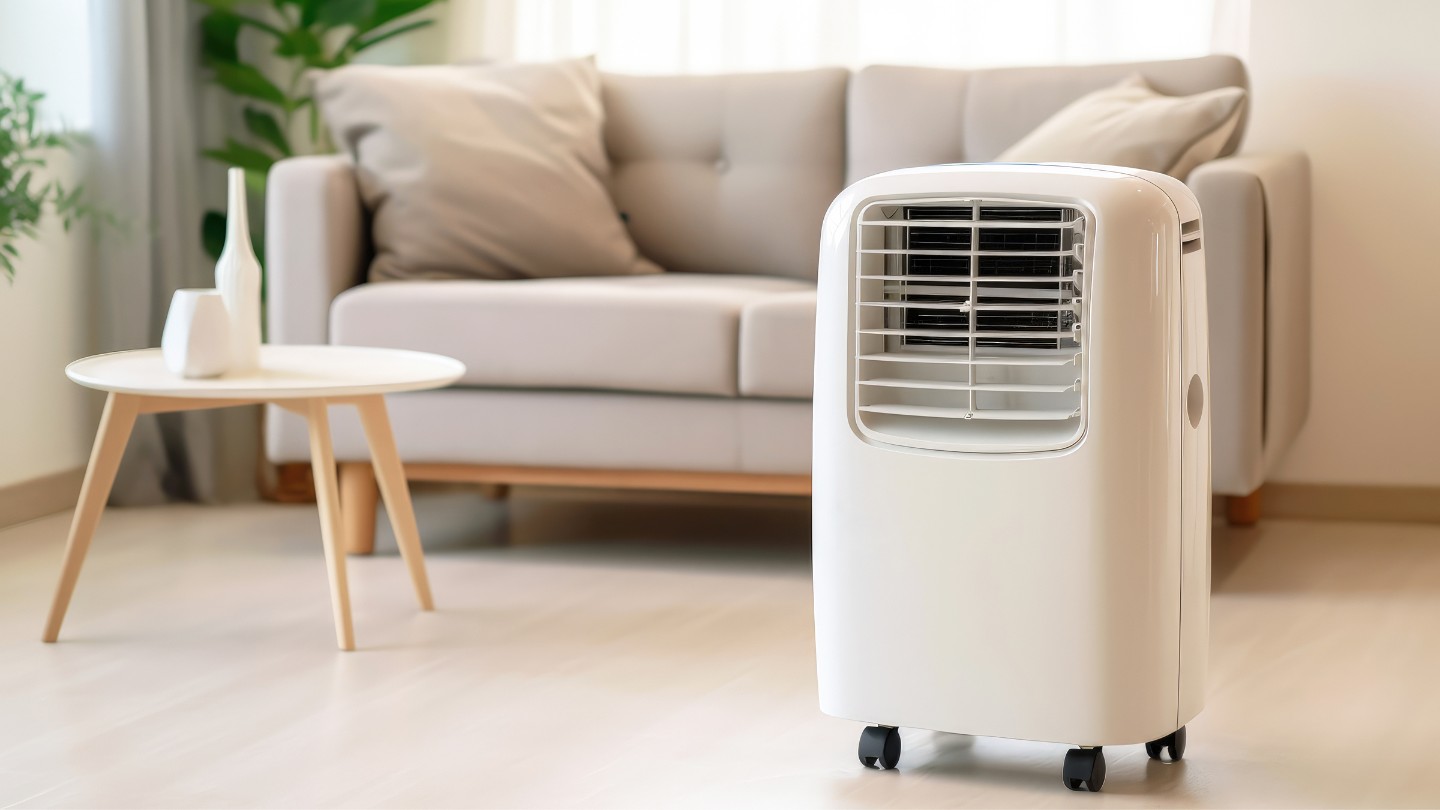
Portable air conditioners (ACs) are a convenient solution for cooling specific areas in homes or offices. They offer flexibility and mobility, allowing you to move them from room to room as needed. However, you may encounter some common issues with portable AC units, such as water leakage.
Water leakage can be a frustrating problem to deal with, as it not only creates a mess but can also cause damage to your floors, furniture, or walls. Understanding the causes of water leakage in portable AC units is crucial in effectively resolving the issue and preventing further damage.
In this article, we will explore the common causes of water leakage in portable AC units, as well as provide helpful tips on how to fix these issues. So, if you’re tired of finding puddles of water around your portable AC, keep reading to discover the solutions.
Key Takeaways:
- Keep your portable AC unit free from water leakage by regularly cleaning the drainage system and ensuring proper installation. Addressing common causes such as low refrigerant levels and condensation buildup can prevent potential damage and maintain efficient cooling.
- Don’t let water leakage ruin your cooling experience. Take proactive steps to unclog the drainage system, check and refill the refrigerant, and address condensation buildup. Proper installation and regular maintenance are key to enjoying hassle-free comfort.
Read more: Why Does My Window AC Leak Water
Understanding Portable AC Units
Before delving into the causes of water leakage, it’s important to have a basic understanding of how portable AC units work. These units operate on a similar principle to traditional air conditioning systems, but with a few key differences.
A portable AC consists of four main components: a compressor, a condenser, an expansion valve, and an evaporator. The compressor and condenser are located in the outdoor unit, while the expansion valve and evaporator are housed in the indoor unit.
The refrigerant, a chemical substance that absorbs and releases heat, flows through these components, facilitating the cooling process. The warm air from your room is drawn into the unit, where it passes over the evaporator coils. The refrigerant absorbs the heat from the air, lowering its temperature.
As the air cools, the moisture in the air condenses and collects on the evaporator coils. This moisture is drained out of the unit through a drainage system, typically a small hose or tube. However, if there is an issue with the drainage system or any other component, water leakage can occur.
Now that you have a general understanding of how portable AC units work, let’s explore the common causes of water leakage in these units and how to fix them.
Common Causes of Water Leakage
Water leakage in portable AC units can be caused by various factors. It’s crucial to identify the specific cause in order to effectively resolve the issue. Here are the most common causes of water leakage in portable AC units:
- Clogged Drainage System: Over time, the drainage system of a portable AC unit can become clogged with dust, dirt, or debris. This blockage prevents the water from properly draining out of the unit, leading to leakage. Regular cleaning and maintenance of the drainage system can help prevent this issue.
- Low Refrigerant Level: If the refrigerant level is too low, it can cause the evaporator coils to freeze up. When the unit defrosts, excess water can drip and leak. A professional technician should be consulted to inspect and refill the refrigerant to the appropriate level.
- Improper Installation or Setup: Incorrect installation or improper setup of the portable AC unit can result in water leakage. If the unit is not properly leveled, tilted backward, or placed on an uneven surface, it can cause water to pool and leak. Ensuring the unit is installed correctly is important to prevent this issue.
- Condensation Buildup: In humid environments, condensation can build up more rapidly on the evaporator coils. If the amount of condensation exceeds the drainage capacity of the unit, water leakage can occur. Using a dehumidifier in conjunction with the portable AC unit can help reduce condensation.
- Cracked or Damaged Drain Pan: The drain pan, located under the evaporator coils, collects the condensate water and directs it towards the drainage system. If the drain pan is cracked or damaged, water can leak out. In such cases, the drain pan may need to be replaced to stop the leakage.
By understanding these common causes of water leakage in portable AC units, you can take the necessary steps to resolve the issue. In the next section, we will discuss the solutions for fixing water leakage problems in detail.
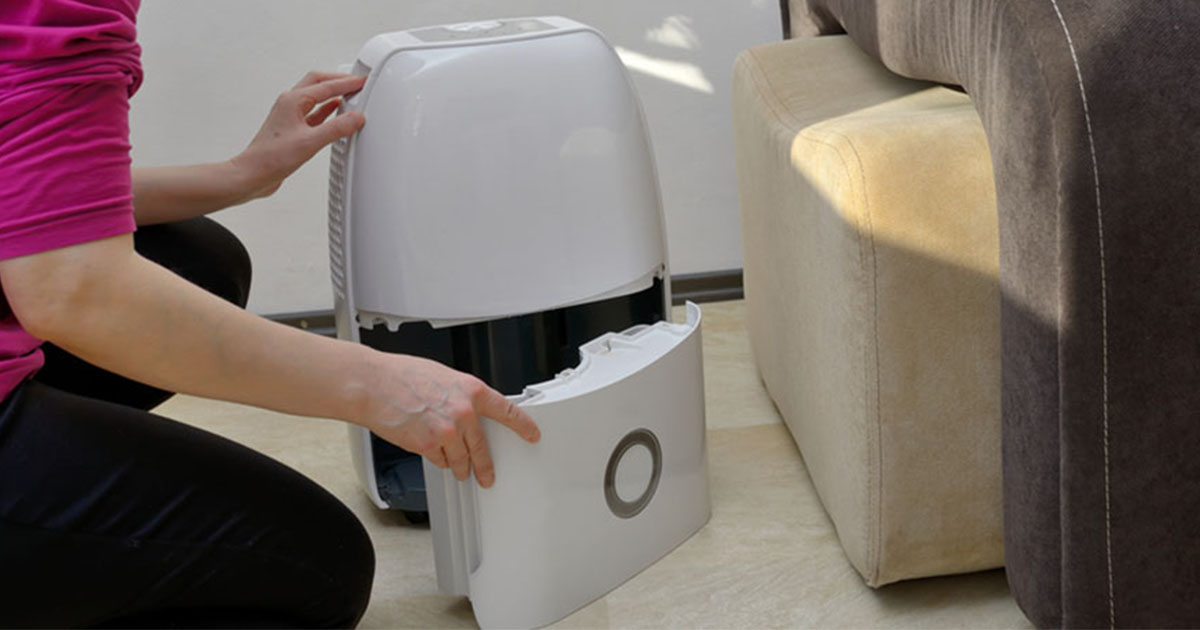
Clogged Drainage System
A clogged drainage system is one of the most common causes of water leakage in portable AC units. Over time, dust, dirt, and debris can accumulate in the drainage system, obstructing the flow of water. When the drainage system is clogged, the water has nowhere to go and ends up leaking out of the unit.
The best way to fix a clogged drainage system is by cleaning it thoroughly. Here’s how to do it:
- Turn off the portable AC unit and unplug it from the power source for safety.
- Locate the drainage hose or tube at the back of the unit. It is usually a small plastic tube.
- Remove the drainage tube from the unit and check for any visible obstruction. Use a flashlight to inspect the tube for any blockage.
- If you notice any debris or clog, gently remove it using a long, flexible brush or a pipe cleaner. Be careful not to damage the tube.
- Once the drainage tube is cleaned, fill a basin or bucket with warm water and a mild detergent.
- Insert one end of the drainage tube into the basin or bucket and flush it with the soapy water. This will help remove any remaining dirt or residue.
- Rinse the drainage tube with clean water to ensure all the soap is removed.
- After the drainage tube is clean, reattach it to the unit securely.
Once you have cleaned the drainage system, test the portable AC unit to ensure that water is draining properly and no leakage occurs. If the issue persists, it may be necessary to seek professional assistance.
Regular maintenance, including cleaning the drainage system, is important to prevent water leakage in portable AC units. It is recommended to clean the drainage system at least once every few months or as needed, depending on the usage and environment.
Now that you know how to address a clogged drainage system, let’s move on to the next common cause of water leakage: low refrigerant level.
Low Refrigerant Level
Low refrigerant level is another common cause of water leakage in portable AC units. The refrigerant is responsible for absorbing heat from the air and cooling it down. If the refrigerant level is too low, it can result in insufficient cooling, causing the evaporator coils to freeze up.
When the frozen evaporator coils defrost, excess water can drip and leak from the unit. If you suspect that low refrigerant is causing water leakage, it is best to consult a professional technician to inspect and refill the refrigerant to the appropriate level.
The process of checking and refilling the refrigerant typically requires specialized equipment and knowledge. A professional technician will be able to accurately determine if low refrigerant is the cause of the water leakage issue and perform the necessary steps to resolve it.
It is important to note that refrigerant leaks are not a common occurrence in properly installed and maintained portable AC units. If you are experiencing water leakage due to low refrigerant, it may indicate an underlying issue, such as a leak in the system, that needs to be addressed. A technician will be able to diagnose and repair any leaks to prevent further water leakage problems.
Regular maintenance of your portable AC unit, including checking the refrigerant level, can help prevent low refrigerant issues. Additionally, keeping the unit clean and free from dust and debris can improve its overall efficiency and performance.
Now that you understand the common causes of water leakage, we will explore another possible culprit: improper installation or setup.
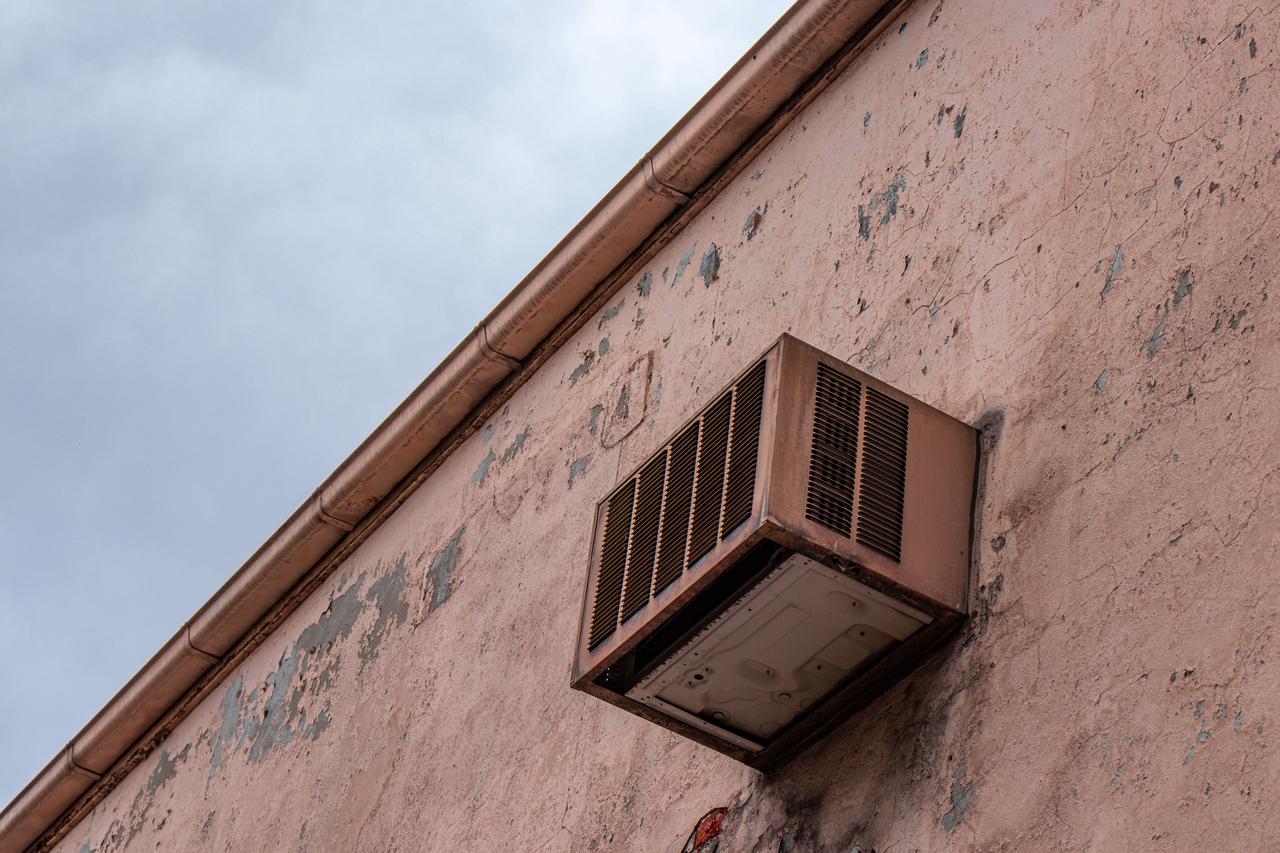
Improper Installation or Setup
Improper installation or setup of a portable AC unit can lead to water leakage issues. If the unit is not installed correctly or is not set up properly, it can cause water to pool and leak. Here are a few factors to consider when ensuring proper installation and setup:
- Leveling: It is essential to level the portable AC unit to prevent water from collecting and leaking. Use a bubble level to ensure that the unit is evenly balanced. If the unit is tilted backward or placed on an uneven surface, water may not drain properly and can result in leakage.
- Adequate Ventilation: Portable AC units require proper ventilation for optimal performance and to prevent water leakage. Make sure that the unit is placed in an area with adequate airflow and that the exhaust hose is properly connected and vented outside. Poor ventilation can cause the unit to operate inefficiently and increase the risk of water leakage.
- Sealing Gaps: Check for any gaps or openings around the window or door where the portable AC unit is installed. These gaps can allow warm air from outside to enter the room, causing excessive condensation and water leakage. Use weatherstripping or sealant to seal any gaps and ensure a proper seal.
- Proper Draining: Ensure that the drainage system of the unit is correctly set up. Check that the drainage tube or hose is securely connected and that it is directed towards a suitable drainage point. Avoid kinks or obstructions in the tube that could impede the flow of water.
If you suspect that improper installation or setup is causing water leakage, carefully review the unit’s manual for specific instructions and troubleshooting tips. Alternatively, you can seek the assistance of a professional installer or technician to ensure that the unit is correctly installed and set up.
By addressing any issues related to installation or setup, you can mitigate the risk of water leakage and promote the proper functioning of your portable AC unit.
Next, we will discuss condensation buildup and its role in water leakage in portable AC units.
Condensation Buildup
Condensation buildup is another factor that can contribute to water leakage in portable AC units, especially in humid environments. As the portable AC unit cools the air, moisture in the air condenses on the evaporator coils, forming water droplets.
In normal circumstances, the condensate water is collected and directed towards the drainage system of the unit, where it is safely drained away. However, in high humidity conditions, the amount of condensation can exceed the drainage capacity of the unit, resulting in water leakage.
To mitigate condensation buildup and prevent water leakage, consider the following steps:
- Dehumidifiers: Using a dehumidifier in conjunction with your portable AC unit can help reduce the overall humidity in the room. By removing excess moisture from the air, you can reduce the workload on the AC unit and minimize condensation buildup.
- Ventilation: Proper ventilation is crucial to prevent condensation. Ensure that the room where the portable AC unit is located has adequate airflow. This can be achieved by using fans or opening windows and doors to promote air circulation.
- Temperature Settings: Adjust the temperature settings of the portable AC unit to a comfortable level that still provides adequate cooling. Setting the unit’s temperature too low can cause excessive condensation and increase the risk of water leakage.
- Clean Evaporator Coils: Over time, dust and dirt can accumulate on the evaporator coils, hindering their ability to effectively cool the air and promote proper drainage of condensate water. Regularly cleaning the evaporator coils can help ensure optimal performance and reduce the chances of condensation buildup.
By taking these preventative measures, you can help minimize condensation buildup and reduce the likelihood of water leakage in your portable AC unit.
Next, we will explore the possibility of a cracked or damaged drain pan as a cause of water leakage.
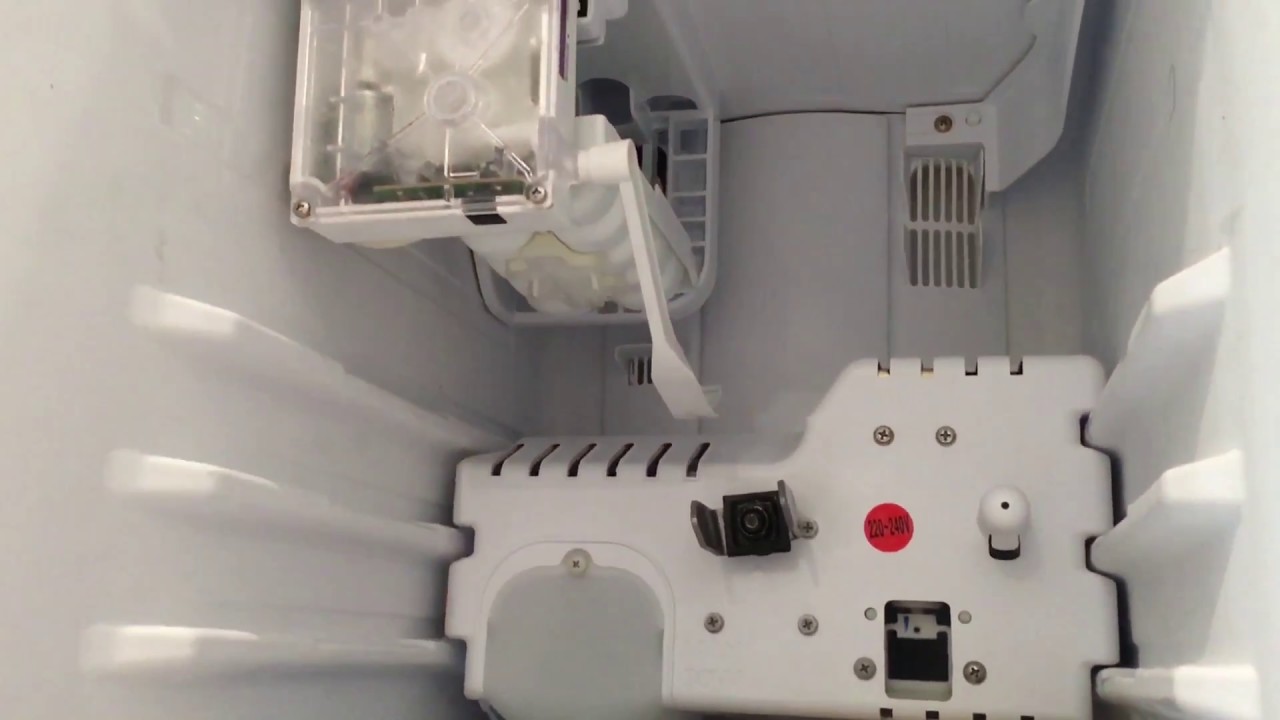
Cracked or Damaged Drain Pan
A cracked or damaged drain pan is another potential cause of water leakage in portable AC units. The drain pan, located beneath the evaporator coils, collects the condensate water and directs it towards the drainage system.
If the drain pan is cracked or damaged, the water may leak out instead of being properly drained. This can result in water puddles around the unit and potentially cause damage to your floors or furniture.
To address this issue, follow these steps:
- Inspect Drain Pan: Carefully examine the drain pan for any visible cracks or signs of damage. Use a flashlight if necessary to get a clear view of the condition of the pan.
- Replace Damaged Pan: If you identify any cracks or damage to the drain pan, it will need to be replaced. Contact the manufacturer or consult a professional technician to obtain a compatible replacement.
- Installation: When installing the new drain pan, make sure it is aligned properly and securely in place. Follow the manufacturer’s instructions for the correct installation procedure.
- Check for Leaks: Once the new drain pan is installed, test the portable AC unit to ensure that water is no longer leaking. Monitor the unit closely for any signs of leakage and make any necessary adjustments if needed.
Replacing a cracked or damaged drain pan may require some technical expertise. If you are uncomfortable performing the replacement yourself, it is advisable to seek the assistance of a professional technician to ensure proper installation and avoid any further issues.
Regularly inspecting the drain pan for any signs of damage and addressing them promptly can help prevent water leakage and maintain the functionality of your portable AC unit.
Now that we have explored the common causes of water leakage and their potential solutions, let’s move on to the next section on how to fix water leakage issues in portable AC units.
Check the drainage system and make sure the unit is level. Clean the air filter and ensure the seals are tight. If the problem persists, contact the manufacturer for further assistance.
How to Fix Water Leakage Issues
If you are experiencing water leakage in your portable AC unit, there are several steps you can take to fix the issue. These solutions will depend on the specific cause of the leakage. Here are some common methods to address water leakage problems:
- Cleaning and Unclogging the Drainage System: As mentioned earlier, a clogged drainage system is a common cause of water leakage. Regularly clean the drainage tube or hose and remove any debris or blockages. This will ensure that the water can flow freely and be properly drained.
- Checking and Refilling the Refrigerant: If the water leakage is caused by low refrigerant levels, it is best to consult a professional technician to check the refrigerant levels and refill if necessary. They will have the knowledge and equipment to properly handle the refrigerant and ensure the unit operates efficiently.
- Properly Installing and Setting Up the AC Unit: Ensure that the portable AC unit is properly installed and set up. Check for levelness, proper ventilation, and appropriate sealing of gaps. Taking these steps will help prevent water leakage caused by improper installation or setup.
- Removing Excess Condensation: In humid conditions, excessive condensation can lead to water leakage. Utilize a dehumidifier in conjunction with the portable AC unit to lower the humidity levels in the room. This will help reduce the formation of condensation and minimize water leakage.
- Replacing a Cracked or Damaged Drain Pan: If the drain pan is cracked or damaged, it needs to be replaced. Contact the manufacturer or a professional technician to obtain a compatible replacement and ensure proper installation. This will prevent water from leaking out of the drain pan and causing further issues.
Remember, if you are unsure about how to fix water leakage issues in your portable AC unit, it is best to consult a professional technician who specializes in AC repairs. They have the expertise to diagnose and address the specific problem, ensuring that the unit operates efficiently and effectively.
Regular maintenance, including cleaning and inspection of the unit, can also help prevent water leakage issues in the future. By keeping the portable AC unit in good condition, you can enjoy cool and comfortable surroundings without the worry of water leakage.
Now that we have covered the various methods for fixing water leakage issues, it’s time to wrap up our article.
Read more: Why Is My Water Pump Leaking
Cleaning and Unclogging the Drainage System
One of the common causes of water leakage in portable AC units is a clogged drainage system. Over time, dust, dirt, and debris can accumulate in the drainage tube or hose, impeding the flow of water. This blockage can cause the water to back up and leak out of the unit.
To fix this issue, follow these steps to clean and unclog the drainage system:
- Turn off and unplug the portable AC unit: Before attempting any maintenance or cleaning, ensure that the unit is turned off and unplugged from the power source to prevent any accidents.
- Locate the drainage tube or hose: Usually, the drainage tube or hose is located at the back of the portable AC unit. It is a small, flexible plastic component.
- Remove the drainage tube or hose: Carefully detach the drainage tube or hose from the unit. Be cautious not to damage or break the connection or any other components in the process.
- Inspect for blockages: Examine the drainage tube or hose for any visible debris or blockages. Look for dirt, dust, or trapped objects that may impede the water flow.
- Clean the tube or hose: Use a long, flexible brush or a pipe cleaner to gently remove the debris or blockages from the drainage system. Be cautious not to push the debris further into the tube or hose.
- Flush with water: Fill a basin or bucket with warm water and a mild detergent. Insert one end of the drainage tube or hose into the basin or bucket and flush it with the soapy water. This will help remove any remaining dirt or residue.
- Rinse with clean water: After flushing with soapy water, rinse the drainage tube or hose with clean water to ensure all the soap is removed.
- Reattach the drainage tube or hose: Once the drainage system is clean, securely reattach the drainage tube or hose to the unit.
After cleaning and unclogging the drainage system, turn on the portable AC unit and monitor it for any signs of water leakage. Ensure that the water is properly draining out and not pooling near the unit.
Regular cleaning and maintenance of the drainage system, typically once every few months or as needed, can help prevent water leakage issues and keep your portable AC unit functioning efficiently.
With the drainage system cleaned and unclogged, you can now enjoy the cool and comfortable air without the worry of water leakage.
Now that we have covered the process of cleaning and unclogging the drainage system, let’s conclude our article.
Checking and Refilling the Refrigerant
A common cause of water leakage in portable AC units is a low refrigerant level. The refrigerant is the chemical substance responsible for cooling the air in the unit. When the refrigerant level is too low, it can lead to inadequate cooling, causing the evaporator coils to freeze up. As these coils defrost, excess water can drip and leak from the unit.
If you suspect that a low refrigerant level is the cause of the water leakage, it is important to have it checked and refilled by a professional technician. Here is the process involved:
- Contact a professional technician: Reach out to a licensed HVAC technician who has experience with portable AC units. They will have the necessary equipment and expertise to handle refrigerant-related issues safely and effectively.
- Inspection of the unit: The technician will inspect the portable AC unit to evaluate the refrigerant level and check for any signs of leaks or other issues. They may also assess the overall condition of the unit and its components.
- Refilling the refrigerant: If the technician determines that the refrigerant level is indeed low, they will proceed to refill it. This process involves connecting the unit to a refrigerant supply and carefully metering the appropriate amount of refrigerant into the system to reach the correct level.
- Leak detection and repair: In some cases, low refrigerant levels may be indicative of a refrigerant leak. The technician will perform leak detection tests to identify any leaks in the system. If they find a leak, they will proceed with the necessary repairs to ensure that the refrigerant remains at the correct level and prevent further water leakage.
- System performance check: After refilling the refrigerant and making any necessary repairs, the technician will conduct a thorough system performance check. This check ensures that the unit is functioning properly and that there are no remaining issues that could contribute to water leakage.
It’s important to note that handling refrigerant requires specialized knowledge and equipment to ensure safety and proper handling. Attempting to refill the refrigerant yourself can lead to potential hazards and may further damage the unit. It is always recommended to seek the assistance of a professional technician with proper certification and experience.
By having a professional technician check and refill the refrigerant in your portable AC unit, you can ensure that it operates at its optimal level, reducing the risk of water leakage and improving its overall performance.
Now that you understand the process of checking and refilling the refrigerant, let’s move on to explore proper installation and setup of the AC unit.
Properly Installing and Setting Up the AC Unit
Improper installation or setup of a portable AC unit can often lead to water leakage issues. To ensure the unit operates efficiently and effectively, it is important to follow proper installation and setup procedures. Here are some key considerations:
- Location: Choose an appropriate location for the portable AC unit. Consider factors such as proximity to an electrical outlet, access to a window for venting, and the size of the room or area to be cooled. Avoid placing the unit in direct sunlight or near heat sources, as this can affect its performance.
- Leveling: Once you have chosen the location, ensure that the unit is level. Use a bubble level to check if it is evenly balanced on the surface it is placed on. If the unit is tilted backward or to the side, water may not flow properly, leading to leakage. Adjust the unit or use leveling pads to achieve a level position.
- Ventilation: Proper ventilation is crucial for the efficient operation of a portable AC unit. Make sure that the unit is positioned near a window or door where the exhaust hose can be vented outside. Ensure that the exhaust hose is securely connected to both the unit and the window venting kit to prevent hot air from entering the room and causing excessive condensation.
- Sealing gaps: Inspect the area around the window or door where the exhaust hose is vented. Check for any gaps or openings that allow warm air from outside to enter the room. Use weatherstripping or sealant to seal these gaps and ensure a tight seal. This prevents excess humidity from entering the room and reduces the risk of water leakage.
- Condensate drainage: Ensure that the portable AC unit is properly connected to a suitable drainage point. The drain pan collects the condensate water and directs it towards the drainage system. Validate that the drainage tube or hose is securely connected and free from obstructions or kinks that could impede the flow of water.
By properly installing and setting up your portable AC unit, you can minimize the risk of water leakage and optimize its cooling performance. Following the manufacturer’s instructions and guidelines specific to your unit is essential to ensure proper installation.
If you are unsure about the installation process, it is recommended to seek professional assistance. HVAC technicians have the expertise and experience to expertly install the unit and address any potential issues that could lead to water leakage.
Proper installation and setup of the AC unit are crucial factors in preventing water leakage and maximizing its efficiency. Now, let’s move on to the topic of removing excess condensation.
Removing Excess Condensation
In environments with high humidity, excess condensation can be a common cause of water leakage in portable AC units. When the air is humid, the moisture in the air condenses on the evaporator coils of the AC unit, resulting in water droplets.
To prevent water leakage from excess condensation, there are several steps you can take:
- Use a Dehumidifier: Utilizing a dehumidifier in conjunction with your portable AC unit can help reduce the overall humidity in the room. By removing excess moisture from the air, it reduces the workload on the AC unit and minimizes the formation of condensation.
- Proper Ventilation: Ensure that the room in which the portable AC unit is installed has proper ventilation. Good airflow helps to reduce humidity levels and prevents moisture from accumulating in the air. Use fans or open windows and doors to promote air circulation and reduce condensation.
- Optimize Temperature Settings: Adjust the temperature settings of the portable AC unit to strike a balance between cooling and condensation. Setting the temperature too low can cause the evaporator coils to become excessively cold, resulting in rapid condensation and potential water leakage. Aim for a comfortable temperature that is effective in cooling the room without excessive condensation buildup.
- Regular Maintenance: Regularly clean the evaporator coils of the AC unit to eliminate any dust or dirt accumulation that can hinder the cooling process. Keeping the evaporator coils clean can lead to efficient cooling, reducing the chances of excessive condensation and subsequent water leakage.
By implementing these measures, you can effectively reduce excess condensation and minimize the risk of water leakage from your portable AC unit. It is important to note that if the humidity levels in your area are consistently high, you may need to rely more heavily on dehumidifiers and proper ventilation to manage condensation.
If you continue to experience water leakage issues from excessive condensation despite taking these steps, it may be advisable to consult with a professional technician. They can assess the situation and offer further guidance on resolving the problem.
Now that you understand how to address excess condensation, let’s move on to discuss the possibility of a cracked or damaged drain pan as a cause of water leakage.
Read more: Why Is My Freezer Leaking Water
Replacing a Cracked or Damaged Drain Pan
If you have a cracked or damaged drain pan in your portable AC unit, it can be a significant source of water leakage. The drain pan, located beneath the evaporator coils, collects the condensate water and directs it towards the drainage system. When the drain pan is compromised, water can escape and cause leaks.
To resolve this issue, you’ll need to replace the damaged drain pan. Here is a step-by-step guide on how to do it:
- Turn off and unplug the portable AC unit: Before proceeding with any maintenance or repairs, ensure that the unit is switched off and safely unplugged from the power source.
- Locate the drain pan: The drain pan is typically located underneath the evaporator coils. Consult the manufacturer’s manual or technical documentation to verify the exact location and access points of the drain pan.
- Remove the drain pan: Carefully detach or slide out the drain pan from its position. Take note of the connected parts and any specific screws or clips that may need to be removed.
- Inspect the drain pan: Examine the drain pan closely for any cracks, damage, or signs of wear. Pay attention to the bottom surface and edges where water may escape. If you detect any issues, it’s essential to replace the drain pan promptly.
- Obtain a compatible replacement drain pan: Contact the manufacturer or an authorized distributor to acquire a compatible replacement drain pan for your portable AC unit. Provide them with the model number or other relevant details to ensure a proper fit.
- Install the new drain pan: Insert the new drain pan into the designated space, aligning it with the connection points. Follow the manufacturer’s instructions or refer to the technical documentation for guidance on proper installation. Ensure a secure fit and make any necessary adjustments.
- Reassemble the AC unit: Put back any screws, clips, or components that were removed during the process. Double-check all connections and ensure everything is properly in place.
- Test for water leakage: Once the new drain pan is installed, turn on the portable AC unit and monitor it closely for any signs of water leakage. Check that the water is flowing correctly into the drain pan and not escaping from any gaps or cracks.
If you are uncomfortable or unsure about replacing the drain pan yourself, it is recommended to seek the assistance of a professional technician. They have the experience and expertise to handle the replacement process properly and can ensure everything is working optimally.
Remember, regular maintenance and cleaning of your portable AC unit can help prevent drain pan damage and prolong its lifespan. By addressing a cracked or damaged drain pan promptly, you can eliminate water leakage and maintain the efficient operation of your portable AC unit.
Now that you know how to replace a cracked or damaged drain pan, let’s summarize the key points discussed throughout this article.
Conclusion
Water leakage in portable AC units can be a frustrating and potentially damaging issue. Fortunately, by understanding the common causes and implementing the appropriate solutions, you can effectively address and prevent water leakage problems.
We discussed several common causes of water leakage, including a clogged drainage system, low refrigerant levels, improper installation or setup, condensation buildup, and a cracked or damaged drain pan. Each of these issues requires specific actions to resolve the problem.
To fix a clogged drainage system, regular cleaning and unclogging of the drainage tube or hose are necessary. This ensures that water can flow freely and be properly drained away from the unit.
When dealing with low refrigerant levels, it is essential to consult a professional technician who can check and refill the refrigerant to the appropriate level. They can also detect and repair any potential leaks in the system.
For proper installation and setup, ensure that the portable AC unit is level, well-ventilated, and properly sealed against gaps. This promotes efficient operation and reduces the risk of water leakage.
To address condensation buildup, using a dehumidifier, maintaining proper ventilation, and optimizing temperature settings can help minimize condensation and prevent water leakage.
If you have a cracked or damaged drain pan, it is necessary to replace it promptly. Contact the manufacturer or a professional technician to obtain a compatible replacement and ensure a secure fit.
Remember, regular maintenance, such as cleaning the evaporator coils and inspecting the drainage system, can help prevent future water leakage issues. It is also crucial to follow the manufacturer’s guidelines and recommendations for maintenance and care.
If you are unsure about any aspect of fixing water leakage in your portable AC unit, it is best to consult a professional technician. They have the expertise and knowledge to assess and resolve the problem effectively.
By implementing the appropriate solutions and ensuring proper maintenance, you can enjoy the cool comfort of your portable AC unit without the worry of water leakage. Stay proactive, attentive, and take the necessary steps to keep your portable AC unit operating at its best.
Now that you are equipped with the knowledge to tackle water leakage issues, you can maintain a dry and hassle-free cooling experience. Don’t let water leakage dampen your comfort!
Frequently Asked Questions about Why Is My Portable AC Leaking Water
Was this page helpful?
At Storables.com, we guarantee accurate and reliable information. Our content, validated by Expert Board Contributors, is crafted following stringent Editorial Policies. We're committed to providing you with well-researched, expert-backed insights for all your informational needs.

0 thoughts on “Why Is My Portable AC Leaking Water”