
Articles
Why Is My Floor Creaking
Modified: December 7, 2023
Discover the reasons why your floor is creaking and find helpful articles to address and fix this common issue.
(Many of the links in this article redirect to a specific reviewed product. Your purchase of these products through affiliate links helps to generate commission for Storables.com, at no extra cost. Learn more)
Introduction
There’s nothing more frustrating than walking across a floor that constantly emits loud creaking noises. Not only is it annoying, but it can also be a cause for concern. A creaking floor can indicate underlying issues with the subfloor, floorboards, or even the structural integrity of your home. Understanding the common causes of creaking floors and how to fix them can help restore peace and quiet to your living space.
There are several factors that can contribute to a creaking floor. It’s important to identify the source of the problem before attempting to fix it. In this article, we will explore the most common causes of creaking floors, provide tips on how to determine the source of the creaking, and discuss effective solutions to eliminate those annoying noises once and for all.
So, why is your floor creaking? Let’s delve into the possible culprits and find ways to address them.
Key Takeaways:
- Don’t ignore creaking floors! Address subfloor issues, loose floorboards, and moisture problems promptly to restore peace and stability to your living space.
- Seeking professional help for structural problems is crucial. Don’t delay addressing creaking floors to ensure the safety and integrity of your home.
Read more: Why Does My Attic Creak
Common Causes of Creaking Floors
1. Subfloor Issues: One of the primary reasons for creaking floors is problems with the subfloor. Over time, the subfloor may shift or become uneven, causing the floorboards above it to rub against each other and create creaking sounds.
2. Loose Floorboards: Another common cause of creaking floors is loose floorboards. If the floorboards are not properly secured or have become loose over time, they can move and produce creaking noises when walked upon.
3. Poor Installation: Improper installation of the flooring can also lead to creaking sounds. If the floorboards were not installed securely or if gaps were left between them during installation, they can move and produce creaking noises.
4. Humidity and Moisture: Excessive humidity or moisture in the environment can cause the floorboards to expand and contract. This constant movement can result in creaking sounds as the boards rub against each other or against the subfloor.
5. Age and Wear: As floors age, the materials may deteriorate, causing the floorboards to become worn out or warped. This can result in creaking sounds when weight is applied to the floor.
6. Structural Problems: In some cases, creaking floors may be a symptom of underlying structural issues in the building. If the support beams or joists are damaged or not properly aligned, it can cause the floor to flex and create creaking noises.
Identifying the underlying cause of the creaking floors is crucial for effective troubleshooting and repair. In the next section, we will discuss how to determine the specific source of the creaking sounds.
Subfloor Issues
Subfloor issues are a common culprit behind creaking floors. The subfloor is the layer of material that sits beneath the finished floor, providing stability and support. When there are problems with the subfloor, it can cause the floorboards to shift and rub against each other, resulting in creaking noises.
There are several subfloor issues that can contribute to floor creaking:
- Uneven Subfloor: An uneven subfloor is often caused by settling or shifting of the foundation over time. This can lead to gaps or spaces between the subfloor and the floorboards, causing them to move and produce creaking sounds.
- Subfloor Movement: When the subfloor is not securely fastened to the floor joists, it can move when weight is applied to the floor. This movement can result in creaking sounds as the floorboards rub against each other or against the subfloor.
- Subfloor Moisture: Moisture can seep into the subfloor through cracks or gaps, causing it to warp or rot. This can weaken the subfloor and lead to creaking sounds when pressure is applied to the floor.
To determine if subfloor issues are causing your creaking floors, you can perform a visual inspection and conduct some tests:
Visual Inspection: Examine the floor for any visible gaps, unevenness, or signs of moisture damage. Look for areas where the floorboards are raised or appear to be separating from the subfloor.
Test for Subfloor Movement: Stand on different areas of the floor and see if you can feel any movement or shifting beneath your feet. If there is noticeable movement, it may indicate that the subfloor is not properly secured.
Investigate Subfloor Moisture: Check for signs of moisture damage, such as stains, discoloration, or a musty smell. Use a moisture meter to measure the moisture levels in different areas of the subfloor. High levels of moisture can indicate a problem that needs to be addressed.
If you suspect subfloor issues are causing your creaking floors, it is recommended to consult a professional contractor or flooring specialist. They will be able to assess the extent of the problem and provide appropriate solutions, which may include reinforcing the subfloor, filling gaps, or replacing damaged sections.
Loose Floorboards
Loose floorboards are a common cause of creaking floors. When the floorboards are not securely fastened or have become loose over time, they can move and create creaking noises when weight is applied to them. This can be particularly annoying and disruptive, especially in high-traffic areas of your home.
Here are some potential reasons for loose floorboards:
- Incorrect Nail Placement: During the installation process, if the nails securing the floorboards were not placed in the right position or were not driven in securely, it can cause the floorboards to loosen over time.
- Wear and Tear: With regular use, the floorboards can experience wear and tear, which can lead to loosening. Over time, the constant pressure and movement can cause the nails or screws holding the boards in place to become loose.
- Seasonal Changes: Changes in temperature and humidity can cause the floorboards to expand and contract. This repeated movement can loosen the boards and result in creaking sounds.
To determine if loose floorboards are the cause of the creaking, you can perform the following inspection and tests:
Visual Inspection: Examine the floorboards closely to look for any visible signs of looseness. Pay attention to gaps between the floorboards or if any boards appear raised or uneven.
Test for Loose Floorboards: Walk across the floor and listen for creaking sounds. Use your foot or hand to apply slight pressure to different areas of the floor and see if any boards move or make noise.
If you identify loose floorboards as the cause of the creaking, here are some potential solutions:
- Tighten Nails or Screws: If the floorboards are only slightly loose, you may be able to tighten the existing nails or screws. Carefully locate the loose boards and use a hammer or screwdriver to secure them back in place.
- Add Extra Nails or Screws: For more significant loosening, you may need to add additional nails or screws to reinforce the connection between the floorboards and the subfloor.
- Replace Damaged Boards: If the floorboards are extensively damaged or have become too loose to repair, it may be necessary to replace them with new ones.
Keep in mind that fixing loose floorboards can be a DIY project, but it’s important to exercise caution and follow proper safety procedures. If you’re unsure or uncomfortable with the repair process, it’s always recommended to seek assistance from a professional flooring contractor.
Poor Installation
Poor installation of the flooring can be another common cause of creaking floors. When the floorboards are not installed properly, it can lead to gaps, unevenness, or movement, resulting in creaking noises when walked upon. This issue can occur with various types of flooring materials, such as hardwood, laminate, or engineered wood.
Here are some factors related to poor installation that can contribute to creaking floors:
- Inadequate Subfloor Preparation: If the subfloor is not properly prepared before installation, such as failing to remove debris or ensuring a level surface, it can affect how well the floorboards adhere and result in creaking sounds.
- Improper Fastening: When the floorboards are not fastened securely to the subfloor, they can move and create creaking noises. This can happen if the nails or staples are not driven in at the right angle or if adhesive is not applied evenly.
- Lack of Expansion Gap: Many flooring materials require an expansion gap around the perimeter to accommodate for natural expansion and contraction. Failing to leave enough space can cause the floorboards to push against each other, leading to creaking sounds.
To determine if poor installation is the cause of the creaking, consider the following steps:
Visual Inspection: Examine the floor for any visible signs of poor installation, such as uneven gaps between the floorboards, improper or inconsistent nail or staple placement, or signs of adhesive failure.
Consult the Installation Guidelines: Review the manufacturer’s installation guidelines for the specific flooring type you have. Check if any installation steps were skipped or if there are specific instructions for addressing creaking or movement issues.
If you suspect poor installation as the cause of the creaking, the following solutions may help resolve the problem:
- Reinstall or Tighten Floorboards: If the floorboards were not installed properly, you may need to reinstall them following the correct procedures. Alternatively, you can try tightening any loose boards by adding additional fasteners.
- Fill Gaps or Repair Adhesive: If the creaking is caused by gaps between the floorboards or adhesive failure, you can fill the gaps with a suitable filler or repair the adhesive to eliminate movement and reduce noise.
- Consult a Professional: If the creaking persists despite your attempts to fix the issue, it’s advisable to seek the assistance of a professional flooring installer. They can assess the installation and recommend the best course of action to resolve the problem.
Remember, proper installation is crucial for the longevity and performance of your flooring. If you’re uncertain about your DIY skills or you want to ensure a professional-quality installation, it’s always best to hire a qualified flooring contractor.
Read more: How To Fix Creaking Floors Under Carpet
Humidity and Moisture
Humidity and moisture can play a significant role in causing creaking floors. Excessive moisture in the environment can lead to expansion and contraction of the floorboards, resulting in creaking noises as they rub against each other or the subfloor. This problem is particularly common in areas with high humidity, such as bathrooms, kitchens, or basements.
Here are a few ways in which humidity and moisture can contribute to creaking floors:
- Wood Swelling: Wood is highly sensitive to changes in humidity levels. When the humidity is high, the moisture can penetrate the wood fibers and cause them to swell. This can lead to the floorboards rubbing against each other and producing creaking sounds.
- Wood Shrinking: Conversely, when the humidity is low, the moisture content in the wood decreases, causing it to shrink. This shrinkage can create gaps between the floorboards, which can result in creaking when weight is applied to the floor.
- Moisture Damage: Excess moisture, such as water leaks or spills, can damage the floorboards and weaken their structural integrity. This can lead to warping, buckling, or decay, all of which can contribute to creaking sounds.
To determine if humidity and moisture are causing your creaking floors, consider the following steps:
Assess Humidity Levels: Use a hygrometer to measure the humidity levels in the affected area. Ideal humidity levels for indoor spaces typically range between 30% and 50%. If the humidity exceeds these levels, it can increase the likelihood of creaking floors.
Check for Signs of Moisture Damage: Inspect the area for any signs of moisture damage, such as water stains, discoloration, or mold growth. These indicators suggest that there may be an ongoing moisture issue affecting the floorboards.
To address humidity and moisture-related creaking, you can consider the following solutions:
- Control Humidity Levels: Use dehumidifiers or air conditioners to regulate the humidity levels in your home. This can help minimize the expansion and contraction of the floorboards due to moisture fluctuations.
- Fix Water Leaks: If you discover any water leaks or sources of moisture, such as plumbing issues or leaks from windows or roofs, it’s crucial to address and repair them promptly to prevent further damage to the floorboards.
- Address Subfloor Moisture: If the subfloor is damp or has moisture issues, it’s important to address the underlying cause and repair the subfloor if necessary. This can help prevent the moisture from affecting the floorboards.
In severe cases, where the floorboards have been extensively damaged by moisture and are beyond repair, it may be necessary to replace them entirely. Consult with a professional contractor or flooring specialist for expert advice and assistance in resolving moisture-related creaking issues.
Age and Wear
As floors age and experience regular wear and tear, creaking can become more common. Over time, the materials used in the construction of the floorboards can deteriorate, leading to creaking sounds when weight is applied. This is especially prevalent in older homes or areas of high foot traffic.
Here are a few reasons why age and wear can contribute to creaking floors:
- Material Deterioration: With time, the materials used in the floorboards, such as wood, can naturally deteriorate. This can cause the wood to become more brittle or weakened, leading to creaking noises as the worn-out boards rub against each other or the subfloor.
- Loosened Connections: Over the years, the fasteners used to secure the floorboards, such as nails or screws, can become loose or worn. This can result in the boards moving and producing creaking sounds when weight is applied to the floor.
- Settling of the Structure: As a building settles over time, the floor and its components can shift. This shifting can create movements and gaps between the floorboards, causing creaking noises when pressure is applied.
Determining if age and wear are responsible for the creaking floors can involve the following steps:
Visual Inspection: Examine the floorboards for signs of wear, such as visible cracks, splintering, or noticeable gaps between the boards. Pay attention to areas that show more wear, like entryways or heavily trafficked areas.
Test for Loose or Worn Fasteners: Walk across the floor and carefully listen for any creaking sounds. Use gentle pressure with your foot or hand to identify if any boards or fasteners are loose or worn and contributing to the noises.
When addressing creaking caused by age and wear, consider the following potential solutions:
- Screw or Nail Tightening: If the creaking is due to loose or worn fasteners, you can try tightening the screws or nails. Use caution not to over-tighten, as this may cause damage to the floorboards.
- Fill Gaps or Repair Damaged Boards: Fill in any gaps between floorboards with a suitable filler to reduce movement and noise. If there are severely damaged or weakened boards, you may need to replace them.
- Consider Floor Restoration: In cases where the floorboards are extensively damaged, it may be worthwhile to consider professional floor restoration services. This can involve repairing or replacing damaged sections to restore the floor’s integrity.
It’s important to note that while some creaking due to age and wear can be minimized, it may not be entirely eliminated. However, with proper maintenance and periodic inspections, you can help prolong the lifespan of your floors and address any potential issues before they worsen.
Structural Problems
Creaking floors can sometimes be an indication of underlying structural problems within the building. These issues can range from uneven load distribution to structural movement, and they require prompt attention to prevent further damage and ensure the safety of the occupants.
Here are some common structural problems that can result in creaking floors:
- Uneven Subfloor Support: If the floor joists or support beams underneath the floor are unevenly spaced or damaged, it can cause the floor to sag or flex. This movement can lead to creaking noises when weight is applied to the floor.
- Foundation Issues: Substantial foundation problems, such as settling or shifting, can cause the entire structure to become unlevel. As a result, the floors may become uneven and creak when walked upon.
- Structural Movement: Buildings naturally undergo some degree of movement due to factors like temperature variations, soil conditions, or poor construction. Excessive movement can cause the subfloor or floor joists to shift, resulting in creaking floors.
- Improperly Sized or Spaced Joists: If the floor joists are not correctly sized or spaced according to industry standards, it can lead to inadequate support for the floorboards. This lack of stability can contribute to creaking sounds.
Identifying structural problems as the underlying cause of the creaking floors can require the expertise of a professional contractor or structural engineer. However, there are a few steps you can take to determine if structural issues may be contributing to the problem:
Inspect for Visible Signs: Look for any visible signs of structural problems, such as visible sagging or unevenness in the floors. Pay attention to any cracks in the walls or ceilings, as these could indicate underlying foundation issues.
Seek Professional Evaluation: If you suspect structural problems, it’s crucial to consult with a qualified professional who can conduct a thorough assessment. They will be able to accurately diagnose the issue and provide appropriate recommendations for repair.
If structural problems are indeed the cause of the creaking floors, the appropriate solution will depend on the specific issue identified. In some cases, it may involve reinforcing or replacing damaged support beams or addressing foundation concerns.
Due to the complexity and potential safety risks associated with structural problems, it is strongly advised to consult with a professional contractor or structural engineer. They will have the expertise and experience to ensure that the necessary repairs are carried out correctly and effectively.
How to Determine the Source of the Creaking
Before you can effectively address the creaking floors, it’s important to determine the exact source of the problem. Pinpointing the cause will help you implement the most appropriate solutions. Here are some steps to help you determine the source of the creaking:
- Visual Inspection: Start by visually inspecting the floor and surrounding areas. Look for any visible signs of damage, gaps, or inconsistencies between the floorboards. Note any areas that appear raised, worn, or uneven.
- Walk Areas: Walk across the floor and pay attention to where the creaking sounds are most prominent. Take note of the specific spots or areas that produce the most noise. This will help you focus your investigation on those specific locations.
- Apply Weight: Apply pressure to various areas of the floor using your foot or hand. Feel for any movement or shifting beneath the floor. Note if the creaking sounds occur when pressure is applied to specific spots.
- Time of Day: Pay attention to whether the creaking sounds are more prevalent at certain times of the day or under specific conditions. For example, if the creaking is worse in the morning or after heavy rainfall, it may be related to moisture or humidity issues.
- Weather Impact: Observe if the creaking changes with changing weather conditions. Extreme temperature fluctuations or changes in humidity levels can affect the expansion and contraction of the floorboards, potentially causing creaking.
- Professional Assessment: If you are unable to determine the source of the creaking or suspect underlying structural issues, it’s advisable to consult with a professional. A flooring specialist or contractor can conduct a more thorough assessment and provide expert guidance on addressing the problem.
By carefully observing, walking, and applying pressure to your floors, you can gather valuable information about the source of the creaking. Keep in mind that determining the exact cause may require a combination of these steps and potentially seeking professional assistance. Once you have identified the source, you can move forward with the appropriate solutions to repair and eliminate the creaking sounds.
Read more: Why Is My Dog Licking The Floor
Visual Inspection
Performing a visual inspection is the first step in determining the source of the creaking floors. By carefully examining the floor and surrounding areas, you can identify any visible signs of damage, gaps, or inconsistencies that may be causing the creaking sounds. Here’s how to conduct a thorough visual inspection:
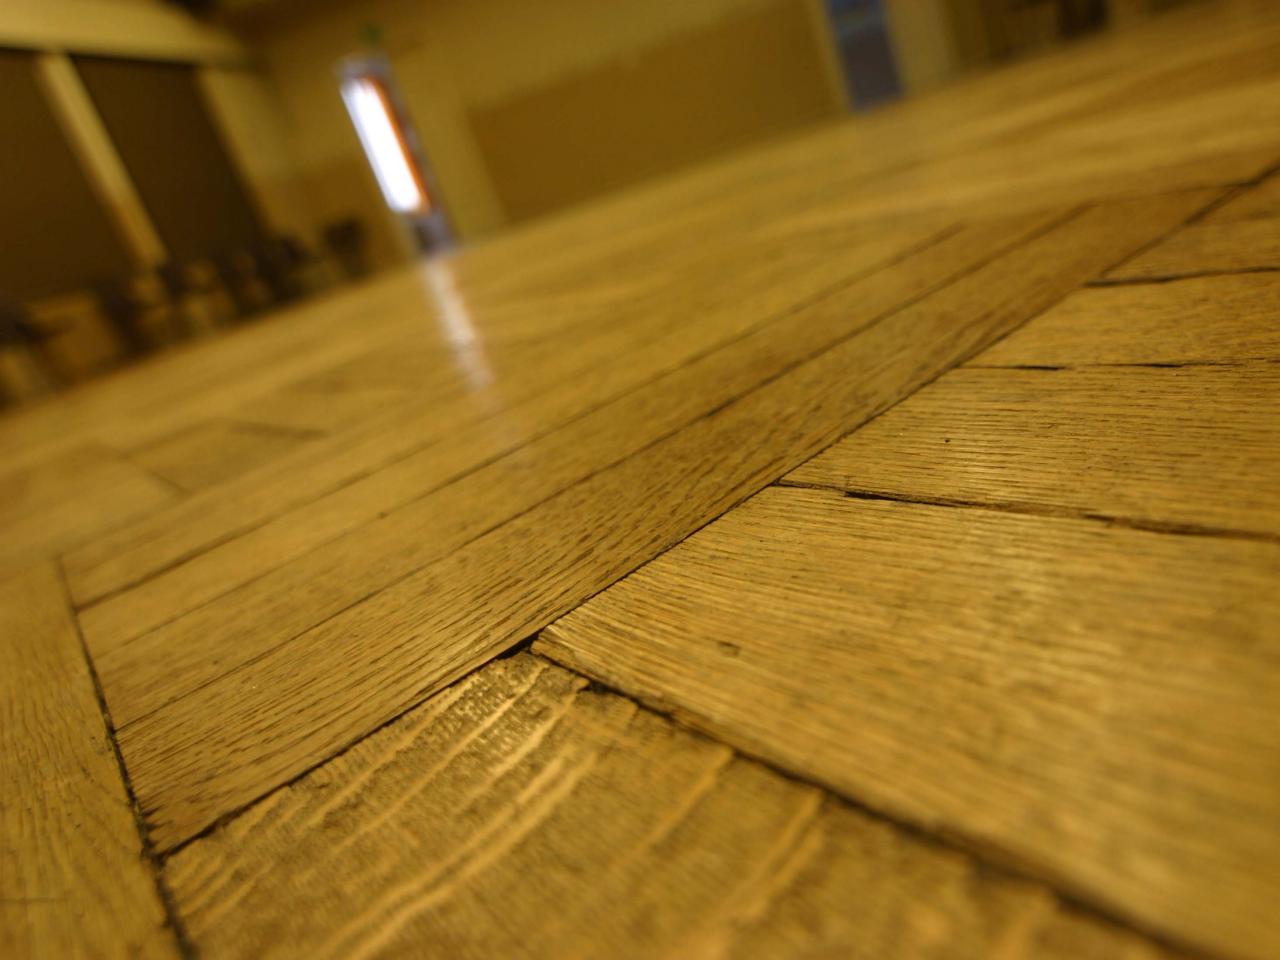
- Look for Gaps: Inspect the floorboards for any noticeable gaps between them. Gaps can occur due to improper installation, wood shrinkage, or other factors. Pay close attention to areas where gaps are more pronounced.
- Check for Loose Floorboards: Examine the floorboards to see if any of them are loose. Loose boards can shift and rub against each other, causing creaking noises. Gently press on the floorboards to detect any movement or instability.
- Notice Raised or Uneven Boards: Stroll across the floor and pay attention to any boards that appear raised or uneven. These uneven surfaces can create friction and generate creaking sounds when weight is applied.
- Inspect Subfloor: Carefully examine the subfloor beneath the floorboards. Look for any signs of moisture damage, rot, or structural issues that may be impacting the stability of the floor. Moisture-related problems may cause the subfloor to warp or decay, leading to creaking sounds.
- Examine Floor Edges: Focus on the edges of the floor where it meets walls or other structures. Check for gaps, separations, or any visible signs of movement or instability. These areas are prone to creaking if the floorboards are not properly secured or if there are structural issues.
- Take Note of Wear and Tear: Look for any signs of wear and tear on the floorboards. Scratches, dents, or rough surfaces can contribute to creaking noises. Pay attention to areas that experience high foot traffic, as they are more susceptible to wear and tear.
During the visual inspection, it can be helpful to use a flashlight to illuminate hard-to-see areas or to get a closer look at potential problem spots. Take note of any observations or findings as you go along – this will assist you in the troubleshooting process and when discussing the issue with professionals, if needed.
Remember, while a visual inspection provides valuable insight, it may not always reveal the underlying cause of the creaking. If you are unsure or if the cause is not apparent, it is advisable to proceed with further testing or seek the expertise of a flooring specialist or contractor.
Tip: To fix a creaky floor, try sprinkling talcum powder or powdered graphite into the joints between the floorboards to reduce friction and eliminate the noise.
Test for Loose Floorboards
Testing for loose floorboards is an essential step in identifying the source of creaking floors. Loose floorboards can cause friction and movement, leading to the annoying creaking sounds. By applying pressure and checking for instability, you can determine if loose floorboards are the cause. Here’s how to test for loose floorboards:
- Walk across the Floor: Start by walking across the floor and paying close attention to any areas where creaking sounds are most pronounced. Take note of the specific spots or sections that produce the most noise.
- Apply Pressure: Stand on different areas of the floor that are emitting creaking sounds. Apply gentle pressure with your foot or hand to the floorboards in those specific areas. Observe if there is any noticeable movement or if the boards feel unstable.
- Listen for Creaking: While applying pressure, listen for creaking sounds. If you hear the creaking noise when pressure is applied or when the floorboards shift slightly, it indicates that they may be loose or not securely fastened.
- Observe Gaps: Look for any gaps between the floorboards as you apply pressure. If you notice the floorboards separating slightly or if you can see visible gaps appear, it could be a sign of loose boards.
- Focus on High-Traffic Areas: Concentrate your testing on high-traffic areas, such as hallways or entryways, as these areas are more prone to loose floorboards due to increased wear and tear.
- Note Instability: Pay attention to any feelings of instability or movement under your foot or hand. Loose floorboards may shift or wiggle slightly when pressure is applied, indicating that they may need to be addressed.
By actively testing for loose floorboards, you can pinpoint the areas where the creaking originates. If looseness is detected, it’s important to take steps to address the issue. Tightening the nails or screws that secure the floorboards or adding additional fasteners can often help stabilize loose floorboards and reduce or eliminate the creaking sounds.
However, exercise caution when attempting to fix loose floorboards yourself, as it may require proper tools and techniques. If you are uncertain or uncomfortable with the repair process, it’s recommended to seek assistance from a professional flooring contractor to ensure the problem is addressed effectively and safely.
Investigate Subfloor Problems
Investigating subfloor problems is crucial in determining the source of creaking floors. Issues with the subfloor, such as unevenness or moisture damage, can cause the floorboards to shift or rub against each other, resulting in creaking sounds. By examining the subfloor, you can identify potential problems that may be contributing to the issue. Here’s how to investigate subfloor problems:
- Visual Inspection: Begin by visually inspecting the subfloor beneath the floorboards. Look for any signs of damage, such as water stains, mold growth, or visible rot. Note any areas where the subfloor appears uneven or compromised.
- Check for Unevenness: Use a level or straight edge to check for any significant unevenness in the subfloor. Place the level across different sections of the floor to identify areas where the subfloor may be sagging or not properly leveled.
- Test for Moisture: Moisture can contribute to subfloor problems, leading to creaking floors. Use a moisture meter to measure the moisture levels in various areas of the subfloor. High moisture levels may indicate water damage or excessive humidity that can affect the stability of the floorboards.
- Probe Subfloor: Gently probe the subfloor with a screwdriver or similar tool to check for any soft spots or areas that give way easily. Soft or spongy areas may indicate rot or deterioration of the subfloor, which can impact the stability of the floorboards.
- Consider Previous Repairs or Installations: If the subfloor has been repaired or replaced in the past, examine those areas closely. Improper installation or inadequate repairs can contribute to subfloor problems and subsequent creaking issues.
- Consult a Professional: If you are unsure about the condition of the subfloor or suspect significant subfloor problems, it’s wise to seek the expertise of a professional. A flooring specialist or contractor can conduct a thorough inspection, provide accurate assessments, and recommend appropriate solutions.
Identifying subfloor problems is essential because addressing these issues directly can help eliminate the creaking sounds in your floors. Depending on the extent of the problem, solutions may include reinforcing the subfloor, filling gaps or unevenness, or even replacing damaged sections. It’s essential to consult with a professional to ensure the proper course of action is taken for your specific situation.
Keep in mind that subfloor repairs can be complex and may require professional knowledge and specialized tools. If you are uncomfortable or inexperienced with these types of repairs, it is advisable to hire a qualified contractor to ensure the subfloor is addressed properly and effectively.
Assess Moisture and Humidity Levels
Assessing moisture and humidity levels is crucial in determining the source of creaking floors, especially if the issue is related to the expansion and contraction of the floorboards. Excessive moisture or humidity can cause wood to swell and create rubbing or friction between the floorboards, resulting in creaking sounds. Here’s how to assess moisture and humidity levels:
- Moisture Meter: Use a moisture meter specifically designed for measuring wood moisture levels. Take readings in different areas of the floor to determine if there are variations in moisture content. Moisture levels above recommended values may indicate excessive moisture in the floorboards.
- Visual Signs of Moisture: Look for visible signs of moisture-related issues, such as water stains, discoloration, or mold growth on or around the floorboards. These signs can indicate ongoing moisture problems that may be contributing to the creaking sounds.
- Check for Leaks: Inspect the surrounding area for any signs of water leaks, such as visible water damage on walls or ceilings, drips, or pooling water. Leaking pipes, roofs, or windows can introduce moisture into the environment and impact the floorboards.
- Measure Humidity: Use a hygrometer to measure the humidity levels in the room. Ideal humidity levels for indoor spaces typically range between 30% and 50%. High humidity, especially above this range, can contribute to moisture-related creaking in the floors.
- Monitor Seasonal Changes: Pay attention to any patterns related to seasonal changes. For example, if the creaking worsens during periods of high humidity or rainy seasons, it may indicate that moisture fluctuations are contributing to the issue.
- Address Humidity Sources: Identify and address potential sources of humidity, such as poor ventilation, high moisture areas (like bathrooms or kitchens), or improperly sealed windows or doors. Taking measures to control humidity can help minimize the expansion and contraction of floorboards.
By assessing moisture and humidity levels, you can determine if these factors are contributing to the creaking floors. If excessive moisture or humidity is detected, it’s important to address the underlying issue. This may involve fixing water leaks, improving ventilation, using dehumidifiers, or implementing proper moisture control measures.
However, it’s important to note that resolving moisture-related creaking may require professional assistance, especially if the issue is extensive or if there is underlying structural damage. A professional flooring specialist or contractor can help identify the root cause and recommend appropriate solutions to eliminate the creaking sounds caused by moisture or humidity.
Read more: Why Is My Car Floor Wet
How to Fix Creaking Floors
Creaking floors can be both annoying and concerning, but the good news is that they can often be resolved. The appropriate solution will depend on the specific cause of the creaking. Here are some common methods for fixing creaking floors:
- Fix Loose Floorboards: If the creaking is due to loose floorboards, there are a few different approaches you can take. One option is to tighten the existing nails or screws that secure the floorboards. Use a screwdriver or a hammer, depending on the type of fastener used. Alternatively, you can add additional nails or screws to reinforce the connection and reduce movement.
- Repair Subfloor Issues: If the subfloor is the source of the creaking, addressing the underlying subfloor problems is necessary. This can involve a variety of solutions depending on the specific issue. For example, if there are gaps between the subfloor and the floorboards, you can use shims or adhesive to fill the gaps and secure the floorboards. If there are sections of the subfloor that are uneven or damaged, you may need to reinforce or replace those sections.
- Address Humidity and Moisture Problems: If excessive humidity or moisture is causing the creaking, it’s important to address these issues. Ensure proper ventilation in the affected area to reduce moisture buildup. Use dehumidifiers to maintain optimal humidity levels. If there are water leaks or sources of moisture, fix them promptly to prevent further damage to the floorboards.
- Seek Professional Help for Structural Problems: If the creaking is a result of underlying structural issues, it is recommended to seek professional assistance. Structural problems require expertise and specialized knowledge to address effectively. A professional contractor or structural engineer can assess the situation, determine the necessary repairs, and provide guidance on resolving the structural issues.
It’s important to note that fixing creaking floors can sometimes be a DIY project, but in other cases, it may require professional help. If you are unsure about the cause of the creaking or if you would prefer expert assistance, consulting a flooring specialist or contractor is advisable. They can accurately identify the problem and provide the most suitable solutions for your specific situation.
Remember, prevention is key to avoiding future issues with creaking floors. Ensure proper installation of flooring materials, maintain optimal humidity levels, address any signs of wear and tear promptly, and routinely inspect your floors for any potential problems.
By taking the appropriate steps to fix creaking floors, you can restore peace and quiet to your living space and enjoy a floor that is sturdy, stable, and free from annoying noises.
Fix Loose Floorboards
One of the most common causes of creaking floors is loose floorboards. When floorboards are not securely fastened or have become loose over time, they can shift and move, resulting in creaking sounds when weight is applied. Fixing loose floorboards can help eliminate those annoying noises and restore stability to your flooring. Here’s how you can address this issue:
- Locate the Loose Floorboards: Walk across the floor and listen for the areas where creaking sounds are most prominent. Pay close attention to sections that feel unstable or show visible signs of movement.
- Tighten Nails or Screws: If the floorboards are only slightly loose, you may be able to fix the issue by tightening the existing nails or screws. Use a screwdriver or a hammer, depending on the type of fastener used, to securely tighten them. Be careful not to overtighten, as this could damage the floorboards or strip the screws.
- Add Extra Nails or Screws: For more significant loosening or if there are no existing fasteners in place, you may need to add additional nails or screws to reinforce the connection between the floorboards and the subfloor. Use appropriately sized fasteners and ensure they are driven in at an angle that securely holds the floorboards in place.
- Consider Using Wood Glue: In some cases, using wood glue can help further stabilize loose floorboards. Apply a small amount of wood glue along the joints of the loose boards before securing them with nails or screws. Wipe away any excess glue before it dries. Allow sufficient time for the glue to dry completely before walking on the floor.
- Use Bridging: If the loose floorboards are part of a larger area, such as a hallway or room, you can use bridging to help distribute the weight more evenly and reduce movement. Bridging involves installing perpendicular pieces of lumber between the floor joists beneath the loose boards, adding additional support.
- Consider Reinforcing with Blocking: Another method to address loose floorboards is by installing blocking between floor joists beneath the affected area. Blocking involves adding pieces of lumber perpendicular to the floor joists, helping to stabilize the floorboards and reduce movement.
While fixing loose floorboards is often a DIY project, it’s important to exercise caution and follow proper safety procedures. When working with tools and fasteners, wear protective eyewear and gloves. If you are unsure or uncomfortable with the repair process, it’s always best to seek assistance from a professional flooring contractor. They can provide expert advice, ensure the repairs are carried out correctly, and recommend additional solutions if needed.
By addressing loose floorboards, you can eliminate creaking sounds and restore the stability of your flooring. Regular maintenance and inspection of your floors can help prevent future issues with loose boards and ensure the longevity of your flooring.
Repair Subfloor Issues
Subfloor problems can often contribute to creaking floors. When the subfloor is uneven, damaged, or not properly prepared, it can cause the floorboards to shift and rub against each other, resulting in creaking sounds. Repairing subfloor issues is essential for eliminating the underlying cause of the creaking. Here are steps you can take to address subfloor problems:
- Identify the Problem Areas: Perform a thorough inspection to locate any problem areas in the subfloor. Look for unevenness, gaps between the subfloor and floorboards, signs of water damage, or structural issues. Pay attention to areas that align with the creaking sounds.
- Fill Gaps: If there are gaps between the subfloor and the floorboards, you can use a suitable filler material to fill them in. Apply the filler carefully, ensuring it is level with the subfloor to create a smooth surface. Allow the filler to dry completely before proceeding.
- Reinforce Subfloor Joists: If the creaking is a result of weak or damaged subfloor joists, you may need to reinforce them. This can be done by adding additional support, such as sister joists or blocking, to strengthen the subfloor structure and reduce movement.
- Address Unevenness: If the subfloor is uneven, it can cause the floorboards to flex and create creaking sounds. To resolve this, you may need to level the subfloor. This can involve using shims or leveling compounds to even out any irregularities. Follow the manufacturer’s instructions and ensure the subfloor is level and stable before proceeding.
- Replace Damaged Subfloor Sections: In cases of severe subfloor damage, such as rot or structural issues, replacing the damaged sections may be necessary. Carefully remove the affected subfloor sections and install new ones. Ensure the replacement subfloor is properly secured and level with the surrounding area.
- Consult a Professional: If you are unsure about the extent of subfloor damage or if the repairs seem complex, it’s best to seek professional help. A flooring specialist or contractor can assess the subfloor condition, provide expert advice, and ensure that the necessary repairs are carried out effectively.
Repairing subfloor issues helps address the underlying cause of the creaking floors and ensures a stable and squeak-free surface. It is important to approach subfloor repairs carefully, following proper safety measures and using appropriate materials and techniques. If you are uncertain about your DIY skills or the complexity of the repairs, consulting a professional is highly recommended.
Additionally, preventing future subfloor problems involves maintaining a controlled moisture environment, promptly addressing any water leaks or plumbing issues, and ensuring proper subfloor preparation during renovations or installations. Regular inspections and maintenance of your floors will help identify and address any subfloor issues before they worsen.
Address Humidity and Moisture Problems
Humidity and moisture issues can be a common cause of creaking floors. Excessive humidity or moisture can cause floorboards to swell and create friction, leading to creaking sounds. Addressing these problems is crucial to eliminate the underlying cause of the creaking. Here are steps you can take to address humidity and moisture problems:
- Improve Ventilation: Proper ventilation is crucial for maintaining optimal humidity levels. Ensure adequate airflow in the affected area by opening windows, using fans, or installing vents. Good ventilation helps reduce moisture buildup and prevents the floors from absorbing excess humidity.
- Use Dehumidifiers: If you live in a high-humidity region or have areas prone to excess moisture, using dehumidifiers can help regulate humidity levels. Dehumidifiers remove excess moisture from the air, creating a more stable environment for your floors.
- Fix Water Leaks: Water leaks are a common source of moisture problems. Inspect the area for any signs of leaks or water damage. Fix plumbing issues, such as leaky pipes or faucets, and repair any roof or window leaks promptly. Properly seal any areas where water may be seeping in, such as gaps around plumbing fixtures or windows.
- Address Subfloor Moisture: Excessive moisture in the subfloor can affect the stability of the floorboards. Investigate the subfloor for signs of moisture damage or high moisture levels. Use a moisture meter to measure the moisture content in the subfloor. If there are ongoing moisture issues in the subfloor, consider installing a vapor barrier or addressing the underlying cause to mitigate moisture-related problems.
- Control Indoor Humidity: Monitor and control indoor humidity levels using a hygrometer. Ensure that the humidity levels are within the recommended range of 30% to 50%. If needed, use a humidifier or dehumidifier to achieve the desired humidity level. Regularly clean and maintain these devices to prevent mold or bacteria growth.
- Implement Moisture Control Measures: Take preventive measures to control moisture in the affected area. Use moisture-resistant flooring materials in areas prone to moisture, such as bathrooms or basements. Promptly clean up spills to prevent water from seeping into the floorboards. Use rugs or mats in high-moisture areas to protect the floors and absorb moisture.
Addressing humidity and moisture problems helps create a more stable environment for your flooring and reduces the likelihood of creaking floors. By controlling moisture levels and fixing leaks, you can prevent further damage to the floorboards and extend the lifespan of your floors.
However, if moisture-related creaking persists or if there are significant moisture issues, it’s advisable to consult with a professional. A specialist can conduct a thorough assessment, identify the root cause of the problem, and recommend appropriate solutions tailored to your specific situation.
Seek Professional Help for Structural Problems
In some cases, creaking floors can be a result of underlying structural problems within the building. These issues require immediate attention and should be addressed by professionals to ensure the safety and stability of your home. Here’s how you can seek the help of professionals to fix structural problems:
- Identify Signs of Structural Problems: Look for signs that indicate potential structural issues, such as significant sagging or dipping of the floors, cracks in the walls or ceilings, or doors and windows that no longer align properly. These signs can indicate more complex problems that require professional assessment.
- Consult with a Structural Engineer: When dealing with structural problems, it is advisable to consult with a qualified structural engineer. They have the expertise to assess the severity of the issues and provide professional guidance on the necessary repairs.
- Obtain Multiple Professional Opinions: It is a good idea to seek opinions from multiple professionals to ensure a comprehensive understanding of the structural issues and the recommended solutions. This allows you to compare their assessments and choose the most suitable course of action.
- Follow the Recommendations: If structural problems are identified, follow the recommendations provided by the structural engineer or professional contractors. They may recommend solutions such as reinforcing the support beams, repairing or replacing damaged structural elements, or making adjustments to the foundation.
- Hire Qualified Professionals: Engage experienced and licensed contractors to carry out the necessary repairs. Ensure they have expertise in structural repairs and adhere to industry standards and regulations. Request proof of insurance and references before hiring them.
- Take Timely Action: Do not delay addressing structural problems, as they can worsen over time and potentially compromise the safety and integrity of your home. Prompt action is critical, so seek professional help as soon as you notice signs of structural issues.
It’s important to note that addressing structural problems requires specialized knowledge and expertise. Attempting to fix structural issues without professional assistance can lead to further damage and safety risks. By seeking the help of professionals, you can ensure that the structural problems are properly diagnosed and repaired, providing a long-term solution to the creaking floors.
Remember, the safety and stability of your home should always be the priority. By entrusting the structural repairs to qualified professionals, you can have peace of mind knowing that the issues are being addressed properly and effectively.
Conclusion
Creaking floors can be a nuisance, but they can also be a sign of underlying issues within your home. Understanding the common causes of creaking floors and taking appropriate measures to address them is key to restoring peace and stability to your living space.
In this article, we explored various factors that can contribute to creaking floors, including subfloor issues, loose floorboards, poor installation, humidity and moisture problems, age and wear, and structural problems. Each of these causes requires a unique approach to fixing the creaking and restoring the integrity of your floors.
By visually inspecting the floor, testing for loose floorboards, investigating subfloor problems, assessing moisture and humidity levels, and seeking professional help for structural issues, you can determine the root cause and choose the most suitable solutions to fix the creaking floors.
Whether it involves tightening screws, filling gaps, repairing the subfloor, addressing moisture-related problems, or seeking the expertise of professionals for structural repairs, it’s important to take the necessary steps promptly. Ignoring the creaking floors can lead to further damage and potentially compromise the safety and stability of your home.
Remember, prevention is key to avoiding future issues with creaking floors. Proper maintenance, regular inspections, controlling moisture levels, and addressing any problems promptly are essential for preserving the longevity and performance of your floors.
In conclusion, by understanding the causes of creaking floors and implementing the appropriate solutions, you can enjoy a quiet, stable, and comfortable living environment. So, take the necessary actions to banish those annoying creaks and enjoy the peace of your creak-free floors.
Frequently Asked Questions about Why Is My Floor Creaking
Was this page helpful?
At Storables.com, we guarantee accurate and reliable information. Our content, validated by Expert Board Contributors, is crafted following stringent Editorial Policies. We're committed to providing you with well-researched, expert-backed insights for all your informational needs.




0 thoughts on “Why Is My Floor Creaking”