Articles
How To Fix Buckled Wood Floor
Modified: December 7, 2023
Discover effective articles on how to fix buckled wood floors and restore their original beauty. Follow step-by-step guides and expert advice to resolve this common flooring issue.
(Many of the links in this article redirect to a specific reviewed product. Your purchase of these products through affiliate links helps to generate commission for Storables.com, at no extra cost. Learn more)
Introduction
Wooden floors are a timeless and elegant addition to any home. They add warmth, character, and a touch of nature to your living space. However, over time, wooden floors can develop issues such as buckling, which not only negatively impacts the appearance but also compromises the structural integrity of the floor.
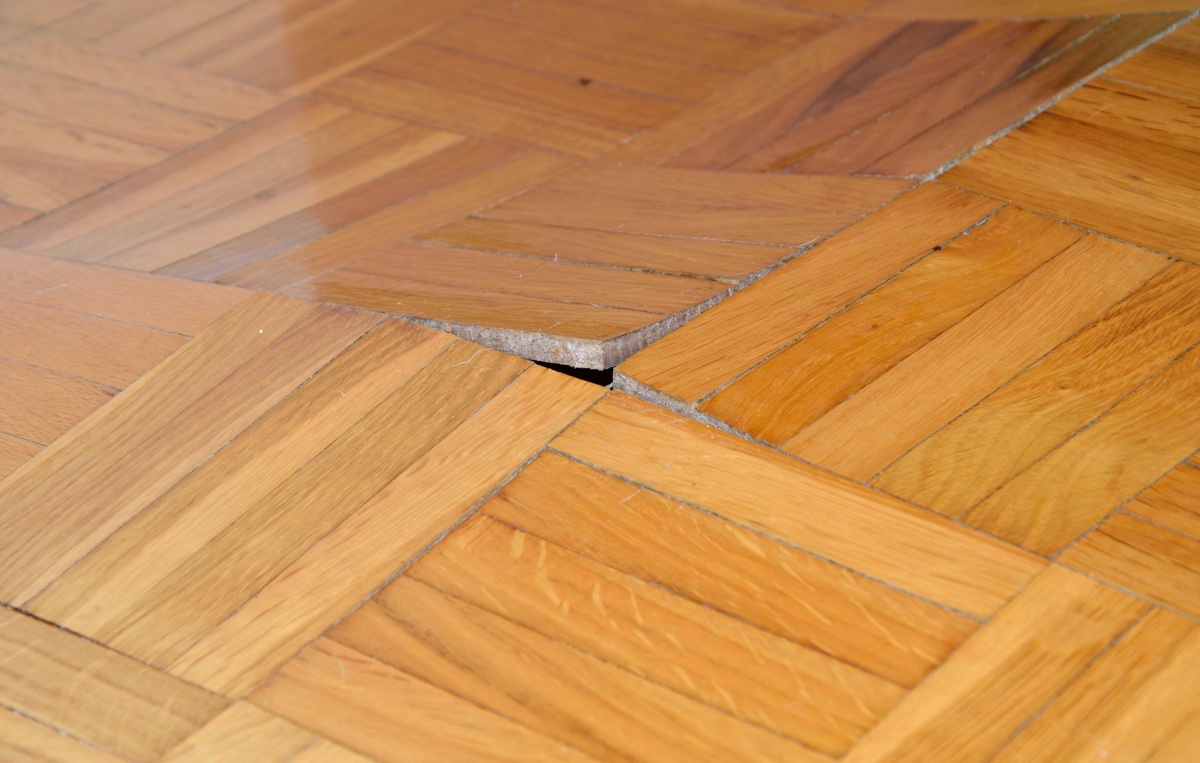
Buckling occurs when the wood floorboards swell and push against each other, causing them to lift and deform. This can result in uneven flooring, tripping hazards, and a generally unpleasant walking experience. If left untreated, buckling can lead to more extensive damage and costly repairs.
In this article, we will explore the causes of buckled wood floors, the tools and materials needed for repairs, and step-by-step instructions to fix this issue. Whether you are a DIY enthusiast or a homeowner seeking professional assistance, this guide will help you understand the process involved in repairing buckled wood floors.
Before we delve into the repair process, it is crucial to have a clear understanding of what causes wood floors to buckle in the first place. By identifying the root causes, you can take preventative measures to avoid future issues and ensure the longevity of your flooring.
Key Takeaways:
- Identifying the root causes of buckled wood floors, such as moisture, subfloor issues, and poor installation, is crucial for effective repairs and long-term prevention. Understanding the underlying issues is key to successful restoration.
- Whether addressing minor buckling with simple repairs or tackling major issues by replacing damaged floorboards, taking preventive measures like controlling moisture levels and proper acclimation can help avoid future buckling and maintain the longevity of wood floors.
Read more: How To Fix Buckling Laminate Floor
Understanding Buckled Wood Floors
Buckling is a common problem in wood floors and understanding its causes can help in effectively addressing the issue. There are several factors that contribute to the buckling of wood floors:
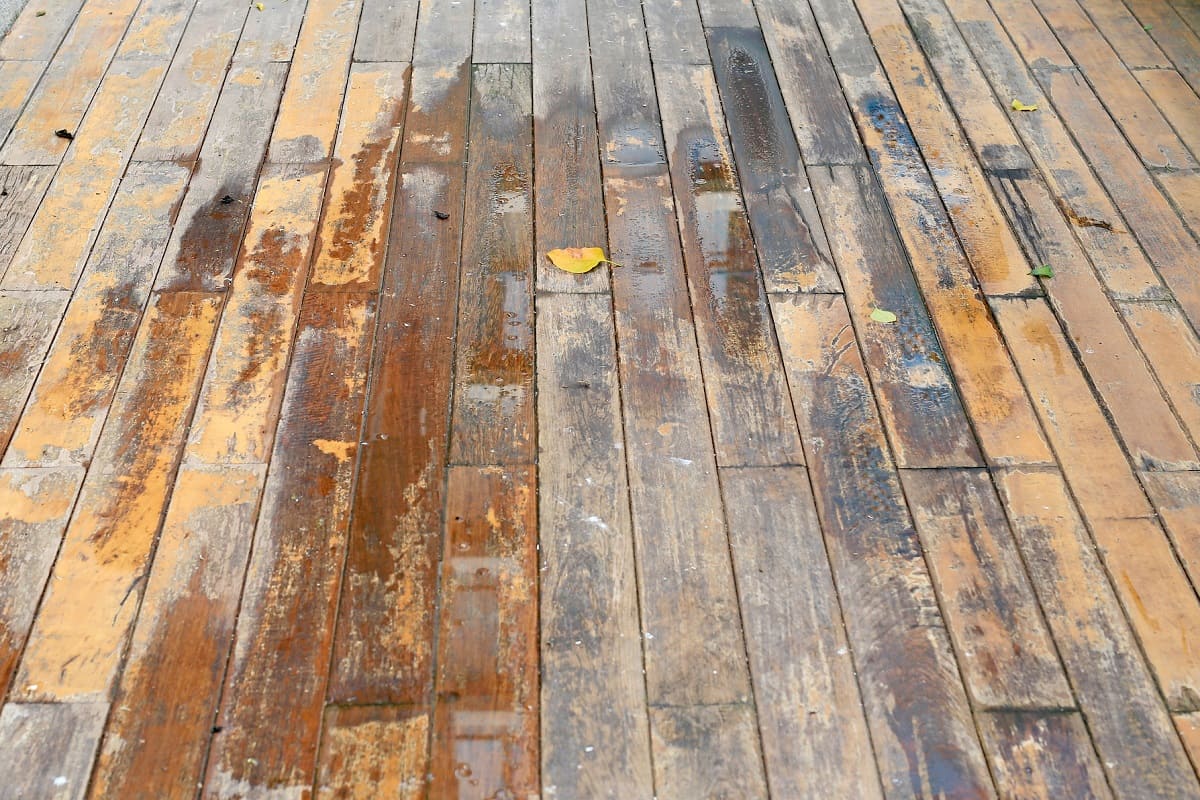
- Moisture: One of the primary reasons for wood floor buckling is moisture. Excessive moisture can penetrate the wood, causing it to expand and warp. This can occur due to high humidity levels, water spills, leaks, or inadequate subfloor moisture barriers.
- Subfloor Issues: Problems with the subfloor can also lead to buckling. Uneven subfloors or subfloor moisture issues can cause the wood floorboards to warp and buckle.
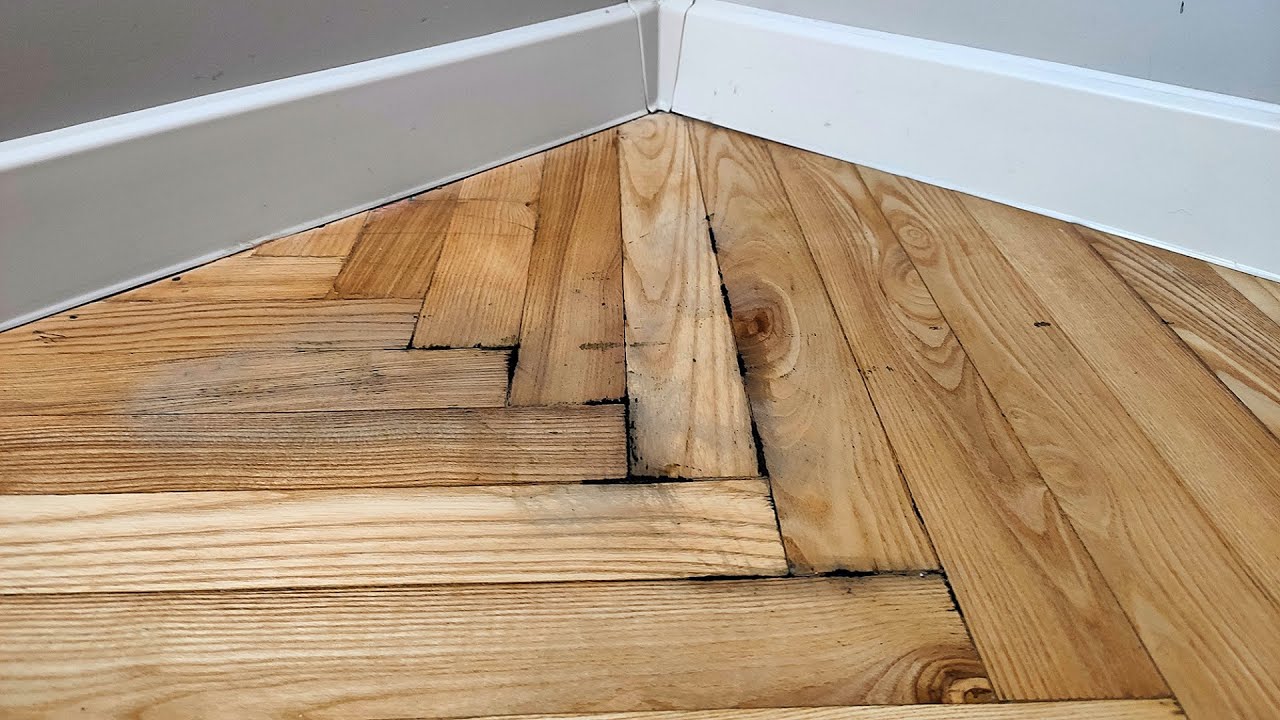
- Improper Installation: Inadequate acclimation of wood before installation or improper installation techniques can result in buckled wood floors. When wood is not allowed to acclimate to its environment or is not installed with the proper expansion gaps, it can lead to buckling as the wood expands and contracts with changes in temperature and humidity.
- Poor Ventilation: Insufficient ventilation can trap moisture, leading to high humidity levels and moisture-related issues. This can contribute to the buckling of wood floors.
- Structural Issues: Underlying structural problems, such as sagging beams or joists, can also cause the floor to buckle. These issues should be addressed before attempting any repairs.
It is essential to identify the specific cause of the buckling in order to determine the most appropriate repair method. In some cases, minor buckling can be remedied with simple repairs, while more severe cases may require more extensive measures, such as replacing damaged floorboards.
In the next sections, we will discuss the tools and materials needed for repairing buckled wood floors, as well as the steps involved in preparing the work area and removing furniture and floor coverings to access the affected area.
Identifying the Causes of Buckling
In order to effectively fix a buckled wood floor, it is important to identify the underlying causes. By pinpointing the root issue, you can address it directly, preventing future instances of buckling. Here are some common causes to consider:
- Moisture: Excessive moisture is one of the primary culprits behind buckling wood floors. Determining the source of the moisture is essential. It could be due to leaks, high humidity levels, or inadequate subfloor moisture barriers. Check for signs of water damage, such as damp spots, staining, or a musty odor.
- Subfloor Issues: Uneven or damaged subflooring can also lead to buckling. Inspect the subfloor for any signs of unevenness, dips, or protrusions. Pay attention to areas near water sources, as they are more prone to moisture-related issues.
- Installation Problems: Improper installation techniques can cause a wood floor to buckle. Look for signs of inadequate expansion gaps between floorboards, as well as gaps or spacing issues along walls. Check if the wood was properly acclimated before installation, as insufficient acclimation can result in expansion and buckling.
- Poor Ventilation: Insufficient airflow and poor ventilation can contribute to moisture buildup and high humidity levels. Look for signs of inadequate ventilation, such as condensation on windows or walls, a musty smell, or mold and mildew growth.
- Structural Problems: Underlying structural issues, such as sagging beams or joists, can cause the wood floor to buckle. Look for signs of sagging or bowing in the affected area. If you suspect structural problems, it is advisable to consult with a professional contractor or structural engineer.
Identifying the cause of the buckling will enable you to determine the appropriate repair method. Minor buckling caused by temporary moisture exposure may be resolved by addressing the underlying moisture issue and allowing the floor to dry. However, if the buckling is due to more significant structural or installation issues, a more involved repair process may be required.
In the upcoming sections, we will discuss the tools and materials needed for repairing buckled wood floors, as well as provide step-by-step instructions on how to prepare the work area and remove furniture and floor coverings in order to access the affected area.
Tools and Materials Needed
When it comes to repairing buckled wood floors, having the right tools and materials is essential to ensure a successful and efficient repair process. Here are the key items you will need:
Tools:
- Hammer or rubber mallet
- Power drill
- Circular saw or jigsaw
- Pry bar or floor puller
- Chisel
- Measuring tape
- Level
- Sanding machine or sandpaper
- Vacuum cleaner
- Protective gear (goggles, gloves, dust mask)
Materials:
- Replacement floorboards
- Wood adhesive
- Nails or screws
- Wood filler
- Primer and paint or stain (if refinishing)
- Sanding discs or sandpaper (various grits)
- Caulk or sealant
It is important to have these tools and materials readily available before starting the repair process. This will ensure that you have everything you need to properly address the buckling issue.
Additionally, it is advisable to wear protective gear, such as goggles, gloves, and a dust mask, to protect yourself from any potential hazards during the repair process.
Once you have gathered the necessary tools and materials, you are ready to prepare the work area and remove furniture and floor coverings to access the buckled area. This will allow you to thoroughly inspect the subfloor and assess the extent of the damage before proceeding with the appropriate repair method.
Preparing the Work Area
Before you can begin repairing a buckled wood floor, it is important to properly prepare the work area. This involves removing furniture and floor coverings, as well as inspecting the subfloor for any underlying issues. Here are the steps to follow:
- Clear the Area: Begin by clearing the room of any furniture, rugs, or other items that may obstruct your work. This will provide you with a clear and open space to assess the entire floor and make necessary repairs.
- Protect the Surrounding Area: Use drop cloths or plastic sheets to protect adjacent surfaces, walls, and cabinets from any potential damage during the repair process. This will help prevent dust, debris, and accidental damage to surrounding areas.
- Remove Floor Coverings: Carefully remove any flooring materials covering the wood floor, such as carpets, tiles, or laminate. Set them aside for reinstallation once the repairs are complete. Check for any signs of moisture or damage on the floor coverings, as this may indicate the extent of the problem.
- Inspect the Subfloor: With the floor coverings removed, inspect the subfloor for any signs of issues. Look for unevenness, dips, water stains, or signs of moisture. If you notice any structural problems or significant subfloor damage, it may be necessary to consult with a professional before proceeding with the repair.
- Identify the Buckled Areas: Evaluate the wood floor to identify the specific areas that are buckled or raised. Take note of the severity and extent of the buckling, as this will help determine the most appropriate repair method.
By properly preparing the work area, you set the stage for a smooth and effective repair process. Removing furniture and floor coverings will give you the necessary access to the buckled areas, while inspecting the subfloor will help you assess the overall condition and identify any underlying issues that may need to be addressed.
Next, we will discuss the process of removing furniture and floor coverings in more detail, allowing us to directly access the affected area.
Read more: How To Fix A Buckling Carpet
Removing Furniture and Floor Coverings
Before you can address a buckled wood floor, it is necessary to remove any furniture and floor coverings that may be covering the affected area. This allows for better access and visibility, making the repair process more effective. Here are the steps to follow:
- Clear the Room: Start by removing all furniture from the room. This includes chairs, tables, sofas, and any other items that may be on the floor. Clearing the space will provide you with ample room to work and prevent any accidental damage to the furniture during the repair process.
- Roll up Rugs and Carpets: If you have any rugs or carpets covering the wood floor, carefully roll them up and move them out of the room. Set them aside in a safe place to prevent any damage or tripping hazards. Inspect the underside of the rugs or carpets for signs of moisture or damage, as this may indicate the extent of the problem with the wood floor.
- Remove Floor Trim or Baseboards: In some cases, it may be necessary to remove the floor trim or baseboards to access the buckled area of the wood floor. Use a pry bar or floor puller to gently remove the trim from the walls. Take care to avoid damaging the trim, as it may need to be reinstalled once the repairs are complete.
- Inspect the Floorboards: With the furniture and floor coverings removed, carefully examine the wood floor to identify the specific areas that are buckled or raised. Pay attention to the severity and extent of the buckling to determine the most appropriate repair method.
By removing furniture and floor coverings, you create an unobstructed workspace to address the buckled wood floor. This allows for a thorough inspection of the affected area and ensures that the repairs can be performed effectively.
In the next sections, we will discuss how to inspect the subfloor and assess the extent of the damage, as well as the different repair methods for minor and major buckling issues.
Inspecting the Subfloor
After removing furniture and floor coverings, it is essential to inspect the subfloor to determine the condition and identify any underlying issues. The subfloor provides the foundation for the wood floor and plays a crucial role in its stability. Here are the steps to inspect the subfloor:
- Clear the Surface: Remove any debris or dust from the subfloor to ensure a clear and accurate inspection. Use a broom or vacuum cleaner to clean the surface thoroughly.
- Check for Moisture: Look for signs of moisture on the subfloor. Moisture can cause the wood floor to buckle, so it is important to determine the source of the moisture and address it. Check for water stains, damp areas, or a musty smell, as these can indicate moisture-related issues.
- Inspect for Unevenness or Damage: Examine the subfloor for any unevenness, dips, or damage. Walk across the floor and carefully observe if there are any noticeable changes in level or areas that feel soft or unstable. These issues can contribute to the buckling of the wood floor.
- Look for Structural Problems: Check for any structural problems, such as sagging beams or joists, which can impact the stability of the subfloor and cause the wood floor to buckle. Look for any signs of bowing or deflection in the support structure.
- Note the Subfloor Material: Take note of the type of subfloor material you have. This will help determine the appropriate repair methods for addressing the buckling issue. Common subfloor materials include plywood, OSB (oriented strand board), or concrete.
Inspecting the subfloor is an important step in understanding the condition and identifying any underlying issues that may be contributing to the buckling of the wood floor. It allows you to address these issues directly, ensuring a more effective and long-lasting repair.
Next, we will discuss how to assess the extent of the buckling and determine the best repair method based on the severity of the issue.
Assessing the Extent of Damage
Once you have inspected the subfloor and identified any underlying issues, the next step is to assess the extent of the damage to the buckled wood floor. This will help you determine the severity of the problem and the best course of action for repair. Here are some factors to consider when assessing the damage:
- Number of Buckled Areas: Take note of the number of areas on the wood floor that are buckled or raised. Determine whether it is a single localized spot or if multiple areas throughout the room are affected. This will help you gauge the scale of the repair work required.
- Severity of Buckling: Evaluate the severity of the buckling. Determine if the floorboards are slightly raised or if they are significantly warped and lifting off the subfloor. The extent of the buckling will impact the repair method chosen.
- Impact on Floor Stability: Assess how the buckling affects the overall stability of the wood floor. If the buckling is causing significant unevenness, tripping hazards, or compromises the structural integrity of the floor, it may require more extensive repairs.
- Subfloor Condition: Consider the condition of the subfloor as well. If the subfloor is uneven or damaged, it may need to be addressed before tackling the buckled wood floor.
- Previous Repair Attempts: Take into account any previous repair attempts or modifications that may have contributed to the buckling. Previous improper repairs may need to be rectified to effectively address the issue.
By assessing the extent of the damage, you will be able to determine the appropriate repair method. Minor buckling issues can often be resolved through simple repairs, such as adjusting humidity levels or fixing individual floorboards. However, more severe cases may require more extensive repairs, such as replacing damaged floorboards or addressing structural problems.
In the next sections, we will discuss the different repair methods for minor and major buckling issues, as well as provide step-by-step instructions for fixing the problem.
Use a moisture meter to determine the source of the buckling. If it’s from a water leak, fix the leak and allow the floor to dry completely before repairing. If it’s from humidity, consider installing a dehumidifier in the room.
Determining the Best Repair Method
After assessing the extent of the damage to the buckled wood floor, it is important to determine the best repair method based on the severity of the issue. Depending on the specific circumstances, different approaches may be required to effectively address the problem. Here are some factors to consider when determining the appropriate repair method:
- Minor Buckling: If the buckling is minor and localized to a small area, simple repairs may be sufficient. This can include adjusting the moisture levels in the room, using a dehumidifier to lower humidity, or fixing individual floorboards that are causing the buckling.
- Major Buckling: For more severe buckling issues that affect larger areas of the floor, a more in-depth repair approach may be necessary. This can include removing and replacing damaged floorboards, addressing subfloor issues, or even refinishing the entire floor if necessary.
- Underlying Causes: Consider the underlying causes of the buckling. If it is primarily due to excessive moisture, addressing the moisture source and ensuring proper subfloor ventilation may be key. If the buckling is a result of structural issues, it is crucial to address those problems before attempting any repairs.
- Budget and Time Constraints: Take into account your budget and time constraints when deciding on the repair method. Some repairs can be more time-consuming and costly, so it is important to choose an approach that aligns with your resources.
- Professional Assistance: In some cases, it may be necessary to seek professional assistance, especially for major buckling issues or complex repairs. Professional contractors or flooring specialists have the expertise and tools to properly diagnose the problem and provide an effective repair solution.
By considering these factors, you can determine the best repair method for your buckled wood floor. Whether it requires minor adjustments, replacing damaged floorboards, or more involved repairs, identifying the most suitable approach will ensure a successful restoration of your flooring.
In the upcoming sections, we will discuss the step-by-step instructions for fixing minor buckling issues as well as repairing major buckling problems, providing you with the necessary guidance to restore the stability and aesthetics of your wood floor.
Read more: How To Fix A Chip In Wood Floor
Fixing Minor Buckling Issues
If you have identified minor buckling issues in your wood floor, there are several simple repairs you can undertake to resolve the problem. Here are the step-by-step instructions for fixing minor buckling issues:
- Address Moisture Levels: Determine the source of excess moisture and take steps to address it. This can involve adding a dehumidifier to reduce humidity levels, fixing any leaks or water sources, or improving ventilation in the room. Controlling moisture is crucial to prevent further buckling.
- Allow for Acclimation: If the buckling is a result of improper acclimation during installation, allow the floorboards to acclimate to the room’s environment. This typically involves leaving the new floorboards in the room for a few days prior to installation, allowing them to adjust to the temperature and humidity levels.
- Reattach the Floorboards: If specific floorboards are causing the buckling, you can reattach them to the subfloor. Use a hammer or rubber mallet to gently tap the floorboards back into place. Make sure to leave a small gap between boards to allow for expansion and contraction.
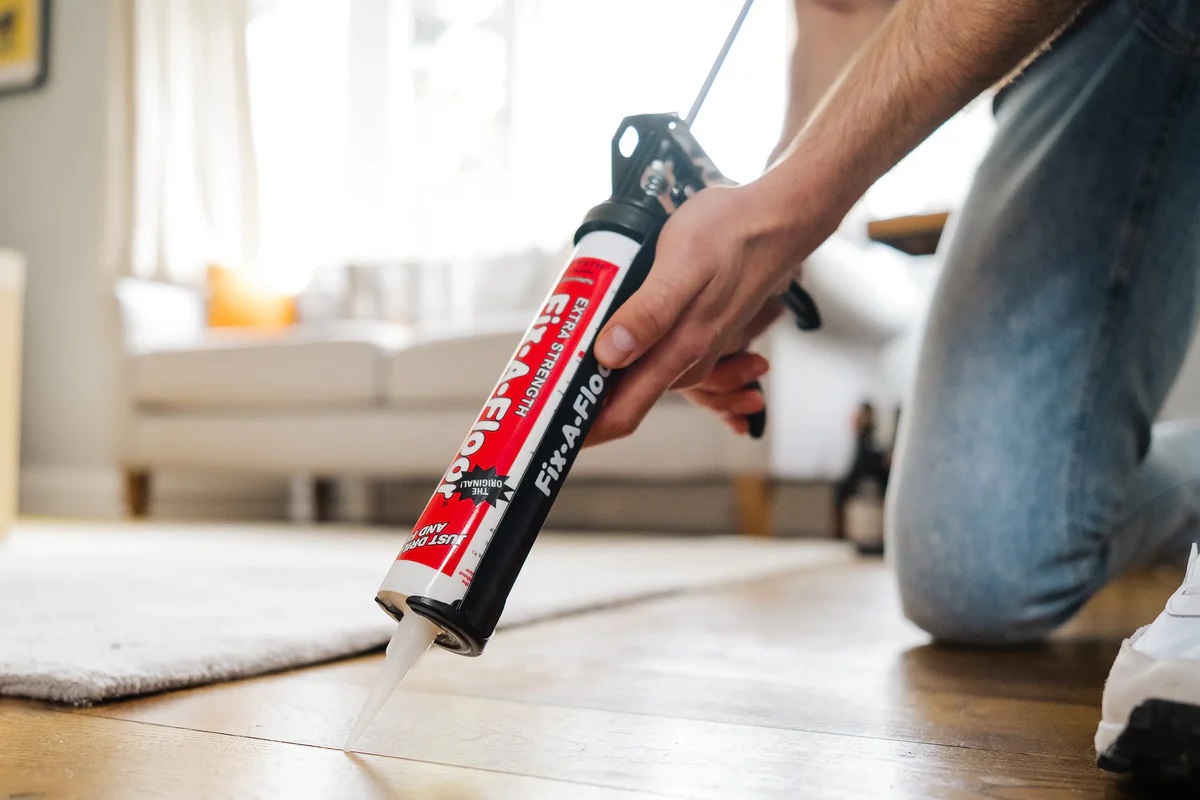
- Secure Loose Floorboards: If any floorboards are loose, use nails or screws to securely fasten them to the subfloor. This will help prevent further buckling and ensure stability.
- Mend Gaps: Fill any small gaps between floorboards with wood filler. Apply the filler using a putty knife, and smooth it out to ensure a seamless finish. Allow the filler to dry according to the manufacturer’s instructions.
- Sand and Refinish: Once the repairs are made, sand the entire floor surface to ensure a smooth and even finish. Use a sanding machine or sandpaper with progressively finer grits to achieve the desired result. Remove any dust or debris with a vacuum cleaner before proceeding with refinishing.
- Apply a New Finish: Apply a primer and then paint or stain to the sanded floor, following the manufacturer’s instructions. This will give your floor a fresh look and protect it from future damage.
By following these steps, you can effectively fix minor buckling issues in your wood floor. Remember to address the underlying causes of the buckling, such as moisture or acclimation problems, to prevent the issue from recurring in the future.
In the next section, we will discuss the more involved process of repairing major buckling problems and replacing damaged floorboards.
Repairing Major Buckling Problems
If you are dealing with major buckling problems in your wood floor, more extensive repairs are required to restore its stability and appearance. Here are the step-by-step instructions for repairing major buckling problems:
- Address Underlying Issues: Before proceeding with the repairs, address any underlying issues that may be contributing to the buckling. This can involve fixing structural problems, such as sagging beams or joists, or leveling the subfloor if it is uneven.
- Identify Damaged Floorboards: Inspect the buckled area and identify the floorboards that are extensively warped or damaged. Mark these floorboards for removal.
- Remove Damaged Floorboards: Use a circular saw or jigsaw to carefully cut and remove the damaged floorboards. Take care to cut along the seams of neighboring floorboards to make the removal process easier.
- Clean the Subfloor: Thoroughly clean the exposed subfloor, removing any debris, adhesive, or remnants of the old floorboards. This will provide a clean surface for the replacement floorboards.
- Measure and Cut Replacement Floorboards: Measure the dimensions of the removed floorboards and use these measurements to cut the replacement boards to the appropriate size. Ensure a proper fit by measuring carefully and using a circular saw or jigsaw to make precise cuts.
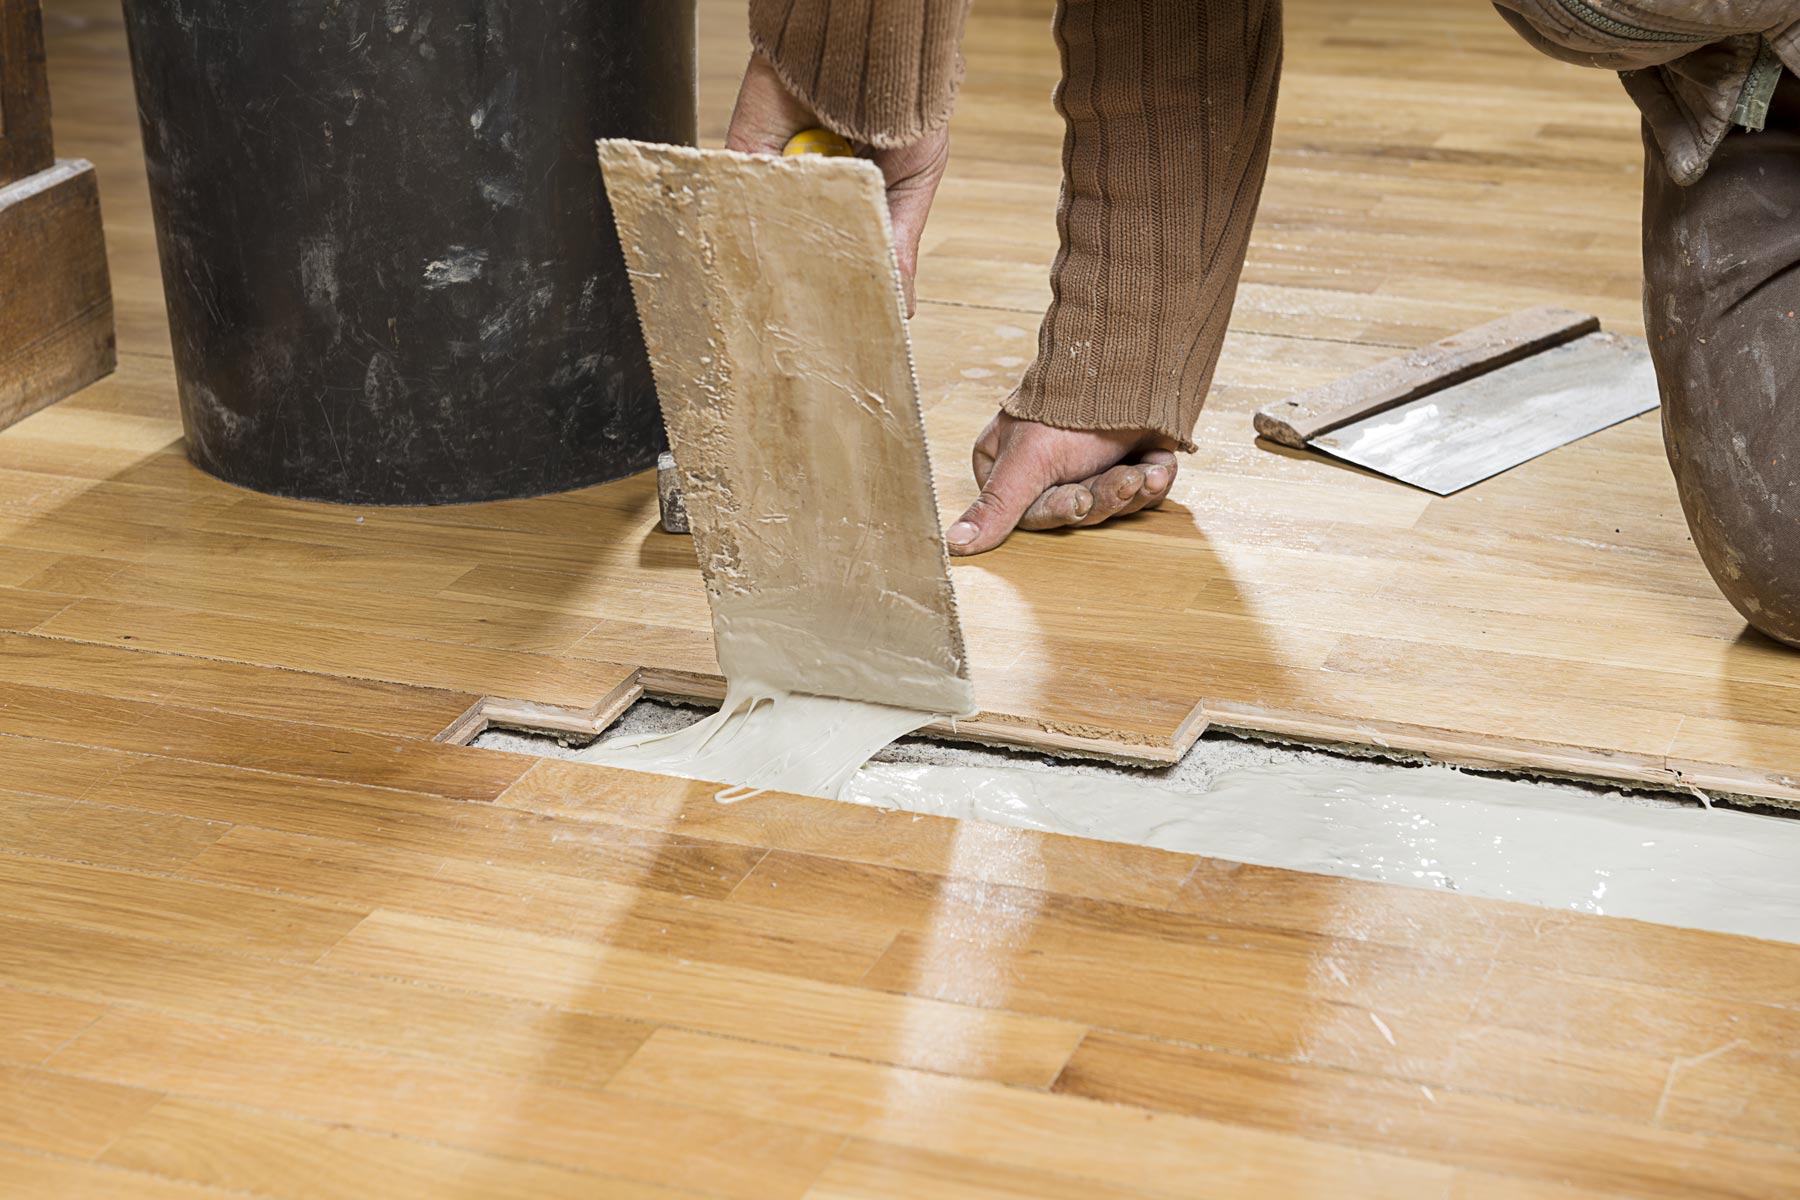
- Install Replacement Floorboards: Apply wood adhesive to the subfloor where the replacement boards will be placed. Insert the replacement boards into the adhesive, ensuring a snug fit. Use a rubber mallet, if necessary, to gently tap the boards into place.
- Secure the Replacement Boards: Use nails or screws to securely fasten the replacement boards to the subfloor. Make sure to countersink the fasteners and fill any resulting holes with wood filler.
- Sand and Refinish: Sand the entire floor surface, including the newly installed replacement boards, to create a smooth and even finish. Start with coarse grit sandpaper and progress to finer grits. Remove dust and debris with a vacuum cleaner before proceeding with refinishing.
- Apply a New Finish: Apply a primer and then paint or stain to the sanded floor, following the manufacturer’s instructions. This will restore the appearance of your wood floor and provide protection against future damage.
Repairing major buckling problems requires careful removal of damaged floorboards and precise installation of replacement boards. By following these steps, you can effectively restore the stability and aesthetics of your wood floor.
Remember, if you are unsure or uncomfortable with performing these repairs yourself, it is recommended to seek the assistance of a professional contractor or flooring specialist who can handle the job effectively.
In the next section, we will discuss the process of replacing damaged floorboards in more detail, providing you with the necessary guidance to address this specific repair scenario.
Replacing Damaged Floorboards
If you have identified specific floorboards that are extensively warped or damaged, the best approach is to replace them with new ones. Here are the step-by-step instructions for replacing damaged floorboards:
- Identify the Damaged Floorboards: Carefully inspect the buckled area and identify the floorboards that are significantly warped, cracked, or otherwise damaged. Mark these boards for removal.
- Remove the Damaged Floorboards: Use a circular saw or jigsaw to cut along the seams of the neighboring floorboards. Cut through the damaged floorboards carefully, ensuring not to damage the surrounding boards. Remove the damaged boards by prying them up with a pry bar or floor puller.
- Clean the Subfloor: Thoroughly clean the exposed subfloor, removing any debris, adhesive, or remnants left behind by the removed floorboards. This will provide a clean surface for the installation of the new floorboards.
- Measure and Cut Replacement Floorboards: Measure the dimensions of the removed floorboards and use these measurements to cut the replacement boards to the appropriate size. Carefully mark and cut the new boards using a circular saw or jigsaw, ensuring a precise fit.
- Test Fit the Replacement Floorboards: Before securing the replacement boards, test fit them in the vacant area to ensure they fit properly. Make any necessary adjustments to the size or shape of the boards as needed.
- Apply Wood Adhesive: Apply wood adhesive to the subfloor where the replacement boards will be placed. This will help secure them securely to the subfloor.
- Install the Replacement Floorboards: Place the replacement boards onto the adhesive, fitting them snugly into the empty spaces. Use a rubber mallet to gently tap the boards into place, ensuring they are level and flush with the surrounding floorboards.
- Secure the Replacement Boards: Use nails or screws to securely fasten the replacement boards to the subfloor. Make sure to countersink the fasteners and fill any resulting holes with wood filler for a seamless finish.
- Sand and Refinish: Sand the entire floor surface, including the newly installed replacement boards, to create a smooth and even finish. Start with coarse grit sandpaper and progress to finer grits. Remove dust and debris with a vacuum cleaner before proceeding with refinishing.
- Apply a New Finish: Apply a primer and then paint or stain to the sanded floor, following the manufacturer’s instructions. This will restore the appearance of your wood floor and provide protection against future damage.
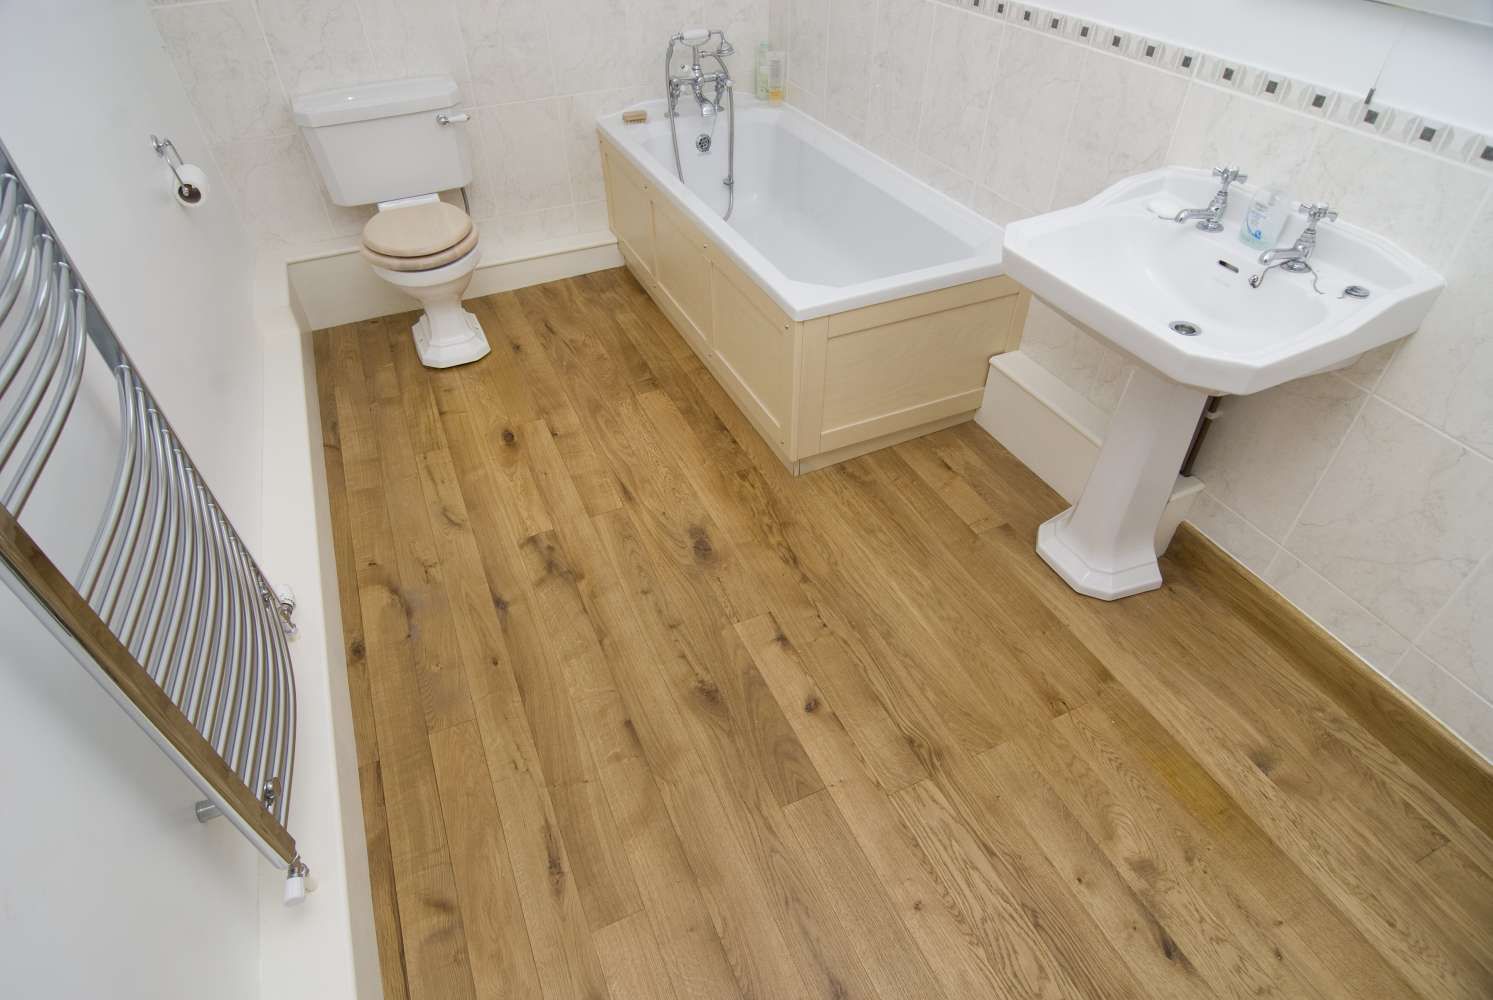
By following these step-by-step instructions, you can effectively replace damaged floorboards and restore the stability and aesthetics of your wood floor. It is recommended to use the same type of wood and finish as the existing floor to achieve a cohesive look.
If you are uncertain or uncomfortable with performing these repairs yourself, it is always advisable to seek the assistance of a professional contractor or flooring specialist who can handle the job effectively.
In the next section, we will discuss the process of sanding and refinishing the floor, which is often necessary after making any repairs to the wood floor.
Sanding and Refinishing the Floor
After completing the necessary repairs, such as fixing minor buckling issues or replacing damaged floorboards, it is often necessary to sand and refinish the floor to restore its smoothness and enhance its appearance. Here are the step-by-step instructions for sanding and refinishing the floor:
- Gather the Necessary Supplies: Before you begin, gather all the supplies you will need, including a sanding machine or sandpaper with various grits, a vacuum cleaner, a mop or cloth, and the chosen finish for your wood floor.
- Prepare the Work Area: Clear the room of any furniture, rugs, or other items that may obstruct your work. Cover any nearby surfaces or furniture with drop cloths or plastic sheets to protect them from dust and debris.
- Sand the Floor: Start the sanding process by using a coarse-grit sandpaper or a sanding machine with a coarse-grit sanding disc. Sand the entire floor surface, following the natural grain of the wood, until the old finish and any imperfections are removed. Repeat the process with progressively finer grits of sandpaper or discs to achieve a smooth surface.
- Remove Dust and Debris: After sanding, thoroughly vacuum the floor to remove all the dust and debris. Dust particles left on the floor can affect the final finish. Use a damp mop or cloth to wipe the floor and ensure that the surface is clean and ready for refinishing.
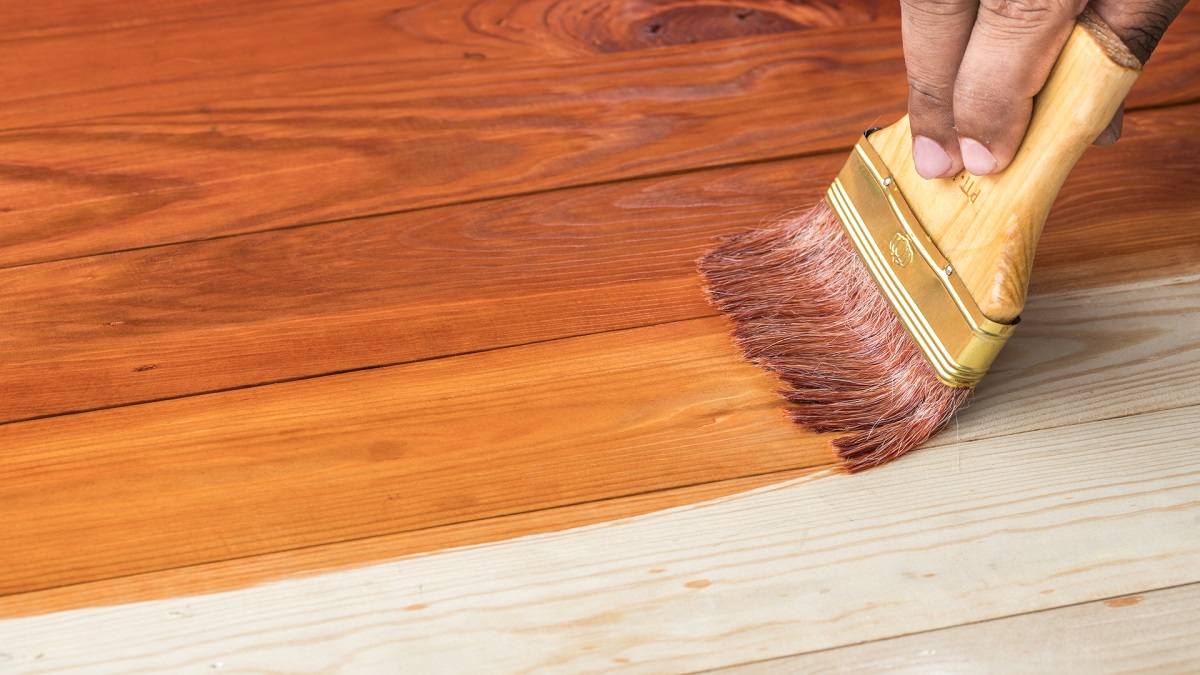
- Apply the Finish: Follow the instructions provided by the manufacturer for the chosen finish. Apply a primer or sealant as recommended, and then apply the finish evenly across the entire floor, using a brush, roller, or applicator pad. Work in small sections, maintaining a wet edge to achieve a uniform finish. Allow the finish to dry completely before applying additional coats, if needed.
- Apply Additional Coats (Optional): Depending on your desired finish and the manufacturer’s instructions, you may choose to apply additional coats for added protection and a richer appearance. Make sure to allow sufficient drying time between coats.
- Allow for Curing: After applying the final coat, allow the floor to cure as specified by the manufacturer. This typically requires staying off the floor for a designated period of time to allow the finish to fully harden and provide maximum durability.
- Replace Furniture and Rugs: Once the finish has fully cured, you can replace the furniture and rugs onto the floor. Take care when moving heavy furniture to avoid scratching or damaging the newly refinished surface.
By following these steps, you can achieve a beautifully sanded and refinished wood floor that not only looks renewed but also provides enhanced protection against daily wear and tear.
It is important to note that sanding and refinishing a wood floor can be a time-consuming process and may require some skill and experience. If you are unsure or uncomfortable with doing it yourself, it is recommended to seek the assistance of a professional flooring specialist who can ensure a high-quality finish.
As a final step, we will discuss some preventive measures you can take to avoid future buckling issues and maintain the longevity of your wood floor.
Read more: How To Fix A Hole In Wood Floor
Preventing Future Buckling
While it’s important to address current buckling issues in your wood floor, taking preventive measures can help avoid similar problems in the future. Here are some steps you can take to prevent future buckling:
- Control Moisture Levels: Maintain a consistent and appropriate level of humidity in your home. Use dehumidifiers in humid climates or during the summer months to prevent excessive moisture from seeping into the wood floor and causing it to swell.
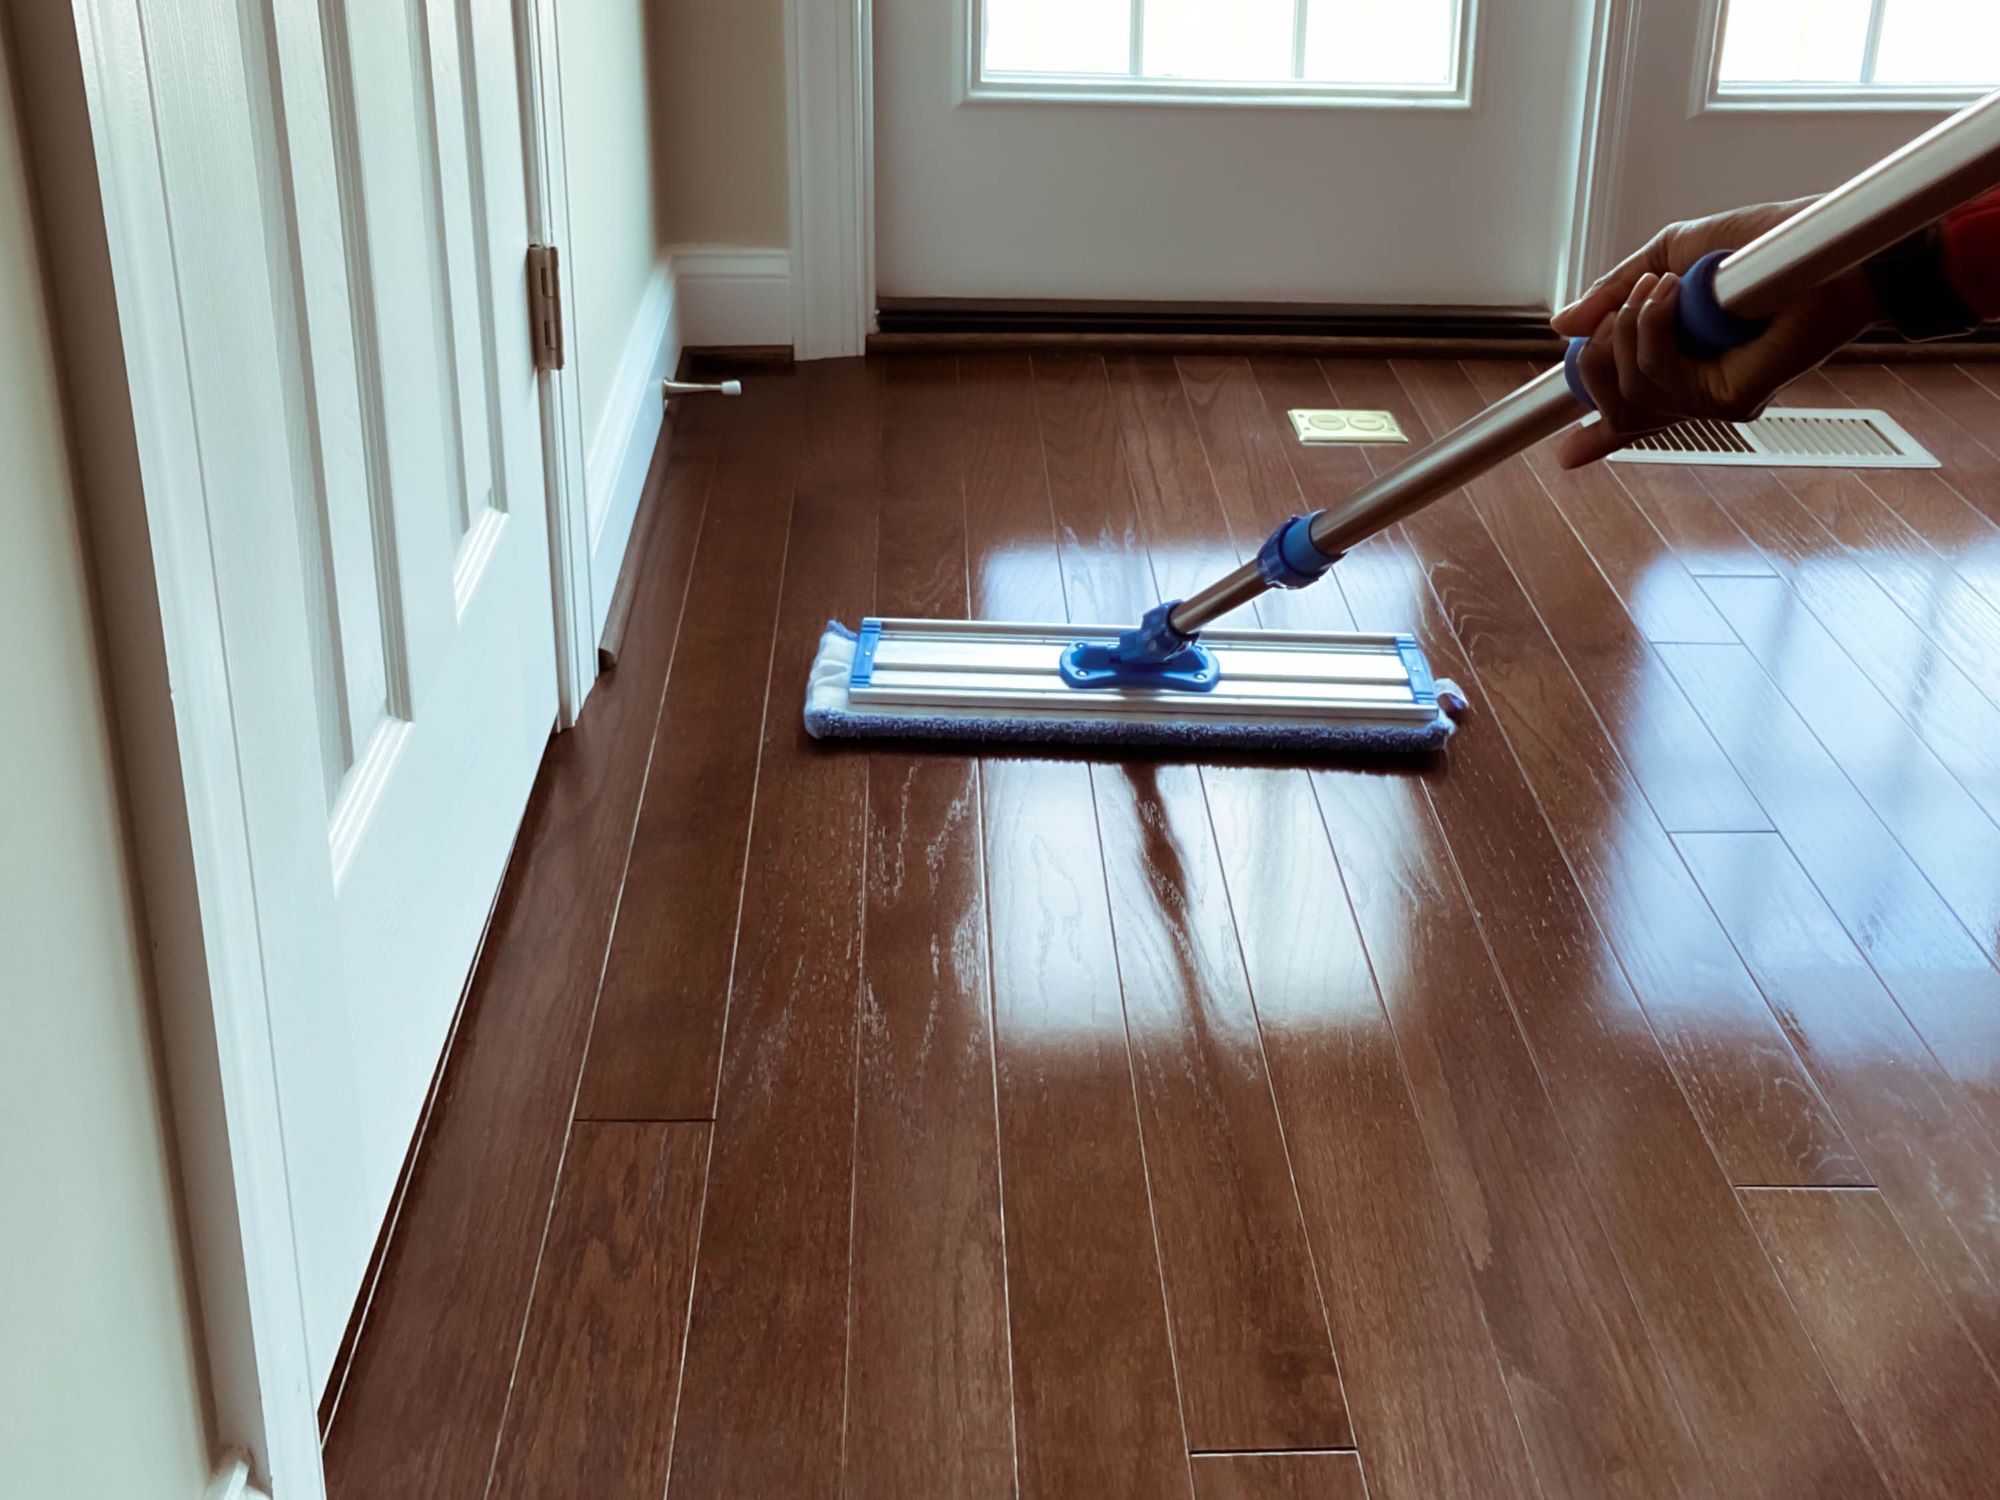
- Avoid Excessive Spills: Clean up any spills on your wood floor promptly to minimize water damage. Wipe away standing water and use a dry cloth or mop to absorb any moisture. Avoid wet-mopping your wood floor unless necessary.
- Use Area Rugs and Mats: Place area rugs and mats in high-traffic areas, especially near entryways and kitchen sinks, to protect the wood floor from potential water damage. Ensure that the rugs and mats have a non-slip backing to prevent tripping hazards.
- Protect Against Sunlight: Direct sunlight can cause wood floors to fade and even warp over time. Use curtains, blinds, or UV-protective film on windows to limit the exposure of your wood floor to sunlight.
- Avoid Extreme Temperature Changes: Maintain a stable indoor temperature to minimize expansion and contraction of the wood floorboards. Sudden temperature changes can lead to buckling. Use heating and cooling systems to regulate the temperature in your home.
- Properly Acclimate Wood Flooring: If you plan to install new wood flooring, allow the flooring material to acclimate in the room for at least 48 hours before installation. This allows the wood to adjust to the temperature and humidity levels of the space.
- Ensure Proper Installation: Ensure that your wood floor is installed correctly by following the manufacturer’s guidelines and best practices. Properly leave expansion gaps along walls and transitions to allow for natural movement of the wood floor.
- Maintain Proper Ventilation: Ensure that your home has adequate ventilation to prevent excess moisture buildup. Use vents, fans, or open windows to facilitate proper air circulation, especially in areas prone to moisture, like bathrooms and kitchens.
By implementing these preventive measures, you can safeguard your wood floor from future buckling issues and potential damage. Regular maintenance and observation of your wood floor’s condition can also help identify any early signs of buckling or other problems, allowing for prompt action and minimizing the risk of further damage.
Remember, if you notice any significant buckling or structural issues with your wood floor, it is advisable to seek the assistance of a professional flooring specialist who can provide expert guidance and solutions.
I hope this guide has been informative and helpful in understanding how to address buckled wood floors and prevent future issues. With the right knowledge and care, your wood floor can remain beautiful and durable for years to come.
Good luck with your wood floor repairs and maintenance!
Conclusion
Dealing with a buckled wood floor can be a frustrating and concerning issue, but with the right knowledge and tools, you can effectively address the problem and restore the beauty and stability of your flooring. Understanding the causes of buckling, identifying the extent of the damage, and choosing the appropriate repair method are key steps in the process.
Whether you’re facing minor buckling issues that can be resolved with simple repairs or major problems that require more extensive measures like replacing damaged floorboards, taking the necessary steps to address the underlying causes and perform the repairs correctly is crucial. It’s important to ensure proper acclimation, control moisture levels, and maintain a stable indoor environment to prevent future buckling.
Remember to gather the necessary tools and materials, prepare the work area by removing furniture and floor coverings, inspect the subfloor, and assess the extent of the buckling before proceeding with repairs. Whether you choose to tackle the repairs yourself or seek professional assistance, the goal is to restore your wood floor to its original beauty and functionality.
Taking preventive measures to control moisture levels, protect against sunlight, and maintain proper ventilation can help prolong the lifespan of your wood floor and minimize the risk of future buckling. Regularly inspecting your wood floor for any signs of buckling or damage and addressing issues promptly can save you time, effort, and money in the long run.
By following the step-by-step instructions provided in this guide and practicing preventive maintenance, you can effectively address buckled wood floors and ensure their durability and beauty for years to come.
Remember, if you encounter any major structural issues or feel uncertain about performing the repairs yourself, it is always recommended to consult with a professional contractor or flooring specialist who can provide expert guidance and assistance.
With patience, proper precautions, and careful execution, you can restore your buckled wood floor and enjoy a beautiful and functional living space once again.
Frequently Asked Questions about How To Fix Buckled Wood Floor
Was this page helpful?
At Storables.com, we guarantee accurate and reliable information. Our content, validated by Expert Board Contributors, is crafted following stringent Editorial Policies. We're committed to providing you with well-researched, expert-backed insights for all your informational needs.


0 thoughts on “How To Fix Buckled Wood Floor”