Articles
Why Is My Toilet Overflowing When I Flush
Modified: October 18, 2024
Find informative articles on why your toilet may be overflowing when you flush. Gain insights and solutions to prevent this plumbing issue.
(Many of the links in this article redirect to a specific reviewed product. Your purchase of these products through affiliate links helps to generate commission for Storables.com, at no extra cost. Learn more)
Introduction
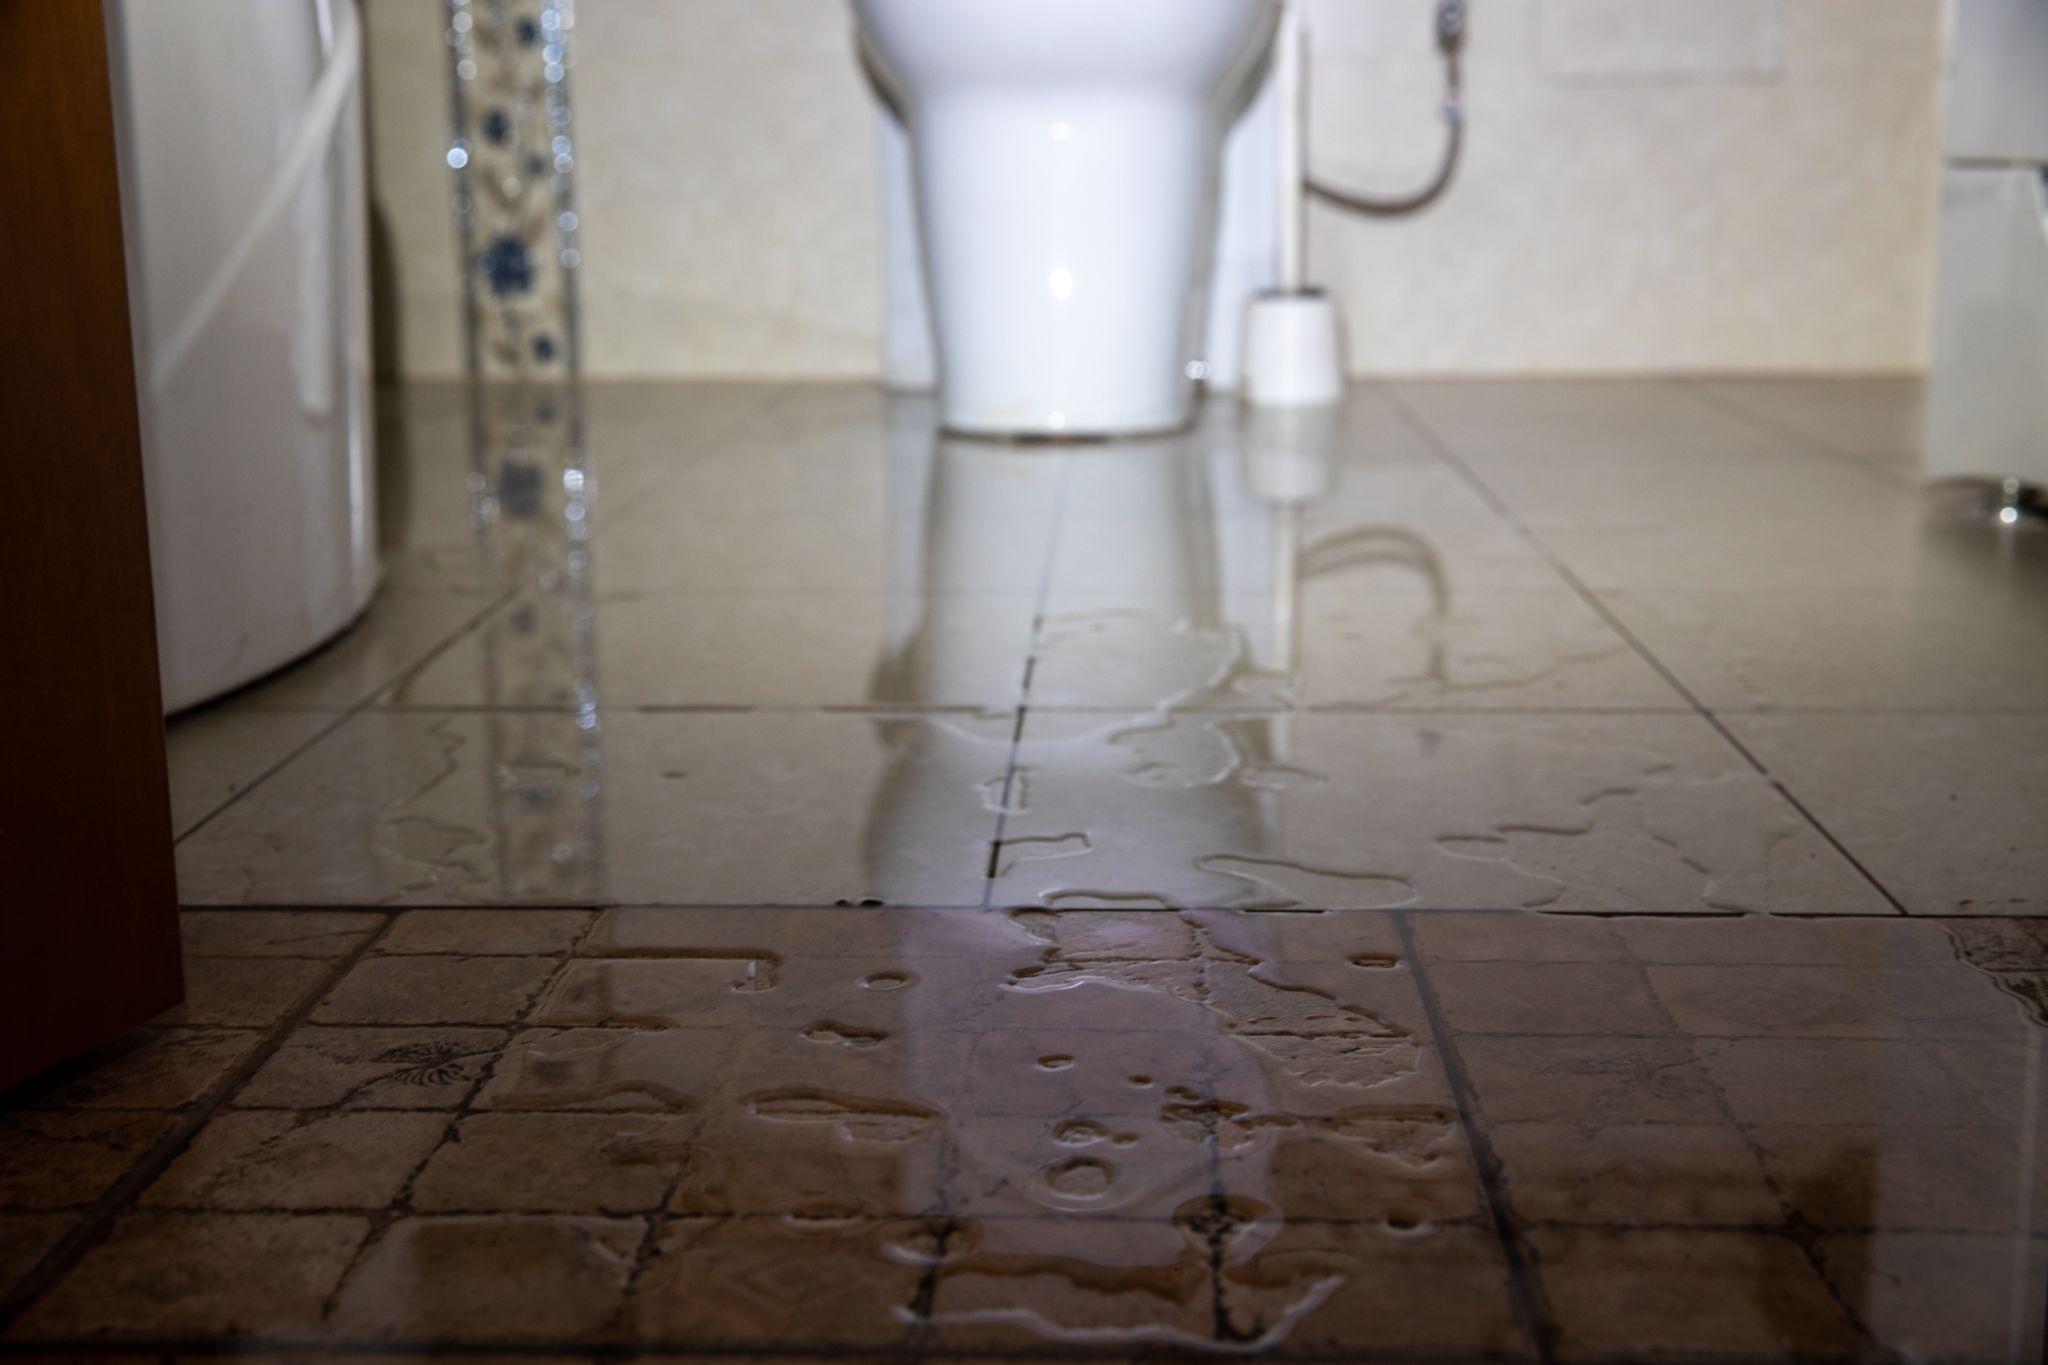
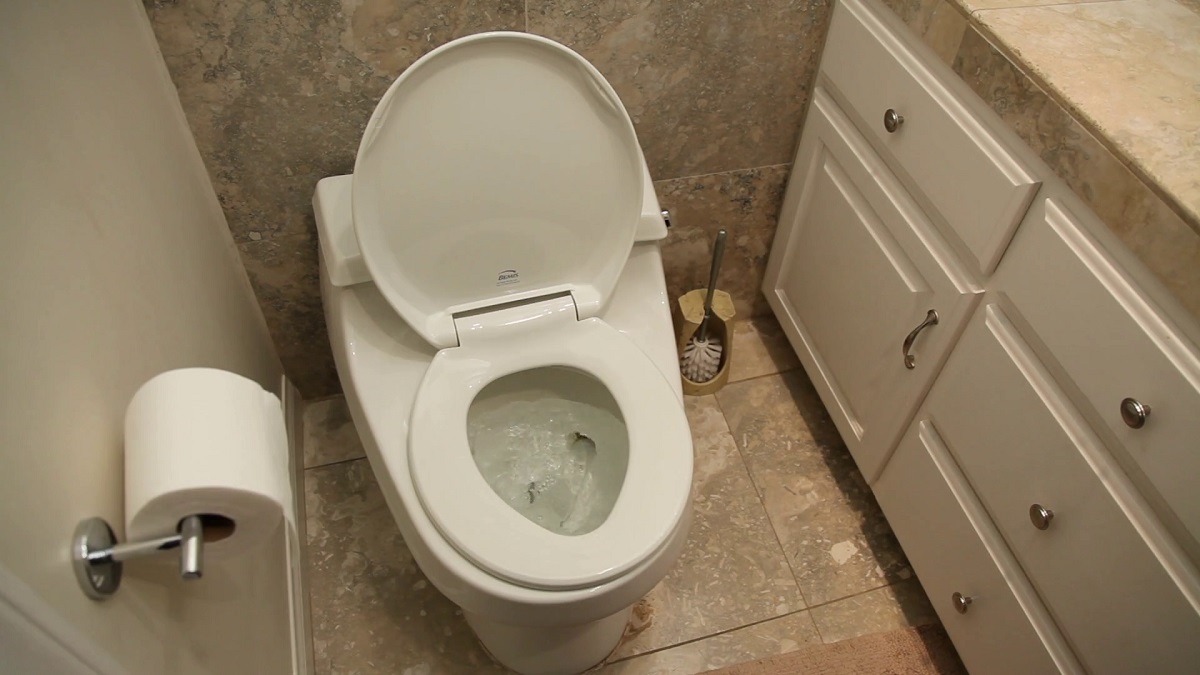
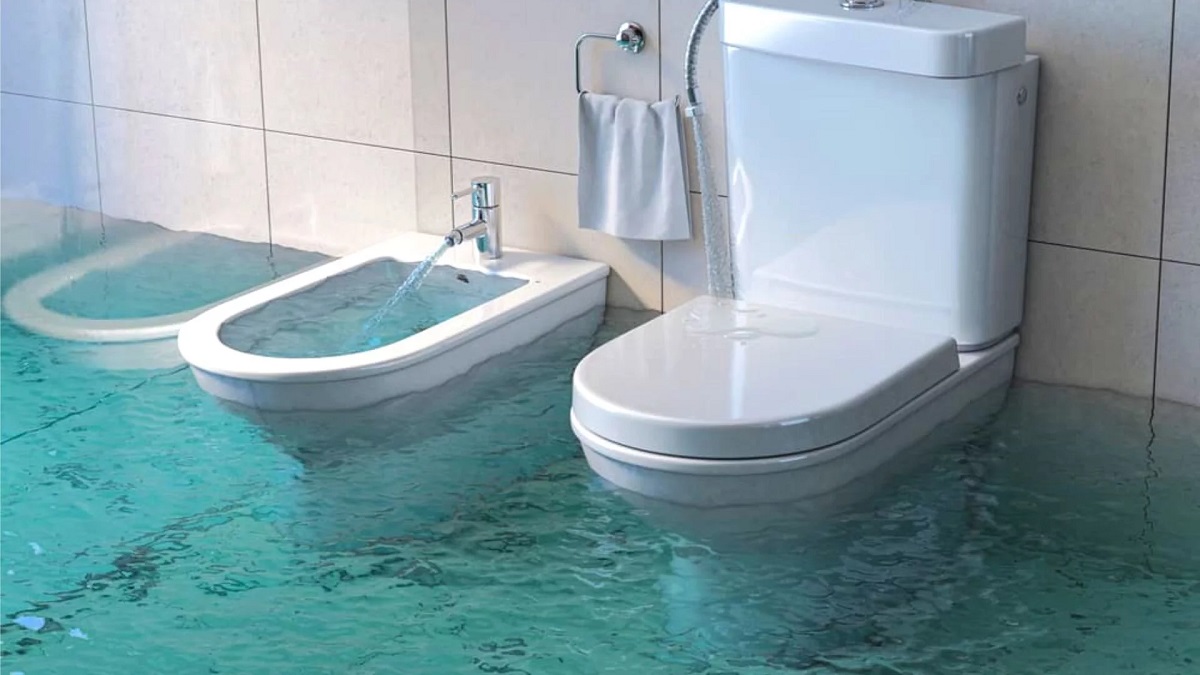
There’s nothing quite as frustrating as the sight of a toilet overflowing when you flush it. Not only can it create a mess, but it can also cause water damage and inconvenience to your daily routine. Understanding the causes of a toilet overflow and how to prevent it can save you from this unpleasant situation.
A toilet overflow occurs when the water level in the bowl rises above its normal level, spilling onto the bathroom floor. There are several common causes for this problem, ranging from simple blockages to malfunctioning components within the toilet system. By identifying the underlying issue, you can take the necessary steps to resolve it and prevent future incidents.
In this article, we will explore the common causes of toilet overflow and provide practical solutions to address them. Whether you are a homeowner or a renter, having this knowledge will empower you to handle toilet-related issues with confidence.
Key Takeaways:
- Prevent toilet overflow by practicing proper flushing techniques, maintaining components, and educating household members. Promptly address issues to ensure a hassle-free and efficient toilet system.
- Clear blockages, adjust water levels, and repair or replace malfunctioning components to prevent toilet overflow. Regular maintenance and proper habits are key to a well-functioning toilet.
Common Causes of Toilet Overflow
Understanding the common causes of toilet overflow can help you diagnose and resolve the issue promptly. Here are some of the most frequent culprits:
1. Blocked Drainage Pipes: One of the primary reasons for toilet overflow is a blockage in the drainage pipes. This can occur due to a build-up of foreign objects, excessive toilet paper, or even tree roots infiltrating the pipes. When the flow of water is restricted, it can lead to an overflow when you flush.
2. Clogged Toilet Trap: The toilet trap, also known as the S-shaped bend in the bowl, can become clogged over time. This can happen due to the accumulation of debris, such as hair, toilet paper, or sanitary products. A clogged trap obstructs the flow of water, causing it to back up and overflow.
3. Malfunctioning Flapper or Fill Valve: The flapper and fill valve are crucial components of the toilet tank. The flapper controls the release of water into the bowl, while the fill valve regulates the water level in the tank. If either of these components is faulty or worn out, it can lead to excessive water entering the bowl, resulting in an overflow.
4. High Water Level in the Tank: If the water level in the toilet tank is set too high, it can increase the chances of an overflow. When you flush, an excessive amount of water is released into the bowl, overwhelming the drainage system and causing an overflow.
5. Faulty Toilet Float: The toilet float is responsible for shutting off the water supply once the tank is filled to the appropriate level. If the float is not functioning correctly, it may not stop the water from entering the tank, leading to an overflow when the tank becomes too full.
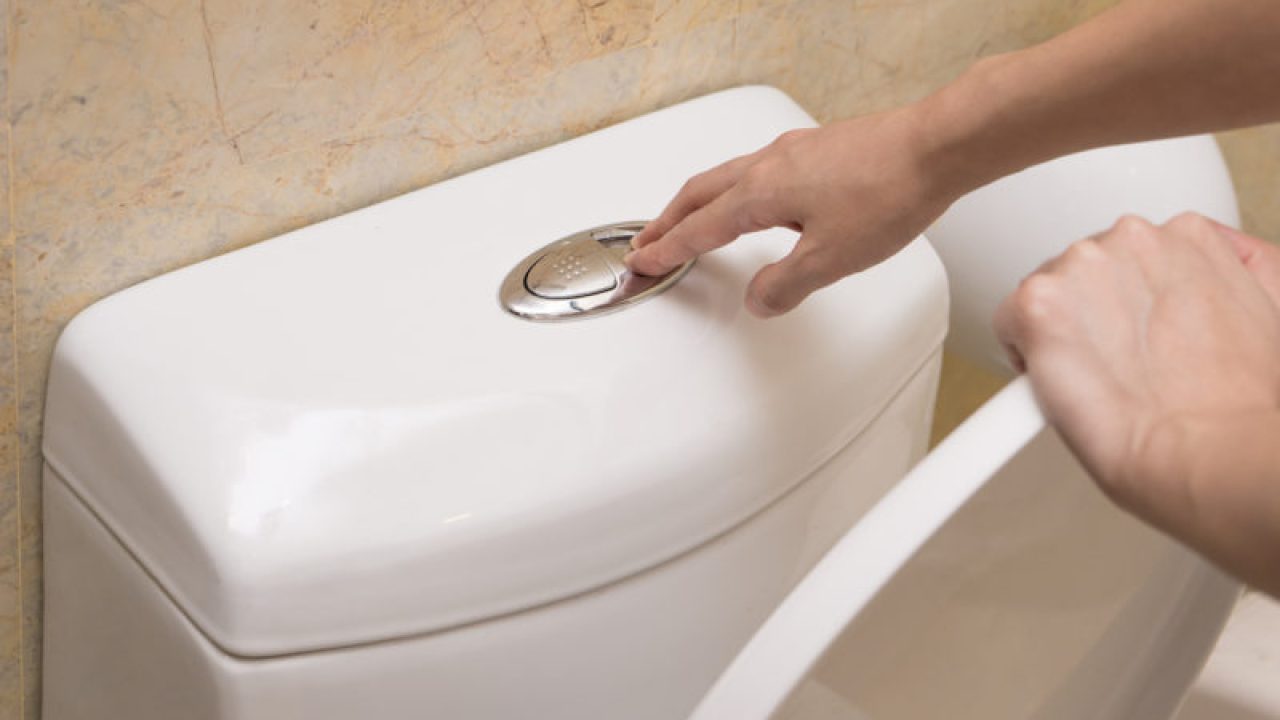
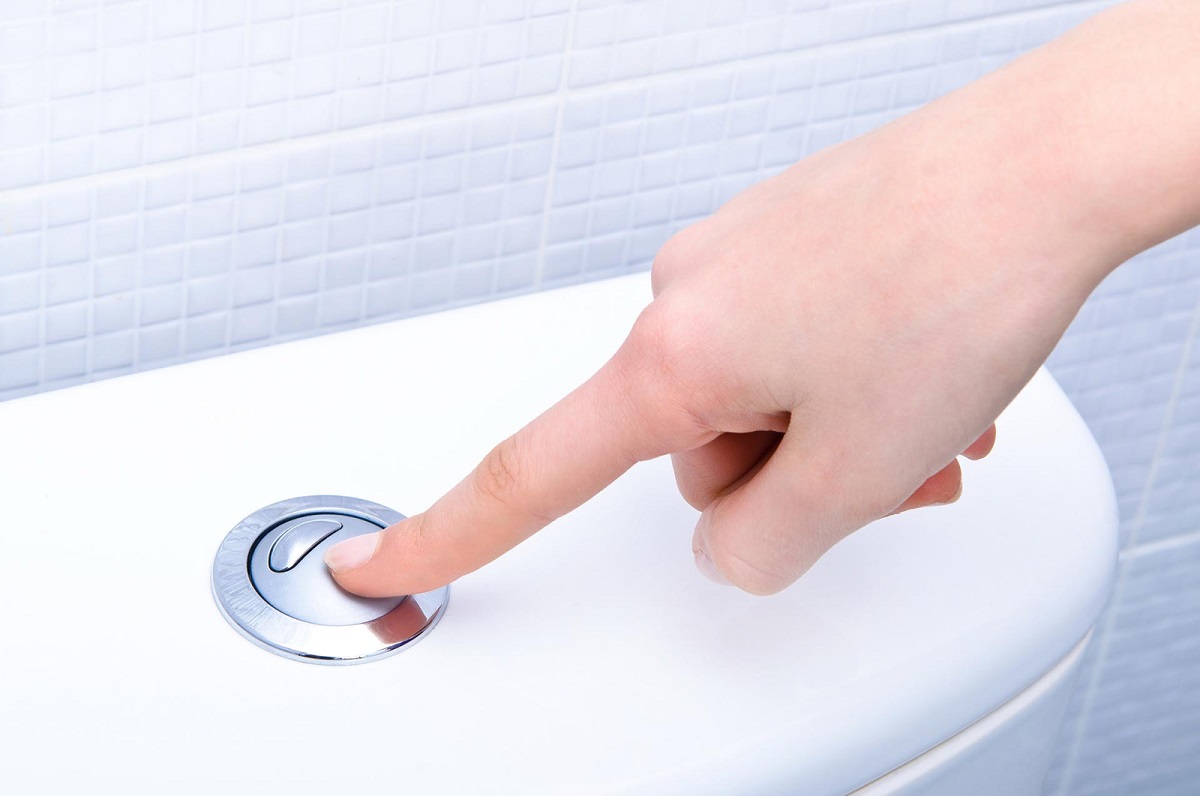
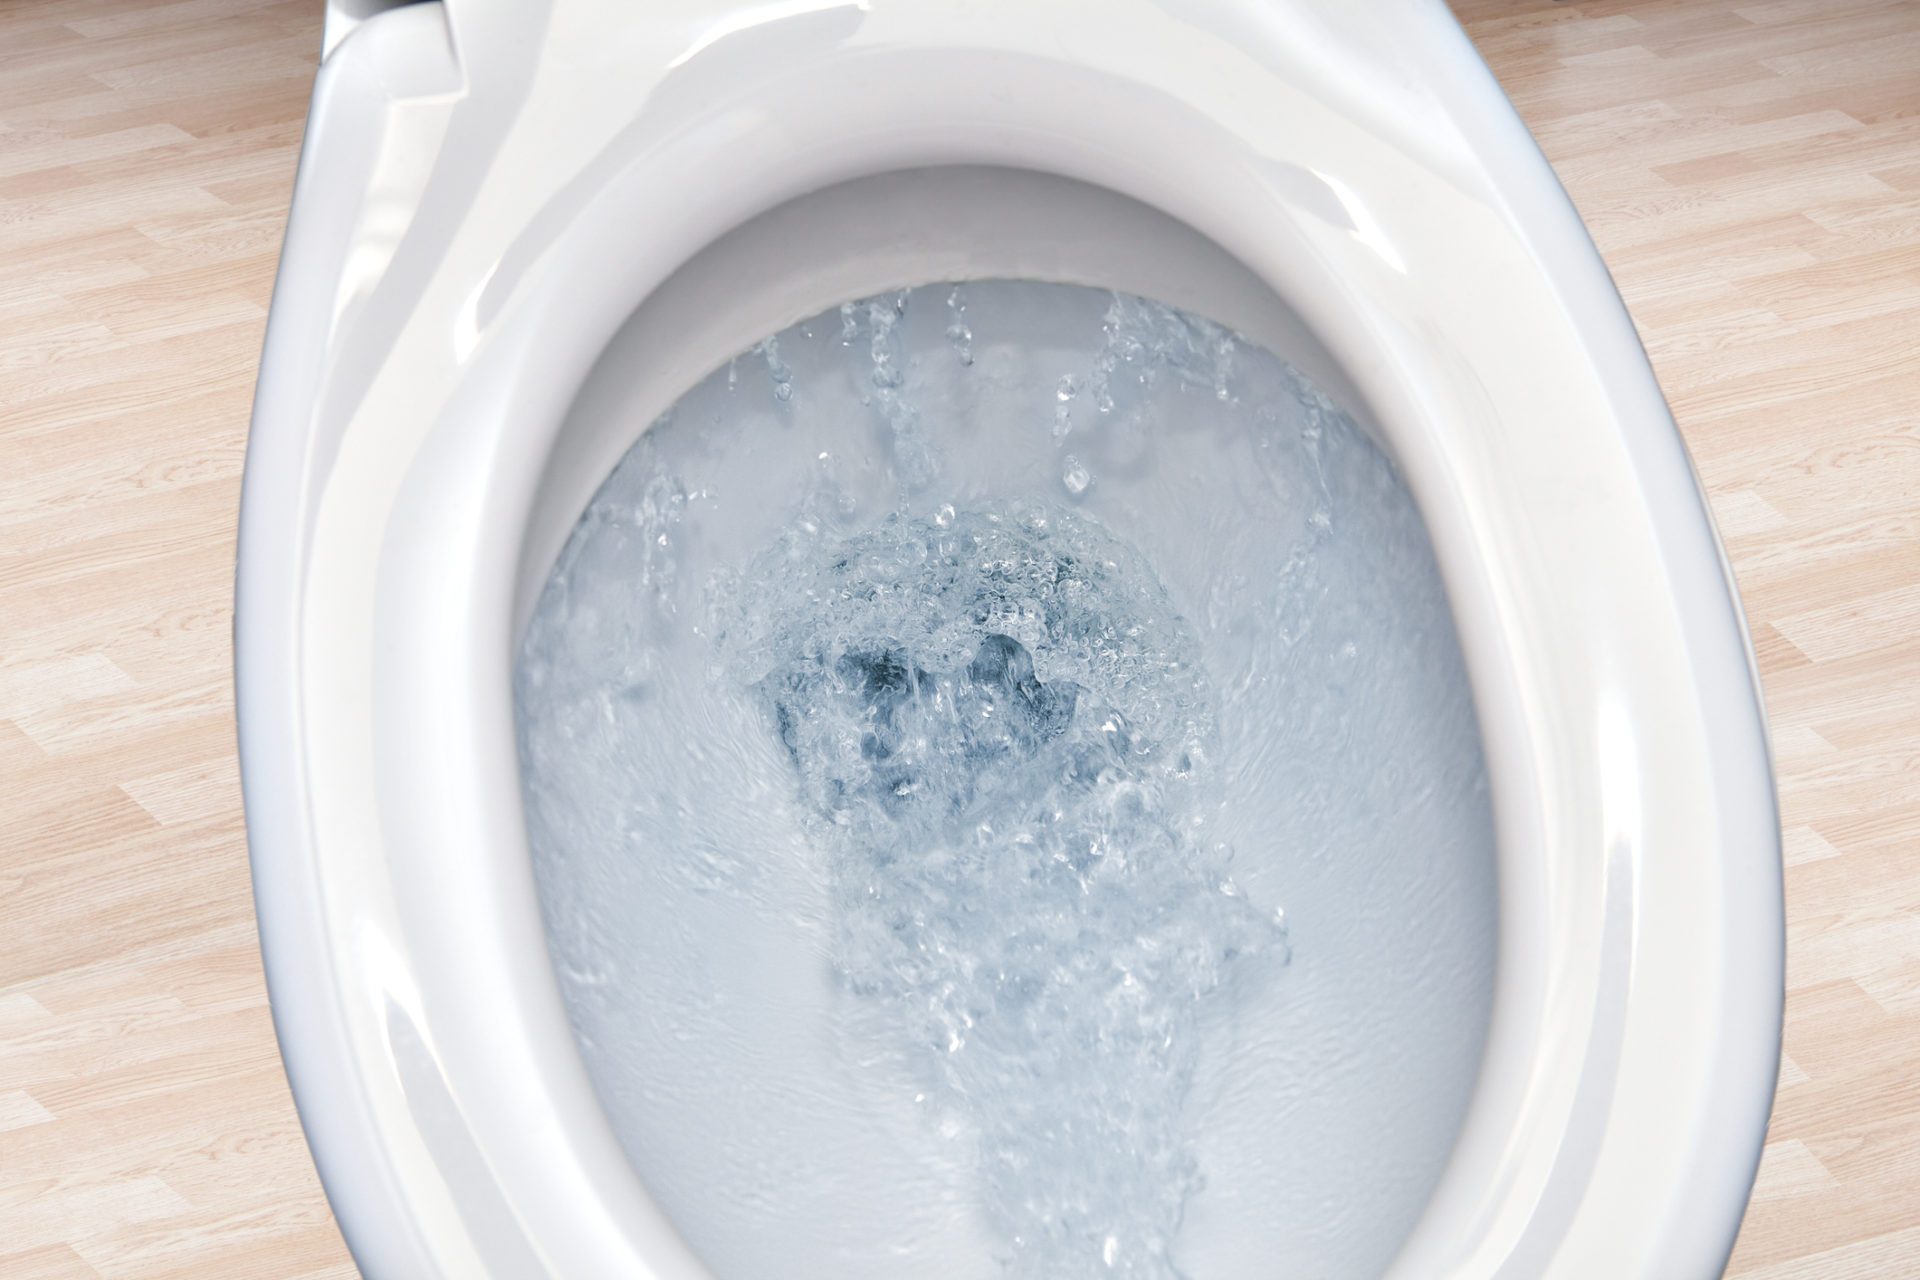
6. Incorrect Toilet Flushing Technique: Believe it or not, the way you flush the toilet can also contribute to an overflow. Flushing multiple times in quick succession or flushing large amounts of waste at once can overwhelm the toilet’s drainage system and cause it to overflow.
By understanding these common causes, you can begin troubleshooting and implementing the appropriate solutions to prevent toilet overflow. In the next sections, we will explore these solutions in detail, so you can handle any issues that may arise with confidence.
Blocked Drainage Pipes
Blocked drainage pipes are a common cause of toilet overflow. When there is a blockage in the pipes, water cannot flow freely, leading to a backup and eventual overflow. Several factors can contribute to blocked drainage pipes, including:
1. Foreign Objects: Items such as paper towels, wipes, sanitary products, or small toys that accidentally find their way into the toilet can cause blockages. These objects do not break down like toilet paper and can accumulate, clogging the pipes.
2. Excessive Toilet Paper: Using an excessive amount of toilet paper in one flush can overwhelm the drainage system, especially if the toilet paper is thick or not easily dissolved.
3. Tree Root Infiltration: In some cases, tree roots can grow into the sewer lines, causing blockages. These roots can infiltrate the pipes through cracks or joints, obstructing the flow of water and leading to toilet overflow.
If you suspect that blocked drainage pipes are causing your toilet to overflow, there are several steps you can take to address the issue:
1. Use a Plunger: A plunger is a useful tool for clearing simple blockages. Place the plunger over the drain opening and plunge vigorously several times to create suction and dislodge the blockage.
2. Use a Toilet Auger: A toilet auger, also known as a toilet snake, is a flexible tool designed to reach deeper into the pipes to break up stubborn blockages. Insert the auger into the drain and turn the handle to maneuver it through the pipes, clearing the obstruction.
3. Chemical Drain Cleaners: Chemical drain cleaners can be effective in breaking down organic blockages. However, they should be used with caution, as they contain harsh chemicals that can damage pipes. Follow the instructions carefully and consider using an eco-friendly option.
4. Call a Professional: If your attempts to clear the blockage are unsuccessful or you suspect a more severe issue, it is best to call a professional plumber. They have the expertise and tools to diagnose and resolve complex blockages safely.
To prevent future blockages, it is essential to be mindful of what is flushed down the toilet. Avoid flushing non-flushable items and dispose of them properly in the trash. Additionally, use an appropriate amount of toilet paper and consider using septic-safe or quick-dissolving toilet paper to minimize the risk of blockages.
By addressing blocked drainage pipes promptly and adopting proper flushing habits, you can prevent toilet overflow and maintain a functioning plumbing system in your home.
Clogged Toilet Trap
A clogged toilet trap is another common cause of toilet overflow. The toilet trap refers to the S-shaped bend in the toilet bowl that prevents sewer gases from entering the bathroom. Over time, this trap can become clogged with debris, leading to water backing up and eventually overflowing. Here are some factors that can contribute to a clogged toilet trap:
1. Accumulation of Debris: The toilet trap can become clogged due to the buildup of various materials, including hair, soap scum, mineral deposits, and even small objects that accidentally fall into the bowl.
2. Excessive Toilet Paper: Using too much toilet paper can contribute to a clogged toilet trap. When large amounts of toilet paper are flushed, they can get trapped in the bend of the trap, obstructing the flow of water.
If you suspect a clogged toilet trap is causing your toilet to overflow, there are steps you can take to clear the obstruction:
1. Plunge the Toilet: Using a plunger, create a seal around the drain opening and plunge vigorously up and down. This can help dislodge the clog and restore the proper flow of water.
2. Use a Toilet Auger: If the plunger doesn’t work, a toilet auger can be used to reach deeper into the toilet trap and break up the clog. Insert the auger into the drain and rotate the handle to push the coil through the trap, clearing the blockage.
3. Chemical Drain Cleaners: Chemical drain cleaners can also be effective in breaking down organic clogs in the toilet trap. Follow the instructions carefully and use a product specifically designed for toilets.
It’s important to note that if these methods don’t resolve the issue, or if you are hesitant to perform the task yourself, it’s best to contact a professional plumber. They have the necessary tools and expertise to assess and clear stubborn clogs safely.
To prevent future clogs in the toilet trap, consider implementing these preventive measures:
1. Proper Toilet Paper Usage: Use an appropriate amount of toilet paper and avoid excessive use in a single flush. This reduces the likelihood of the toilet trap becoming overwhelmed with paper.
2. Regular Maintenance: Regularly clean the toilet bowl and flush with hot water to help prevent debris from accumulating in the trap.
By being aware of the common causes of a clogged toilet trap and implementing preventive measures, you can reduce the chances of an overflowing toilet and maintain a properly functioning plumbing system in your home.
Malfunctioning Flapper or Fill Valve
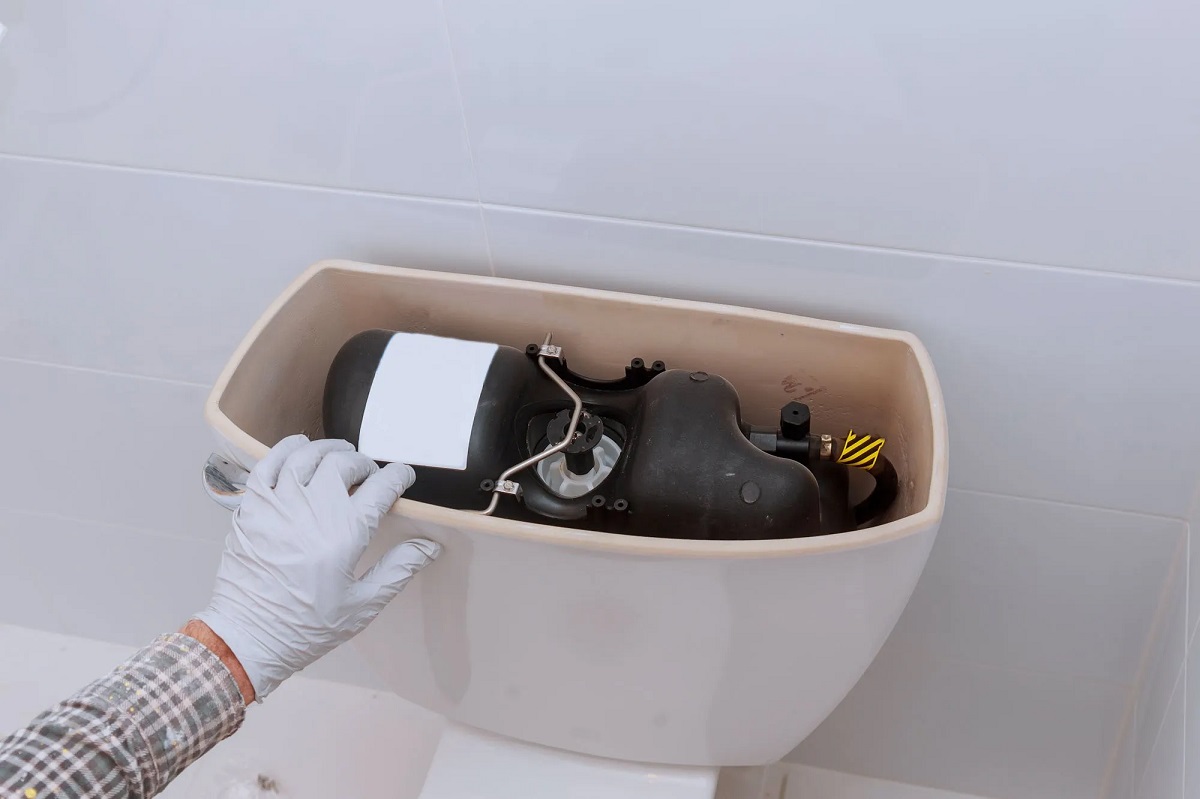
A malfunctioning flapper or fill valve can often be the cause of a toilet overflow. These components play vital roles in the toilet’s flushing and filling cycle. When they are not functioning properly, too much water can enter the bowl, leading to an overflow. Here’s a closer look at these components and their potential problems:
1. Flapper: The flapper is a rubber or plastic valve that covers the flush valve opening at the bottom of the tank. It lifts when you flush, allowing water to flow from the tank into the bowl. If the flapper is worn out, damaged, or not properly sealing, it can result in a continuous flow of water into the bowl and cause an overflow.
2. Fill Valve: The fill valve, also known as the ballcock, is responsible for regulating the water level in the toilet tank. When the tank is empty, the fill valve allows water to enter and fill the tank. Once it reaches the predetermined level, the fill valve stops the flow of water. A malfunctioning fill valve may not shut off the water completely, causing the tank to overfill and leading to a potential overflow.
To determine if a malfunctioning flapper or fill valve is the cause of your toilet overflow, there are a few steps you can take:
1. Inspect the Flapper: Lift the toilet tank lid and observe the flapper. Check for any visible signs of wear, damage, or mineral build-up. Ensure that the flapper is not sticking or improperly aligned. If there are any issues, replace the flapper with a new one that is compatible with your toilet model.
2. Check the Fill Valve: Listen for any water running or hissing sounds coming from the tank. This may indicate that the fill valve is not closing properly. Adjust the float or control mechanism to ensure it is set to the correct water level. If the fill valve continues to malfunction, consider replacing it with a new one.
3. Perform a Dye Test: To confirm if the flapper or fill valve is causing the overflow, perform a dye test. Add a few drops of food coloring or a dye tablet into the tank. Wait for a few minutes without flushing. If the color appears in the bowl, it indicates a leak in the flapper or fill valve, and they should be repaired or replaced.
Addressing a malfunctioning flapper or fill valve involves replacing the faulty component. The replacement process may vary depending on the toilet model. If you are unsure or uncomfortable performing the repair yourself, it’s recommended to seek the assistance of a professional plumber.
Regular maintenance and inspections of these components can help prevent future issues. Checking and replacing worn-out flappers, adjusting the fill valve as needed, and ensuring proper alignment can minimize the risk of toilet overflow caused by flapper or fill valve problems.
By promptly addressing and resolving malfunctioning flapper or fill valve issues, you can prevent toilet overflows and maintain a properly functioning toilet system in your home.
High Water Level in the Tank
A high water level in the toilet tank can contribute to toilet overflow. When the water level is set too high, it increases the amount of water that flushes into the bowl, overwhelming the drainage system and leading to an overflow. Several factors can cause a high water level in the tank:
1. Improper Float Adjustment: The float is a mechanism in the toilet tank that controls the water level. If it is not properly adjusted or is sticking, it may cause the tank to fill with more water than necessary, resulting in a high water level.
2. Defective Fill Valve: A defective or malfunctioning fill valve may not shut off completely, causing the water to continuously fill the tank and raise the water level beyond what is required.
If you suspect a high water level in your toilet tank is causing overflow issues, follow these steps to resolve the problem:
1. Adjust the Float: Locate the float inside the toilet tank. It is typically a ball or a cup-shaped device attached to a lever. Gently bend the float arm downward to lower the water level or adjust the float mechanism according to the manufacturer’s instructions. This will help control the water level in the tank.
2. Check the Fill Valve: Inspect the fill valve for any signs of damage or malfunction. If it is not shutting off completely or continues to fill the tank even after reaching the desired water level, consider replacing the fill valve with a new one.
3. Perform a Flush Test: After making adjustments to the float or replacing the fill valve, perform a flush test to ensure the water level is at an appropriate level. Flush the toilet and observe if the water level rises or if there are any signs of overflow. Repeat the process and make further adjustments if necessary.
It is important to note that the water level in the tank should typically be about an inch below the overflow tube. This ensures proper flushing while preventing potential overflow issues. Refer to the toilet’s user manual or consult a professional plumber if you are unsure about the recommended water level for your specific toilet model.
Taking preventative measures can help avoid high water levels and subsequent toilet overflow:
1. Regular Tank Maintenance: Periodically inspect the components inside the toilet tank for wear or damage. Clean any mineral deposits or debris that may affect the float or fill valve’s functioning.
2. Proper Float Adjustment: Maintain the proper float adjustment to ensure that the water level remains at an appropriate height in the tank.
By addressing a high water level in the toilet tank, you can prevent toilet overflow and maintain optimal functioning of your toilet system.
Faulty Toilet Float
A faulty toilet float can be another culprit behind toilet overflow. The toilet float is responsible for regulating the water level in the tank and shutting off the water flow once the desired level is reached. When the float malfunctions, it can lead to an excessive amount of water entering the tank, causing it to overflow when the water level surpasses the overflow tube. Here are some common issues with the toilet float:
1. Waterlogged Float: Over time, the float may develop leaks or cracks, causing it to become waterlogged. A waterlogged float loses buoyancy and fails to rise with the water level, resulting in continuous water flow and potential overflow.
2. Mispositioned Float: If the float is positioned too high or too low, it can affect its ability to accurately control the water level. If the float is set too high, it may fail to trigger the shut-off valve, causing the tank to fill beyond the recommended level and leading to an overflow.
3. Sticking Float: A sticking float can occur when debris, mineral deposits, or corrosion hinder its movement. This can prevent the float from rising or falling as needed to regulate the water level, potentially resulting in an overflow.
If you suspect a faulty toilet float is causing your toilet to overflow, here are some steps you can take to address the issue:
1. Inspect the Float: Lift the toilet tank lid and locate the float. Examine it for any signs of damage, cracks, or waterlogging. Ensure it moves freely without any sticking or obstruction.
2. Replace a Waterlogged Float: If the float is waterlogged, it will need to be replaced. Most floats can be unscrewed or detached from the fill valve assembly and replaced with a new one. Make sure to choose a float that is compatible with your toilet model.
3. Adjust the Float Position: If the float is mispositioned, adjust its height by either bending the float arm or adjusting the float mechanism as per the manufacturer’s instructions. The float should be set to an appropriate level that triggers the shut-off valve once the desired water level is reached.
4. Clean or Repair a Sticking Float: If the float is sticking due to debris or mineral buildup, clean it with a mixture of vinegar and water or a suitable cleaning solution. Gently scrub away any deposits using a soft brush. If the float is corroded or damaged, consider replacing it.
Regular maintenance and inspections of the toilet float can help prevent future overflow issues. Ensure that the float is in good condition, properly adjusted, and free from any obstructions or sticking points.
By addressing a faulty toilet float promptly and ensuring its proper functioning, you can prevent toilet overflow and maintain a reliable and efficient toilet system in your home.
Incorrect Toilet Flushing Technique
Believe it or not, an incorrect toilet flushing technique can contribute to toilet overflow. Flushing the toilet improperly can lead to excessive water being released into the bowl, overwhelming the drainage system and causing an overflow. Here are some common mistakes that can result in an incorrect toilet flushing technique:
1. Multiple Flushes in Quick Succession: Flushing the toilet multiple times in quick succession can overload the drainage system. Each flush adds a significant amount of water to the bowl, and if the water cannot drain fast enough, it may result in an overflow.
2. Flushing Large Amounts of Waste at Once: Flushing large amounts of waste, such as excessive toilet paper or sanitary products, in a single flush can overwhelm the toilet’s drainage system. These items can create blockages, obstructing the flow of water and causing the toilet to overflow.
3. Flushing Non-Flushable Items: Flushing non-flushable items, including baby wipes, cotton balls, dental floss, or paper towels, can lead to blockages in the toilet’s drainage system. These items do not break down like toilet paper and can cause clogs, resulting in an overflow.
To prevent toilet overflow caused by incorrect flushing techniques, here are some guidelines to follow:
1. Flush Properly and Wait: After flushing the toilet, wait for the water level to fully recede before flushing again, especially if you need to dispose of a large amount of waste. This allows the drainage system enough time to process the water and prevent overflow.
2. Flush in Moderation: Avoid excessive flushing, especially in quick succession. Give the toilet ample time to drain between each flush to prevent overwhelming the system.
3. Proper Waste Disposal: Dispose of non-flushable items, such as wipes, feminine hygiene products, and paper towels, in trash receptacles instead of the toilet. This helps avoid blockages in the drainage system and potential overflow issues.
Educating household members, guests, and children about proper flushing etiquette is crucial in preventing toilet overflow caused by incorrect flushing techniques. By following these guidelines, you can help maintain a properly functioning toilet system and minimize the risk of overflow.
It’s important to note that if you regularly experience toilet overflow despite following correct flushing techniques, there may be an underlying issue with the toilet or the plumbing. In such cases, it is recommended to seek the assistance of a professional plumber to diagnose and address the problem.
Check the water level in the tank and adjust the float if it’s too high. Also, try using a plunger to clear any clogs in the drain. If the problem persists, it may be a sign of a more serious issue and you should call a plumber.
Solutions to Prevent Toilet Overflow
Toilet overflow can be an unpleasant and messy experience. Fortunately, there are several solutions you can implement to prevent this issue from occurring. By addressing the common causes of toilet overflow and adopting preventative measures, you can maintain a smoothly functioning toilet system. Here are some effective solutions:
1. Clearing Blocked Drainage Pipes: If blocked drainage pipes are causing the overflow, you can use a plunger or a toilet auger to remove the blockage. Regular maintenance and proper disposal of waste can help prevent future blockages.
2. Unclogging the Toilet Trap: A clogged toilet trap can be cleared by using a plunger or a toilet auger. Avoid flushing items that can cause blockages, and consider using septic-safe toilet paper.
3. Repairing or Replacing the Flapper or Fill Valve: Malfunctioning components, such as the flapper or fill valve, can cause excessive water to flow into the bowl. Inspect and replace worn-out or faulty components to ensure proper water control.
4. Adjusting the Water Level in the Tank: Set the water level in the tank appropriately, about an inch below the overflow tube. This prevents excessive water from entering the bowl and causing an overflow.
5. Fixing or Replacing the Toilet Float: A faulty toilet float can cause the tank to overfill. Replace a waterlogged or malfunctioning float to ensure accurate water level regulation.
6. Proper Toilet Flushing Technique: Educate household members about proper flushing etiquette, such as not flushing excessive amounts of waste or non-flushable items. Flush in moderation and avoid rapid consecutive flushes.
In addition to these solutions, here are some general tips to prevent toilet overflow:
– Maintain Regular Maintenance: Inspect the toilet components regularly, clean the toilet, and remove any mineral deposits or debris that may affect proper functioning.
– Use a Trash Receptacle: Dispose of non-flushable items, such as wipes, sanitary products, and paper towels, in a trash receptacle instead of flushing them down the toilet.
– Install Drain Screens: Placing drain screens in your toilet can help catch debris and prevent them from entering the drainage system, reducing the risk of blockages.
– Monitor Water Usage: Be mindful of the amount of water you use when flushing the toilet and avoid excessive use, especially in older or low-flow toilets.
– Install an Overflow Alarm: Consider installing an overflow alarm in your toilet to provide an early warning if the water level rises too high, allowing you to take prompt action.
By implementing these solutions and practicing good habits, you can significantly reduce the likelihood of toilet overflow and maintain a well-functioning toilet system in your home. In cases where the cause of the overflow cannot be resolved or if you are unsure of how to address the issue, it is best to consult a professional plumber for assistance.
Read more: Why Do I Have To Flush My Toilet Twice
Clearing Blocked Drainage Pipes
Blocked drainage pipes are one of the most common causes of toilet overflow. If you suspect that blocked drainage pipes are the issue, taking prompt action to clear the blockage is essential. Here are some effective methods to clear blocked drainage pipes and prevent toilet overflow:
1. Plunger: A plunger is a simple yet effective tool for clearing simple blockages in the toilet drainage pipes. Ensure that there is enough water in the bowl to cover the suction cup of the plunger. Place the plunger over the drain opening, creating a tight seal, and vigorously plunge up and down. The pressure created can dislodge the blockage and restore the proper flow of water. Repeat as necessary until the blockage is cleared.
2. Toilet Auger: For more stubborn blockages, a toilet auger, also known as a toilet snake, can be used. Insert the auger into the toilet drain and twist the handle clockwise while applying gentle pressure. The snake-like tool will maneuver through the pipes, breaking up the blockage or grabbing and pulling it out. Care should be taken not to scratch the porcelain of the toilet during this process.
3. Chemical Drain Cleaners: Chemical drain cleaners can be effective in breaking down organic blockages. However, they should be used with caution and adhering to the manufacturer’s instructions. Carefully pour the drain cleaner into the toilet bowl and wait for the recommended time before flushing. It’s important to note that chemical drain cleaners can be harmful to pipes and should be used sparingly.
4. Enzyme-Based Drain Cleaners: Enzyme-based drain cleaners are environmentally friendly alternatives to chemical cleaners. These cleaners use natural enzymes to break down organic matter. Pour the recommended amount into the toilet bowl, wait for the specified time, and flush with hot water. Enzyme-based cleaners are generally safer for pipes and septic systems.
5. Professional Plumbing Services: If the blockage persists or you are uncomfortable attempting to clear it yourself, it is advised to seek professional plumbing services. Plumbers have specialized tools, such as high-pressure water jets or drain snakes, which can effectively clear stubborn blockages. They can also inspect the entire drainage system to identify and address any underlying issues that may contribute to frequent blockages.
To prevent future blockages and potential toilet overflow, here are some preventive measures:
– Proper Waste Disposal: Avoid flushing non-flushable items such as wipes, cotton balls, dental floss, and sanitary products down the toilet. These items can accumulate and cause blockages in the drainage system.
– Use Septic-Safe Toilet Paper: Choose toilet paper that is designed to break down quickly and easily, reducing the risk of blockages. Look for labels indicating that the toilet paper is septic-safe or easily dissolvable.
– Routine Maintenance: Regularly inspect the toilet bowl and tank for any signs of buildup or potential blockages. Clean the toilet components, including the flapper, fill valve, and rim holes, as mineral deposits can accumulate and hinder water flow.
By taking the necessary steps to clear blocked drainage pipes and implementing preventive measures, you can reduce the chances of toilet overflow and maintain a properly functioning plumbing system in your home.
Unclogging the Toilet Trap
An obstructed toilet trap, also known as the S-shaped bend in the toilet bowl, can cause water to back up and result in a toilet overflow. Clearing the clogged toilet trap is necessary to restore proper drainage and prevent future incidents. Here are effective methods to unclog the toilet trap:
1. Plunger: The plunger is a versatile tool that can often clear minor clogs in the toilet trap. Ensure there is enough water in the bowl to cover the suction cup of the plunger. Place the plunger over the drain opening, creating a tight seal, and vigorously plunge up and down. The pressure generated can dislodge the blockage in the trap. Repeat the process several times if needed.
2. Toilet Auger: When a plunger fails to clear the clog, a toilet auger, also known as a toilet snake, can be used. Insert the auger into the toilet trap, and slowly rotate the handle while gently pushing the cable forward. The auger’s coiled cable will break up the clog or hook onto it for removal. Care should be taken to avoid scratching the porcelain of the toilet bowl.
3. Hot Water and Dish Soap: For organic blockages, hot water and dish soap can be an effective unclogging method. Boil a pot of water and add a few tablespoons of dish soap to it. Pour the mixture into the toilet bowl and let it sit for a few minutes. The hot water and soap combination can help break down the clog. Flush the toilet to see if the blockage clears. Repeat the process if necessary.
4. Enzyme-Based Drain Cleaners: Enzyme-based drain cleaners can be utilized to break down organic clogs in the toilet trap. These cleaners contain natural enzymes that target and dissolve the organic matter causing the blockage. Follow the instructions provided by the manufacturer for effective usage. Enzyme-based cleaners are generally safer for the plumbing system compared to harsh chemical cleaners.
5. Call a Professional Plumber: If these methods fail to clear the clog or if you do not feel comfortable performing the unclogging process yourself, it is recommended to contact a professional plumber. Plumbers have the experience, tools, and expertise to handle complex clogs and ensure the proper functioning of the toilet trap.
To prevent future clogs in the toilet trap, practice the following preventive measures:
– Proper Waste Disposal: Avoid flushing non-flushable items, such as wipes, feminine hygiene products, cotton balls, and paper towels, down the toilet. Dispose of them in a waste bin to prevent blockages.
– Reduced Toilet Paper Usage: Use an appropriate amount of toilet paper to avoid excessive buildup in the toilet trap. Consider using septic-safe or easily dissolvable toilet paper.
– Routine Maintenance: Regularly inspect and clean the toilet trap using a toilet brush. This can help prevent the accumulation of debris and minimize the risk of clogs.
By taking the necessary steps to unclog the toilet trap and implementing preventative measures, you can minimize the chances of toilet overflow and maintain a properly functioning toilet system in your home. Remember, if the clog persists or if you are unsure about how to proceed, it is best to consult a professional plumber for assistance.
Repairing or Replacing the Flapper or Fill Valve
If a malfunctioning flapper or fill valve is causing your toilet to overflow, it is important to repair or replace these components to ensure proper water control and prevent future incidents. Here’s a step-by-step guide on how to repair or replace the flapper or fill valve:
Repairing the Flapper
1. Turn off the Water Supply: Locate the water shut-off valve behind or near the toilet and turn it clockwise to shut off the water supply to the tank.
2. Remove the Tank Lid: Lift the tank lid and set it in a safe place. Be cautious, as the lid can be heavy.
3. Inspect the Flapper: Examine the flapper for any signs of wear, damage, or misalignment. The flapper is typically a rubber or plastic valve that covers the flush valve opening at the bottom of the tank.
4. Clean or Adjust the Flapper: If the flapper appears dirty or misaligned, clean it with warm water and a soft brush. Ensure it seats properly on the flush valve opening without any gaps. If the flapper is damaged or worn, consider replacing it.
5. Replace the Flapper: To replace the flapper, detach it from the flush valve chain or clip. Take note of the flapper’s size and type to ensure you purchase a suitable replacement. Install the new flapper by attaching it to the chain or clip and ensuring it covers the flush valve opening completely.
6. Turn on the Water Supply: Turn the water supply valve counterclockwise to restore the water flow to the tank.
Replacing the Fill Valve
1. Turn off the Water Supply: Shut off the water supply to the toilet by turning the water shut-off valve clockwise. Flush the toilet to drain remaining water from the tank.
2. Remove the Tank Lid: Lift the tank lid and set it aside.
3. Disconnect the Water Supply Line: Locate the water supply line, typically connected to the bottom of the fill valve. Use an adjustable wrench to loosen the nut and disconnect the water supply line.
4. Remove the Fill Valve: Unscrew the coupling nut or lock nut securing the fill valve to the bottom of the tank. Lift the old fill valve out of the tank and set it aside.
5. Install the New Fill Valve: Follow the manufacturer’s instructions for the specific fill valve model you have purchased. Typically, this involves inserting the new fill valve into the tank and securing it with the coupling nut or lock nut. Reconnect the water supply line to the fill valve and tighten the nut with the adjustable wrench.
6. Turn on the Water Supply: Turn the water shut-off valve counterclockwise to restore the water flow to the toilet tank. Allow the tank to fill, and check for any leaks around the fill valve or water supply line.
Repairing or replacing the flapper or fill valve can resolve issues such as excessive water flow, continuous running of water, or improper water control. If you are uncertain about performing these repairs yourself, or if the problem persists after attempting the repairs, it is advisable to seek the assistance of a professional plumber. They have the expertise to diagnose and resolve complex issues in the toilet’s flushing system.
Regular maintenance and periodic checks of these components can help prevent future malfunctions and ensure the optimal functioning of your toilet system.
Adjusting the Water Level in the Tank
Properly adjusting the water level in your toilet tank is crucial to prevent overflow and maintain optimal flushing performance. When the water level is set too high, it can lead to excessive water entering the bowl and causing an overflow. Conversely, if the water level is set too low, it may result in inadequate flushing. Here’s a step-by-step guide on how to adjust the water level in the tank:
1. Turn off the Water Supply: Locate the water shut-off valve near the base of the toilet or on the wall behind it. Rotate the valve clockwise to shut off the water supply to the tank.
2. Remove the Tank Lid: Lift the tank lid and carefully set it aside on a stable surface. Be cautious, as the lid can be heavy.
3. Locate the Fill Valve: The fill valve is a cylindrical device connected to the water supply line inside the tank. It is typically located on the left-hand side of the tank.
4. Adjust the Float: Connected to the fill valve is a float, which regulates the water level in the tank. The float can be a buoyant ball, cup, or other shape. The position of the float determines the water level. Adjust the float by either bending the float arm or adjusting the float mechanism according to the manufacturer’s instructions. The objective is to set the float to the desired water level, typically about an inch below the overflow tube.
5. Check the Water Level: Turn the water supply valve counterclockwise to slowly restore the water flow to the tank. Watch the water fill the tank and observe the water level rising. Once the water level reaches the desired height, the float should rise and shut off the water supply.
6. Test the Flush: Flush the toilet to ensure that the water level remains consistent and that there are no signs of water overflowing from the bowl or tank. If necessary, make further adjustments to the float to achieve the desired water level.
7. Turn on the Water Supply: If all adjustments are satisfactory and the flush is working properly, turn the water shut-off valve counterclockwise to fully restore the water flow to the tank.
Regularly checking and adjusting the water level in the tank is important for maintaining proper flushing performance and preventing overflow. It ensures that the toilet flushes effectively without wasting excess water. Additionally, a correctly adjusted water level can prevent damage to the fill valve and other components in the tank.
Remember, each toilet may have slightly different mechanisms for adjusting the water level. Consult the manufacturer’s instructions or reach out to a professional plumber if you are unsure about the specific adjustment process for your toilet model.
By taking the time to adjust the water level in the tank correctly, you can avoid potential toilet overflow, promote water efficiency, and maintain the proper functioning of your toilet system.
Fixing or Replacing the Toilet Float
A faulty toilet float can cause the water level in the tank to rise too high, potentially leading to toilet overflow. The toilet float is responsible for controlling the water flow and shutting off the valve when the tank reaches the desired level. If the float is not functioning properly, it may fail to regulate the water level, resulting in continuous water flow and overflow. Here’s a step-by-step guide on how to fix or replace the toilet float:
Fixing the Toilet Float
1. Turn off the Water Supply: Locate the water shut-off valve near the base of the toilet or on the wall behind it. Rotate the valve clockwise to shut off the water supply to the tank.
2. Remove the Tank Lid: Carefully lift the tank lid and set it aside on a stable surface.
3. Inspect the Float: The toilet float is usually a plastic or ball-shaped device connected to an arm or rod. Examine the float for any visible signs of damage, wear, or misalignment.
4. Check for Waterlogging: If the float is waterlogged or filled with water, it may have lost its buoyancy. This can affect its ability to rise and shut off the water flow properly.
5. Adjust the Float: If the float is misaligned, gently bend the float arm or adjust the float mechanism following the manufacturer’s instructions. The objective is to ensure that the float moves freely and can rise and fall with the water level in the tank.
6. Clean Mineral Deposits: If mineral deposits are present on the float, it can hinder its movement. Clean the float with a mixture of vinegar and water or a descaling solution to remove any mineral buildup. Rinse the float thoroughly and ensure it is free from any obstructions.
7. Test the Float Operation: With the water supply still turned off, slowly turn the water back on. Observe the float as the tank fills with water. The float should rise with the water level and shut off the valve once it reaches the desired level.
8. Verify Proper Shutoff: Flush the toilet and allow it to refill. Ensure that the float stops the water flow when the tank is full and that there are no signs of continuous water flow or overflow.
Replacing the Toilet Float
9. Purchase a Replacement Float: If the float is damaged or beyond repair, purchase a suitable replacement float. Ensure that it is compatible with your toilet model.
10. Follow the Manufacturer’s Instructions: Consult the manufacturer’s instructions for removing and installing the new float. The specific process may vary based on your toilet model.
11. Install the New Float: Typically, this involves detaching the old float from the float rod or arm and attaching the new float in its place. Ensure a secure connection, allowing the float to move freely.
12. Test the Float Operation: Turn the water supply back on and observe the new float’s movement as the tank fills. Confirm that it rises and activates the shut-off valve at the appropriate water level.
Remember, each toilet model may have slight variations in float design and attachment methods. Refer to the manufacturer’s instructions specific to your toilet or consider seeking the assistance of a professional plumber if you’re unsure about the process.
By fixing or replacing the toilet float, you can restore proper water control in the tank, prevent overflow, and ensure the efficient functioning of your toilet system. Regular inspections and maintenance will help identify any float issues early on, allowing for prompt repairs and avoiding potential water damage.
Proper Toilet Flushing Technique
Adopting a proper toilet flushing technique is essential to prevent toilet overflow and maintain the optimal functioning of your toilet system. Following these guidelines will help ensure efficient flushing and minimize the risk of clogs or other issues. Here are some key points to keep in mind:
1. Flush in Moderation: Avoid excessive flushing, especially in quick succession. Give the toilet enough time to drain between each flush to prevent overwhelming the drainage system.
2. Flush Waste in Batches: If you need to dispose of a large amount of waste, flush it in batches rather than all at once. This allows the toilet to handle the waste more efficiently, reducing the risk of clogs.
3. Use the Proper Amount of Toilet Paper: Use an appropriate amount of toilet paper. Excessive amounts of toilet paper can contribute to clogs. Be mindful of the thickness and ply of the toilet paper, as thicker paper may require using less per flush.
4. Avoid Flushing Non-Flushable Items: Only flush toilet paper and human waste down the toilet. Avoid flushing non-flushable items such as wipes, paper towels, cotton balls, dental floss, feminine hygiene products, or any other materials that are not designed to be flushed. These items can cause blockages in the plumbing system.
5. Teach Proper Toilet Habits: Educate household members, guests, and children about proper toilet flushing etiquette. Ensure that everyone understands the importance of only flushing appropriate materials and the potential consequences of improper flushing.
6. Consider Multiple Flushes for Large Amounts of Waste: If you need to dispose of a substantial amount of waste, it’s better to flush it in smaller increments. Flush once, allow the toilet to complete the flush cycle, and then repeat as necessary.
7. Regular Maintenance and Cleaning: Maintain regular cleaning and maintenance practices for your toilet. Clean the bowl periodically and inspect components for any signs of wear or blockages. Regular maintenance helps prevent buildup that can lead to clogs.
8. Consider Water-saving Options: If your toilet is older and uses more water per flush, consider upgrading to a water-saving model. These toilets use less water per flush, reducing the strain on the drainage system and lowering the risk of clogs.
By practicing proper toilet flushing techniques, you can minimize the likelihood of toilet overflow, clogs, and other plumbing issues. These simple habits not only improve the performance of your toilet but also contribute to water conservation efforts and reduce the need for unnecessary repairs.
Remember, if you encounter persistent or recurring problems with your toilet, it is advisable to consult a professional plumber to diagnose and resolve any underlying issues. They can provide expert advice and assistance to ensure the optimal functioning of your toilet system.
Conclusion
Toilet overflow can be a frustrating and messy experience. However, by understanding the common causes and implementing preventative measures, you can effectively prevent this issue and maintain a properly functioning toilet system in your home.
Throughout this article, we explored the common causes of toilet overflow, including blocked drainage pipes, clogged toilet traps, malfunctioning flappers or fill valves, high water levels in the tank, faulty toilet floats, and incorrect flushing techniques. We discussed various solutions for each cause, such as using plungers and toilet augers to clear blockages, adjusting the water level in the tank, and repairing or replacing malfunctioning components.
Preventing toilet overflow starts with practicing proper toilet habits. This includes flushing in moderation, using an appropriate amount of toilet paper, and avoiding the flushing of non-flushable items. Educating household members and guests about these habits is crucial to maintaining the integrity of your plumbing system.
Regular maintenance and inspections are essential to catch any issues early on and prevent potential overflow. Cleaning components, such as the flapper, fill valve, and toilet trap, helps prevent mineral deposits and debris buildup, which can lead to blockages.
In cases where the cause of the toilet overflow persists or is beyond your expertise, it is advisable to seek the assistance of a professional plumber. They have the knowledge, tools, and experience to diagnose and resolve complex plumbing issues.
By adopting these measures, you can minimize the risk of toilet overflow and ensure the efficient operation of your toilet system. Not only will you prevent messy and inconvenient situations, but you will also contribute to water conservation efforts and the longevity of your plumbing infrastructure.
Remember, the key to avoiding toilet overflow lies in taking preventative action, practicing proper flushing techniques, and addressing any issues promptly. By doing so, you can maintain a functional and hassle-free toilet system for years to come.
Frequently Asked Questions about Why Is My Toilet Overflowing When I Flush
Was this page helpful?
At Storables.com, we guarantee accurate and reliable information. Our content, validated by Expert Board Contributors, is crafted following stringent Editorial Policies. We're committed to providing you with well-researched, expert-backed insights for all your informational needs.

0 thoughts on “Why Is My Toilet Overflowing When I Flush”