Home>Furniture & Design>Bathroom Accessories>How To Wash Non-Slip Rug Pad
Bathroom Accessories
How To Wash Non-Slip Rug Pad
Modified: October 20, 2024
Learn how to properly clean and maintain your non-slip rug pad for a safer and more hygienic bathroom. Discover the best techniques for washing bathroom accessories.
(Many of the links in this article redirect to a specific reviewed product. Your purchase of these products through affiliate links helps to generate commission for Storables.com, at no extra cost. Learn more)
Introduction
Cleaning a non-slip rug pad is an essential part of maintaining a clean and hygienic bathroom. Over time, dirt, dust, and moisture can accumulate on the rug pad, compromising its non-slip properties and overall effectiveness. By regularly washing your non-slip rug pad, you can ensure that it continues to provide a secure and stable surface for your bathroom rug while also preventing the buildup of mold and mildew.
In this comprehensive guide, we will walk you through the step-by-step process of washing your non-slip rug pad to restore its functionality and extend its lifespan. Whether you have a natural rubber or PVC-based rug pad, these cleaning methods will help you maintain a clean and safe bathroom environment.
By following these simple yet effective cleaning techniques, you can keep your bathroom rug pad looking and performing its best for years to come. Let's dive into the step-by-step process of washing a non-slip rug pad to ensure a clean, fresh, and slip-free bathroom space.
Key Takeaways:
- Keep your bathroom clean and safe by washing your non-slip rug pad regularly. Remove it, shake or vacuum, hand wash with mild detergent, rinse, and air dry to maintain its non-slip properties and prevent mold and odors.
- By following the step-by-step guide, you can ensure a fresh and slip-free bathroom. Regularly inspect and clean your rug pad to extend its lifespan and maintain a hygienic and safe environment for your bathroom rug.
Read more: How To Install Non-Slip Rug Pad
Step 1: Remove the Rug Pad
The first step in washing a non-slip rug pad is to carefully remove it from its current location in the bathroom. Start by lifting the bathroom rug that sits on top of the rug pad. Gently roll or fold the rug to expose the rug pad underneath. If the rug pad is secured to the floor with adhesive strips or tape, carefully detach it to avoid damaging the flooring or the rug pad itself.
Once the rug pad is free from any attachments, lift it from the floor and place it in a clean and spacious area where you can easily work on cleaning it. It's important to choose a location that allows for ample space to maneuver the rug pad during the cleaning process. A flat surface, such as a clean floor or a large table, is ideal for this task.
By removing the rug pad from its original placement, you can effectively access the entire surface for thorough cleaning. This step also prevents any cleaning solutions or water from coming into contact with the bathroom floor, minimizing the risk of damage to the flooring material.
As you lift the rug pad, take note of any areas that may have accumulated visible dirt, stains, or debris. This initial inspection will help you target specific areas during the cleaning process, ensuring that the rug pad is restored to its optimal condition.
With the rug pad now removed and ready for cleaning, you can proceed to the next step of shaking or vacuuming to remove loose dirt and debris before initiating the hand-washing process.
Removing the rug pad from its original position sets the stage for a thorough and effective cleaning process, allowing you to address any accumulated dirt or stains with precision and care. This proactive approach ensures that the rug pad is cleaned comprehensively, promoting a hygienic and slip-free bathroom environment.
Step 2: Shake or Vacuum the Rug Pad
After removing the non-slip rug pad from its original placement, the next crucial step in the cleaning process involves shaking or vacuuming the rug pad to eliminate loose dirt, dust, and debris. This step is essential for preparing the rug pad for hand washing, ensuring that the cleaning process is as effective as possible.
Shake the Rug Pad
Shaking the rug pad is a simple yet effective method for dislodging loose particles and debris that may have accumulated on its surface. To shake the rug pad, find a suitable outdoor area where you can safely and vigorously shake the pad without causing any disturbance or creating a mess indoors. Holding one end of the rug pad firmly, vigorously shake it in a back-and-forth motion to dislodge dirt and debris. You may also opt to gently beat the rug pad against a solid surface to further loosen any embedded particles.
Vacuum the Rug Pad
If shaking the rug pad is not feasible or if it requires additional cleaning, using a vacuum cleaner equipped with a brush attachment is an excellent alternative. Begin by attaching the brush accessory to the vacuum hose and carefully run it over the entire surface of the rug pad. The brush attachment effectively dislodges and captures loose dirt, dust, and debris, leaving the rug pad cleaner and more receptive to the hand-washing process.
Read more: What Makes Non-Slip Shoes Non-Slip
Target Stubborn Stains and Debris
During the shaking or vacuuming process, pay close attention to any stubborn stains or debris that may require extra attention. Use a soft-bristled brush or a handheld vacuum with a crevice tool to target specific areas that may have accumulated more significant dirt or debris. By focusing on these trouble spots, you can ensure that the rug pad is thoroughly prepared for the subsequent hand-washing stage.
By shaking or vacuuming the rug pad before hand washing, you can effectively remove loose dirt and debris, setting the stage for a more thorough and successful cleaning process. This proactive approach ensures that the rug pad is primed for hand washing, allowing you to achieve optimal cleanliness and restore its non-slip properties effectively.
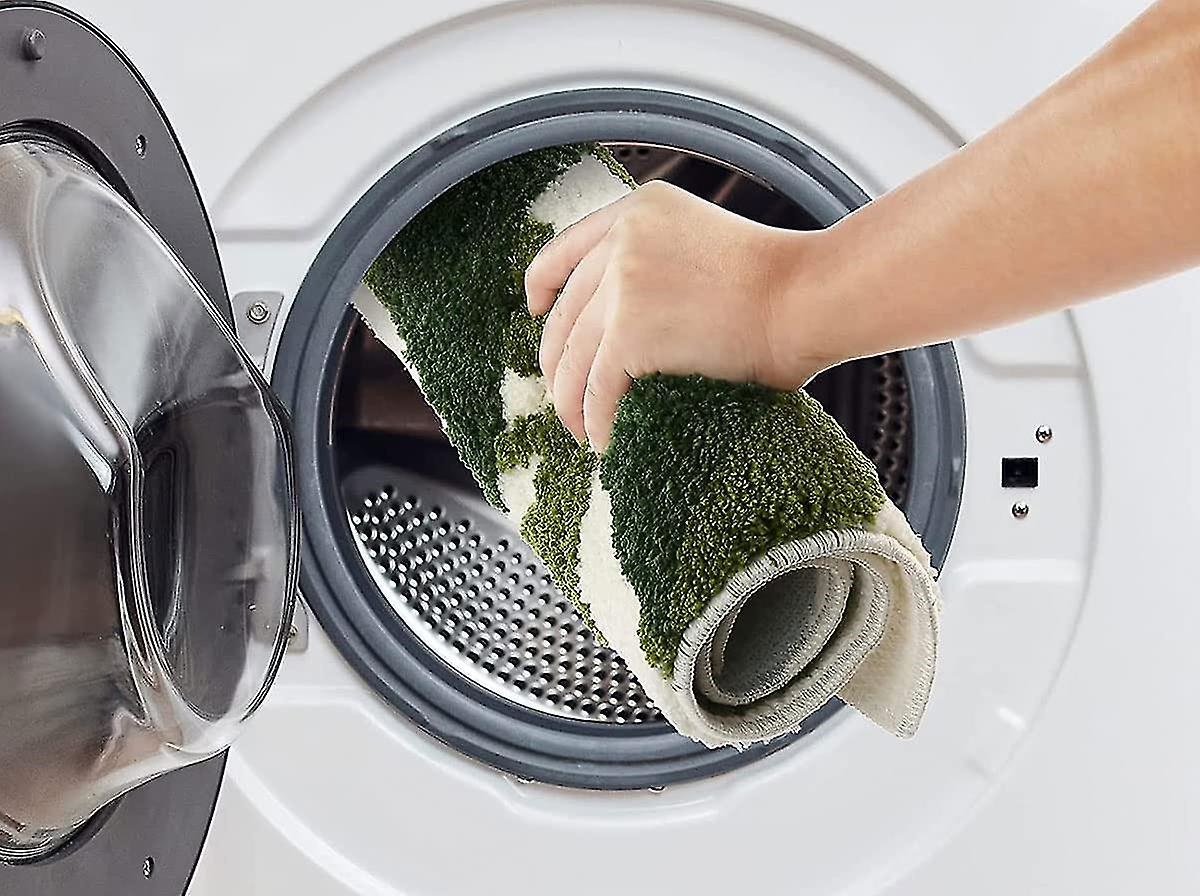
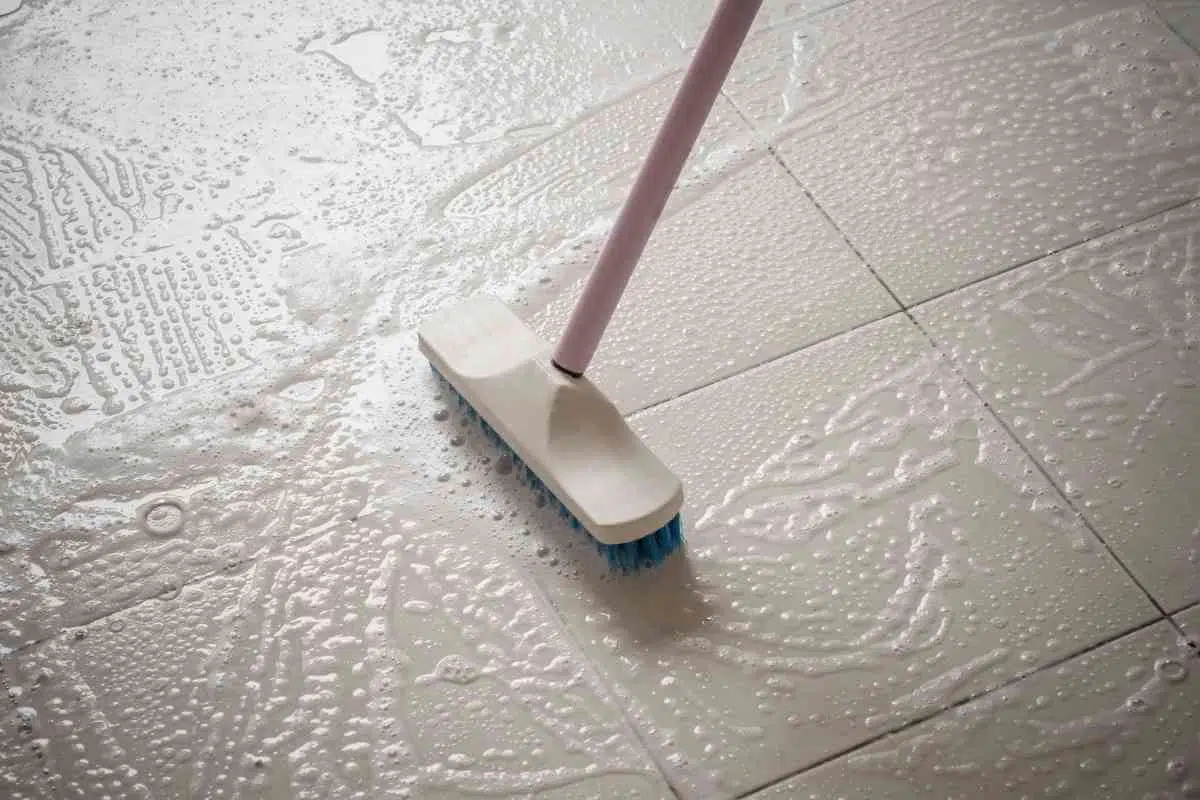
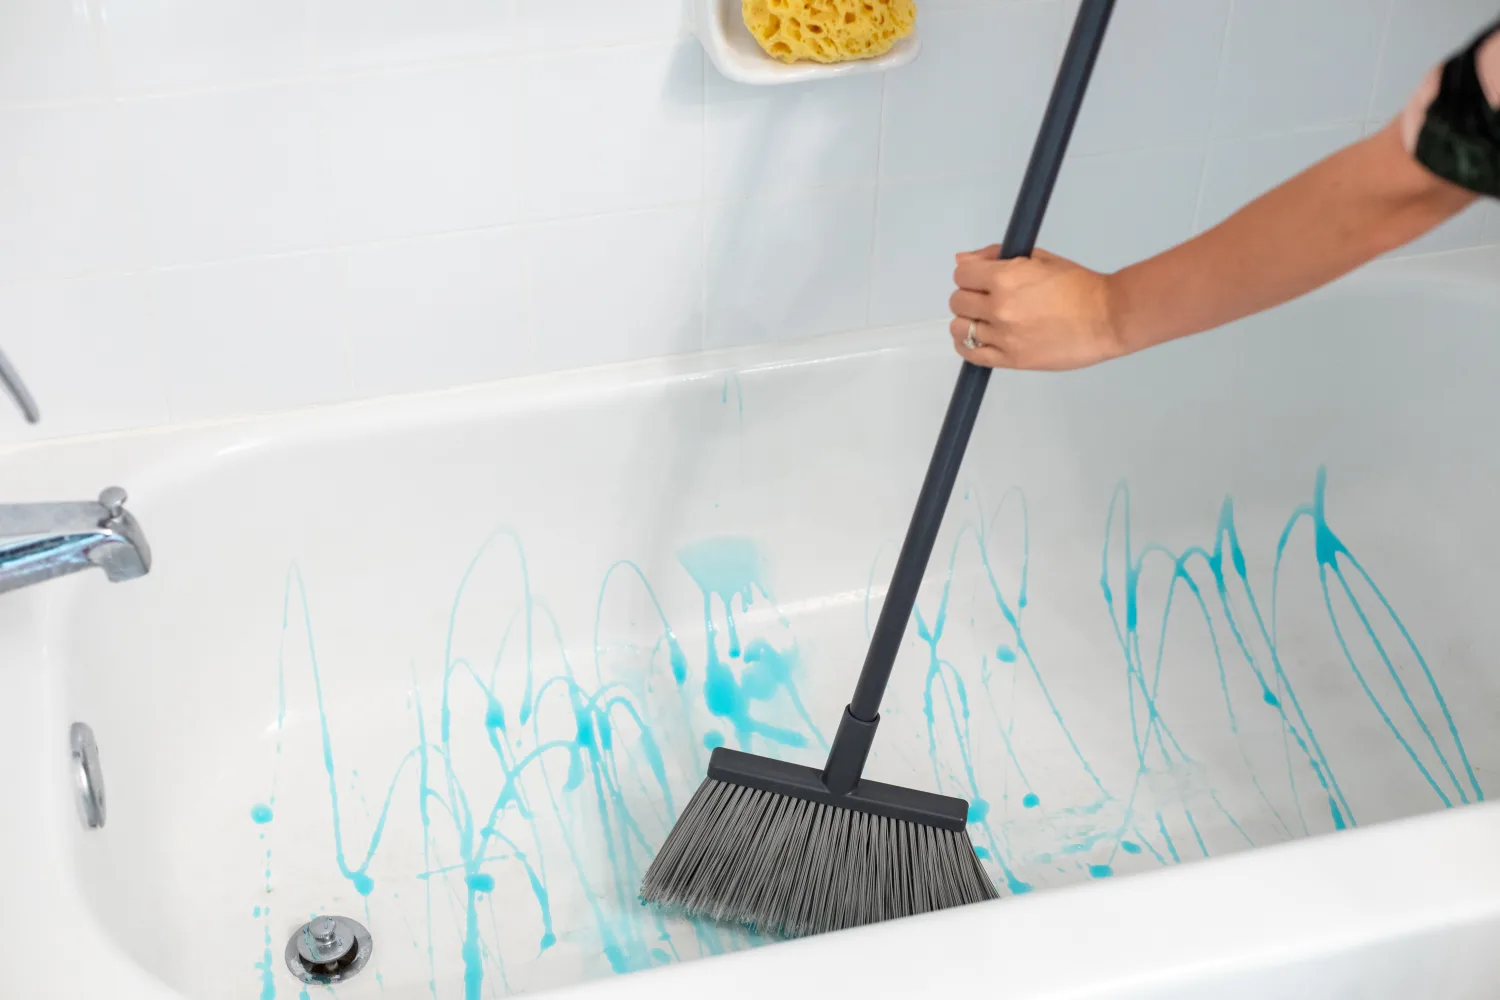
Step 3: Hand Wash the Rug Pad
Hand washing is a gentle and effective method for cleaning a non-slip rug pad, allowing you to target specific areas and ensure thorough cleanliness without causing damage. Before initiating the hand-washing process, gather the necessary supplies, including a mild detergent, a soft-bristled brush or sponge, and a large basin or tub filled with lukewarm water.
Start by preparing the cleaning solution. Add a small amount of mild detergent to the lukewarm water and gently agitate the mixture to create a soapy solution. It's important to use a mild detergent that is suitable for delicate materials, as harsh chemicals can potentially damage the rug pad's surface or compromise its non-slip properties.
Once the cleaning solution is ready, carefully submerge the rug pad into the soapy water, ensuring that it is fully immersed. Allow the rug pad to soak for a few minutes to loosen any embedded dirt, stains, or odors. During this soaking period, gently agitate the rug pad by hand to encourage the cleaning solution to penetrate the fibers and effectively lift away dirt and grime.
After the soaking period, use a soft-bristled brush or sponge to gently scrub the entire surface of the rug pad. Work in small sections, applying light pressure to target any visible stains or areas of concentrated dirt. Focus on stubborn spots or soiled areas, using circular motions to lift and remove dirt without causing damage to the rug pad's material.
As you hand wash the rug pad, periodically rinse the brush or sponge to remove loosened dirt and detergent residue. This ensures that you are effectively lifting away dirt and grime without redistributing it onto the rug pad's surface. Continue to scrub the entire rug pad, paying close attention to any areas that may require additional cleaning.
Once you have thoroughly scrubbed the entire surface of the rug pad, drain the soapy water from the basin or tub and refill it with clean lukewarm water. Submerge the rug pad once again, allowing it to soak in the fresh water to rinse away any remaining detergent and dirt. Gently agitate the rug pad to facilitate the rinsing process, ensuring that all traces of soap and grime are effectively removed.
After the final rinse, carefully lift the rug pad from the water and gently squeeze out any excess moisture. Avoid wringing or twisting the rug pad, as this can distort its shape and compromise its non-slip properties. Instead, gently press the rug pad between clean towels to absorb excess water, taking care to maintain its original shape and dimensions.
With the hand-washing process complete, the rug pad is now ready for the final step of rinsing and drying to restore its non-slip functionality and ensure a clean, fresh surface for your bathroom rug.
By hand washing the rug pad with care and attention to detail, you can effectively remove dirt, stains, and odors while preserving its non-slip properties and overall integrity. This gentle cleaning method promotes a hygienic and slip-free bathroom environment, ensuring that your rug pad continues to provide a secure and stable surface for your bathroom rug.
Step 4: Rinse and Dry the Rug Pad
After completing the hand-washing process, it's essential to thoroughly rinse and dry the rug pad to ensure that it regains its non-slip functionality and remains free from moisture. Proper rinsing and drying are crucial steps in maintaining the cleanliness and integrity of the rug pad, preventing the accumulation of mold, mildew, and odors.
To begin the rinsing process, fill a clean basin or tub with lukewarm water. Submerge the hand-washed rug pad into the water, gently agitating it to facilitate the removal of any remaining detergent or dirt. Allow the rug pad to soak in the fresh water, ensuring that all traces of soap and grime are effectively rinsed away. Periodically agitate the rug pad by hand to expedite the rinsing process, promoting thorough cleanliness.
Once the rug pad has been adequately rinsed, carefully lift it from the water and gently squeeze out excess moisture. Avoid applying excessive pressure or wringing the rug pad, as this can compromise its shape and non-slip properties. Instead, gently press the rug pad between clean towels to absorb residual water, ensuring that it remains damp but not saturated.
With the excess moisture removed, it's time to initiate the drying process. Lay the rug pad flat on a clean, dry surface, such as a large towel or a breathable mat. Position the rug pad in a well-ventilated area, away from direct sunlight and heat sources, to prevent potential damage to its material.
Allow the rug pad to air dry naturally, periodically flipping it over to ensure even drying on both sides. Depending on the size and thickness of the rug pad, the drying process may take several hours to complete. It's important to exercise patience and avoid hastening the drying process with artificial heat, as this can compromise the integrity of the rug pad and its non-slip properties.
Throughout the drying period, periodically check the rug pad for any lingering moisture or dampness. If necessary, replace the towels underneath the rug pad to facilitate continued absorption of moisture. Additionally, ensure that the surrounding area remains well-ventilated to promote efficient drying and prevent the accumulation of humidity.
Once the rug pad is completely dry to the touch, carefully inspect it for any signs of residual moisture or damp spots. Confirm that both sides of the rug pad are thoroughly dry before returning it to its original location in the bathroom.
By diligently rinsing and drying the rug pad, you can effectively restore its non-slip functionality and maintain a clean, fresh surface for your bathroom rug. This meticulous approach to rinsing and drying ensures that the rug pad remains free from moisture, mold, and odors, promoting a hygienic and slip-free bathroom environment.
To wash a non-slip rug pad, hand wash it in a bathtub with mild detergent and warm water. Gently scrub the pad, rinse thoroughly, and air dry completely before placing it back under the rug.
Conclusion
In conclusion, maintaining a clean and hygienic bathroom environment involves regular care and maintenance of essential components such as the non-slip rug pad. By following the step-by-step process outlined in this guide, you can effectively wash your rug pad to restore its non-slip functionality and ensure a fresh and clean surface for your bathroom rug.
The process begins with the careful removal of the rug pad from its original location, allowing for thorough access and preparation for cleaning. By shaking or vacuuming the rug pad, you can effectively eliminate loose dirt and debris, setting the stage for the subsequent hand-washing process.
Hand washing the rug pad with a mild detergent and gentle scrubbing ensures that dirt, stains, and odors are effectively removed without compromising its non-slip properties. The meticulous rinsing and drying process that follows further guarantees that the rug pad regains its functionality and remains free from moisture, mold, and odors.
By incorporating these cleaning methods into your regular bathroom maintenance routine, you can extend the lifespan of your non-slip rug pad and promote a clean, fresh, and slip-free bathroom environment. Additionally, maintaining a clean rug pad contributes to the overall hygiene and aesthetics of your bathroom, enhancing the comfort and safety of the space.
It's important to note that the frequency of washing your non-slip rug pad may vary depending on usage and environmental factors. Regular inspection and cleaning, especially in high-traffic areas, can help preserve the effectiveness and longevity of the rug pad.
In essence, the process of washing a non-slip rug pad is a simple yet essential aspect of maintaining a clean and safe bathroom environment. By following the guidelines outlined in this comprehensive guide, you can ensure that your rug pad continues to provide a secure and stable surface for your bathroom rug, promoting comfort, safety, and overall well-being in your bathroom space.
Frequently Asked Questions about How To Wash Non-Slip Rug Pad
Was this page helpful?
At Storables.com, we guarantee accurate and reliable information. Our content, validated by Expert Board Contributors, is crafted following stringent Editorial Policies. We're committed to providing you with well-researched, expert-backed insights for all your informational needs.

0 thoughts on “How To Wash Non-Slip Rug Pad”