Home>Furniture & Design>Bedroom Furniture>How To Clean Memory Foam Ear Tips
Bedroom Furniture
How To Clean Memory Foam Ear Tips
Modified: October 20, 2024
Learn how to effectively clean memory foam ear tips to keep your bedroom furniture in top condition. Discover the best methods for maintaining hygiene and extending the lifespan of your ear tips.
(Many of the links in this article redirect to a specific reviewed product. Your purchase of these products through affiliate links helps to generate commission for Storables.com, at no extra cost. Learn more)
Introduction
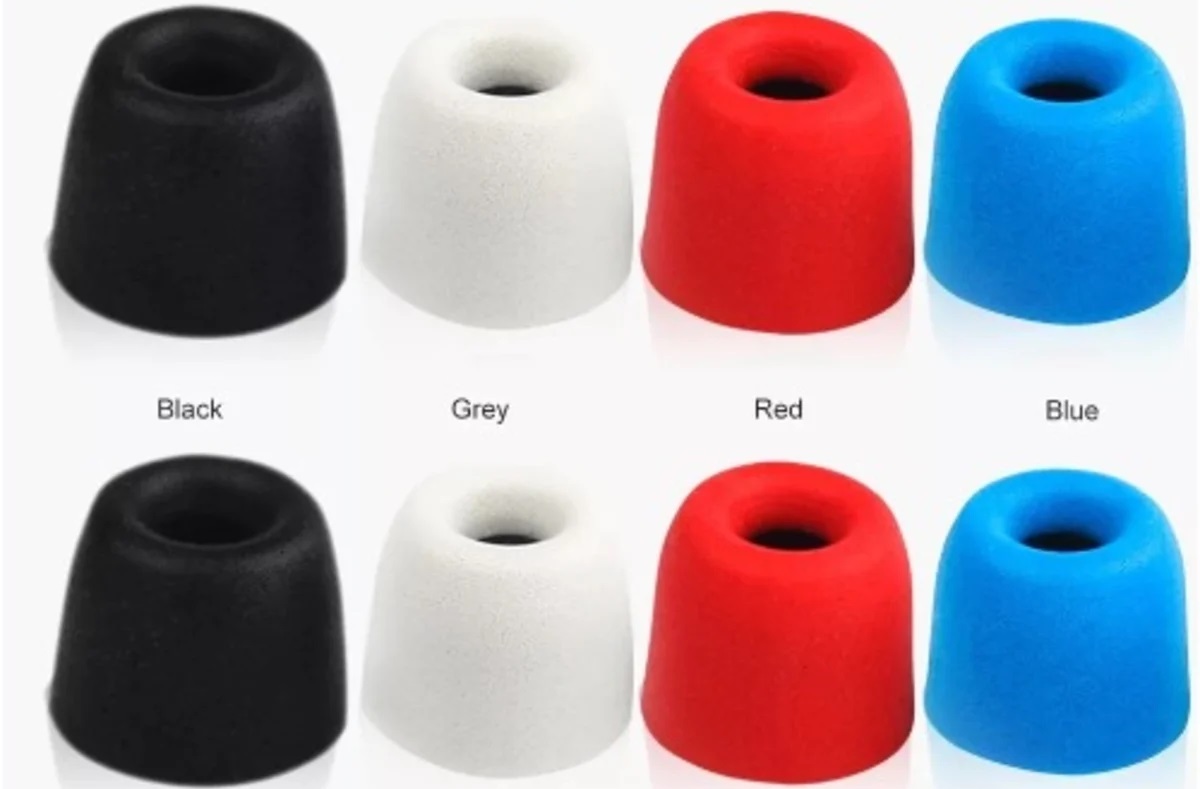
Welcome to the world of high-fidelity sound and superior comfort! If you’re the proud owner of memory foam ear tips, you’re already familiar with the unparalleled listening experience they provide. These soft, pliable, and ultra-comfortable ear tips not only deliver exceptional sound isolation but also ensure a snug fit for extended listening sessions. However, to maintain their peak performance and hygiene, it’s essential to keep them clean and well-maintained.
In this guide, we’ll walk you through the step-by-step process of cleaning your memory foam ear tips, ensuring that you can continue to enjoy your favorite tunes with pristine sound quality and comfort. Whether you’re a music enthusiast, an audiophile, or simply someone who appreciates the joy of crystal-clear sound, taking care of your memory foam ear tips is an important part of your audio experience. With the right materials and a little bit of know-how, you can easily keep your ear tips in top condition, ready to deliver an exceptional listening experience every time you pop them in.
So, let’s dive into the world of pristine sound and hygiene as we explore the best practices for cleaning and maintaining your memory foam ear tips.
Key Takeaways:
- Regularly cleaning memory foam ear tips is crucial for hygiene, sound quality, comfort, and longevity, ensuring a pristine listening experience.
- Gather mild soap, warm water, soft brush, and dry surface for effective cleaning. Safely remove, clean, dry, and reassemble ear tips for optimal performance.
Read more: How To Clean A Memory Foam Mattress
Why Clean Memory Foam Ear Tips
Memory foam ear tips are designed to provide a comfortable and secure fit while offering excellent sound isolation. However, due to their location in the ear canal, they are prone to accumulating earwax, dirt, and other debris over time. Regular cleaning of memory foam ear tips is essential for several reasons:
- Hygiene: Over time, ear tips can become a breeding ground for bacteria and germs, especially if they come into contact with earwax and sweat. Cleaning your ear tips regularly helps prevent the buildup of harmful microorganisms, reducing the risk of ear infections and other hygiene-related issues.
- Sound Quality: A buildup of earwax and debris on the ear tips can affect the sound quality and clarity of your earphones. By keeping the ear tips clean, you ensure that the sound remains crisp and clear, preserving the audio fidelity that you expect from your high-quality earphones.
- Comfort: Clean ear tips provide a more comfortable and hygienic listening experience. By removing dirt and earwax buildup, you can maintain the softness and pliability of the memory foam, ensuring a comfortable fit and minimizing any potential irritation or discomfort during extended wear.
- Longevity: Regular cleaning can prolong the lifespan of your memory foam ear tips. By preventing the accumulation of debris and oils, you can help maintain the integrity of the foam material, ensuring that your ear tips remain in optimal condition for an extended period.
By understanding the importance of cleaning memory foam ear tips, you can ensure that your listening experience remains enjoyable, hygienic, and true to the high standards set by your premium earphones.
Materials Needed
Before diving into the cleaning process, it’s essential to gather the necessary materials to ensure a thorough and effective cleaning of your memory foam ear tips. Here’s what you’ll need:
- Mild Liquid Soap: Opt for a gentle, mild liquid soap that is suitable for cleaning delicate materials. Avoid harsh detergents or cleaners that could potentially damage the memory foam.
- Warm Water: You’ll need access to warm water for rinsing the ear tips. Ensure that the water is not too hot, as excessive heat can affect the integrity of the memory foam.
- Soft Bristled Brush or Cloth: A soft-bristled brush or a clean, lint-free cloth will be used to gently remove debris and dirt from the ear tips. Avoid using abrasive materials that could damage the foam.
- Microfiber Towel or Air Dryer: A microfiber towel can be used to gently pat the ear tips dry after cleaning. Alternatively, an air dryer set to a low, cool setting can be used to facilitate the drying process without exposing the foam to excessive heat.
- Clean, Dry Surface: Prepare a clean, dry surface where you can lay out the ear tips to air dry after the cleaning process is complete.
By ensuring that you have these materials on hand, you can proceed with confidence, knowing that you have everything you need to effectively clean and maintain your memory foam ear tips.
Step 1: Remove Ear Tips
Before embarking on the cleaning process, it’s important to carefully remove the memory foam ear tips from your earphones. This step ensures that you can clean the ear tips thoroughly without risking damage to the earphones themselves. Here’s how to safely remove the ear tips:
- Gently Twist and Pull: Grasp the base of the ear tip and gently twist it to loosen it from the earphone nozzle. Once it’s loosened, carefully pull the ear tip away from the nozzle, taking care not to apply excessive force that could potentially damage the earphones.
- Inspect for Debris: As you remove each ear tip, take a moment to inspect it for any visible debris, earwax buildup, or discoloration. This visual inspection will help you gauge the level of cleaning required for each ear tip.
- Set Aside in a Clean Area: Place the removed ear tips on a clean, dry surface, ensuring that they are laid out in a way that allows air to circulate around them. This prepares them for the subsequent cleaning steps.
By following these steps, you can safely and effectively remove the memory foam ear tips from your earphones, setting the stage for the thorough cleaning process that will help maintain their performance and hygiene.
To clean memory foam ear tips, gently remove them from the earphones and wipe them with a damp cloth and mild soap. Avoid soaking or submerging them in water to prevent damage. Allow them to air dry completely before using them again.
Step 2: Clean Ear Tips
With the ear tips removed, it’s time to delve into the cleaning process to ensure that they remain hygienic and free from debris. Follow these steps to effectively clean your memory foam ear tips:
- Prepare the Cleaning Solution: In a small container, mix a mild liquid soap with warm water to create a gentle cleaning solution. Ensure that the soap is well-diluted to avoid any residue that could affect the texture of the memory foam.
- Gently Submerge the Ear Tips: Carefully place the removed ear tips into the cleaning solution, ensuring that they are fully submerged. Allow them to soak for a few minutes to loosen any dirt, oils, and earwax that may have accumulated.
- Use a Soft-Bristled Brush or Cloth: After soaking, gently agitate the ear tips in the cleaning solution to help dislodge any debris. Use a soft-bristled brush or a clean, lint-free cloth to delicately remove any remaining dirt or earwax from the surface of the foam. Take care not to press too hard, as memory foam is a delicate material.
- Rinse Thoroughly: Once the ear tips have been cleaned, rinse them under running water to remove any traces of the cleaning solution. Ensure that the water is not too hot, as excessive heat can affect the integrity of the memory foam.
By following these steps, you can effectively clean your memory foam ear tips, ensuring that they remain free from debris and maintain their soft, pliable texture for a comfortable listening experience.
Read more: How To Clean Memory Foam Sandals
Step 3: Dry Ear Tips
After cleaning the memory foam ear tips, it’s crucial to ensure that they are thoroughly dried before reassembling them with your earphones. Proper drying helps maintain the integrity of the foam and prevents the growth of mold or mildew. Follow these steps to effectively dry your ear tips:
- Pat Dry with a Microfiber Towel: Gently pat the ear tips with a clean microfiber towel to remove excess water. Avoid wringing or squeezing the foam, as this can distort its shape and texture.
- Air Dry in a Well-Ventilated Area: Place the ear tips on a clean, dry surface in a well-ventilated area. Ensure that they are positioned in a way that allows air to circulate around them. Avoid direct exposure to heat sources, as excessive heat can damage the memory foam.
- Utilize an Air Dryer (Optional): If needed, you can use an air dryer set to a low, cool setting to facilitate the drying process. Maintain a safe distance between the air dryer and the ear tips to prevent any potential damage from heat or forceful airflow.
- Check for Complete Dryness: Once the ear tips have been air-dried, ensure that they are completely dry to the touch before reassembling them with your earphones. This step is crucial to prevent moisture-related issues that could compromise the performance and hygiene of the ear tips.
By following these steps, you can ensure that your memory foam ear tips are thoroughly dried and ready to be reassembled for an optimal listening experience.
Step 4: Reassemble Ear Tips
With your memory foam ear tips cleaned and thoroughly dried, it’s time to reassemble them with your earphones to resume your immersive listening experience. Follow these steps to safely and securely reattach the ear tips:
- Select the Correct Size: Ensure that you choose the appropriate size of ear tips for your earphones, as memory foam ear tips often come in various sizes to accommodate different ear canal shapes and sizes.
- Align and Insert: Align the nozzle of your earphones with the opening of the memory foam ear tips. Gently press and twist the ear tips onto the nozzles, ensuring a secure fit. Take care not to apply excessive force, as this can damage the ear tips or the earphones.
- Check for a Secure Seal: After reattaching the ear tips, gently tug on each earpiece to ensure that they are securely attached to the earphones. A proper seal is essential for optimal sound quality and noise isolation.
- Test the Fit: Insert the earphones into your ears and assess the comfort and seal of the ear tips. They should provide a snug, comfortable fit without causing any discomfort or slippage during use.
By following these steps, you can safely and effectively reassemble your memory foam ear tips with your earphones, ensuring that you can continue to enjoy a superior listening experience with clean, hygienic ear tips.
Conclusion
Congratulations! By following the steps outlined in this guide, you’ve successfully cleaned and maintained your memory foam ear tips, ensuring that they remain hygienic, comfortable, and capable of delivering exceptional sound quality. Regular cleaning of your ear tips is an essential part of preserving their performance and longevity, allowing you to enjoy your favorite music, podcasts, and audio content with clarity and comfort.
Remember, maintaining clean ear tips offers a range of benefits, including improved hygiene, preserved sound quality, enhanced comfort, and prolonged durability. By incorporating the cleaning process into your regular maintenance routine, you can ensure that your memory foam ear tips continue to provide an immersive and enjoyable listening experience for years to come.
As you reinsert your freshly cleaned ear tips and immerse yourself in the world of captivating sound, take pride in knowing that you’ve taken proactive steps to care for an essential component of your audio setup. Whether you’re a music aficionado, a podcast enthusiast, or someone who simply appreciates the power of high-quality audio, clean ear tips are a testament to your commitment to both hygiene and audio excellence.
So, sit back, relax, and let the pristine sound quality and comfort of your memory foam ear tips elevate your listening experience to new heights. Your dedication to maintaining clean and well-kept ear tips ensures that every note, beat, and lyric is delivered with the clarity and precision that you deserve.
Frequently Asked Questions about How To Clean Memory Foam Ear Tips
Was this page helpful?
At Storables.com, we guarantee accurate and reliable information. Our content, validated by Expert Board Contributors, is crafted following stringent Editorial Policies. We're committed to providing you with well-researched, expert-backed insights for all your informational needs.


0 thoughts on “How To Clean Memory Foam Ear Tips”