Home>Furniture & Design>Interior Design Trends>How To Photograph Glass Without Reflections And Shadows

Interior Design Trends
How To Photograph Glass Without Reflections And Shadows
Modified: February 18, 2024
Learn how to capture stunning glass photography without unwanted reflections and shadows. Discover the latest interior design trends for creating captivating images.
(Many of the links in this article redirect to a specific reviewed product. Your purchase of these products through affiliate links helps to generate commission for Storables.com, at no extra cost. Learn more)
Introduction
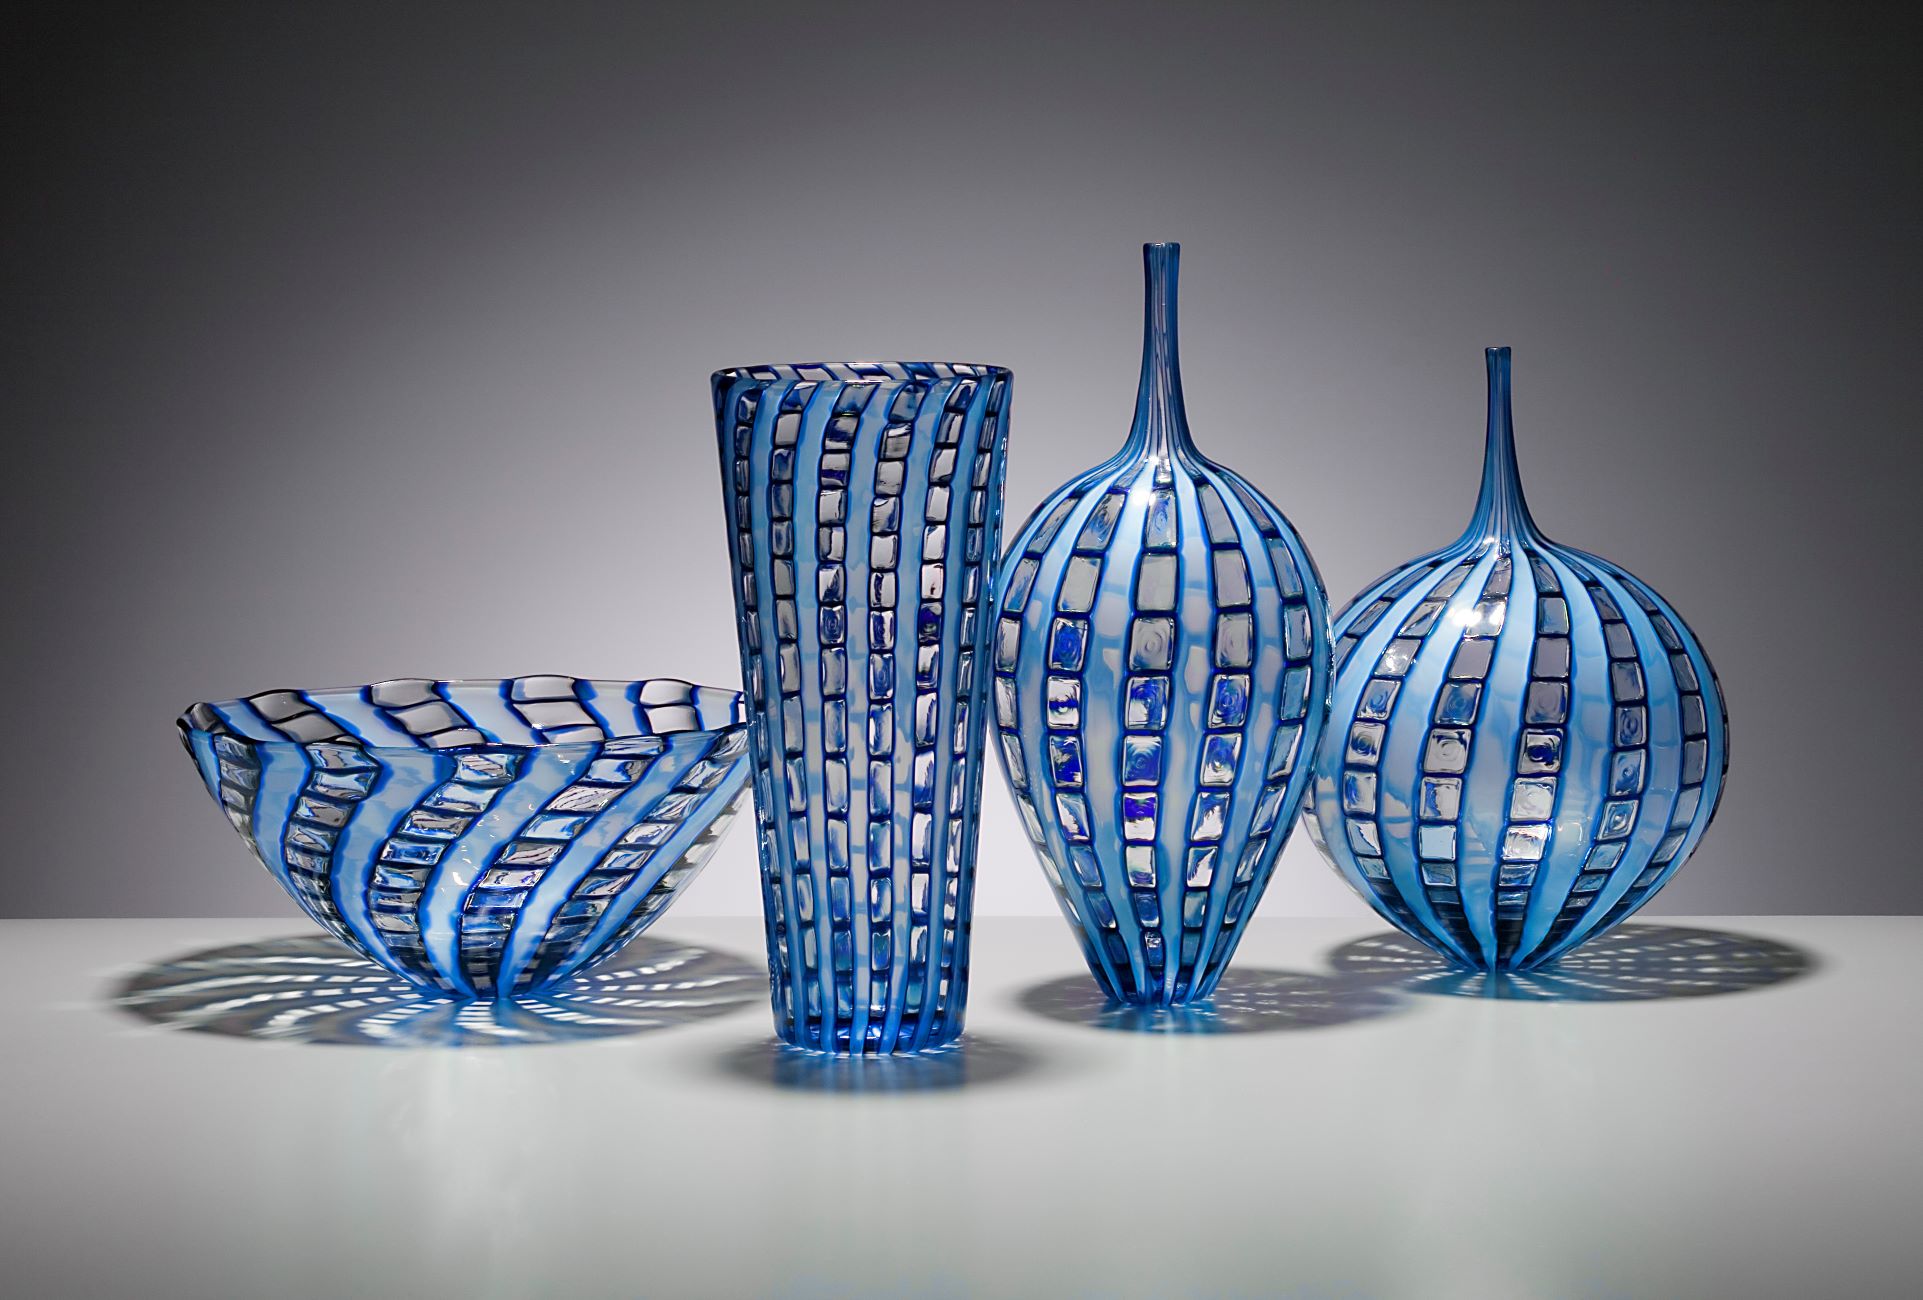
Photographing glass objects can be a challenging task due to their reflective nature. Whether you're capturing the elegance of a crystal vase, the transparency of a glass sculpture, or the allure of a glassware collection, the presence of unwanted reflections and shadows can detract from the beauty of the subject. However, with the right techniques and equipment, you can master the art of photographing glass without reflections and shadows, allowing the true essence of the glass to shine through in your images.
In this comprehensive guide, we will delve into the intricacies of photographing glass, providing you with valuable insights and practical tips to achieve stunning, reflection-free photographs. From understanding the properties of glass to selecting the appropriate lighting and utilizing specialized equipment such as polarizing filters, we will explore the various elements that contribute to capturing captivating images of glass objects.
Whether you're a professional photographer looking to enhance your skills or an enthusiast seeking to elevate your glass photography game, this guide is designed to equip you with the knowledge and techniques necessary to overcome the challenges associated with photographing glass. By mastering the art of controlling reflections and shadows, you can elevate the visual impact of your glass photography, allowing the intricate details and unique characteristics of the glass to take center stage in your images.
Join us on this journey as we unravel the secrets of photographing glass without reflections and shadows, empowering you to unleash your creativity and capture the mesmerizing allure of glass in its purest form. Let's embark on this enlightening exploration of glass photography, where we will uncover the key strategies and methods to achieve impeccable results that showcase the beauty and allure of glass objects.
Key Takeaways:
- Master the art of photographing glass without reflections and shadows by understanding glass properties, choosing the right lighting, using polarizing filters, and adjusting camera settings. Unleash your creativity and capture the mesmerizing allure of glass in its purest form.
- Enhance the quality of glass photography by utilizing light tents or diffusers and employing post-processing techniques to remove reflections and shadows. Elevate your images with clarity, vibrancy, and visual impact, showcasing the true essence of glass objects.
Read more: How To Photograph Through Glass
Understanding the properties of glass
Glass, with its transparent and reflective nature, presents unique challenges when it comes to photography. Understanding the properties of glass is crucial for achieving successful photographs without unwanted reflections and shadows.
First and foremost, it's essential to comprehend that glass is not just a solid, transparent material; it also has reflective properties due to its smooth surface. When light hits the surface of glass, it can bounce off in various directions, leading to reflections and glare in photographs. Additionally, the transparency of glass allows light to pass through, potentially creating shadows when the light source is not properly managed.
Furthermore, the refractive index of glass, which determines how light travels through the material, influences the way it interacts with light in a photographic context. Different types of glass may have varying refractive indices, affecting the dispersion and bending of light as it passes through or reflects off the surface.
Moreover, the shape and curvature of glass objects play a significant role in how light behaves when interacting with them. Curved or irregularly shaped glass surfaces can distort reflections and create complex patterns of light and shadow, adding another layer of complexity to the photography process.
Understanding these properties of glass is fundamental for devising effective strategies to minimize reflections and shadows when photographing glass objects. By gaining insight into how light interacts with glass, photographers can employ specific techniques and equipment to control and manipulate the light, ultimately capturing the true essence of the glass object without unwanted visual disturbances.
In summary, comprehending the properties of glass, including its reflective nature, transparency, refractive index, and shape, is pivotal for mastering the art of photographing glass without reflections and shadows. This foundational knowledge forms the basis for implementing the techniques and solutions that will be explored in the subsequent sections, empowering photographers to overcome the inherent challenges associated with glass photography and achieve exceptional results.
Choosing the right lighting
Selecting the appropriate lighting is a critical factor in capturing stunning photographs of glass objects without unwanted reflections and shadows. The key to achieving optimal lighting for glass photography lies in controlling the direction, intensity, and quality of light to minimize reflections and eliminate shadows.
Natural light, such as soft, diffused sunlight, can be an excellent choice for photographing glass, as it provides a gentle and even illumination that reduces harsh reflections. When shooting indoors, positioning the glass object near a large window or using sheer curtains to diffuse the incoming sunlight can create a beautifully illuminated setting for capturing the intricate details of the glass.
In addition to natural light, artificial lighting sources offer versatility and control for glass photography. Softboxes, diffusers, or light tents can be employed to diffuse and soften the light, minimizing reflections and creating a uniform illumination across the glass surface. By using these light-modifying tools, photographers can achieve a balanced and consistent lighting setup that accentuates the transparency and texture of the glass while minimizing unwanted visual distractions.
Furthermore, the angle of the light source plays a crucial role in controlling reflections and shadows when photographing glass. Positioning the light at an oblique angle relative to the glass object can help minimize direct reflections, as the light is less likely to bounce directly into the camera lens. This approach allows for a more controlled and subdued reflection, enhancing the clarity and transparency of the glass in the final image.
Moreover, utilizing multiple light sources strategically positioned around the glass object can help create a balanced and uniform illumination, reducing the likelihood of pronounced shadows and hotspots. By carefully orchestrating the interplay of light from different angles, photographers can effectively manage reflections and shadows, resulting in captivating photographs that showcase the true beauty of the glass without visual distractions.
In summary, choosing the right lighting for glass photography involves leveraging the qualities of natural and artificial light to create a harmonious and controlled illumination that minimizes reflections and shadows. By understanding the principles of lighting and employing techniques to manipulate and diffuse light, photographers can capture the captivating allure of glass objects with clarity and brilliance, elevating their photographic compositions to new heights of visual excellence.
Using polarizing filters
Polarizing filters are indispensable tools for photographers seeking to capture glass objects with exceptional clarity and minimal reflections. These specialized filters are designed to selectively block or allow specific polarized light waves, enabling photographers to exert precise control over reflections and glare when photographing glass.
By attaching a polarizing filter to the camera lens, photographers can effectively manipulate the polarization of light entering the camera, thereby reducing or eliminating unwanted reflections on glass surfaces. The filter achieves this by selectively blocking polarized light waves that are oriented in specific directions, effectively minimizing the intensity of reflected light that causes glare and visual disturbances in glass photography.
One of the key advantages of polarizing filters is their ability to enhance the transparency and vibrancy of glass objects by reducing the impact of polarized reflections. This results in images that exhibit greater clarity, allowing the intricate details and textures of the glass to be captured with remarkable precision and fidelity.
When using a polarizing filter, photographers can experiment with the orientation of the filter to achieve the desired effect. By rotating the filter, they can fine-tune the suppression of reflections, effectively customizing the level of glare reduction based on the specific characteristics of the glass object and the surrounding lighting conditions.
Furthermore, polarizing filters are particularly effective when photographing glass in outdoor settings, where natural light sources, such as the sun and the sky, can produce intense reflections and glare. By employing a polarizing filter, photographers can mitigate the impact of these reflections, resulting in images that exude a sense of clarity and depth, free from distracting visual disturbances.
It is important to note that polarizing filters are most effective when the angle of incidence of the light is considered. By adjusting the orientation of the filter relative to the light source and the glass object, photographers can optimize the reduction of reflections, ensuring that the resulting images showcase the glass in its purest form, devoid of unwanted visual obstructions.
In summary, the strategic use of polarizing filters empowers photographers to exert precise control over reflections and glare when photographing glass objects. By harnessing the capabilities of these filters, photographers can elevate the quality of their glass photography, capturing images that exude clarity, vibrancy, and visual impact, while minimizing the disruptive effects of reflections and glare.
Use a polarizing filter to reduce reflections on glass. Position the light source to avoid casting shadows onto the glass. Adjust your camera angle to minimize reflections.
Adjusting the camera settings
When photographing glass objects, adjusting the camera settings is crucial for achieving optimal results and minimizing unwanted reflections and shadows. By fine-tuning key parameters such as aperture, shutter speed, and ISO sensitivity, photographers can exert precise control over the exposure and image quality, ensuring that the unique characteristics of the glass are faithfully captured.
One of the fundamental aspects of adjusting camera settings for glass photography is selecting an appropriate aperture. Opting for a narrow aperture, indicated by a higher f-stop number, can enhance the depth of field, resulting in a greater area of the glass object being in sharp focus. This is particularly advantageous when capturing intricate details or complex textures present in the glass, allowing for a comprehensive representation of its visual nuances.
Furthermore, a narrow aperture can contribute to minimizing the impact of reflections and glare, as it reduces the amount of light entering the camera from oblique angles, thereby mitigating the potential for unwanted visual disturbances. By strategically controlling the depth of field through aperture adjustment, photographers can achieve images that showcase the glass object with exceptional clarity and detail, while minimizing the influence of reflections and shadows.
In addition to aperture selection, adjusting the shutter speed plays a pivotal role in managing reflections and shadows when photographing glass. Employing a relatively fast shutter speed can help freeze any subtle movements and vibrations, ensuring that the glass object is captured with precision and sharpness. This is particularly important when working with transparent or translucent glass, as it allows for the preservation of fine details and textures without the introduction of motion blur.
Moreover, a faster shutter speed can contribute to reducing the impact of ambient light and reflections, as the duration of exposure is minimized, limiting the opportunity for unwanted light to influence the final image. By carefully adjusting the shutter speed, photographers can exert control over the visual dynamics of the glass, capturing it in a manner that accentuates its transparency and luminosity, while minimizing the presence of distracting visual artifacts.
Additionally, fine-tuning the ISO sensitivity setting can further enhance the quality of glass photography by optimizing the camera's ability to capture light and detail. While higher ISO settings can increase the camera's sensitivity to light, they may also introduce digital noise, which can detract from the overall image quality. Therefore, selecting an appropriate ISO sensitivity level that balances the need for adequate exposure with minimal noise is essential for achieving exceptional results in glass photography.
By adjusting the camera settings with a keen understanding of the interplay between aperture, shutter speed, and ISO sensitivity, photographers can elevate their glass photography to new heights, capturing images that exude clarity, vibrancy, and visual impact, while minimizing the disruptive effects of reflections and shadows. This meticulous approach to camera settings adjustment empowers photographers to unleash the full potential of their equipment, ensuring that the allure and intricacy of glass objects are faithfully preserved in every photograph.
Read more: How To Make Glass Non-Reflective
Using a light tent or diffuser
When it comes to photographing glass objects, the use of a light tent or diffuser can significantly enhance the quality of the captured images by providing a controlled and diffused lighting environment that minimizes reflections and shadows. A light tent, also known as a lightbox, is a versatile tool designed to create a soft and even illumination around the subject, making it particularly well-suited for photographing glass objects with transparency and reflective surfaces.
The primary function of a light tent is to diffuse and scatter light, resulting in a gentle and uniform illumination that envelops the glass object, effectively minimizing harsh reflections and glare. By enclosing the glass object within the light tent, photographers can create a controlled environment where the light is diffused and softened, allowing for the intricate details and textures of the glass to be captured with exceptional clarity and fidelity.
Furthermore, the use of a light tent facilitates the creation of a seamless and neutral background, eliminating distracting elements and ensuring that the focus remains squarely on the glass object. This clean and uncluttered backdrop enhances the visual impact of the glass, allowing its unique characteristics to take center stage in the composition, free from visual distractions or competing elements.
In addition to light tents, diffusers are valuable accessories that can be employed to soften and scatter light, reducing the intensity of reflections and shadows when photographing glass. Whether in the form of translucent panels, fabric screens, or specialized attachments for lighting equipment, diffusers serve to create a gentle and balanced illumination that enhances the transparency and luminosity of the glass object.
By strategically positioning diffusers between the light source and the glass object, photographers can achieve a controlled and harmonious lighting setup that minimizes the impact of reflections and shadows, resulting in images that exude a sense of clarity and brilliance. The diffused light envelops the glass, revealing its intricate details and textures while maintaining a balanced tonal range and minimizing visual disturbances.
In summary, the strategic use of light tents and diffusers empowers photographers to create a controlled and diffused lighting environment that enhances the quality of glass photography. By leveraging these tools, photographers can capture images that showcase the transparency, texture, and luminosity of glass objects with exceptional clarity and visual impact, while minimizing the disruptive effects of reflections and shadows.
Post-processing techniques for removing reflections and shadows
Post-processing techniques play a pivotal role in refining glass photography by addressing residual reflections and shadows that may persist in the captured images. Through the adept application of digital editing tools and methods, photographers can effectively minimize or eliminate unwanted visual disturbances, ensuring that the true essence of the glass object is faithfully conveyed in the final photographs.
One of the primary post-processing techniques for mitigating reflections and shadows involves the meticulous use of image editing software to selectively adjust the tonal and luminance characteristics of the photograph. By employing targeted adjustments to specific areas of the image, photographers can attenuate reflections and shadows, thereby enhancing the transparency and clarity of the glass object. This approach allows for the precise refinement of the visual elements within the photograph, ensuring that the glass is presented in its purest form, free from distracting visual artifacts.
Furthermore, the strategic application of masking and layering techniques enables photographers to isolate and manipulate specific regions of the image, affording them greater control over the treatment of reflections and shadows. By selectively targeting areas affected by unwanted visual disturbances, photographers can employ advanced editing tools to refine the luminosity, contrast, and color balance, effectively minimizing the impact of reflections and shadows while preserving the intricate details and textures of the glass.
In addition to localized adjustments, the utilization of specialized retouching tools, such as clone stamping and healing brushes, offers photographers the means to delicately remove or diminish residual reflections and shadows that may persist in the image. This meticulous approach to retouching allows for the precise refinement of the glass object, ensuring that any remaining visual distractions are seamlessly addressed, resulting in a photograph that exudes clarity and visual purity.
Moreover, the judicious application of digital filters and enhancement techniques can further contribute to the refinement of glass photography by optimizing the tonal range, contrast, and luminosity of the image. By leveraging these digital tools, photographers can fine-tune the visual characteristics of the glass, ensuring that reflections and shadows are effectively managed, while the transparency and luminosity of the glass are accentuated, resulting in a captivating and visually compelling final image.
In summary, the adept application of post-processing techniques empowers photographers to refine glass photography by addressing reflections and shadows, ensuring that the true beauty and allure of the glass object are faithfully conveyed in the final images. Through the strategic use of digital editing tools and methods, photographers can achieve exceptional results, capturing the transparency, texture, and luminosity of glass objects with remarkable clarity and visual impact, while minimizing the disruptive effects of reflections and shadows.
Frequently Asked Questions about How To Photograph Glass Without Reflections And Shadows
Was this page helpful?
At Storables.com, we guarantee accurate and reliable information. Our content, validated by Expert Board Contributors, is crafted following stringent Editorial Policies. We're committed to providing you with well-researched, expert-backed insights for all your informational needs.


0 thoughts on “How To Photograph Glass Without Reflections And Shadows”