Articles
How To Build Shadow Box Fence
Modified: August 22, 2024
Learn how to build a beautiful shadow box fence with our informative articles. Find step-by-step instructions and expert tips for a successful DIY project.
(Many of the links in this article redirect to a specific reviewed product. Your purchase of these products through affiliate links helps to generate commission for Storables.com, at no extra cost. Learn more)
Introduction
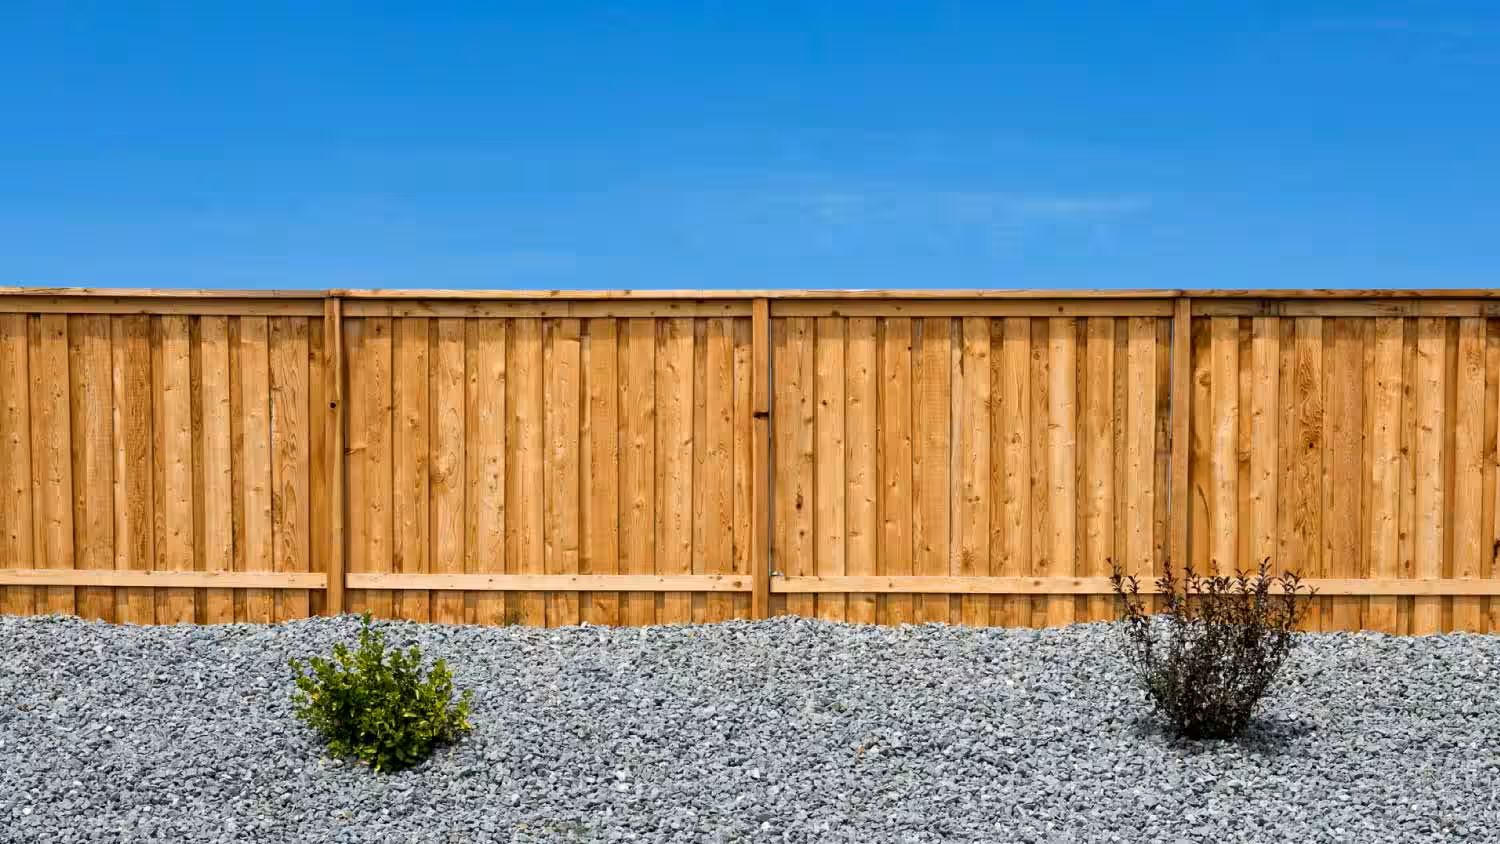
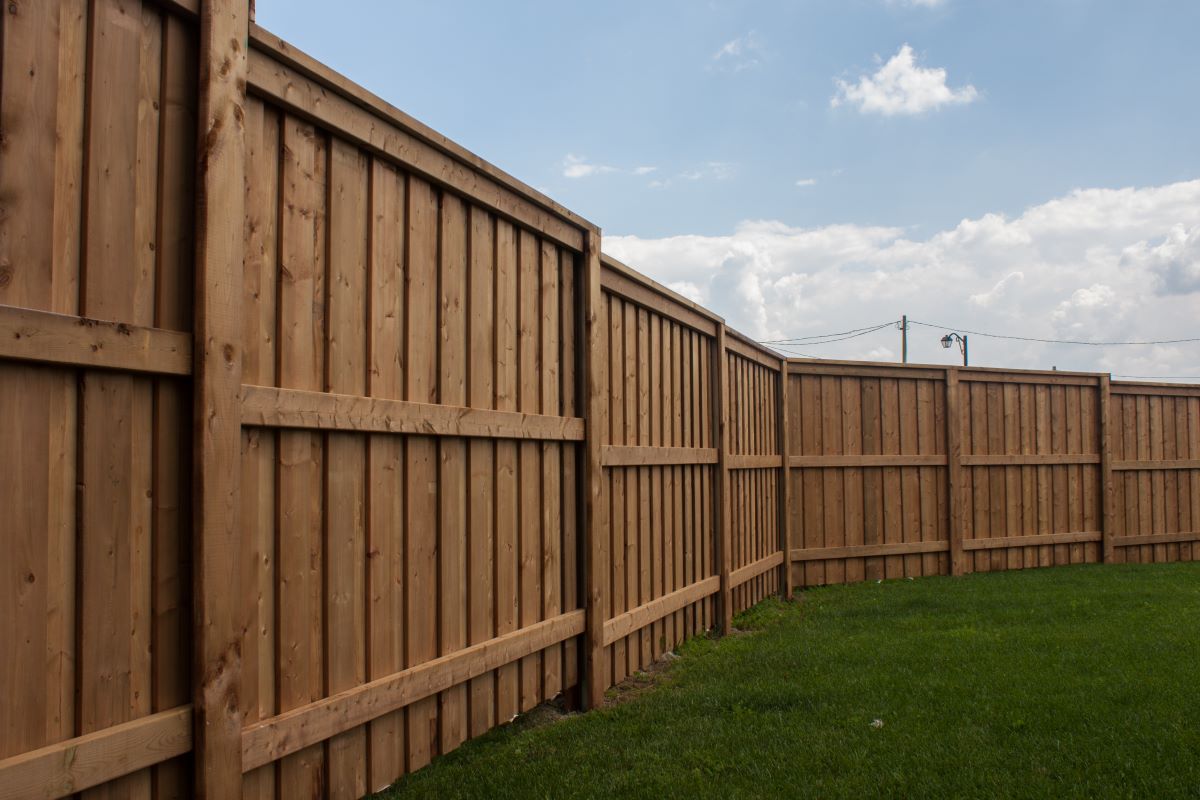
A shadow box fence is a popular choice for homeowners who desire a visually appealing and functional fence. It is constructed in a way that creates depth and dimension, giving the fence a unique and stylish look. The design of a shadow box fence allows for privacy without completely blocking out the surrounding area, making it an ideal option for both residential and commercial properties.
In this article, we will guide you through the process of building a shadow box fence from start to finish. We will provide detailed instructions, tips, and insights to help you successfully complete the project. Whether you’re a seasoned DIY enthusiast or a beginner, this article will equip you with the knowledge and confidence to tackle this project.
Before we dive into the steps, it’s important to gather all the necessary materials. Here’s a list of what you’ll need:
Key Takeaways:
- Building a shadow box fence requires precise measurements, secure post installation, and attention to detail. The result is a visually appealing and functional fence that enhances privacy and property aesthetics.
- Adding finishing touches such as post caps and regular maintenance prolongs the lifespan of a shadow box fence. DIY enthusiasts can enjoy the process while ensuring a professional-looking and durable end product.
Read more: What Is A Shadow Box In Construction
Step 1: Gather Materials
Before you begin building your shadow box fence, it’s crucial to collect all the necessary materials. Having everything on hand will streamline the construction process and ensure that you aren’t left scrambling for supplies midway through the project. Here’s a comprehensive list of what you’ll need:
- Fence posts – These will serve as the foundation of your shadow box fence. Choose sturdy and durable posts that are suitable for your specific climate and environment.
- Fence rails – The horizontal beams that connect the fence posts. Opt for rails that are strong and able to withstand the weight of the fence boards.
- Fence boards – These are the vertical slats that create the shadow box effect. Select high-quality boards that are resistant to rot, decay, and insect infestation.
- Fence post caps – These decorative accessories add a finishing touch to your fence posts. Choose caps that complement the overall design and style of your fence.
- Fence screws or nails – Depending on your preference, you can use either screws or nails to secure the fence boards to the rails and posts.
- Cement – This is necessary for setting the fence posts securely into the ground. Make sure to use a high-quality cement mix that is suitable for outdoor applications.
- Level – A level will help you ensure that your fence is straight and level throughout the construction process.
- Tape measure – Accurate measurements are key to building a properly sized and aligned shadow box fence. Have a tape measure on hand to measure distances and dimensions accurately.
- Saw – You may need a saw to cut your fence boards, rails, or posts to the desired length. Choose a saw suitable for the type of material you are cutting.
- Safety equipment – Always prioritize safety when working on any construction project. Wear protective gear such as gloves, safety glasses, and a dust mask to protect yourself from potential hazards.
Once you have gathered all the necessary materials, you can move on to the next step: measuring and marking the fence line.
Step 2: Measure and Mark the Fence Line
Before you start digging the fence post holes, it’s important to accurately measure and mark the fence line. This step ensures that your shadow box fence will be properly aligned and straight. Here’s how to do it:
- Start by determining where you want your fence to begin and end. Use stakes or markers to mark these points.
- Next, use a tape measure to determine the distance between the marked points. This will be the length of your fence.
- Take into account any obstacles, such as trees or structures, along the fence line. Adjust the position of the fence accordingly to avoid any obstructions.
- Use a string line or chalk line to connect the marked points. Stretch the line tightly to ensure a straight and even fence line.
- Double-check the alignment of the string line or chalk line using a level. Make any necessary adjustments to ensure the line is perfectly level.
- Mark the location of the fence posts along the line, ensuring they are spaced evenly. Typically, fence posts are spaced 6 to 8 feet apart, but this may vary depending on your specific design.
Once you have measured and marked the fence line, you are ready to move on to the next step: digging the fence post holes. It’s important to take your time and be precise during this step, as it will determine the stability and overall quality of your shadow box fence.
Step 3: Dig the Fence Post Holes
Now that you have measured and marked the fence line, it’s time to dig the fence post holes. The depth and width of the holes will depend on the size of your fence posts and the soil conditions in your area. Here’s a step-by-step guide on how to dig the fence post holes:
- Using a post hole digger or shovel, start digging the first hole at one of the marked post locations. The hole should be deep enough to bury around one-third of the fence post length, plus an additional 6 inches for gravel.
- Continue digging the remaining post holes along the fence line, maintaining consistent spacing between them. It’s crucial to ensure that the holes are evenly spaced and aligned.
- Check the depth of each hole using a tape measure or a piece of string with the desired depth marked on it. Adjust the hole depth as necessary to ensure uniformity.
- If the soil conditions in your area are prone to erosion, it’s recommended to add a layer of gravel at the bottom of each hole. This helps with drainage and stability.
- After digging all the holes, remove any loose dirt or debris from the holes using a shovel or post hole digger.
- Check the alignment of the holes using a string line or level. Make any necessary adjustments to ensure that the holes are straight and level.
Keep in mind that the number of post holes you dig will depend on the length of your fence and the spacing between the fence posts. It’s important to follow local building codes and regulations regarding fence installations in your area.
With the fence post holes dug, you are now ready to move on to the next step: setting the fence posts securely in the ground. This step is crucial for the stability and longevity of your shadow box fence.
Step 4: Set the Fence Posts
With the fence post holes dug, it’s time to set the fence posts securely in the ground. This step ensures the stability and durability of your shadow box fence. Here’s a step-by-step guide on how to set the fence posts:
- Start by placing a 2-inch layer of gravel or crushed stone at the bottom of each fence post hole. This aids in drainage and helps prevent the post from sinking over time.
- Take one of the fence posts and place it into the first hole. Use a level to ensure that the post is perfectly plumb. Make any necessary adjustments to align it vertically.
- While holding the post in place, have a helper pour concrete mix into the hole around the post. Follow the manufacturer’s instructions for the proper ratio of water to concrete mix.
- Continue filling the hole with concrete, making sure it completely surrounds the fence post. Use a stick or a pole to consolidate the concrete and remove any air pockets.
- Repeat this process for the remaining fence posts, ensuring that each post is plumb and aligned with the string line.
- Allow the concrete to cure according to the manufacturer’s instructions. This usually takes about 24 to 48 hours.
Setting the fence posts with concrete provides added strength and stability to your shadow box fence. It helps prevent the fence from leaning or shifting over time, especially in areas with strong winds or unstable soil conditions.
Once the concrete has fully cured, you can move on to the next step: attaching the fence rails to the posts. This will form the framework for your shadow box fence.
When building a shadow box fence, make sure to use pressure-treated wood to prevent rot and decay. Additionally, use stainless steel or galvanized nails to prevent rust and staining.
Read more: How To Build A Wattle Fence
Step 5: Attach the Fence Rails
Now that the fence posts are securely set in concrete, it’s time to attach the fence rails. The fence rails are horizontal beams that connect the fence posts and provide a sturdy framework for the fence boards. Here’s a step-by-step guide on how to attach the fence rails:
- Start by measuring the length between two adjacent fence posts. Cut a fence rail to this length, ensuring a precise fit.
- Position the fence rail horizontally between the two posts at the desired height. Use a level to ensure that the rail is perfectly straight.
- Once the rail is in the correct position, use screws or nails to attach it to the fence posts. Make sure to use enough fasteners to secure the rail firmly in place.
- Repeat this process for the remaining fence rails, ensuring that they are evenly spaced and aligned.
- Check the levelness of each rail as you proceed, making any necessary adjustments to ensure a straight and level framework.
Attaching the fence rails properly is essential for the stability and structural integrity of your shadow box fence. The rails should be securely fastened to the fence posts to ensure that they can support the weight of the fence boards.
With the fence rails in place, you are now ready to move on to the next step: installing the fence boards. This is where the distinctive shadow box effect of your fence will come to life.
Step 6: Install the Fence Boards
Now that the fence rails are securely attached, it’s time to install the fence boards. These vertical slats create the unique shadow box effect of your fence and provide privacy while still allowing light and air to pass through. Here’s a step-by-step guide on how to install the fence boards:
- Start by measuring the height between the top and bottom fence rails. This will determine the length of each fence board.
- With the measurements in hand, cut the fence boards to the desired length using a saw. Make sure to double-check the measurements before cutting to ensure accuracy.
- Position the first fence board vertically against the first fence rail. Use a level to ensure that the board is straight and plumb.
- Once the board is properly aligned, attach it to the fence rail using screws or nails. Make sure to leave a small gap between each board to allow for expansion and contraction due to weather conditions.
- Repeat this process for the remaining fence boards, ensuring that they are evenly spaced and aligned.
- Check the levelness of each board as you progress, making any necessary adjustments to ensure a straight and level surface.
- Continue installing the fence boards until you reach the end of the fence line.
Installing the fence boards requires precision and attention to detail to achieve a polished and professional-looking shadow box fence. Take your time to ensure that each board is properly aligned and securely fastened.
With the fence boards installed, you are nearing the completion of your shadow box fence. The next step is to add post caps and finishing touches to enhance the aesthetic appeal of your fence.
Step 7: Add Post Caps and Finishing Touches
With the fence boards installed, it’s time to add the final touches to your shadow box fence. This includes adding post caps and other finishing details that will enhance the overall appearance of your fence. Here’s a step-by-step guide on how to complete this step:
- Start by selecting post caps that match the style and design of your fence. There are various options available, including decorative metal caps, wooden caps, or even solar-powered caps for added functionality.
- Carefully attach the post caps to the top of each fence post. Make sure they are centered and securely fastened.
- Inspect the fence for any loose screws or nails and tighten or replace them as needed to ensure the fence’s stability.
- Clean the fence boards and remove any debris or sawdust that may have accumulated during the installation process.
- Consider staining or painting your shadow box fence to further enhance its appearance and protect the wood from weathering.
- Take a step back and admire your completed shadow box fence. You have successfully built a visually appealing and functional fence that will enhance the beauty and privacy of your property.
Adding post caps and other finishing touches not only adds a polished look to your shadow box fence but also helps protect the fence posts from moisture and prolongs their lifespan.
Remember to regularly maintain your fence by inspecting it for any damage, cleaning it as needed, and applying a fresh coat of stain or paint when necessary.
Congratulations on successfully building your own shadow box fence! You can now enjoy the privacy and aesthetic appeal it brings to your outdoor space.
As a final note, it’s worth mentioning that building a shadow box fence requires time, patience, and careful attention to detail. If you are not confident in your DIY skills or don’t have the necessary tools, it’s always a good idea to consult with a professional fence installer who can ensure the job is done correctly.
Now go ahead and enjoy your beautifully crafted shadow box fence!
Conclusion
Building a shadow box fence is a rewarding project that combines functionality and style. It provides both privacy and an aesthetically pleasing look to your outdoor space. By following the steps outlined in this guide, you can successfully construct your own shadow box fence and enjoy the benefits it brings.
Throughout the process, we covered the essential steps, from gathering the necessary materials to installing the fence boards and adding the finishing touches. Each step plays a crucial role in ensuring the stability, durability, and visual appeal of your fence.
Remember to take accurate measurements, dig precise fence post holes, and set the posts securely in concrete. Attention to detail during the installation of the fence rails and boards is key to achieving a straight and level fence. Adding post caps and finishing touches not only enhances the look of your fence but also contributes to its longevity.
Always prioritize safety when undertaking any construction project, and don’t hesitate to seek professional assistance or guidance if needed. Building a shadow box fence requires time, effort, and patience, but the end result is a stunning addition to your property that will provide privacy and enhance your outdoor space for years to come.
Now, armed with the knowledge gained from this guide, go ahead and embark on your shadow box fence construction project. Enjoy the process and the satisfaction of creating a functional and visually appealing fence that will be a source of pride for your property.
Once you've mastered building a shadow box fence, why not tackle more woodworking projects? Our guide on the best woodworking techniques offers everything needed to create stunning pieces effortlessly. From selecting the right tools to finishing touches, these insights ensure your projects stand out. Don't miss out on refining your crafting skills with our latest recommendations!
Frequently Asked Questions about How To Build Shadow Box Fence
Was this page helpful?
At Storables.com, we guarantee accurate and reliable information. Our content, validated by Expert Board Contributors, is crafted following stringent Editorial Policies. We're committed to providing you with well-researched, expert-backed insights for all your informational needs.


0 thoughts on “How To Build Shadow Box Fence”