Home>Furniture & Design>Interior Design Trends>How To Remove Mineral Deposits From Glass

Interior Design Trends
How To Remove Mineral Deposits From Glass
Modified: February 18, 2024
Learn effective techniques for removing mineral deposits from glass surfaces. Keep up with the latest interior design trends and maintain a sparkling, clear view.
(Many of the links in this article redirect to a specific reviewed product. Your purchase of these products through affiliate links helps to generate commission for Storables.com, at no extra cost. Learn more)
Introduction
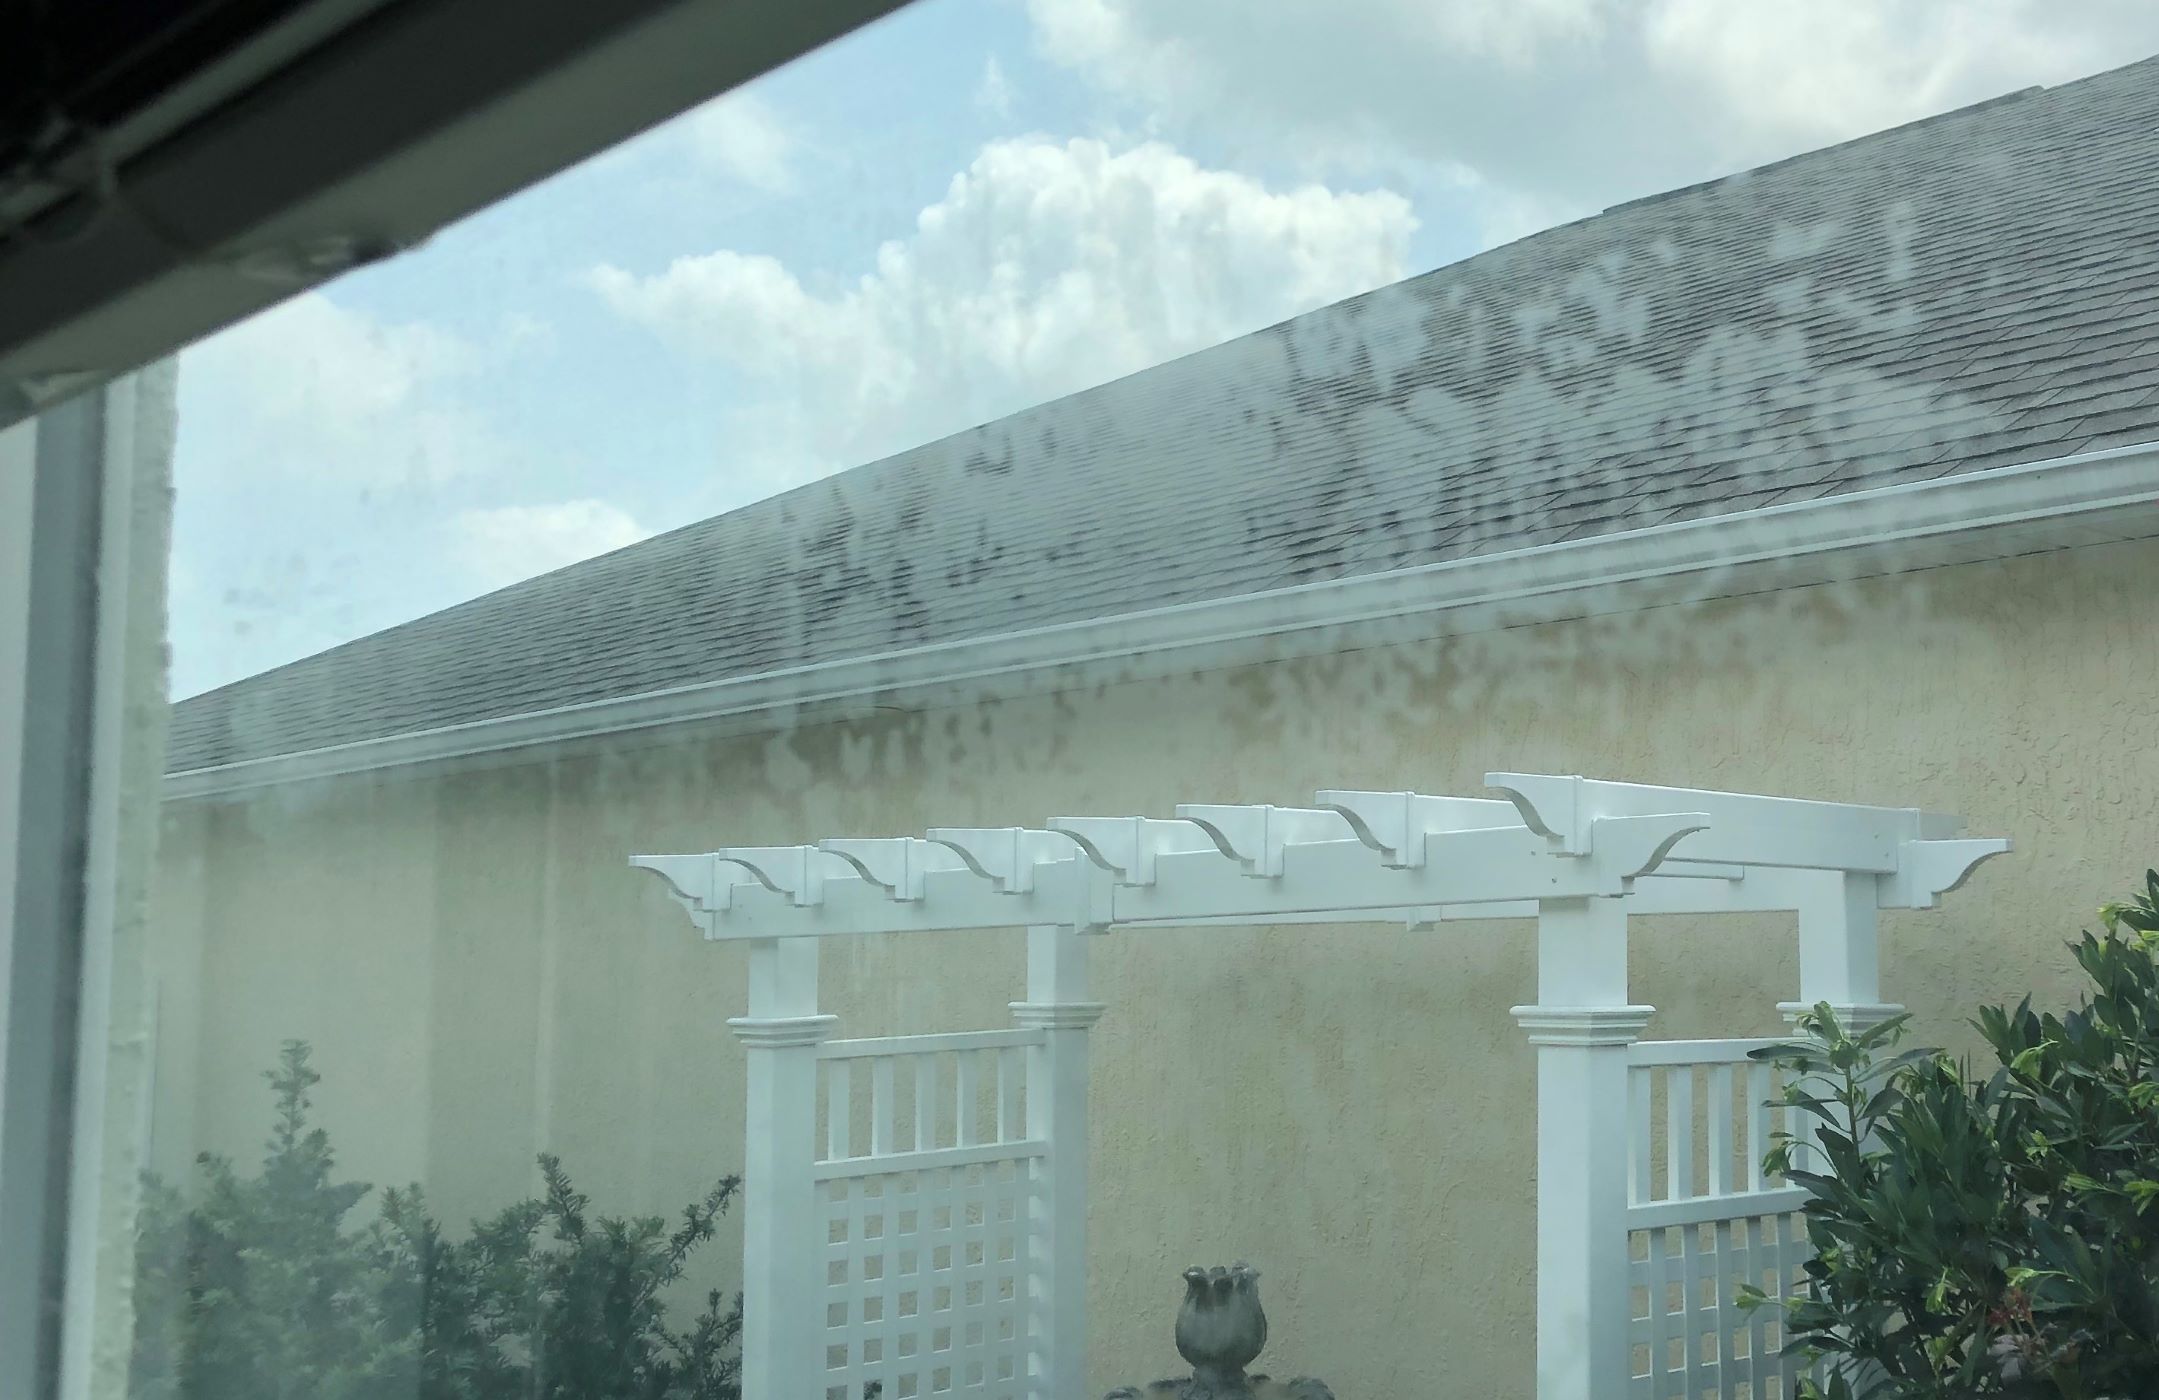
Mineral deposits on glass surfaces can be a persistent nuisance, diminishing the clarity and aesthetic appeal of windows, shower doors, and glassware. These deposits, often caused by hard water or mineral-rich sources, can leave unsightly stains and streaks that are challenging to remove using conventional cleaning methods. However, with the right approach and materials, you can effectively restore the pristine condition of glass surfaces and eliminate mineral deposits.
In this comprehensive guide, we will delve into the process of removing mineral deposits from glass, providing step-by-step instructions and valuable insights to help you achieve optimal results. By understanding the nature of mineral deposits and employing the appropriate tools and techniques, you can restore the transparency and luster of glass surfaces, enhancing the overall visual appeal of your living spaces.
Whether you are dealing with stubborn water spots on your shower enclosure or mineral buildup on your glassware, this guide will equip you with the knowledge and skills needed to tackle these challenges effectively. By following the outlined steps and incorporating additional tips and precautions, you can elevate the cleanliness and clarity of glass surfaces in your home or workspace.
Join us as we embark on a journey to conquer mineral deposits and restore the brilliance of glass, empowering you to maintain a pristine and inviting environment. Let's dive into the intricacies of mineral deposit removal and unveil the transformative potential of targeted cleaning solutions and techniques. With our guidance, you'll be well-equipped to tackle this common issue and elevate the visual appeal of your glass surfaces with confidence and precision.
Key Takeaways:
- Say goodbye to mineral deposits on glass! Use a vinegar and water solution, gentle scrubbing, and thorough rinsing to restore the pristine clarity of your glass surfaces. It’s easy and effective!
- Keep your glass surfaces sparkling! Remember to wear gloves, test cleaning solutions, and avoid abrasive tools. With a little care and regular maintenance, you can conquer mineral deposits and maintain the allure of your glass.
Read more: How To Remove Calcium Deposits From Glass
Understanding Mineral Deposits
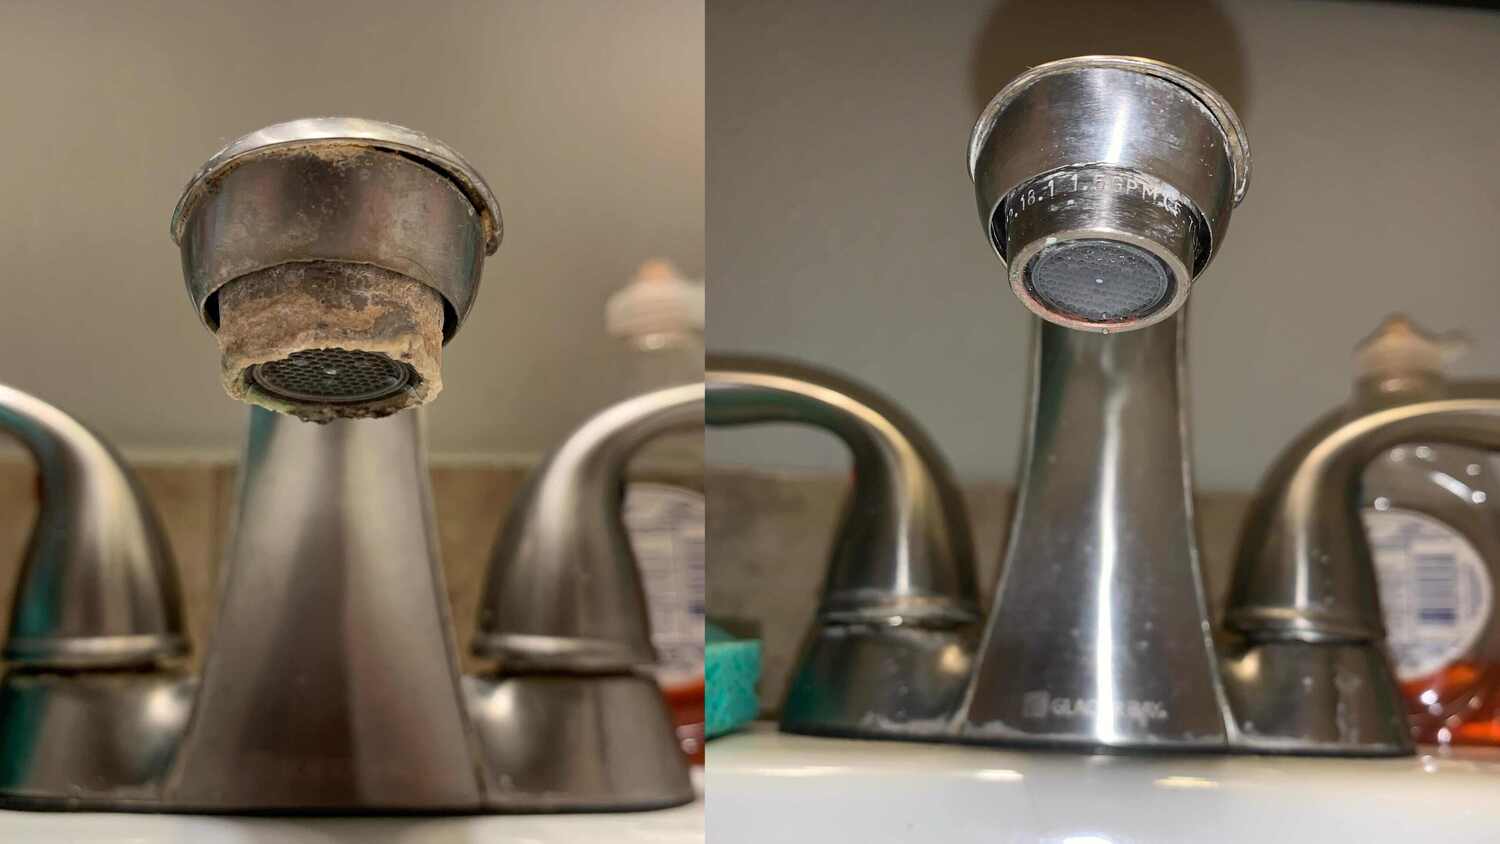
Mineral deposits, also known as hard water stains or water spots, are the result of mineral-rich water evaporating and leaving behind mineral residue on glass surfaces. These deposits typically consist of minerals such as calcium, magnesium, and silica, which are commonly found in hard water sources. When water droplets evaporate on glass, the minerals within the water become concentrated, leading to the formation of stubborn and unsightly deposits.
The appearance of mineral deposits can vary, ranging from cloudy or hazy spots to white or off-white streaks on glass surfaces. In addition to affecting the visual clarity of glass, these deposits can also compromise the smooth texture of the surface, creating a rough or gritty feel when touched.
Understanding the composition and formation of mineral deposits is crucial for effectively addressing this issue. By recognizing the specific minerals involved and the mechanisms of deposit formation, you can tailor your cleaning approach to target and eliminate these unwanted residues.
It's important to note that the presence of mineral deposits is not indicative of poor hygiene or cleanliness. Instead, it is a common consequence of using hard water or mineral-rich sources for various household activities, such as bathing, dishwashing, and glassware cleaning. As a result, mineral deposits can accumulate over time, gradually diminishing the pristine appearance of glass surfaces.
By gaining a deeper understanding of mineral deposits and their underlying causes, you can approach the cleaning process with clarity and purpose. Armed with this knowledge, you'll be better equipped to select the appropriate cleaning solutions and techniques to effectively dissolve and remove mineral deposits from glass, restoring its transparency and visual appeal.
In the following sections, we will explore the tools and materials needed, as well as the step-by-step process for removing mineral deposits from glass surfaces. By combining this practical guidance with a comprehensive understanding of mineral deposits, you'll be empowered to tackle this common cleaning challenge with confidence and precision.
Tools and Materials Needed
To effectively remove mineral deposits from glass surfaces, you will need a specific set of tools and materials designed to target and dissolve the stubborn residues. By assembling the following items, you can prepare a comprehensive cleaning arsenal to tackle mineral deposits with precision and efficiency.
White Vinegar
White vinegar serves as a versatile and effective cleaning agent for combating mineral deposits on glass. Its acidic nature enables it to dissolve the minerals, making it an essential component of your cleaning solution. The mild yet potent properties of white vinegar make it a preferred choice for addressing hard water stains and restoring the clarity of glass surfaces.
Distilled Water
Distilled water, free from mineral impurities, is an ideal companion to white vinegar for creating a potent cleaning solution. By using distilled water in conjunction with white vinegar, you can ensure that the cleaning solution is free from additional mineral contaminants, maximizing its effectiveness in dissolving and removing existing deposits.
Spray Bottle
A spray bottle is a practical and convenient tool for dispensing the cleaning solution onto the affected glass surfaces. Opt for a clean and empty spray bottle that allows for easy application of the solution, ensuring thorough coverage of the mineral deposits for optimal cleaning results.
Microfiber Cloth or Soft Sponge
A microfiber cloth or a soft sponge is essential for gentle yet effective scrubbing of the glass surfaces. These non-abrasive tools enable you to remove mineral deposits without causing damage or scratches, preserving the integrity of the glass while facilitating the cleaning process.
Rubber Gloves
Rubber gloves provide protection for your hands during the cleaning process, particularly when working with acidic cleaning solutions such as white vinegar. By wearing rubber gloves, you can shield your skin from potential irritation or dryness, ensuring a comfortable and safe cleaning experience.
Plastic Scraper (Optional)
In cases where mineral deposits are particularly stubborn or have hardened over time, a plastic scraper can be used to gently dislodge the deposits from the glass surface. When used with caution and precision, a plastic scraper can aid in loosening and removing persistent deposits without causing damage to the glass.
By gathering these essential tools and materials, you can prepare a comprehensive cleaning kit tailored to the specific requirements of removing mineral deposits from glass. With these items at your disposal, you'll be ready to embark on the step-by-step process of restoring the pristine clarity and visual appeal of glass surfaces in your home or workspace.
Read more: How To Remove Lime Deposits From A Bathtub
Step 1: Preparation
Before embarking on the process of removing mineral deposits from glass, it is essential to prepare the affected surfaces and gather the necessary tools and materials for a seamless cleaning experience. Proper preparation sets the stage for effective cleaning and ensures that the subsequent steps unfold with precision and efficiency.
Clear the Area
Begin by clearing the immediate area surrounding the glass surfaces to be cleaned. Remove any objects, decorations, or items that may obstruct access to the affected areas. Creating a clear and unobstructed workspace allows for unrestricted movement and facilitates thorough cleaning without the risk of accidental damage to nearby objects.
Ventilation
Ensure adequate ventilation in the cleaning area to disperse any fumes or odors that may arise from the use of cleaning solutions, particularly white vinegar. Open windows or use fans to promote air circulation, creating a comfortable and well-ventilated environment for the cleaning process.
Protective Gear
Prioritize safety by donning rubber gloves to protect your hands during the cleaning process. The acidic nature of white vinegar necessitates the use of protective gloves to shield your skin from potential irritation or dryness. By wearing rubber gloves, you can engage in the cleaning process with confidence and comfort.
Mix the Cleaning Solution
Prepare the cleaning solution by combining equal parts of white vinegar and distilled water in a clean spray bottle. The diluted white vinegar solution serves as a potent and effective agent for dissolving mineral deposits without causing damage to the glass surface. Thoroughly mix the solution by gently shaking the spray bottle to ensure a homogeneous blend of white vinegar and distilled water.
Inspection
Carefully inspect the glass surfaces for the presence of mineral deposits, identifying areas that require targeted cleaning. Take note of the extent and severity of the deposits, as well as any areas that may require additional attention during the cleaning process. This visual assessment allows for a strategic and focused approach to addressing the specific areas of concern.
By meticulously preparing the cleaning environment, assembling the necessary tools and materials, and assessing the condition of the glass surfaces, you establish a solid foundation for the subsequent steps of the mineral deposit removal process. With these preparatory measures in place, you are poised to proceed with confidence and precision, ready to tackle the challenge of restoring the pristine clarity of glass surfaces through targeted cleaning and removal of mineral deposits.
Step 2: Application of Cleaning Solution
With the preparatory groundwork laid out, it's time to initiate the process of removing mineral deposits from glass surfaces through the strategic application of the cleaning solution. This pivotal step involves the precise and thorough dispensing of the diluted white vinegar solution onto the affected areas, setting the stage for the dissolution and subsequent removal of stubborn mineral residues.
Begin by holding the spray bottle containing the prepared cleaning solution at a moderate distance from the glass surface. With a steady hand, apply a generous mist of the solution onto the areas marred by mineral deposits, ensuring comprehensive coverage of the affected surfaces. The gentle misting action allows the cleaning solution to adhere to the deposits, initiating the dissolution process without overwhelming the glass surface.
As the cleaning solution makes contact with the mineral deposits, the acidic properties of the white vinegar work to effectively break down and dissolve the stubborn residues. The chemical reaction between the vinegar and the minerals within the deposits facilitates the gradual loosening and disintegration of the unwanted stains, preparing them for subsequent removal.
It is essential to allow the cleaning solution to remain in contact with the mineral deposits for a sufficient duration, enabling the acidic action of the white vinegar to penetrate and weaken the stubborn residues. This period of contact allows the solution to exert its dissolving effect, gradually softening the mineral deposits and preparing them for the next phase of the cleaning process.
During this phase, exercise patience and precision, allowing the cleaning solution to work its magic on the mineral deposits without rushing the process. The deliberate application and dwell time of the cleaning solution are instrumental in ensuring thorough and effective dissolution of the deposits, setting the stage for the subsequent steps of scrubbing and removal.
By methodically applying the diluted white vinegar solution and allowing it to interact with the mineral deposits, you pave the way for a targeted and efficient cleaning process, harnessing the potent properties of the cleaning solution to initiate the breakdown and dissolution of stubborn mineral residues. This strategic application marks a crucial phase in the journey to restore the pristine clarity and visual appeal of glass surfaces, laying the groundwork for the subsequent steps of scrubbing and removal.
Step 3: Scrubbing and Removal
Following the strategic application of the cleaning solution, the next pivotal phase involves the meticulous scrubbing and removal of the softened mineral deposits from the glass surfaces. This step is instrumental in dislodging and eliminating the dissolved residues, restoring the pristine clarity and smooth texture of the glass.
Armed with a microfiber cloth or a soft sponge, gently yet firmly scrub the areas where the mineral deposits have been treated with the cleaning solution. Employ circular or back-and-forth motions to effectively dislodge the softened residues, gradually revealing the underlying glass surface. Exercise caution and precision to avoid applying excessive pressure that could potentially scratch or damage the glass.
As you engage in the scrubbing process, periodically assess the progress to gauge the extent of mineral deposit removal. The dissolved residues should begin to lift and disperse under the gentle scrubbing action, gradually revealing the improved clarity and smoothness of the glass surface. Continue scrubbing until the majority of the mineral deposits have been successfully loosened and removed, ensuring a comprehensive and thorough cleaning outcome.
In cases where the mineral deposits exhibit heightened resistance or have hardened over time, the optional use of a plastic scraper can aid in delicately dislodging the stubborn residues. Exercise caution and restraint when utilizing the plastic scraper, ensuring that it is applied with precision and gentleness to avoid causing damage to the glass surface.
Throughout the scrubbing and removal process, maintain a keen focus on the targeted areas, addressing any lingering deposits with meticulous attention to detail. By methodically scrubbing and removing the softened mineral residues, you can gradually unveil the renewed brilliance and transparency of the glass surfaces, marking a significant milestone in the journey to conquer mineral deposits.
As the scrubbing and removal phase nears completion, take a moment to admire the transformative impact of your efforts, witnessing the remarkable transition from obscured and blemished glass to revitalized and pristine surfaces. The strategic combination of the cleaning solution and gentle scrubbing has effectively dissolved and removed the stubborn mineral deposits, breathing new life into the glass and elevating its visual appeal.
By navigating the scrubbing and removal process with patience and precision, you have successfully liberated the glass surfaces from the grip of mineral deposits, restoring their inherent clarity and luster. This pivotal phase sets the stage for the final steps of rinsing and drying, bringing you closer to the culmination of a comprehensive and effective mineral deposit removal journey.
Read more: What Is Mineral Glass
Step 4: Rinse and Dry
Following the meticulous scrubbing and removal of mineral deposits from the glass surfaces, the final phase entails the crucial steps of rinsing and drying to complete the cleaning process. This pivotal stage serves to eliminate any residual cleaning solution and ensure the restoration of pristine clarity and smoothness to the glass.
Begin by thoroughly rinsing the treated glass surfaces with clean water, effectively removing any lingering traces of the diluted white vinegar solution and dislodged mineral residues. Use a gentle stream of water to cascade over the glass, systematically washing away the remnants of the cleaning solution and dissolved deposits. Ensure comprehensive coverage of the treated areas, allowing the cleansing action of water to purify and rejuvenate the glass surfaces.
As the rinsing process unfolds, visually inspect the glass surfaces to confirm the removal of all traces of the cleaning solution and mineral deposits. The transparent and unobstructed appearance of the glass signifies the successful elimination of unwanted residues, marking a significant achievement in the journey to restore the pristine clarity of the surfaces.
Following the thorough rinsing, proceed to dry the glass surfaces using a clean and absorbent cloth, such as a microfiber towel. Gently pat and wipe the glass, absorbing the residual moisture and ensuring a streak-free and polished finish. Exercise care and precision to eliminate any water droplets or moisture, leaving the glass surfaces impeccably dry and glistening.
As you engage in the drying process, take note of the enhanced transparency and radiance of the glass, appreciating the transformative impact of the comprehensive cleaning endeavor. The meticulous rinsing and drying actions culminate in the revitalization of the glass surfaces, elevating their visual appeal and restoring their inherent brilliance.
Upon completing the rinsing and drying phase, take a moment to admire the revitalized glass surfaces, reveling in the remarkable transition from obscured and blemished areas to pristine and inviting spaces. The strategic combination of targeted cleaning, scrubbing, and meticulous rinsing and drying has effectively liberated the glass from the grip of mineral deposits, unveiling its renewed clarity and luster.
With the successful completion of the rinsing and drying process, the journey to remove mineral deposits from glass surfaces reaches its culmination, leaving behind revitalized and immaculate spaces. The transformative impact of these final steps solidifies the triumph over mineral deposits, ensuring the enduring radiance and visual allure of the glass surfaces.
Additional Tips and Precautions
As you embark on the journey to remove mineral deposits from glass surfaces, it is essential to consider additional tips and precautions to enhance the effectiveness and safety of the cleaning process. By incorporating these insights into your approach, you can optimize the outcomes and ensure a seamless and rewarding experience.
Use Protective Eyewear
When working with cleaning solutions and engaging in scrubbing activities, consider wearing protective eyewear to shield your eyes from potential splashes or airborne particles. This precautionary measure promotes safety and minimizes the risk of eye irritation or discomfort during the cleaning process.
Test in a Small Area
Before applying the cleaning solution to larger glass surfaces, conduct a small-scale test in an inconspicuous area to assess the compatibility and impact of the solution. This preliminary test allows you to gauge the effectiveness of the cleaning solution and its interaction with the specific type of glass, ensuring that it delivers the desired results without adverse effects.
Avoid Abrasive Tools
While addressing mineral deposits, refrain from using abrasive tools or harsh cleaning implements that could scratch or damage the glass surface. Opt for non-abrasive materials such as microfiber cloths and soft sponges to gently scrub the glass, preserving its smooth texture and integrity throughout the cleaning process.
Regular Maintenance
Incorporate regular maintenance practices to prevent the accumulation of mineral deposits on glass surfaces. Consider using a squeegee or microfiber cloth to remove excess water and moisture from shower enclosures and windows after each use, minimizing the opportunity for mineral residues to form and adhere to the glass.
Consider Professional Services
For particularly stubborn or extensive mineral deposits, consider seeking professional cleaning services specializing in glass restoration. Professional cleaners possess the expertise and specialized equipment to tackle challenging deposits, ensuring thorough and meticulous removal while preserving the pristine condition of the glass.
Environmental Considerations
When disposing of residual cleaning solutions or materials, adhere to environmentally responsible practices. Consider diluting and neutralizing the cleaning solution before disposal, minimizing its impact on the environment and adhering to local regulations regarding the proper disposal of cleaning agents.
By integrating these additional tips and precautions into your approach, you can elevate the efficacy and safety of the mineral deposit removal process, fostering a proactive and conscientious approach to maintaining the clarity and allure of glass surfaces. These insights empower you to navigate the cleaning journey with confidence and consideration, ensuring optimal outcomes while safeguarding the integrity of the glass and the surrounding environment.
Read more: Why Is Glass Not A Mineral
Conclusion
In conclusion, the journey to remove mineral deposits from glass surfaces is a transformative endeavor that empowers individuals to restore the pristine clarity and visual allure of their living spaces. By understanding the nature of mineral deposits and employing targeted cleaning solutions and techniques, individuals can effectively conquer the persistent challenge of mineral residue accumulation on glass.
Throughout this comprehensive guide, we have explored the intricacies of mineral deposits, delving into their composition and formation to gain a deeper understanding of this common cleaning challenge. By recognizing the impact of hard water and mineral-rich sources on glass surfaces, individuals can approach the cleaning process with clarity and purpose, armed with the knowledge needed to address the specific characteristics of mineral deposits.
The step-by-step journey to remove mineral deposits from glass surfaces has been meticulously outlined, encompassing essential phases such as preparation, application of cleaning solution, scrubbing and removal, as well as rinsing and drying. Each phase represents a strategic and deliberate approach to targeting and eliminating mineral residues, culminating in the revitalization of glass surfaces and the restoration of their inherent brilliance.
Furthermore, the incorporation of additional tips and precautions underscores the proactive and conscientious nature of the cleaning process, emphasizing safety, environmental responsibility, and long-term maintenance practices. By integrating these insights into the cleaning approach, individuals can optimize the outcomes and ensure the enduring radiance and allure of their glass surfaces.
As the journey to remove mineral deposits from glass surfaces reaches its culmination, the transformative impact of these efforts becomes evident, unveiling revitalized and immaculate spaces that exude clarity and visual appeal. The successful triumph over mineral deposits signifies not only the effective dissolution and removal of unwanted residues but also the empowerment of individuals to maintain pristine and inviting environments.
Ultimately, the comprehensive knowledge and practical guidance provided in this guide equip individuals with the tools and insights needed to navigate the process of removing mineral deposits from glass surfaces with confidence and precision. By harnessing the transformative potential of targeted cleaning solutions and techniques, individuals can elevate the cleanliness and visual allure of their living spaces, ensuring that glass surfaces radiate with enduring clarity and brilliance.
Frequently Asked Questions about How To Remove Mineral Deposits From Glass
Was this page helpful?
At Storables.com, we guarantee accurate and reliable information. Our content, validated by Expert Board Contributors, is crafted following stringent Editorial Policies. We're committed to providing you with well-researched, expert-backed insights for all your informational needs.


0 thoughts on “How To Remove Mineral Deposits From Glass”