
Furniture
How High To Hang A Picture Above A Dresser
Modified: January 18, 2024
Learn how to hang a picture above your dresser with the perfect height. Get expert tips and advice on furniture placement for a stylish and cohesive look.
(Many of the links in this article redirect to a specific reviewed product. Your purchase of these products through affiliate links helps to generate commission for Storables.com, at no extra cost. Learn more)
Introduction
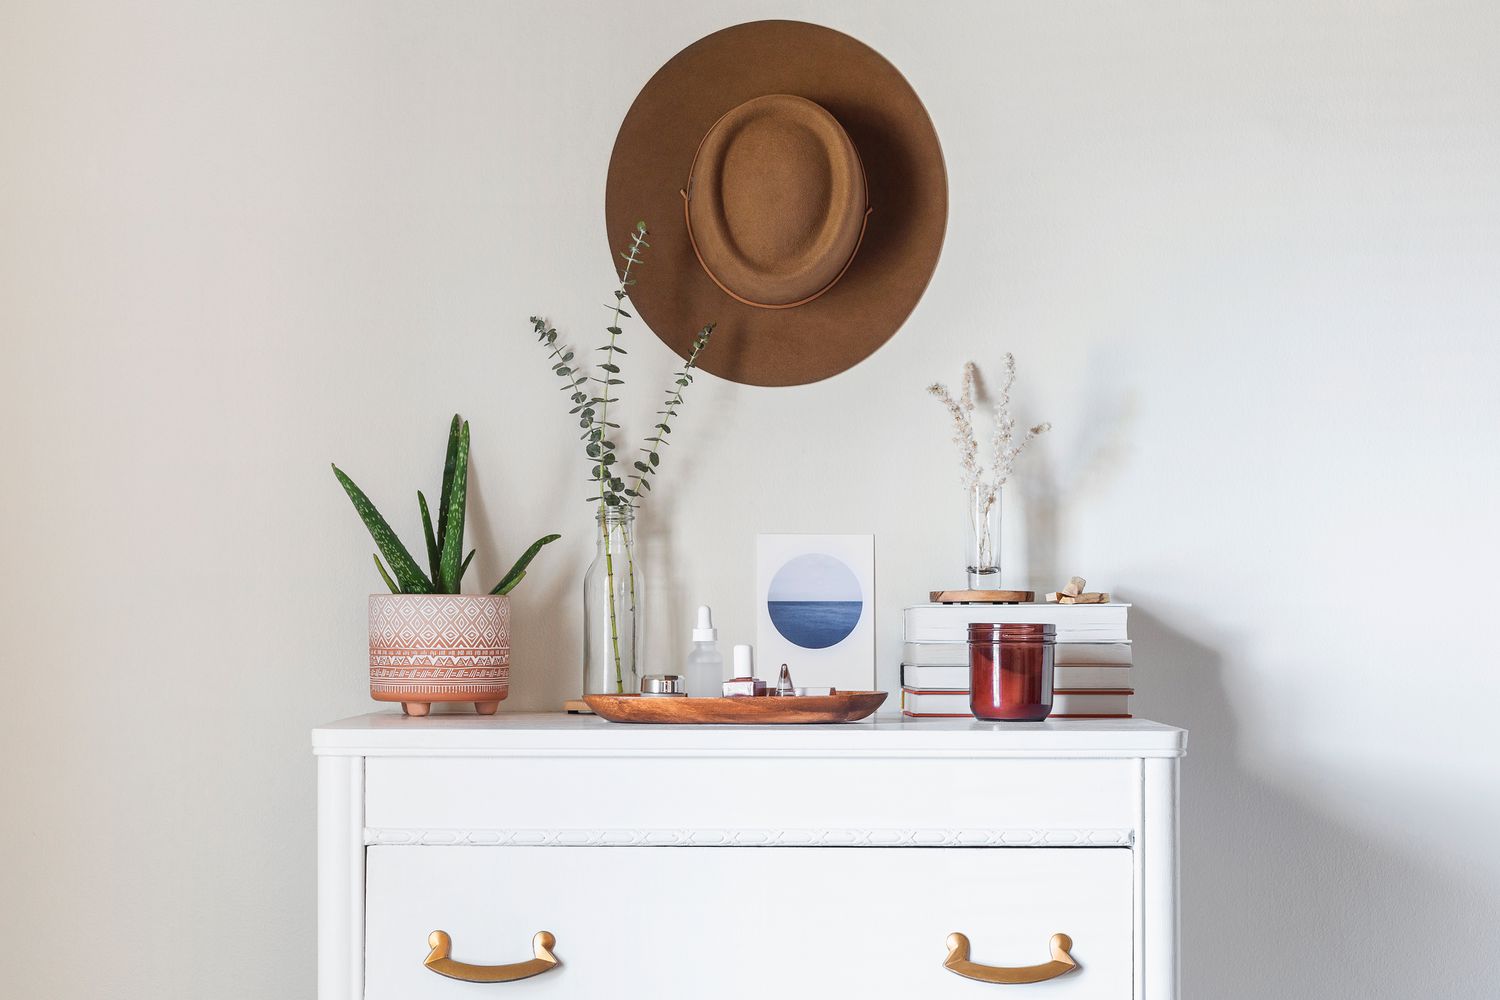
When it comes to decorating your home, hanging pictures above a dresser is a great way to add personality and style to your space. However, getting the placement just right can sometimes be a challenge. Should the picture be centered? How high should it be hung? These are questions that often come to mind.
Luckily, there are some guidelines and factors to consider that can help you achieve the perfect placement. In this article, we will explore the best practices for hanging pictures above a dresser, taking into account factors such as proportion, height, and balance.
By following these tips and guidelines, you will be able to create a visually appealing display that enhances your overall room design.
Key Takeaways:
- Achieving proportional placement and eye-level positioning are crucial for creating a visually balanced and harmonious display of artwork above a dresser. Consider factors such as dresser size, room style, and color palette to enhance your overall room design.
- Experiment, trust your instincts, and have fun exploring different possibilities until you achieve a truly unique and visually pleasing arrangement. Consider working with multiple frames to add depth, texture, and personality to your space.
Read more: How High To Hang Pictures Above Bed
Factors to Consider
Before diving into the specifics of hanging a picture above a dresser, there are a few factors you should consider to ensure a harmonious and balanced arrangement:
- Dresser size: Take into account the size of your dresser. A larger dresser may require a larger or more substantial piece of artwork, while a smaller dresser may look best with a smaller or medium-sized picture.
- Wall space: Assess the available wall space above the dresser. If you have a large empty wall, you may have more flexibility in terms of the size and number of pictures you can hang. On the other hand, if you have limited space, you may need to be more strategic in your placement.
- Room style: Consider the overall style of your room. Is it modern, rustic, or traditional? Choose artwork that complements the existing decor and enhances the style you want to achieve.
- Color palette: Keep in mind the color palette of your room. Select artwork that incorporates colors found in your decor to create a cohesive look and tie the room together.
- Focal point: Determine whether you want the picture above the dresser to be the focal point of the room. If so, choose a larger or more eye-catching piece. Alternatively, if you want the dresser itself to be the focus, opt for a smaller artwork that complements the dresser without overpowering it.
By considering these factors, you will be able to choose a picture and placement that harmonizes with the overall look and feel of your space.
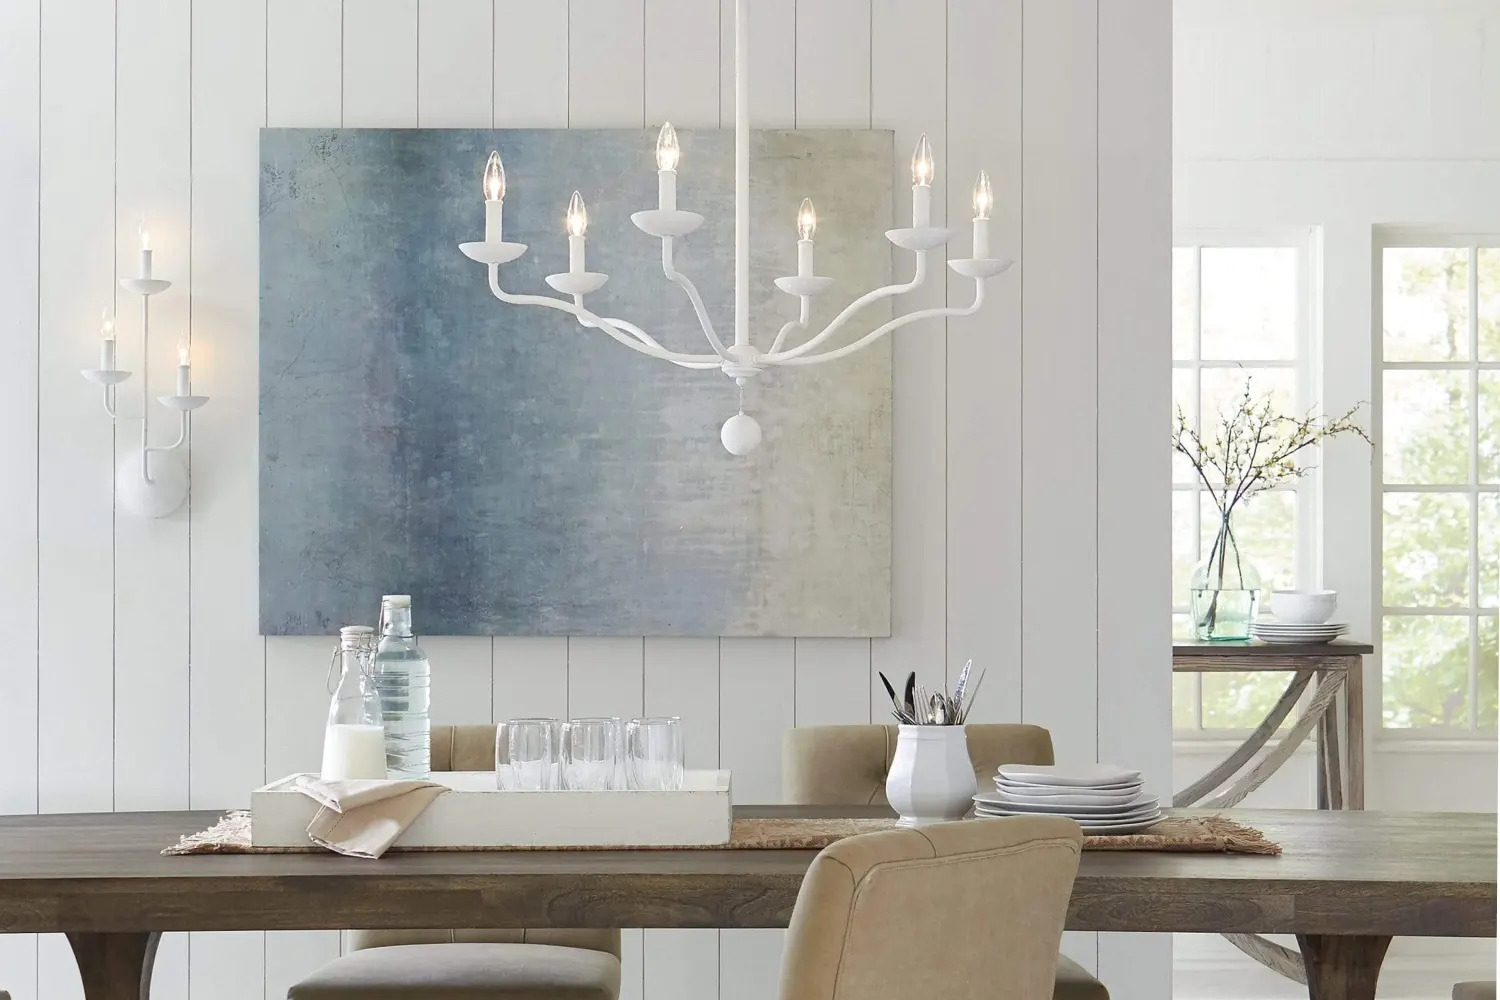
Proportional Placement
When it comes to hanging a picture above a dresser, achieving proportional placement is crucial. You want the artwork to complement the size and shape of the dresser, creating a visually balanced display. Here are some tips to help you achieve proportional placement:
- Centered or off-center: Decide whether you want to center the picture above the dresser or place it off-center for a more asymmetrical look. Both options can work depending on your personal preference and the overall style of your room.
- Size of the picture: Consider the size of your picture in relation to the size of the dresser. A general guideline is to choose a picture that is two-thirds to three-quarters the width of the dresser. This will create a pleasing proportion and prevent the artwork from overpowering the dresser.
- Vertical or horizontal orientation: Determine whether a vertical or horizontal orientation works best for your space. This decision can be influenced by the shape of the dresser and the arrangement of other items in the room.
- Maintain balance: Ensure that the picture is not too small or too large in relation to the dresser. It should be visually coherent and maintain a sense of balance within the overall composition.
Remember, the goal is to create a harmonious and proportional display that complements the dresser and enhances the overall aesthetic of the room.
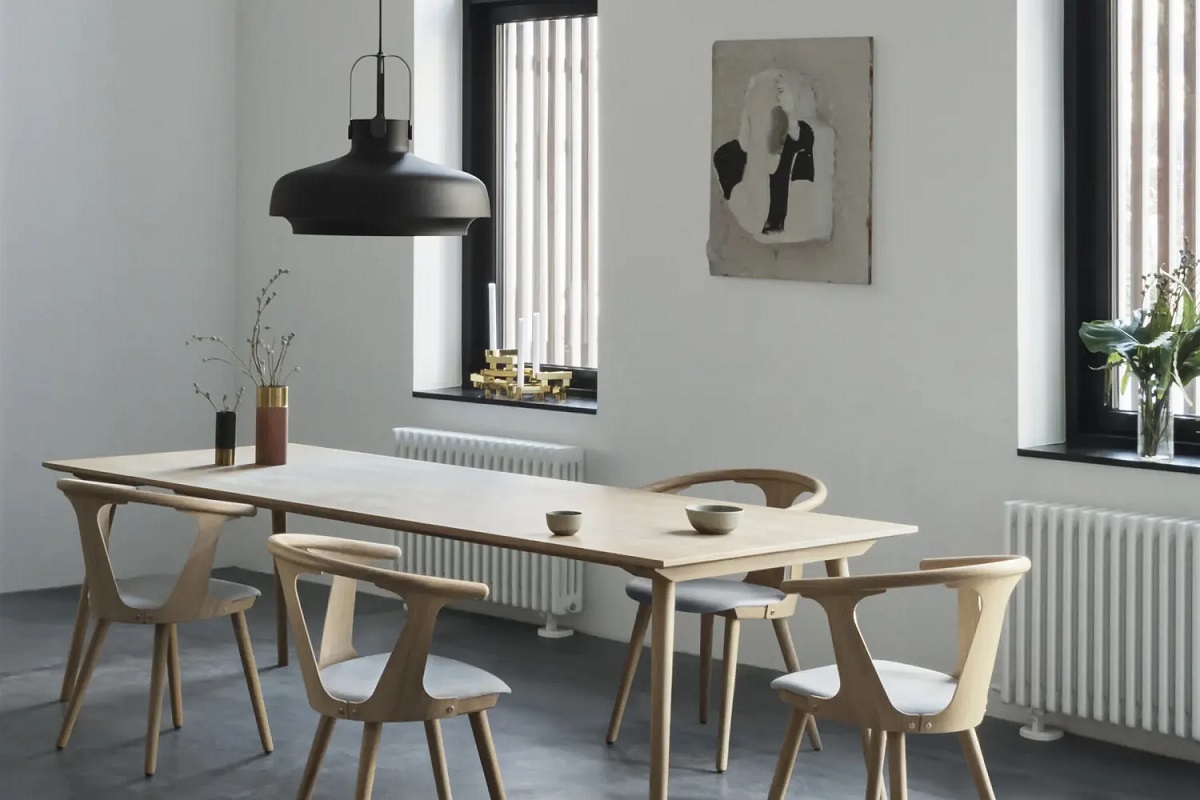
Height Considerations
Choosing the right height for hanging a picture above a dresser can greatly impact the overall look and feel of the space. Here are some height considerations to keep in mind:
- Eye level: As a general guideline, hang the center of the picture at eye level. Eye level is typically around 57-60 inches from the floor. This ensures that the artwork is easily visible and accessible for viewers.
- Consider the dresser: Take into account the height of the dresser when determining the hanging height. You want the bottom edge of the picture to be around 6-12 inches above the top of the dresser, depending on the size of the artwork and the overall height of the dresser.
- Wall space: If you have a tall dresser or high ceilings, you may have more room to play with the height of the picture. In this case, you can consider hanging the picture slightly higher than eye level to create a more dramatic effect.
- Avoid too high or too low: Avoid hanging the picture too high or too low, as it can make the arrangement feel disconnected from the dresser and the rest of the room. Aim for a height that allows the picture to be visually integrated with the dresser and other elements in the space.
Keep in mind that these are general guidelines, and the height may vary depending on personal preference, artwork size, and the specific dimensions of your dresser. The key is to find a height that feels visually balanced and cohesive within the overall composition.
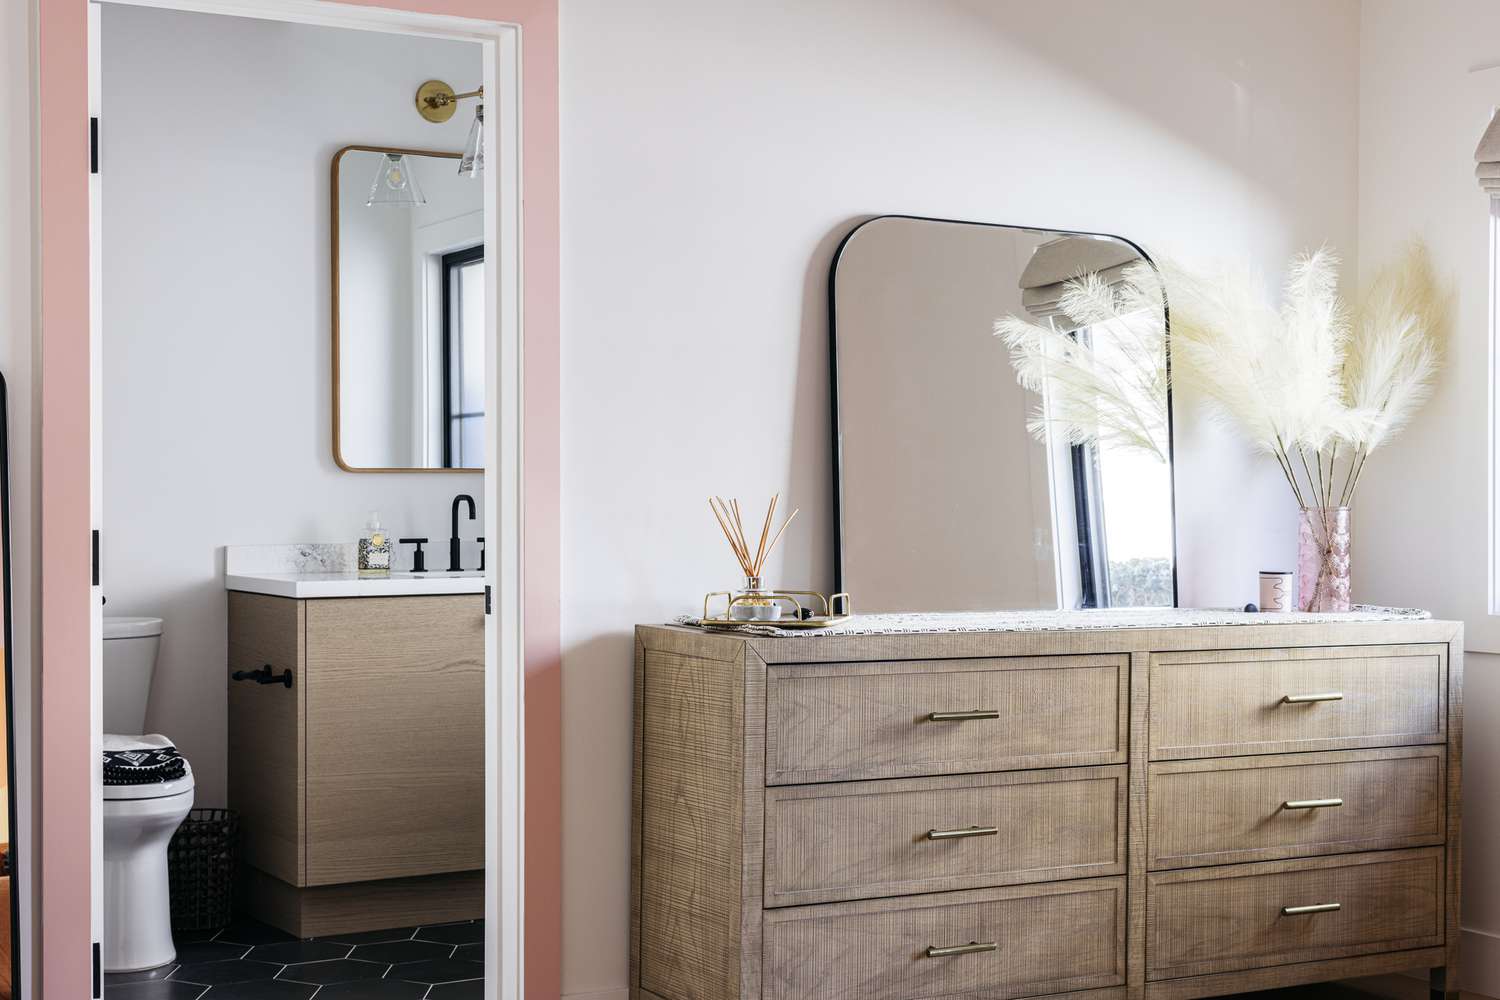
Eye-Level Placement
When it comes to hanging pictures above a dresser, achieving eye-level placement is a popular choice. Eye-level placement ensures that the artwork is easily viewable and creates a visually pleasing arrangement. Here are some tips to help you achieve eye-level placement:
- Measure the height: Measure the height of the dresser and mark the center point. This will serve as the reference point for hanging the picture.
- Hang at eye level: Hang the center of the picture at eye level, which is typically around 57-60 inches from the floor. This allows most people to view the artwork comfortably without straining their necks or having to look too high or too low.
- Consider the size of the artwork: If you have a large or oversized picture, you may need to adjust the height slightly to maintain a balanced composition. The bottom edge of the picture should still be within the recommended 6-12 inches above the top of the dresser.
- Account for furniture height: Take into consideration the height of the dresser itself. If it is taller or shorter than average, you may need to make adjustments to ensure the eye-level placement is visually harmonious with the dresser.
By achieving eye-level placement, you create a focal point that is easily accessible and visually integrated with the dresser and the surrounding space. This placement also allows you to showcase the artwork at a comfortable viewing height for yourself and your guests.
Hang a picture 6-8 inches above the dresser to create a visually appealing display. This will help the picture and the dresser to visually connect without feeling cramped.
Read more: How High To Mount A TV Above A Dresser
Hanging Guidelines
When it comes to hanging pictures above a dresser, there are some general guidelines that can help you achieve a successful and visually pleasing arrangement. Follow these tips to ensure a smooth hanging process:
- Use the right hardware: Invest in the appropriate hanging hardware for your picture. This typically includes picture hooks, nails, or wall anchors, depending on the weight of the artwork and the type of wall you have.
- Measure and mark: Measure the width and height of the picture, then mark the corresponding position on the wall above the dresser. Use a level to ensure that your marks are straight and aligned with the dresser.
- Prevent wall damage: To avoid damaging your walls, use proper hanging techniques. If you’re unsure about the integrity of your wall or if you’re hanging a heavy picture, consult a professional or opt for alternative hanging methods such as using adhesive hooks or picture hanging strips.
- Consider frame weight: Take into account the weight of the picture frame when selecting the appropriate hanging hardware. Heavier frames may require stronger support or multiple hooks for added stability.
- Test the arrangement: Before committing to a final placement, use painter’s tape or cutouts of the picture dimensions to visualize the arrangement on the wall. This allows you to experiment with different positioning options without putting unnecessary holes in the wall.
- Secure the picture: Once you’ve determined the desired placement, carefully hang the picture on the wall, making sure it is level and securely attached to the wall. Step back and check the overall look to ensure everything is visually balanced.
Following these hanging guidelines will help you achieve a professional and secure display of your artwork above the dresser. Remember to take your time, measure carefully, and double-check your work for a polished and visually appealing result.
Positioning for Balance
When hanging pictures above a dresser, it’s essential to consider the balance of the arrangement. Positioning the artwork in relation to the dresser and other decorative elements can create a visually pleasing and harmonious display. Here are some tips for positioning for balance:
- Centered alignment: If you want a symmetrical and balanced look, consider centering the artwork directly above the middle of the dresser. This creates a visually pleasing focal point and provides a sense of equilibrium.
- Grouping elements: Instead of just hanging one large picture, you can create a balanced composition by grouping multiple frames or using a combination of artwork and decorative items. Arrange them in a visually interesting way, using different sizes and shapes to create a dynamic display.
- Spacing and alignment: Pay attention to the spacing between the picture and the edges of the dresser. Leave enough space for the artwork to breathe and ensure that it feels visually integrated with the dresser rather than cramped or crowded.
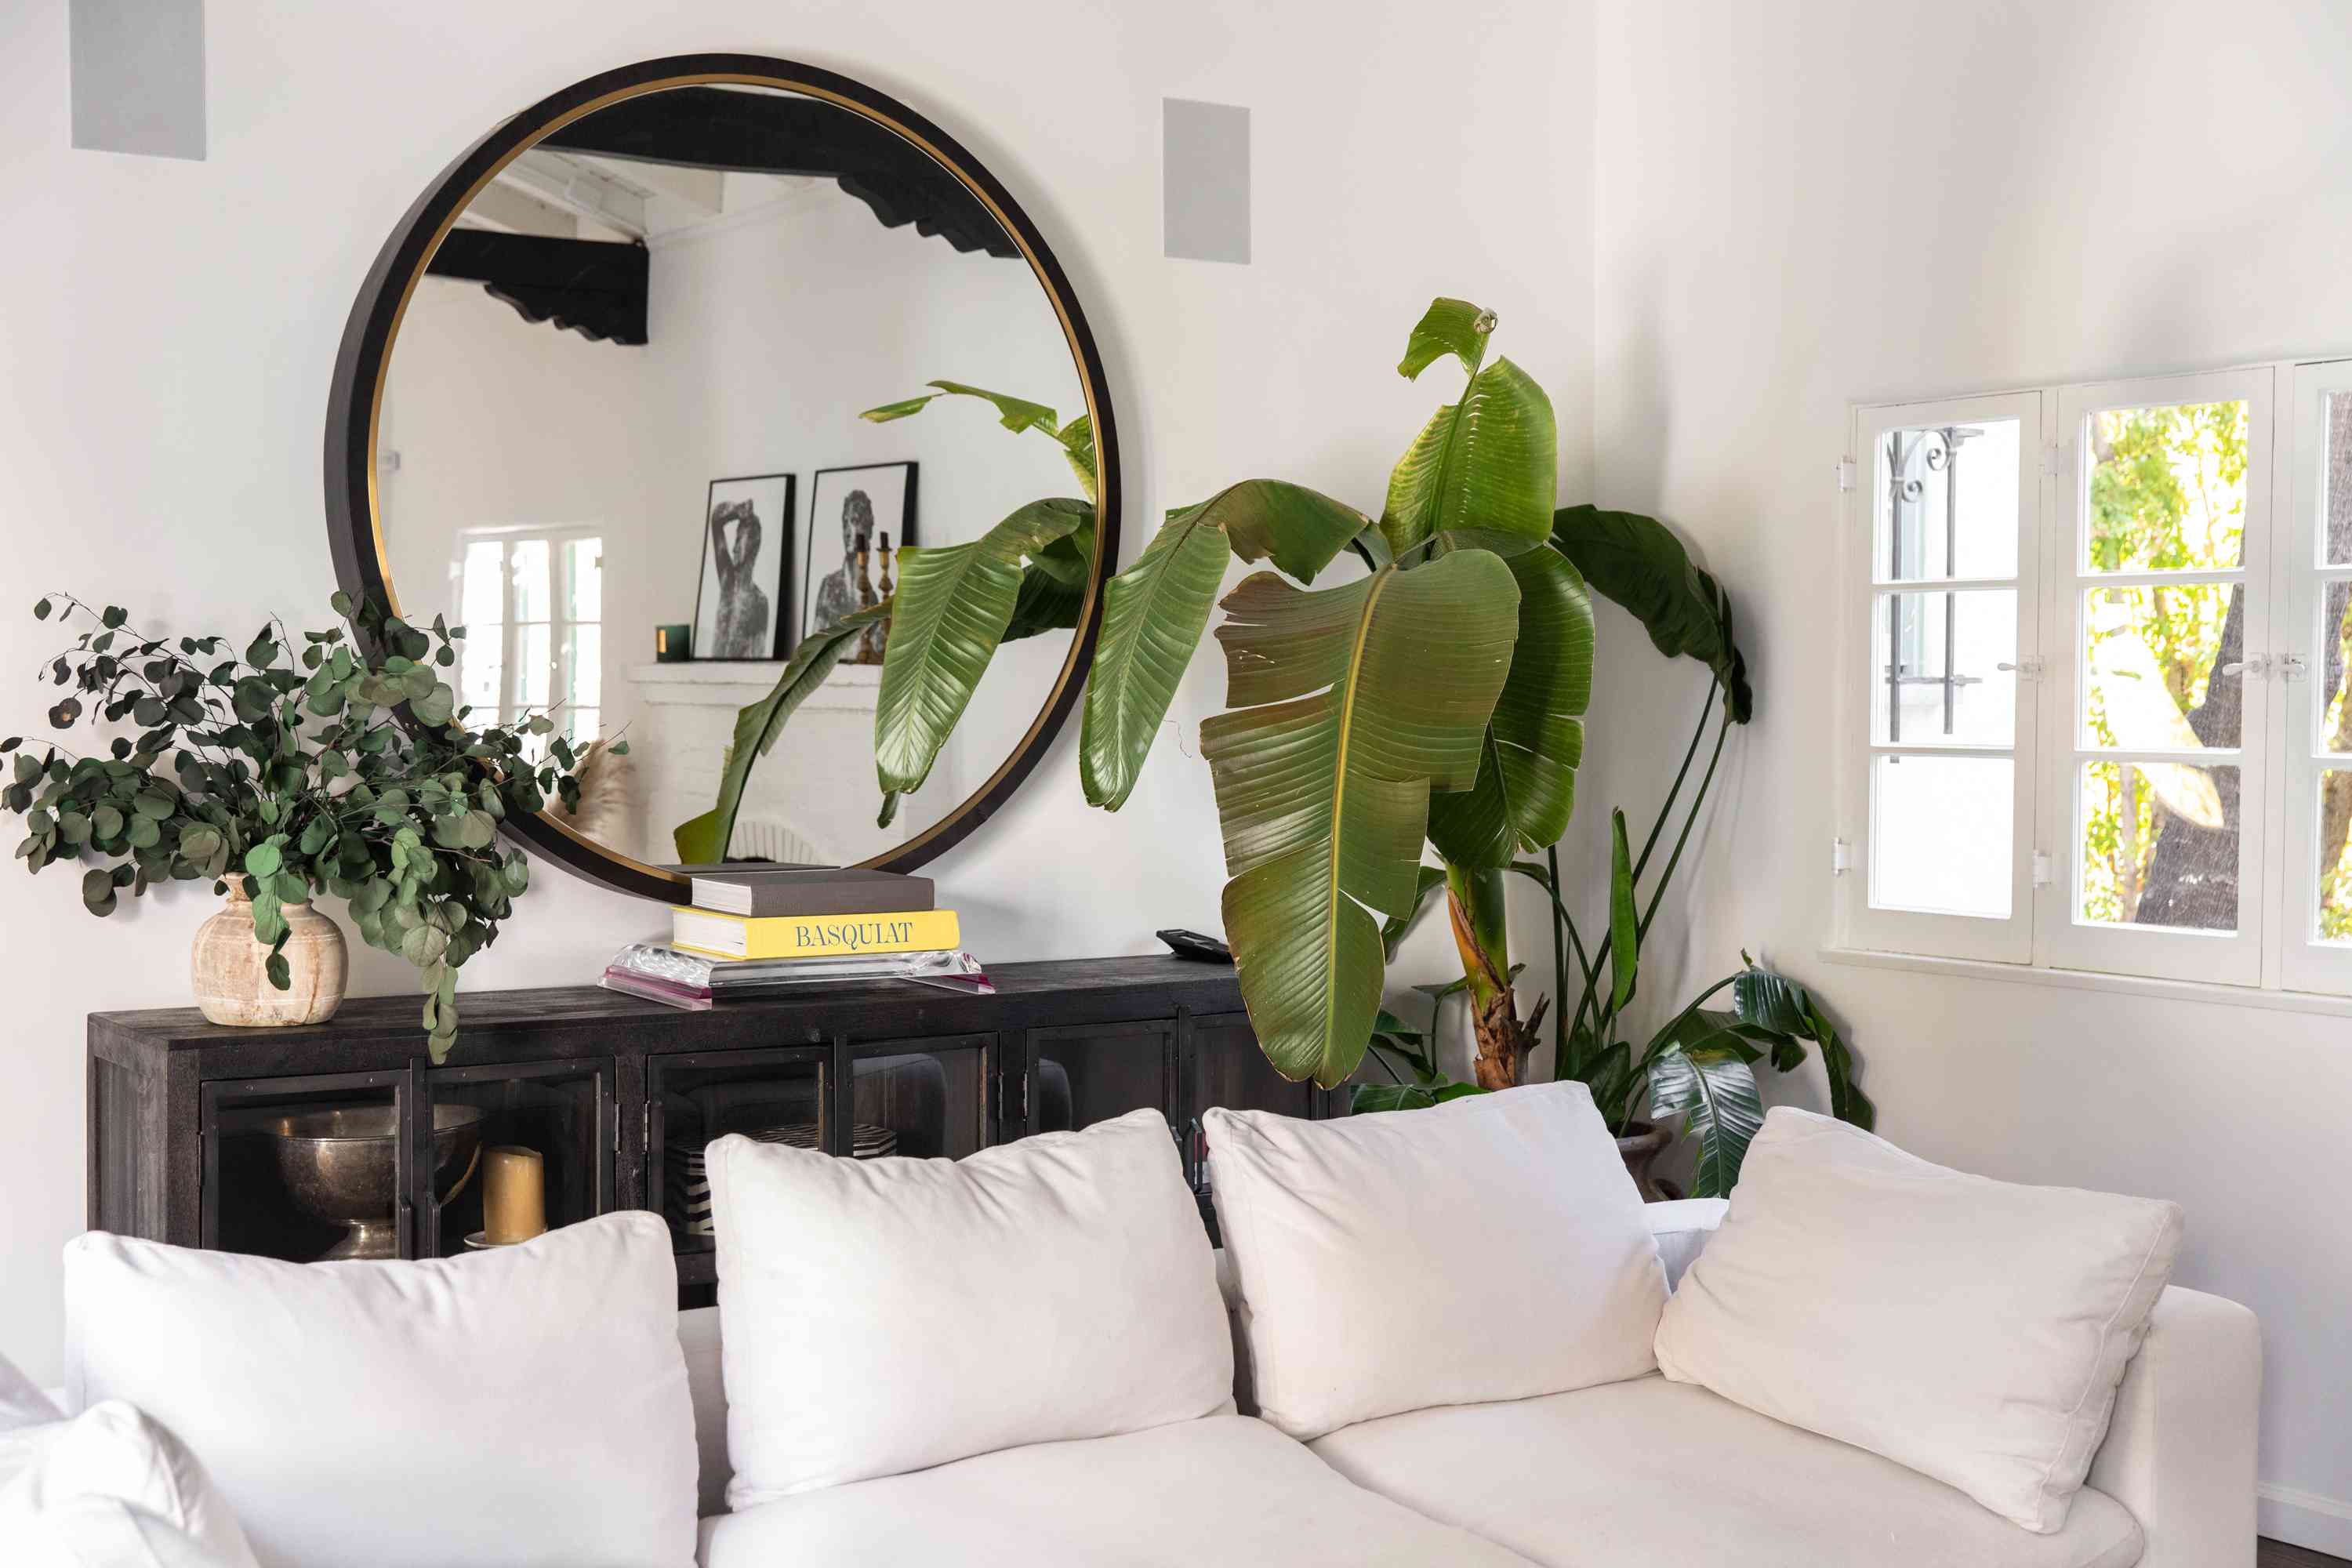
- Consider other elements: Take into account other elements in the room, such as lamps, mirrors, or shelves. Position the picture in a way that complements these elements and creates a cohesive and balanced overall design.
- Use a focal point: If you have a specific decorative item or feature on the dresser that you want to highlight, position the picture in a way that enhances and frames that focal point. This creates a visually appealing and intentional arrangement.
By carefully positioning the artwork above the dresser, you can create a balanced and visually pleasing composition that enhances the overall aesthetic of the room.
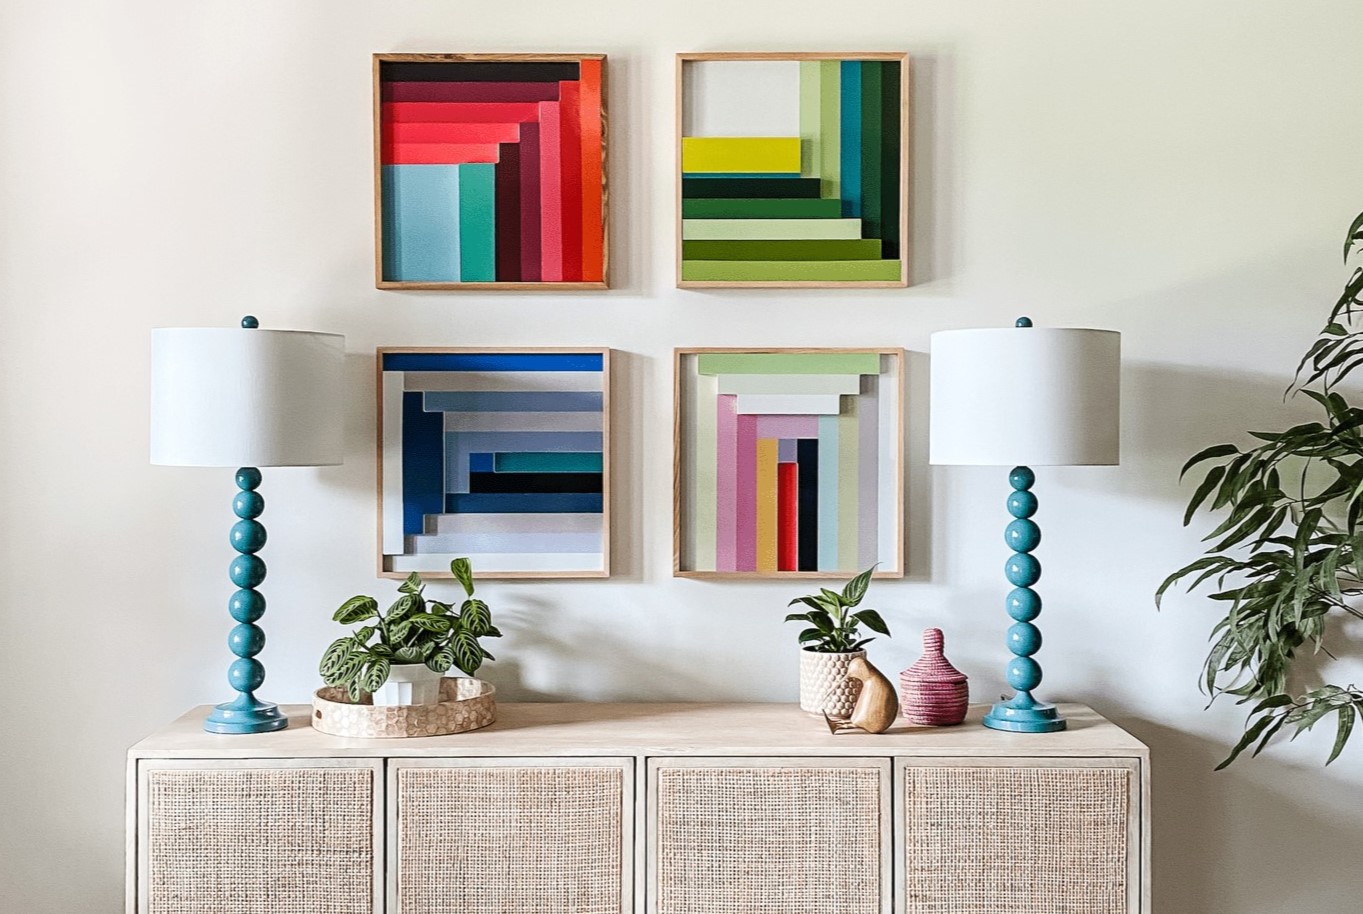
Working with Multiple Frames
If you’re aiming to create a visually stunning display above your dresser, consider working with multiple frames. Grouping several frames together can add depth, texture, and personality to your space. Here are some tips to help you work with multiple frames:
- Choose a cohesive theme: Select frames that share a common theme, whether it’s a similar color, style, or subject matter. This will create a cohesive and harmonious look when the frames are grouped together.
- Play with different sizes and orientations: Have fun experimenting with different sizes and orientations of frames. Mix larger and smaller frames, and incorporate both vertical and horizontal orientations. This provides visual interest and adds dimension to the display.
- Create a focal point: Designate one frame as the focal point to anchor the arrangement. This can be a larger or more visually striking frame that draws attention. Place it slightly off-center to create a dynamic and engaging composition.
- Consider the spacing: Take into account the spacing between each frame. Aim for consistent spacing to create a balanced and visually appealing arrangement. You can use a ruler or painter’s tape to ensure even spacing.
- Arrange in a grid or gallery style: You can arrange the frames in a grid-like pattern for a modern and organized look. Alternatively, opt for a more eclectic gallery style arrangement, where frames are positioned in a fluid and asymmetric manner. This adds a playful and artistic touch to the display.
- Test the arrangement: Before permanently fixing the frames to the wall, lay them out on the floor or a large table to experiment with different arrangements. This allows you to visualize the overall look and make adjustments to achieve the desired result.
Working with multiple frames above your dresser offers endless possibilities for creating a visually captivating display. It allows you to showcase various artwork, photographs, or even a mix of both, adding a personal and unique touch to your space.
Final TIP: Experiment and Trust your Eye
When it comes to hanging pictures above a dresser, one of the most important tips is to trust your eye and experiment with different arrangements. While guidelines are helpful, every space is unique, and what works for one room may not work for another. Here’s why it’s important to experiment and trust your eye:
1. Personal style: Your personal style and taste should dictate how you arrange the artwork. Don’t be afraid to think outside the box and be creative with your placement. It’s your space, so let it reflect your personality and aesthetic preferences.
2. Visual balance: While following general guidelines is important, remember that achieving visual balance is a subjective matter. You may find that the artwork looks best slightly higher or lower than the recommended height. Trust your intuition and make adjustments until you feel the arrangement is visually balanced and pleasing to the eye.
3. Trial and error: Hanging pictures is not an exact science. It may take a few attempts to find the perfect arrangement. Don’t be discouraged if your first try doesn’t meet your expectations. Keep experimenting, making small adjustments, and stepping back to evaluate the overall composition.
4. Flexibility: Be open to trying different layouts, sizes, and frames. You might discover unexpected combinations that create a stunning display. Don’t be afraid to mix and match frames or switch out artwork to create a fresh and dynamic arrangement.
5. Seek inspiration: Look for inspiration in home decor magazines, websites, or social media platforms. Explore different arrangements and styles to spark your creativity and help you envision how the artwork will look in your space. Adapt and customize these ideas to suit your personal style and the specific layout of your room.
Remember that the ultimate goal is to create a display that brings joy and adds personality to your space. Experiment, trust your instincts, and have fun exploring different possibilities until you achieve a truly unique and visually pleasing arrangement.
Conclusion
Hanging pictures above a dresser is a fantastic way to enhance the style and atmosphere of your space. By considering factors such as proportion, height, and balance, you can create a visually pleasing and harmonious arrangement that complements your dresser and showcases your artwork. Remember these key points:
Take into account the size of your dresser and the available wall space. Consider the style and color palette of your room to ensure that the artwork enhances the overall decor. Placement at eye-level creates an easily accessible and visually integrated focal point. Proper hanging techniques, measuring, and using the right hardware will ensure a secure and professional display.
Experiment with different arrangements and trust your eye to achieve the perfect placement. Working with multiple frames can add depth and personality to the display. Finally, don’t be afraid to think outside the box and let your personal style shine through.
By following these guidelines and embracing your creativity, you’ll be able to create a stunning and captivating display of artwork above your dresser that truly elevates your home’s aesthetic. Enjoy the process and have fun transforming your space into a personalized and visually pleasing haven.
Frequently Asked Questions about How High To Hang A Picture Above A Dresser
Was this page helpful?
At Storables.com, we guarantee accurate and reliable information. Our content, validated by Expert Board Contributors, is crafted following stringent Editorial Policies. We're committed to providing you with well-researched, expert-backed insights for all your informational needs.


0 thoughts on “How High To Hang A Picture Above A Dresser”