Home>Garden Essentials>How Long For Hay To Germinate
Garden Essentials
How Long For Hay To Germinate
Modified: September 1, 2024
Get your garden thriving with quick germination tips for hay. Learn how long it takes for hay to germinate and see results in no time!
(Many of the links in this article redirect to a specific reviewed product. Your purchase of these products through affiliate links helps to generate commission for Storables.com, at no extra cost. Learn more)
Introduction
Welcome to the fascinating world of hay germination. If you’ve ever wondered how long it takes for hay to germinate, you’re in the right place. Understanding the factors that influence germination time can help you plan your gardening activities more effectively and achieve successful results.
Germination is a crucial stage in the life cycle of plants, including hay. It is the process by which a seed begins to sprout and grow into a new plant. The germination time varies depending on several factors, such as the type of hay seeds, soil conditions, temperature, moisture, and the presence of dormancy periods.
Knowing the germination time for hay can be beneficial for farmers, gardeners, and landscapers who rely on hay for various purposes, such as livestock feed, soil erosion control, or as a decorative element in gardens and landscapes.
In this article, we will explore the factors that affect the germination time of hay and provide you with some methods to speed up the process and achieve quicker germination. So let’s dive in and uncover the secrets of hay germination!
Key Takeaways:
- Understanding the factors that influence hay germination time, such as seed type, soil conditions, and temperature, is crucial for successful growth.
- Proper soil preparation, seeding techniques, and providing optimal temperature and moisture are essential for promoting quick and healthy hay seed germination.
Read more: How Long To Leave Hay On Grass Seed
Factors Affecting Germination Time of Hay
Several factors play a significant role in determining the germination time of hay. Understanding these factors can help you set realistic expectations and take appropriate measures to ensure successful germination. Let’s take a closer look at the key factors influencing the germination time of hay seeds:
- Type of Hay Seeds: Different types of hay have varying germination times. Some hay seeds may have a shorter germination period, while others may take longer. It’s important to research and identify the specific type of hay seeds you are working with to have a better understanding of their germination characteristics.
- Soil Conditions: The quality and condition of the soil can significantly impact the germination time of hay. The soil should be well-draining to prevent waterlogging, as excessive moisture can delay germination or even lead to seed rot. Additionally, the soil pH should be within the optimal range for the specific type of hay seeds, as different plants have different pH preferences.
- Temperature and Moisture: Hay seeds have specific temperature and moisture requirements for germination. The ideal temperature range for most hay seeds is typically between 50 to 85 degrees Fahrenheit (10 to 29 degrees Celsius). It’s important to provide consistent moisture levels during the germination process, as extremes of drought or excessive watering can hinder germination.
- Dormancy Period: Some hay seeds may have a dormancy period, which is a period of inactivity or suspended growth. This dormancy is a natural mechanism that allows the seeds to survive unfavorable conditions and ensures germination occurs under optimal circumstances. Breaking seed dormancy often requires specific conditions, such as scarification or stratification, which we will discuss in more detail later.
It’s important to note that each factor can influence germination time individually, but they also interact with one another. For example, soil conditions affect moisture levels, and both temperature and moisture impact seed viability and germination speed.
By understanding the various factors that affect germination time, you can make informed decisions and implement strategies to optimize the conditions for successful hay germination. In the next section, we will explore some methods that can help speed up the germination process and promote healthy growth.
Type of Hay Seeds
When it comes to hay germination, the type of hay seeds you are working with plays a crucial role in determining the germination time. Different types of hay have varying characteristics, including their germination requirements and rates. Let’s explore some common types of hay seeds and their germination characteristics:
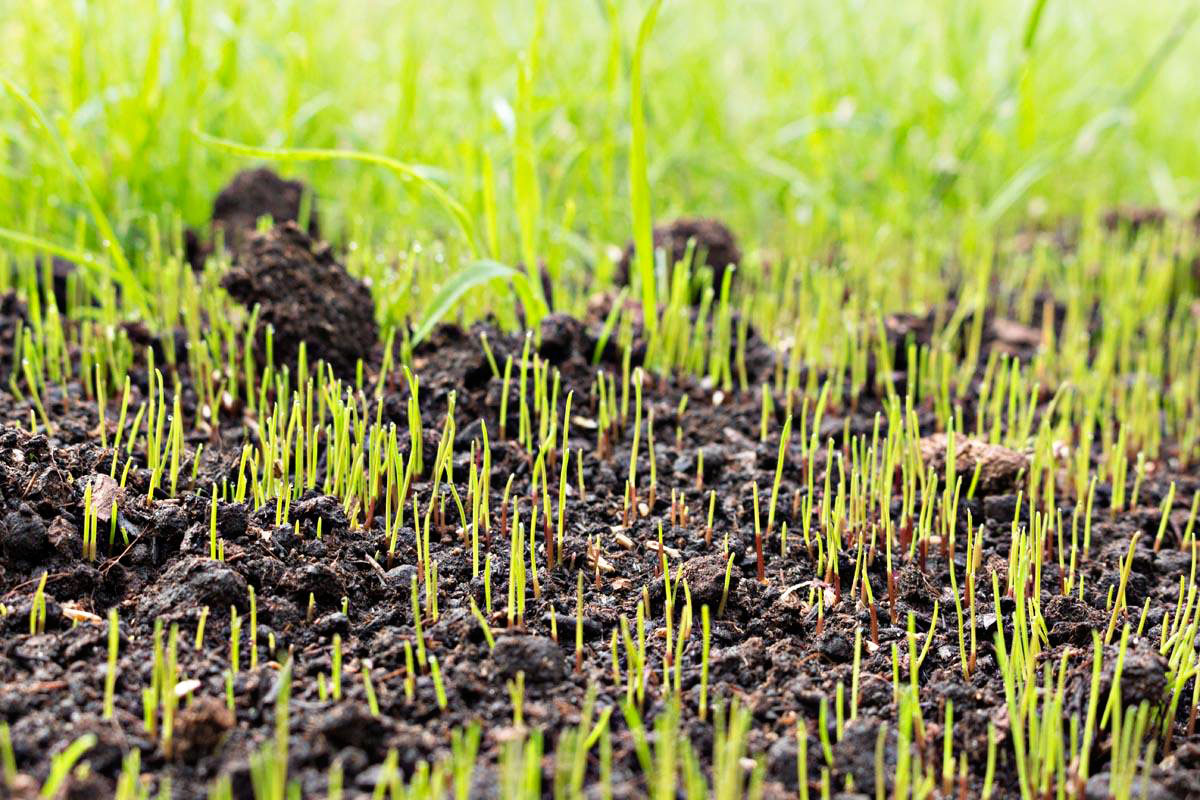
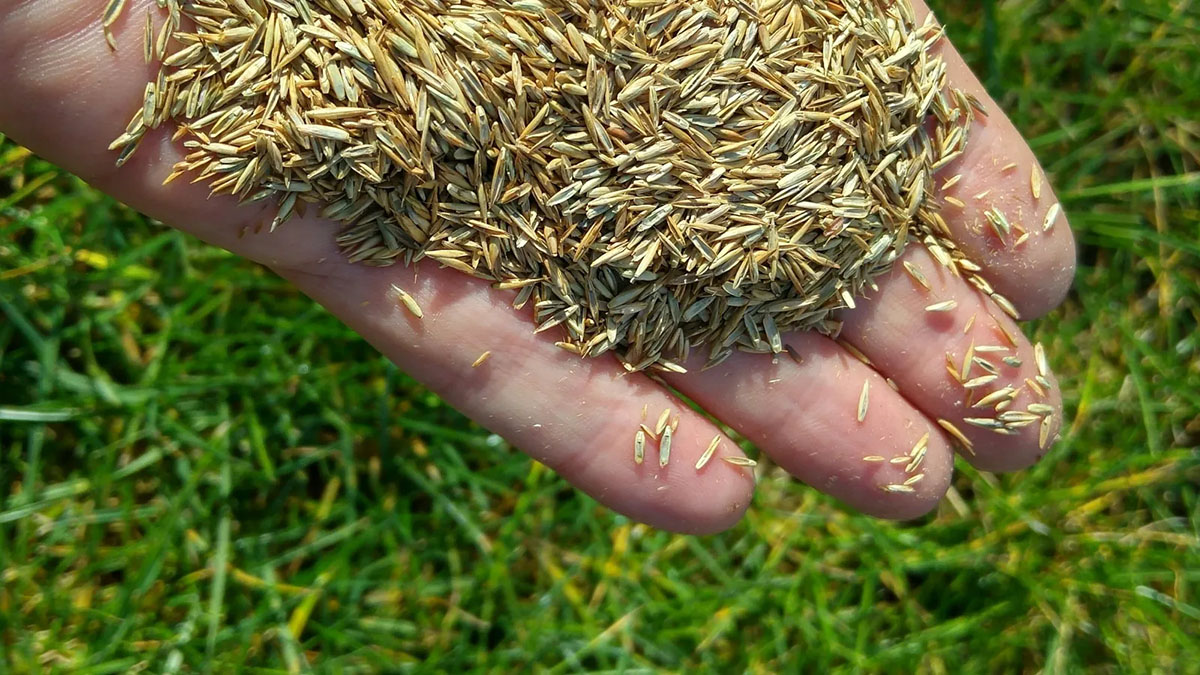
- Grass Hay Seeds: Grass hay seeds, such as Timothy, Bermuda, or Kentucky Bluegrass, are widely used for livestock feed and have relatively fast germination times. Typically, these seeds germinate within 7 to 14 days under optimal conditions. However, it’s important to note that different grass species may have slight variations in their germination rates.
- Legume Hay Seeds: Legume hay seeds, such as Alfalfa, Clover, or Red Clover, are known for their high nutritional value and soil-improving properties. Legume seeds often have a slightly longer germination time compared to grass hay seeds. It’s common for legume hay seeds to take around 10 to 21 days to germinate, depending on the specific variety and environmental conditions.
- Mixed Hay Seeds: Mixed hay, as the name suggests, contains a combination of grass and legume seeds. This blend offers a balance of nutrition and growth characteristics. The germination time for mixed hay seeds can vary depending on the ratio of grass to legume seeds. In general, mixed hay seeds tend to have a germination window of 7 to 21 days.
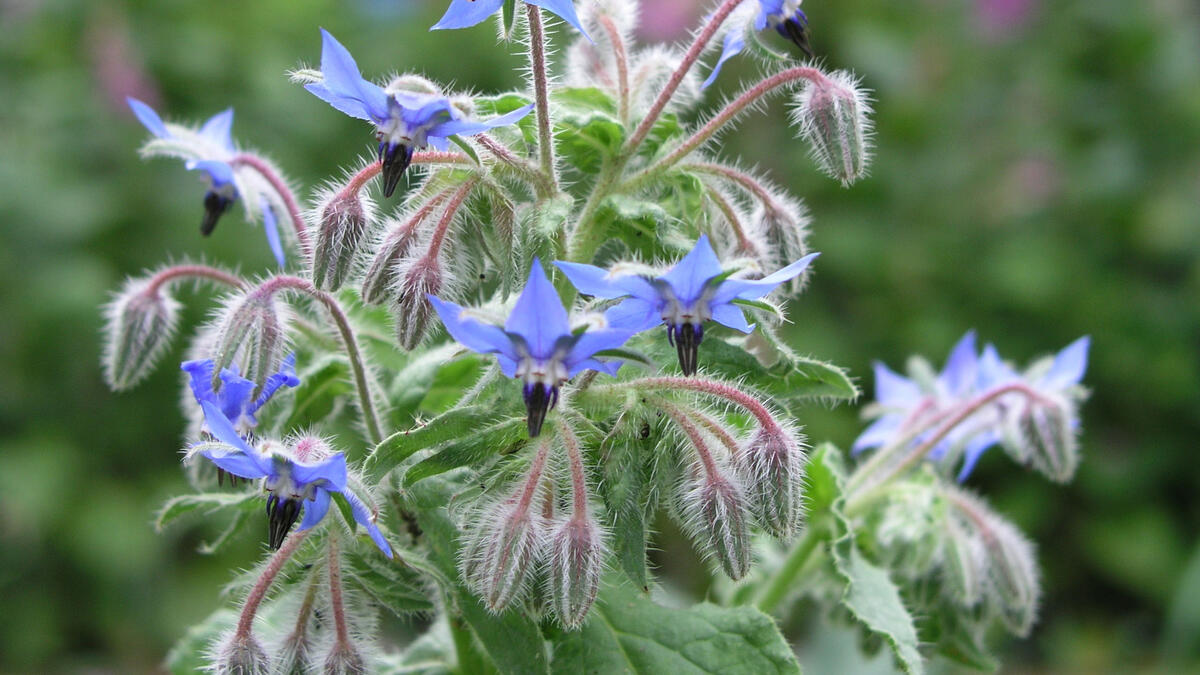
- Wildflower Hay Seeds: Wildflower hay seeds are commonly used for creating beautiful meadows and adding vibrant colors to landscapes. The germination time for wildflower hay seeds can vary significantly depending on the specific flowers included in the mix. Some flowers may germinate quickly within a week, while others may take several weeks. It’s essential to research the germination characteristics of each flower before sowing the wildflower hay seeds.
Understanding the germination characteristics of different hay seed types can help you plan and manage your hay germination process more effectively. It’s important to follow the recommended planting instructions provided by seed suppliers and consult with local experts to ensure optimal germination conditions for the specific hay seeds you are working with.
In the next sections, we will explore the role of soil conditions, temperature, moisture, and dormancy periods in hay germination and provide you with some methods to speed up the process and achieve successful results. Stay tuned!
Soil Conditions
The quality and condition of the soil play a crucial role in the germination of hay seeds. Providing an optimal environment for seedling development is essential for successful germination. Let’s take a closer look at the key soil conditions that influence hay germination:
- Soil Texture: The texture of the soil refers to the relative proportions of sand, silt, and clay particles. Ideally, the soil for hay germination should have a loamy texture, which provides a balance of drainage and water retention. Loamy soil allows water to percolate through while retaining enough moisture for the seeds to germinate and develop.
- Soil pH: The pH level of the soil can affect the availability of essential nutrients for the germinating seeds. Most hay seeds prefer a slightly acidic to neutral pH range of around 6.0 to 7.0. However, it’s crucial to consider the specific pH preferences of the type of hay seeds you are working with. Conducting a soil pH test and making necessary adjustments can help create a favorable environment for germination.
- Soil Fertility: The fertility of the soil is vital for the healthy growth of hay seedlings. It’s recommended to prepare the soil by adding organic matter, such as compost, well-rotted manure, or other natural amendments. Organic matter improves soil structure, enhances nutrient availability, and promotes microbial activity, all of which are beneficial for germination and seedling development.
- Soil Drainage: Efficient drainage is essential to prevent waterlogging, which can inhibit germination and lead to seed rot. Poorly drained soils can cause excessive moisture around the seeds, depriving them of oxygen and hindering their ability to sprout. It’s important to ensure that the soil has proper drainage, either naturally or by amending it with materials like sand or organic matter to improve drainage.
- Soil Compaction: Compacted soils restrict the movement of air, water, and roots, making it challenging for seeds to germinate and establish. Loosening compacted soil through tilling or aerating helps create a more favorable environment for seeds to spread their roots and access water and nutrients. Breaking up the soil also aids in the development of seedlings and their ability to penetrate the surface.
By ensuring the right soil conditions, you provide a solid foundation for successful hay germination. Before sowing the seeds, it’s crucial to prepare the soil by addressing any soil texture, pH, fertility, drainage, or compaction issues. Taking these steps will promote a healthy germination process and increase the chances of establishing strong and thriving hay seedlings.
In the next sections, we will explore the role of temperature, moisture, and dormancy periods in hay germination, and provide you with methods to optimize these factors for successful seed germination. Stay tuned!
Temperature and Moisture
Temperature and moisture are key factors that greatly influence the germination of hay seeds. Providing the right conditions in terms of temperature and moisture levels can significantly impact the speed and success of germination. Let’s explore the role of temperature and moisture in hay germination:
- Temperature Requirements: Hay seeds have specific temperature requirements for optimal germination. Most hay seeds germinate best within a temperature range of 50 to 85 degrees Fahrenheit (10 to 29 degrees Celsius). It’s important to ensure that the soil temperature remains within this range throughout the germination period. Using a soil thermometer can help you monitor and maintain the appropriate temperature for germination.
- Moisture Levels: Adequate moisture is crucial for hay seed germination. During germination, the seeds absorb water, causing them to swell and activate the metabolic processes required for growth. It’s important to provide consistent moisture throughout the germination process. However, excessive watering can lead to waterlogged conditions that may hinder germination or cause seed rot. Maintaining a balanced moisture level is key to promoting successful germination.
- Watering Techniques: Proper watering techniques greatly influence the success of hay germination. When watering, it’s best to use a fine mist or a gentle spray to avoid displacing or burying the seeds. Applying water in a light and even manner helps ensure that the seeds receive sufficient moisture without being washed away or overwatered. As the seedlings begin to emerge, adjust your watering schedule to meet their specific needs, keeping the soil consistently moist but not saturated.
- Seed Depth: The depth at which hay seeds are planted can affect both temperature and moisture levels. Planting too deep can delay germination as the seeds struggle to reach the surface where temperature and moisture conditions are favorable. On the other hand, planting too shallow may expose the seeds to excessive heat or dry out quickly. It’s important to follow the recommended planting depth for the specific type of hay seeds you are working with to ensure optimal germination conditions.
It’s worth noting that while temperature and moisture are critical for germination, they can vary depending on the specific hay seed type. Some seeds may have specific temperature requirements, such as cool-season grasses preferring cooler temperatures, while others may be more adaptable. Understanding the specific needs of the hay seed type you are working with can help you create the ideal germination environment.
By providing the appropriate temperature and moisture levels, you can accelerate the germination process and increase the likelihood of successful hay seed germination. In the next section, we will explore a technique called stratification that can be used to further promote germination for some hay seeds. Keep reading!
Read more: How Long To Germinate Pitaya
Dormancy Period
Many hay seeds have a natural dormancy period, which is a period of inactivity or suspended growth. This dormancy has evolved as a survival mechanism, allowing seeds to avoid germination during unfavorable conditions and ensuring germination occurs under optimal circumstances. Understanding and addressing seed dormancy is crucial for successful hay germination. Let’s explore the role of dormancy periods in hay germination:
The dormancy period can vary among different hay seed types and even within different varieties of the same seed type. Some seeds have a hard seed coat that needs to be broken down or softened before germination can occur. Others may require specific environmental cues, such as changes in temperature or light, to signal the end of dormancy and initiate germination.
To break seed dormancy and encourage germination, several techniques can be employed:
- Scarification: Scarification is a process that involves breaking or scratching the hard outer seed coat to allow water and air to penetrate. This can be done manually by gently filing or nicking the seed coat with a small knife or using mechanical scarification techniques. Scarification helps to speed up the germination process by allowing moisture to reach the embryo and trigger growth.
- Stratification: Stratification is the process of subjecting seeds to a period of cold, moist conditions to simulate winter and overcome dormancy. This technique is particularly useful for seeds with a natural requirement for cold stratification. The seeds are often placed in a damp, cool environment for a specific period, mimicking the conditions they would experience in nature during winter. This process helps break dormancy and prepares the seeds for germination once warm temperatures return.
- Pre-soaking: Some hay seeds benefit from pre-soaking, where they are soaked in water for a certain period to soften the seed coat and initiate germination. This can help overcome any physical or chemical barriers that prevent water uptake by the seed.
- Warm stratification: In some cases, warm stratification may be required for certain hay seeds. This involves exposing the seeds to a warm and moist environment to stimulate germination. Seeds that require warm stratification often come from regions with warm climates and need these conditions to break dormancy and begin germination.
It’s important to note that not all hay seeds have a significant dormancy period, and some may readily germinate without any special treatments. However, understanding the dormancy requirements of the specific hay seeds you are working with can greatly enhance germination success.
By employing appropriate seed scarification, stratification, pre-soaking, or warm stratification techniques, you can effectively break seed dormancy and promote timely and successful germination of hay seeds. In the next section, we will provide some additional tips and methods to speed up the germination process. Keep reading!
Hay typically takes 7-14 days to germinate, but this can vary based on factors like temperature, moisture, and seed quality. Keep the soil consistently moist for best results.
Methods to Speed Up Germination
If you’re eager to see your hay seeds sprout and grow, there are several methods you can employ to speed up the germination process. These techniques can help create optimal conditions for hay seeds, leading to quicker and more successful germination. Let’s explore some proven methods to speed up the germination of hay seeds:
- Preparing the Soil: Before sowing the hay seeds, it’s essential to prepare the soil properly. Clear the area of any debris or weeds that may hinder seed germination. Loosen the soil using a garden fork or tiller to improve aeration and drainage. Incorporate organic matter, such as compost or aged manure, to enrich the soil and provide essential nutrients. Well-prepared soil promotes faster and healthier seed growth.
- Proper Seeding Techniques: The way you sow the hay seeds can also impact germination time. Follow the recommended seeding depth specified for the particular hay seed type. Avoid burying the seeds too deep, as it may delay germination. If needed, mix the seeds with a carrier material like sand to facilitate even distribution. Uniform spacing and seed placement will help ensure consistent germination and seedling growth.
- Providing Optimal Temperature and Moisture: As discussed earlier, temperature and moisture levels are critical for hay seed germination. Monitor the soil temperature and maintain it within the suitable range for the specific seed type. Provide consistent moisture, making sure the soil remains adequately moist but not waterlogged. Adjust watering frequency and amounts as the seedlings emerge to meet their evolving needs.
- Promoting Germination with Stratification: Stratification, as mentioned earlier, can be a valuable technique to speed up germination for certain hay seeds. If your seeds require cold stratification, place them in a damp and cool environment, such as a refrigerator or a cold frame, for the recommended period. This process will help break dormancy and promote faster and more synchronized germination once the seeds are planted.
- Supplementing with Light: Some hay seeds benefit from exposure to light during germination. These light-dependent seeds require direct or indirect illumination to trigger germination. For such seeds, ensure they are sown at the appropriate depth to receive the required amount of light. You may also consider using a grow light or placing the seeds in a well-lit area to enhance germination speed.
By employing these methods, you can significantly enhance the germination rate and speed of hay seeds. However, it’s important to remember that each seed type has its unique requirements, and it’s crucial to research and understand the specific needs of the hay seeds you are planting. Consult seed suppliers, local agricultural extension offices, or experienced gardeners for tailored advice based on the specific hay seed type and your growing conditions.
Remember, patience is key in gardening. While these methods can speed up germination, some hay seeds naturally have longer germination periods. With proper care, attention, and a little bit of luck, you’ll soon witness the sprouting of beautiful hay seedlings. Good luck and happy gardening!
Preparing the Soil
Before sowing hay seeds, it is crucial to prepare the soil properly. Soil preparation sets the stage for successful germination and healthy growth of your hay plants. Here are some important steps to consider when preparing the soil for hay germination:
- Clear the Area: Start by removing any weeds, rocks, or debris from the area where you plan to sow your hay seeds. Weeds can compete for nutrients and space, inhibiting the growth of your hay plants. Clearing the area ensures that the hay seeds have optimum conditions for germination and unhindered access to sunlight.
- Test the Soil: Conduct a soil test to assess the pH level and nutrient content of the soil. This will provide valuable information about the soil’s fertility and its suitability for hay germination. Soil tests can be done using DIY kits or by sending samples to a local agricultural extension office or soil testing laboratory. Based on the test results, you can make any necessary amendments to optimize the soil conditions for hay germination.
- Loosen the Soil: Loosening the soil is important to create a favorable environment for seedling growth. Use a garden fork or a tiller to loosen compacted soil and improve its structure. Loosening the soil enhances its ability to hold moisture and nutrients, promotes root penetration, and encourages overall plant growth.
- Incorporate Organic Matter: Adding organic matter, such as compost or aged manure, to the soil is beneficial for hay germination. Organic matter improves soil fertility, enhances moisture retention, and provides essential nutrients for plant growth. Spread a layer of organic matter, approximately 2-3 inches thick, over the soil surface. Then, use a garden fork or a tiller to incorporate it into the top 6-8 inches of soil.
- Smooth and Level the Soil: After incorporating organic matter, smooth and level the soil surface using a rake. This helps create an even planting bed, ensuring consistent seed placement and germination. A smooth and level soil surface also prevents water runoff and aids in adequate moisture distribution.
- Consider Soil Amendments: Based on the soil test results, you may need to make specific amendments to adjust the pH or provide additional nutrients. If the soil pH is too acidic, you can add lime to raise it. Conversely, if the soil pH is too alkaline, you can amend it with elemental sulfur. Always follow the recommended application rates and guidelines when applying soil amendments.
Properly preparing the soil is essential for creating optimal conditions for hay germination and subsequent growth. It promotes nutrient availability, enhances moisture retention, and improves the overall structure of the soil. Taking these steps will set the foundation for healthy hay plants and ensure a successful harvest.
Remember to consult your local agricultural extension office or experienced gardeners for specific guidance based on your region and the type of hay you plan to grow. With well-prepared soil, your hay seeds will have the best start for germination and a thriving future. Good luck!
Proper Seeding Techniques
When it comes to hay germination, using proper seeding techniques is crucial for achieving successful and uniform growth. Following correct seeding practices ensures that the seeds are planted at the right depth and spacing, optimizing conditions for germination and seedling establishment. Here are some key steps to consider for proper seeding techniques:
- Timing: The timing of seeding plays a crucial role in hay germination. It’s important to sow the seeds during the recommended planting window for your specific hay type and regional climate. Different hay varieties have different requirements, so consult seed suppliers, agricultural extension offices, or local experts to determine the ideal time for sowing in your area.
- Prepare the Soil: Before sowing the seeds, ensure that the soil has been properly prepared, as discussed earlier. Clear the area of debris and weeds, loosen the soil, incorporate organic matter, and create a smooth and level planting bed. Well-prepared soil provides a favorable environment for seed germination and encourages uniform growth.
- Even Seed Distribution: Achieving an even distribution of seeds is essential to promote uniform germination and prevent overcrowding of seedlings. Depending on the size of the planting area, you can either hand-broadcast the seeds or use a mechanical seeder. If hand-broadcasting, divide the seeds into smaller portions and distribute them evenly across the planting bed, moving in a back-and-forth motion. For larger areas, consider using a mechanical seeder to ensure consistent seed distribution.
- Seeding Depth: Planting the seeds at the proper depth is crucial for germination success. Follow the recommended seeding depth for the specific hay seed type you are working with. In general, most hay seeds should be planted at a depth of ¼ to ½ inch. Planting too shallow may expose the seeds to excessive heat and drying, while planting too deep can delay germination. A consistent seeding depth ensures that seeds have the necessary contact with the soil for proper germination.
- Seed Spacing: Adequate spacing between seeds allows each seedling to have enough space, nutrients, and sunlight for healthy growth. Refer to the seed packet or consult seed suppliers for the recommended seed spacing for your specific hay type. Create furrows or rows with the recommended spacing, and place the seeds in the furrows at the appropriate interval. Proper seed spacing aids in preventing competition among seedlings and promotes optimal growth.
- Seed-to-Soil Contact: After sowing the hay seeds, ensure good seed-to-soil contact. Gently rake or tamp the soil surface to lightly cover the seeds. This helps anchor the seeds in the soil, enhances moisture absorption, and provides the necessary support for seedling development. Avoid burying the seeds too deep, as this can impede emergence and slow down the germination process.
By using proper seeding techniques, you create a favorable environment for hay seed germination and set the stage for successful seedling establishment. Uniform seed distribution, appropriate seeding depth and spacing, and good seed-to-soil contact all contribute to achieving optimal germination conditions.
Remember to water the newly sown seeds immediately after planting and maintain consistent moisture throughout the germination period. This will aid in seed imbibition, or the absorption of water by the seeds, promoting germination and early root growth.
By following these proper seeding techniques, you are well on your way to a successful and productive hay germination process. Good luck with your seed planting!
Read more: How Long For Oregano To Germinate
Providing Optimal Temperature and Moisture
Creating the right environment in terms of temperature and moisture is crucial for the successful germination of hay seeds. By providing optimal conditions, you can significantly enhance the germination rate and promote healthy seedling growth. Here are some key factors to consider when it comes to temperature and moisture for hay germination:
- Temperature: Different types of hay seeds have specific temperature requirements for optimal germination. Most hay seeds thrive in temperatures between 50 to 85 degrees Fahrenheit (10 to 29 degrees Celsius). It’s important to monitor the soil temperature and ensure it remains within the suitable range for the specific seed type. Using a soil thermometer is a useful tool to measure the temperature at the seed depth. A consistent and appropriate temperature promotes quicker and more successful germination.
- Moisture: Adequate moisture is essential for hay seed germination. The moisture helps soften the seed coat, allowing for the absorption of water and activation of the germination process. Proper moisture levels also assist in the transportation of nutrients to the developing seedling. Keep the soil consistently moist, but avoid overwatering, as excessive moisture can lead to rotting or fungal diseases. Regularly check the moisture content of the soil by feeling the top layer or using a moisture meter to ensure a balanced level of moisture.
- Irrigation: Proper irrigation is crucial for providing consistent moisture to the germinating seeds. When irrigating, use a gentle spray or misting technique to avoid displacing or burying the seeds. Start watering immediately after sowing the seeds to help settle them in the soil and initiate hydration. As the seeds germinate and seedlings begin to emerge, adjust your watering schedule based on their specific needs. It’s important to provide enough moisture to keep the soil consistently moist while avoiding waterlogging.
- Mulching: Mulching around the seeded area can help maintain moisture levels and regulate soil temperature. Applying a layer of organic mulch, such as straw or wood chips, helps to reduce evaporation, prevent weed growth, and insulate the soil. Mulch also helps to protect the developing seedlings from extreme temperature fluctuations and conserves moisture in the soil, reducing the frequency of irrigation.
- Protection from Extreme Conditions: Extreme temperature or moisture conditions can adversely affect germination. During periods of excessive heat, you may need to provide shade or employ shading methods, such as using shade cloth or temporary coverings, to protect the seeded area from overheating. Similarly, during heavy rainfall, cover the area with a water-permeable fabric or plastic sheeting to prevent the seeds from being washed away or waterlogged. Monitoring and protecting your seeds from extreme conditions will help ensure successful germination.
By providing optimal temperature and moisture conditions during the germination process, you give your hay seeds the best chance of successful sprouting and healthy growth. Remember to monitor the temperature, water consistently, and protect the seeds from extreme conditions. With proper care and attention, you’ll be rewarded with a lush and flourishing hay crop.
In the next section, we will explore the technique of stratification, which can further promote germination for certain types of hay seeds. Keep reading to learn more!
Promoting Germination with Stratification
Stratification is a technique used to promote germination for certain types of hay seeds that have a natural dormancy period or specific environmental requirements. This process involves subjecting the seeds to a period of cold, moist conditions, mimicking the natural winter conditions that the seeds would experience in their native habitats. Stratification can help break seed dormancy and prepare the seeds for successful germination. Here’s how you can promote germination with stratification:
- Identify Seeds Requiring Stratification: Not all hay seeds require stratification. Some seeds, particularly those from cold climates or native to regions with distinct seasonal changes, benefit from this process. Research the specific hay seed type you are working with to determine if stratification is necessary for optimal germination.
- Collect or Purchase Seeds: If you are collecting seeds from existing plants or purchasing them, ensure that the seeds are fully mature and healthy. Proper seed selection is crucial for successful germination. To increase the chances of stratification success, gather or purchase seeds that are from the same geographic region, as they may have adapted to the local climatic conditions.
- Prepare Seeds for Stratification: Before stratification, you may need to prepare the seeds to enhance their germination potential. Scarification, which is the process of breaking or scratching the hard outer seed coat, may be necessary for some seeds to allow water penetration. Follow the specific instructions for scarifying the seeds if required.
- Moist Stratification: For moist stratification, place the seeds in a container or plastic bag along with a moist, sterile medium such as damp peat moss or vermiculite. Ensure that the medium is not soaking wet, as excess moisture can lead to seed rot. Seal the container or bag and label it with the seed type and date. Place the container in the refrigerator at a temperature between 33 to 41 degrees Fahrenheit (0.5 to 5 degrees Celsius) for the recommended stratification period, which varies depending on the specific seed type.
- Warm Stratification: Some hay seeds may require warm stratification instead of, or in addition to, cold stratification. In this case, the seeds are exposed to warm and moist conditions to stimulate germination. Place the seeds in a container or plastic bag with a moist medium and seal it. Keep the container in a warm location with a temperature between 68 to 86 degrees Fahrenheit (20 to 30 degrees Celsius) for the recommended period. Ensure the medium remains consistently moist, but not waterlogged.
- Observation and Transition: Throughout the stratification period, check the seeds regularly for any signs of sprouting or mold development. After the recommended stratification period, remove the seeds from the refrigerator or warm location. Transition the seeds to room temperature for a few days to allow them to acclimate to their new environment before sowing.
Stratification is an effective way to break seed dormancy and promote germination for certain types of hay seeds. It mimics the natural conditions required for these seeds to germinate successfully. By providing the appropriate stratification process, you enhance the chances of quicker, more synchronized germination.
Remember, not all hay seeds require stratification, so it’s important to do thorough research and understand the specific requirements of the seed type you are working with. Consult seed suppliers, agricultural extension offices, or experienced gardeners for guidance on stratification, as they can provide valuable advice based on your region and hay seed variety.
In the next section, we will wrap up this article and summarize the key points we have covered. Stay tuned!
Conclusion
Congratulations! You are now equipped with valuable knowledge about the germination process of hay seeds and the factors that influence their growth. Understanding these factors, such as the type of hay seeds, soil conditions, temperature, moisture, and dormancy periods, is essential for successful hay germination. By following the proper techniques and providing optimal conditions, you can greatly increase the chances of quick and successful germination.
Here are the key takeaways from this article:
- Hay seeds have different germination times depending on the type of hay, soil conditions, temperature, moisture, and presence of dormancy periods.
- Preparing the soil by clearing the area, testing the soil, loosening the soil, incorporating organic matter, and smoothing the surface sets the stage for successful germination.
- Proper seeding techniques, such as timing, even seed distribution, correct seeding depth and spacing, and good seed-to-soil contact, ensure uniform germination and growth.
- Providing optimal temperature and moisture by monitoring the soil temperature, maintaining consistent moisture, proper irrigation, mulching, and protecting seeds from extreme conditions promotes successful germination.
- Stratification can be used to break dormancy in certain hay seeds, with cold and warm stratification methods preparing the seeds for germination.
Remember that successful hay germination requires a combination of knowledge, patience, and proper care. Keep an eye on the seedlings, provide adequate water and nutrients as they grow, and maintain a weed-free environment to ensure healthy development. Consult local experts and resources for tailored advice based on your specific region and hay type.
Now that you are well-equipped with these insights, it’s time to put your knowledge into practice and enjoy the satisfaction of seeing your hay seeds sprout, grow, and flourish. Happy gardening and best of luck with your hay germination endeavors!
Frequently Asked Questions about How Long For Hay To Germinate
Was this page helpful?
At Storables.com, we guarantee accurate and reliable information. Our content, validated by Expert Board Contributors, is crafted following stringent Editorial Policies. We're committed to providing you with well-researched, expert-backed insights for all your informational needs.

0 thoughts on “How Long For Hay To Germinate”