Home>Garden Essentials>How To Change Play Area On HTC Vive
Garden Essentials
How To Change Play Area On HTC Vive
Modified: March 7, 2024
Learn how to change the play area on your HTC Vive and transform it into a virtual garden. Create a lush and immersive gaming experience with this step-by-step guide.
(Many of the links in this article redirect to a specific reviewed product. Your purchase of these products through affiliate links helps to generate commission for Storables.com, at no extra cost. Learn more)
Introduction
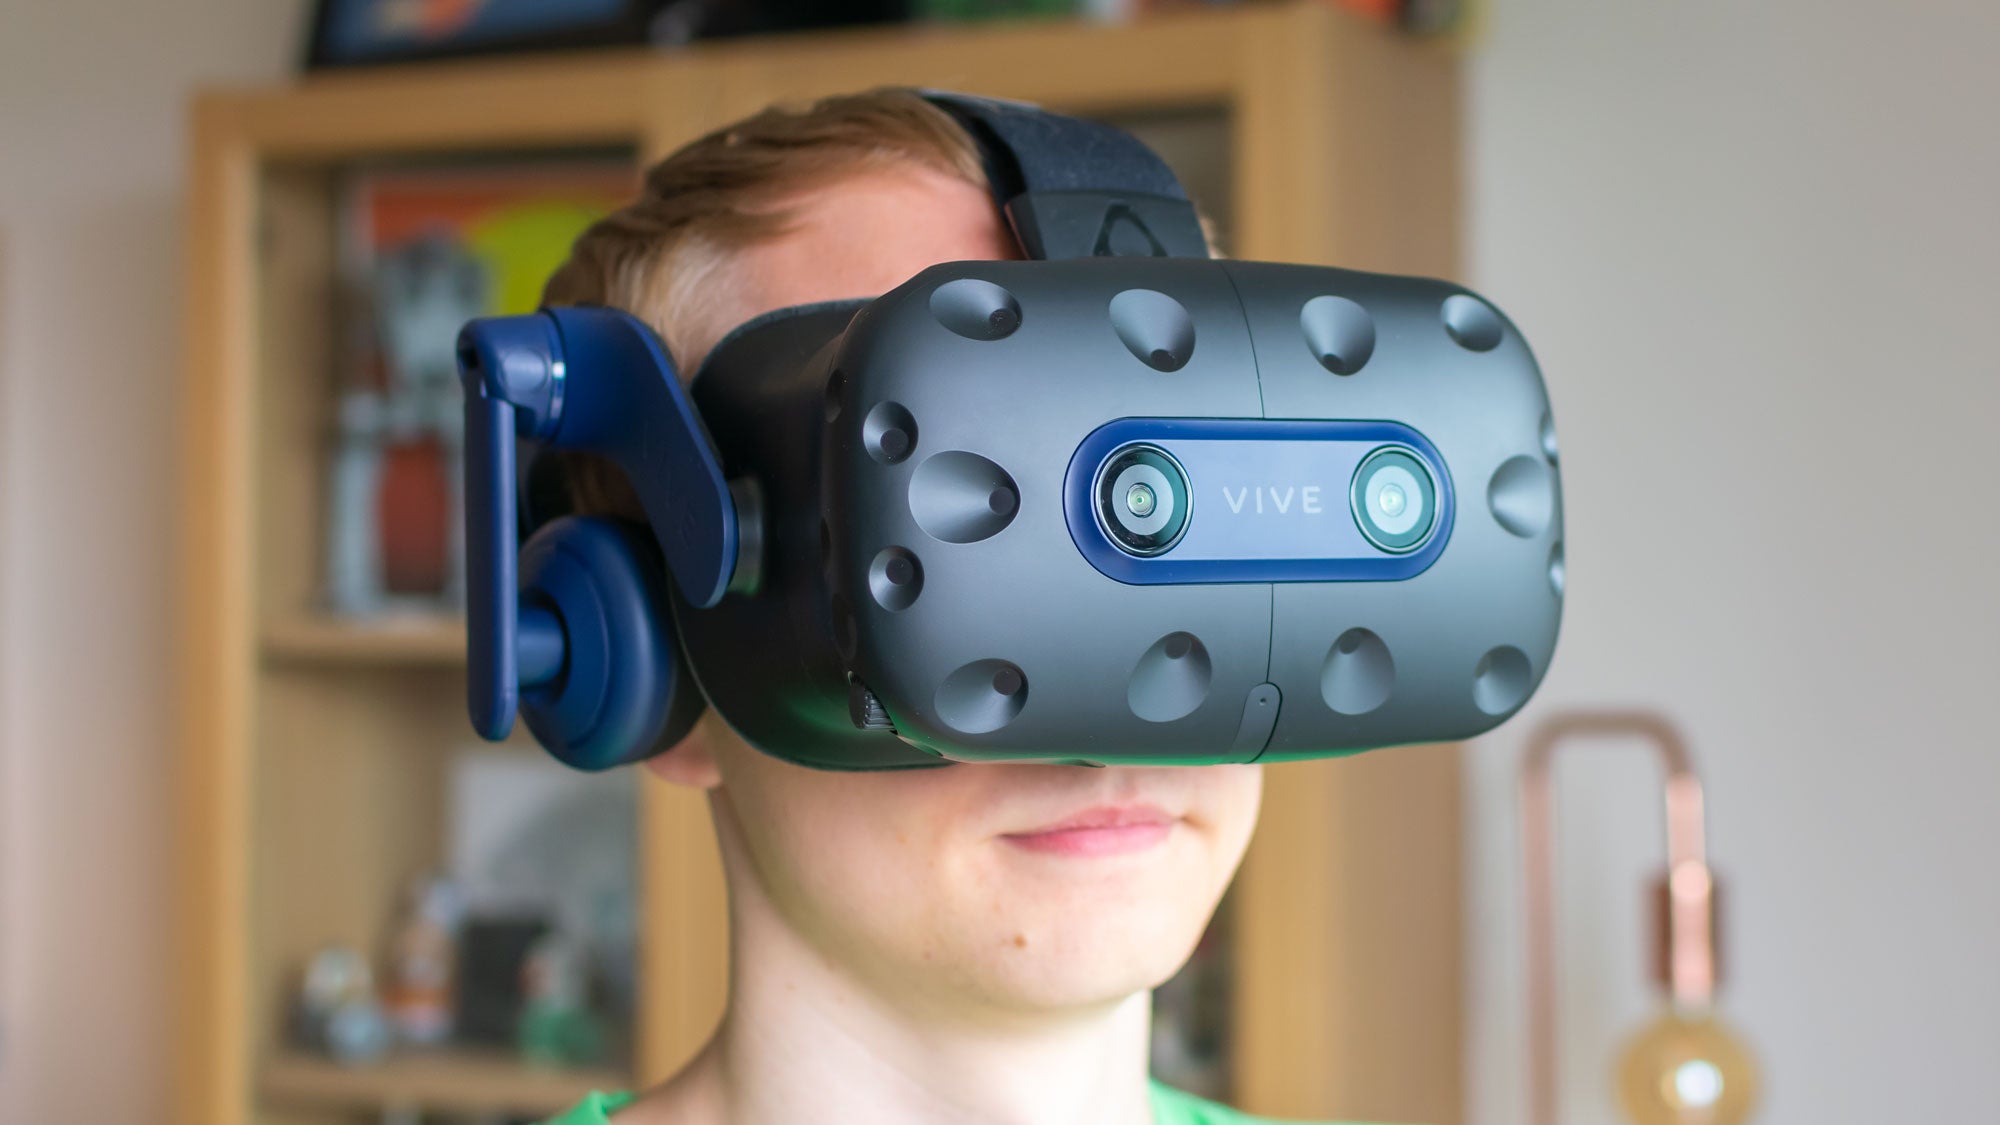
Welcome to the world of virtual reality! If you’re the proud owner of an HTC Vive, you’re already familiar with the immersive experiences it can offer. One important aspect of the HTC Vive system is the play area, which defines the physical space you can move around in while wearing the headset. Whether you’re setting up your Vive for the first time or looking to change your play area, this guide will walk you through the process.
By understanding how to adjust and customize your play area, you can ensure the best possible VR experience. So, let’s dive in and explore the steps needed to change the play area on your HTC Vive.
But before we begin, it’s important to note that this guide assumes you have already set up your HTC Vive system, including the base stations. If you haven’t done so already, please refer to the official HTC Vive setup guide for detailed instructions on how to get started with your VR headset.
Key Takeaways:
- Customizing your HTC Vive play area ensures a safe and immersive VR experience. Prepare the room, adjust base station positioning, calibrate the play area, change its shape, and confirm the changes for optimal virtual adventures.
- By following simple steps, you can create a personalized VR space. Clear the room, position the base stations, calibrate the play area, customize its shape, and confirm the changes for a seamless virtual reality journey.
Read more: How To Set Up Play Area With Vive
Understanding the Play Area on HTC Vive
The play area, also known as the “Chaperone” system on the HTC Vive, is a crucial component that ensures you have a safe and enjoyable virtual reality experience. It is designed to keep you within the boundaries of your physical space while you’re fully immersed in the virtual world.
When you initially set up your HTC Vive, you’ll define the play area by placing the base stations in strategic positions to track your movements. The play area can be rectangular or square, depending on the layout of your room.
Why is it essential to understand the play area on your HTC Vive? Well, for starters, it helps prevent accidents by alerting you when you’re nearing the boundaries of your designated space. The Chaperone system uses a range of visual cues, such as grid lines or virtual walls, to indicate the limits of your play area. These cues serve as gentle reminders to keep you from inadvertently wandering into furniture or walls, which can result in injury or damage to your surroundings.
Another benefit of understanding the play area is maximizing your VR experience. By customizing the play area to match your space, you can ensure that you have enough room to move around comfortably and engage in the virtual environment without restrictions. This freedom of movement adds a whole new level of immersion and realism to your VR adventures.
Now that we have a clear understanding of the importance of the play area, let’s dive into the steps to change and customize it on your HTC Vive.
Step 1: Preparing the Room
Before you begin changing the play area on your HTC Vive, it’s crucial to prepare your room adequately. By taking a few simple steps, you can create a safe and optimized environment for your virtual reality experiences.
Start by clearing the room of any obstacles or hazards that could potentially interfere with your VR gameplay. Remove furniture, sharp objects, and fragile items from the designated play area. Ensure that there are no loose wires or cables that you could trip over while wearing the headset.
Next, consider the lighting conditions in your room. While some VR experiences work well in dimly lit environments, others may require brighter lighting for optimal tracking performance. Experiment with different lighting setups to find what works best for you.
If you have reflective surfaces in the room, such as mirrors or glass, cover them or position them in a way that minimizes reflections. Reflective surfaces can interfere with the tracking system and affect the accuracy of your movements in the virtual world.
Lastly, ensure that your computer and the HTC Vive system are properly connected and powered on. Check that all the necessary cables and connections are secure to avoid any technical issues during the play area setup process.
By taking the time to prepare your room, you’ll create an optimal environment for your HTC Vive play area adjustments. Once you’ve completed these preparations, you’re ready to move on to the next step: adjusting the base station positioning.
Step 2: Adjusting the Base Station Positioning
Proper positioning of the base stations is crucial for accurate tracking within your play area. The base stations emit infrared signals that are detected by the sensors on the HTC Vive headset and controllers, allowing for precise movement tracking in the virtual world.
Here’s how to adjust the base station positioning:
- Mount the base stations: It’s recommended to mount the base stations on stable surfaces, such as tripods or wall brackets. Make sure they are securely fastened and positioned at opposite corners of your play area, facing inward.
- Power on the base stations: Connect the base stations to power outlets and ensure they are turned on.
- Open SteamVR: Launch the SteamVR application on your computer.
- Access the SteamVR settings: In the SteamVR window, click on the “Settings” menu and select “Developer” from the drop-down menu.
- Run Room Setup: Within the Developer settings, click on “Room Setup” to start the process of adjusting the base station positioning.
- Follow the on-screen instructions: The Room Setup guide will provide step-by-step instructions on how to position yourself and the controllers within the play area. It will also guide you in defining the boundaries by tracing the perimeter of your available space.
- Ensure proper visibility: During the Room Setup process, make sure that the sensors on the HTC Vive headset and controllers can easily see the base stations. Avoid any obstructions that could interfere with the line of sight.
Once you’ve completed the base station positioning adjustments, you’re ready to move on to the next step: calibrating the play area.
To change the play area on your HTC Vive, open the SteamVR app, go to Settings, then select “Developer” and click on “Room Setup.” Follow the on-screen instructions to set up a new play area.
Step 3: Calibrating the Play Area
Now that you’ve positioned the base stations, it’s time to calibrate the play area on your HTC Vive. Calibrating helps ensure that the virtual boundary matches your physical space and allows for accurate tracking and movement detection.
To calibrate the play area, follow these steps:
- Launch SteamVR: Make sure SteamVR is running on your computer.
- Put on the HTC Vive headset: Wear the headset and ensure it is properly positioned on your head.
- Open the SteamVR dashboard: Press the system button on one of the HTC Vive controllers to access the SteamVR dashboard.
- Select “Room Setup”: Navigate to the “Devices” tab in the SteamVR dashboard and click on “Room Setup.”
- Choose “Standing Only” or “Room-Scale”: Depending on your preference and available space, select either “Standing Only” or “Room-Scale” as your play area configuration.
- Define the play area: Follow the on-screen instructions to trace the boundaries of your physical space using one of the HTC Vive controllers. Walk around the perimeter of your play area, ensuring that you’re in a safe and comfortable position.
- Confirm the play area: Once you’ve traced the boundaries, confirm the play area by clicking on the appropriate button in the SteamVR dashboard.
It’s important to make sure that the play area is accurately calibrated to allow for seamless movement and tracking within the virtual environment. Take your time during this step to ensure that you have enough space to move freely and avoid any potential obstacles.
Once you’ve successfully calibrated the play area, it’s time to proceed to the next step: changing the play area shape.
Read more: How To Make A Play Area For Baby
Step 4: Changing the Play Area Shape
Changing the shape of your play area on the HTC Vive allows you to customize the virtual boundaries to match the available space in your room. Whether you need a smaller area for seated experiences or a larger area for room-scale gameplay, the process of adjusting the play area shape is simple.
To change the play area shape, follow these steps:
- Launch SteamVR: Ensure that SteamVR is running on your computer.
- Put on the HTC Vive headset: Wear the headset and make sure it’s properly fitted.
- Open the SteamVR dashboard: Press the system button on one of the HTC Vive controllers to access the SteamVR dashboard.
- Select “Room Setup”: Navigate to the “Devices” tab in the SteamVR dashboard and click on “Room Setup.”
- Choose “Standing Only” or “Room-Scale”: Depending on your desired play area shape, select either “Standing Only” or “Room-Scale” configuration.
- Adjust the play area shape: Follow the on-screen instructions to modify the virtual boundaries. Use one of the HTC Vive controllers to resize and reshape the play area by dragging the blue boundary lines.
- Confirm the changes: Once you’re satisfied with the new play area shape, confirm the changes by clicking on the appropriate button in the SteamVR dashboard.
Remember to take into account the physical limitations of your room and ensure that the new play area shape aligns with the available space. The ability to customize the play area shape allows for flexibility and a tailored VR experience.
Once you’ve changed the play area shape to your liking, it’s time to move on to the final step: confirming the changes.
Step 5: Confirming the Changes
After you’ve adjusted the play area shape on your HTC Vive, it’s essential to confirm the changes to ensure that your new configuration has been properly applied. Confirming the changes helps ensure that the virtual boundaries align with your physical space, providing you with an accurate and immersive VR experience.
To confirm the changes made to the play area, follow these steps:
- Put on the HTC Vive headset: Wear the headset and make sure it’s properly positioned on your head.
- Launch SteamVR: Ensure that SteamVR is running on your computer.
- Open the SteamVR dashboard: Press the system button on one of the HTC Vive controllers to access the SteamVR dashboard.
- Select “Room Setup”: Navigate to the “Devices” tab in the SteamVR dashboard and click on “Room Setup.”
- Review the play area: Carefully inspect the virtual boundaries displayed in the SteamVR room setup. Make sure they accurately represent the actual boundaries of your physical space.
- Adjust if necessary: If you notice any discrepancies or need to make further modifications, follow the appropriate steps to resize or reshape the play area as desired.
- Confirm the changes: Once you’re satisfied with the play area configuration and the virtual boundaries align with your physical space, confirm the changes by selecting the appropriate button in the SteamVR dashboard.
By confirming the changes, you can ensure that the virtual environment of your HTC Vive accurately reflects the physical space you have available. This confirmation process enhances safety, prevents accidental collisions, and optimizes your overall VR experience.
Congratulations! You have successfully changed the play area on your HTC Vive, allowing for a customized and immersive virtual reality experience. Enjoy exploring a wide range of virtual worlds and applications within the boundaries of your newly configured play area.
Remember, if you ever need to readjust or change the play area shape again, you can always go through the steps outlined in this guide to modify it to your liking. Happy VR gaming!
Conclusion
Changing the play area on your HTC Vive opens up endless possibilities for immersive virtual reality experiences. By understanding and following the steps outlined in this guide, you can easily adjust and customize your play area to match the physical space available to you.
First, it’s crucial to prepare the room by clearing obstacles and ensuring proper lighting conditions. Next, adjusting the base station positioning is essential for accurate tracking and movement detection within the play area. Calibrating the play area ensures that the virtual boundaries align with your physical space, enhancing the safety and accuracy of your VR experience.
Changing the play area shape allows for customization based on the type of VR experience you desire, whether it’s room-scale gameplay or seated experiences. Finally, confirming the changes ensures that the virtual boundaries accurately represent your physical space, providing a seamless and immersive virtual reality environment.
Remember, the play area on your HTC Vive is not just a virtual boundary—it is your portal to endless adventures in the virtual world. By adjusting and customizing the play area, you can maximize your comfort, safety, and enjoyment, allowing for a truly immersive and unforgettable VR experience.
Now that you have the knowledge to change and optimize your play area, it’s time to dive back into the captivating world of virtual reality. So put on your HTC Vive headset, step into your newly configured play area, and let your imagination soar!
Frequently Asked Questions about How To Change Play Area On HTC Vive
Was this page helpful?
At Storables.com, we guarantee accurate and reliable information. Our content, validated by Expert Board Contributors, is crafted following stringent Editorial Policies. We're committed to providing you with well-researched, expert-backed insights for all your informational needs.


0 thoughts on “How To Change Play Area On HTC Vive”