Home>Garden Essentials>How To Set Up Play Area With Vive
Garden Essentials
How To Set Up Play Area With Vive
Modified: March 7, 2024
Learn how to create the perfect garden play area with Vive. Discover tips and ideas for setting up a fun and safe outdoor space for your children to enjoy.
(Many of the links in this article redirect to a specific reviewed product. Your purchase of these products through affiliate links helps to generate commission for Storables.com, at no extra cost. Learn more)
Introduction
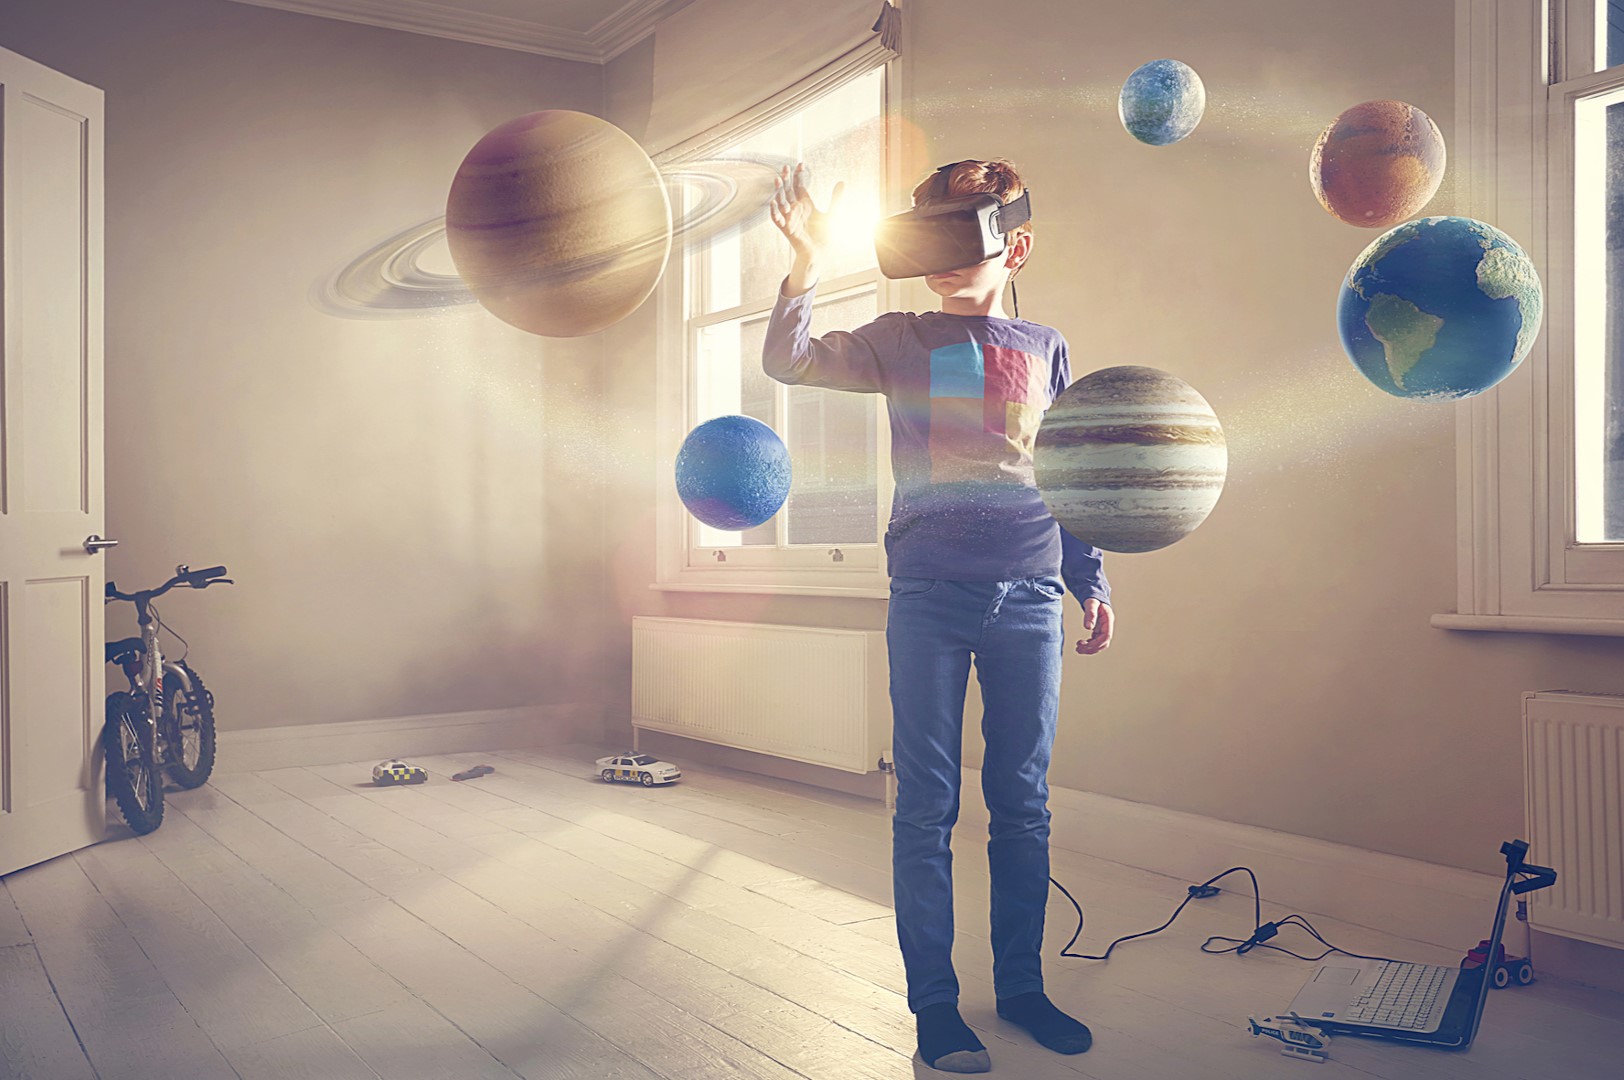
Welcome to the wonderful world of virtual reality gaming! If you’ve just purchased the Vive, one of the leading virtual reality systems on the market, you’re in for a truly immersive gaming experience. One of the key features of the Vive is the ability to create a play area where you can freely move around and interact with the virtual environment. Setting up this play area is crucial to ensure optimal performance and enjoyment.
In this article, we will guide you through the process of setting up your Vive play area. We’ll cover everything from the prerequisites and room selection to mounting the base stations and calibrating the play area. By following these steps, you’ll be well on your way to diving into a world of virtual reality like never before.
Before we get started, make sure you have all the necessary equipment and accessories. You will need the Vive headset, the two wireless controllers, the base stations, the link box, and the necessary cables. Additionally, ensure that your computer meets the system requirements for running the Vive smoothly.
Now, let’s get ready to create your very own Vive play area!
Key Takeaways:
- Setting up a Vive play area requires adequate space, stable flooring, and clear line of sight for the base stations. It’s crucial to prepare the room, mount the base stations, and calibrate the play area for an immersive VR experience.
- Testing the play area involves navigating the virtual environment, checking for tracking accuracy, and ensuring comfort and safety. Regular testing and adjustments are essential for an optimized and enjoyable virtual reality gaming experience.
Read more: How To Change Play Area On HTC Vive
Step 1: Requirements for Setting Up the Vive Play Area
Before you begin setting up your Vive play area, it’s important to ensure you have all the necessary requirements. Here’s a list of what you’ll need:
- Adequate space: The Vive play area requires a minimum of 6.5 feet by 5 feet of clear space. However, for a more immersive experience, it’s recommended to have at least 10 feet by 10 feet of space.
- Stable and flat surface: Choose an area with a stable, level floor to avoid any accidents or discomfort during gameplay.
- Sockets and power outlets: Make sure there are enough power outlets nearby to connect the base stations and other accessories.
- Computer and specifications: Your computer should meet the minimum system requirements for running the Vive smoothly. This includes having a compatible operating system, a powerful processor, sufficient RAM, and a capable graphics card.
- Mounting options: Decide whether you want to mount the base stations on the walls using brackets or use alternative mounting options such as tripods or shelves.
It’s also worth noting that the Vive play area requires a clear line of sight between the base stations and the headset. Avoid placing any objects or obstacles that may obstruct the line of sight.
Once you have gathered all the necessary requirements, you’re ready to move on to the next step: selecting the ideal room for your Vive play area.
Step 2: Selecting the Ideal Room for the Play Area
Now that you have all the necessary requirements, it’s time to choose the perfect room for your Vive play area. Here are some considerations to keep in mind:
1. Size and Layout: The room should ideally have enough space to accommodate the minimum play area requirements of 6.5 feet by 5 feet. However, if you have a larger room, it will allow for a more immersive and unrestricted experience. Ensure that the room has an open layout with minimal obstructions like furniture or hanging objects to avoid any collisions while playing.
2. Lighting Conditions: While setting up your Vive play area, it’s important to consider the lighting conditions of the room. Make sure the room is not too bright, as excessive light can interfere with the tracking system of the Vive. Conversely, a completely dark room can also cause tracking issues. Optimal lighting conditions would be a moderately lit room with diffused lighting, where the base stations can easily detect and track the headset and controllers.
3. Accessibility to Power Outlets: Ensure that there are power outlets nearby to connect the base stations and other accessories. It’s best to have outlets that are easily accessible and not too far from the play area, as this will make the setup process smoother and more convenient.
4. Clear Space: It’s essential to have a clutter-free and clear space for your Vive play area. Remove any furniture, decorations, or obstacles that may obstruct movement or interfere with the tracking system. This will help prevent accidents and allow you to move freely without any hindrance in the virtual world.
Once you have identified the room that meets these criteria, you can proceed to the next step of preparing the room for Vive play area setup.
Step 3: Preparing the Room for Vive Play Area Setup
Now that you have selected the ideal room for your Vive play area, it’s time to prepare the room for the setup process. Follow these steps to ensure a smooth and hassle-free installation:
1. Clear the Space: Start by clearing the room of any furniture, objects, or obstacles that might obstruct your movement or interfere with the Vive’s tracking system. Make sure the play area is completely free from any potential hazards.
2. Secure Loose Items: Take a quick look around and secure any loose items or cables that may pose a tripping hazard. Tuck away or secure any loose wires or cords to prevent accidents during gameplay.
3. Install Cable Management System (Optional): If you want to keep the cables organized and prevent them from tangling, consider installing a cable management system. These systems typically consist of adhesive hooks or cable clips that can be attached to the walls or ceiling to keep the VR headset and controller cables neatly secured.
4. Set Up Play Area Boundaries: Using a measuring tape or a chalk, mark the boundaries of your play area on the floor. This will help you stay within the designated area while playing and prevent you from bumping into walls or objects.
5. Ensure Proper Ventilation: Virtual reality gaming can be an active and immersive experience, causing your body temperature to rise. Ensure that the room has proper ventilation to prevent overheating and discomfort during extended gaming sessions.
By following these steps, you have successfully prepared the room for your Vive play area setup. Now it’s time to move on to the next step, which involves mounting the base stations.
Step 4: Mounting the Base Stations
Mounting the base stations is an important step in setting up your Vive play area. The base stations emit infrared light signals that allow the Vive headset and controllers to track your movements accurately. Follow these steps to properly mount the base stations:
1. Decide on Mounting Options: Determine whether you want to mount the base stations on the walls using brackets or use alternative mounting options such as tripods or shelves. Wall mounting provides a more permanent and stable solution, while tripods offer flexibility and easy repositioning.
2. Select Ideal Locations: Find two spots in the room that offer a clear line of sight and maximum coverage for the play area. Make sure these locations are above head height and have minimal obstructions such as furniture or curtains that could obstruct the infrared signals.
3. Mount the Base Stations: If you choose to wall mount, follow the instructions provided with the mounting brackets to securely attach the base stations to the walls. Alternatively, if you opt for tripods or shelves, place the base stations at the desired locations and ensure they are stable and level.
4. Adjust the Angle: Tilt the base stations downward at a slight angle, pointing towards the center of the play area. This allows for optimal tracking coverage and reduces the chances of occlusion.
5. Power on the Base Stations: Connect the power cables to the base stations and plug them into a nearby power outlet. Make sure the base stations are powered on and functioning properly.
6. Check for Sync Status: Once the base stations are powered on, check the indicator lights on the front. A solid green light indicates that the base stations are synced and ready to track your movements.
By following these steps, you have successfully mounted the base stations for your Vive play area. The next step involves connecting the base stations to your PC, so you can have seamless communication between the headset, controllers, and your computer.
Read more: How To Set Up A Puppy Play Area
Step 5: Connecting the Base Stations to Your PC
Now that you have mounted the base stations for your Vive play area, it’s time to connect them to your PC. This step ensures that there is a proper communication between the base stations, the Vive headset, and your computer. Follow these steps to connect the base stations:
1. Locate the Link Box: The Link Box is a small device that acts as the intermediary between the base stations and your PC. Locate the Link Box and place it near your computer in a convenient and accessible spot.
2. Connect the Power Adapter: Plug one end of the power adapter into an available outlet and connect the other end to the DC input on the Link Box. Ensure that the power adapter is securely connected.
3. Connect the Base Stations: Using the provided power cables, connect each base station individually to the corresponding power outlet on the Link Box. Ensure that the cables are securely connected.
4. Connect the Link Box to Your PC: Use the provided USB cable to connect the Link Box to an available USB port on your PC. Make sure the connection is secure and snug.
5. HDMI Connection: Connect the HDMI cable from the Link Box to the HDMI port on your PC’s graphics card. Ensure a secure connection to avoid any signal interruption.
6. Check the Connections: Once all the connections are made, double-check to ensure that all the cables are securely plugged in and there are no loose connections.
7. Power on the Link Box: Press the power button on the Link Box to turn it on. The LED indicator on the front should light up, indicating that it is receiving power and is ready to communicate with the base stations.
By following these steps, you have successfully connected the base stations to your PC. The next step involves setting up the Vive headset, so you can dive into the virtual world of gaming.
When setting up your Vive play area, make sure to clear the space of any obstacles and use the provided base stations to track your movements. Ensure the play area is well-lit and free of reflective surfaces to prevent tracking issues.
Step 6: Setting Up the Vive Headset
Now that you have connected the base stations to your PC, it’s time to set up the Vive headset. Follow these steps to ensure a smooth and accurate setup:
1. Unpack the Vive Headset: Carefully unpack the Vive headset and remove any protective packaging. Ensure that all the components are present and in good condition.
2. Adjust the Headset Straps: Put on the Vive headset and adjust the straps to ensure a comfortable and secure fit. The straps should be tightened enough to keep the headset in place, but not too tight to cause discomfort.
3. Calibrate the IPD (Interpupillary Distance): Use the IPD adjustment dial on the underside of the headset to align the lenses with your specific interpupillary distance. This will help optimize the image quality and clarity.
4. Connect the Headset to the Link Box: Connect the provided 3-in-1 cable from the headset to the corresponding ports on the Link Box. Ensure that the connections are secure and properly aligned.
5. Power on the Headset: Press the power button on the Vive headset to turn it on. You will see LEDs on the front of the headset indicating that it is powered on and ready for use.
6. Adjust the Lens Distance: Use the lens adjustment knobs on the sides of the headset to fine-tune the distance between the lenses and your eyes. This will help achieve optimal focus and minimize the chances of eye strain.
7. Put on the Headset: Put the Vive headset on your head, ensuring that it is positioned comfortably and securely. Adjust the straps and the fit of the headset as needed to achieve the best viewing experience.
8. Check for Proper Tracking: Once the headset is on, check for proper tracking by moving your head around. You should see the virtual environment respond to your movements accurately and smoothly.
By following these steps, you have successfully set up the Vive headset. The next step involves running the Room Setup tool, which will help you calibrate the play area for better tracking and gameplay experiences.
Step 7: Running the Room Setup Tool
Running the Room Setup tool is a crucial step in ensuring accurate tracking and optimal gameplay experiences with your Vive headset. This tool helps calibrate the play area and fine-tune the virtual environment to match your physical space. Follow these steps to run the Room Setup tool:
1. Launch SteamVR: Make sure that SteamVR is installed on your PC and launch it. You can find SteamVR in your Steam library or in the system tray.
2. Access the SteamVR Settings: In the SteamVR menu, click on the drop-down menu located in the upper left corner and select “Settings”. This will take you to the SteamVR settings menu.
3. Activate the Room Setup: Within the settings menu, click on “Devices” and then select “Room Setup”. This will prompt the Room Setup tool to open.
4. Follow the On-Screen Instructions: The Room Setup tool will guide you through a series of steps to calibrate your play area. This includes defining the center of your play area, tracing the boundaries using the controllers, and specifying the floor level.
5. Set Up the Chaperone System: The Chaperone system is designed to keep you safe and prevent you from moving outside the boundaries of your play area. During the Room Setup, you’ll have the option to customize the Chaperone system settings, such as the style and visibility of the boundaries.
6. Complete the Room Setup: Once you have followed all the on-screen instructions and customized the Chaperone system settings, click on “Complete” to finish the Room Setup process.
7. Test the Calibration: After completing the Room Setup, it’s important to test the calibration of your play area. Put on your Vive headset and move around within the play area to ensure that the tracking is accurate and there are no obstructions or tracking issues.
By following these steps, you have successfully run the Room Setup tool to calibrate your play area. This ensures that your Vive headset is optimized for accurate tracking and immersive gameplay experiences. The next step involves calibrating the play area to create a safe and enjoyable virtual reality environment.
Step 8: Calibrating the Play Area
Calibrating the play area is an essential step to ensure accurate tracking and create a safe and enjoyable virtual reality environment with your Vive headset. Follow these steps to calibrate your play area:
1. Start SteamVR: Launch SteamVR on your PC and make sure your Vive headset is connected and powered on.
2. Enter the Play Area: Put on your Vive headset and enter the play area. Make sure you have enough space and allow the base stations to detect the headset and controllers.
3. Access the SteamVR Settings: In the SteamVR menu, click on the drop-down menu located in the upper left corner and select “Settings”. This will take you to the SteamVR settings menu.
4. Adjust the Play Area: Within the settings menu, click on “Devices” and then select “Chaperone”. Here, you can adjust the size and shape of the play area to match your physical space. Follow the on-screen instructions to trace the boundaries and customize the play area shape as desired.
5. Configure the Chaperone System: The Chaperone system helps keep you safe by providing a visual representation of the play area boundaries while you are immersed in virtual reality. Within the Chaperone settings, you can customize the appearance and visibility of the boundaries to suit your preferences.
6. Set Floor Level: While still in the Chaperone settings, make sure to accurately set the floor level. This will ensure that the virtual environment aligns correctly with your physical space.
7. Test the Play Area: Once you have adjusted the play area and configured the Chaperone system, it’s important to test the calibration. Move around within the play area, ensuring that the virtual boundaries accurately match the physical boundaries. Check for any obstacles or objects that might interfere with your movement and adjust the play area if necessary.
8. Fine-Tune Calibration: If you notice any tracking issues or inaccuracies, you can fine-tune the calibration by repeating the steps above or adjusting the base station positions for better coverage and tracking. Make sure there are no reflective surfaces or bright lights in the play area that could interfere with the tracking system.
By following these steps, you have successfully calibrated your play area to ensure accurate tracking and create a safe and enjoyable virtual reality experience with your Vive headset. The final step involves testing the play area to ensure seamless gameplay.
Read more: How To Set Up A Play Area For A Bird
Step 9: Testing the Play Area
After calibrating the play area for your Vive headset, it’s important to thoroughly test it to ensure a seamless and immersive gaming experience. Follow these steps to test your play area:
1. Put on the Vive Headset: Begin by putting on your Vive headset and ensuring that it’s properly adjusted for a comfortable fit. Make sure the controllers are fully charged and within reach.
2. Navigate the Virtual Environment: Start exploring the virtual environment by moving around within the play area. Walk, crouch, and use the controllers to interact with the virtual objects and elements.
3. Test Tracking: Pay attention to the tracking of the headset and controllers. Move your head and limbs in different directions and observe how accurately the virtual environment mirrors your movements. Check for any latency or tracking issues that may affect gameplay.
4. Experiment with Movement: Try different types of movements, such as walking, running, jumping, and bending, to ensure that the sensors are capturing your actions accurately. Test out various game mechanics that require physical movement to gauge how well the play area responds to your actions.
5. Check for Occlusion: Walk around the play area and observe if there are any instances of occlusion, where the headset or controllers briefly lose tracking due to obstacles or objects obstructing the line of sight with the base stations. Make any necessary adjustments to the base station positions to minimize occlusion.
6. Test Comfort and Safety: Ensure that you feel comfortable and safe while moving within the play area. Avoid colliding with walls, furniture, or other objects in your physical space. If needed, make adjustments to the play area boundaries or Chaperone system to improve safety and prevent accidents.
7. Evaluate Overall Performance: Take note of the overall performance of the play area and how well it enhances your virtual reality gaming experience. Assess the accuracy of tracking, responsiveness, and immersion to ensure that the play area meets your expectations.
By thoroughly testing your play area, you can identify any potential issues, optimize performance, and make necessary adjustments to enhance your overall virtual reality gaming experience with the Vive headset.
Remember to enjoy yourself as you embark on exciting virtual adventures in your newly calibrated play area!
Conclusion
Congratulations on successfully setting up your Vive play area! By following the steps outlined in this guide, you have created an immersive and optimized virtual reality gaming environment. From selecting the ideal room to calibrating the play area and testing its performance, each step has been crucial in ensuring a seamless and enjoyable gaming experience.
Having a well-designed play area with accurate tracking and clear boundaries is essential for truly immersing yourself in the virtual world. The Vive headset, coupled with the base stations, allows you to freely move, interact, and explore without limitations. Whether it’s walking, crouching, or even jumping, your movements will be accurately reflected in the virtual environment.
Remember to always ensure the safety of yourself and others while using the Vive play area. Take note of the play area boundaries and the Chaperone system, which help prevent collisions with walls and objects. It’s important to consider the lighting conditions, ventilation, and the accessibility of power outlets to create a comfortable and enjoyable experience.
Regularly test and fine-tune your play area to maintain optimal performance. Keep an eye out for any tracking issues, occlusion, or other factors that may affect your gameplay. Make the necessary adjustments to improve accuracy, comfort, and safety as needed.
With your Vive play area set up and calibrated, you’re now ready to immerse yourself in a variety of virtual reality experiences. Enjoy exploring new worlds, engaging in immersive gameplay, and discovering the endless possibilities of virtual reality gaming!
So, put on your Vive headset, grab your controllers, and get ready to dive into a world of virtual reality like never before. Happy gaming!
Frequently Asked Questions about How To Set Up Play Area With Vive
Was this page helpful?
At Storables.com, we guarantee accurate and reliable information. Our content, validated by Expert Board Contributors, is crafted following stringent Editorial Policies. We're committed to providing you with well-researched, expert-backed insights for all your informational needs.


0 thoughts on “How To Set Up Play Area With Vive”