Home>Garden Essentials>How To Lay Bark For Play Area
Garden Essentials
How To Lay Bark For Play Area
Modified: March 7, 2024
Create a safe and attractive play area in your garden with our step-by-step guide on how to lay bark. Transform your outdoor space into a child-friendly haven today!
(Many of the links in this article redirect to a specific reviewed product. Your purchase of these products through affiliate links helps to generate commission for Storables.com, at no extra cost. Learn more)
Introduction
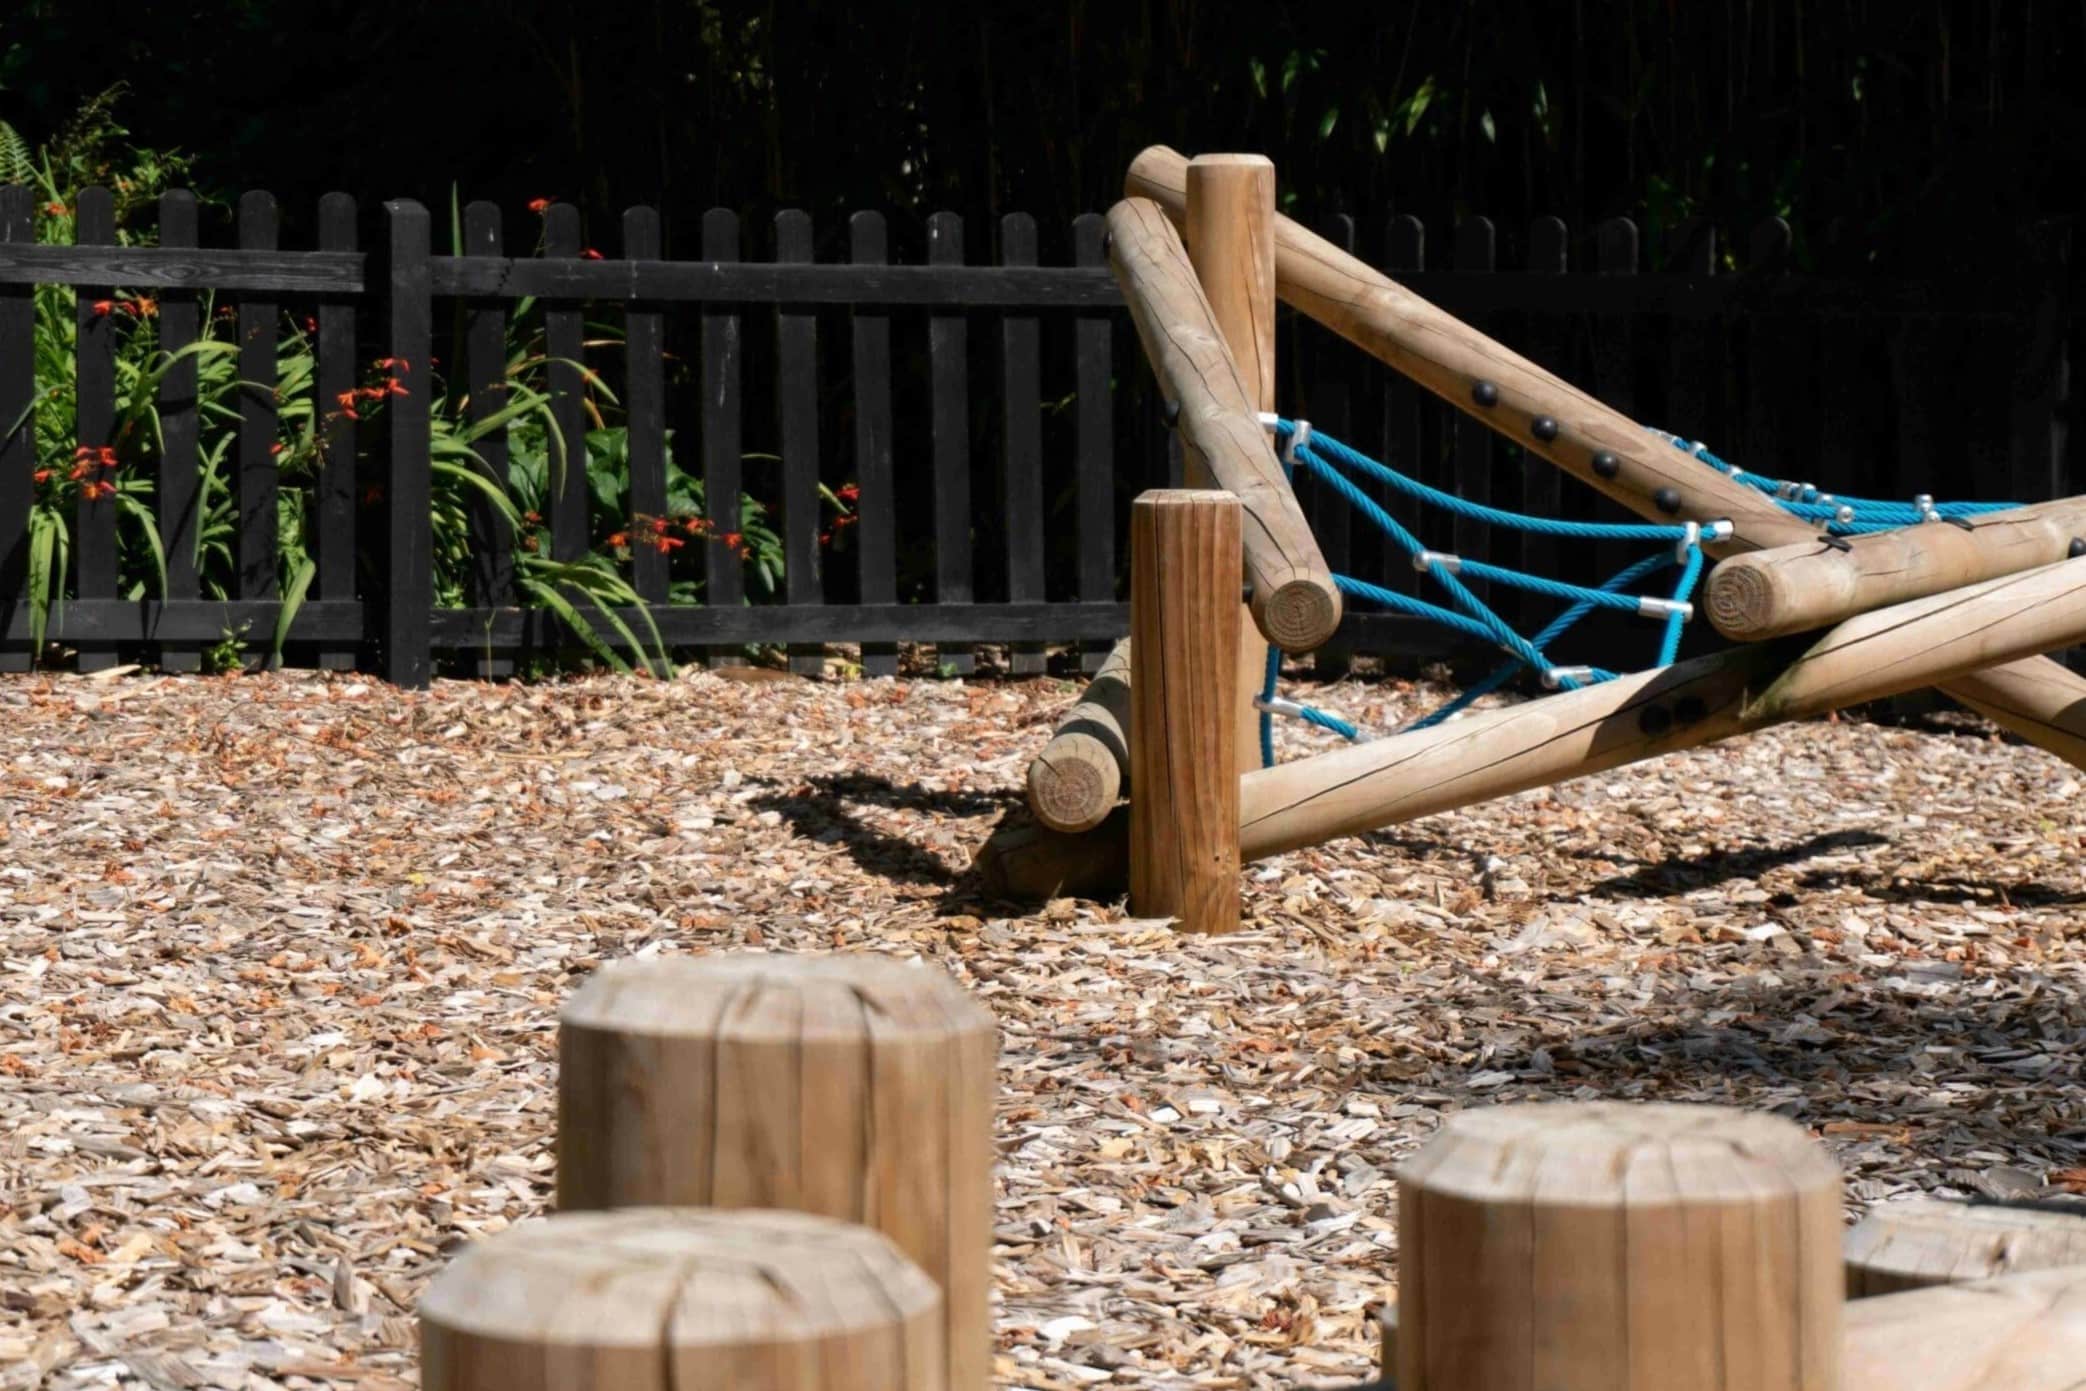
Welcome to our comprehensive guide on how to lay bark for a play area. Creating a safe and inviting play space for children is essential, and using bark as a ground cover is a popular choice for many reasons. Not only does it provide a soft and cushioned surface, but it also acts as a natural weed suppressant and helps to retain moisture in the soil. Whether you are starting from scratch or looking to refresh an existing play area, this step-by-step guide will walk you through the process of laying bark to ensure a successful and durable play surface.
Before we dive into the details, it’s important to note that proper site preparation is crucial for the long-term success of your play area. This includes clearing the area, leveling the ground, and installing edging to keep the bark contained. By following these steps and choosing the right type of bark for your specific needs, you can create a safe and attractive play space that children will love.
So let’s get started and learn how to lay bark for a play area!
Key Takeaways:
- Preparing the play area, choosing the right bark, and regular maintenance are essential for creating a safe and inviting play space for children. Safety, aesthetics, and functionality should be the top priorities.
- Proper site preparation, leveling the ground, and installing edging are crucial steps in laying bark for a play area. Choosing the right type of bark and calculating the amount needed are also key factors for success.
Read more: How To Make A Play Area For Baby
Step 1: Site Preparation
Before you begin laying bark for your play area, it’s important to properly prepare the site. This will ensure a level and stable surface for the bark, and also prevent any unwanted weeds or plants from growing through the covering.
The first step in site preparation is to clear the area of any existing debris, such as rocks, branches, or old play equipment. This will create a clean and blank canvas for your play area. Make sure to inspect the site thoroughly and remove any hazardous objects that could pose a safety risk.
Next, it’s important to level the ground. Uneven surfaces can make it difficult to properly spread the bark and may result in uneven coverage. Use a rake or shovel to remove any high spots and fill in any low spots to create a smooth and level area. This will ensure that the bark is distributed evenly and provides a uniform surface for play.
Once the ground is level, it’s time to install edging around the perimeter of the play area. Edging serves two important purposes: it keeps the bark contained within the designated area, and it prevents the bark from spilling onto surrounding surfaces such as grass or pavement.
There are various types of edging materials you can choose from, including plastic or metal strips, landscape timbers, or even bricks or stones. Select an edging material that suits your aesthetic preferences and budget, while also providing durability and functionality. Install the edging securely and make sure it is level with the ground to prevent trip hazards.
By taking the time to properly prepare the site for your play area, you are setting the foundation for a successful bark installation. This step ensures a clean and level surface and helps to maintain the integrity of the bark covering for years to come.
Step 2: Clearing the Area
Now that you have completed the initial site preparation, it’s time to focus on clearing the area where the bark will be laid. This step is crucial to ensure that the bark covering is clean and free from any debris that could interfere with its effectiveness and aesthetics.
Start by removing any existing grass or vegetation in the designated play area. This can be done using a shovel, a garden hoe, or a turf cutter, depending on the size and condition of the area. Make sure to dig deep enough to remove the roots to prevent any regrowth.
If there are any large rocks, tree roots, or other obstacles in the area, it’s important to clear them out as well. These obstructions can not only affect the levelness of the ground but also pose tripping hazards for children playing in the area. Take your time to carefully remove these objects to create a smooth and safe surface.
Once the area is clear of vegetation and debris, it’s a good idea to inspect the soil for any remaining weeds or weed seeds. Weeds can be persistent and can quickly emerge through the bark covering if not properly controlled. If you spot any weeds, remove them by hand or use an appropriate herbicide.
During the clearing process, it’s also a good idea to mark any underground utilities or wiring that may be present in the play area. This will help prevent any accidental damage during the next steps of the installation process.
By thoroughly clearing the area of vegetation and debris, you are creating a clean and blank canvas for the bark covering. This step ensures that the bark will be laid on a fresh and unobstructed surface, providing a safe and inviting play area for children.
Step 3: Leveling the Ground
After clearing the area, the next step in preparing your play area is to level the ground. A level surface is essential for proper installation and ensures that the bark is evenly distributed, providing a consistent and safe playing surface.
To begin, inspect the ground for any areas that are higher or lower than the desired level. Use a rake or a shovel to remove any excess soil from higher spots and fill in any depressions with additional soil. Take your time during this process to ensure that the entire area is even and smooth.
One helpful tip is to use a long board or a straightedge to check for levelness across the play area. Place the board or straightedge on the ground and look for any gaps between the surface and the board. If you spot any uneven areas, adjust the soil accordingly until the board sits flush with the ground.
It’s important to note that the ground should be level but not completely compacted. A slightly loose soil texture will allow for better drainage and prevent the bark from becoming too compacted over time. However, make sure that the ground is firm enough to provide a stable foundation for the bark.
Leveling the ground may require some time and effort, but it is well worth it in ensuring the overall success of your play area. A level surface helps to prevent tripping hazards and creates a uniform foundation for the bark installation.
Once you have finished leveling the ground, you are ready to move on to the next step: installing the edging to keep the bark contained and contained within the designated play area.
Step 4: Installing Edging
Installing edging is an important step in creating a clean and well-defined play area for the bark covering. Edging not only adds a visually pleasing border but also serves practical purposes by keeping the bark contained and preventing it from spilling onto surrounding areas.
There are several types of edging materials available, including plastic or metal strips, landscape timbers, bricks, or stones. The choice of edging material will depend on your personal preference, budget, and the desired aesthetic of your play area.
To install the edging, begin by outlining the perimeter of your play area. Use chalk or string to mark the boundaries, ensuring straight lines and smooth curves. This step will help guide you during the installation process and provide a clear visual of the designated play space.
Next, dig a shallow trench along the marked boundary. The depth and width of the trench will depend on the chosen edging material, so be sure to refer to the manufacturer’s instructions for the specific dimensions. The trench should be deep enough for the edging to sit at ground level and provide a flush finish.
Once the trench is ready, carefully place the edging material into the trench. If you are using plastic or metal strips, connect them together securely. For landscape timbers, stack them alongside each other, ensuring a tight fit. If using bricks or stones, arrange them in a pattern that complements your play area design.
As you place the edging, use a level to ensure that it is straight and even. Adjust the edging as needed to maintain a consistent height and alignment throughout the play area. This will help create a sleek and professional appearance.
After the edging is in place, backfill the trench with soil and tamp it down to secure the edging. This will provide stability and prevent it from shifting or moving over time. Use a rake to smooth and level the surrounding soil, ensuring a seamless transition between the edging and the surrounding ground.
By installing edging, you are not only enhancing the visual appeal of your play area but also ensuring that the bark remains contained within the designated space. Edging provides a clear boundary and prevents the bark from spreading onto surrounding surfaces, creating a neat and well-maintained play area for children to enjoy.
Read more: How To Organize A Play Area For Toddlers
Step 5: Choosing the Right Bark
Choosing the right type of bark for your play area is crucial to ensure the safety, functionality, and longevity of the space. There are various types of barks available on the market, each with their own unique characteristics and benefits. Consider the following factors when selecting the right bark for your play area:
Safety: The primary concern when choosing bark for a play area is the safety of the children. Look for bark that is certified as playground-safe and meets safety standards. It should be free from harmful chemicals, toxins, and sharp objects that could pose a hazard.
Cushioning: The main purpose of using bark as a ground cover is to provide a soft and cushioned surface that absorbs impact. Look for bark that has good shock absorption properties and provides adequate support for falls and tumbles.
Size and Texture: Consider the size and texture of the bark. Larger chunks of bark may provide more stability and are less likely to shift around, while smaller bark particles can create a smoother surface. Choose a texture that is comfortable to walk and play on.
Durability: Select bark that is long-lasting and resistant to decay. It should be able to withstand heavy use, weather conditions, and retain its integrity over time. This will reduce the need for frequent replacement and maintenance.
Weed Suppression: Look for bark that has good weed-suppressing properties. It should help prevent weed growth in your play area, reducing the need for constant weeding and maintenance.
Sustainability: Consider the environmental impact of the bark you choose. Opt for bark that is sustainably sourced and produced, preferably from renewable resources. This ensures that the bark is environmentally friendly and contributes to the overall sustainability of your play area.
Take the time to research and compare different types of barks available in your area. Consider consulting with a garden expert or nursery to get recommendations based on your specific needs and preferences. Read reviews and gather feedback from others who have used the bark to gauge its performance and suitability for your play area.
Remember, choosing the right bark is crucial in creating a safe, comfortable, and visually appealing play area for children. By considering the factors mentioned above, you can select the best bark that combines safety, functionality, and durability for an optimal play experience.
Before laying bark in a play area, make sure to clear the area of any debris and level the ground. Lay down a weed barrier to prevent weeds from growing through the bark. Then, spread the bark evenly to create a soft and safe surface for play.
Step 6: Calculating the Amount of Bark Needed
Calculating the amount of bark needed for your play area is essential to ensure you purchase the right quantity and avoid any wastage or shortage. The amount of bark required will depend on the size of your play area and the desired depth of the bark covering. Here’s how you can calculate the amount of bark needed:
1. Measure the play area: Start by measuring the length and width of your play area using a measuring tape. Make sure to measure in the same units (e.g., feet or meters) for consistency.
2. Determine the desired depth: Decide on the depth of the bark covering based on your preferences and safety requirements. A recommended depth is around 6 inches (15 cm) for adequate cushioning and weed suppression.
3. Convert measurements: Convert the measured length and width into the same unit used for depth. For example, if your play area is 10 feet by 12 feet and you want a 6-inch depth, convert the measurements into inches (10 feet = 120 inches, 12 feet = 144 inches).
4. Calculate the volume: Multiply the length, width, and depth measurements together to calculate the total volume of bark needed. For example, using the measurements above, the calculation would be: 120 inches x 144 inches x 6 inches = 103,680 cubic inches.
5. Convert to cubic yards: Most bark suppliers provide bark coverage estimates in cubic yards. To convert the cubic inches into cubic yards, divide the total volume by 46,656 (since there are 46,656 cubic inches in a cubic yard). Using the previous example, the calculation would be: 103,680 cubic inches ÷ 46,656 = 2.22 cubic yards (rounded up to the nearest decimal).
6. Consider extra coverage: It’s always a good idea to account for extra coverage to compensate for any uneven areas, settling, or future top-ups. Adding around 10-15% to the calculated amount should provide a buffer for these situations.
By following these steps, you can accurately calculate the amount of bark needed for your play area. This will ensure you purchase the right quantity, saving you time, money, and the inconvenience of running out of bark during the installation process.
Step 7: Spreading the Bark
Now that you have calculated the amount of bark needed, it’s time to start the process of spreading the bark in your play area. This step is where the transformation begins, as the bark covering will provide the cushioning and aesthetic appeal for your play space.
Follow these steps to ensure the proper and efficient spreading of the bark:
1. Start from a strategic location: Choose a corner or edge of your play area to begin spreading the bark. This will help create a systematic approach and ensure even coverage throughout.
2. Use a wheelbarrow or distribution method: Depending on the size of your play area, you can use a wheelbarrow or other means of distributing the bark. This helps transport the bark efficiently and saves time and effort.
3. Spread a thin and even layer: For the initial layer, spread a thin and even layer of bark across the designated area. Use a rake or shovel to distribute the bark smoothly, ensuring a consistent depth. Start with a depth of about 2 inches and spread it evenly.
4. Work in sections: Divide your play area into manageable sections and focus on one section at a time. This will help you maintain control and ensure that the bark is evenly distributed.
5. Rake and level the bark: After each section is covered, use a rake or shovel to rake and level the bark. This will help create an even surface and ensure that the bark is spread uniformly. Pay attention to any low or uneven spots and adjust the bark as needed.
6. Repeat the process: Continue spreading the bark in thin and even layers, section by section. As you progress, periodically rake and level the bark to ensure a smooth and consistent surface.
7. Avoid excessive compaction: While you want the bark to settle and provide stability, it’s important not to over-compact it. Excessive compaction can reduce the cushioning effect and impede drainage. Use gentle pressure to lightly compact the bark, ensuring it remains loose and soft.
8. Pay attention to edges and corners: Take extra care when spreading the bark near the edges and corners of your play area. Use a rake or shovel to ensure the bark extends all the way to the edging, creating a clean and finished look.
By following these steps, you will be able to efficiently and effectively spread the bark in your play area, creating a soft and inviting surface for children to enjoy.
Step 8: Raking and Leveling
Once the bark has been spread across the play area, it is important to rake and level it to ensure a smooth and even surface. This step helps to distribute the bark evenly, address any uneven spots, and create a visually appealing play area. Follow these steps for effective raking and leveling:
1. Use a wide garden rake: Start by using a wide garden rake to gently rake the bark. This will help distribute it evenly across the play area and fill in any low spots.
2. Work in small sections: Focus on raking and leveling one small area at a time, rather than trying to cover the entire play area at once. This allows for better control and precision.
3. Rake from all directions: Rake the bark in different directions, including side to side, back and forth, and in circular motions. This helps to evenly distribute the bark and prevent any clumping or uneven patches.
4. Pay attention to edges and corners: Take extra care to rake and level the bark near the edges and corners of the play area. Use the rake to ensure the bark extends all the way to the edging, creating a clean and finished look.
5. Check for even depth: As you rake, periodically check the depth of the bark to ensure it remains consistent. Use a measuring tool or your hand to gauge the depth. Adjust the bark as needed to achieve a uniform thickness.
6. Smooth out any rough patches: If you come across any rough or uneven patches, use the rake to smooth them out. Gently rake over the area to distribute the bark and create a smoother surface.
7. Level with a leveling tool: For more precise leveling, you can use a leveling tool such as a landscaping rake or a straight edge. Run the tool across the play area to ensure a consistent level of the bark throughout.
8. Step back and assess: Once you have raked and leveled the bark, step back and assess the overall look and feel of the play area. Make any necessary adjustments to achieve the desired levelness and appearance.
9. Keep a rake handy for maintenance: After the initial raking and leveling, it’s a good idea to keep a rake handy for regular maintenance. This allows you to quickly address any uneven areas or redistribution that may occur over time.
By taking the time to rake and level the bark, you ensure a smooth and even surface for children to play on. This step enhances the overall appearance of the play area and provides a safe and enjoyable experience for everyone.
Read more: How To Make A Dog Play Area
Step 9: Compacting the Bark
After spreading and leveling the bark in your play area, the next step is to compact it. Properly compacting the bark helps to create a stable and long-lasting surface, while also enhancing its safety and functionality. Follow these steps to effectively compact the bark:
1. Use a lawn roller or compactor: A lawn roller or compactor is a useful tool for compacting the bark. Roll the compactor across the play area in different directions, applying light to moderate pressure. Ensure that you cover the entire play area evenly.
2. Gently tamp with a hand tamper: If you don’t have access to a lawn roller or compactor, you can use a hand tamper. Gently tamp down the surface of the bark, applying consistent pressure. Work in small sections, moving methodically across the play area.
3. Pay attention to high traffic areas: Focus on compacting the bark in areas that receive heavy foot traffic. These areas, such as entry points or play equipment, may require extra compaction to maintain a level surface.
4. Avoid over-compacting: While it is important to compact the bark, be careful not to overdo it. Over-compaction can result in a hard surface that diminishes the cushioning effect of the bark. Aim for a balance between stability and maintaining a soft and forgiving surface.
5. Continuously monitor the depth: As you compact the bark, keep an eye on its depth. Some settling may occur during the compaction process. If you notice any areas becoming too thin, add additional bark and level it out before compacting again.
6. Inspect for any bare spots: After compacting, inspect the play area for any bare spots or areas with thin bark coverage. Add additional bark as needed to ensure a consistent depth throughout the play area.
7. Regularly check for compaction maintenance: Over time, the bark may settle or shift due to use and weather conditions. Regularly check the play area for any signs of poor compaction and re-compact as necessary to maintain a stable and safe surface.
By properly compacting the bark, you ensure a firm and secure surface for play. This step helps to create a stable and uniform play area that maintains its safety and functionality for an extended period.
Step 10: Regular Maintenance and Upkeep
Regular maintenance and upkeep are essential for ensuring the longevity and safety of your bark play area. By implementing a routine maintenance plan, you can keep the play surface in optimal condition for children to enjoy. Here are some key steps for maintaining and caring for your bark play area:
1. Inspect for debris: Regularly check the play area for any debris, such as fallen branches or leaves. Remove any debris to keep the surface clean and free from potential hazards.
2. Address weed growth: Keep an eye out for any weed growth in the bark play area. Handpick or use a suitable herbicide to tackle any weeds before they become established and spread.
3. Replenish bark as needed: Over time, bark may break down or be displaced due to usage and weather conditions. Keep extra bark on hand to replenish any areas that have become thin or bare. This will help maintain a consistent depth and cushioning effect.
4. Rake and level the bark: Regularly rake and level the bark to distribute it evenly and address any uneven areas. Use a rake to smooth out any rough patches and ensure a uniform surface throughout the play area.
5. Check for compaction: Periodically check the compactness of the bark. If you notice areas that have become too compacted or too loose, make the necessary adjustments to maintain an optimal balance for safety and cushioning.
6. Assess edging condition: Inspect the edging around the play area for any signs of damage or shifting. Repair or adjust the edging as needed to keep the bark contained and prevent it from spilling onto surrounding surfaces.
7. Address drainage issues: If you notice any pooling of water or poor drainage in the play area, take steps to improve the drainage. Consider adding drainage channels or perforated pipes to prevent water from accumulating and causing damage to the bark.
8. Regularly review safety measures: Take the time to regularly review and reinforce safety measures in the play area. Ensure that any play equipment is well-maintained, and check for any potential trip hazards or sharp edges.
9. Stay vigilant for signs of pests: Keep an eye out for any signs of pests, such as ants or termites, in the bark play area. Take appropriate measures to address any infestations, such as using organic pest control methods or seeking professional assistance if necessary.
10. Establish a maintenance schedule: Create a maintenance schedule that outlines specific tasks and their frequency. This will help ensure that regular upkeep is carried out and prevent any issues from escalating.
By implementing regular maintenance and upkeep practices, you can prolong the lifespan of your bark play area and provide a safe and enjoyable space for children to play. Remember to stay proactive and address any maintenance needs promptly to maintain the quality and functionality of the area.
Conclusion
Congratulations! You have successfully learned how to lay bark for a play area. By following the step-by-step guide provided in this article, you can create a safe, attractive, and functional space for children to enjoy.
From site preparation to selecting the right type of bark, calculating the amount needed, spreading and leveling, compacting, and regular maintenance, each step is crucial in ensuring the success and longevity of your play area. By taking the time to properly prepare the site, clear the area, level the ground, install edging, choose the right bark, and maintain the space, you are providing a safe and inviting environment for children to play and explore.
Remember, safety should always be the top priority when it comes to creating a play area. Choosing a playground-safe bark, ensuring the proper depth and cushioning, and regularly maintaining the surface are crucial in minimizing risks and promoting a secure play experience.
Additionally, don’t forget to consider the aesthetics and functionality of the play area. The right bark choice and a well-executed installation can transform the space into an inviting and visually appealing environment that children will love.
Regular maintenance and upkeep are key to preserving the condition and functionality of the play area. By incorporating a maintenance schedule and promptly addressing any issues such as debris, weeds, or bark displacement, you can ensure that the play area remains in optimal condition for years to come.
Creating a bark play area requires time, effort, and attention to detail, but the end result is a safe and enjoyable space for children to have fun and explore. So go ahead and put your newfound knowledge into practice, and create a magical play area that will bring joy and laughter to children for years to come!
Frequently Asked Questions about How To Lay Bark For Play Area
Was this page helpful?
At Storables.com, we guarantee accurate and reliable information. Our content, validated by Expert Board Contributors, is crafted following stringent Editorial Policies. We're committed to providing you with well-researched, expert-backed insights for all your informational needs.


0 thoughts on “How To Lay Bark For Play Area”