Home>Garden Essentials>How To Collect Amaranth Seeds
Garden Essentials
How To Collect Amaranth Seeds
Modified: March 16, 2024
Learn how to collect amaranth seeds from your garden with this comprehensive guide. Find out the best methods and tips for a successful harvest.
(Many of the links in this article redirect to a specific reviewed product. Your purchase of these products through affiliate links helps to generate commission for Storables.com, at no extra cost. Learn more)
Introduction
Welcome to the world of amaranth seeds! If you’re a passionate gardener looking to expand your knowledge and expertise, collecting amaranth seeds is a rewarding and exciting endeavor. Amaranth, a versatile plant with a long history, offers not only beautiful foliage and flowers but also nutritious and delicious seeds.
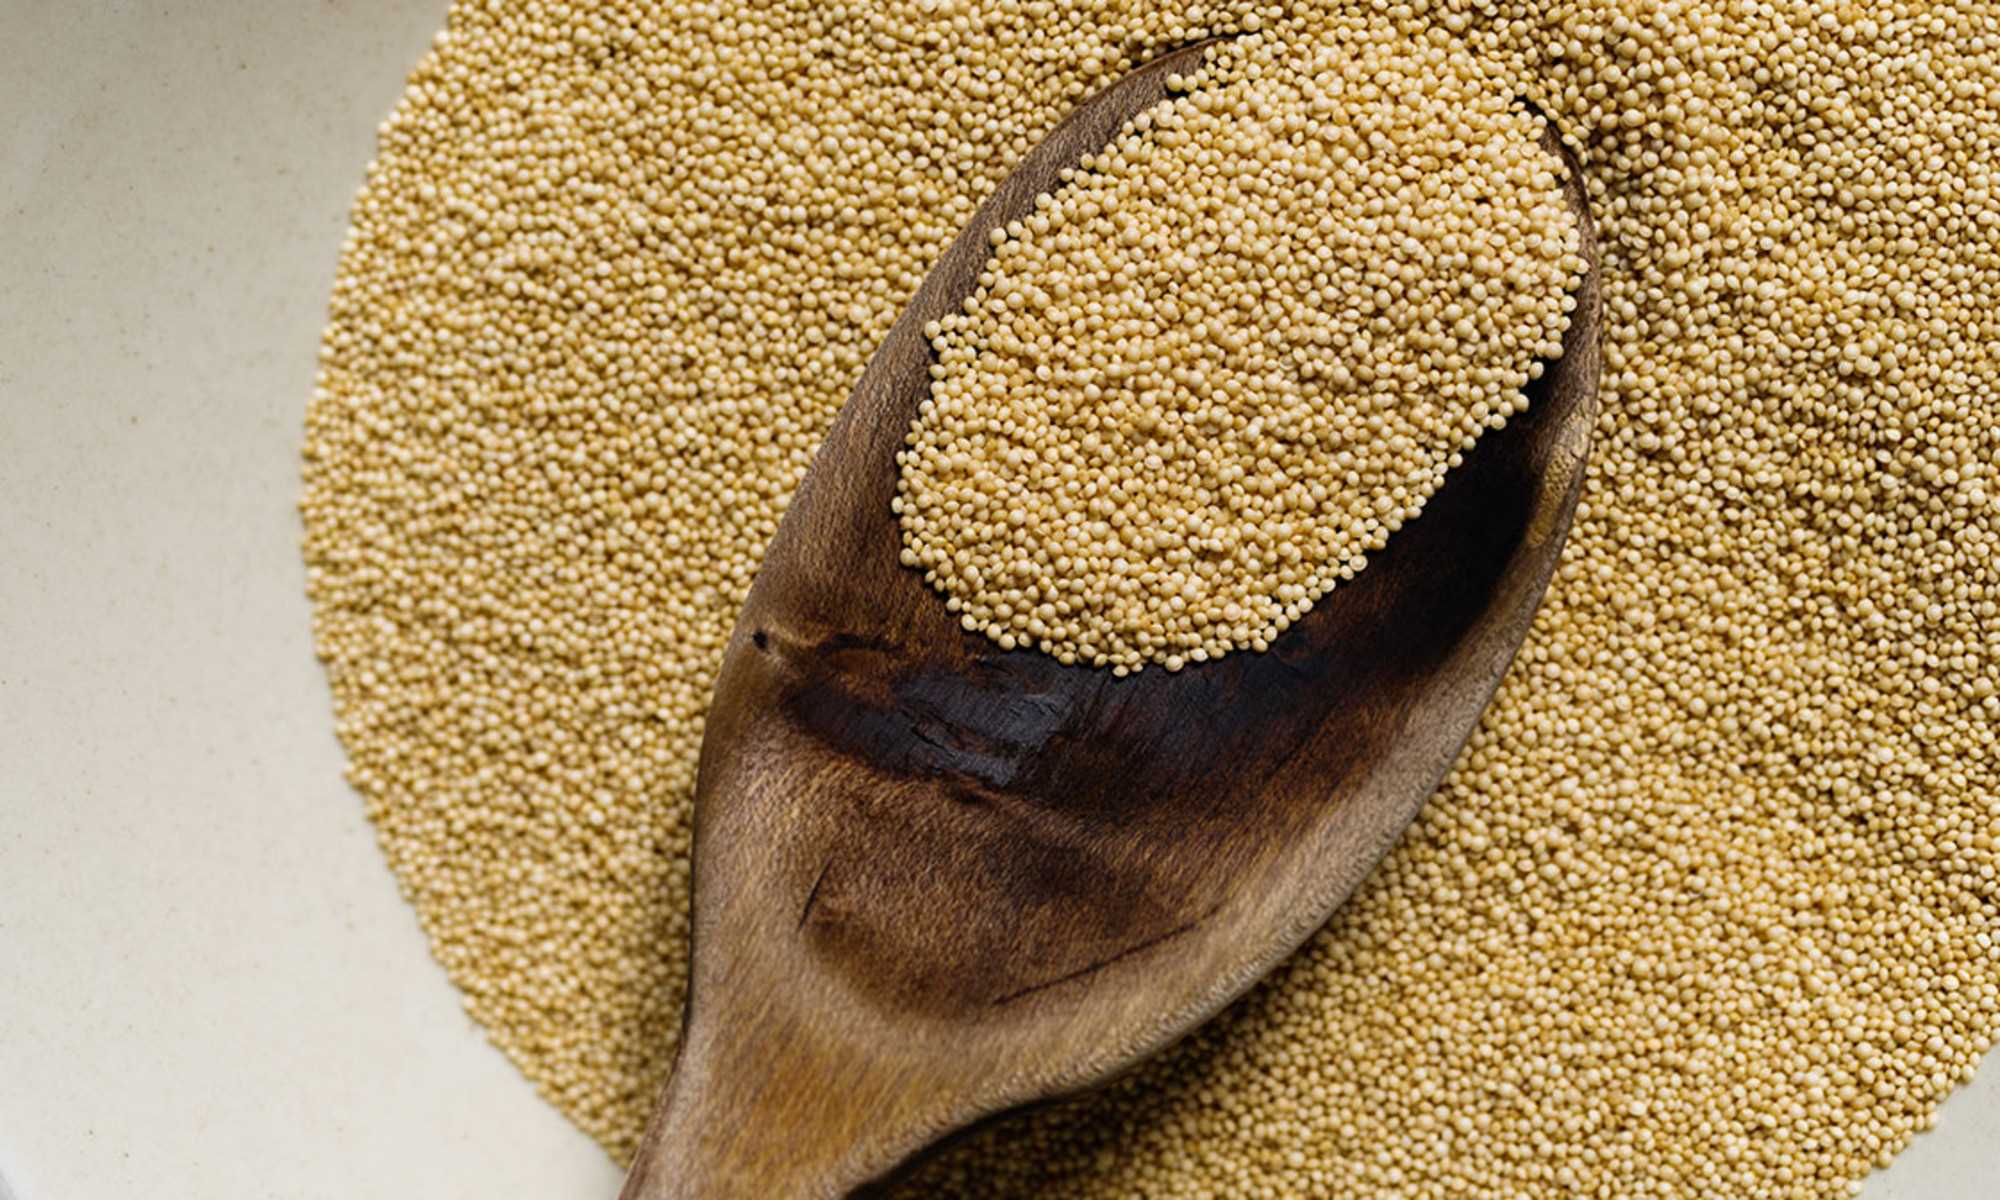
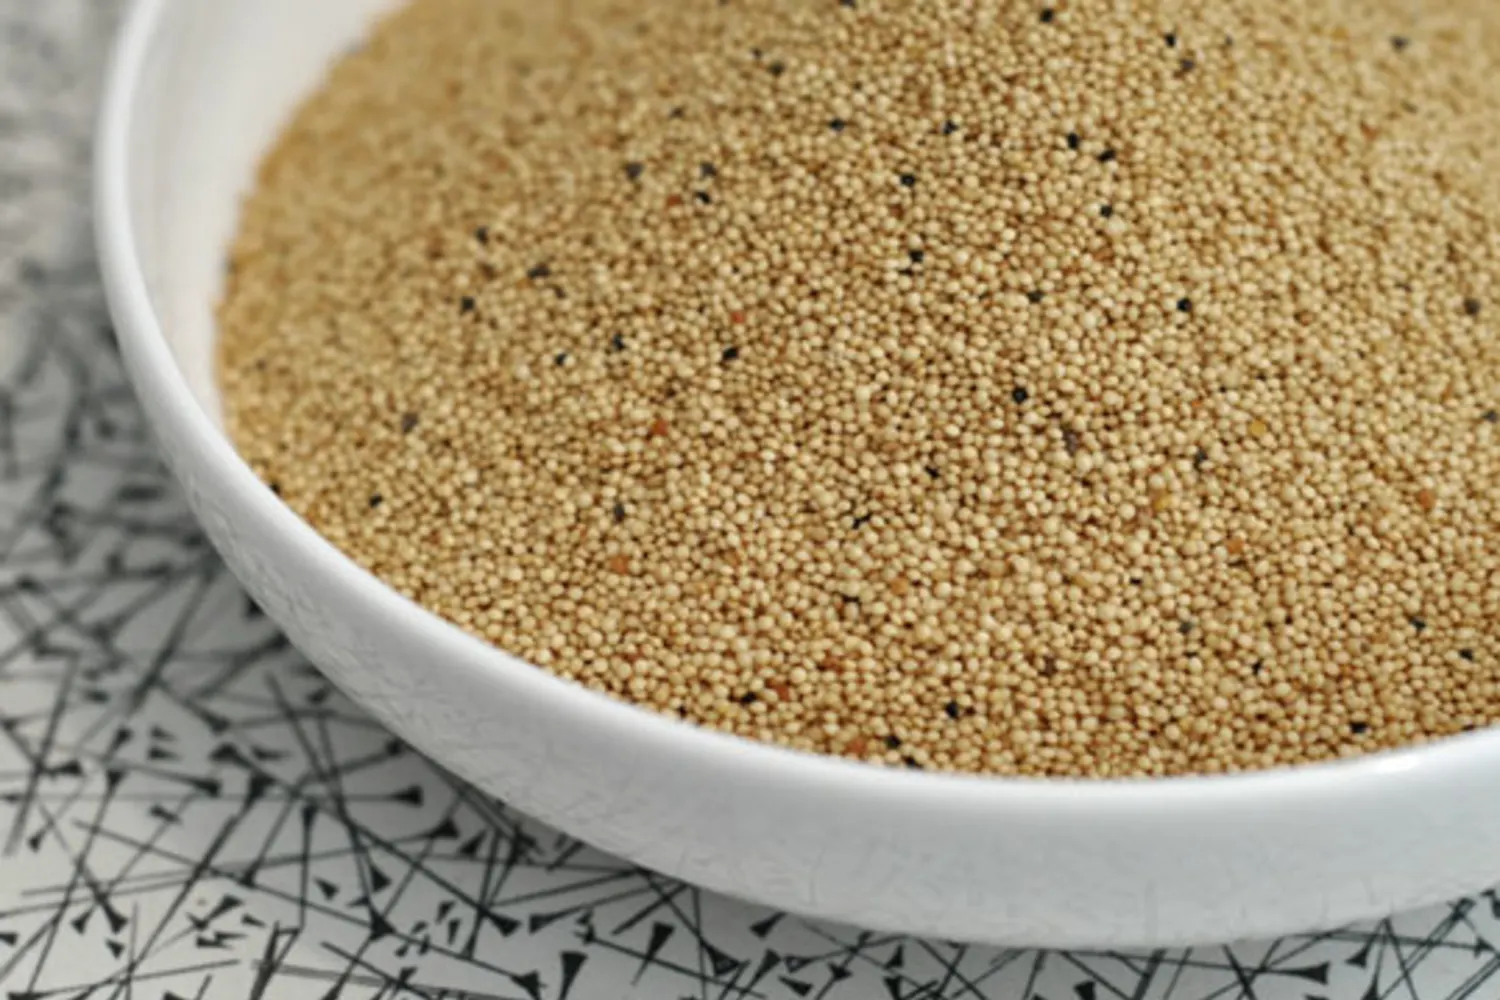
Amaranth seeds, also known as pseudocereals, are small powerhouse packages of nutrition. They are gluten-free and packed with essential vitamins, minerals, and amino acids, making them a highly valued addition to any diet. These tiny seeds are not only a nourishing source of energy but also have a delightful nutty flavor, making them a versatile ingredient in a variety of culinary creations.
In this article, we will explore the process of collecting amaranth seeds, from selecting the right variety to harvesting, drying, and storing the seeds. We will also delve into the proper cleaning and cleaning techniques to ensure you have high-quality seeds ready to be used in your garden or kitchen. So let’s dive in and uncover the secrets to successful amaranth seed collection!
Key Takeaways:
- Amaranth seeds are versatile, nutritious, and easy to collect. They can be used in cooking, baking, and as a crunchy snack. With proper care, you can grow, harvest, and enjoy the benefits of these tiny powerhouses!
- Selecting the right amaranth variety, growing, harvesting, and cleaning the seeds are essential steps in the process. By following these steps, you can ensure a bountiful harvest and enjoy the delicious and nutritious benefits of amaranth seeds!
Read more: How To Use Amaranth Seeds
Understanding Amaranth Seeds
Before diving into the process of collecting amaranth seeds, it’s essential to have a good understanding of what exactly amaranth seeds are and why they are so special.
Amaranth seeds are the edible part of the amaranth plant, which belongs to the Amaranthaceae family. Unlike traditional grains, such as wheat or rice, amaranth seeds are classified as pseudo-cereals. This means that they are not technically grains but are used and consumed similarly. In fact, amaranth seeds have been cultivated and consumed for thousands of years, dating back to ancient civilizations like the Aztecs and Incas.
One of the unique characteristics of amaranth seeds is their fantastic nutritional profile. They are rich in essential amino acids, including lysine, which is often deficient in other grains. Amaranth seeds are also packed with fiber, vitamins, and minerals, such as iron, calcium, magnesium, and phosphorus. These seeds are a complete protein source and are particularly beneficial for those following a vegetarian or vegan diet.
Another fascinating feature of amaranth seeds is their versatility. When cooked, they have a slightly sticky texture, similar to porridge or couscous. This makes them an excellent base for sweet or savory dishes. You can use amaranth seeds in a variety of ways, such as in soups, stews, salads, or even as a gluten-free alternative for baking.
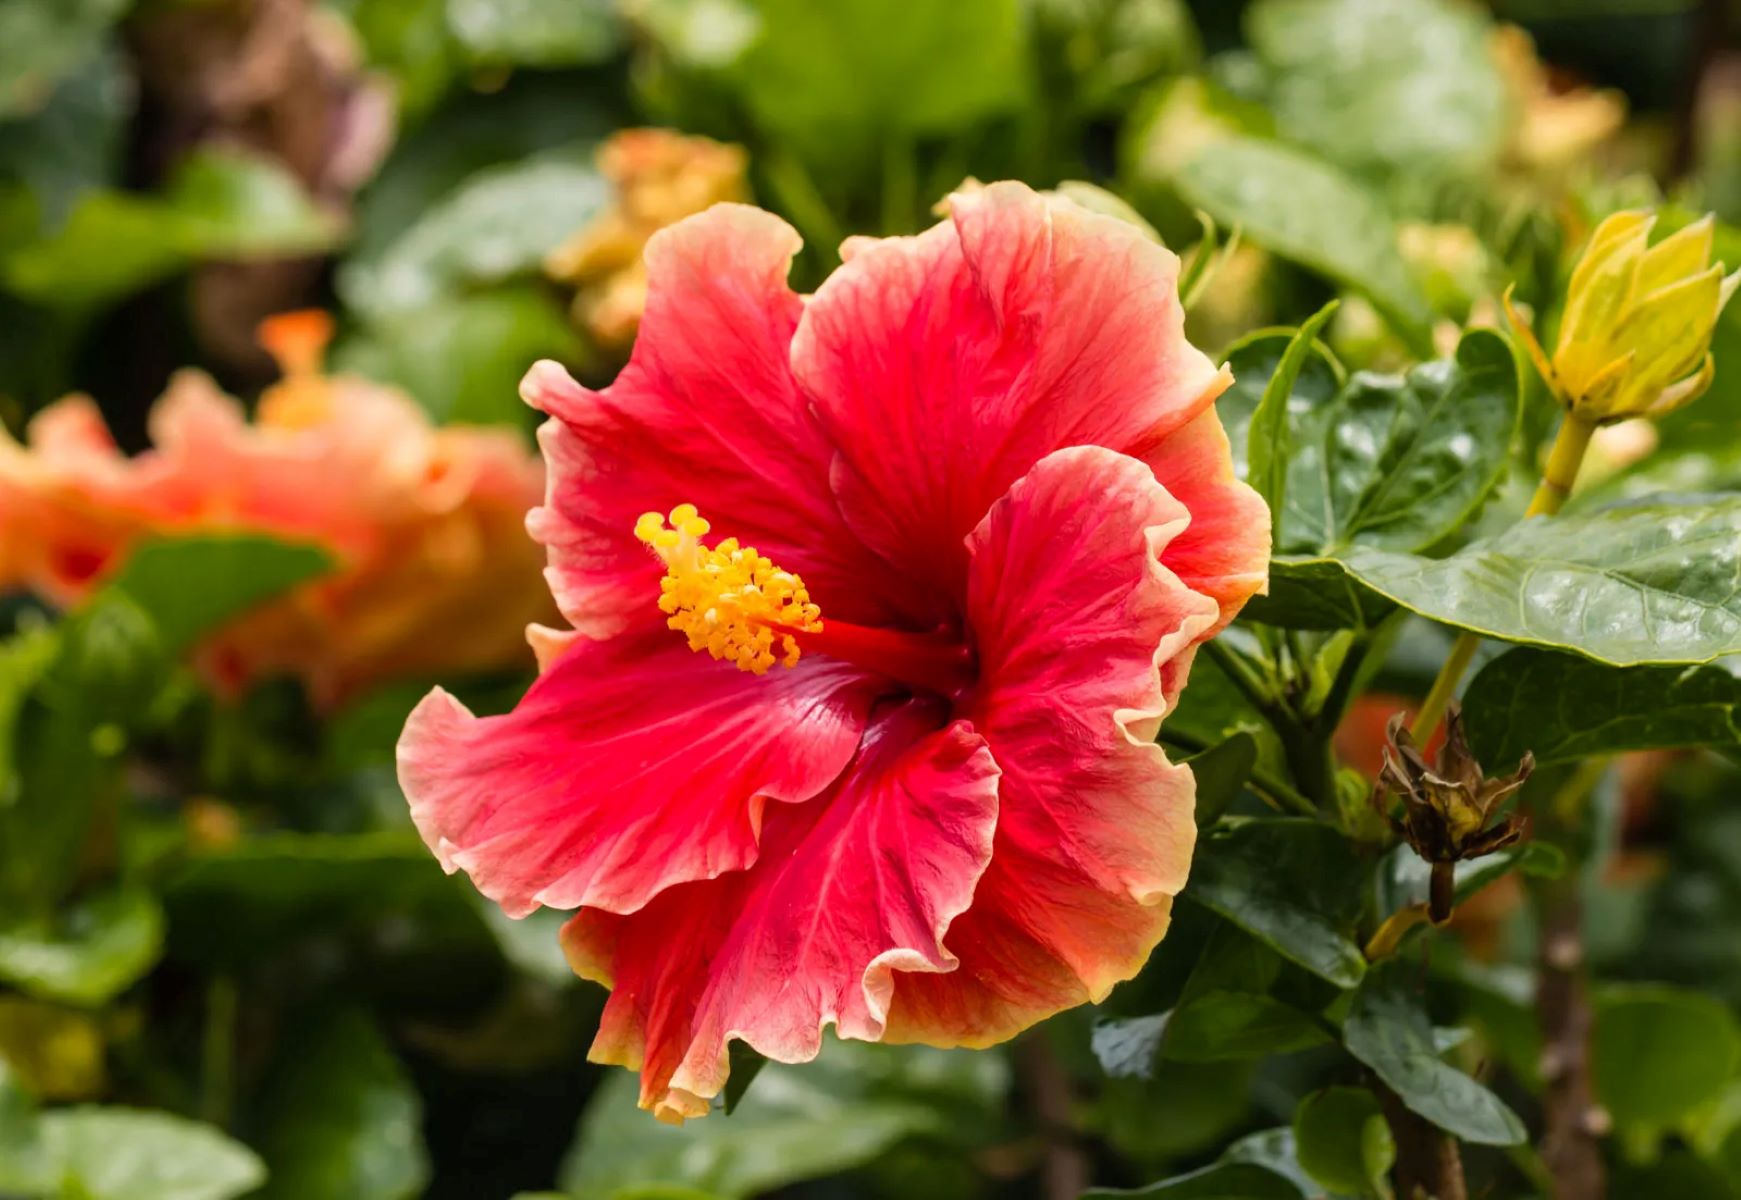
Furthermore, amaranth plants are known for their vibrant and eye-catching foliage and flowers. They come in a variety of colors, including shades of green, red, purple, and gold. By collecting and growing amaranth seeds, you not only get the nutritious seeds but also add beauty and visual interest to your garden.
Now that you have a better understanding of the significance of amaranth seeds let’s move on to the next step, which is selecting the right amaranth variety for seed collection.
Selecting the Right Amaranth Variety
When it comes to collecting amaranth seeds, choosing the right variety is crucial. Different amaranth varieties have varying characteristics, such as plant size, seed color, and flavor. Here are some key factors to consider when selecting the right amaranth variety for seed collection:
- Growth Habit: Amaranth plants come in various growth habits, including upright, semi-upright, and spreading. Consider the available space in your garden and choose a variety that best fits your needs. It’s also worth noting that upright varieties are generally easier to harvest.
- Seed Color: Amaranth seeds come in different colors, including shades of white, red, purple, and gold. The choice of seed color is mainly a personal preference, but keep in mind that some varieties may have specific culinary uses or may be more valued for their ornamental appeal.
- Flavor: While most amaranth seeds have a nutty flavor, some varieties may have slight differences in taste. Consider whether you prefer a milder or more robust flavor when selecting your amaranth variety.
- Climate Suitability: Different amaranth varieties thrive in different climates. Some are more heat-tolerant, while others can withstand colder temperatures. Research the climate conditions in your area and choose a variety that will perform well in your specific climate zone.
- Purpose: Determine your purpose for growing amaranth. If you primarily want to collect seeds for culinary purposes, select a variety known for its abundant and high-quality seeds. On the other hand, if you are seeking a visual delight for your garden, ornamental varieties with vibrant foliage and flowers may be the ideal choice.
It’s worth noting that some amaranth varieties are hybrids, while others are heirlooms. Hybrids have been bred for specific traits and may offer advantages such as disease resistance or higher yields. On the other hand, heirloom varieties are open-pollinated and carry the rich history and unique traits of their lineage. Consider your preferences and goals when deciding between hybrid and heirloom varieties.
Once you have considered these factors, it’s time to source your amaranth seeds. Look for reputable seed suppliers or garden centers that specialize in heirloom or specialty varieties. You can also explore online seed exchanges or connect with fellow gardeners who may have amaranth seeds to share.
Now that you have selected the right amaranth variety, it’s time to move on to the next step: growing amaranth for seeds.
Growing Amaranth for Seeds
Growing amaranth for seeds requires careful planning and nurturing to ensure a successful harvest. Follow these steps to cultivate healthy amaranth plants and obtain abundant seed production:
- Choose the Right Growing Location: Amaranth plants thrive in full sun, so select a spot in your garden that receives at least 6-8 hours of direct sunlight daily. Ensure that the soil is well-draining and rich in organic matter.
- Preparing the Soil: Before planting amaranth seeds, prepare the soil by removing any weeds or debris. Incorporate compost or well-rotted manure to improve soil fertility and ensure good drainage.
- Sowing the Seeds: Amaranth seeds can be directly sown into the garden once the threat of frost has passed and the soil has warmed up. Sow the seeds about ¼ to ½ inch deep and space them 12-18 inches apart. If you are growing more than one variety, ensure sufficient distance between the different varieties to prevent cross-pollination.
- Watering: Keep the soil consistently moist but not waterlogged throughout the growing season. Amaranth plants have shallow roots, so regular watering is crucial, especially during dry spells.
- Fertilization: Amaranth plants are relatively low-maintenance and do not require excessive fertilization. However, you can apply a balanced organic fertilizer once or twice during the growing season to provide a nutrient boost.
- Supportive Measures: Depending on the variety and growth habit, some amaranth plants may require additional support as they grow taller. You can use stakes or trellises to prevent the plants from bending or toppling over.
- Pest and Disease Management: Amaranth plants are generally resistant to pests and diseases. However, keep an eye out for common garden pests like aphids, flea beetles, or snails. If necessary, employ organic pest control methods such as handpicking or using insecticidal soap.
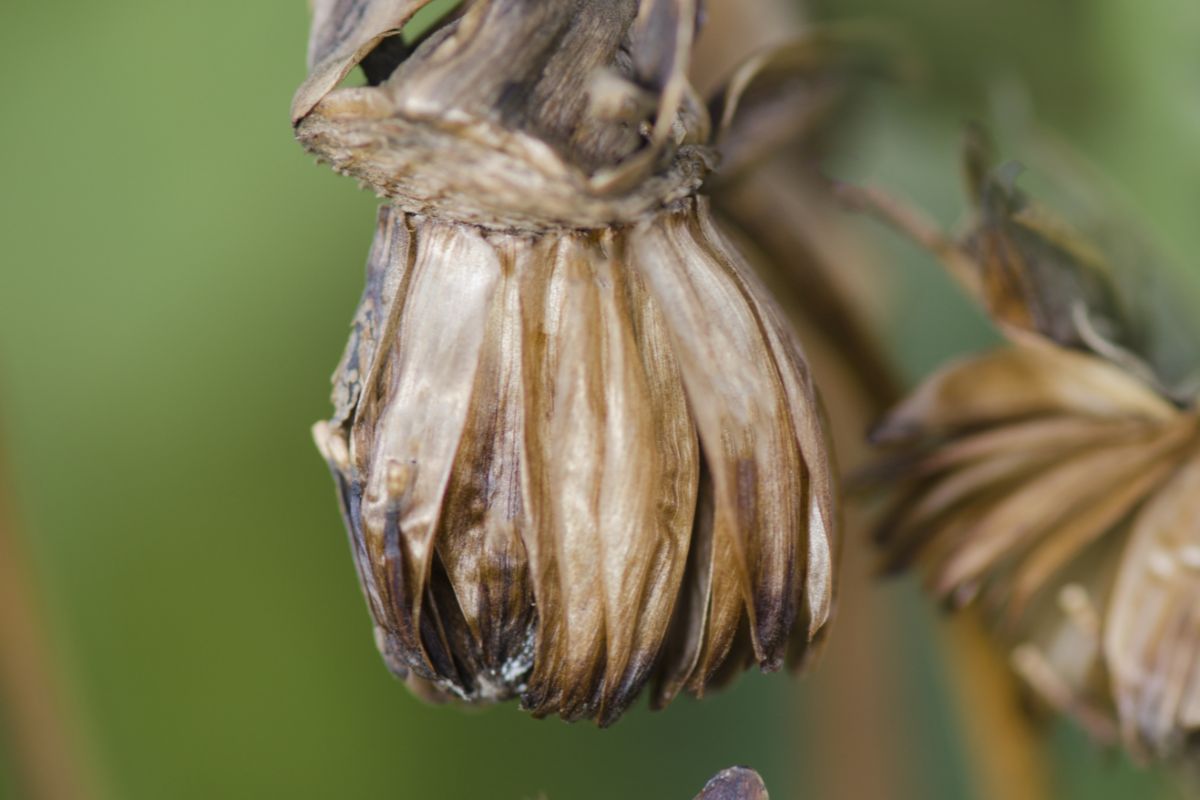
- Monitoring Seed Development: As the amaranth plants mature, closely monitor the seed development process. The flowering phase is an exciting time as the plants produce vibrant, feathery flowers. After pollination, seed heads will form. Keep a close watch on the seed heads to determine the optimal time for harvesting.
Remember to follow good gardening practices such as regular weeding, mulching to conserve moisture, and providing adequate airflow around the plants to reduce the risk of fungal diseases.
By following these steps and providing proper care and attention, you can ensure healthy, vigorous amaranth plants that are primed for a bountiful seed harvest. Once your amaranth seeds are ready for harvesting, it’s time to move on to the next essential step: harvesting the seeds.
After the amaranth flowers have bloomed and dried, gently shake the seed heads into a container to collect the small seeds. Remove any remaining chaff and store the seeds in a cool, dry place.
Harvesting Amaranth Seeds
Harvesting amaranth seeds is an exciting and fulfilling part of the process. Here’s a step-by-step guide to help you harvest the seeds at the perfect time:
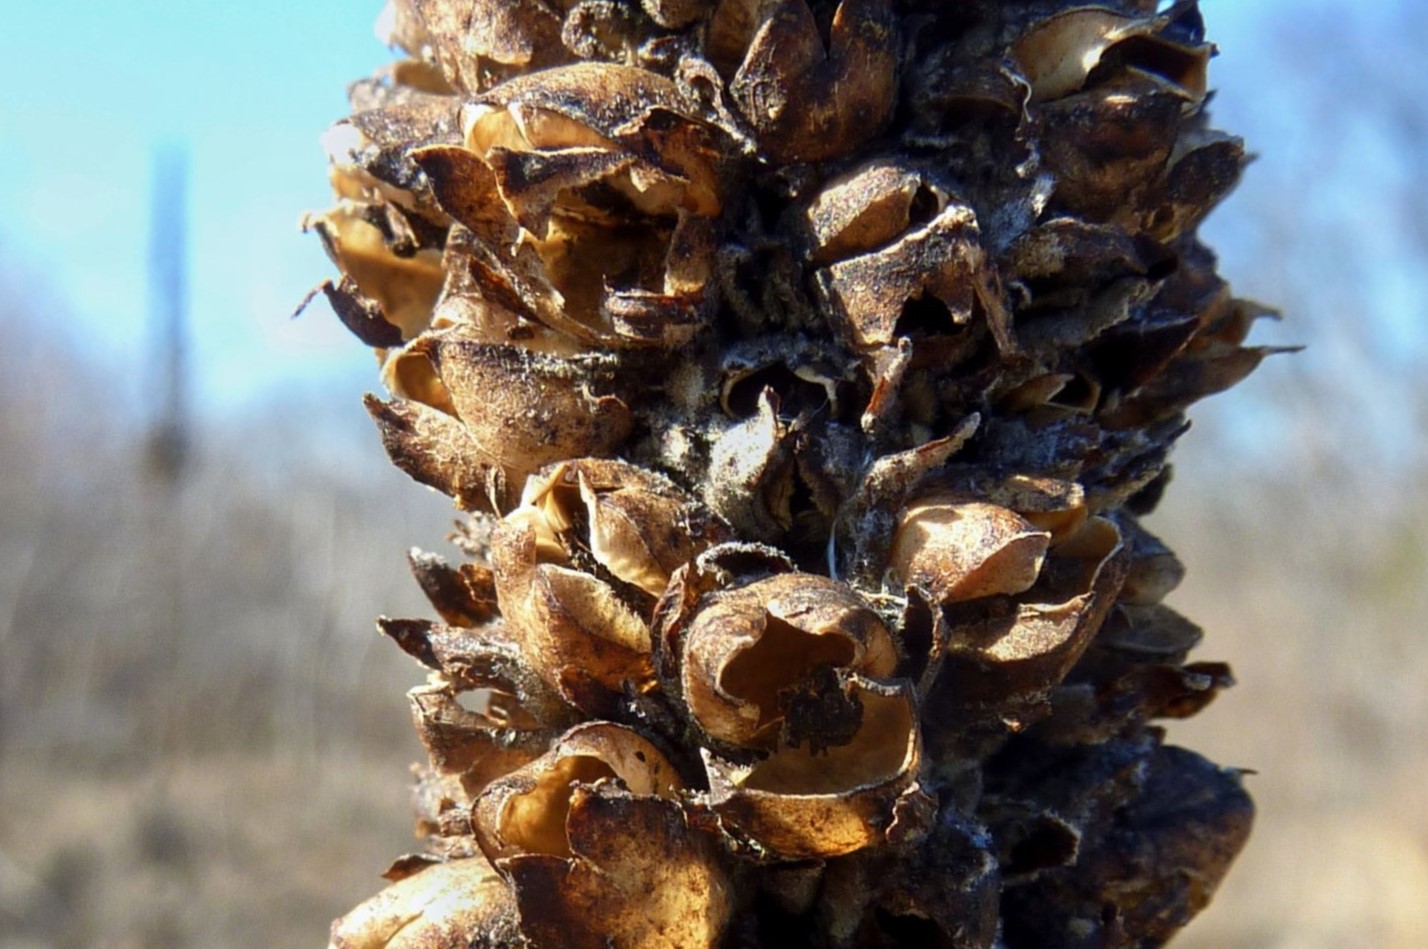
- Observe Seed Maturity: As the amaranth plants continue to grow and develop, keep a close eye on the seed heads. The seeds are ready for harvest when the flower heads have turned fully brown and dry. The seed heads should crumble easily in your hands, and the seeds inside should be hard and dark in color.
- Timing: Harvesting amaranth seeds is best done on a sunny, dry day when the morning dew has evaporated. This ensures that the seeds are adequately dried and less prone to mold or rot during storage.
- Cutting the Seed Heads: Use garden shears or a sharp knife to cut the seed heads from the plants. Cut the heads close to the stem, leaving a short stub. Place the seed heads in a clean, dry container or a clean cloth to prevent any valuable seeds from falling to the ground.
- Drying: After harvesting, transfer the seed heads to a well-ventilated area or a dry room. Hang them upside down or spread them out on a clean surface, allowing air to circulate around the seed heads. Ensure that they are kept away from moisture and direct sunlight. Allow the seed heads to dry completely for about two weeks or until the seeds are thoroughly dried.
- Seed Removal: Once the seed heads are completely dry, gently rub or shake them to release the seeds. Some seeds may fall off easily, while others may require a bit more effort. You can thresh the seed heads against a clean cloth or use your fingers to separate the seeds from the chaff.
- Seed Cleaning: To remove any remaining debris or chaff, you can winnow the seeds. Simply pour the seeds from one container to another on a breezy day or blow gently to let the chaff blow away. Repeat this process a few times until the seeds are clean and free from unwanted material.
- Storage: Place the cleaned amaranth seeds in an airtight container, such as a glass jar or airtight plastic bag. Store them in a cool, dry place away from direct sunlight. Properly stored amaranth seeds can remain viable for several years.
By correctly harvesting and storing the amaranth seeds, you can ensure their longevity and usability for future planting or culinary endeavors.
Now that you have successfully harvested and prepared your amaranth seeds, it’s time to move on to the next step: drying and storing the seeds.
Read more: How To Plant Amaranth Seeds
Drying and Storing Amaranth Seeds
Properly drying and storing your amaranth seeds is crucial for maintaining their quality and viability. Here’s how to ensure your seeds remain in optimal condition:
- Drying: After harvesting the amaranth seed heads, it’s essential to dry them completely before storing. Spread the seed heads out in a single layer on a clean and dry surface. Choose a well-ventilated area away from moisture and direct sunlight. Allow the seed heads to air dry for about two weeks or until the seeds are crisp and fully dry. It’s important to ensure that the seeds are thoroughly dry to prevent molding or rotting during storage.
- Seed Extraction: Once the seed heads are dry, gently rub or shake them to release the seeds. You can also thresh the seed heads against a clean cloth or use your fingers to separate the seeds from the chaff. Removing any remaining debris or chaff will help maintain the quality of the seeds.
- Final Drying: After extracting the seeds, spread them out in a single layer on a clean, dry surface. Allow the seeds to air dry for an additional week to ensure that all moisture has been removed. This final drying stage is crucial for preventing any residual moisture from causing the seeds to spoil during storage.
- Storage Containers: Once the amaranth seeds are completely dry, transfer them to suitable storage containers. Choose airtight containers, such as glass jars or resealable plastic bags, that will protect the seeds from moisture and pests.
- Labeling: It’s essential to label each storage container with the variety, harvest date, and any other relevant information. This will help you keep track of the seeds and ensure that they remain organized.
- Storage Conditions: Store the labeled containers in a cool, dry, and dark place to protect the seeds from heat, humidity, and light exposure. A pantry or a basement storage area is typically suitable for long-term seed storage. The ideal temperature for amaranth seed storage is around 40-50°F (4-10°C). Regularly check the storage area for any signs of moisture, pests, or deterioration.
- Seed Viability: Keep in mind that seed viability varies depending on the amaranth variety and storage conditions. While well-stored amaranth seeds can remain viable for several years, it’s advisable to use them within two to three years for the best germination rates.
By following these steps and providing proper drying and storage conditions, you can ensure that your amaranth seeds remain viable and ready for use in future gardening endeavors or culinary adventures.
Now that you have successfully dried and stored your amaranth seeds, let’s explore some exciting ways to utilize these nutritious and versatile seeds in your daily life.
Cleaning and Cleaning Amaranth Seeds
Before using your amaranth seeds for planting or culinary purposes, it’s important to clean and prepare them. Cleaning the seeds helps remove any remaining debris, chaff, or unwanted material, ensuring that you have high-quality seeds to work with. Here’s a step-by-step guide on how to clean and clean your amaranth seeds:
- Threshing: Threshing is the process of separating the seeds from the remaining plant material. You can do this by gently rubbing or crushing the dried seed heads. This helps to loosen the seeds and separate them from the chaff and stems.
- Winnowing: After threshing, the next step is winnowing. Winnowing involves removing the lighter chaff and debris from the seeds. You can accomplish this by pouring the seeds and chaff into a shallow container, then gently tossing them in the air. The wind will carry away the lighter chaff, while the heavier seeds will fall back into the container.
- Sifting: Sifting is an additional step that you can take to further separate any remaining debris from the seeds. Use a fine-mesh sieve or strainer to pass the seeds through, allowing them to fall into a clean container below. This process helps ensure that the seeds are free from any leftover plant material.
- Blowing: If necessary, you can also use gentle blowing to help further remove fine debris from the seeds. Holding a sieve or strainer with the seeds near your mouth, blow gently through the mesh to dislodge any lightweight particles, allowing them to be carried away by the air.
- Inspecting: Take the time to carefully inspect the cleaned seeds for any remaining debris. It’s helpful to have good lighting and a magnifying glass on hand to spot any tiny particles that may have gone unnoticed. Remove any remaining debris manually to ensure the seeds are clean and ready for use.
- Storage: After cleaning the seeds, it’s important to store them properly to maintain their quality. Transfer the cleaned amaranth seeds to airtight containers, such as glass jars or resealable plastic bags. Label the containers with the variety and date of harvest. Store the containers in a cool, dry place away from direct sunlight, maintaining the recommended storage conditions for amaranth seeds.
- Optional Seed Treatment: To further ensure the quality and longevity of your amaranth seeds, you can consider seed treatment methods such as seed priming or seed coating. These treatments can enhance seed germination and protect against pests or diseases. However, it’s important to follow the recommended guidelines for specific treatments and use them sparingly.
By diligently cleaning and preparing your amaranth seeds, you can ensure that they are free from debris and contaminants, ready to be used in your garden or kitchen.
Now that you have cleaned and prepared your amaranth seeds, it’s time to explore the exciting ways you can incorporate these nutritious seeds into your daily life.
Using Amaranth Seeds
Amaranth seeds are incredibly versatile and can be used in a variety of culinary applications. Here are some exciting ways you can incorporate these nutritious seeds into your daily life:
- Cooked Grains: One of the most common uses of amaranth seeds is as a cooked grain. Add amaranth seeds to boiling water or broth, and cook them until they become tender. The cooked grains have a slightly nutty flavor and a pleasant, sticky texture. You can enjoy them as a side dish, in grain bowls, or as a base for both sweet and savory recipes.
- Flour: Grind amaranth seeds into a fine powder to create amaranth flour. This gluten-free flour can be used as a substitute for wheat flour in baking, offering a nutritional boost to your favorite recipes. It works well in muffins, bread, pancakes, and cookies, adding a unique taste and texture to your baked goods.
- Popped Amaranth: Popped amaranth is a fun and crunchy snack that can be enjoyed on its own or used as a topping for yogurt, cereal, or salads. To pop amaranth, simply heat a dry skillet over medium-high heat, add a small amount of amaranth seeds, and shake the pan continuously until the seeds pop, resembling miniature popcorn.
- Energy Bars and Granola: Add amaranth seeds to homemade energy bars or granola for an extra nutritional boost. The seeds will provide a satisfying crunch and enhance the overall flavor and texture of these nutritious snacks.
- Soups and Stews: Sprinkle amaranth seeds into soups or stews to add a subtle nutty flavor and texture. They can provide an extra nutritional punch to your favorite hearty dishes.
- Breading: Incorporate ground amaranth seeds into your breading mixture for a gluten-free alternative. Use it to coat meats, fish, or vegetables before frying or baking. The amaranth adds a delightful crunch and enhances the overall flavor profile of your dishes.
- Smoothie Booster: Boost the nutritional content of your smoothies by adding a tablespoon of amaranth seeds. They will add a nutty flavor and provide an extra dose of protein, fiber, and essential nutrients.
- Garnish: Sprinkle amaranth seeds on top of salads, roasted vegetables, or yogurt parfaits for an attractive garnish. The seeds add a touch of texture and visual appeal to your dishes.
With their versatile and nutritious qualities, amaranth seeds can elevate both sweet and savory dishes, offering a delightful taste and a host of health benefits.
As you explore the culinary possibilities of amaranth seeds, remember to continue saving and collecting seeds from your own harvests, fostering a cycle of self-sustainability in your garden.
Now that you’re equipped with various ways to use amaranth seeds, it’s time to unleash your creativity in the kitchen and enjoy the incredible benefits of these tiny powerhouses!
Frequently Asked Questions about How To Collect Amaranth Seeds
Was this page helpful?
At Storables.com, we guarantee accurate and reliable information. Our content, validated by Expert Board Contributors, is crafted following stringent Editorial Policies. We're committed to providing you with well-researched, expert-backed insights for all your informational needs.


0 thoughts on “How To Collect Amaranth Seeds”